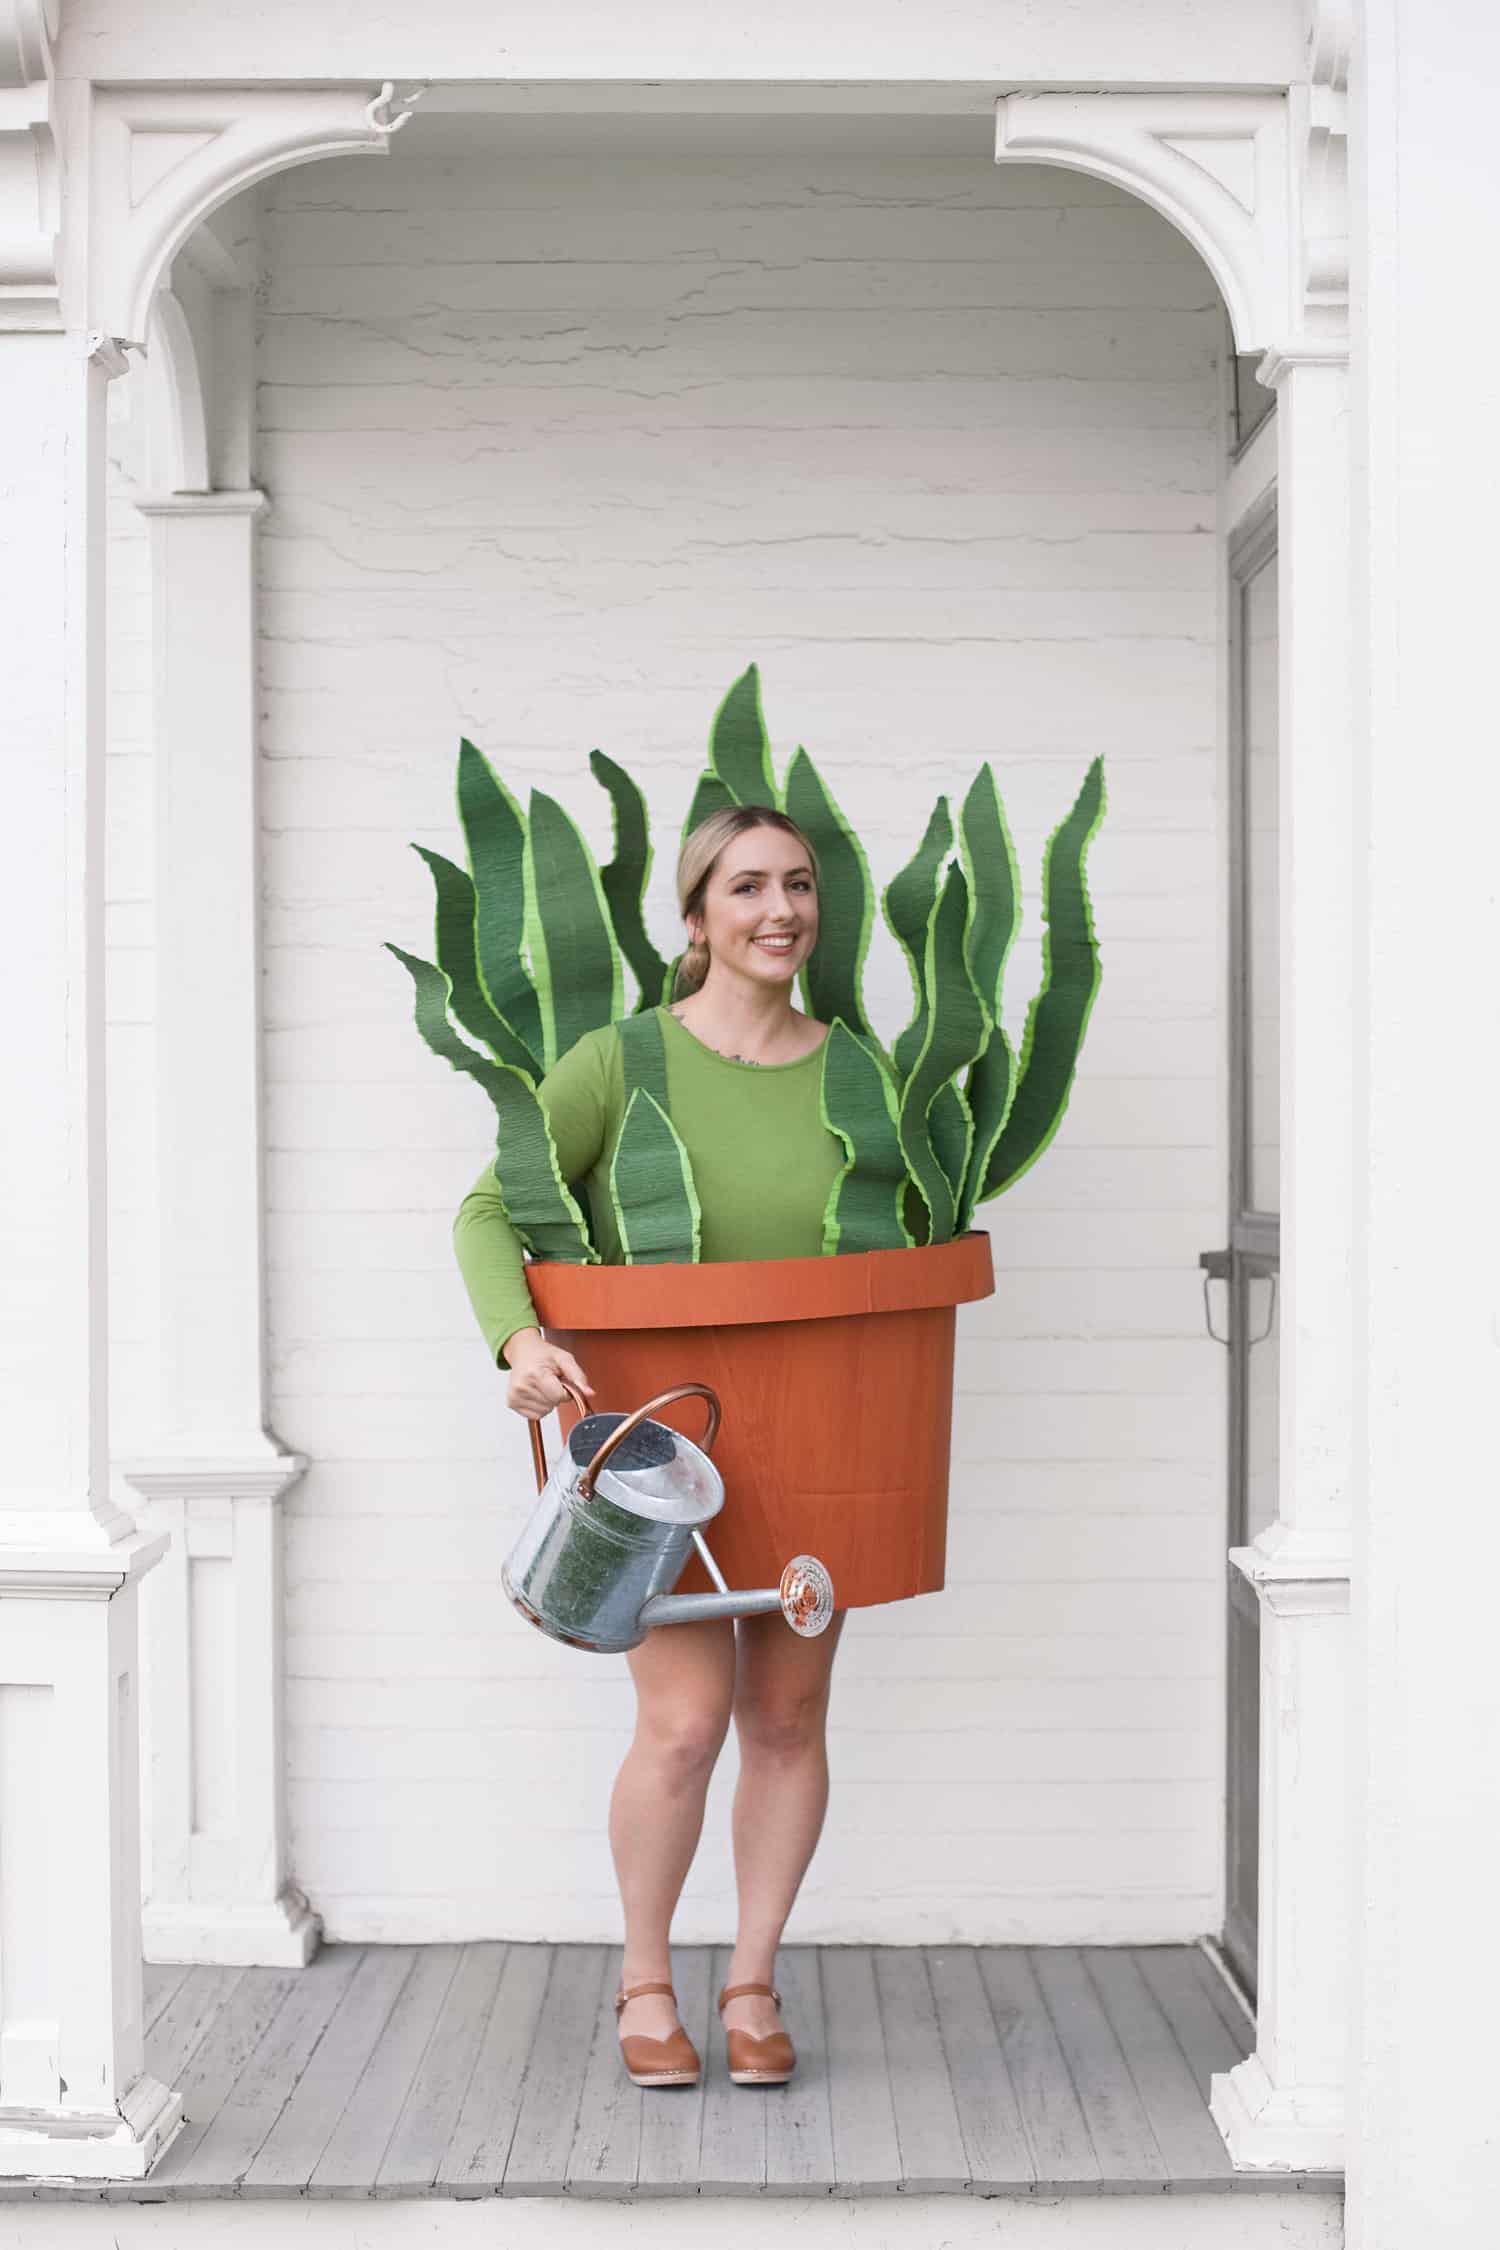
 This Halloween, why not embody the internet’s favorite easy-care houseplant? Do you love plants but suffer from a black thumb? Don’t worry! Cardboard and paper actually prefer not to be watered, and as far as Halloween costumes go, killing it is the ultimate goal!
We’ve teamed up with with Amazon Prime to show you how to make your own house plant costume from an Amazon Smile cardboard box and a few additional supplies. I get a lot of Amazon Smile boxes delivered to my door (#bloggerlife), so cardboard is a convenient material to use. Homemade cardboard costumes – or #boxtumes – are a great way to show off your creativity and spend time with friends and family, so give it a try this year!
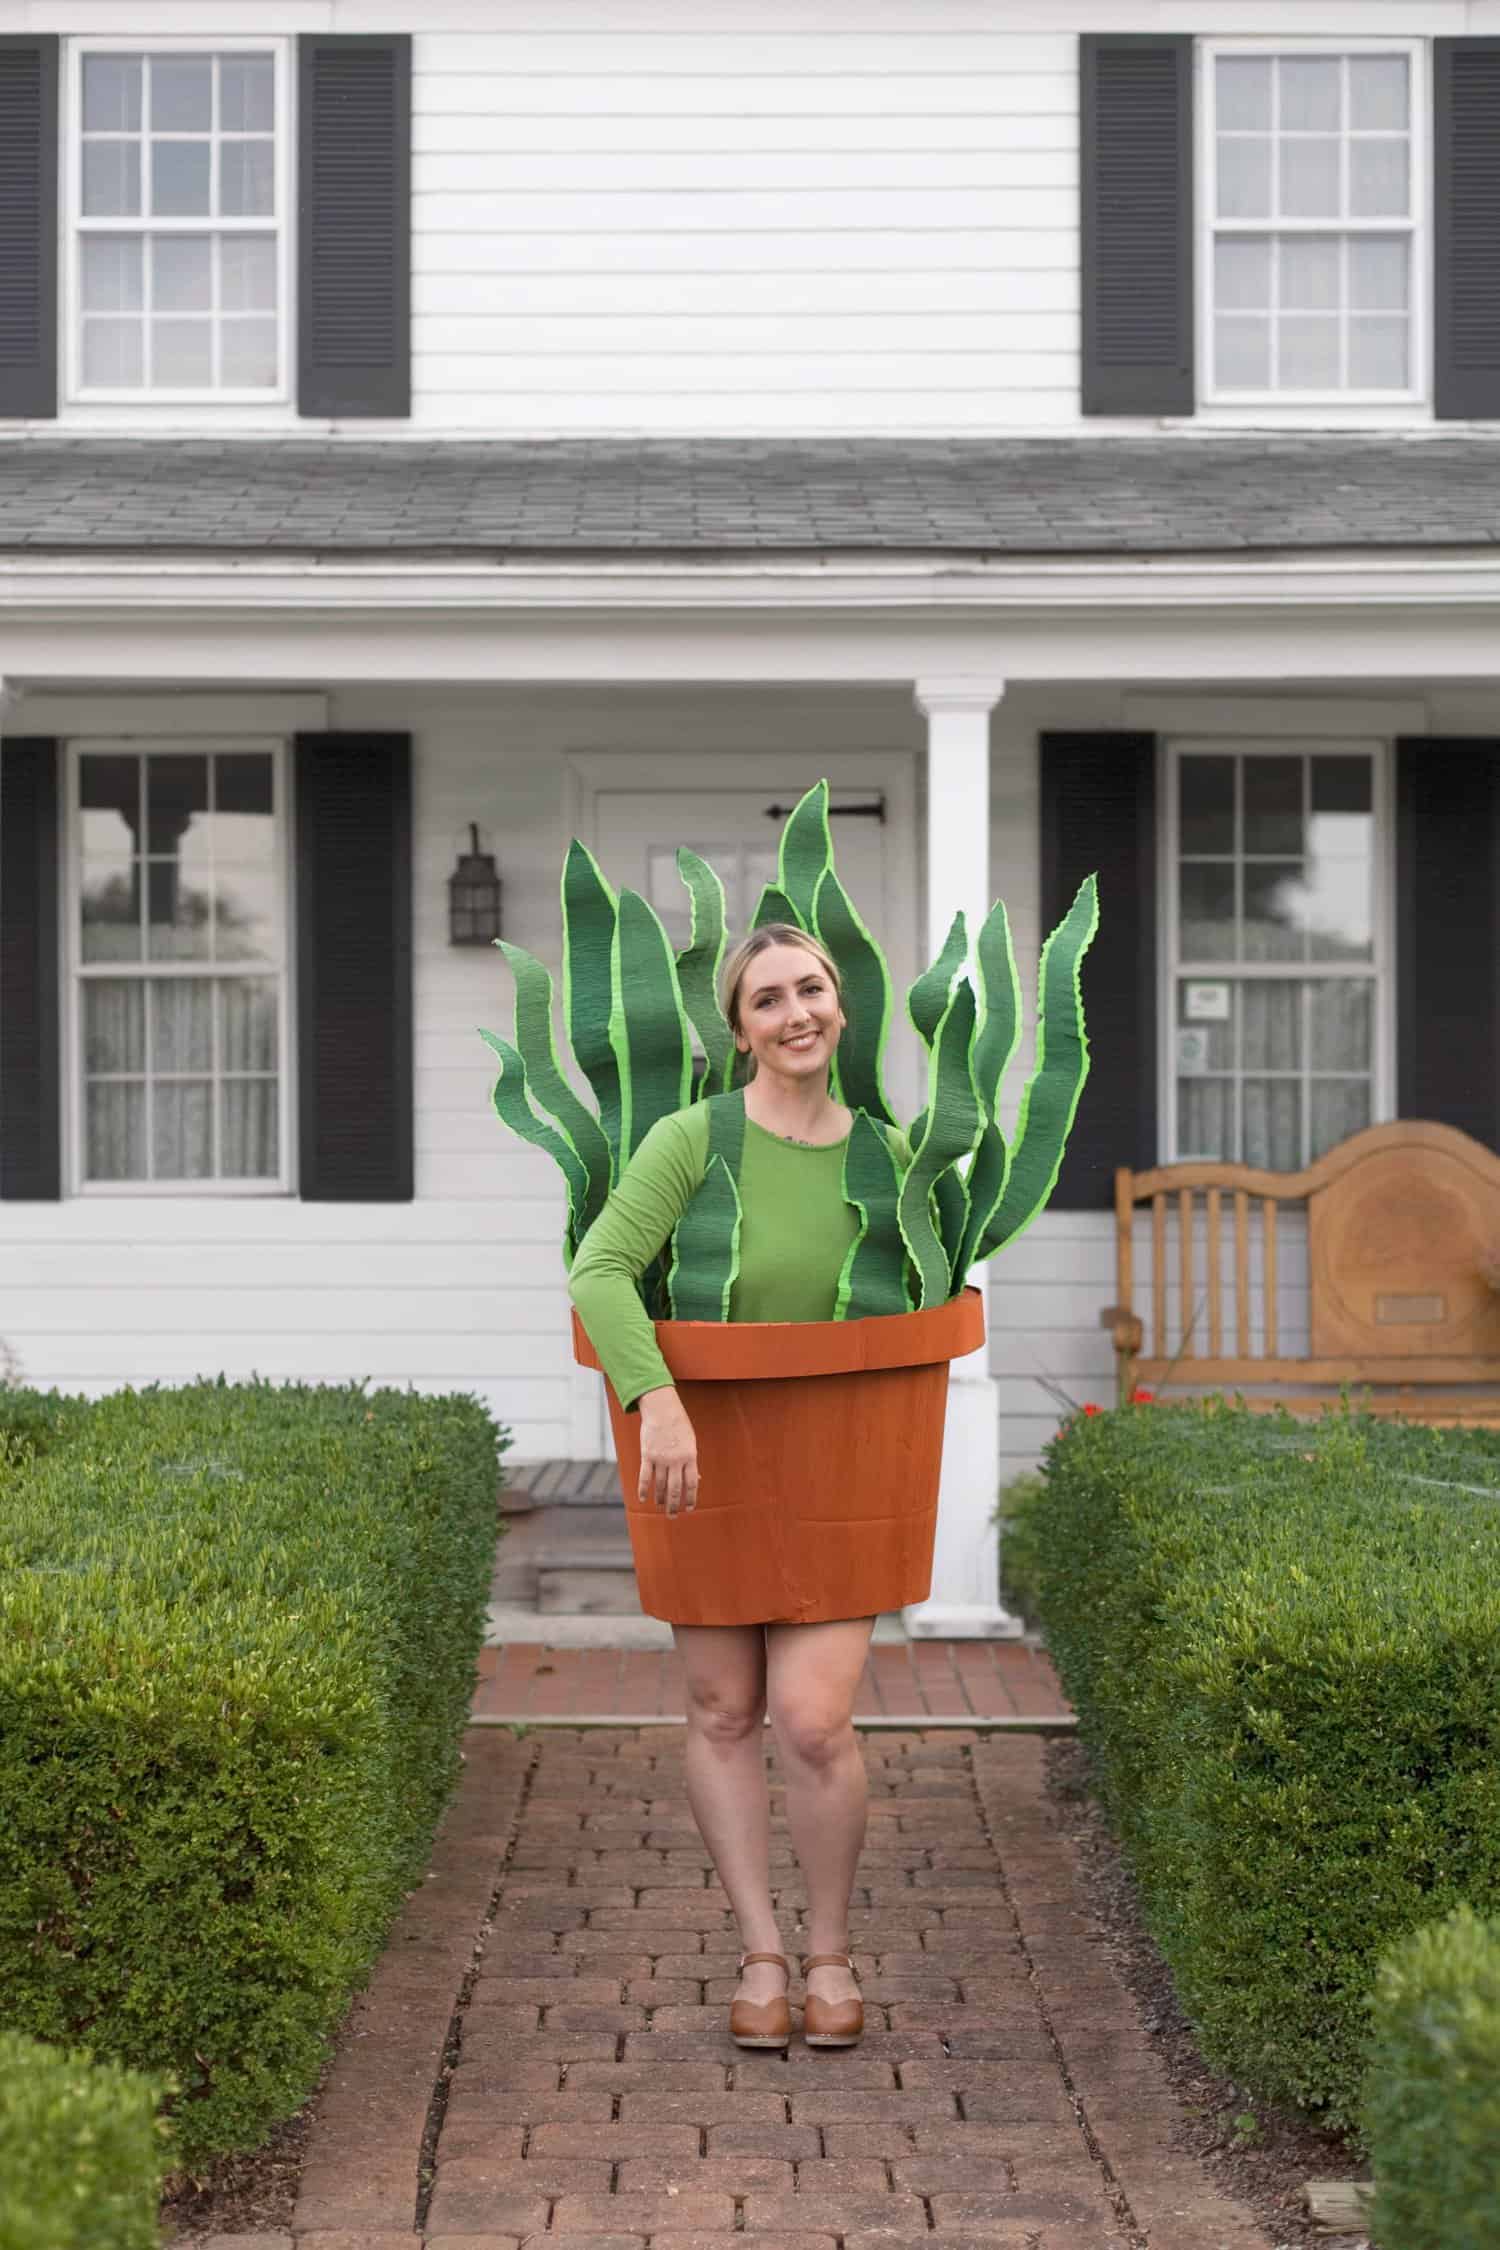
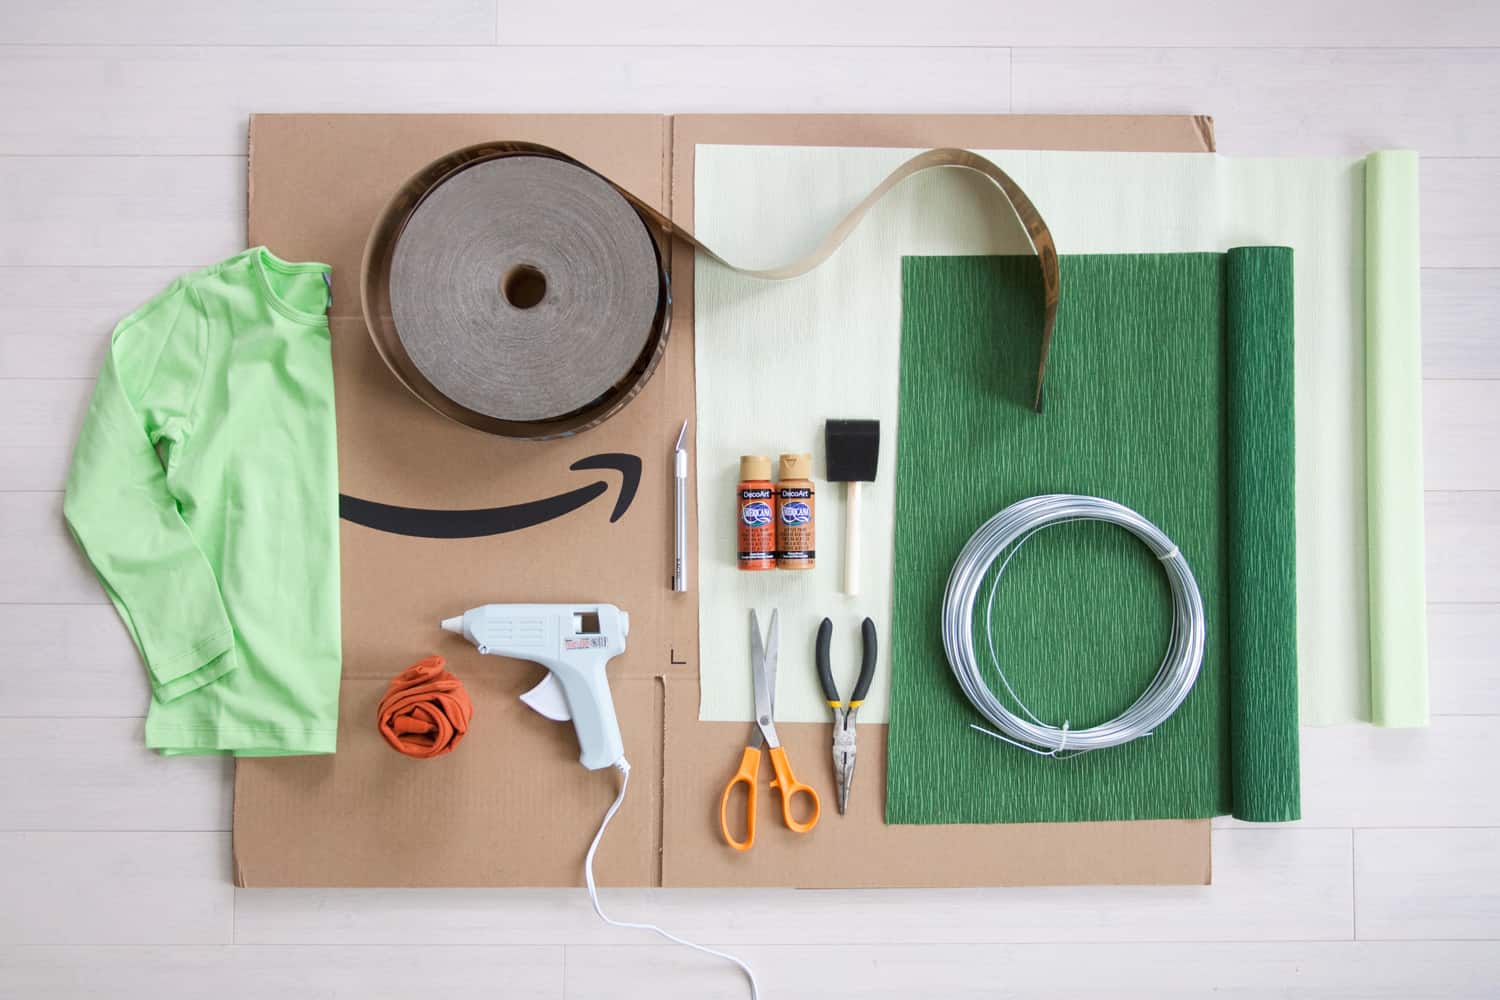 A plant costume made out of a cardboard box? This costume is kind, quirky, and creative! Here’s what you need to make your own:
Materials:
-2-3 large Amazon smile boxes (2 for a child’s costume, 3 for an adult)
–Reinforced paper tape (duct tape may be use on the inside sections only)
-Hot glue sticks (definitely use the extra durable kind!)
–12 gauge galvanized wire
-Green crepe paper in two shades (I used two rolls of the darkest green and two of the second darkest green in this pack).
-Terracotta acrylic paint (I used this color and this color to mimic the texture of a real terracotta pot)
-Green shirt (this is the one I wore)
–Terracotta colored tights for cooler climates
Tools:
–Scissors
-Wire cutter or pliers
–X-ACTO #2 knife with extra blade
–Hot glue gun
-Large foam paint brush
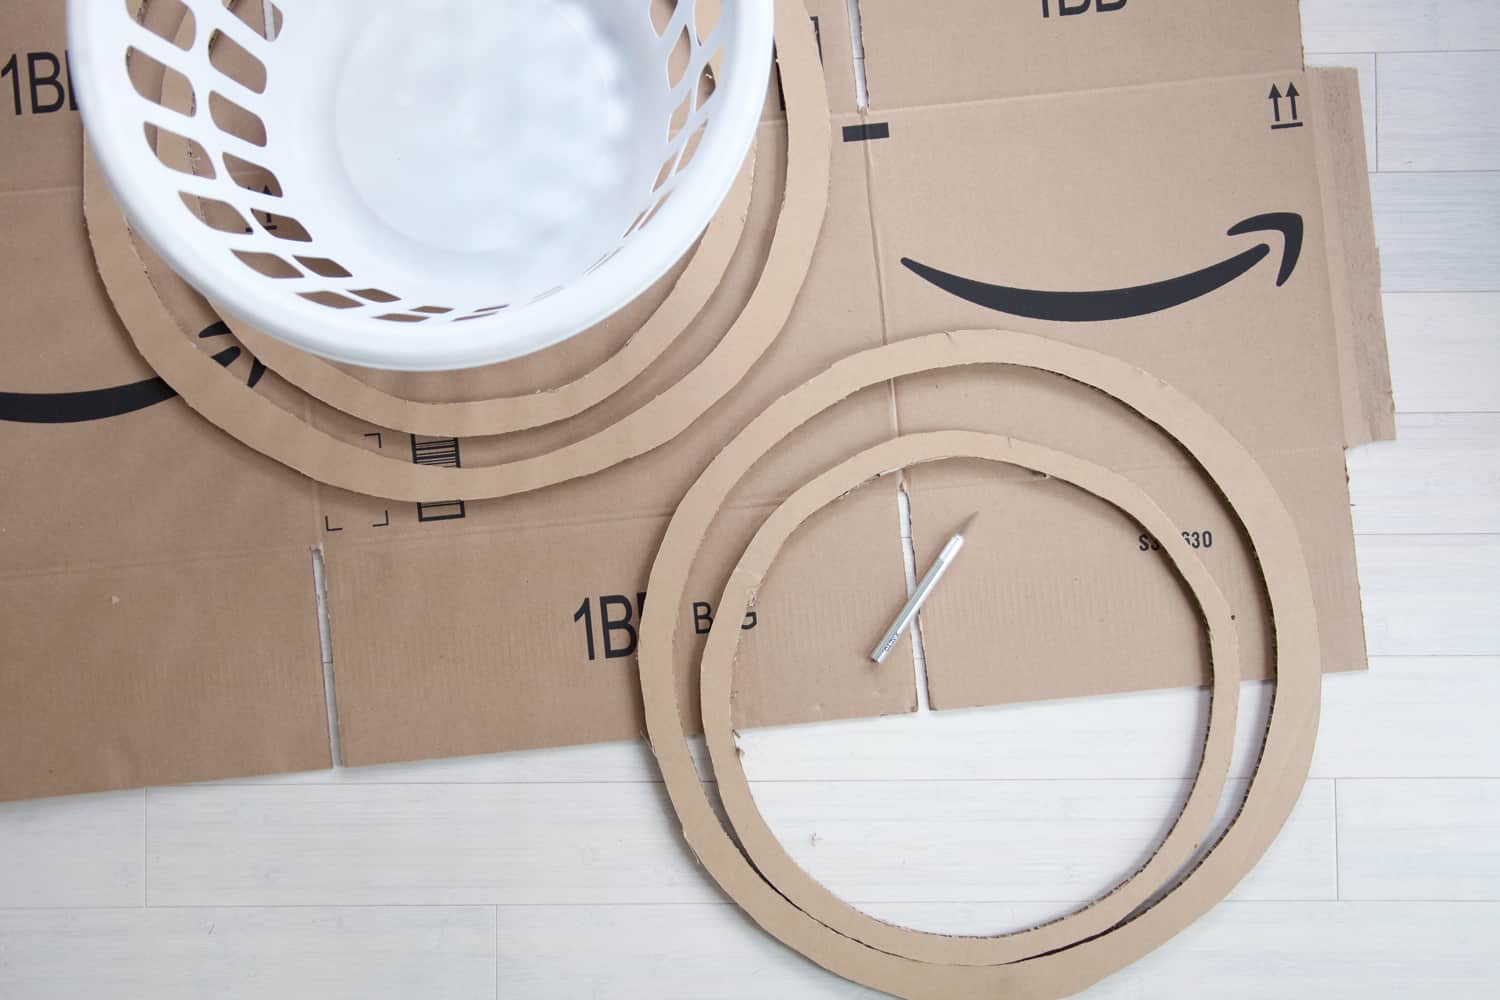 Step One: Use extra thick cardboard to cut out round hoops. If you don’t have extra thick cardboard, you can glue together 2 layers of regular cardboard. These hoops need to be somewhat strong, as they provide the shape reinforcement for the round pot.
To cut the hoops, I first traced the top of a round laundry basket*. I made sure the basket had proportions that would allow my legs to move at the narrowest point. Then I hand-drew a second circle 2″ inside the first. I used an X-ACTO blade to cut along the lines. You’ll need to do at least two passes with the knife to get a clean cut. Be sure to change the blade of your knife after cutting out each shape, or the blade will be too dull to give you a nice cut.
After cutting out the first larger circle, I used the bottom of the laundry basket to trace a smaller circle. Again, I hand-drew a second circle inside of the first and cut out the hoop with a fresh blade.
*If you don’t have a large circular object like a laundry basket, you can draw a large circle using a homemade compass with a pin/nail and string as Laura did in this plant chandelier project.
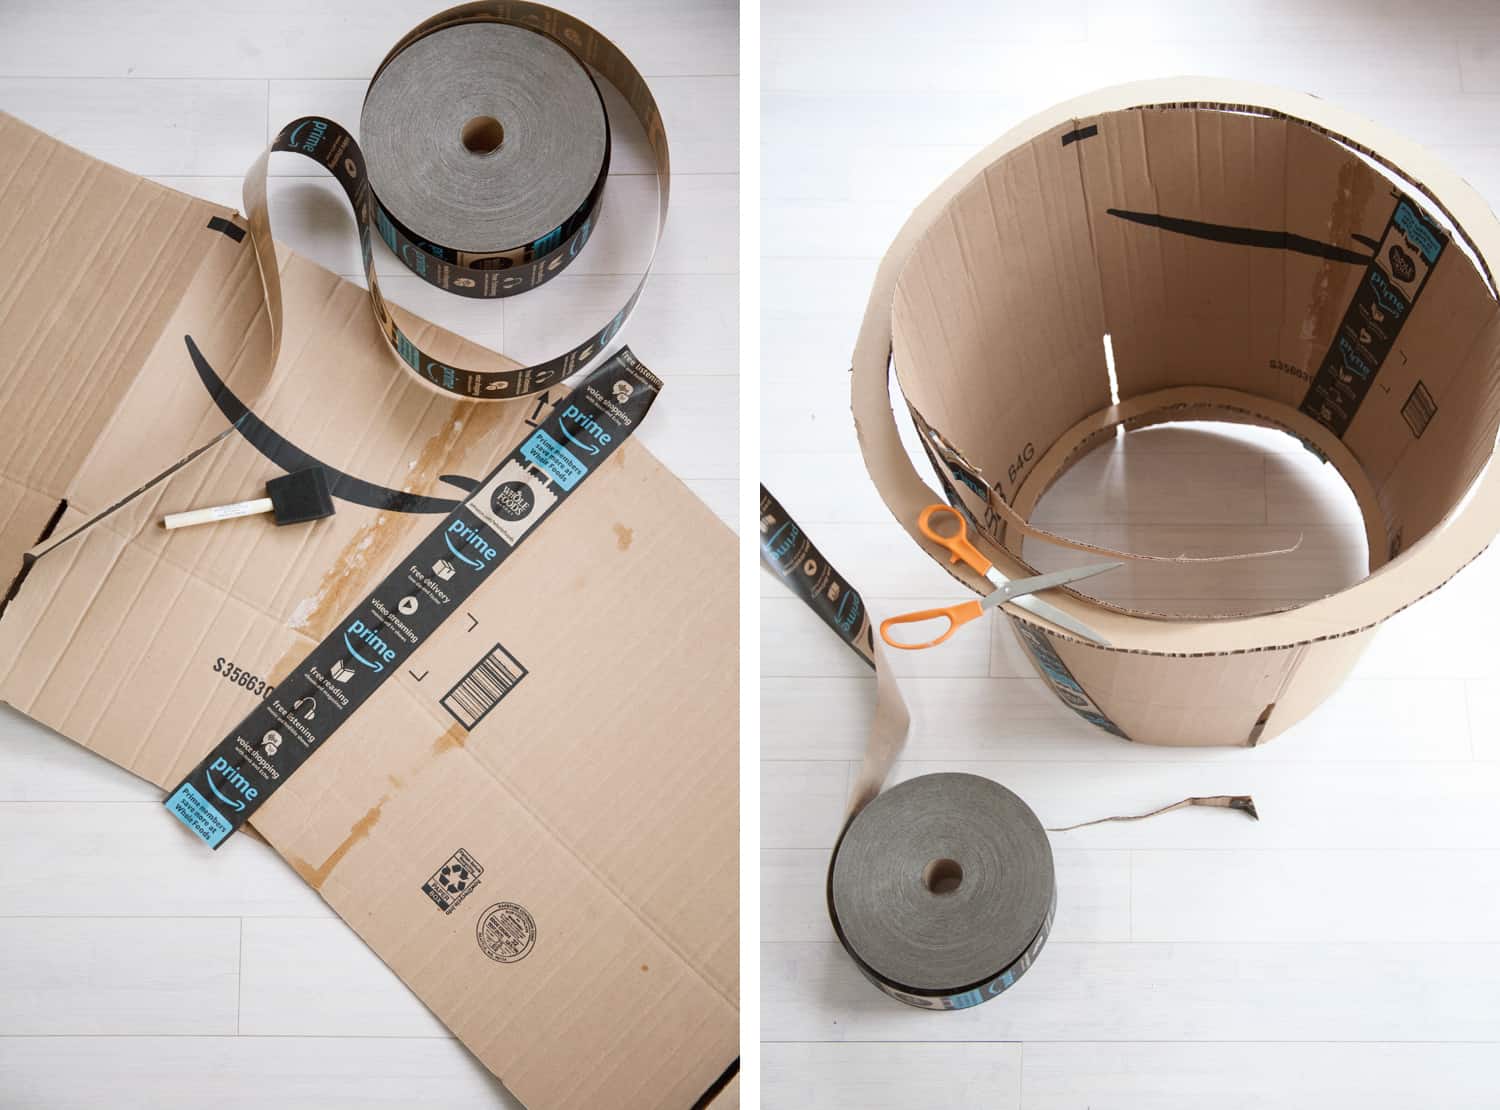 Step Two: Disassemble a large box. I cut off the top flaps of my box to make the cardboard into the size I wanted. I left the bottom flaps because I needed the height. At this point you should work with the corrugation of the cardboard to bend your box and give it flexibility. This will help it curve alongside your cardboard hoops.
After making my cardboard flexible, I split the box into two pieces so I could reattach them at an angle as shown above left. This angular connection gives the pot its tapered shape. As you connect the box, make sure the finished diameter of the top will match the inside of your large hoop. The bottom diameter of your connected box will need to fit snugly around the outside of your small hoop. See above right as a guide. The fit doesn’t need to be perfect, but it should be close. Paper packing tape* can span small gaps, but not large ones.
*It’s important to use paper packing tape for any visible joints. Acrylic paint will not adhere well to plastic packing tape or duct tape. If you prefer using duct tape, you can use it on the inside of the pot where it won’t be visible.
Step Three: The angular joints of the cardboard will stick up higher than the area between them. Use the circular hoops as a guide to trim down the parts that stick up too high. Again, this doesn’t need to be perfect, but it shouldn’t be too jagged or uneven. See above right as a guide.
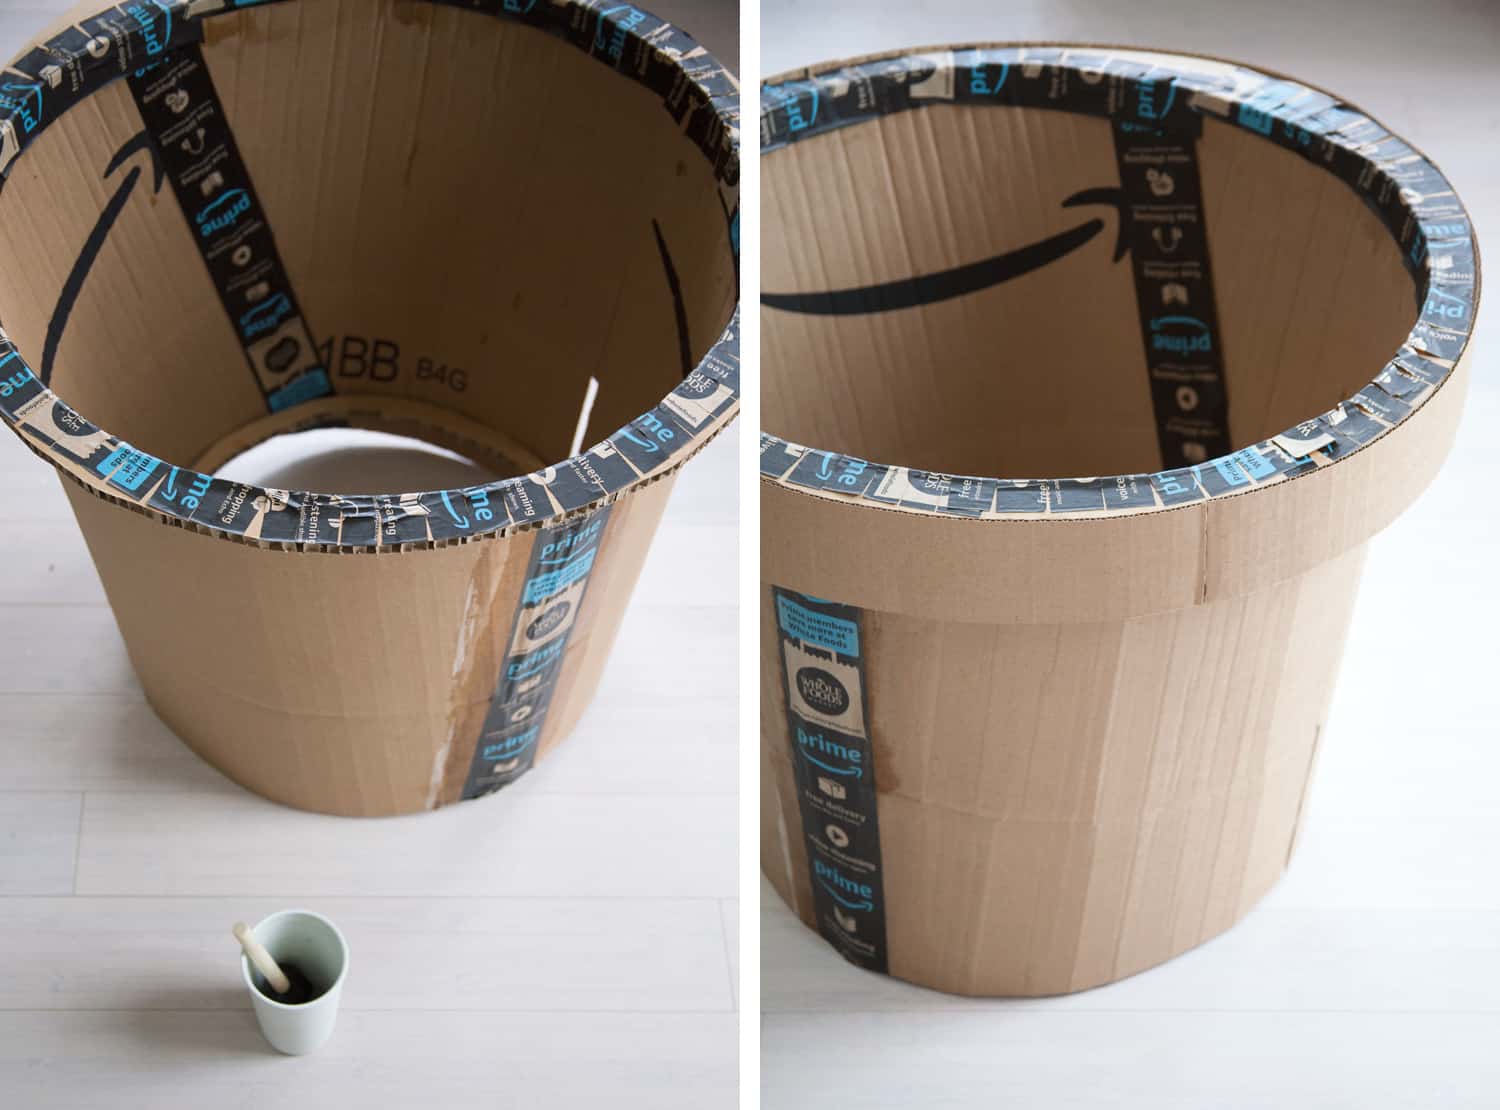 Step Four: Use small strips or scored paper tape to connect the hoops as shown above. I used reinforced paper tape that is activated by water, so I wet the tape with a foam brush before affixing it to the cardboard.
Step Five: Cut a 4″ wide strip of cardboard to attach to the edges of the top lip. To make these strips, I used the flaps I had removed from my boxes in step two. I used a straight edge and a sharp X-ACTO blade to make neat cuts. To get the full length needed to wrap around the pot, I had to combine a few pieces of cardboard strips. I secured them to the pot by using tape behind the strips where it wouldn’t be seen.
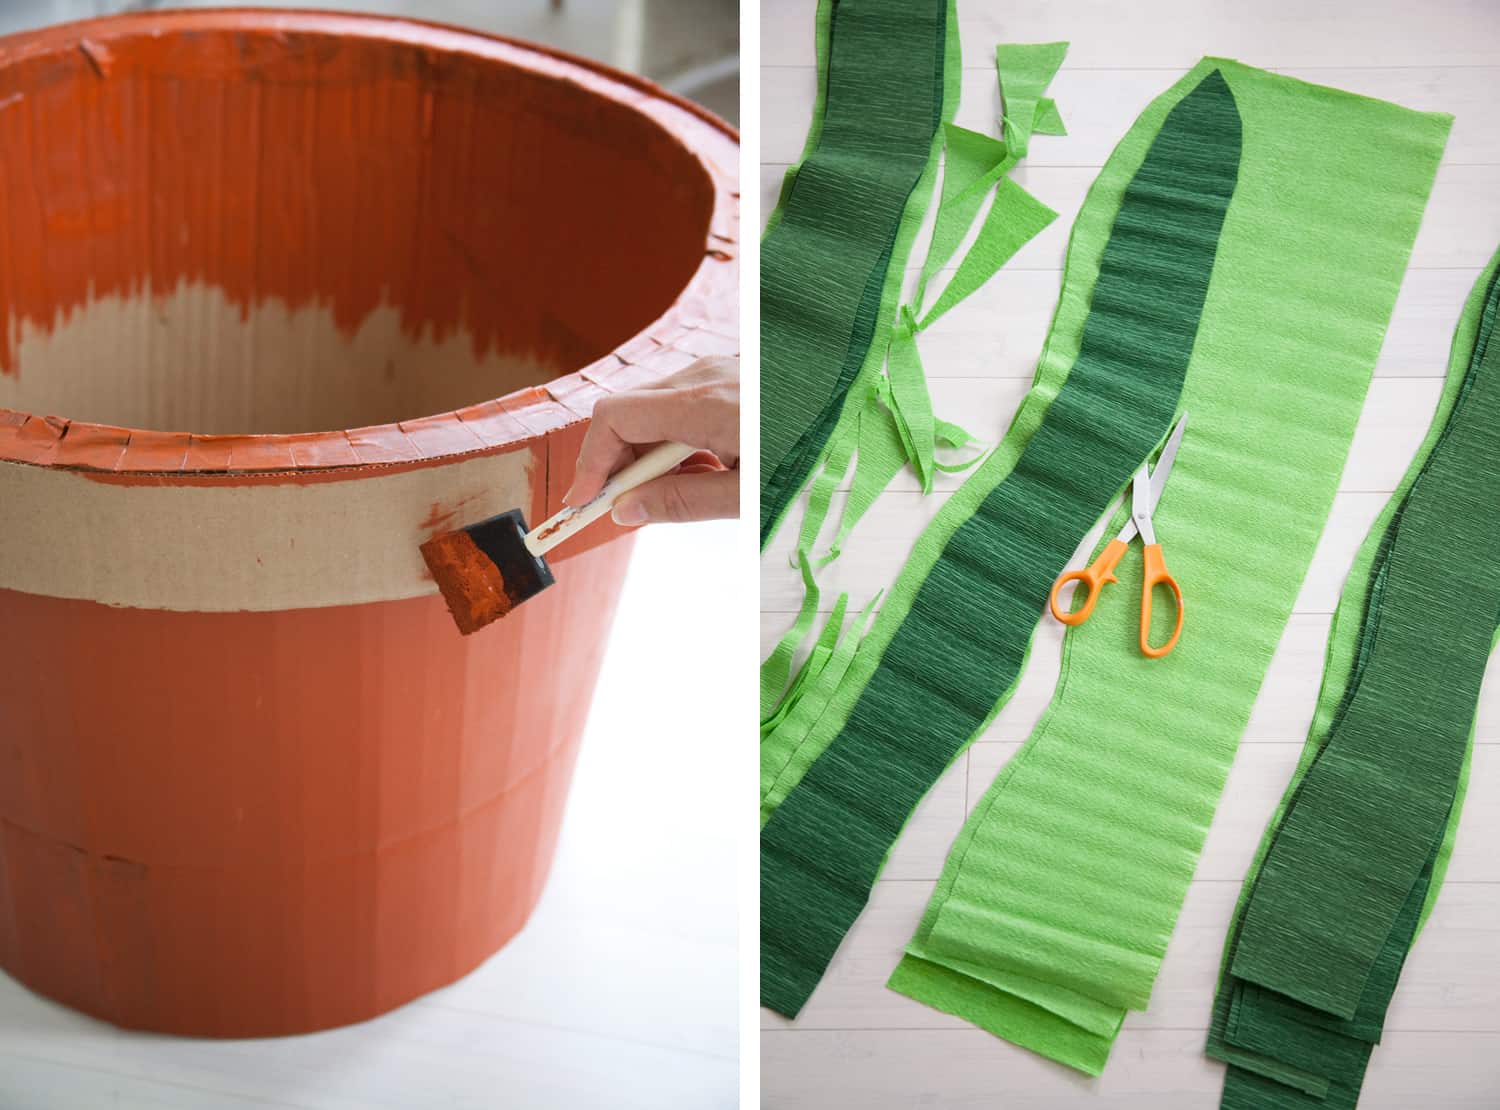 Step Six: Use acrylic craft paint to color the pot. You don’t have to paint the entire inside of the pot if you don’t want to, but you should do at least a portion of the top and bottom which may be visible. I started by painting one coat of the burnt orange acrylic paint. Then I mixed together the honey brown and burnt orange and brushed it unevenly over the first coat of paint. This gave my cardboard pot a textured look that mimics a real terracotta pot.
Step Seven: Cut out the shapes of the leaves. You need two matching dark green shapes and one light green shape to create one leaf.
Begin by cutting each large roll of crepe paper into three even pieces. Layer them on top of one another and cut out long, wavy leaves as shown above. You can layer as many pieces of crepe paper as you want—it saves time to cut the leaves when the paper is stacked. Keep in mind, though, that you need pairs of the dark leaves to match together when assembling them in step nine. So make sure you’re producing even numbers of each dark green shape you create.
For each matching pair of green leaf shapes you made, you will need one matching light green shape that is a bit wider. I used a dark green leaf as a template when cutting out a matching light green leaf.
I was able to get five dark green leaves within the width of each large piece of crepe paper. This gave me 15 dark leaf shapes from each roll. However, you need two dark green and one light green leaf shape to create one whole leaf. So one roll of dark green crepe paper made 7 1/2 leaves. Two rolls gave me enough dark leaf shapes to create 15 leaves. (Though I only made 12 full-size leaves and two small ones to cover my straps.) One roll of lighter green crepe paper wasn’t quite enough, so I used a second roll. Make sure you have enough leftover crepe paper to cover the straps in step eleven!
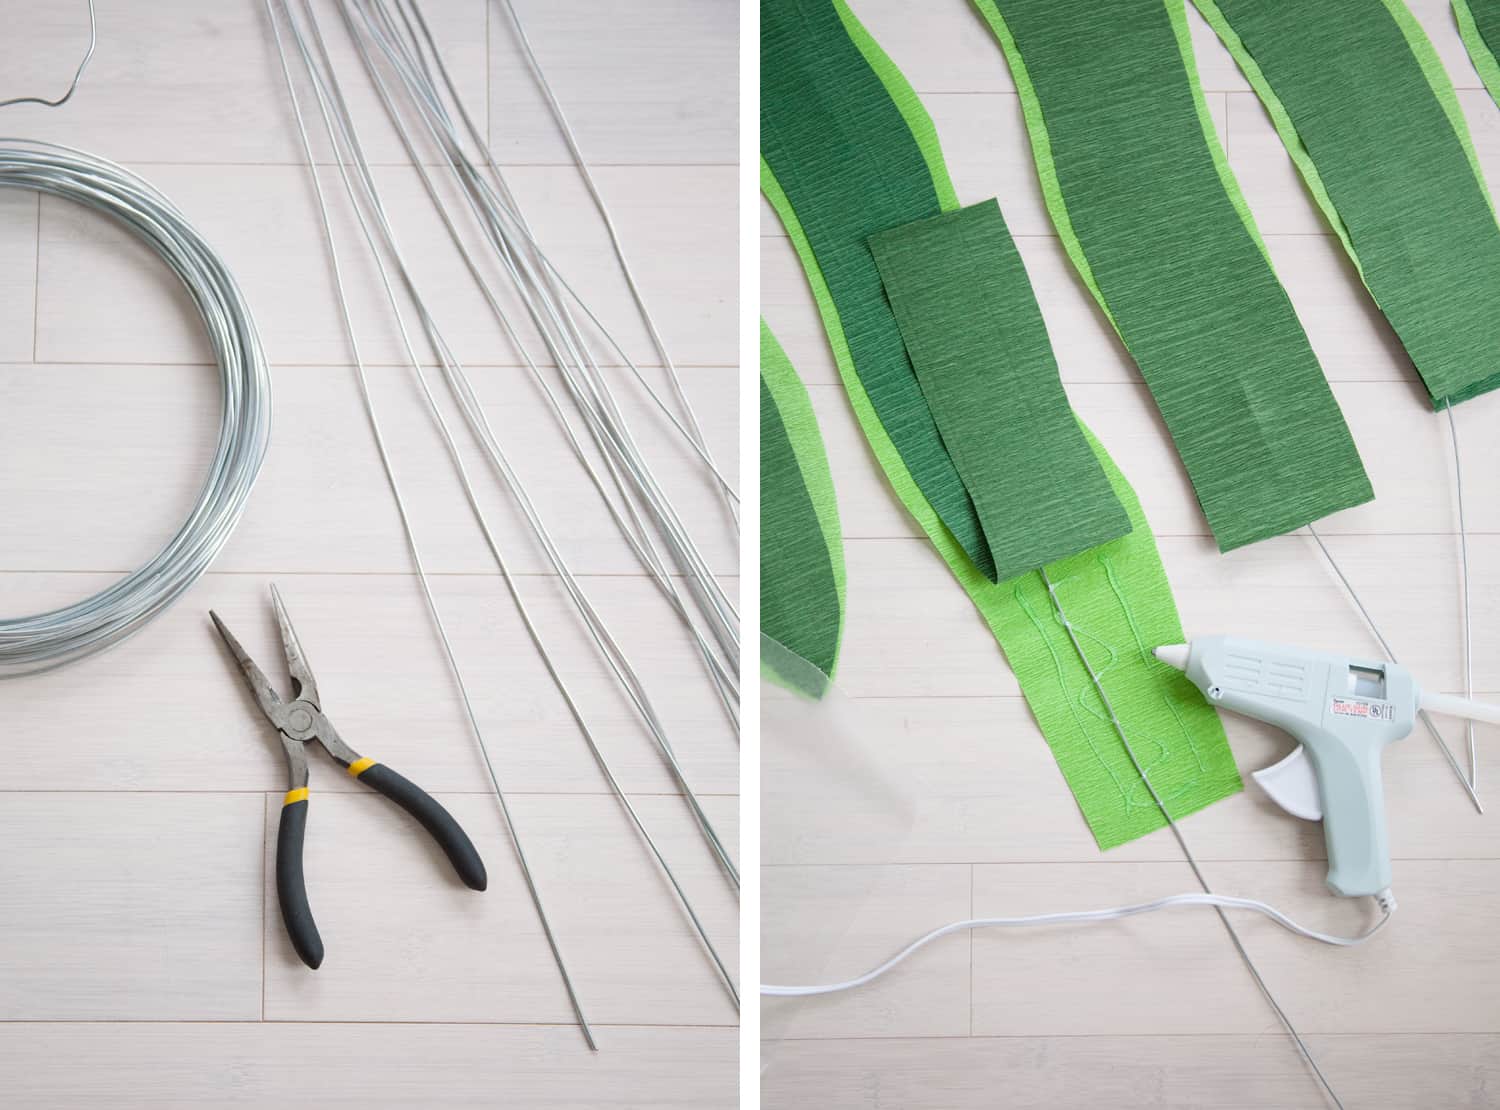 Step Eight: Cut lengths of your wire to the same length of your crepe leaves. Bend them into relatively straight lines.
Step Nine: Assemble your crepe leaves. I did this by placing a light green leaf on the bottom, putting the wire over top of it, then applying glue as shown above right. Work in small sections so your glue doesn’t dry before you get the dark green leaf in place overtop of the wire and glue. After the dark green leaf is in place on the top, flip over the newly wired leaf and add the matching dark green leaf shape to the opposite side.
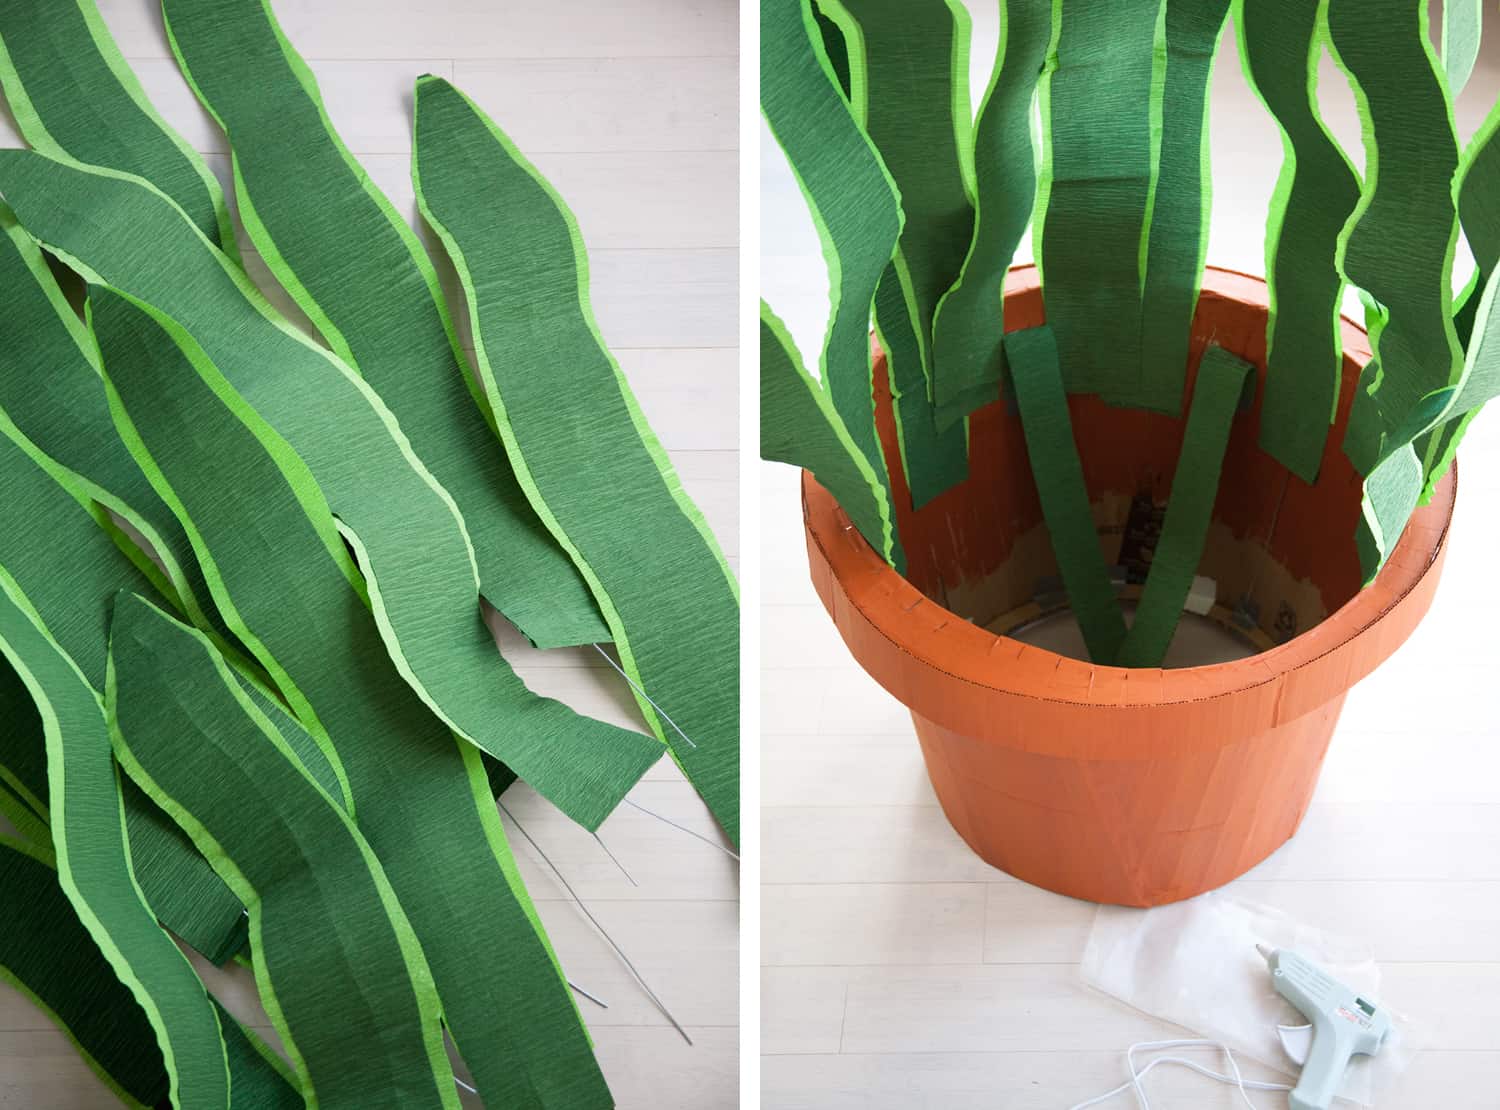 Step Ten: Bend the leaves in gentle curves before attaching them to the inside of the pot.
Step Eleven: Use tape to make straps for your pot. Wrap the tape in crepe paper before attaching them. Criss-cross the straps so they’ll be less likely to slip off your shoulders. I used hot glue to attach the straps, but I highly recommend fastening them with some kind of staple, stitch, or grommet for better security. You can hide the attachment point behind the upper lip of the pot.
At this point I also used hot glue to attach the leaves to the pot. Hot glue alone will be sturdy enough to keep them securely attached when applied generously to at least a 4″ section of the bottom of each leaf. I staggered the attachment points of the leaves to make some taller than others. Keep in mind how the leaves will fit around your body when attaching them. I would caution against putting many near the front, or where your arms will go. Save two small leaves to glue to the front of your straps.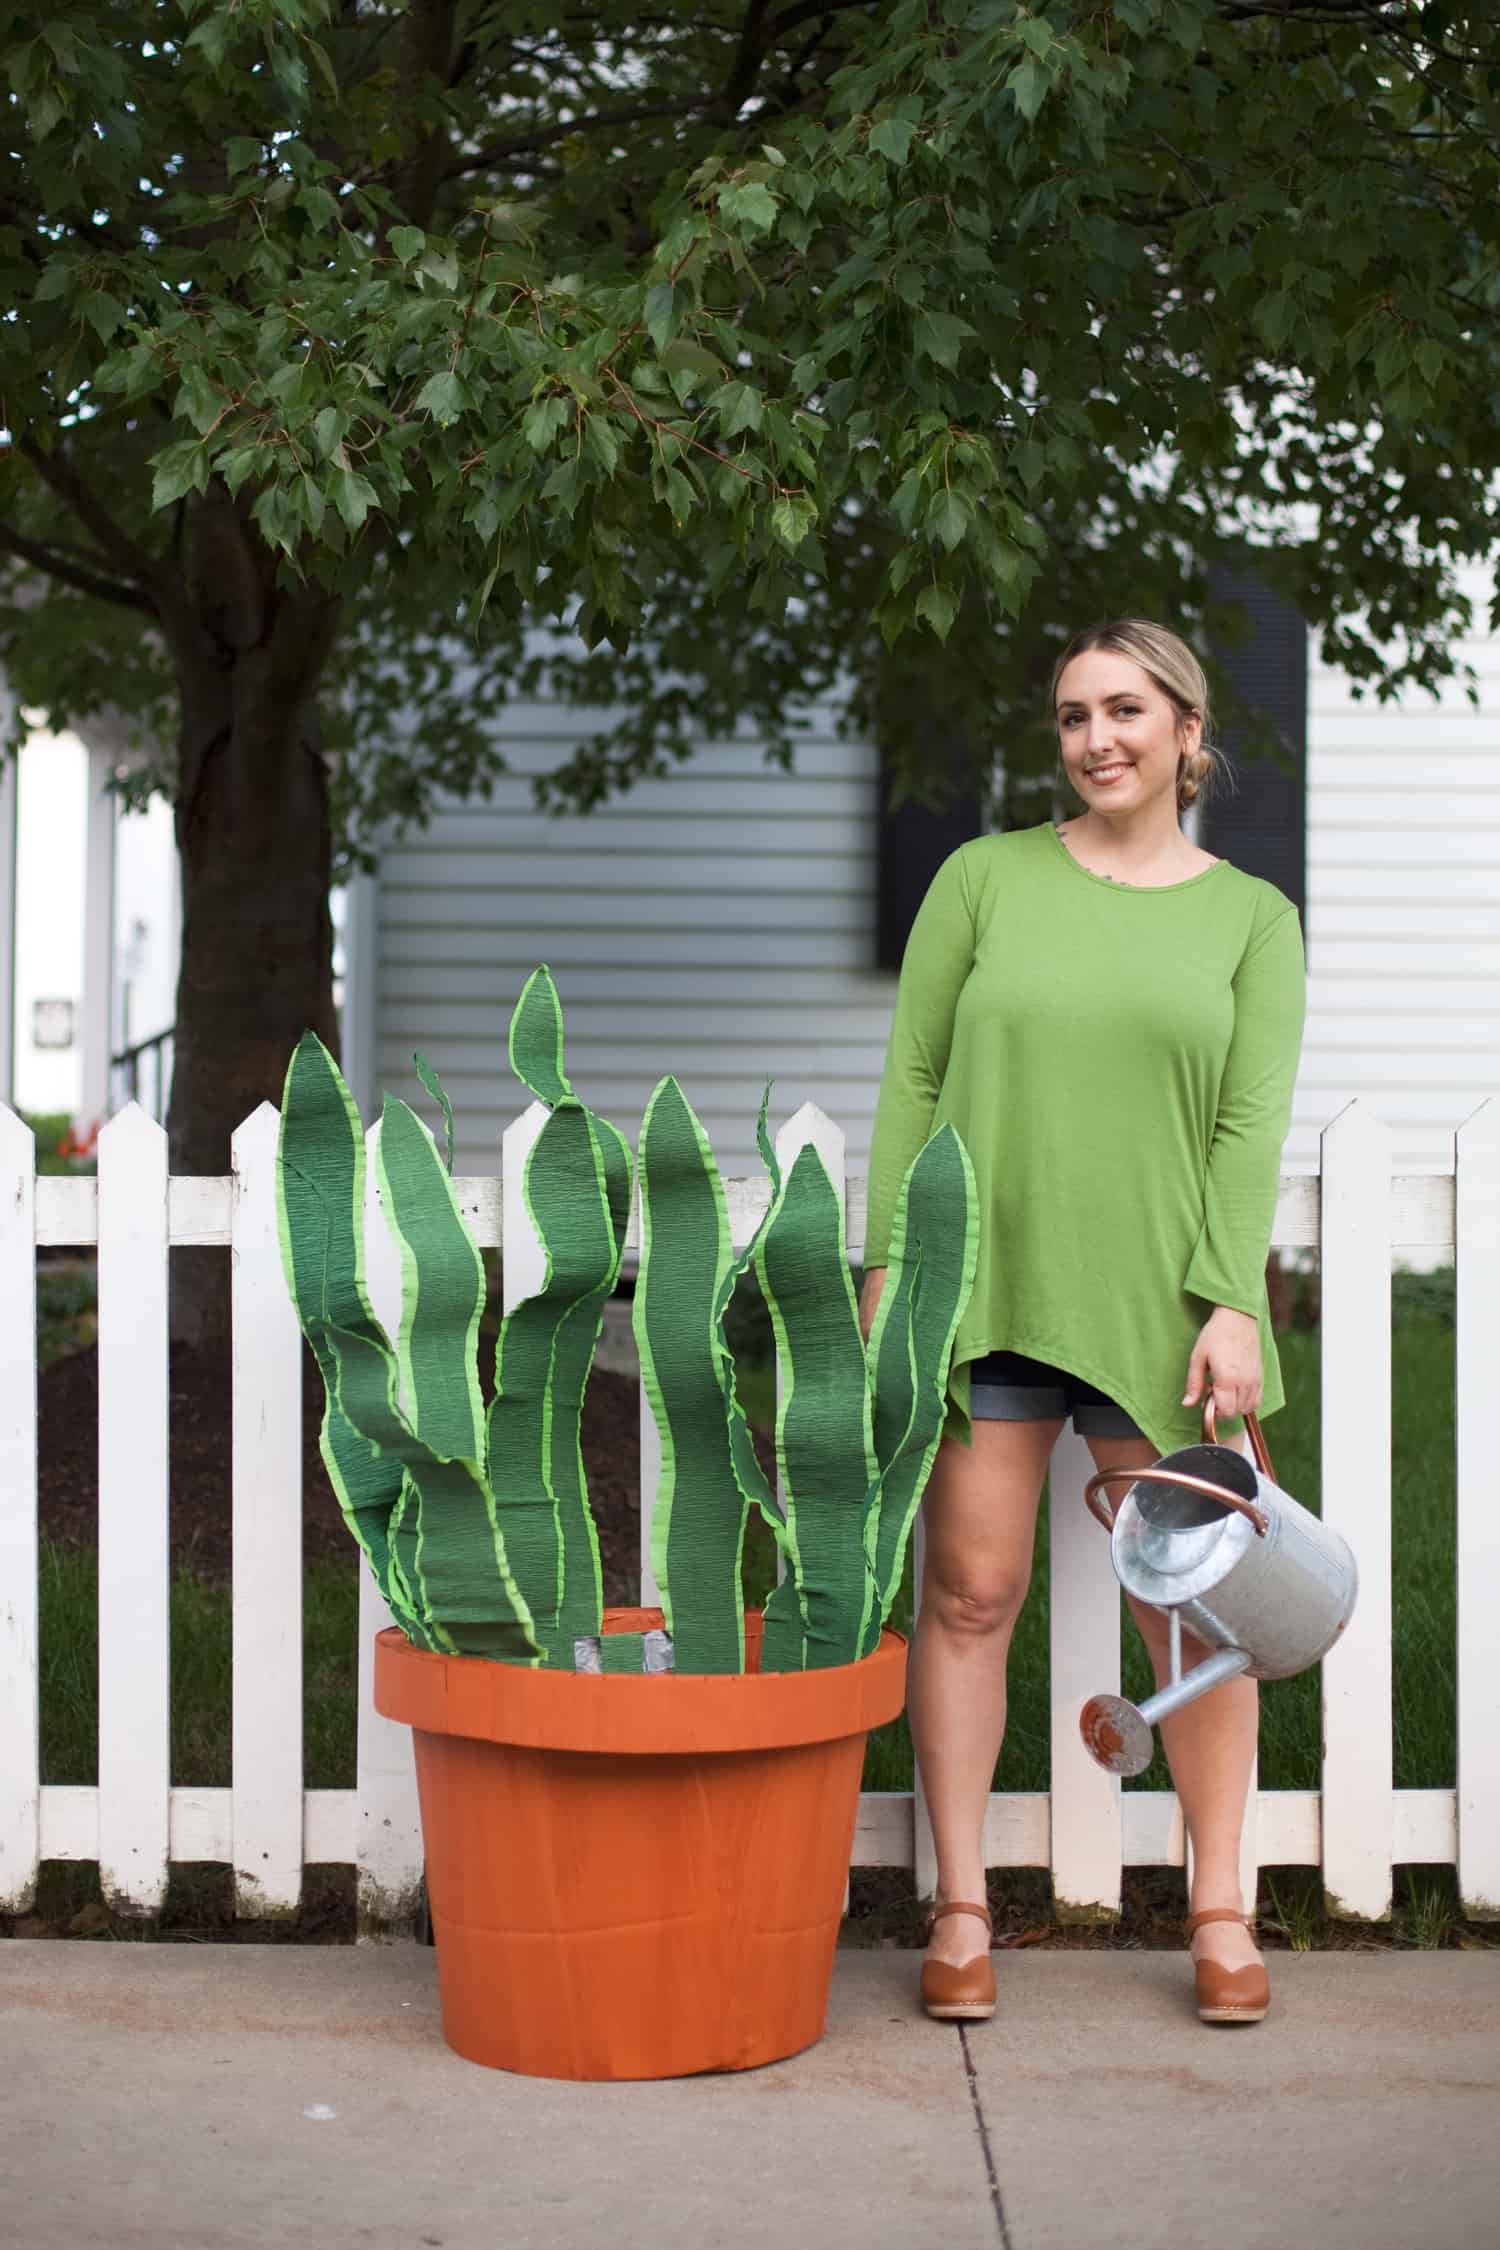 Important Tip:
My one important tip for this boxtume is to really make sure your straps are secure! You can see in the above image that I had to use duct tape because the hot glue failed on the straps, and even then it didn’t feel super sturdy. I hadn’t used Gorilla Glue sticks when attaching my straps, so maybe that would’ve helped? Regardless, I highly recommend using some kind of fastener beyond tape or glue to keep your straps securely attached to the pot. It wouldn’t be too difficult to manually staple, stitch, or grommet the straps into place. The fasteners could conveniently hide behind the top lip of the pot.
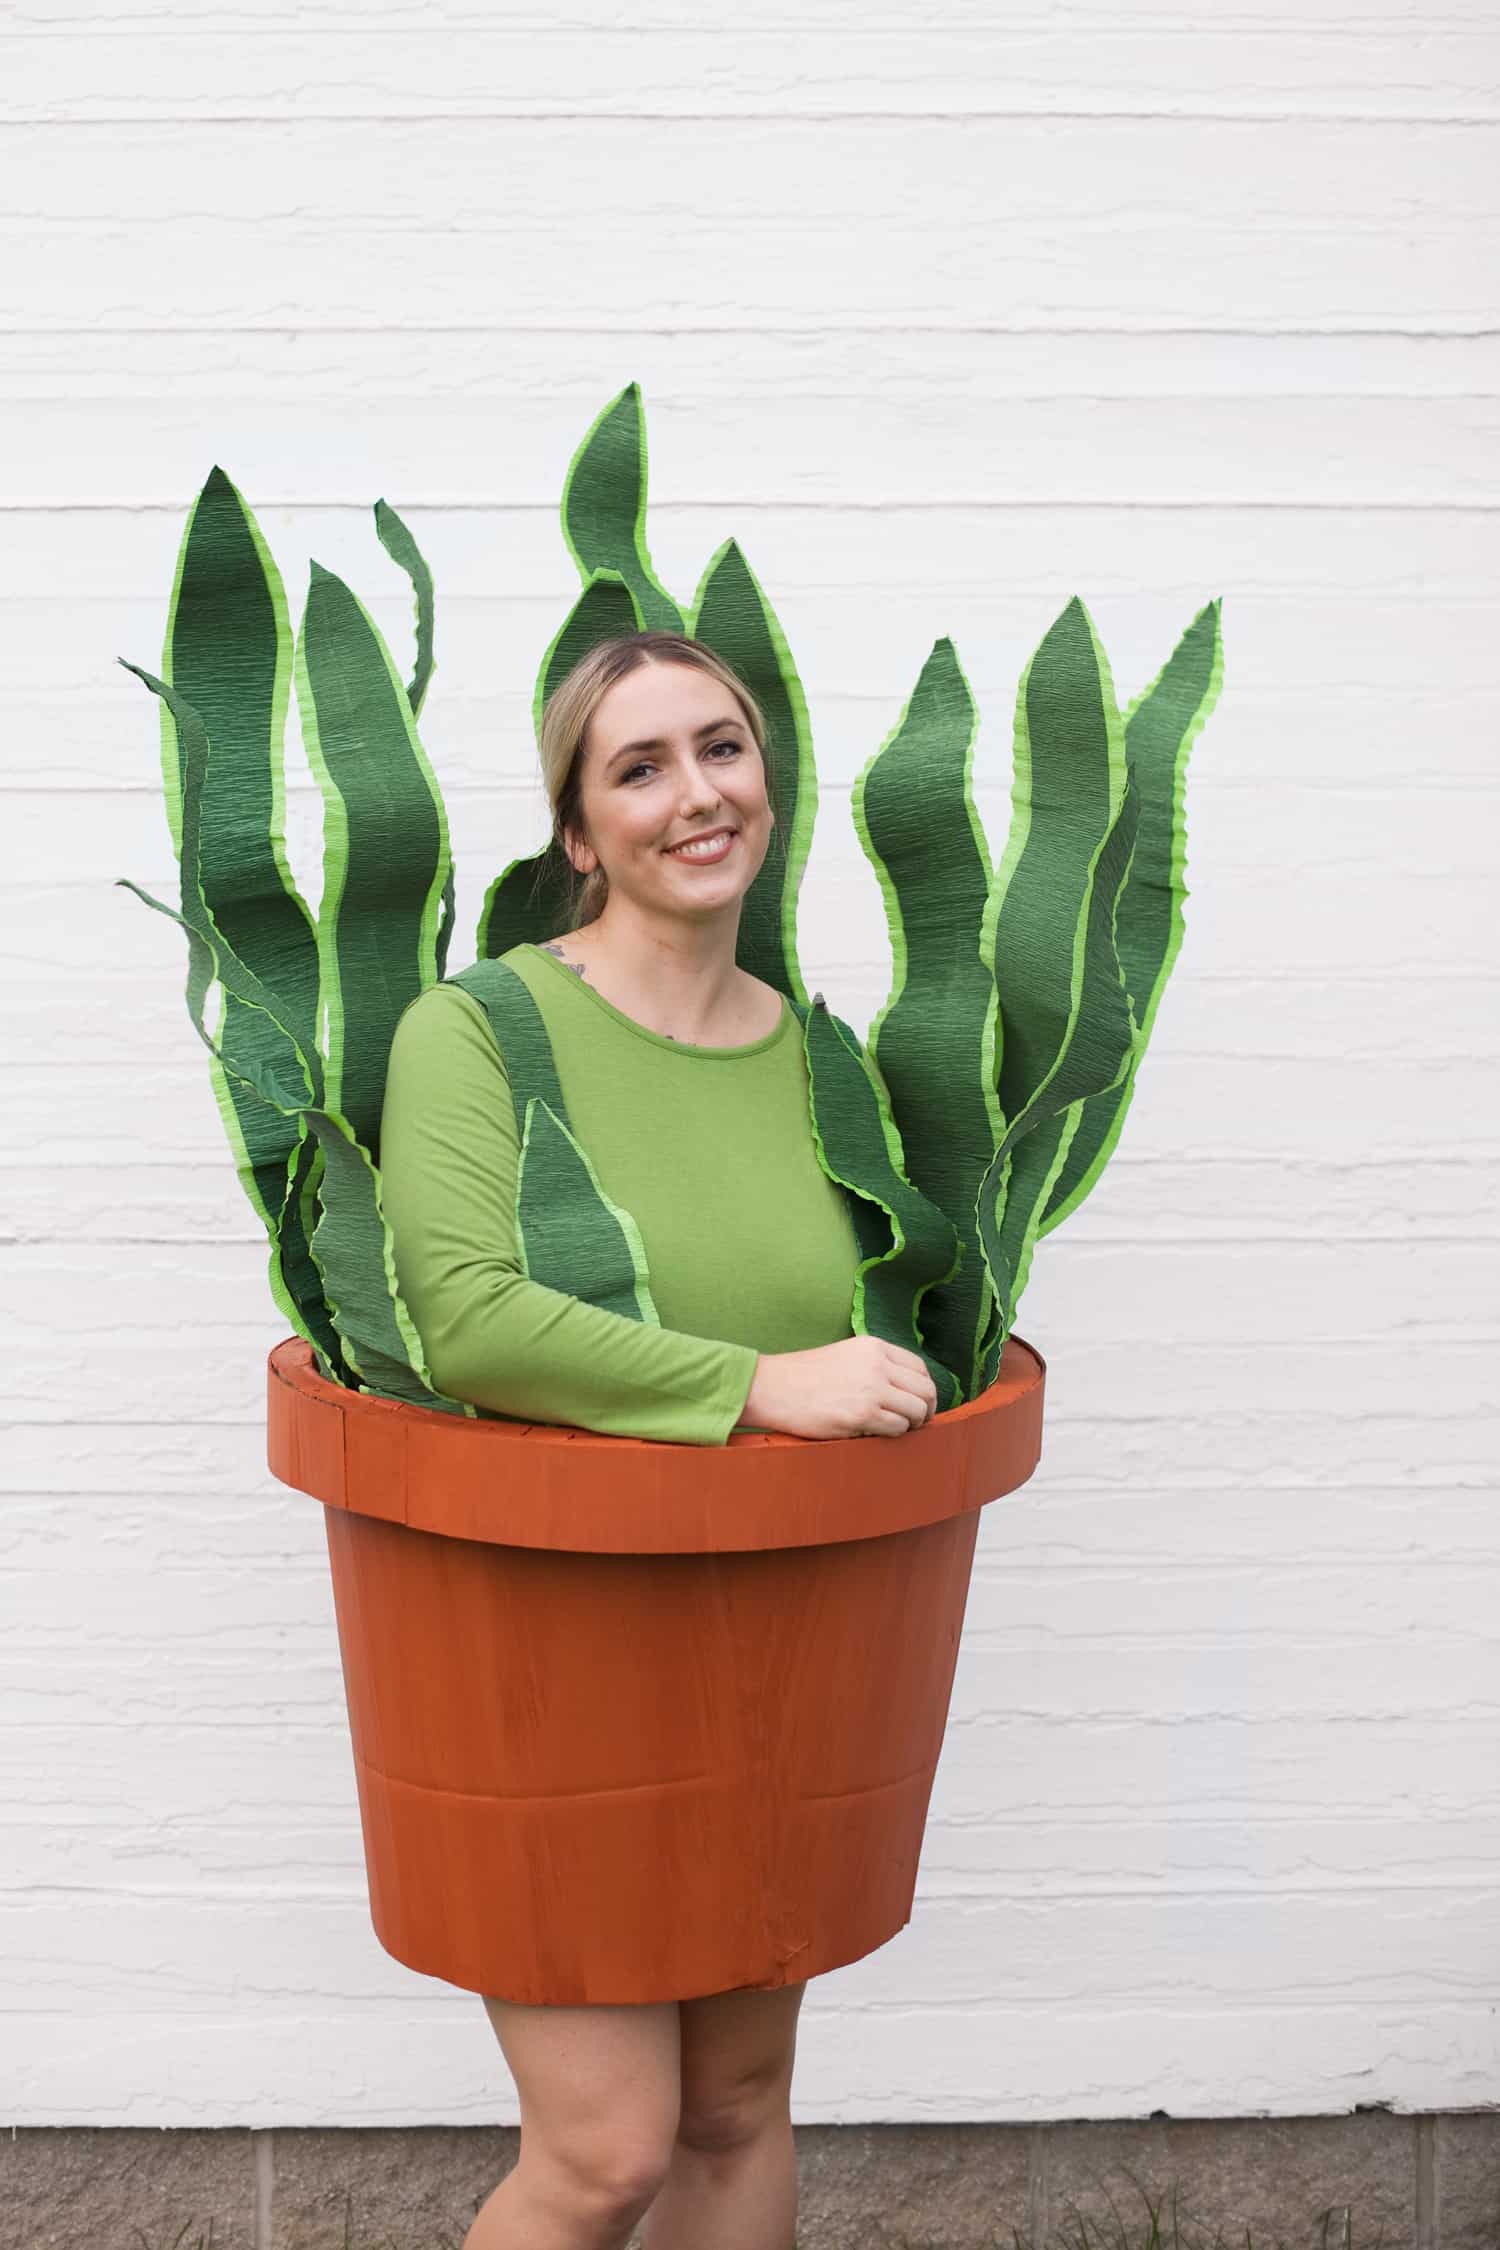 As a bonus, this costume comes with its own armrest! (Another good reason to make sure your straps are super secure!). For a perfect finishing touch, do the plant version of bringing your own water bottle—grab a watering can!
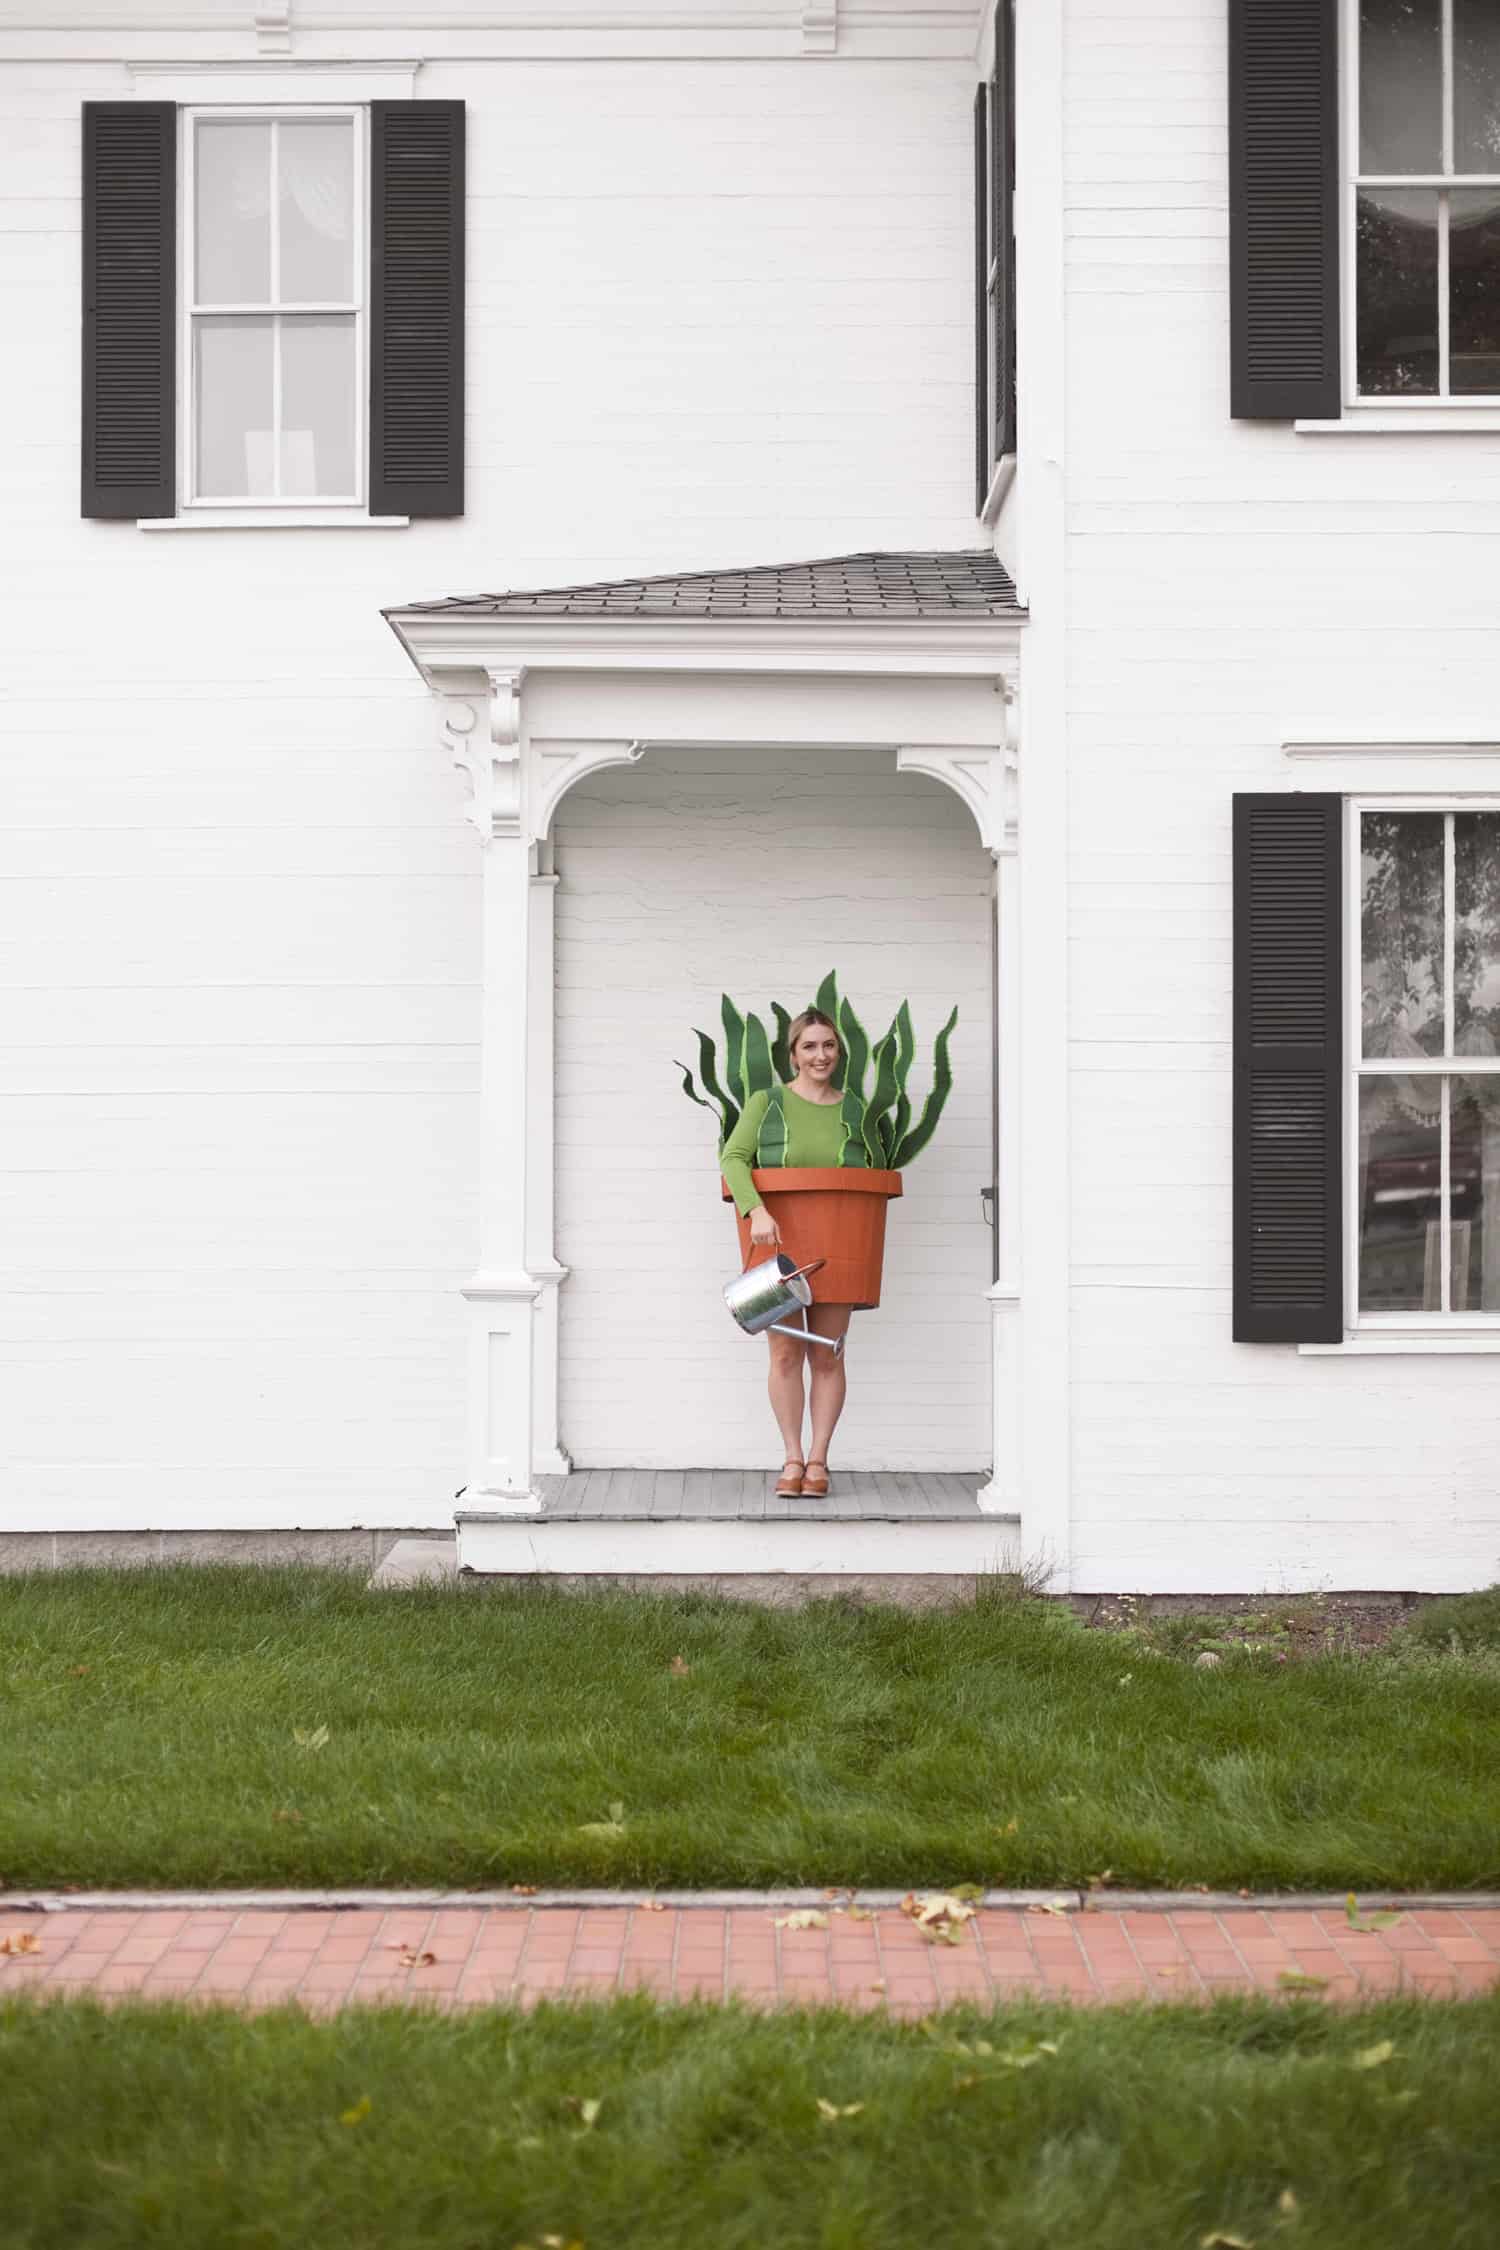 Do you love plants enough to become one for Halloween? Maybe a sedentary lifestyle with only a little indirect sunlight and minimal food and water doesn’t sound like your idea of a good time—but I think it would be fun to be a spider plant for just one night! – Mandi


15 Comments
This is so funny! It’d be an instant hit!! 🙂
Charmaine Ng | Architecture & Lifestyle Blog
http://charmainenyw.com
This is my favorite of the costumes so far!
This is so cute! I’m obsessed with how well it turned out!
Paige
http://thehappyflammily.com
Ah! SO CUTE!!
This is such a great idea. It kind of reminds me of seaweed. I’d be super tempted to dress like Nemo so that it looks like i’m swimming through a coral reef.
Emma | https://geekytourist.com
Oh my gosh!! I’m in love. This is so darn cute. You’re so creative!
http://www.coastalcuriosity.com
What a super cute and creative costume, I’ve never seen a houseplant costume before! So cool!
https://www.makeandmess.com/
Wow! this one super hit for me, creativity speaks its self.
I love this so much! I’ve honestly never seen a costume like it before, so original.
This is sooo good! You could take it a step further and make it into an Audrey II costume from Little Shop of Horrors – the perfect houseplant/Halloween combo costume!!
-Mike, http://www.thecraftygentleman.net
Wow!I like it!It is not very difficult for me.
Thank you!
Hello,
First of all, I’m a big fan of your site and LOVE getting inspired by it. So, thanks for all the hard work.
Secondly, I’ve started my own site, but have been having trouble getting the word out… so I’ve started a monthly promotion – giving away my handmade necklaces. I’d love you to not only enter, but if you’d like to spread the word, I’d be delighted. I have a graphic that I’ve been sending out if you’d like to have that… just reach out to me and I’d be happy to pass it along.
Thanks for just considering helping a fellow dream follower… and have a great weekend.
Kristi McKay
http://www.ayepaloma.com
ayepalomamail@gmail.com
kristimckayrocks@gmail.com
This costume was amazing and yet also a total riot~! LOVE it!
What are the dimensions of the leaves?
I can’t find crepe paper anywhere and don’t have enough time to order it online. Any suggestion on what else can be used for the leaves?