Ever since I started playing around with DIY stamping techniques last year, I have to admit that I’ve been a little obsessed (so far I’ve also made these bracelets and necklaces). There are so many different ways to use the stamping materials, and I really like this version that uses long stamping blanks mounted to leather bracelets. They are pretty fast to make, and you can customize them a lot by using different colors of leather and stamping whatever phrase or hashtag you want on different ones. Yay for choices!
Supplies:
-scraps of medium weight leather (real or faux)
–metal bar stamping blanks
–snaps and snap setter (line 20 size)
–1/16″ hollow rivets
-1/16″ hole piercing and setting tools (this tool is great and does both)
-fabric scissors or metal ruler and rotary cutter
–metal letter punch set
Optional:
–jewelers block (I recommend one as it gives you a cleaner stamp when under your metal)
-Sharpie marker and rubbing alcohol (to darken the letters)
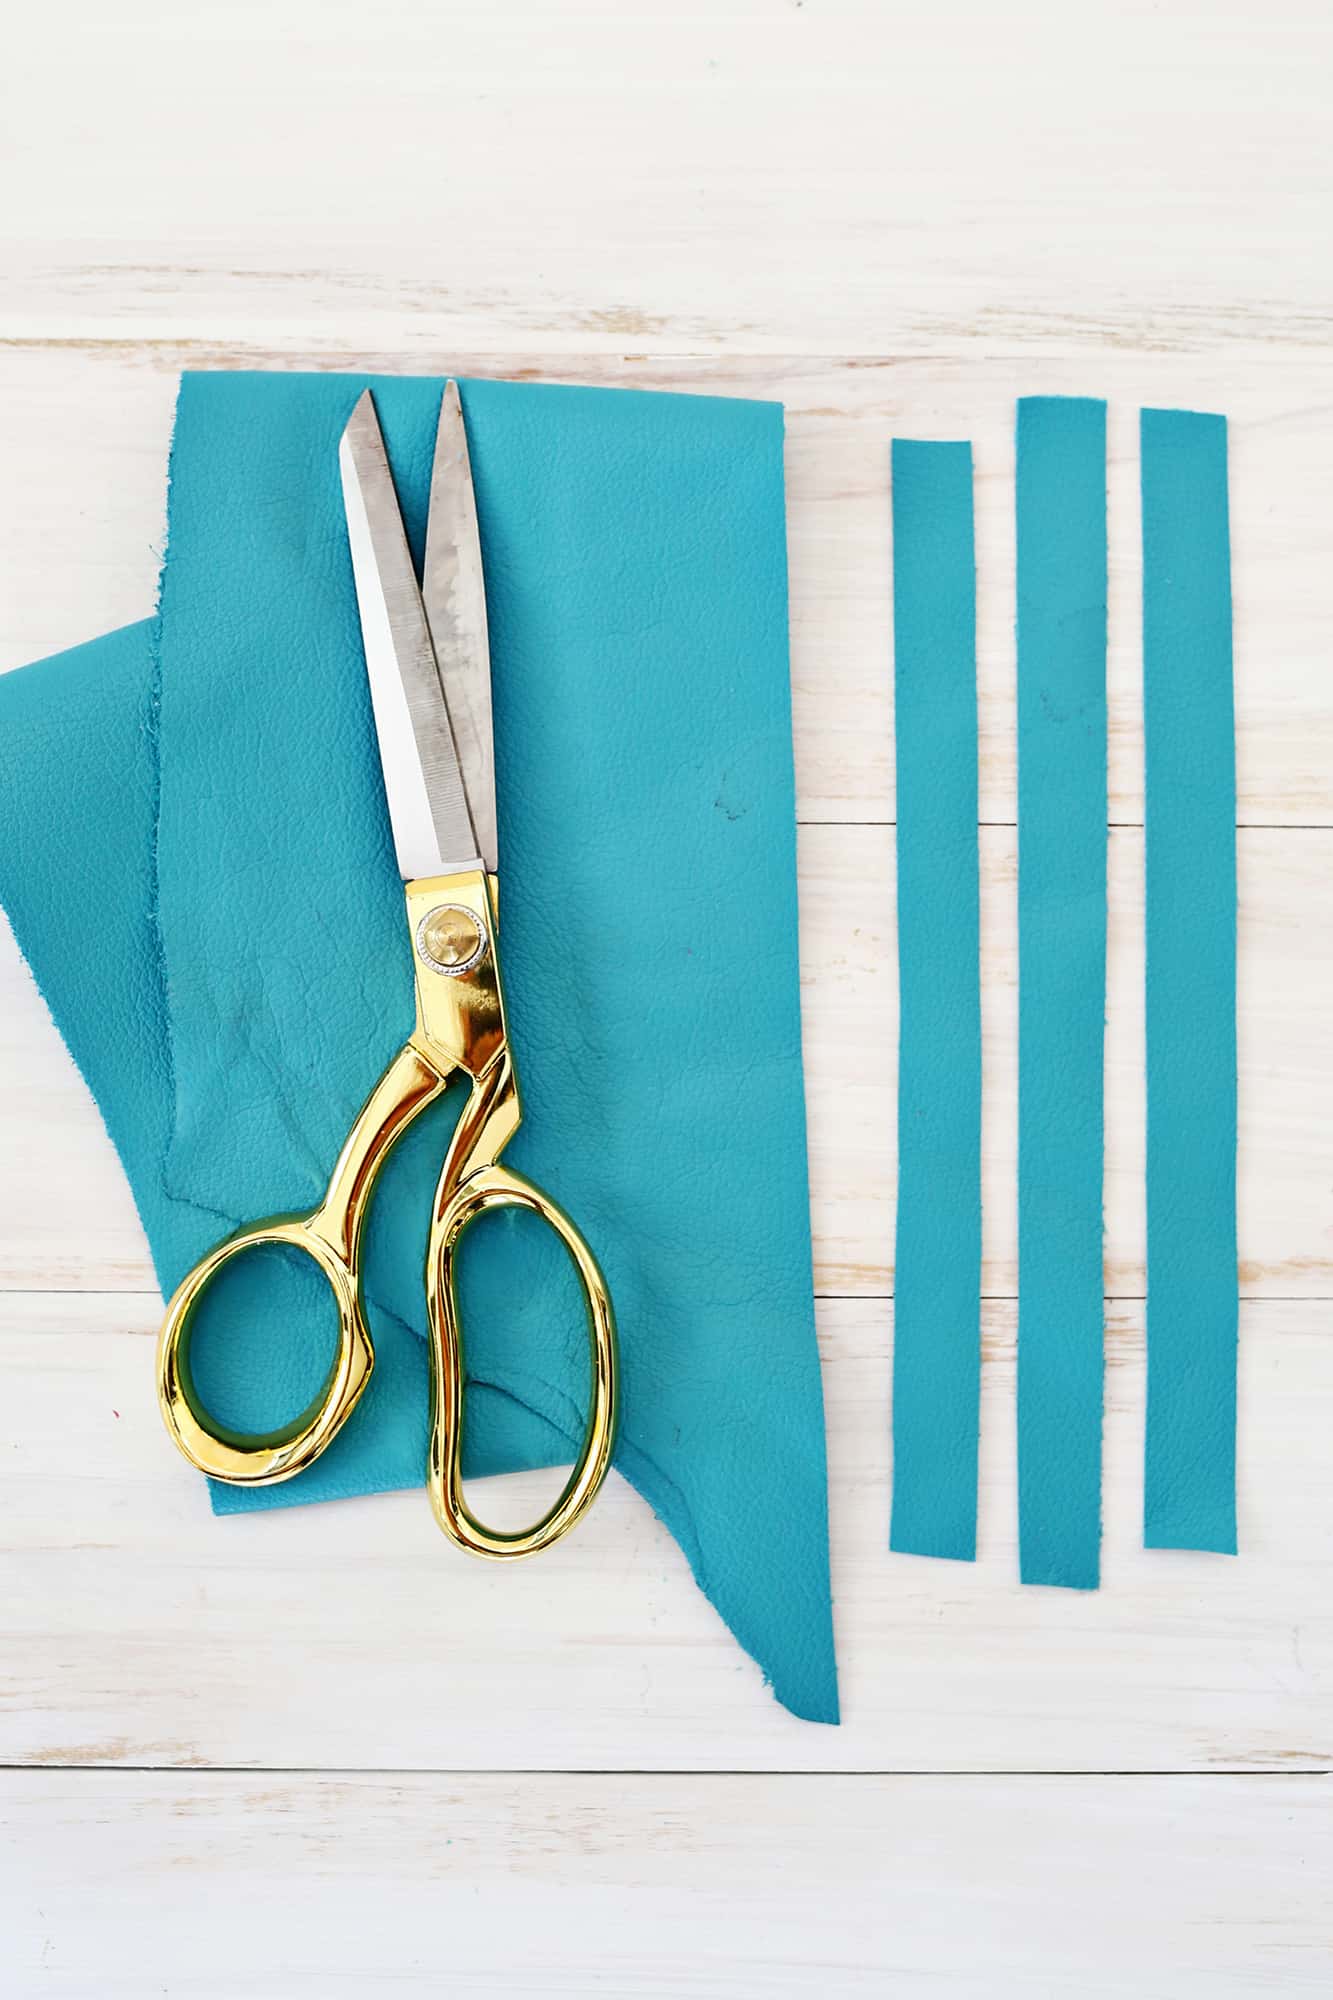
 First you’ll want to cut your leather into strips that are at least 1.5 cm wide and as long as you need to go around your wrist (cut each with extra length and trim later for safety). You can also buy flat leather cord the same width and use that if you want a leather with finished edges. After making a few of these, I would definitely suggest getting a leather that is at least a medium stiffness rather than the really soft pliable leather. The rivets that hold the metal bar in place don’t stay as well when the leather is really soft, and they can pull out much more easily than if the leather is a bit stiffer.
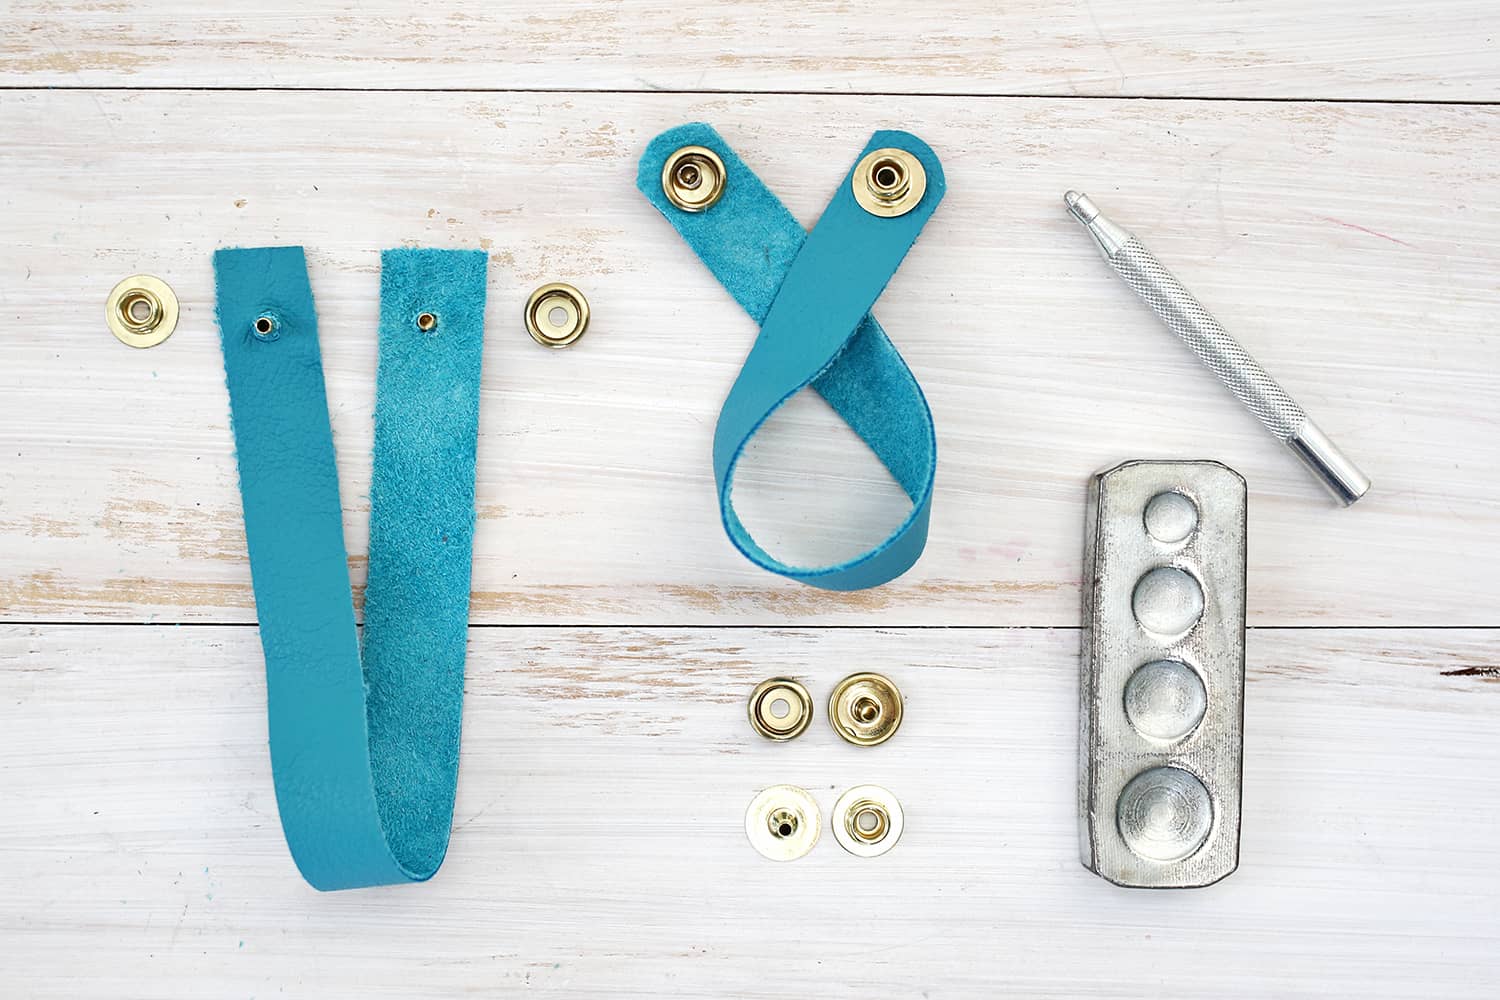
 Use your 1/16″ hole piercing tool to punch two holes where you want your snaps to be installed at each end. Put the corresponding snap pieces through the holes (make sure the correct sides will face each other when installed so they snap together), and use the line 20 snap setter and a hammer to hammer the separate snap sets together (this is a good tutorial for setting snaps).
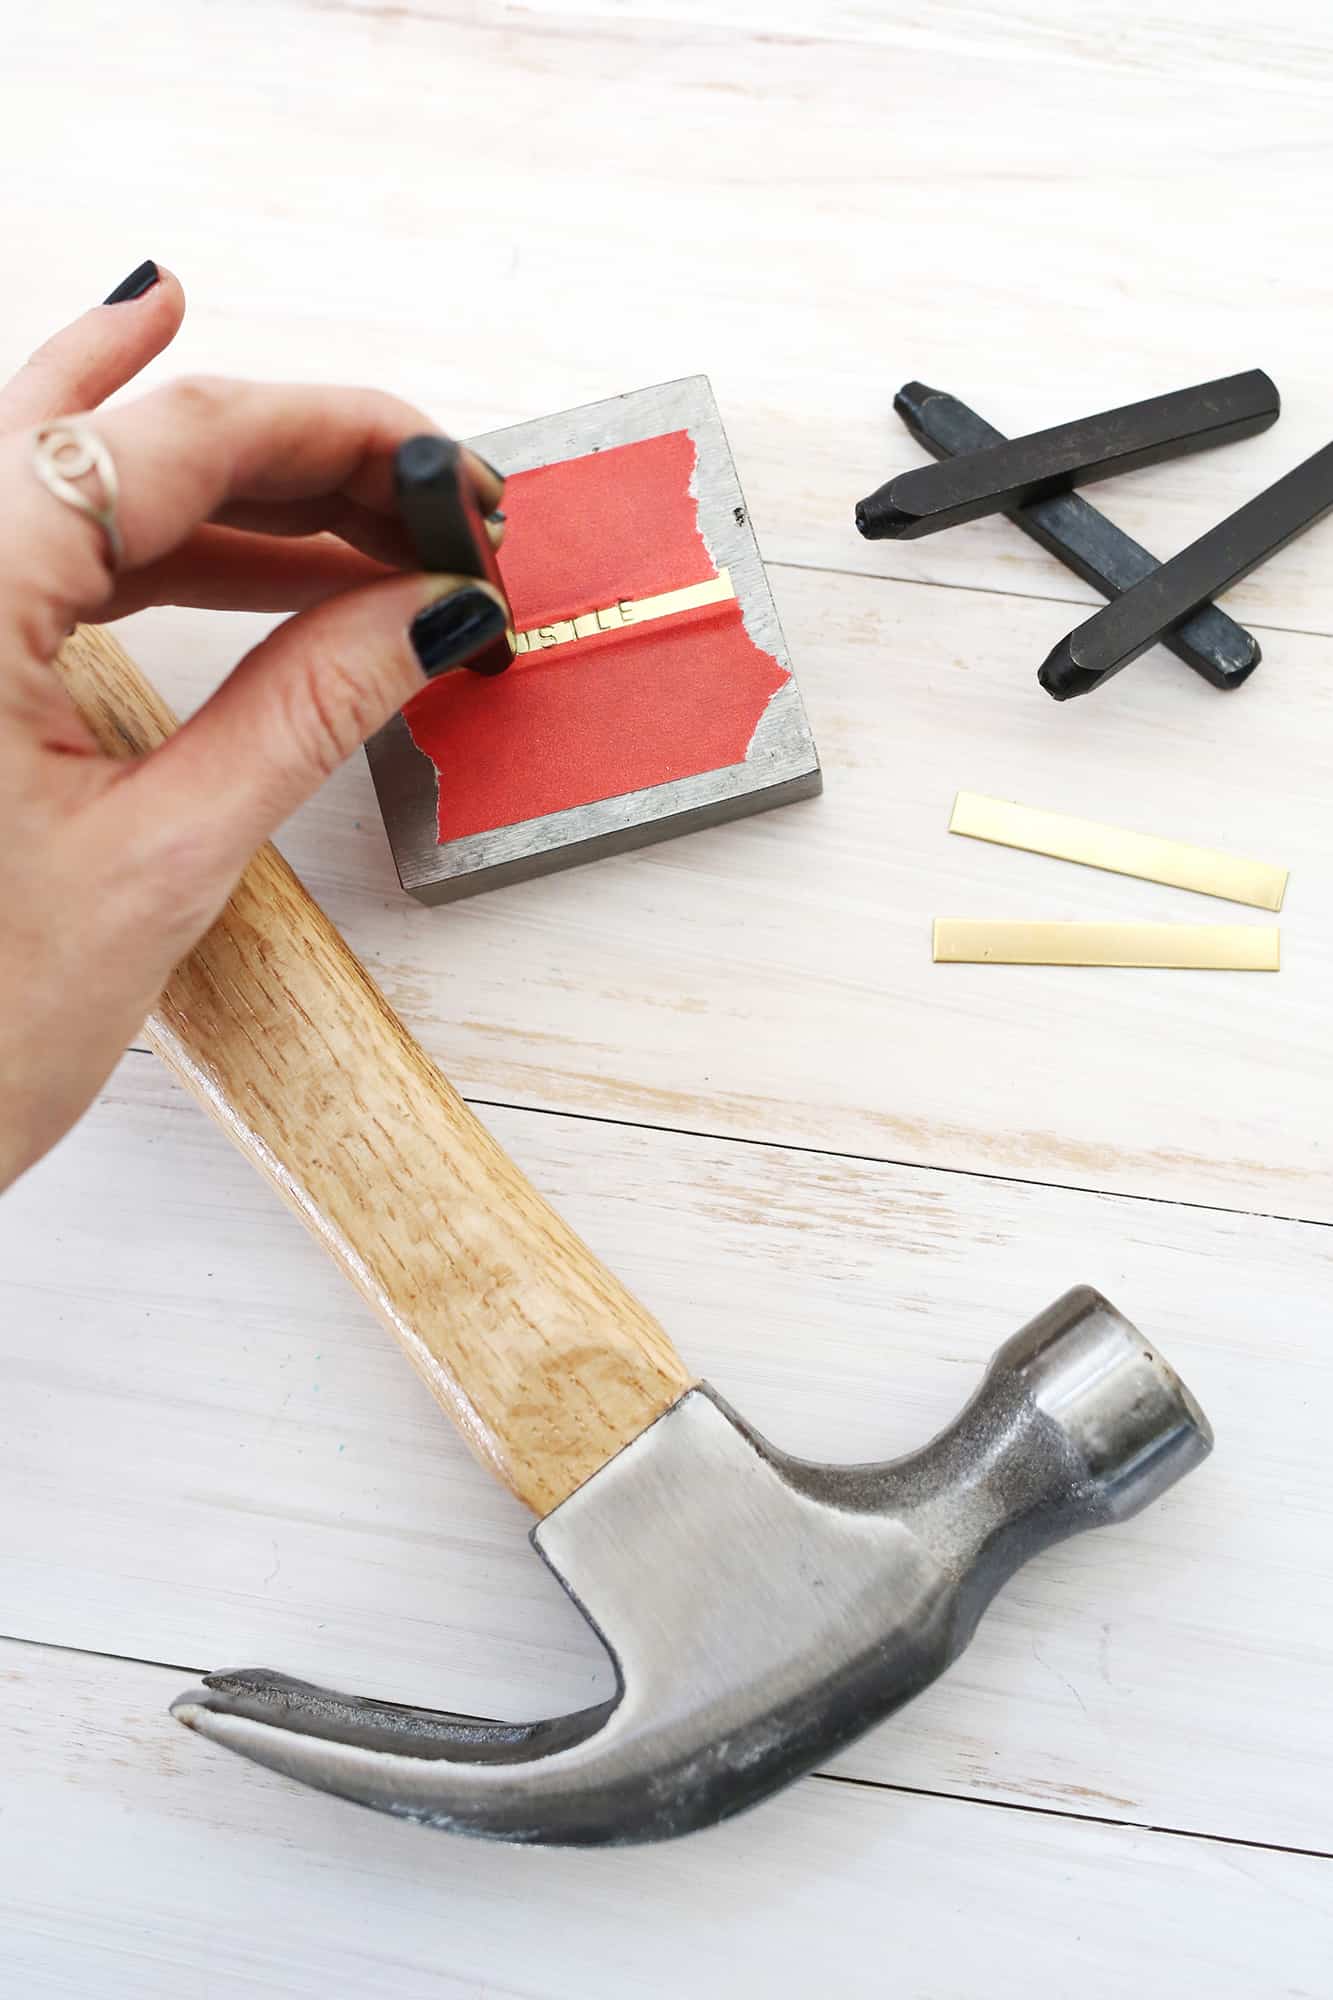
 Tape your metal stamping blank onto your jeweler’s block or hard surface and use your stamp set to create your word or phrase on the blank (you can read more detailed stamping tips in this intro to stamping post). Since the brass blanks are a bit softer than the other blanks I’ve stamped, I noticed that I didn’t have to hit the stamp quite as hard as I have for other blanks, and if I did hit it too hard, the blank would end up curving a bit in the middle. If this happens, you can try to bend it back in place, or just go with it since the curve isn’t that severe. Fill in the letters with a Sharpie marker and then give it a wipe with a cloth soaked with rubbing alcohol if you want to darken the lines of the letters.
 Use your piercing tool to punch two holes in your metal bar at either end for the rivets. Line up your bar in the middle of your leather strap, and punch corresponding holes in the leather beneath the holes in your bar (they also make hand punches like this one you can use to punch both holes). Once the holes are punched, insert a rivet with the closed flat side on top, and use the setting side of the piercing and setting tool to close the rivet and secure the bar to the leather. Repeat on both sides of the bar, and your bracelet is ready to wear! If you feel the metal bar sits too flat on your curved wrist, you can easily bend the bar with your fingers to mimic the curve.
Once you have some of those basic stamping tools, there are so many different ways you can use them, so I highly recommend stocking up on some of the basics. These bracelets make great gifts and you can make some studded leather bracelets or phrase bracelets to stack them with as well. Hope you decide to get into the world of stamping, it’s so fun! xo. Laura
Credits // Author: Laura Gummerman, Photography by: Laura Gummerman and Elsie Larson. Photos edited using Stella from the Signature Collection.


49 Comments
So easy, so styling!
This is such a fantastic idea! I love the simplicity!
super cool idea 🙂 i want to do some of these cool bracelets xx
Such a great idea! it’d also be a fun bridesmaid gift addition. Especially if your wedding was already DIY! 😉
Those are so cute! http://www.hannamarielei.com
Love these! The stamped metal brings a great glam to these and dresses them up. Such a fun idea.
http://absolutelytara.com
Oh man!!! I need to go shopping for supplies!
Where do you find colored leather like this?
Cute! That’s a great idea. I am creative about many things, but when I make jewelry, I tend to only visualize one style, but I would love to make these and they are very different from what I usually make 🙂
I love your blog! It would mean a lot to me if you stopped by mine.
athisfeetdaily.blogspot.com
Such a lovely idea!
What’s on my iPhone 5S+ How I edit my instagram photos
These are so cute! They would make awesome bridesmaid gifts or party favors!
http://www.boxesandjars.com
Super cool and look easy! One more to my to-do list!
The complicate part for me is getting all the tools. The shipment to Brazil is complicated sometimes.
=/
Xo, Deborah
http://www.everything713.blogspot.com.br
Cute!! Love this for a casual outfit
http://www.littleblackshell.com
Cute DIY.
http://thinkworkandgo.blogspot.com/
We have a local leather store here in town, but if you don’t have one in your area, just search online and you’ll find lots of options! If you aren’t sure of how stiff the leather is because you are ordering online, I would buy something like the flat leather cord that’s linked in the first step instead 🙂
Laura
Thanks Kristin! And I’m so glad that you enjoy blogging too, your dog looks like such a sweetie 🙂
Laura
These are super cute. I get my supplies at Beaducation.com They have an amazing selection of stamping tools and materials, as well as free tutorials for all kinds of jewelry making skills.
I need to get myself a stamping kit. I keep thinking about it, but never get to it. This project looks great and super fun.
These looks awesome!
http://www.thepeculiartrouth.com/
Lovely bracelets! They are really cool to wear on a daily basis, and not that difficult to do! You girls have always some fantastic things! With love,
Vera
http://theflashwindow.weebly.com
cute idea!
i wish you guys would post more again! every day i come here hoping to see a little more and am always slightly disappointed. will never stop reading, but miss how it used to be 🙁
Wonderful DIY! Love the bracelets!!
http://www.angerawrs.co.uk
The metal letter stamping is so cool and I love how it’s customizable! I think making a bracelet with your initials would be really cool too – the doll face one is adorable!
Monica – Mocha and Moccasins
Nice. Now I got the inspiration to do leather work again 🙂
http://www.haloonews.typepad.com
This is so great! Such a simple yet great gift idea!
http://sometimesgracefully.com
Oh she look nice, i think it’s a perfect gift for boyfriend, for Valentine’s Day.
These are fantastic! I really need to invest in the stamp kit. I’ve seen a few DIYS that require this!
Jenna || Jennafifi.co.uk
These are great! I love the one that says “Hustle”! I may have to upgrade my supply stash to include leather and metal stamping materials! 🙂
Even before I read the article, I can always tell which projects are yours Laura! I love you sense of style!
This is a great project. I’ve been wanting to get into metal stamping forever.
xx Kathryn
http://www.througthethicket.ca
Love this! So cute 🙂
These are also really good for gift’s x.
jeansandmacaroons.blogspot.com
These look utterly amazing, so simple and stylish. They’d be a great present idea, although I did confused myself reading through the steps!
Aw, love these!
My daughter has one similar to these that I paid way too much for and its her very favorite! I have got to make one of these for her asap!
Aw, thanks Kathryn! Glad you like them!
Laura 🙂
These look really great! I love the colored leather!!
WOW! Lovely, I think it’s time to purchase some leather 🙂
http://inspiremeland.com
Emma
Oh wow! This are literally the coolest DIY ever! Supply shopping-here I come!
These are so cute!! I need to try them! 🙂 They would make perfect gifts.
Love all your jewelry DIYs..this is so cool!
xo
Hems
agoldentulip.blogspot.com
these are so cute!
xx nikki
http://www.dream-in-neon.com
Cute DIY.
http://thinkworkandgo.blogspot.com/
These are so cute, I love this idea!
xx Kelly
Sparkles and Shoes
Cool idea, I love those bracelet you made they look really good
http://hilarynirvana.blogspot.com/
I want to make these now!
I’ve been wanting to get into jewelry stamping for a while, and I think I’m finally going to do it! But I can’t figure out what size letters to get. What would you recommend?
Hi – these look amazing – the link you gave for the blanks isn’t working now and so I wondered what size are the bar blanks that you used roughly /
Thanks !
Hi Suj! Sorry about that! We’ve updated the link: https://www.etsy.com/listing/152084039/brass-blank-14-x-2-metal-blank-for-hand?ref=related-1 🙂 -Jacki
What a cute idea! I love it!