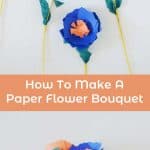
With Thanksgiving happening in the month of November, my daughters and I like to do something special for our neighbors and others we come into contact with weekly through their extra-curricular activities. We might drop off breakfast for their dance teachers or bake our neighbors some dessert. It’s just a little something to let them know we appreciate them.
Besides food, which usually people take gladly, I thought some pretty paper bouquets would make a nice surprise too. Wouldn’t someone handing you a paper bouquet make you smile?! I know it would make us smile for sure!
Supplies:
-paper flower template-cardstock in various colors
-green crepe paper streamer
-floral tape
-floral stem wire
-glue gun and glue stick
-wire cutter
-scissors
Step One: Cut your wire to your desired stem length and wrap the entire length of your wire with floral tape.
Step Two: Using the template, cut out all the necessary pieces for your paper flower: petals, center, and leaves. Tear two 2 1/2″ strips of crepe paper for the calyx. Be sure to cut a slit from the base of the each petal upward to the middle.
Step Three: Near the base of the petal, add a dab of glue on one side, and glue the other side of the petal on top. This gives the petal a little bit of an upward curve. You may need to hold the petal in place for a few seconds while the glue sets. Repeat for each petal. After, add a dot of glue at the base of the petal (on top of the overlap section), and layer another petal on top. Continue layering the petals all the way around. It’s totally up to you how many layers of petals you would like to create.
Step Four: Cut out thin strips of paper and glue them to the center of the flower. Next, cut out a small circle and cut around towards the center of the circle, and then glue that on top of the thin strips.
Another flower center option is to cut a 1″ x 4″ strip of paper and cut 3/4″ slits down along the strip. Add a dab of glue and roll the strip, and glue again at the end to secure. Glue this fringed center to the middle of the flower. Just like there are many petal shapes you could cut out, there are various ways to create the center of the flower. You can have fun mixing and matching the different options.
Step Five: Poke the wire through the center of both 2 1/2″ strips of crepe paper, fold about 1/2″ of the end of the wire 90 degrees, and add a dab of glue to secure it in place. This green crepe paper acts as the calyx of the flower. Add more glue and attach the base of the flower on top of the calyx.
Step Six: Add a leaf to the stem by wrapping the bottom of the leaf onto the stem and then wrapping floral tape around it.
Now, you know the basics in creating simple paper flowers. Have fun experimenting with different petal shapes and centers. You can even use this tutorial to make some giant flowers and use whole sheets of cardstock for each petal. Giant paper flowers would be extra fun to give to someone!
No matter what, though, whether you give friends a single flower or give them whole bouquets, you’re sure to pass good cheer around with this little gift of thoughtfulness. Take it a step further by adding a sweet note to let them know exactly why you are thankful for them. No doubt thankfulness and thoughtfulness are areas we all could probably work on. Don’t you agree?! –Rubyellen
Credits // Author and Photography: Rubyellen Bratcher. Photos edited with Imogen from The Folk Collection.


20 Comments
Aww, the white ones with the pink center are the cutest! I love filling my house with fresh flowers, but I’ll admit it’s a pretty expensive habit. If I even replaced one of those fresh bouquets with one of these, I’d save $20 a month!
Cat
http://oddlylovely.com
I adore paper flowers. They’re so beautiful and can be made in so many colors!
These are cute!
These are so cute!
Too cute!!
Beautiful!
I love this! such a great alternative to real bouquets!
http://Thelollyprojectblog.blogspot.com
Sweet, lovely, simple. I like this. I like it a lot.
xo, Lauren
http://alovelysideproject.com
they look so cute and we will be fresh forever <3
xo
Hems
http://agoldentulip.blogspot.com/
i definitely have to try this! these are absolutely adorable. i’m feeling a little inspired to deliver some paper bouquets now! 🙂
xoxo, kiely
I totally agree, I love thoughtful receiving gifts like this and I love this idea
xo
alysamadisun.blogspot.com
Great for a wedding!
What a cool idea. I’m totally pinning this for later to do with my kids. Valentine’s Day is coming up soon enough… 🙂
http://xfallenmoon.blogspot.ca/
Aww what sweet idea! Happy thanksgiving to you both 🙂
What a lovely gift idea. I’m in the UK so we don’t celebrate Thanksgiving but these would be a great present for Mothers’ Day
very pretty and easy to make 🙂 lovely
This is such an adorable idea, love the concept of saying thanks. We don’t have thanksgiving in England so this seems so lovely!
http://veryflitting.blogspot.co.uk
Love these what a fab idea xx
these are SO pretty!
xx nikki
http://www.dream-in-neon.com
Lovely x
http://www.wild-cherrytree.com