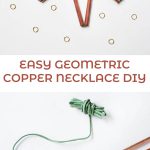
This copper trend, huh! I just can’t quit it! I use a lot of these copper pipes in my personal projects and was experimenting with smaller cuts when they sort of fell together in a triangle and I had a flash of inspiration. I have made a straw bunting before and arranged a himmeli from these same pipes. So the same principle of threading them together to form a shape easily married with the idea of making it into a wearable piece. It feels like a power necklace. I love it!
Supplies:
–two 2′ x 1/4″ copper piping tubes
-6′ of leather cord that will fit inside 1/4″ tubes
-jump rings
-10mm rectangular end caps
-toggle clasp and ring
-pliers
–pipe cutter
Cut your pipe down accordingly:
5 – 1″ cuts
4 – 1.5″ cuts
4 – 2″ cuts
2 – 2.5″ cuts
You’ll create five triangles in a row going from smallest to largest and then back to smallest. Tie a loop knot at one end of your leather cord and then string one of your 1″ cuts of pipe over your cord. Follow it up with two of the 1.5″ cuts of pipe. Then loop the loose end of your cord back through the shortest piece of copper in the same direction you originally looped it through. Keep pulling your leather cord through all three pieces until you get them snugly into a triangle shape near the knotted end.
For your second triangle, you’ll repeat the process of adding one of the 1″ pieces but then follow up with two of the 2″ pieces of copper. Run that cord through the 1″ piece for that triangle again and adjust things so that they’re snugly nestled next to your first triangle. Repeat again with another 1″ short piece and your two longest cuts of pipe for your center triangle. Continue in that fashion with your 2″ cuts for your fourth triangle and your 1.5″ cuts for your last triangle.
Once you’ve adjusted them all so they are snugly touching top corners, tie another loop knot close to the corner. Trim it so that you have about 1/2″ of a tail.
Then tuck that tail into the copper pipe so it won’t be flapping around. This creates your bib piece. You’ll use the rest of your leather cord for the straps in the next few steps.
Using your pliers, connect your end caps to your toggle ring and clasp.
For a necklace that rests on your chest, cut two lengths of leather that are 12″ each. Loop one length through one of the loop knots on one side of the triangles. Bring the two loose ends together again and tie a knot as shown above. Repeat on the other side.
Trim your loose ends so they’re even and about 1/2″ from your knot. Then clamp your end caps over the loose ends with your pliers.
You now have a bold piece from the hardware section to liven up your favorite casual tee and boyfriend jeans. Simplify things a bit and do just one triangle on a longer leather cord for a completely different, yet equally fantastic necklace! –Rachel
Credits//Author and Photography: Rachel Denbow. Photos edited with A Beautiful Mess actions.


18 Comments
This looks like so much fun, and I can already think of 20 variations that would make this a great present for any one of my friends! Time to get crafting…(isn’t that what pregnancy downtime is for, anyways??)
<3 Haley @ http://www.beautyinthischaos.com
So cute! Looks great with a scoop neck tee! Any thoughts on how one could treat it to avoid patina if you want to keep the striking copper color?
This is cool but i’m allergic to copper. 🙁
Beautiful! It’s modern and rusctic at the same time!
I loved! 🙂
http://www.loveandeverythingblog.com
Dana,
Yes, you can mix vinegar and salt and wipe them down to get that shine back. You just need to be careful with not getting any on the leather cord as it might make your necklace smell like vinegar. I’ve heard wiping it with ketchup also works but haven’t tried that method personally.
What a great tutorial!! Yes, with a great tutorial comes a great necklace 🙂
Greetings,
great
Ketchup does work! I use that to keep a copper pipe lamp free of fingerprints and tarnish.
Salt and lemon works too. ?
Really interesting DIY!
I love the copper color, therefore I am a fun of this necklace!
Betty | Inspiremeand
I love anything DIY. I don’t think mine would turn out half as good as yours. :]
// ▲ itsCarmen.com ▲
Such a brilliant idea! Thanks for the tutorial.
♥ Heather & Melissa
Woahh this is too cool! It’s like a chic adult version of a pasta necklace.
Oh wow, that looks so cool! I can’t believe it’s DIY work! Looks great 🙂
Oh wow, that looks so cool! I can’t believe it’s DIY work! Looks great 🙂
That looks fun and is very creative.
So fresh and easy to make. Copper piping tubes are so cool!
Best Regards,
Angelina Stroumpouli
http://www.just-angelina.com
Gorgeous! To add some interesting beads to your DIY accessories-
http://www.gempalace.etsy.com
http://www.siamgempalaceblog.com
This is super cute. I love how robust it looks – the perfect accessory for a really soft feminine outfit I’d say.