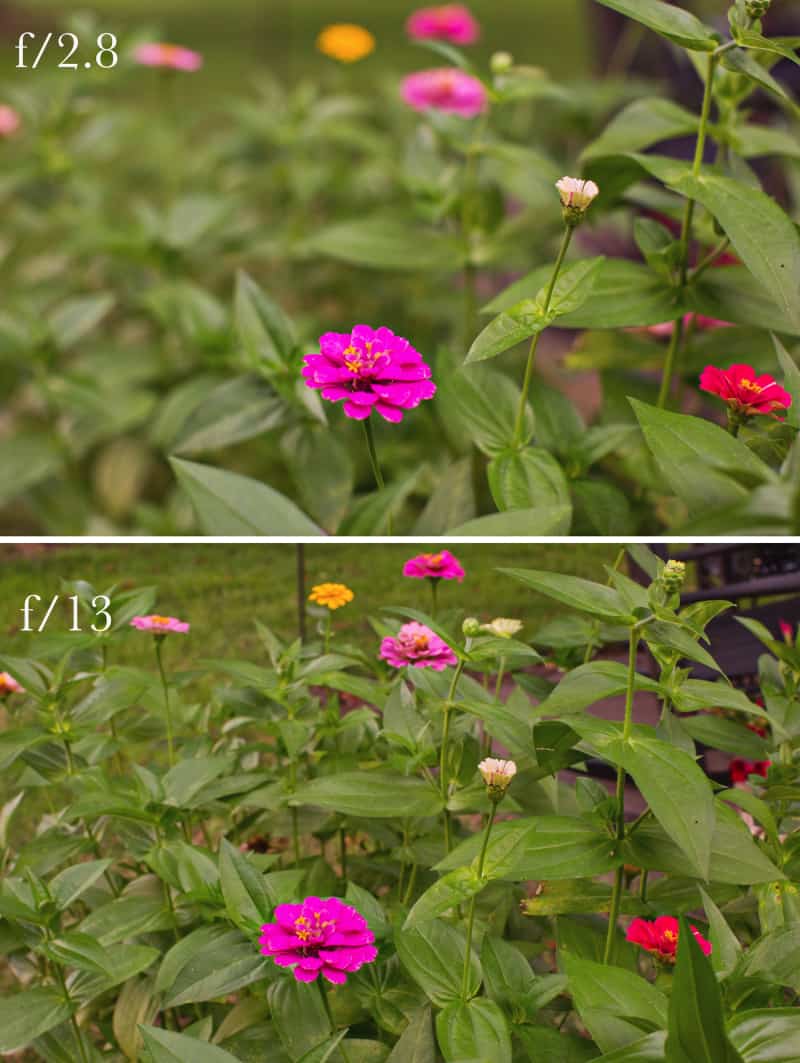
 Have you ever taken pictures only to get home and realize that something or someone in your picture was not in focus? I know if I have ever rushed through a shoot and haven’t adequately reviewed my images and zoomed in on each subject to make sure they are sharp, I can be left with someone or something out of focus. It is a VERY frustrating thing. One thing in your frame can look perfect while the other is blurry. This can be worse when photographing multiple people in one image.
 Just to recap a bit, when you use your focus points (when your camera is in manual mode), you get to choose the point that your camera focuses on. Having this control is absolutely important because it gives you the freedom to focus on EXACTLY what you want. But let’s say you have two subjects in a frame, and you want both of them focused. Is there any way to split your focus and get both of them sharp? Let’s look at several ways to make this happen.
Depth of field: When you are wanting to have multiple things in your photograph sharp and in focus, it can be a bit of a technical game. You have to manipulate one thing to make another thing happen. Your depth of field is basically what is in focus in your camera frame. What is depth of field? Think of it as “how much of the depth is in focus” in your frame. It is the distance/length of the objects in focus in your frame. The less depth of field, the less you will have in focus. The more depth of field, the more you will have in focus. In other words, the lower your aperture (small number but big opening), the less you have in focus. The higher your aperture (big number but small opening), the more you will have in focus. It seems backwards, doesn’t it? Another way to think of it is if you have a low aperture number (f-stop), your depth of field will be thin. Your depth of field gets thicker when you go higher in your f-stop number. It can be a tricky theory to conceptualize and fully understand. You may need to re-read the above sentences a few times until it really sticks in your brain! OK, using the above info, we will apply it to getting multiple subjects/objects in focus.
 If you want both subjects in focus, then you will need to use a higher aperture number (f-stop). The higher your f-stop number, the more depth of field and the more you will have in focus! So shooting at say, 2.8 would probably not get both subjects in focus. If they were standing close together it might be possible. Typically though, if I want both subjects in focus, I would start at f/5.6, focus and see how it looks. I might need to take my aperture to a higher number and increase the depth of field until I am happy with the sharpness. Each and every situation is different, so you really must play with your camera settings until you like what you get!
 How can you use your focus points and get BOTH things in focus? Remember that you can choose your focus points! Focus points are such a handy tool that you should definitely take advantage of if your camera model has them. Choosing your focus points will drastically change your photo. I showed some examples of this in our course DSLR Basics. If you focus on one part of your photo with a focus point and then in the next picture choose something else, it changes a lot … especially if you are using a low f-stop number! Set your focus point on the subject or subjects you want in focus. Once your focus point is set and you’ve determined your DOF, snap a picture. If everything is not in focus, use a higher f-stop. Also, play around with your focus point, put it on different things in your frame and see the outcome.
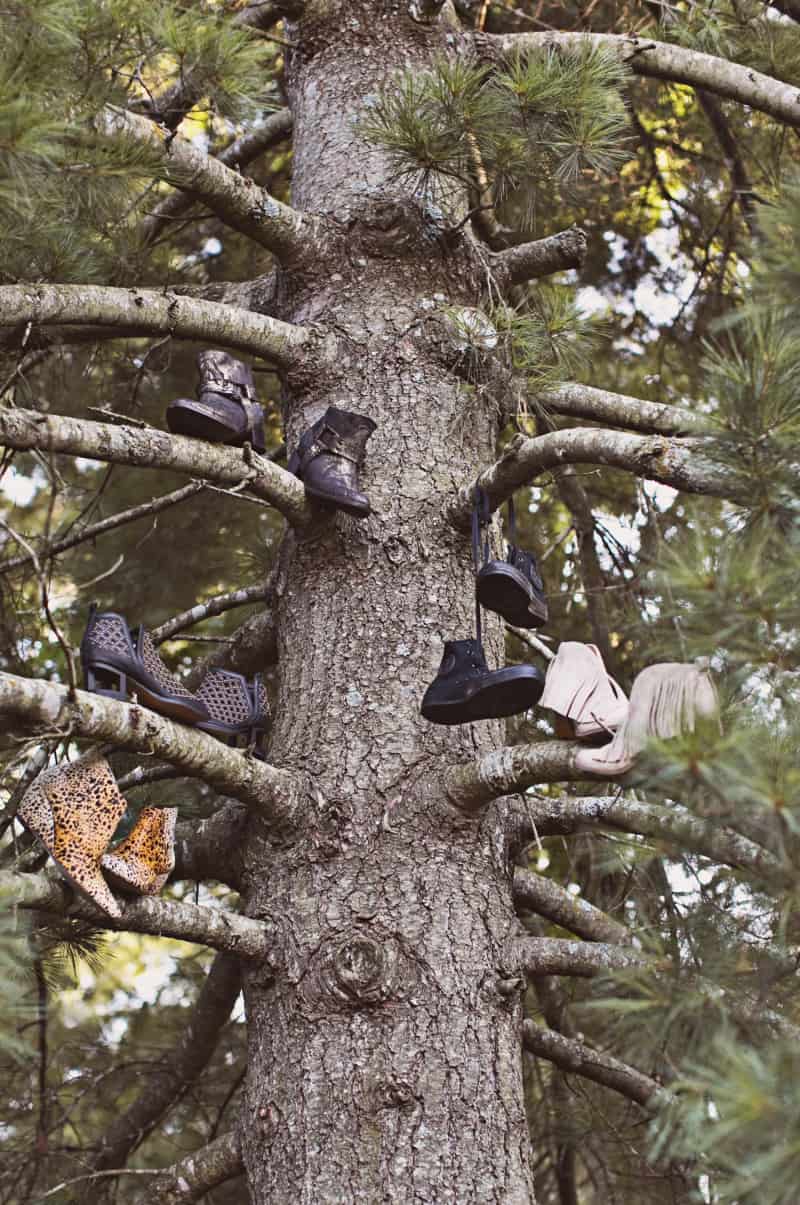
In the shot below, we needed all of the shoes sharp. (They were hung in a tree to give them a quirky background.) So how did I get all of them sharp at the same time?
 Quick tips for photographing groups of people or multiple objects: use a higher aperture number and put your focus point in the very middle of the group. In the shot below, I have the shoes in focus by putting my focus point in the middle of the tree and using an aperture with more depth of field.
 A few tips to ensure sharp photos: If you follow the tips above, you should get your subjects sharp! If you’re still having issues, maybe you’re getting motion blur from your shutter speed being too slow. If you are shooting with a higher f-stop number, you are closing the opening in your camera to a smaller hole which lets in less light. You must compensate for this by using a higher ISO OR a slower shutter speed if you have a tripod. If you don’t have a tripod, then it might be best to make your camera sensor more sensitive to light by using a higher ISO. You will get more light this way AND be able to use a higher f-stop. – Janae
P.S. If this tutorial was over your head, you might consider checking out our course, DSLR Basics. It’s a great introduction to shooting with a DSLR camera.


4 Comments
I found this article very useful now that I’m starting to use my camera ???? I’ll try those tips this week!
Great post!! Would love to see more like this 🙂
Super useful, thank you! I’m still just using my iPhone but I’m looking forward to switching to a DSLR sometime this year! 🙂
Charmaine Ng | Architecture & Lifestyle Blog
http://charmainenyw.com
Great reminder! I took your DSLR course several years ago when I first got my camera and I’m thinking that I should go back for a review… It was a wonderful class and I learned a TON from it. Still one of the best photography classes I have taken!