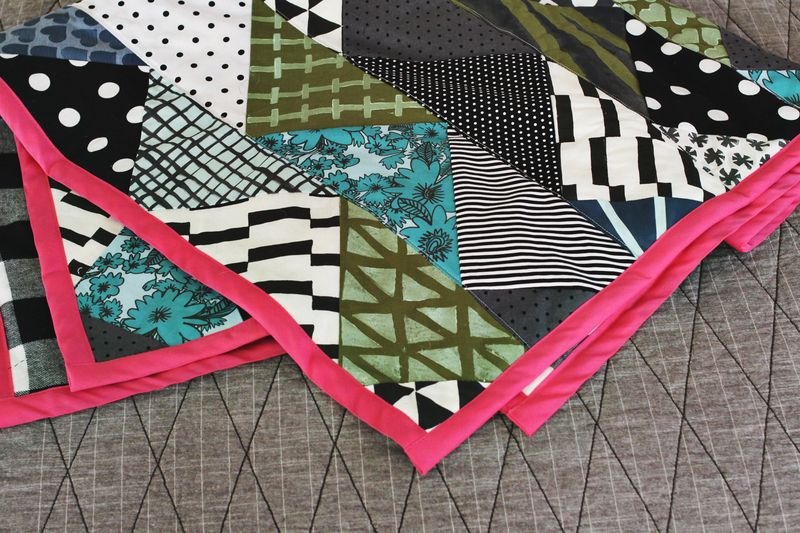
 Making this quilt was so much fun! As I mentioned before, we handprinted most of the squares (read more here). Mallory stitched the triangles into a quilt. Here are her instructions…
Elsie and I bought 1-2 yards of quilting cotton in 3 colors we loved as well as white. For the back we chose a cozy flannel, and the batting is cotton in the crib size (45”x60”) which also works great for a lap size quilt (nobody's pregnant around here—we just like small quilts). We also bought three packs of quilt binding in bright pink to add a pop color.
1. If you plan to use your quilt every day, pre-wash the cotton before cutting it out. Otherwise handwash if the blanket gets dirty. I cut the solid fabrics into 8”x8” squares and we hand printed them. We also used some 8”x8” squares of the fabric Elsie designed and printed through Spoonflower. In addition, we supplemented with some basic, commercial black and white stripes and polka dots. There were around 60 squares total. 2. After all the squares were printed and cut, I spray starched the backs and gave them a good press. Some needed trimming. Then, I cut them on the diagonal to have about 120 triangles. 3. I laid them all down on the floor to find the best composition, to balance the colors and prints. I laid my measuring tape down on the floor to make sure the end measurements would be close to the batting. Of course I also took out the quarter inch per each edge that would end up being seam allowance. Once I finally decided on the layout (after an hour of staring) I cut the triangles that stuck out on one edge in half to make the side straight. I used the discarded halves to fill in the gaps on the opposite side, straightening it out too. 4. I left the triangles lying on the floor and stacked up one row at a time to take it and sew it. Be very organized, so your row doesn’t get out of order or end up backwards. 5. After all of my rows were complete, I ironed the seam allowance (if possible iron it toward the darker triangles so it won’t show through). Once pressed I sewed all of the rows together to finish the front. Then I ironed all of the new row seam allowance down in the same direction. 6. I laid my backing down, good side facing the floor or table. I then laid my batting on top. The last layer was the quilt top facing up. I trimmed the layers to be the same size, and pinned it all over. 7. To quilt I stitched down each row then finished the quilt off using the pre-packaged binding!
Note: If you prefer a tutorial with photos of each step check out Rachel's or Elise's. 

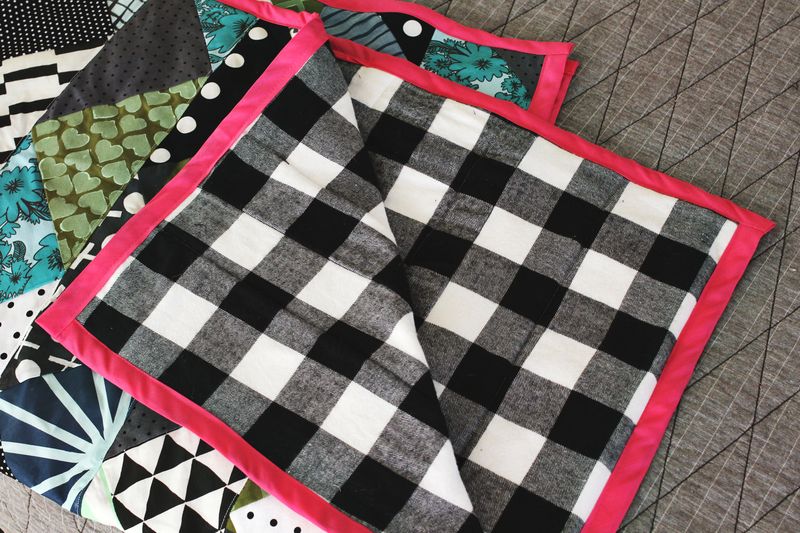
The back of the quilt is flannel, so it's really warm. It's the perfect cozy blanket for movies and popcorn on the couch. :)

 I am so pleased with the finished quilt. I love the bold mix of patterns and the pop of pink that the binding adds! This was my first quilting experience. Thank you, Mallory, for lending us your amazing sewing skills.
Have you ever made a quilt? If you are considering trying one, we highly recommend this mini lap quilt size for your first time. It's small enough to complete in a weekend. xoxo. Elsie
Making this quilt was so much fun! As I mentioned before, we handprinted most of the squares (read more here). Mallory stitched the triangles into a quilt. Here are her instructions…
I am so pleased with the finished quilt. I love the bold mix of patterns and the pop of pink that the binding adds! This was my first quilting experience. Thank you, Mallory, for lending us your amazing sewing skills.


49 Comments
So cool!! I really like the idea! You girls are so original 🙂
http://doitnaturalnow.blogspot.com.es/
This is really, really pretty! Love the clashing of prints and the hot pink border.
Elisa – Wandering Minds fashion
ourwanderingminds.com
This is great! I’ve wanted to make my own quilt for a long time now, I really like the idea of using your own printed fabric shapes. It just makes it even more special! The flannel back is perfect – and the pink just sets it all off! Beautiful project, ladies 🙂
http://www.little-beast.blogspot.com
LOVE!! Not bad for your first try!! Quilting has taken off in last couple of years, glad to see your on board!
I love it! Really think the hand printed fabrics add a sweet more personal touch! Great idea!
http://run2thewild.blogspot.com/
Love this. It really looks fabulous!
~FringeGirl
thedomesticfringe.com
Wow! This looks really really cool! I think I’m going to run to the market and buy some cotton. 🙂
Also it’s really really pretty for Christmas.
I love making quilts! Growing up, my mom/grandma/aunts always tied our quilts, which takes a loo-o-o-oong time, but was a good time just sitting around with all the women of the family and chatting. I remember lying down under the quilting frames and watching the needles poking through the fabric over and over again. Ah! Nostalgia.
This is so pretty, I’d definitely give this a go 🙂
Lea x
It’s Such A Wonderful Life –
http://shebeginstosee.blogspot.com
Why not check out my Christmas Yankee Candle giveaway?
LOVE the pink binding!
So beautiful. You girls really are too clever! I love your blog so much. Next time I am in the US I will be sure to stop by Red Velvet and say hi!
Please check out our blog-we are just starting out in the blogging game!
ohidoliketobe.blogspot.com
I would love to make a quilt, was only looking at Rachel of Smile and Wave’s one the other day!
Good job by the way, it looks amazing 🙂
Cathy
Turquoise Flamingo
http://www.turquoiseflamingo.com/
beautiful! looks like so much fun, you are so talented!
Look really great but for me it is so hard. You are great. Have a nice day.
http://www.fashiondenis.com/
i love this tutorial and have shared it with my quilting group on facebook. we have previously hand printed on fabric too. i love to quilt tho am pretty new at it…x
Black and white plaid pattern: my fav!
My boyfriend has never had a quilt, so I’m hoping to make him one for Christmas (fingers crossed). I was wanting to add some more personal touches, so I might use your fabric painting idea. Thanks for the inspiration!
i love these prints! ma sister is making one right now out of her own old band t-shirts 🙂
Absolutely love this idea, great job!! xx
http://www.creativityandchocolate.blogspot.com
This looks fantastic! Great job, ladies! 🙂
I love this idea. It looks like it took a lot of work to hand stamp the fabric but in the end it was totally worth it! The finished product is so cute and functional!
xoxo
Megan
http://www.arayofsunblog.com
this is such a great idea!i would love to make this my new years project ;D
Thank you for sharing this 🙂
I love it!
My aunt just finished her quilt and she was so proud 🙂 She would really like this too.
Gorgeous! Happy belated Birthday Elsie from Jamaica!!
It looks so pretty and cosy! I definitely want to try this my next weekend off.
This is adorable! Your blog never ever disappoints!
mintclothingcompany.blogspot.com
Xx,
Jess
A beautiful mess! 🙂 so beautiful and thoughtful. always looking forward for your projects!
Wow, it’s beautiful! Well done!
xoxo, Femke
http://buttonsbybutton.blogspot.com
So cute!!
X
http://kendra-genevieve-rose.blogspot.ca
Beautiful quilt! Well done.
I LOVEEEEEEE this quilt so much!!! ive been planning one for ages and between u and rachel denbow, ive got some pretty amazing ideas!!!
can I JUST ASK WHAT SEWING MACHINE YOU USED TO MAKE THIS QUILT as im looking for a new one xxxx
Thank you for this! I am going to make this a mother- daughter project in the New Year! I have never really quilted before, except a pot holder in junior high school, and then we used squares not triangles. Can you clarify the part where you said you sewed up the rows? Did you hand stitch any of these first? Did you sew one side of the triangle to the next and so on, and then add them to the next row? Thanks for the clarification!
We have made many of your DIY, and have great success!
The color scheme is fantastic. I wish I had the patience and dedication for such a big project!
such an amazing proyect! xx
Alice Barton ♥ The Mow Way
It looks amazing! I’m in awe and I’m really inspired to make one right now.
What a beautiful quilt! Great job!
Very beautiful, both for the dessins and the triangular shapes. Good also the finishing touch in strong pink. One of the best quilts I have seen ! Well done girls.
love it!
Pretty!! I’m going to try this, too 😀
I’ve made dozens of quilts over the past few years (I’m the fabric buyer at my shop) and one tip I would suggest is to pin the three layers together first (or use spray baste if it’s a smaller quilt like this one, it helps keep things from shifting or wrinkling/puckering), then quilt it and THEN trim the edges of all three layers to be the same size. No matter how well you pin there is always a little shifting, and if you trim last you’ll have a better chance of a square cornered quilt 🙂 Love the mix of prints/colors and patterns. It’s lovely.
It turned out lovely! Great job ladies! I’m in the process of finishing my first ever lap quilt also!
I love this! Need to make one immediately!
WOW
love love this project!
You must be good with the sewing machine for it?
I am quite bad….
love the contrast binding – the finished quilt looks perfect, bold clashing prints all the way!X
This is wonderful! perfect colours!! I have to try this some time
this is neat. One day I will manage to find the time to get a quilt made for myself! lol
http://www.taylornow.blogspot.com
Now I am determined to make a quilt next year!
The fabrics on these are perfect! I always overthink prints, but now I’m inspired to make some quick simple spots or zig zags or something!
Amazing piece! Thanks for such a great idea!