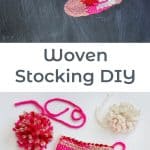
Let’s continue with the weaving trend this year, shall we? Handmade stockings are always my favorite—so much so that I’ve made a new set for our family each year as our decor has changed. My kids won’t grow up with memories of the same stocking each year but rather stories of how crazy their mother was. Nevertheless, it’s safe to say these are my favorite stockings I’ve ever made. They are functional, whimsical, cheerful, and look way more expensive than they actually were to make.
If you’re into the idea of weaving but haven’t tried it out yet, may I suggest you peruse my basic weaving tutorial and the tutorial for creating shapes from earlier this year. They will break things down even further for you.
Supplies:
-cotton yarn for your warp
-5 to 7 different colors of medium to thick wool or synthetic yarn for weaving
-1/3 yard of fleece for every stocking you make
-slab of wood measuring a little taller and wider than you want your stocking to be
-finishing nails
-hammer
-tapestry needle
-sewing machine and thread (hand sewing is an option)
Step One: Nail about 14 finishing nails across your board about 1/3″ apart from each other. Then nail 14 more nails directly under each of those but at a downward angle in the shape of a stocking. Then create a toe shape with more nails spaced about 1/3″ apart. In total, I used 41 nails. You can use a traditional stocking as your template for this or just eyeball it like I did.
Step Two: Tie a loop knot on one end of your cotton yarn and hook it over the nail in the top right corner. Loop it down and up and down and up as shown until you get to the last nail left on the toe side. Carefully tie another loop knot and hook it over your last nail. Trim your ends.
You can see how I’ve hooked the last knot on to the top nail left in the toe section.
Step Three A: To make your toe shape, start from under your weaving and come up and over one row at the lowest point on your stocking shape. Weave up and over two or three rows and then turn back the way you came after wrapping over or under the last row.
Step Three B: Weave past the row you started, and then turn back to the left. You’ll continue weaving past the next row before turning back to the right. Continue increasing by one row one last time on the right. This helps build your toe shape out a little bit.
Step Three C: Keep filling in your toe shape on the left by increasing a new row or set of rows depending on how much room you have to fill. Chunky yarn will make this process faster than small to medium yarn and is a good size for this kind of weaving project. If I were using thin yarn, I would have needed to use more nails to create a tighter weave.
Step Three D: After the halfway point of filling in your toe shape, start decreasing your rows on the right. Your shape will naturally decrease rows on the left as you fill it in. If you run out of yarn, tuck your leftover end to the back side and add another length of yarn that comes up from the back as if it were still connected. For reference, see steps 13 and 14 from this tutorial.
Step Four: Repeat the same process on the heel. I eyeballed the shapes but you can always use a marker in the same color to help mark your pattern on top of the cotton warp.
Step Five: Now you will fill in the rest of your stocking. You can do thick stripes, thin stripes, add tassels, or skip the heel and toe shape and just free weave the whole shape. Just be sure to start at the lowest part of your weaving and work your way up. I started my hot pink row from behind and came up between two rows and then went over and under to the right about four nails as shown before heading back the other direction. To get the random shapes, I just increased and decreased rows as I filled in the space. For a refresher on filling in spaces, see steps 20 and 21 in this tutorial. It’s okay for this to get a little messy. It adds to the whimsy.
Step Six: Work your way all the way to the top. I made sure to try and balance out my colors so that I had each spread throughout. I also used longer strands of the medium red yarn and shorter strands of the thickest white yarn for obvious reasons. I do suggest weaving two rows of the same length of yarn all the way across the top to help join all of your rows like a dowel rod would if you were using one.
Step Seven: Once you’ve finished those top two rows, gently pull the top off of the nails, and then gently pull the bottom and toe piece off. Be sure not to stretch things as you go.
Step Eight: Since the back side will be covered, I just tied off the ends into knots and trimmed the extra to help thing stay put. Then lay your stocking with the right side down on TWO layers of fleece in a coordinating color. Pin along the edges of your stocking so that your pins go through all three layers.
Step Nine: Starting at the top right corner, back stitch and then stitch along the perimeter of your stocking. Be careful to leave about 1/4″ seam allowance (space between the edge and where you’re sewing) so that things don’t unravel when you turn it right side out. You can also stitch this by hand if you don’t have a sewing machine. Just be sure to use small stitches. Leave the top edge of your stocking open.
Step Ten: Once you’re done sewing, trim off the edges and discard.
Step Eleven: Turn it right side out and help it get it’s shape by poking the toe out, etc. Then press the fleece closest to your weaving and your weaving together, and use a blanket stitch across the top to sew them together. This will keep the back side of your weaving from getting pulled and messed up when you fill your stocking. Tie off your end with a double-knot and trim thread. Attach a loop of yarn with a tapestry needle along the seam or through the back side of the fleece to hang.
Once you’ve finished you can add pom poms if you like or go the more minimal route and leave them as they are.
Each of these stockings took me about two hours to complete but didn’t cost much to make at all, and I love that they look like they came straight out of a boutique Christmas store. What do you think? Are you feeling brave enough to weave your own stockings? –Rachel
Credits//Author and Photography: Rachel Denbow. Photos edited with The Folk Collection.


39 Comments
I love this so much!
Elizabeth,
The yarns can be purchased at JoAnn’s or check your local yarn shop.
I would suggest hand sewing as your only other option since this is a heavier weighted project than if you were just using fleece or felt. Fabric glue likely won’t hold things together very long.
Thank you!
Thank you, friend!
This is so cool! Perfect to get into and make on a “me” day!
-Jahaila @ Girl Nesting
Although I’m not quite sure I could replicate this lovely DIY, I absolutely love the end result.
Best,
Araba K.
atuesdayinapril.com
oh my, these are too cute!
xx nikki
www.dream-in-neon.com
One of my favorite projects ever!!!!
xoxo! 🙂 Elsie
These are absolutely adorable – what a fantastic design! Love them
http://highheelsbrownhair.blogspot.co.uk/
these are marvelous!
thanks for sharing your tutorial! i set a link and hope you agree.
best wishes, doro von Hand zu Hand
Those stockings are adorable! I love the idea of making the stocking instead of going out to buy one =)
www.miss-siu.blogspot.com
What a clever idea! I’ll have to get practicing so I can have these by next year. 🙂
Hahahahahahaha. :]
Super nice weaven idea! I start to see the weaving-craft as something really flexible and full of potential! Tnx, xo
This is my favorite Christmas tutorial EVER!!!! I just sent the link to my sister to give a whole year to make them for me, ha ha ha. I love these!!! Great job Rachel!!!!
This is adorable!!
These are so cute! I really want to make one!
This is literally too good. But question: for those of us who don’t have a sewing machine, is hand sewing the only other option?
SO CUTE!!!
That’s adorable! Great job
Xo
This is a really neat idea! 🙂
http://www.geekyjessy.blogspot.com
So, so cute! I love this DIY (like I love eachone of your ideas)
Have a great day!
mtrjschk.blogspot.de
This is so clever! I used to weave all the time at this cute little art store, but all I ever made were slabs of cloth. Love this! -Audrey | Brunch at Audrey’s
Easy and Beautiful. I Love it!
What a great idea! I did some weaving when I was a kid at school and never tried it again. After seeing your project and how easy it is, I think I’ll give weaving another chance.
These are phenomenal. I almost passed up the instruction because they looked very complicated but after reading how they were done, I might try to do the weaving. I love the finished product!
Adorable! I’m loving the lovely yarn too. Where is the yarn from?
….and pinned it, so I’m serious!
Okay this I have to try. You make it seem so simple!!!!!
These look great!! So cute. And I love the idea of new stockings each year. What a fun collection for your children to have.
I haven’t understood all the hype about weaving, but this one is absolutely beautiful and has changed my mind!
I love this DIY,so adorable ♥
http://fashionwithvalentina.blogspot.com
I love this so much!
Great in depth instructions. These are adorable and you’re right that they look high quality boutique. Thanks for sharing.
Http://absolutelytara.com
Those are so very cute!!!
Love from Italia and a happy X-mas time to you,
http://lasagnolove.blogspot.it/2014/12/homemade-x-mas-jam.html
Bambi
I adore this DIY so much and would be great for a gift! Lovely thanks for sharing! 🙂
Lulu xx
http://luluslittlewonderland.blogspot.com
That is IM.PRESS.IVE.
And the answer is no but I AM brave enough to GO to a boutique store and BUY ONE.
Rachel! I have been wanting to hook with wool some stockings, but girl…these fab and might have just changed my mind! So great!
Fabulous idea to take weaving to the next (festive) level!