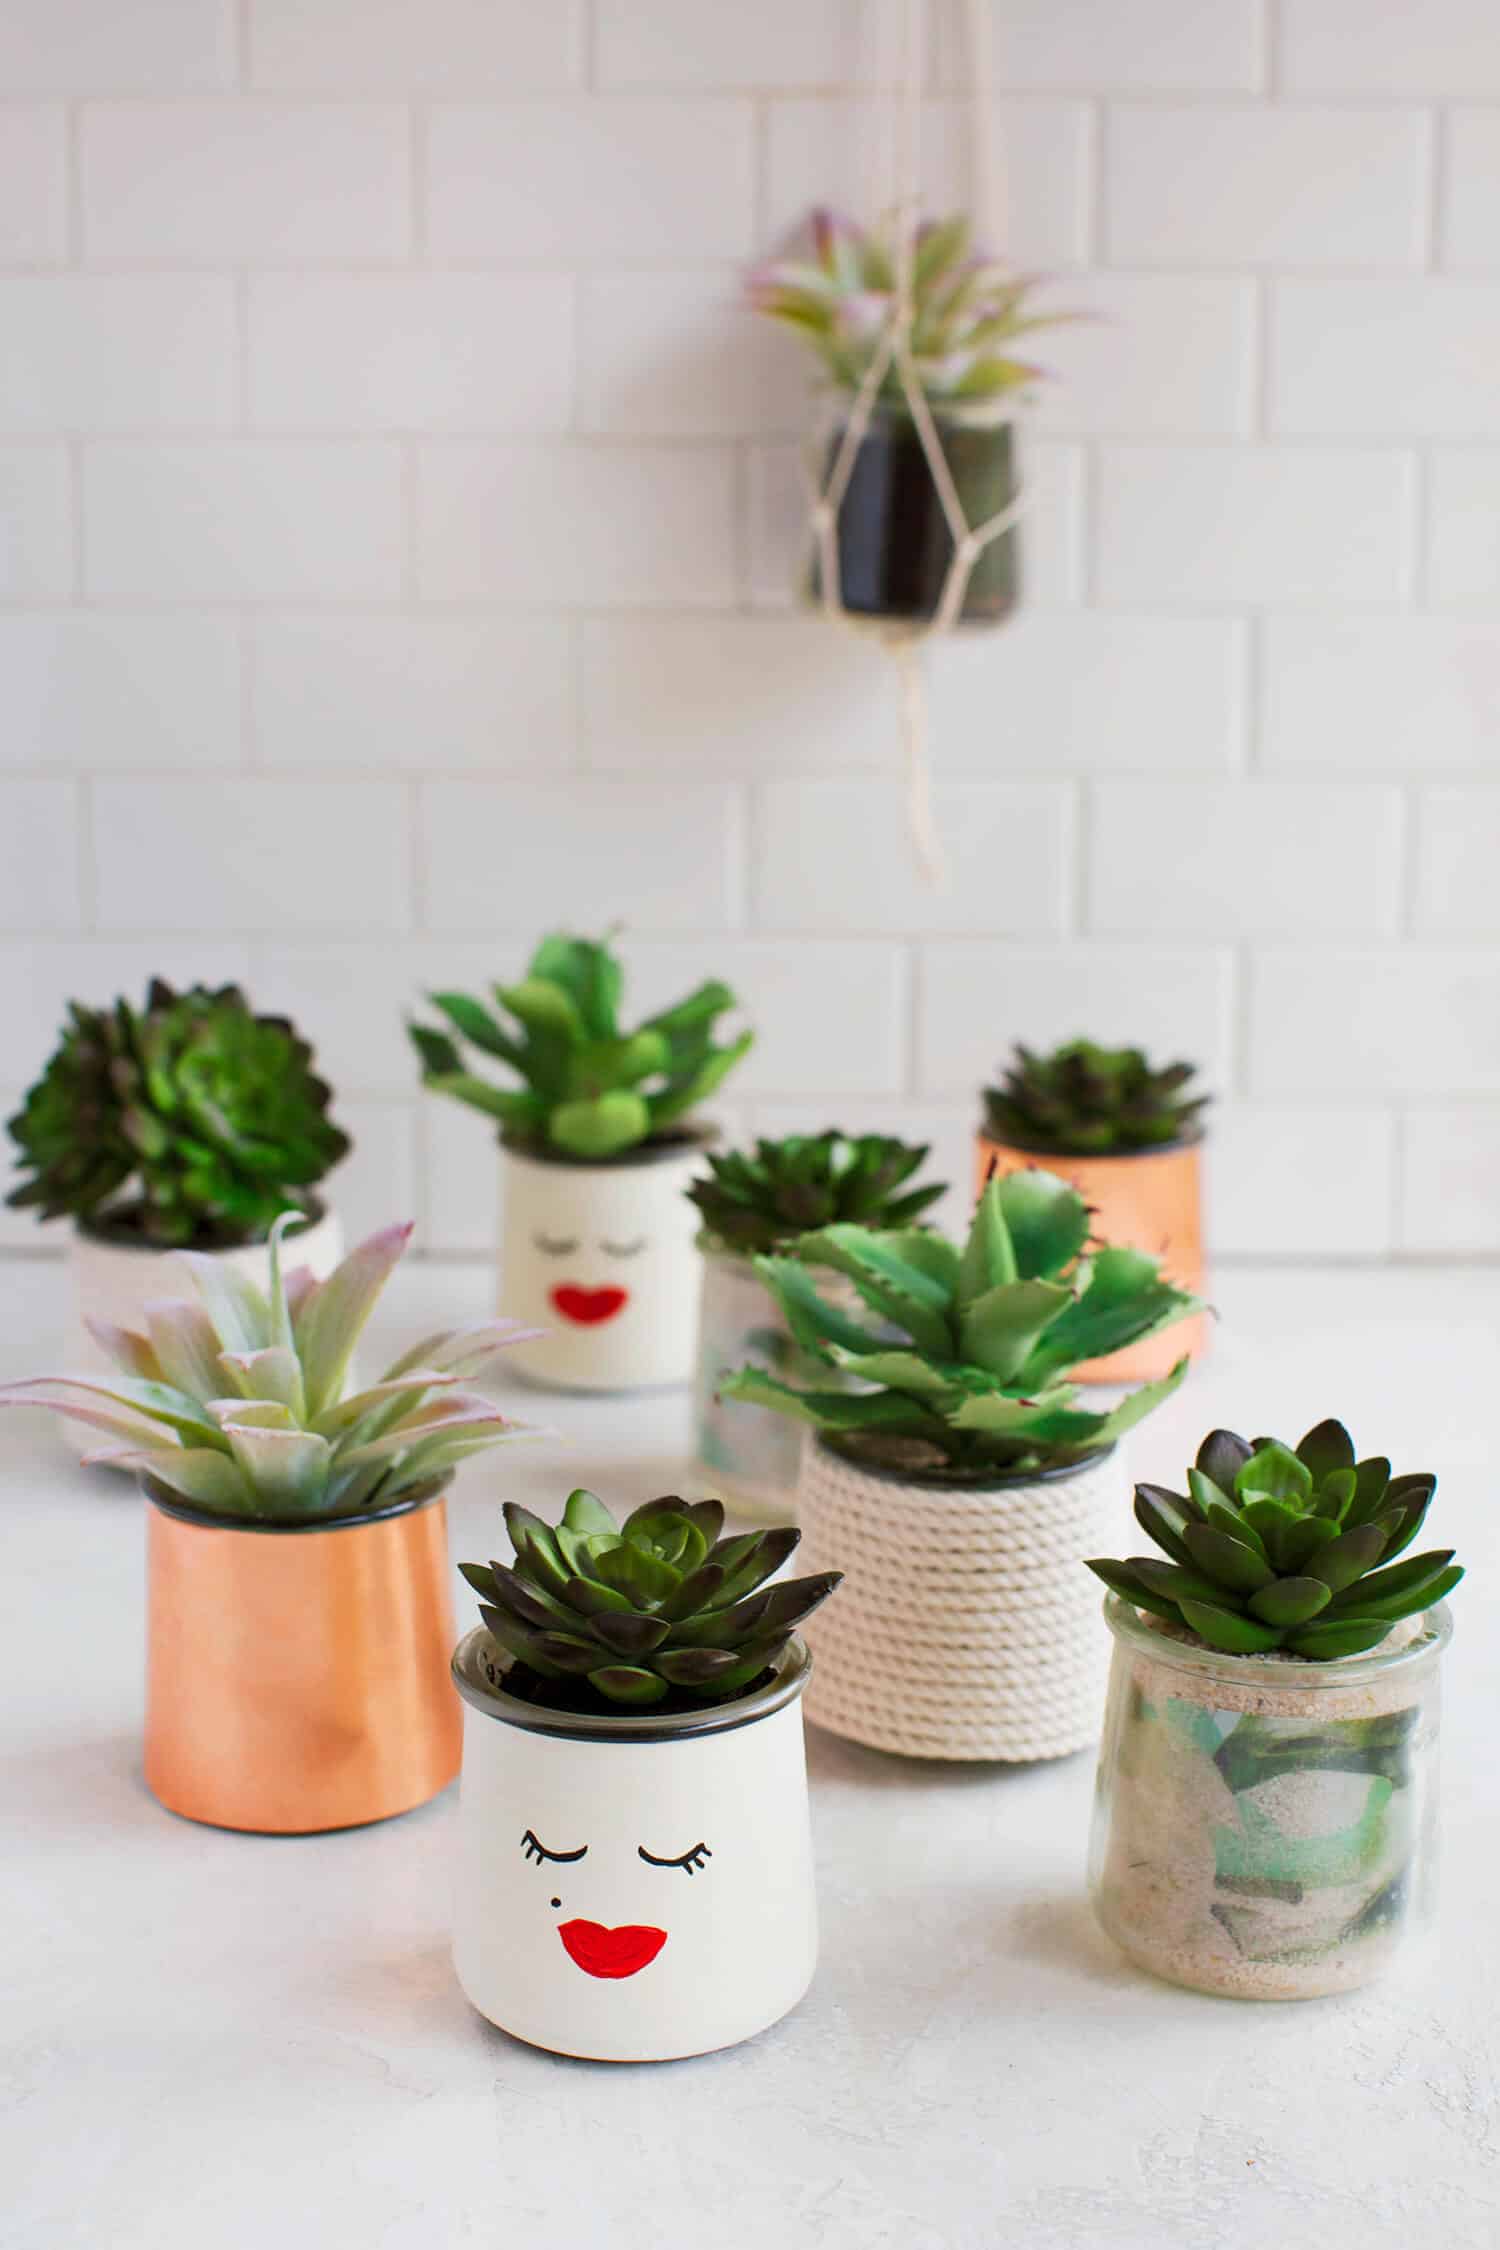
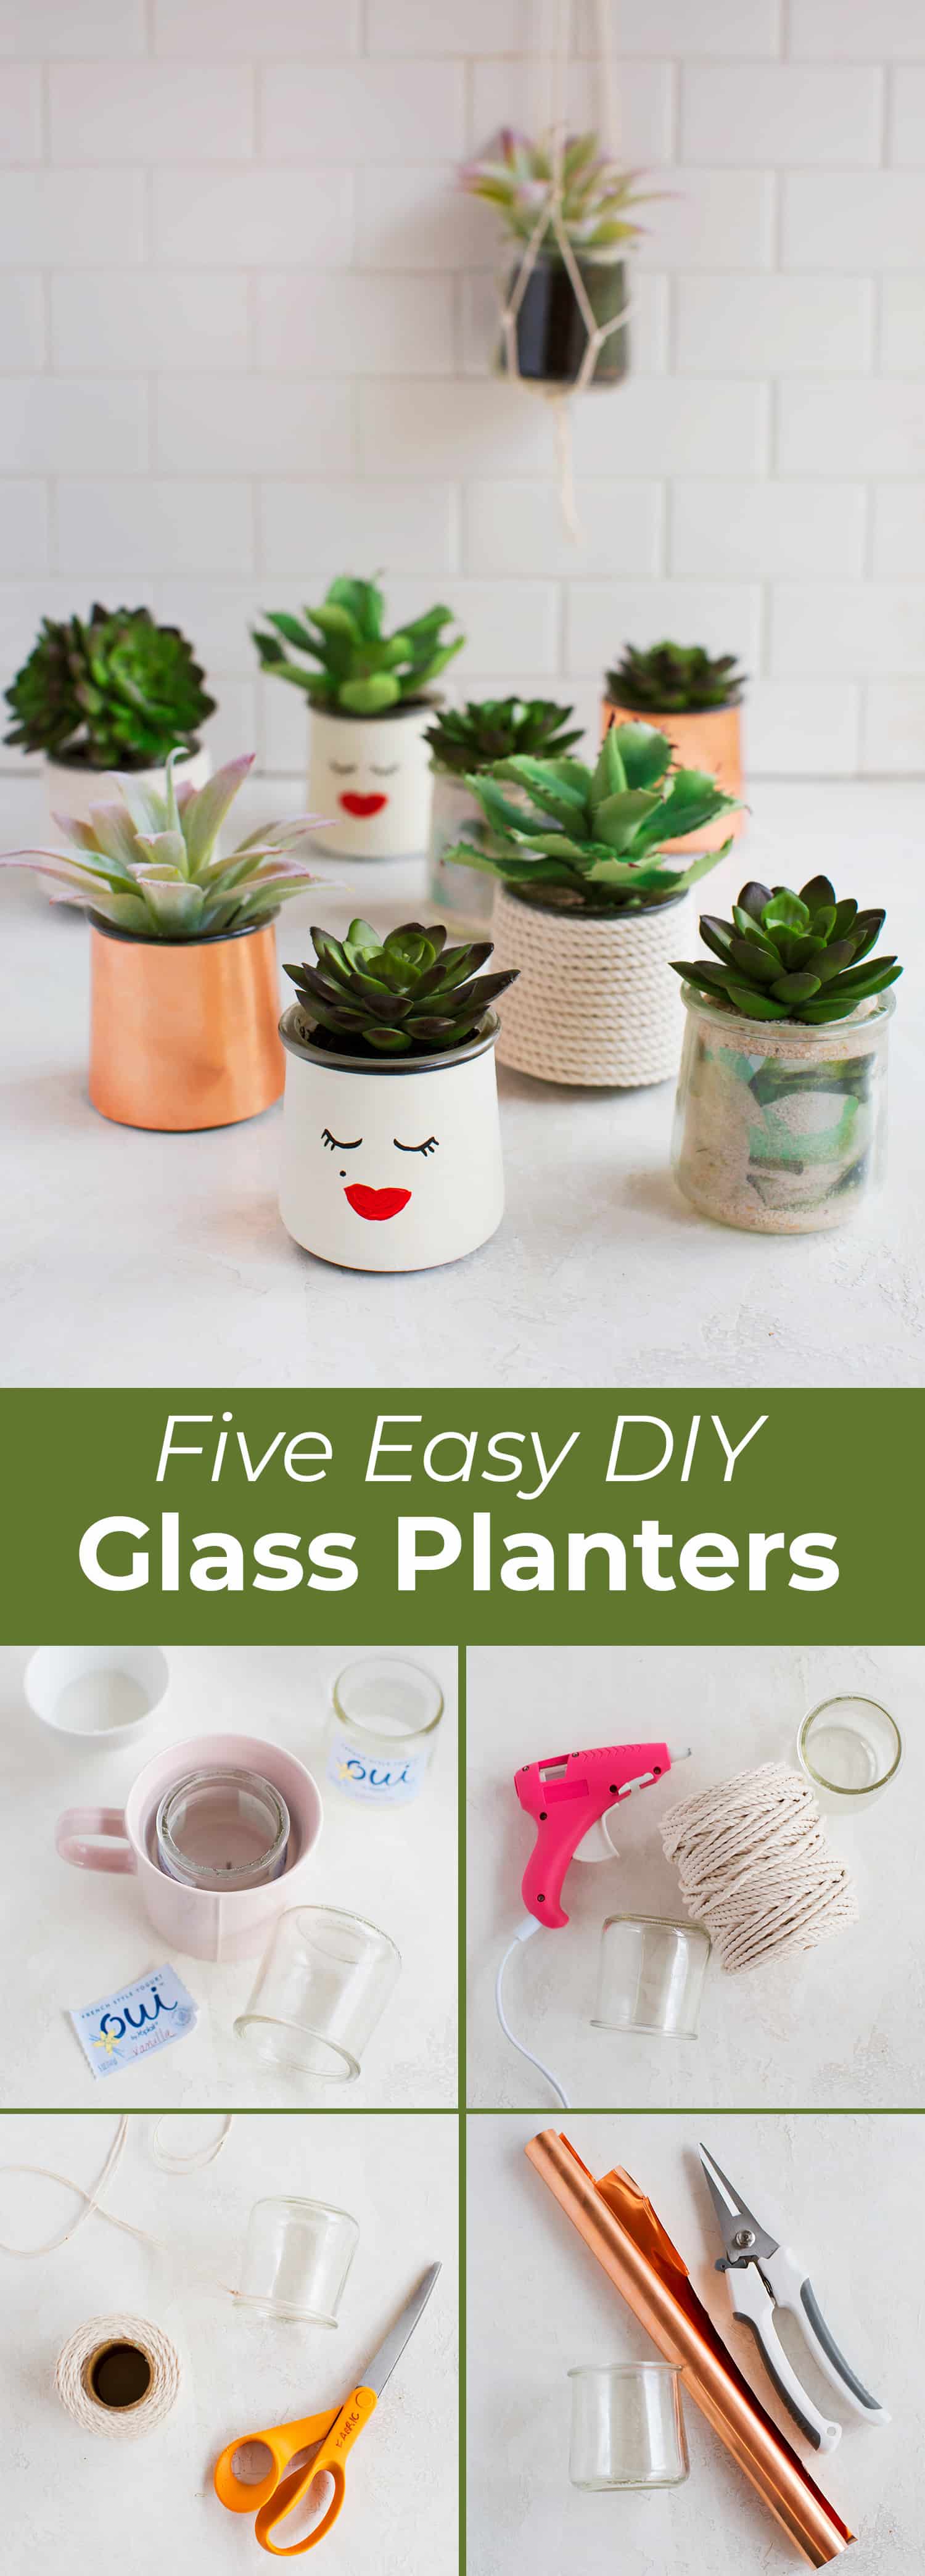
 With spring just around the corner maybe you too are looking for ways to add a few more plant babies to your collection? We worked with Oui by Yoplait to share this tutorial for five simple ways to recycle small glass containers into planters. The key word here is simple—you don’t have to be an expert crafter to enjoy these plant projects.
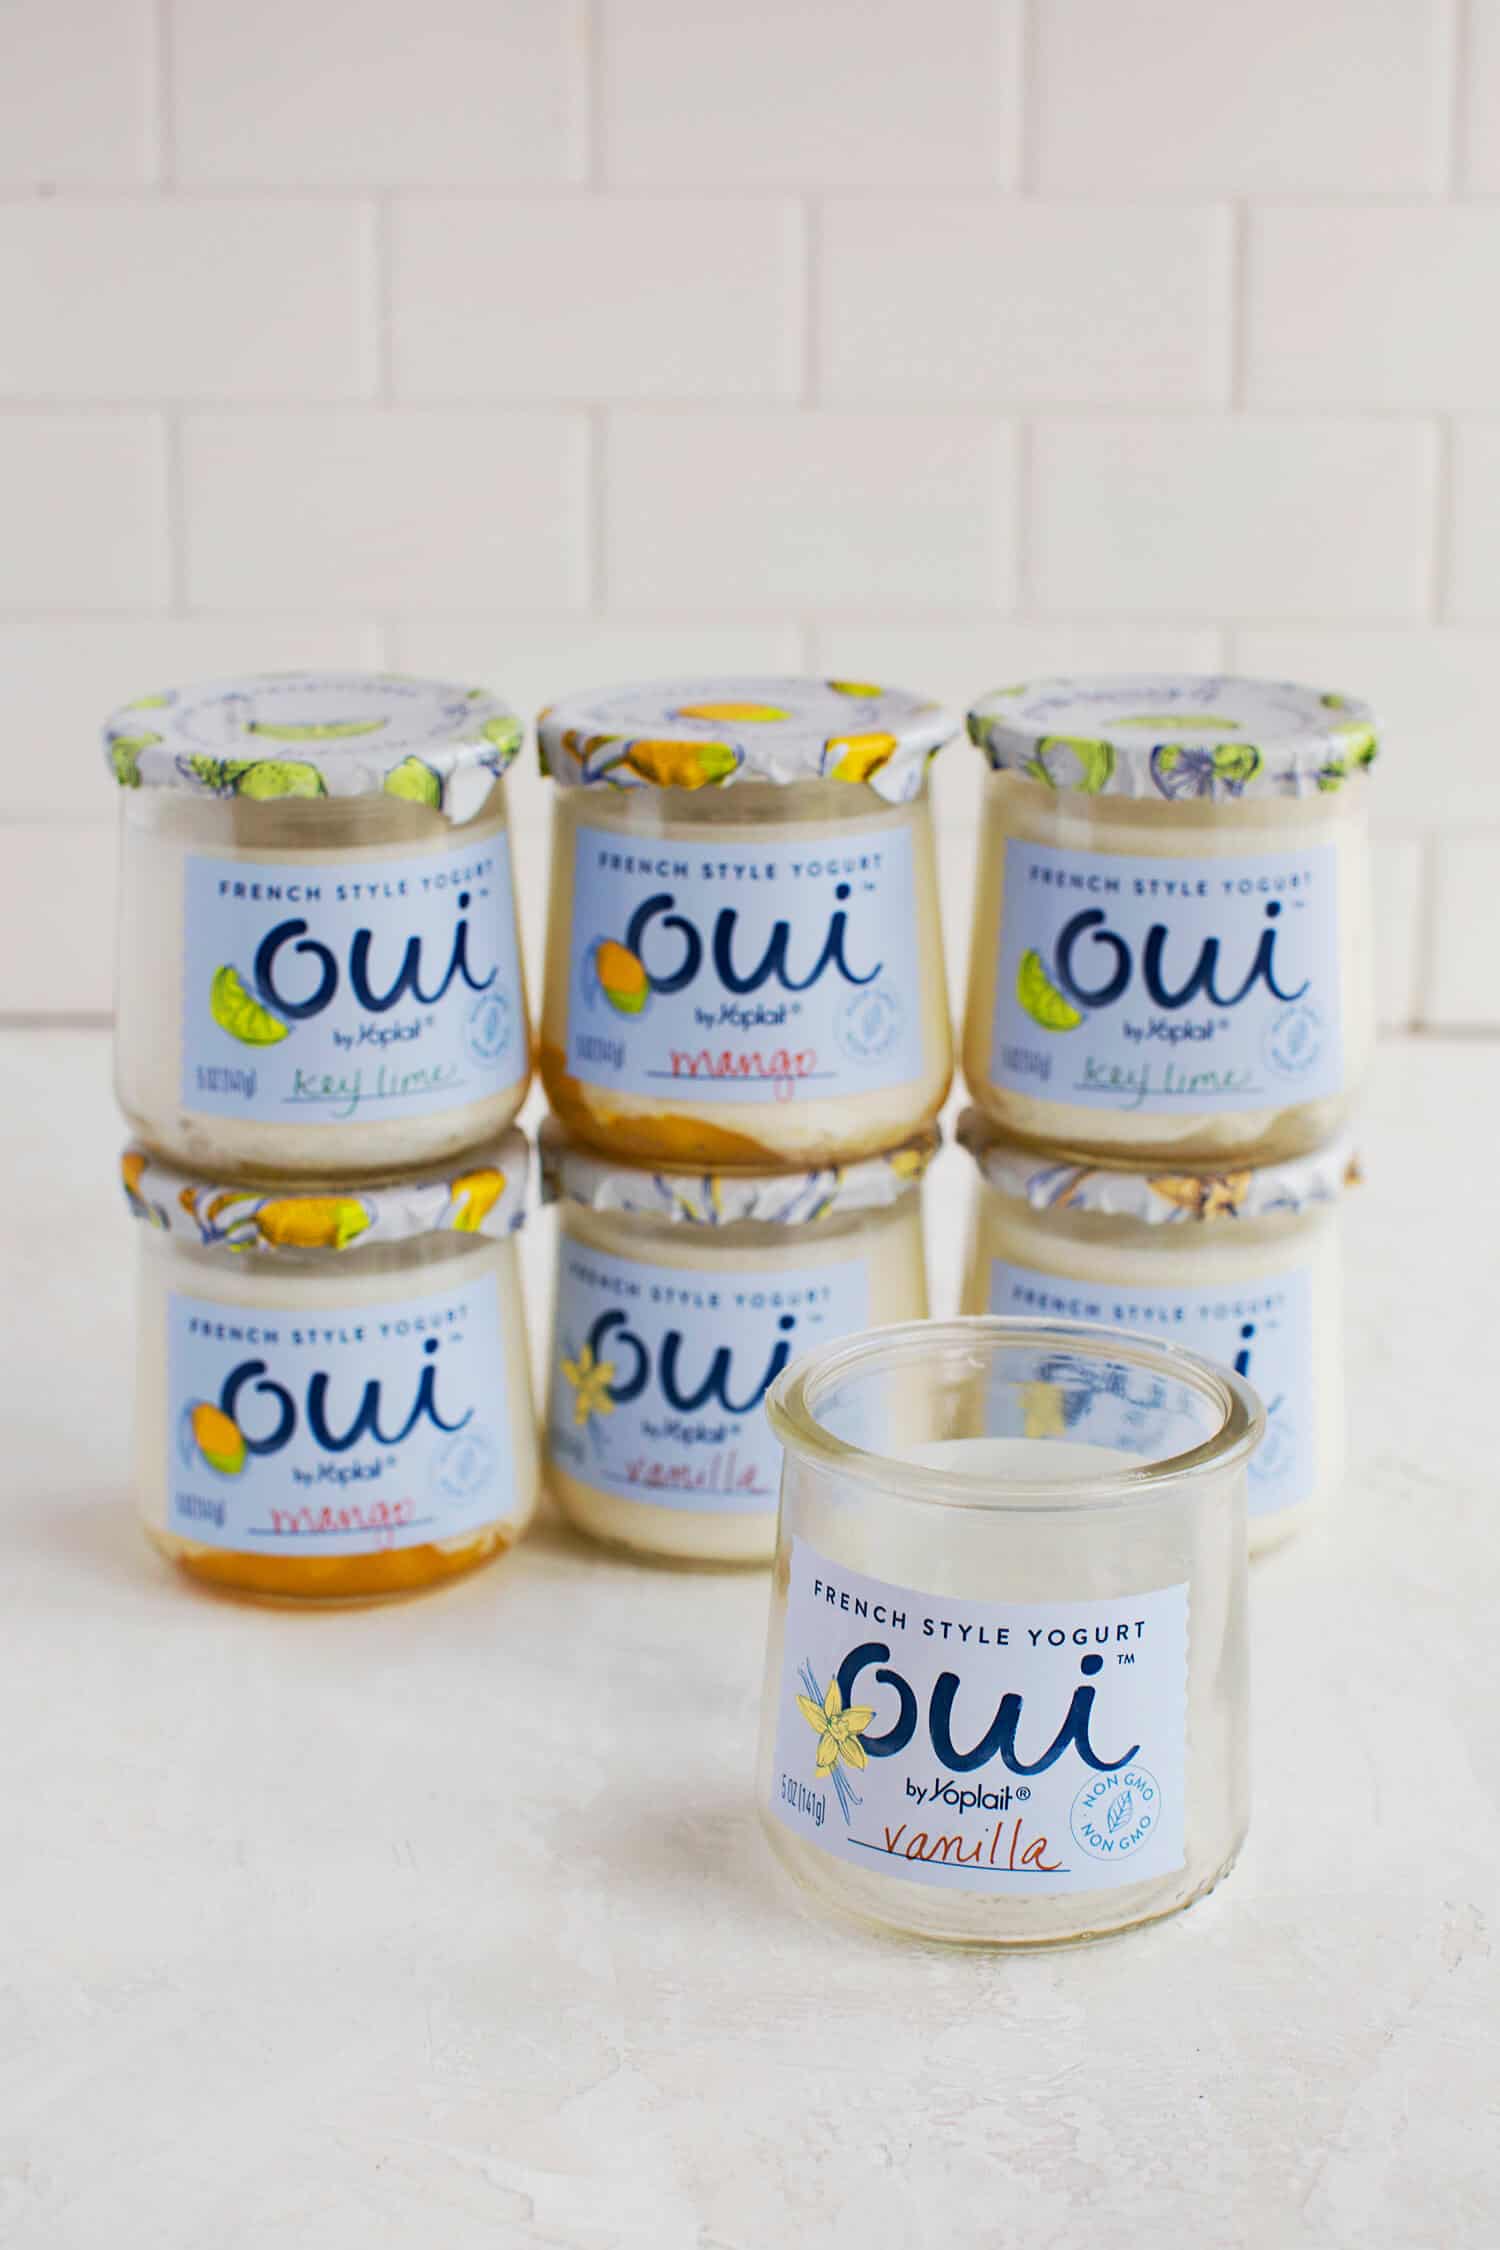
Have you seen the Oui yogurts in stores yet? They are the French style yogurts that come in the little glass jars. They immediately stuck out to me when I first saw them months ago because of the cute jar, and I was impressed when I saw that the plain version is made with only two ingredients (milk and cultures) and is non-GMO. Although I must admit that I also like a lot of their other flavors too, as two new ones that I enjoy are Mango and Key Lime. And of course I could simply recycle the glass jars after enjoying, but because they are so cute I’ve been saving and using them for all sorts of things, like tiny juice glasses, organizing things (paper clips on my office desk right now) and these fun little planter projects.
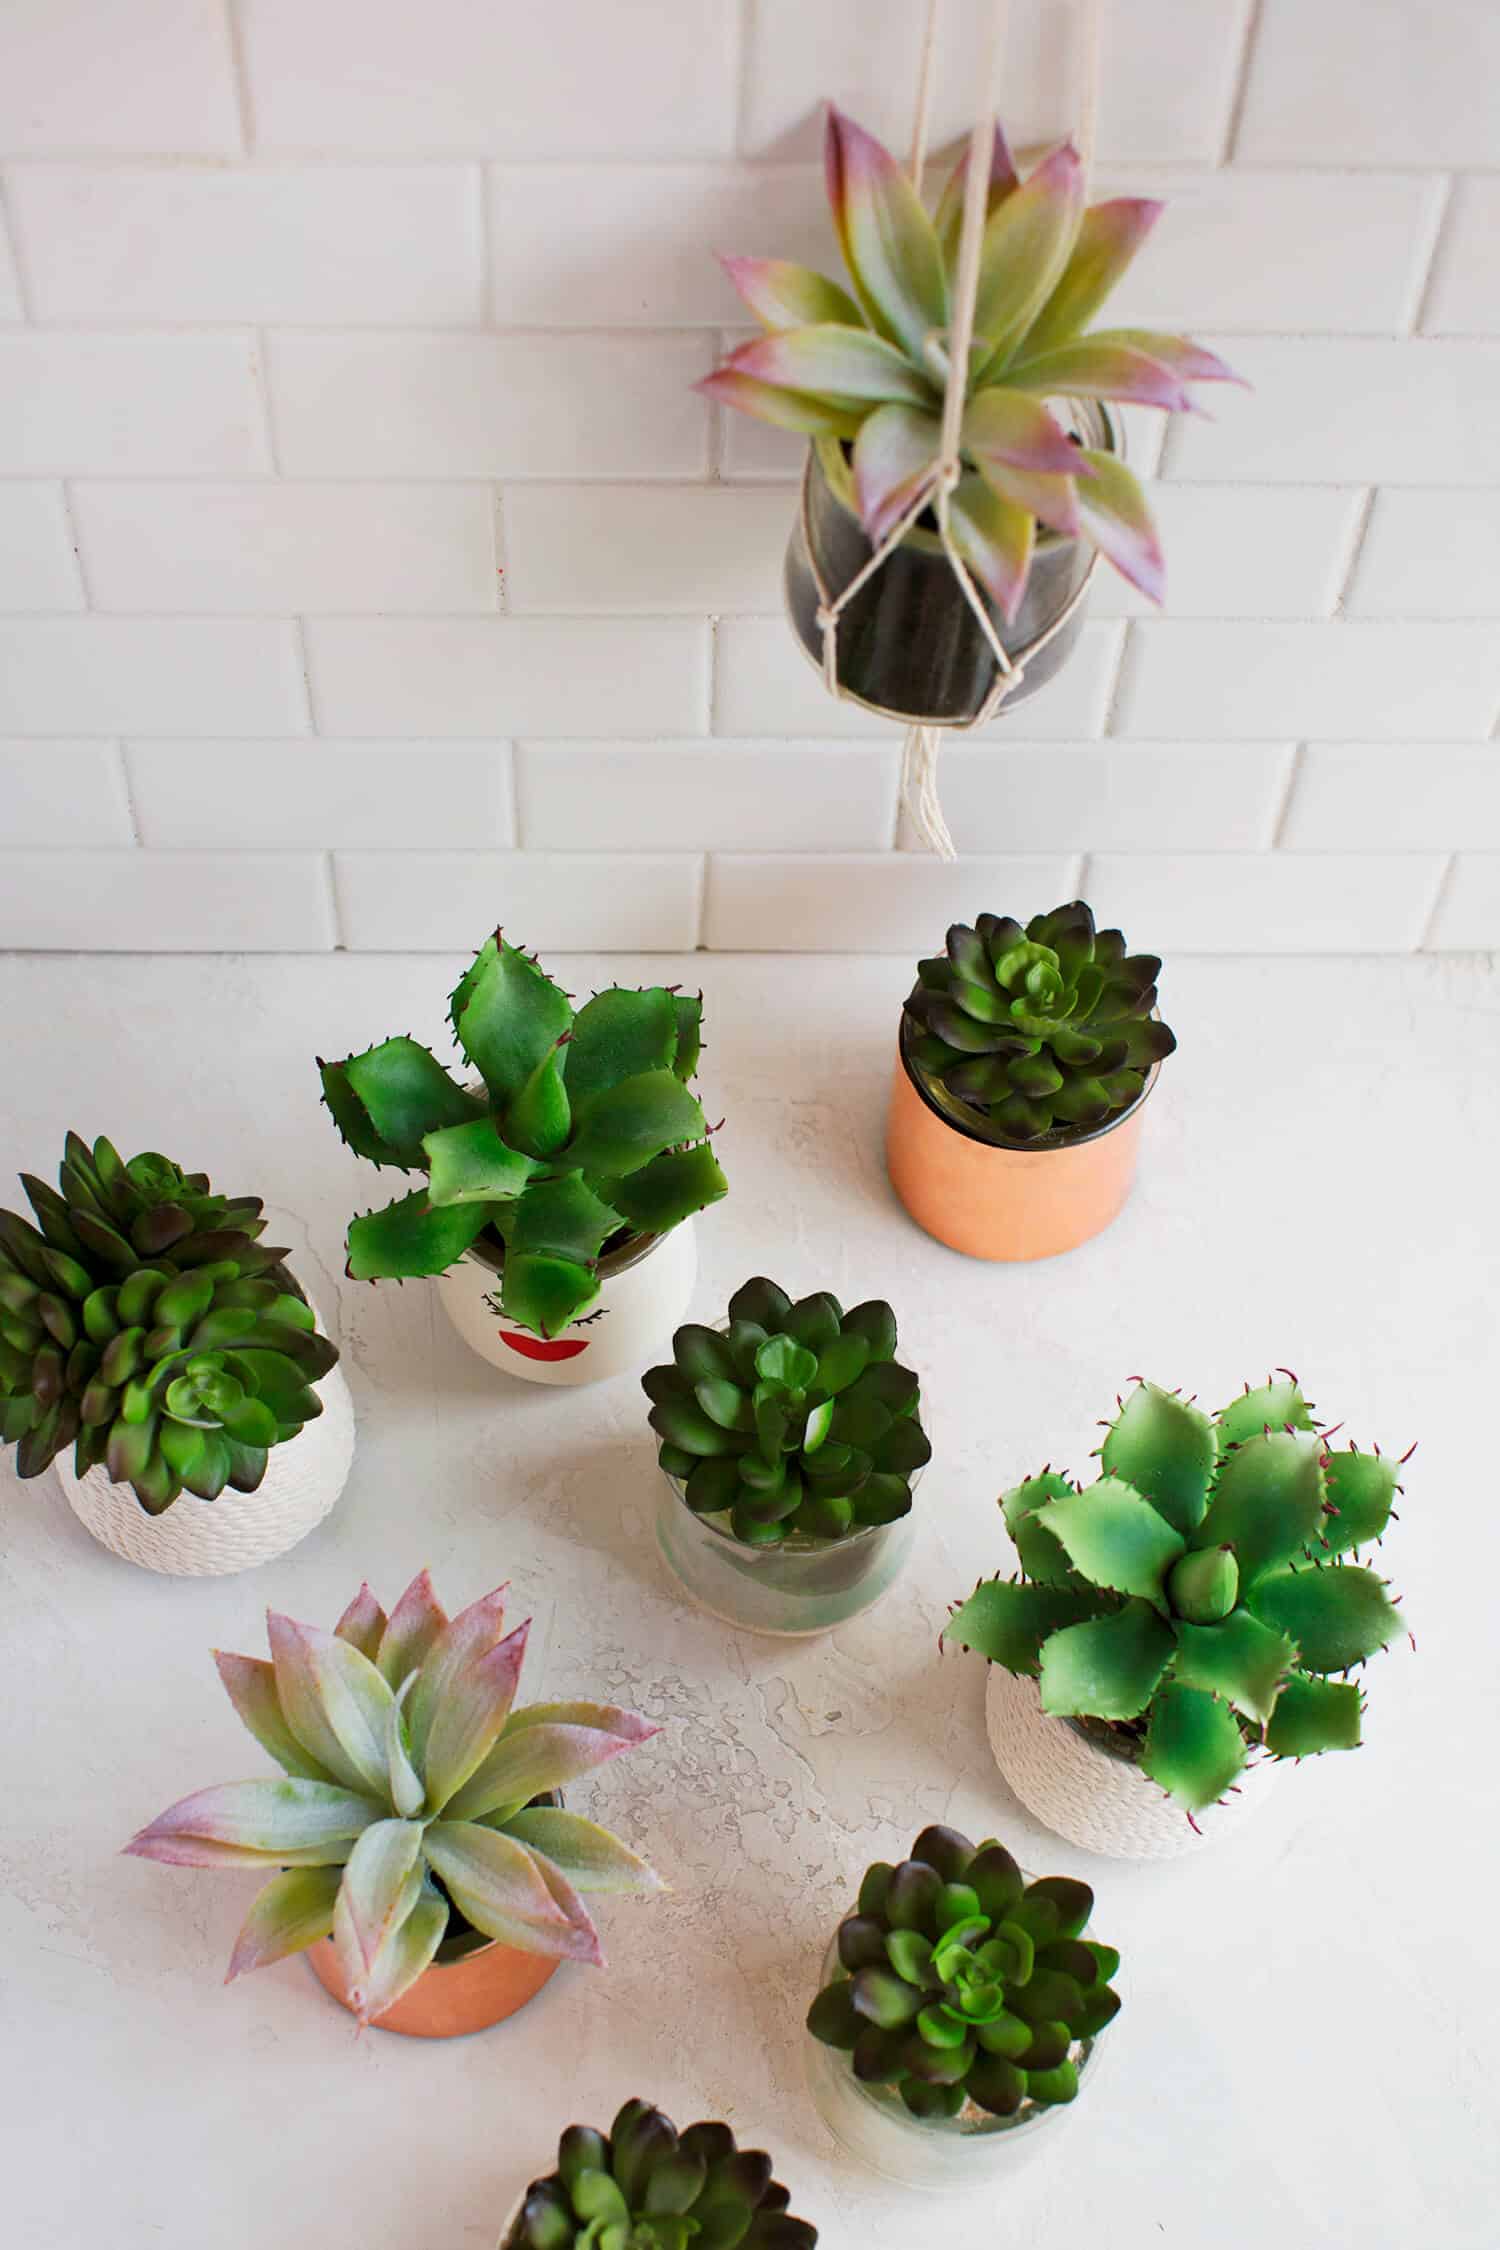
 You could easily modify any of these tutorials to work with different sized glass or even ceramic containers. These are cute for planters around the house or to gift to friends. I don’t know about you but I am never mad when a friend gives me a new little plant to enjoy. 🙂
After cleaning the jar of any remaining food, you’ll also want to remove the labels or any stickers. I tried a few methods because I wanted to find a way to remove labels from glass jars without any super harsh chemicals.
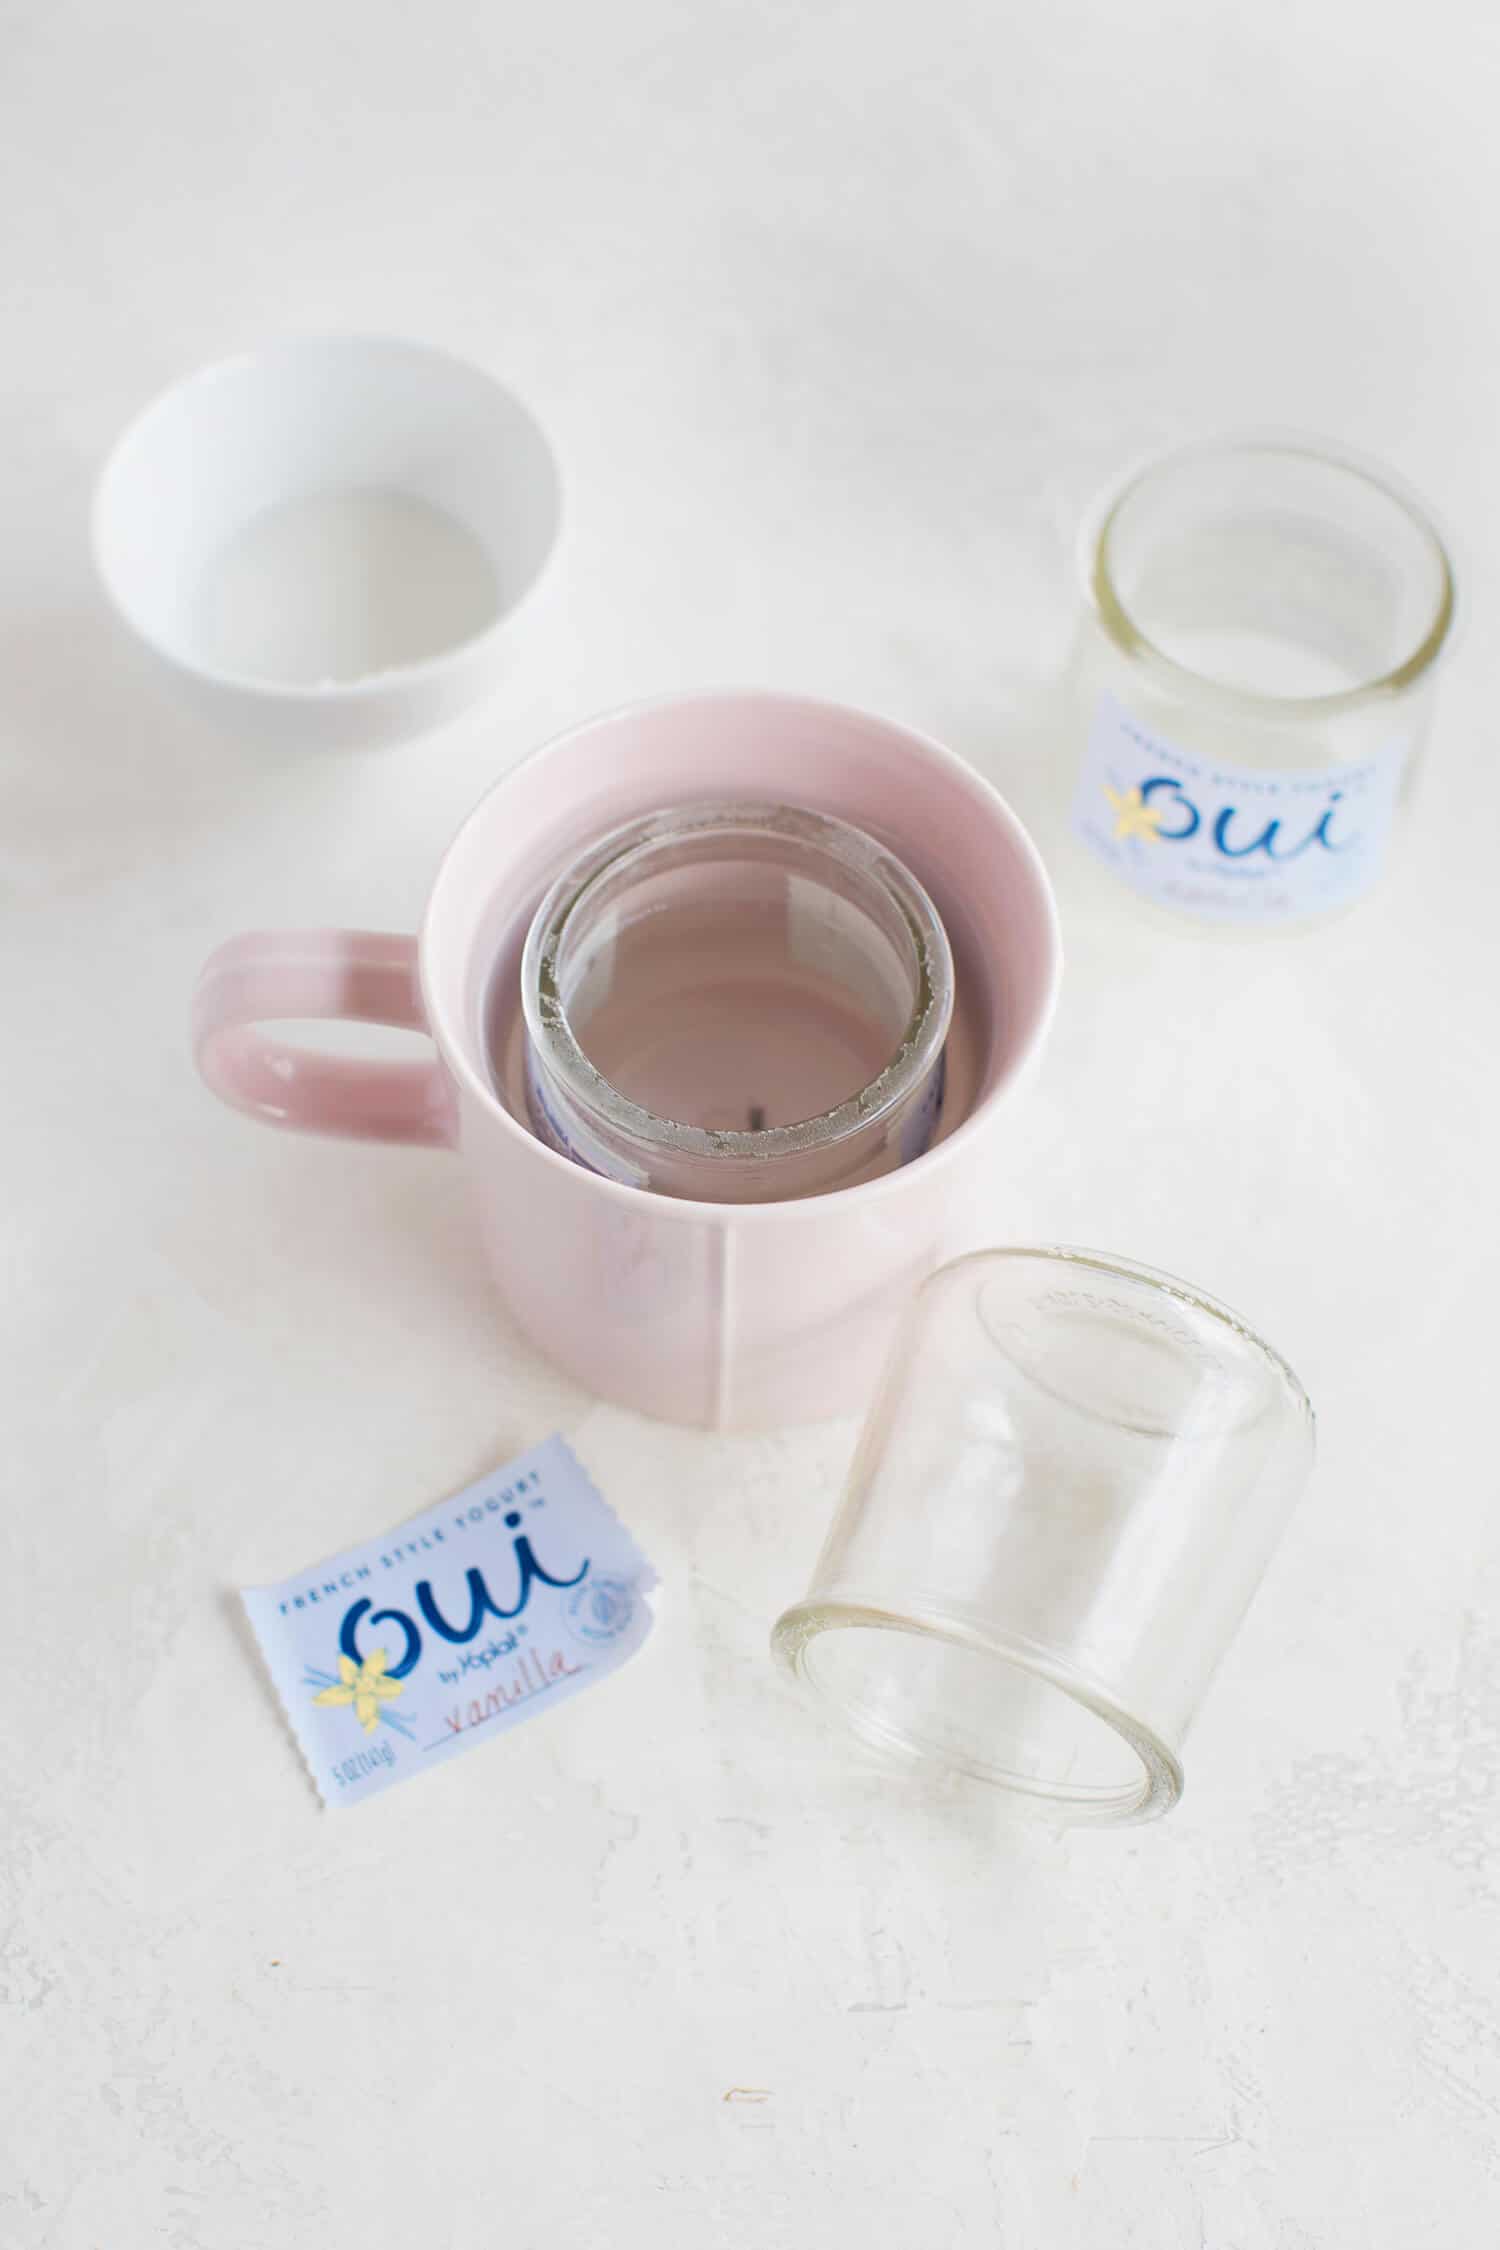 The method that worked best for me was to soak the glass in white vinegar for at least one hour, up to overnight. I tried different amounts of time and the jars I left soaking overnight were the easiest to remove the labels from. If after removing the label there is still a little sticky residue, just use a little baking soda paste (baking soda + a small amount of water) to scrub away. Once your jars are clean, you’re ready to make planters!
Depending on the plants you plan to use, you may want to add a hole to the bottom of the jars for drainage. Use a carbide-tipped drill bit and electric drill to gently (slowly) drill a small hole in the bottom of the jar if needed.
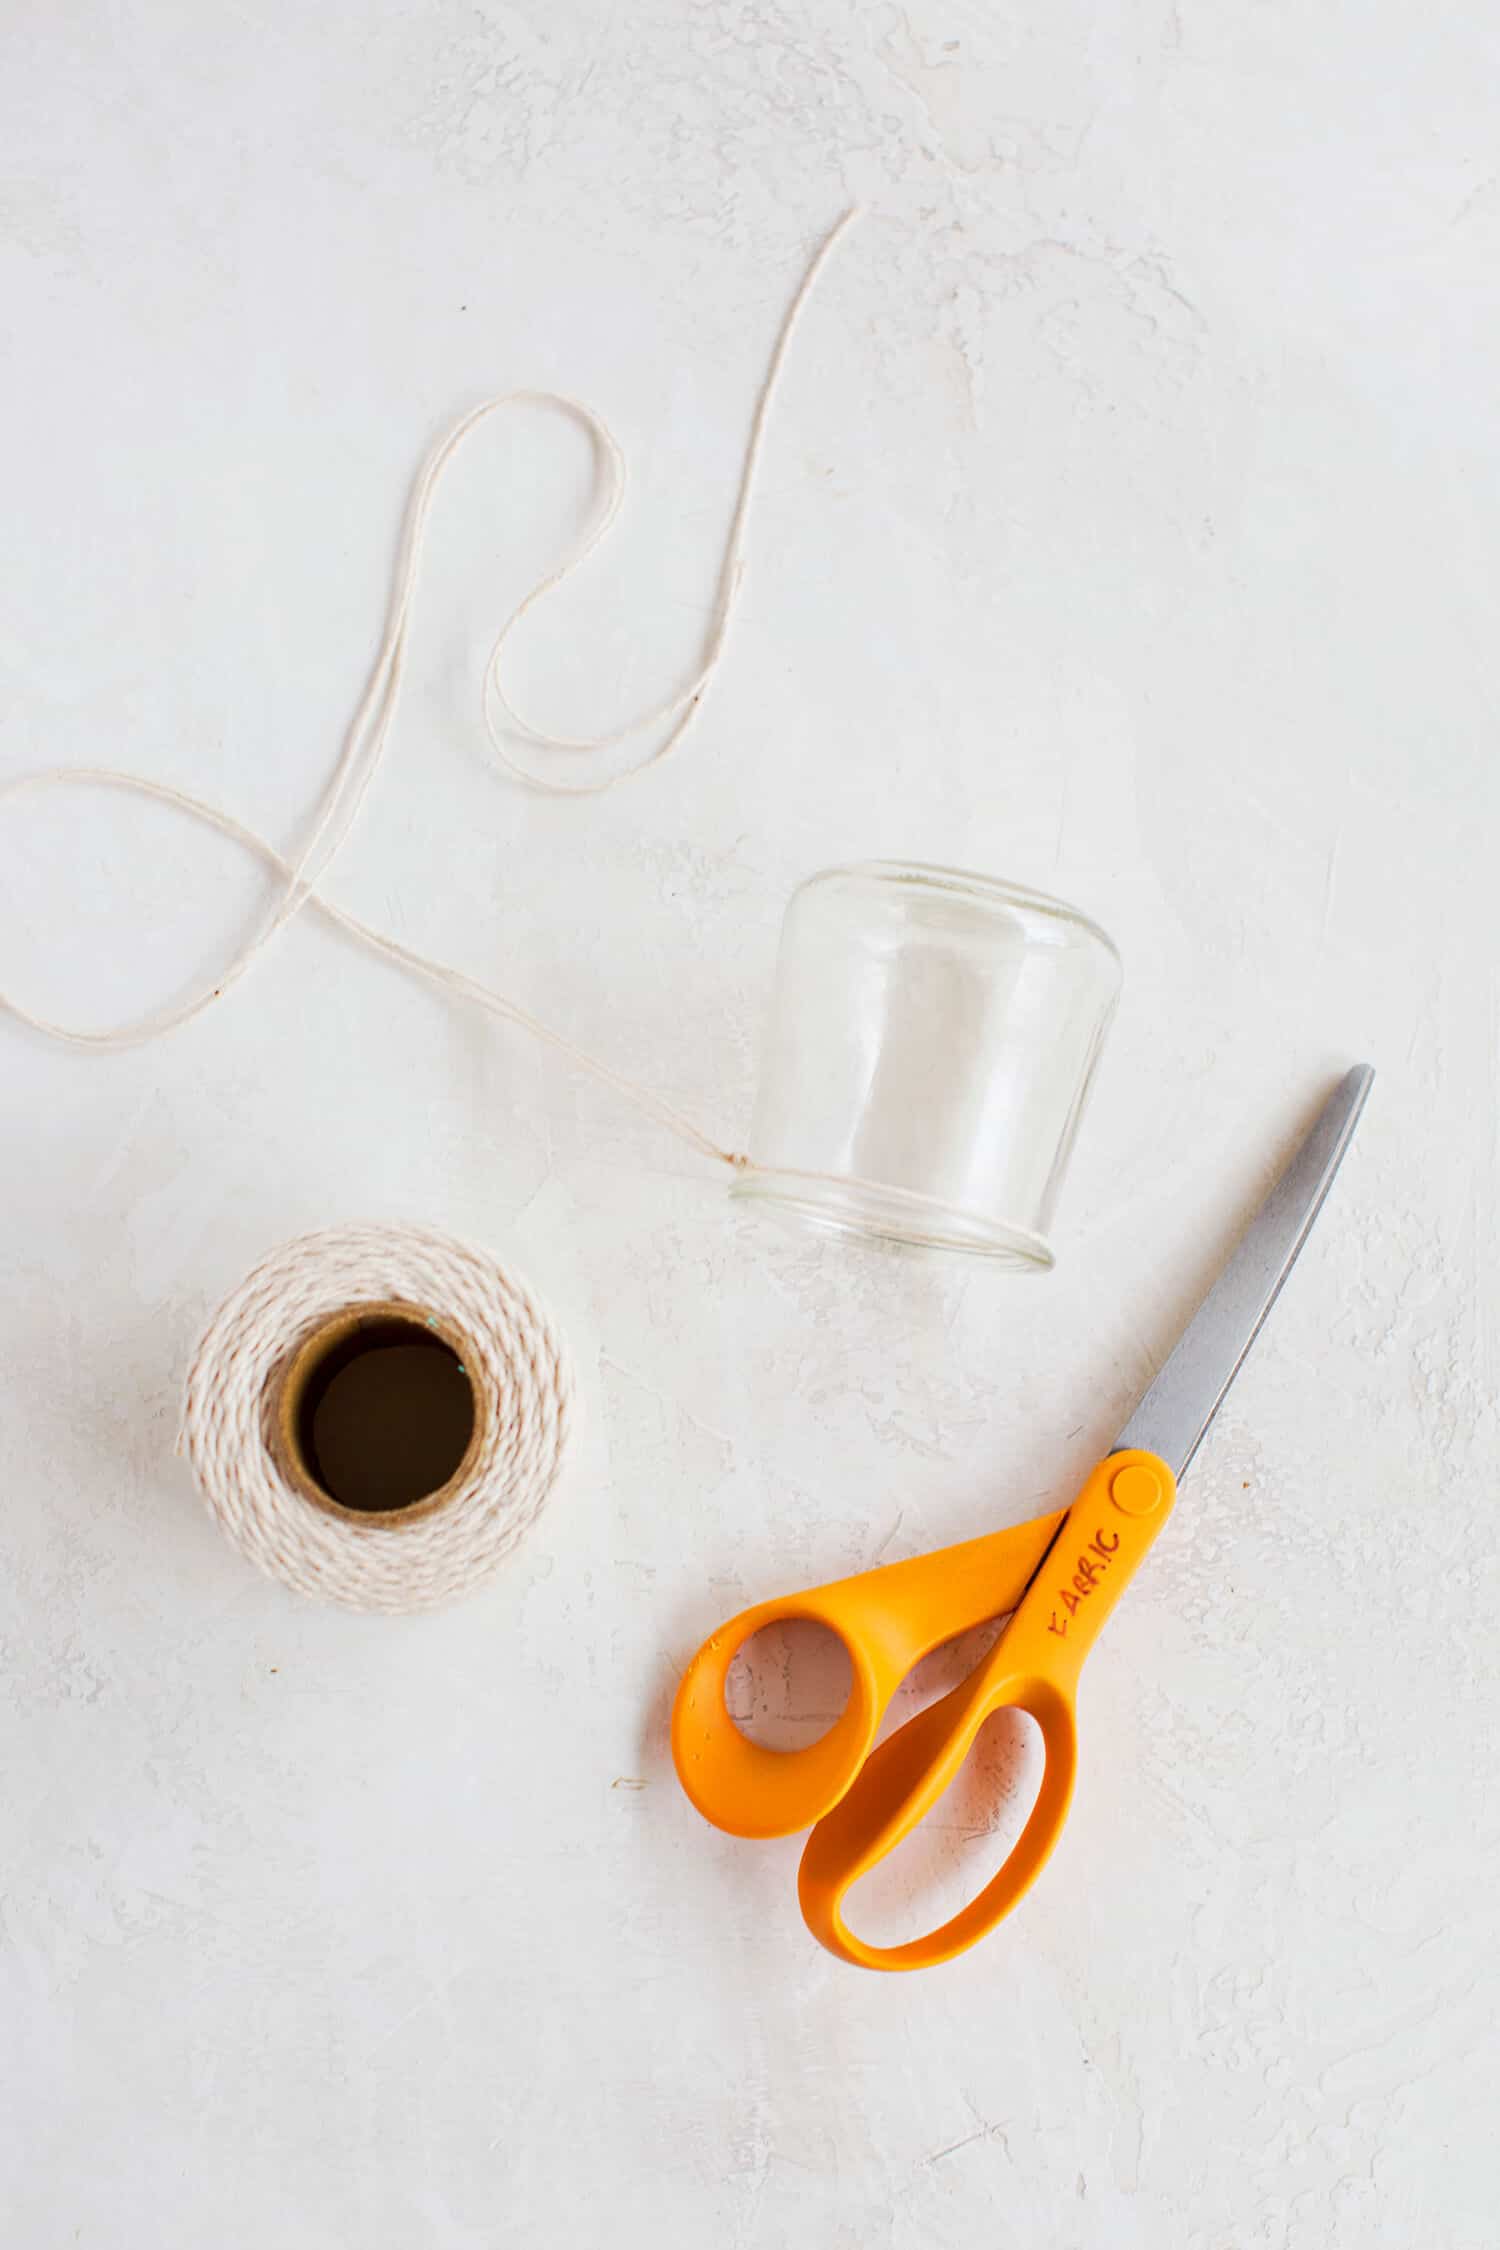 Hanging planter supplies:
-clean Oui by Yoplait glass jars
-rope or twine
-scissors
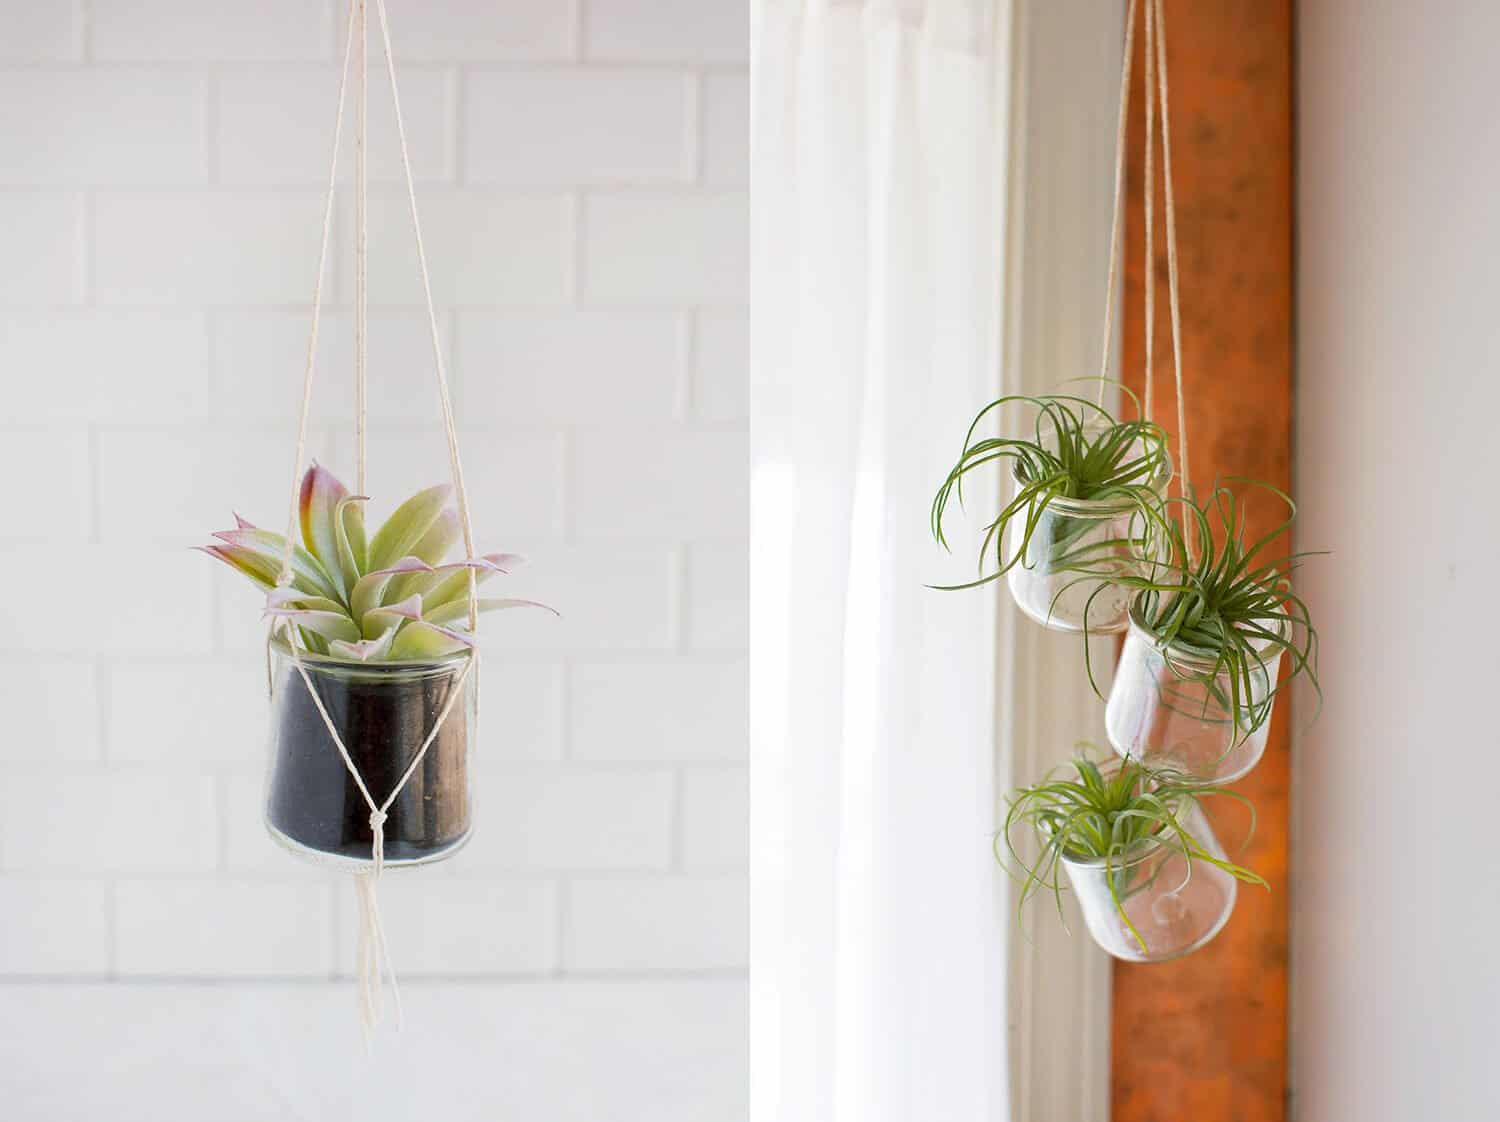 You can keep this super simple by just tying your rope or twine around the lip of each jar for a cute little air plant display. Another method to get the jar more upright for plants that require dirt is this one I shared not too long ago.
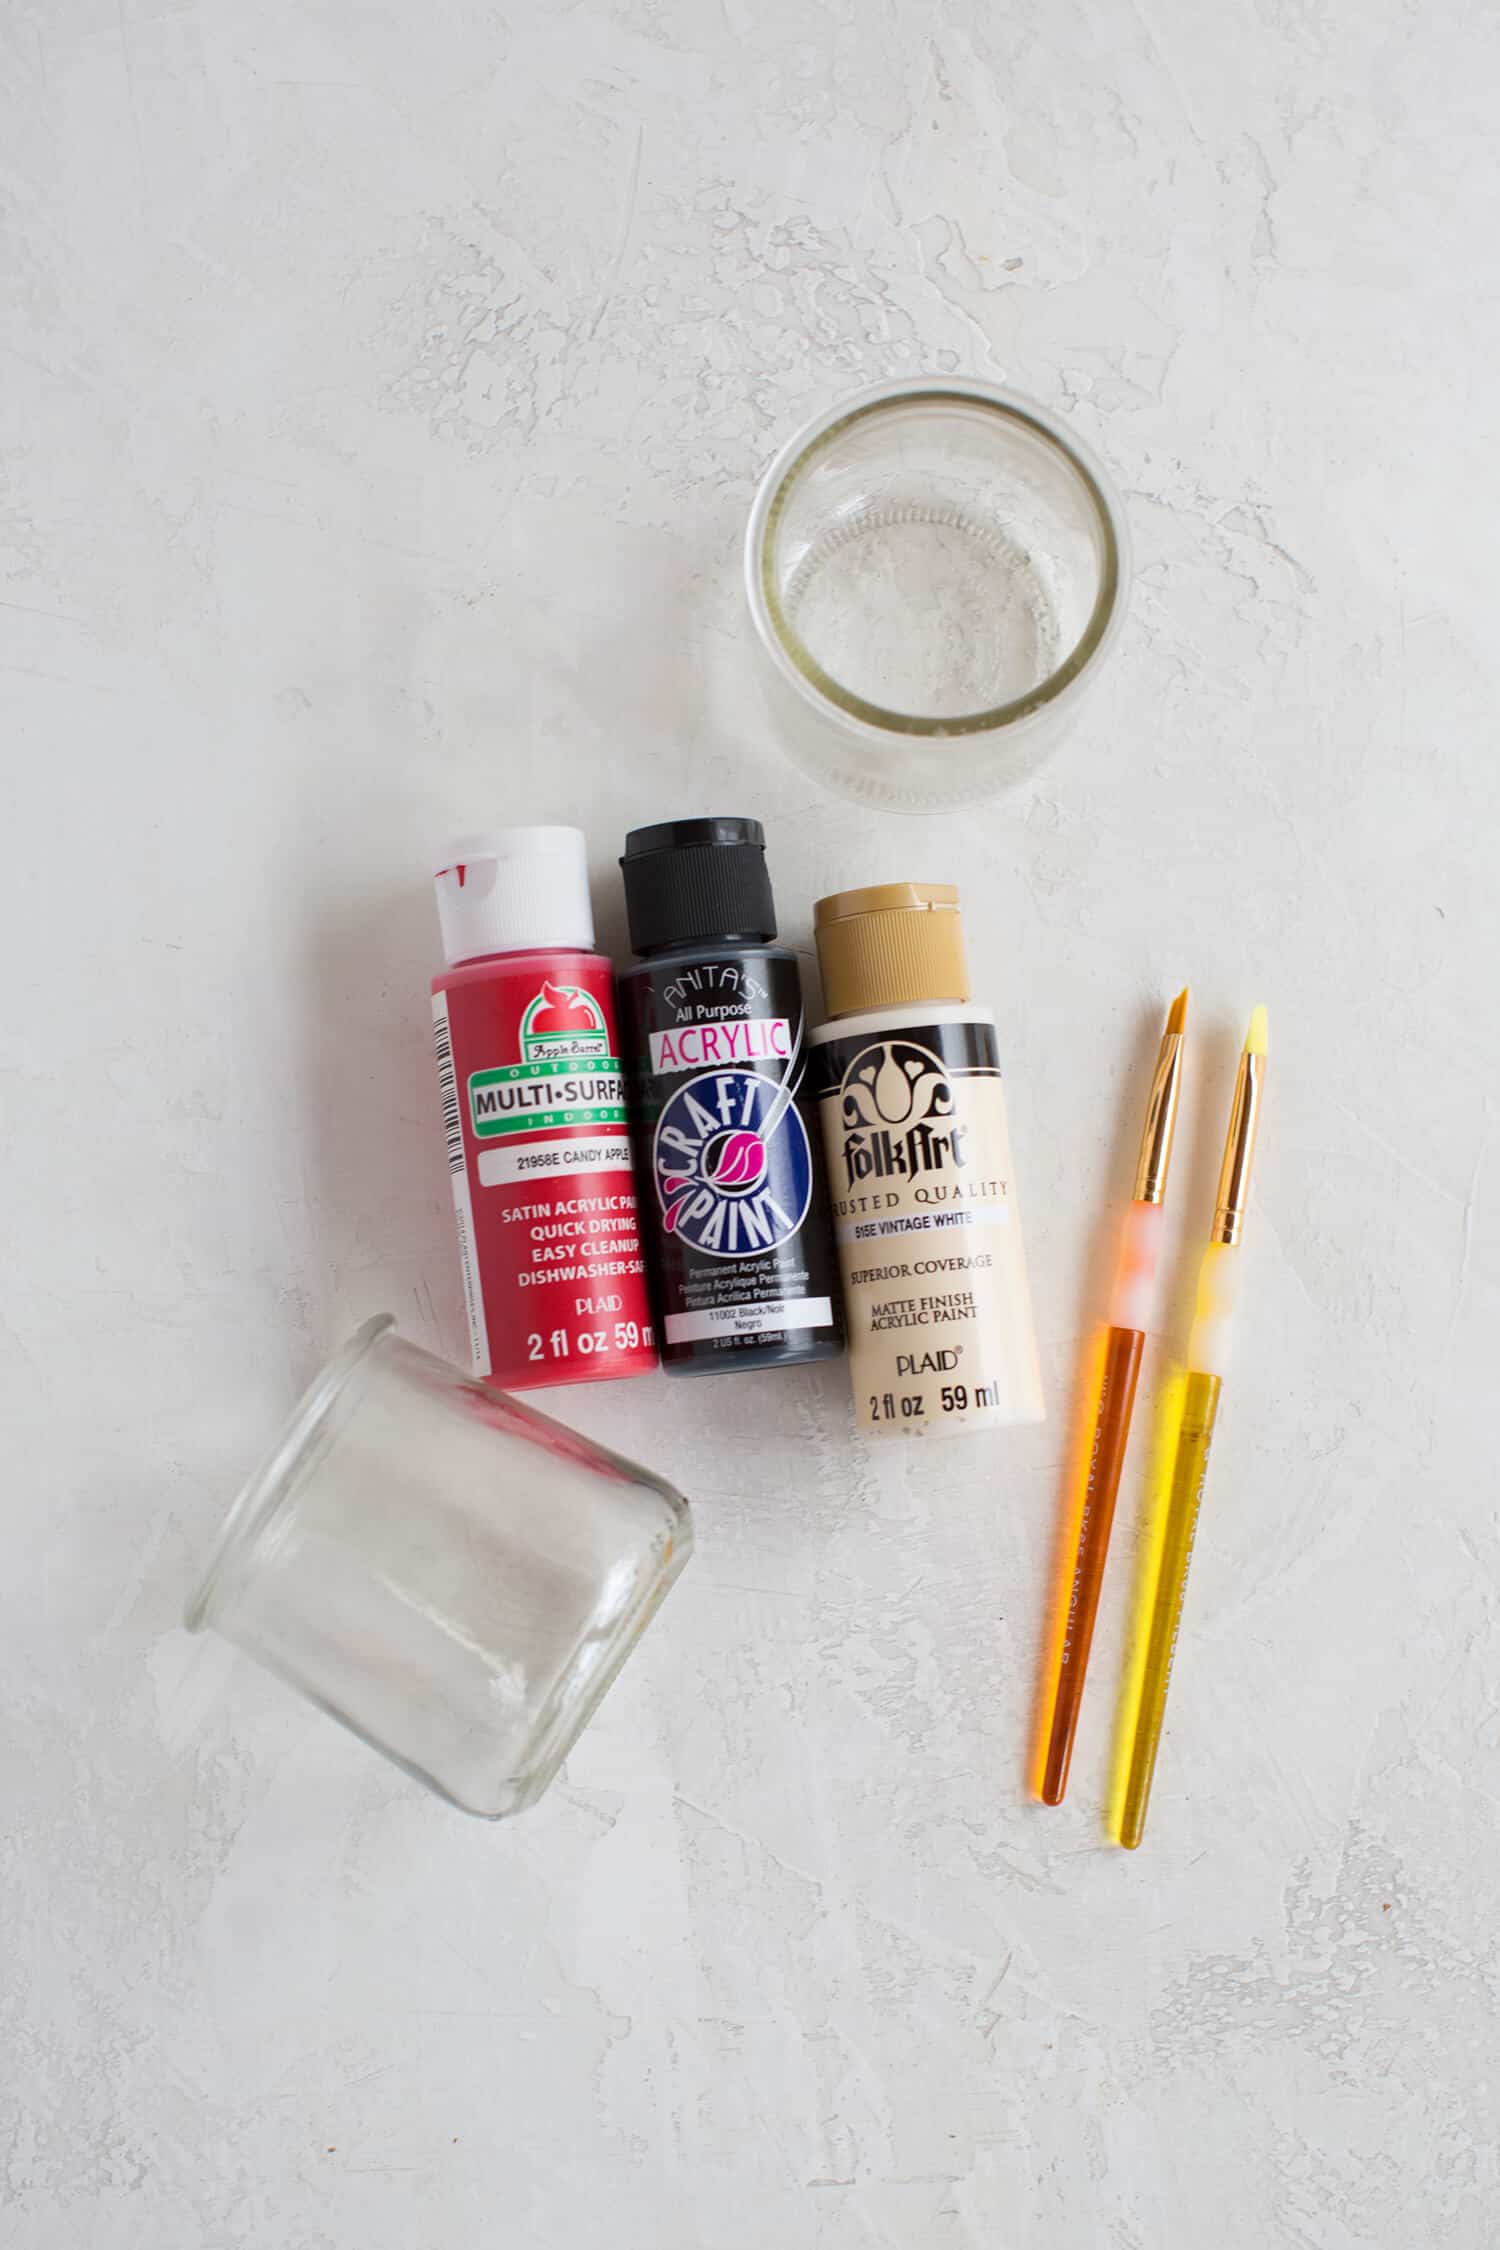 Painted planter supplies:
-clean Oui by Yoplait glass jars
-paint and paint brushes
It’s best to paint the outside of the jar (and easier) so the paint doesn’t soak into any dirt as you water the plant over time.
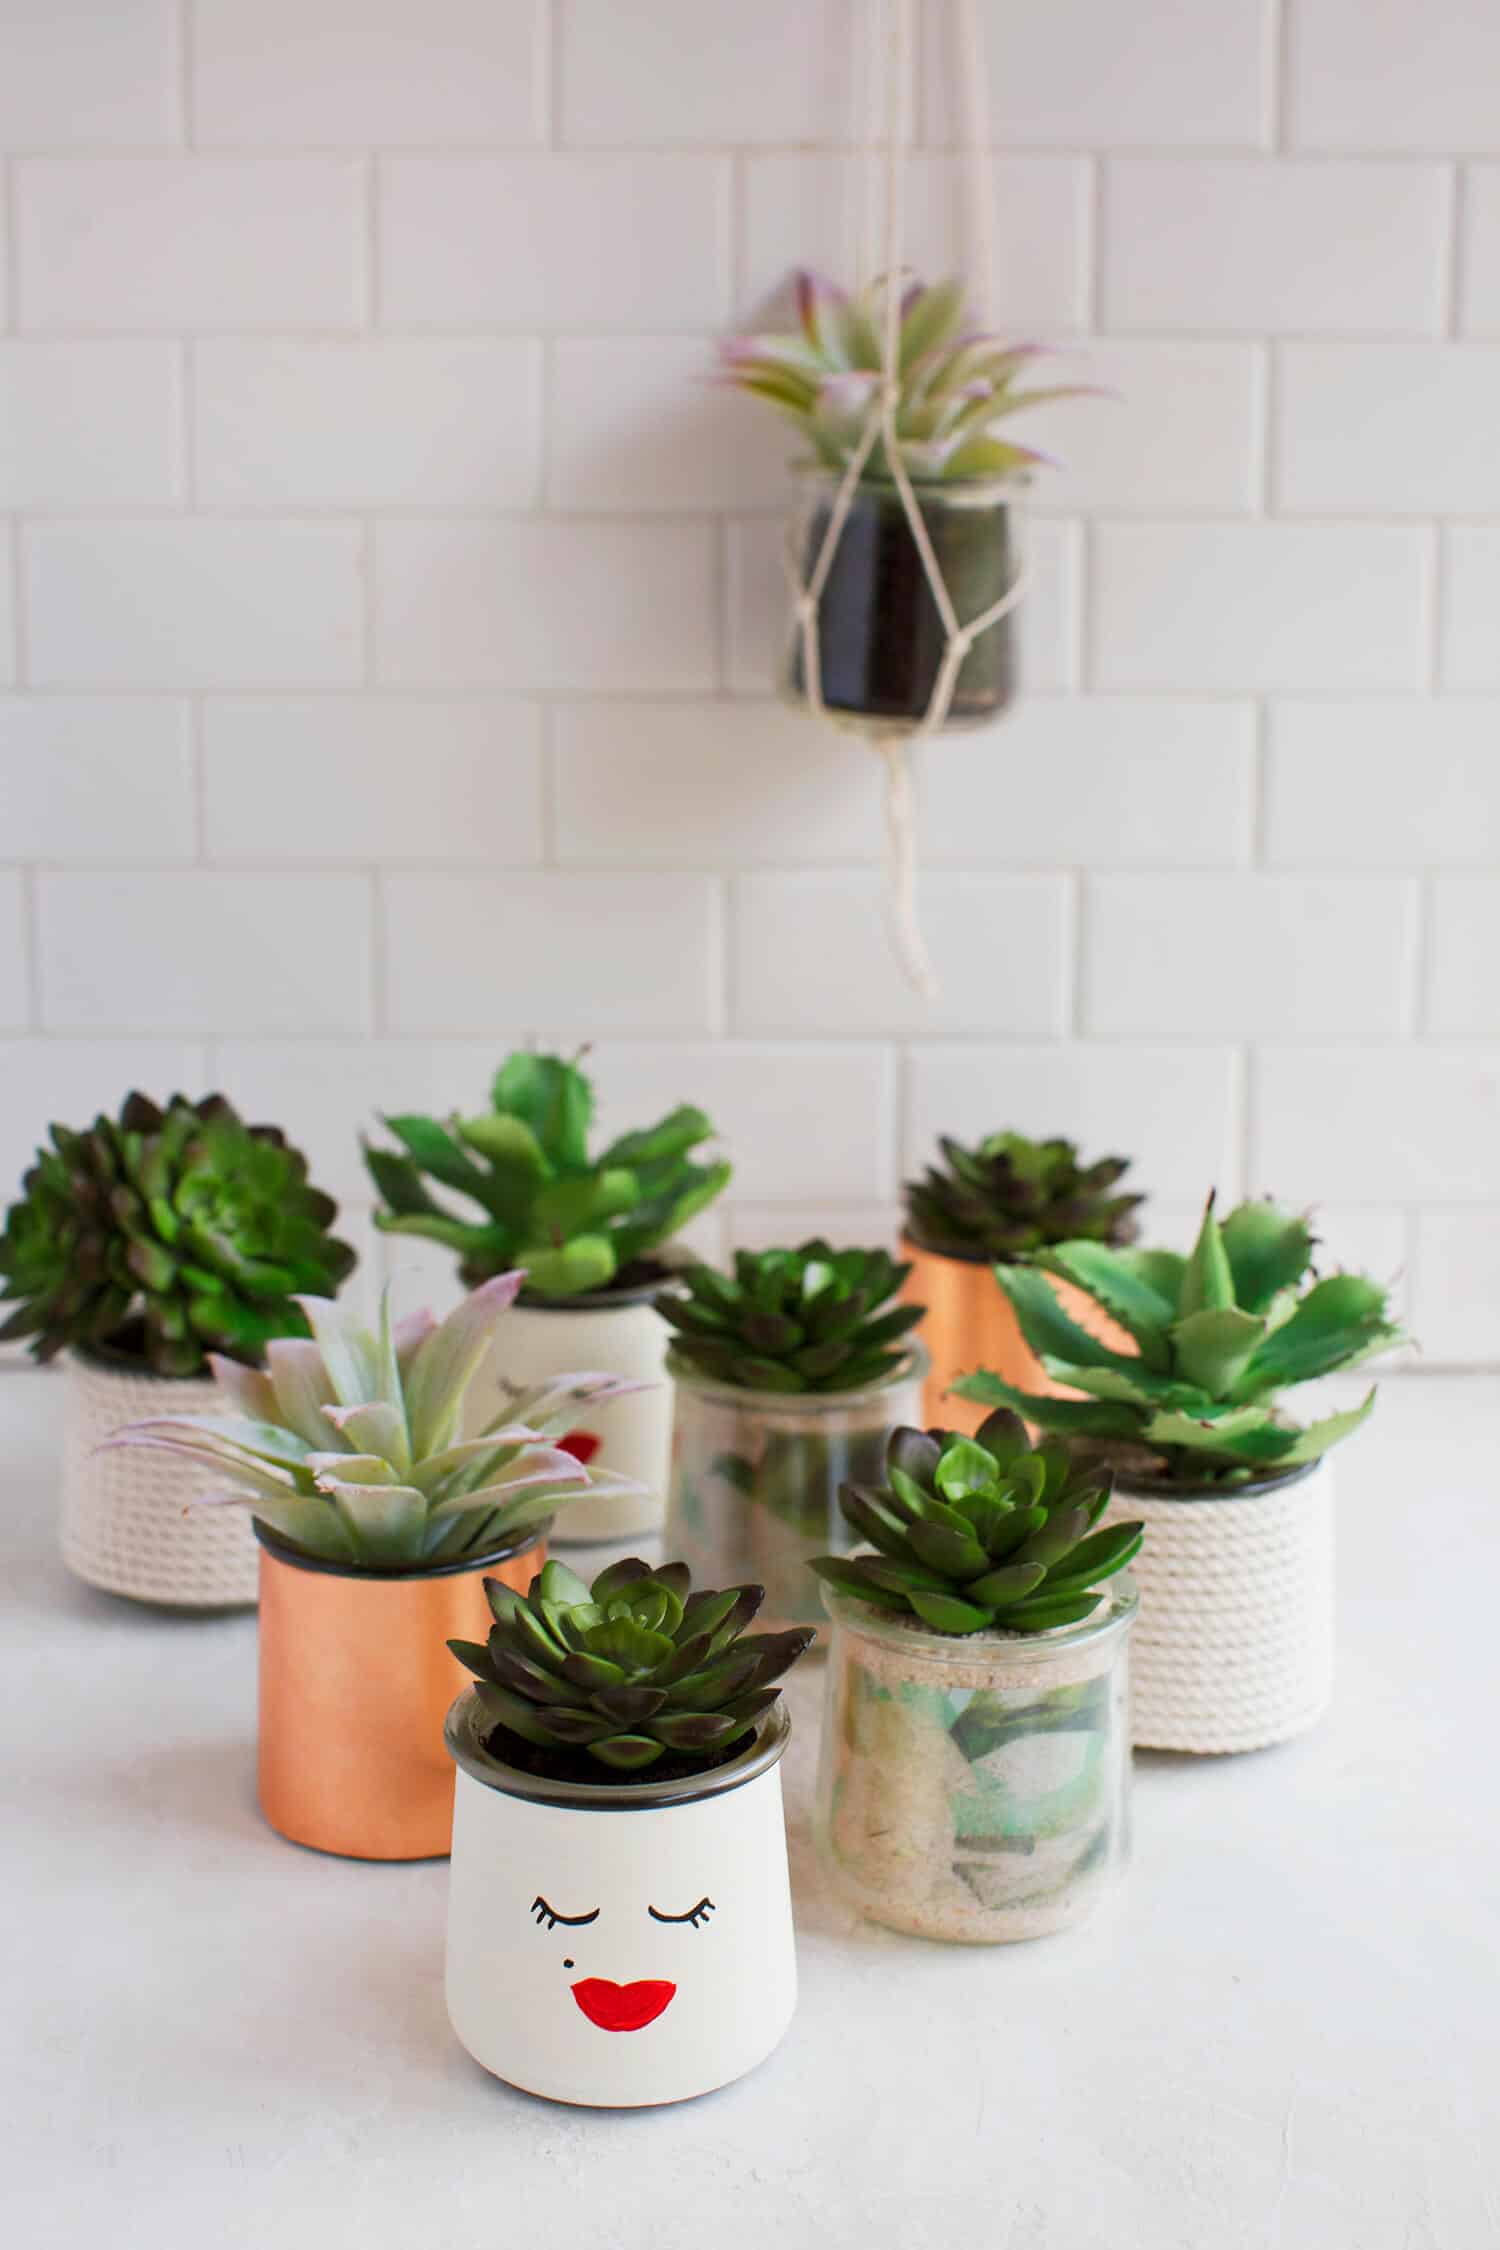
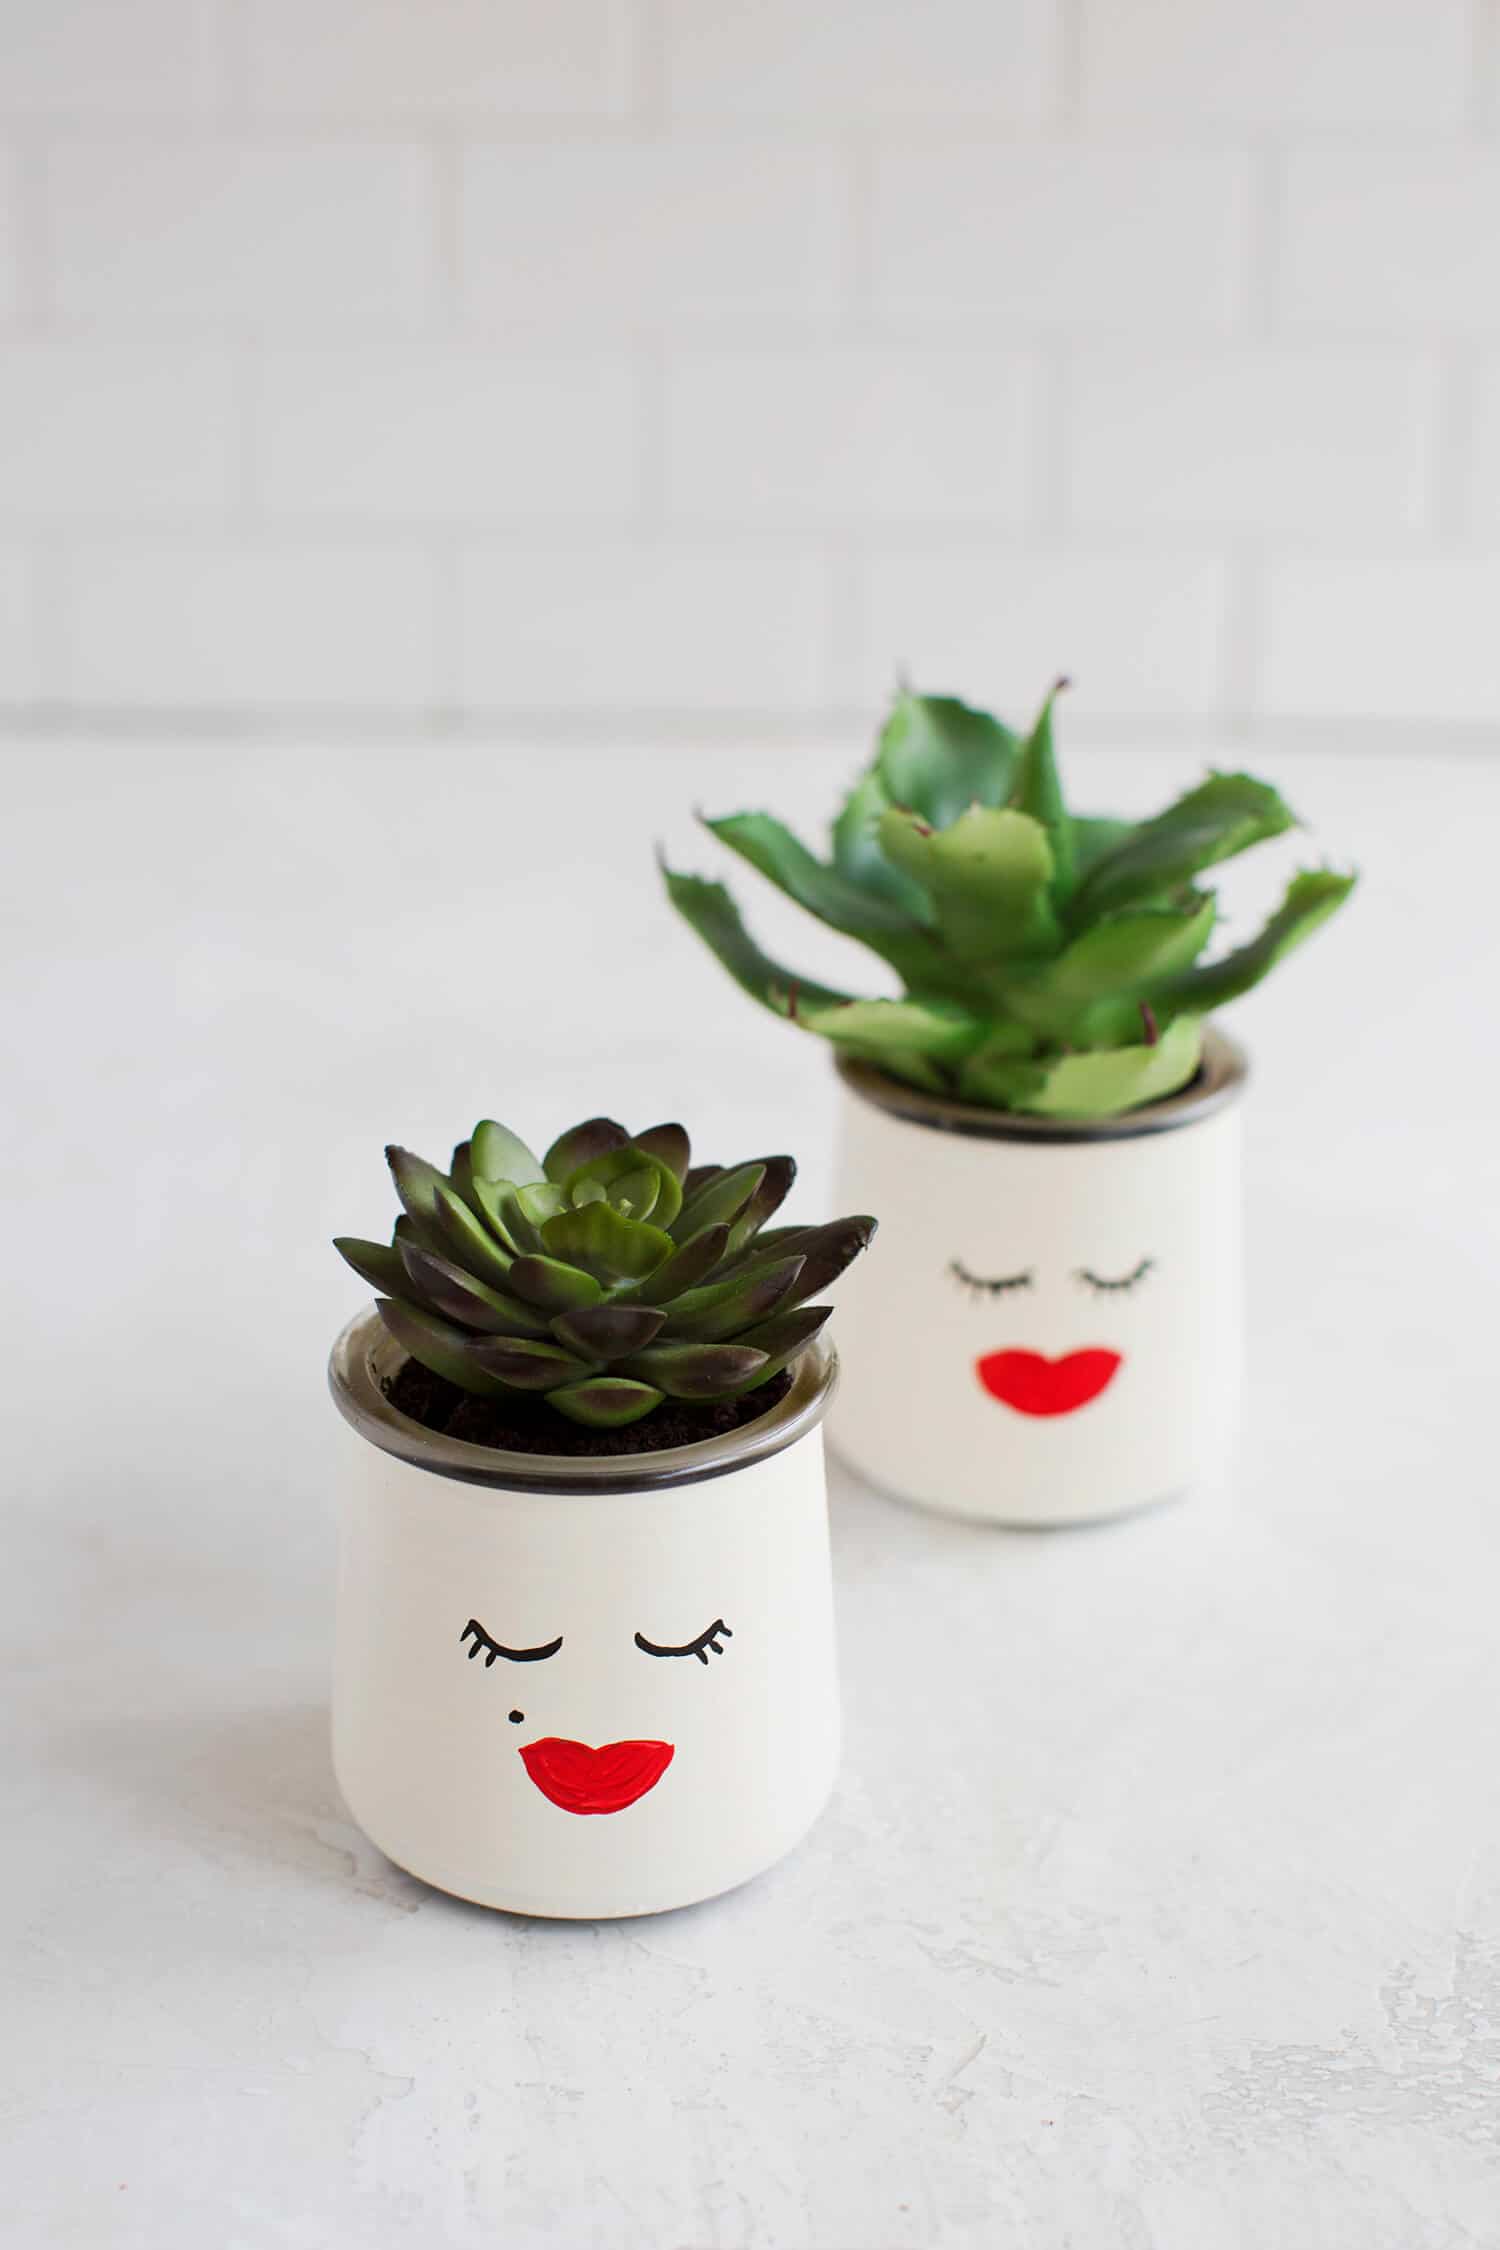 I painted little faces on my jars so that the plants look like (crazy) hair. But you could customize this all sorts of ways, like using chalk paint so you can label the jars with the plant type. This would be great if you’re making a mini indoor herb garden for cooking with. Paint whatever designs you like—follow your heart. 🙂
![]() Packing tape transfer planter supplies:
Packing tape transfer planter supplies:
-clean Oui by Yoplait glass jars
-clear packing tape
-photos or magazine pages
-water
This one is a fun way to add a little (removable) color or design to your jar.
![]() You can see step-by-step instructions for how to achieve a tape transfer here. I love that this one is partially see through, and would be great for an air plant display too. (Am I obsessed with air plants? Maybe.)
You can see step-by-step instructions for how to achieve a tape transfer here. I love that this one is partially see through, and would be great for an air plant display too. (Am I obsessed with air plants? Maybe.)
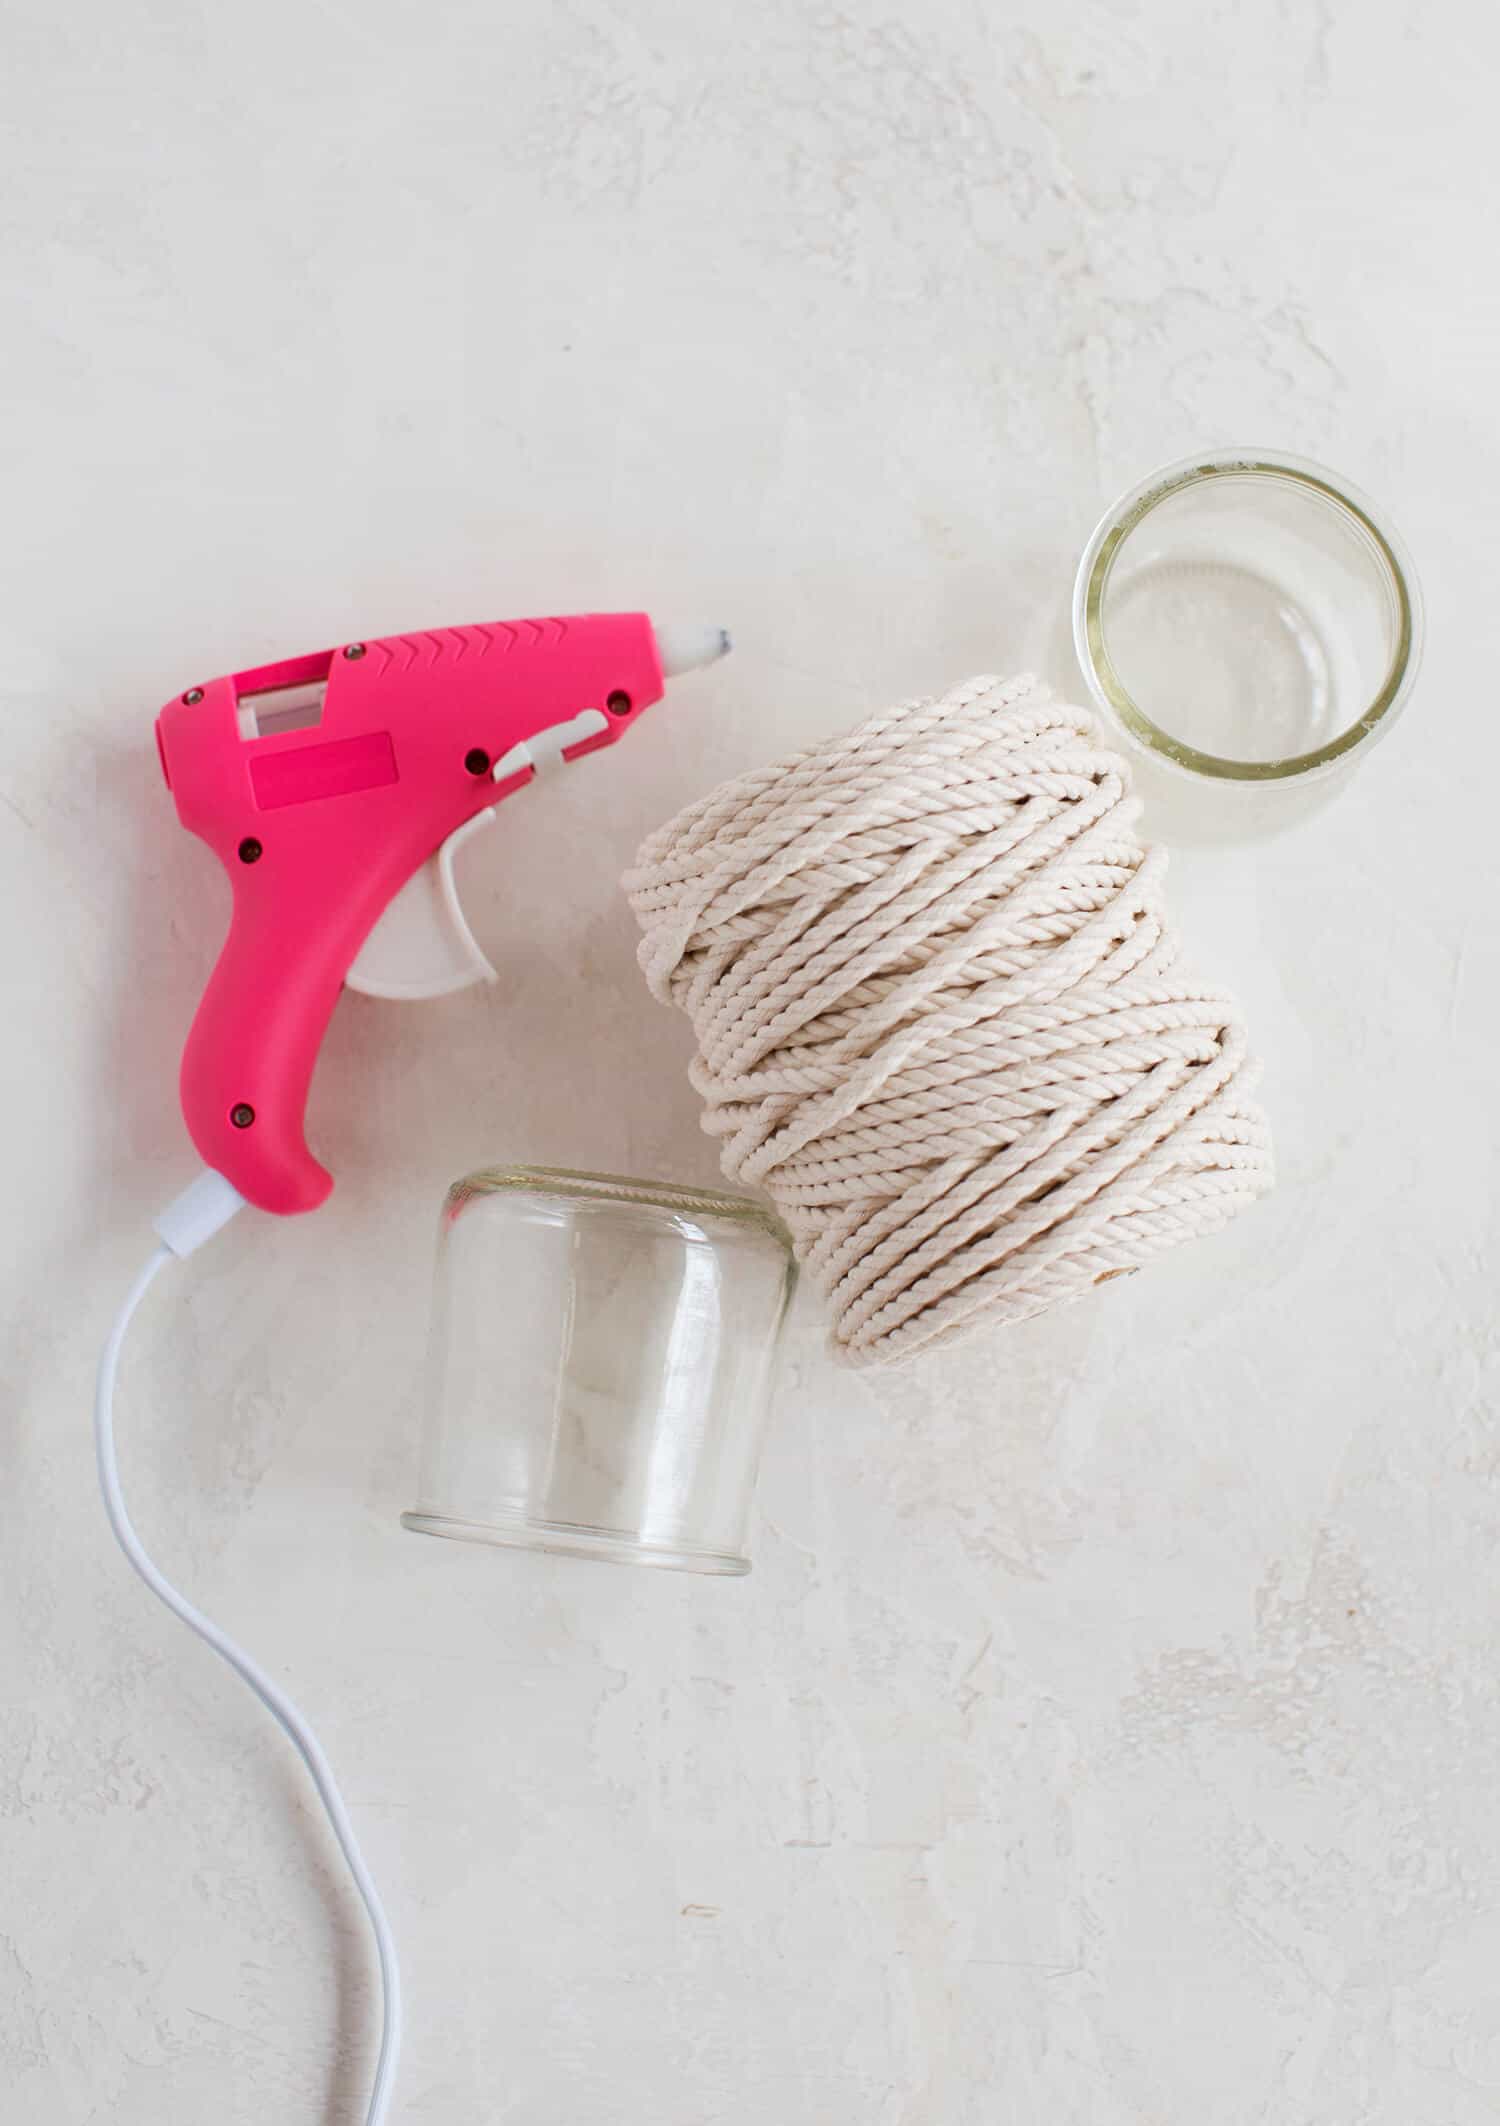 Rope planter supplies:
-clean Oui by Yoplait glass jars
-rope
-scissors
-hot glue gun
I always feel like a REAL crafter when I break out my hot glue gun. Ha!
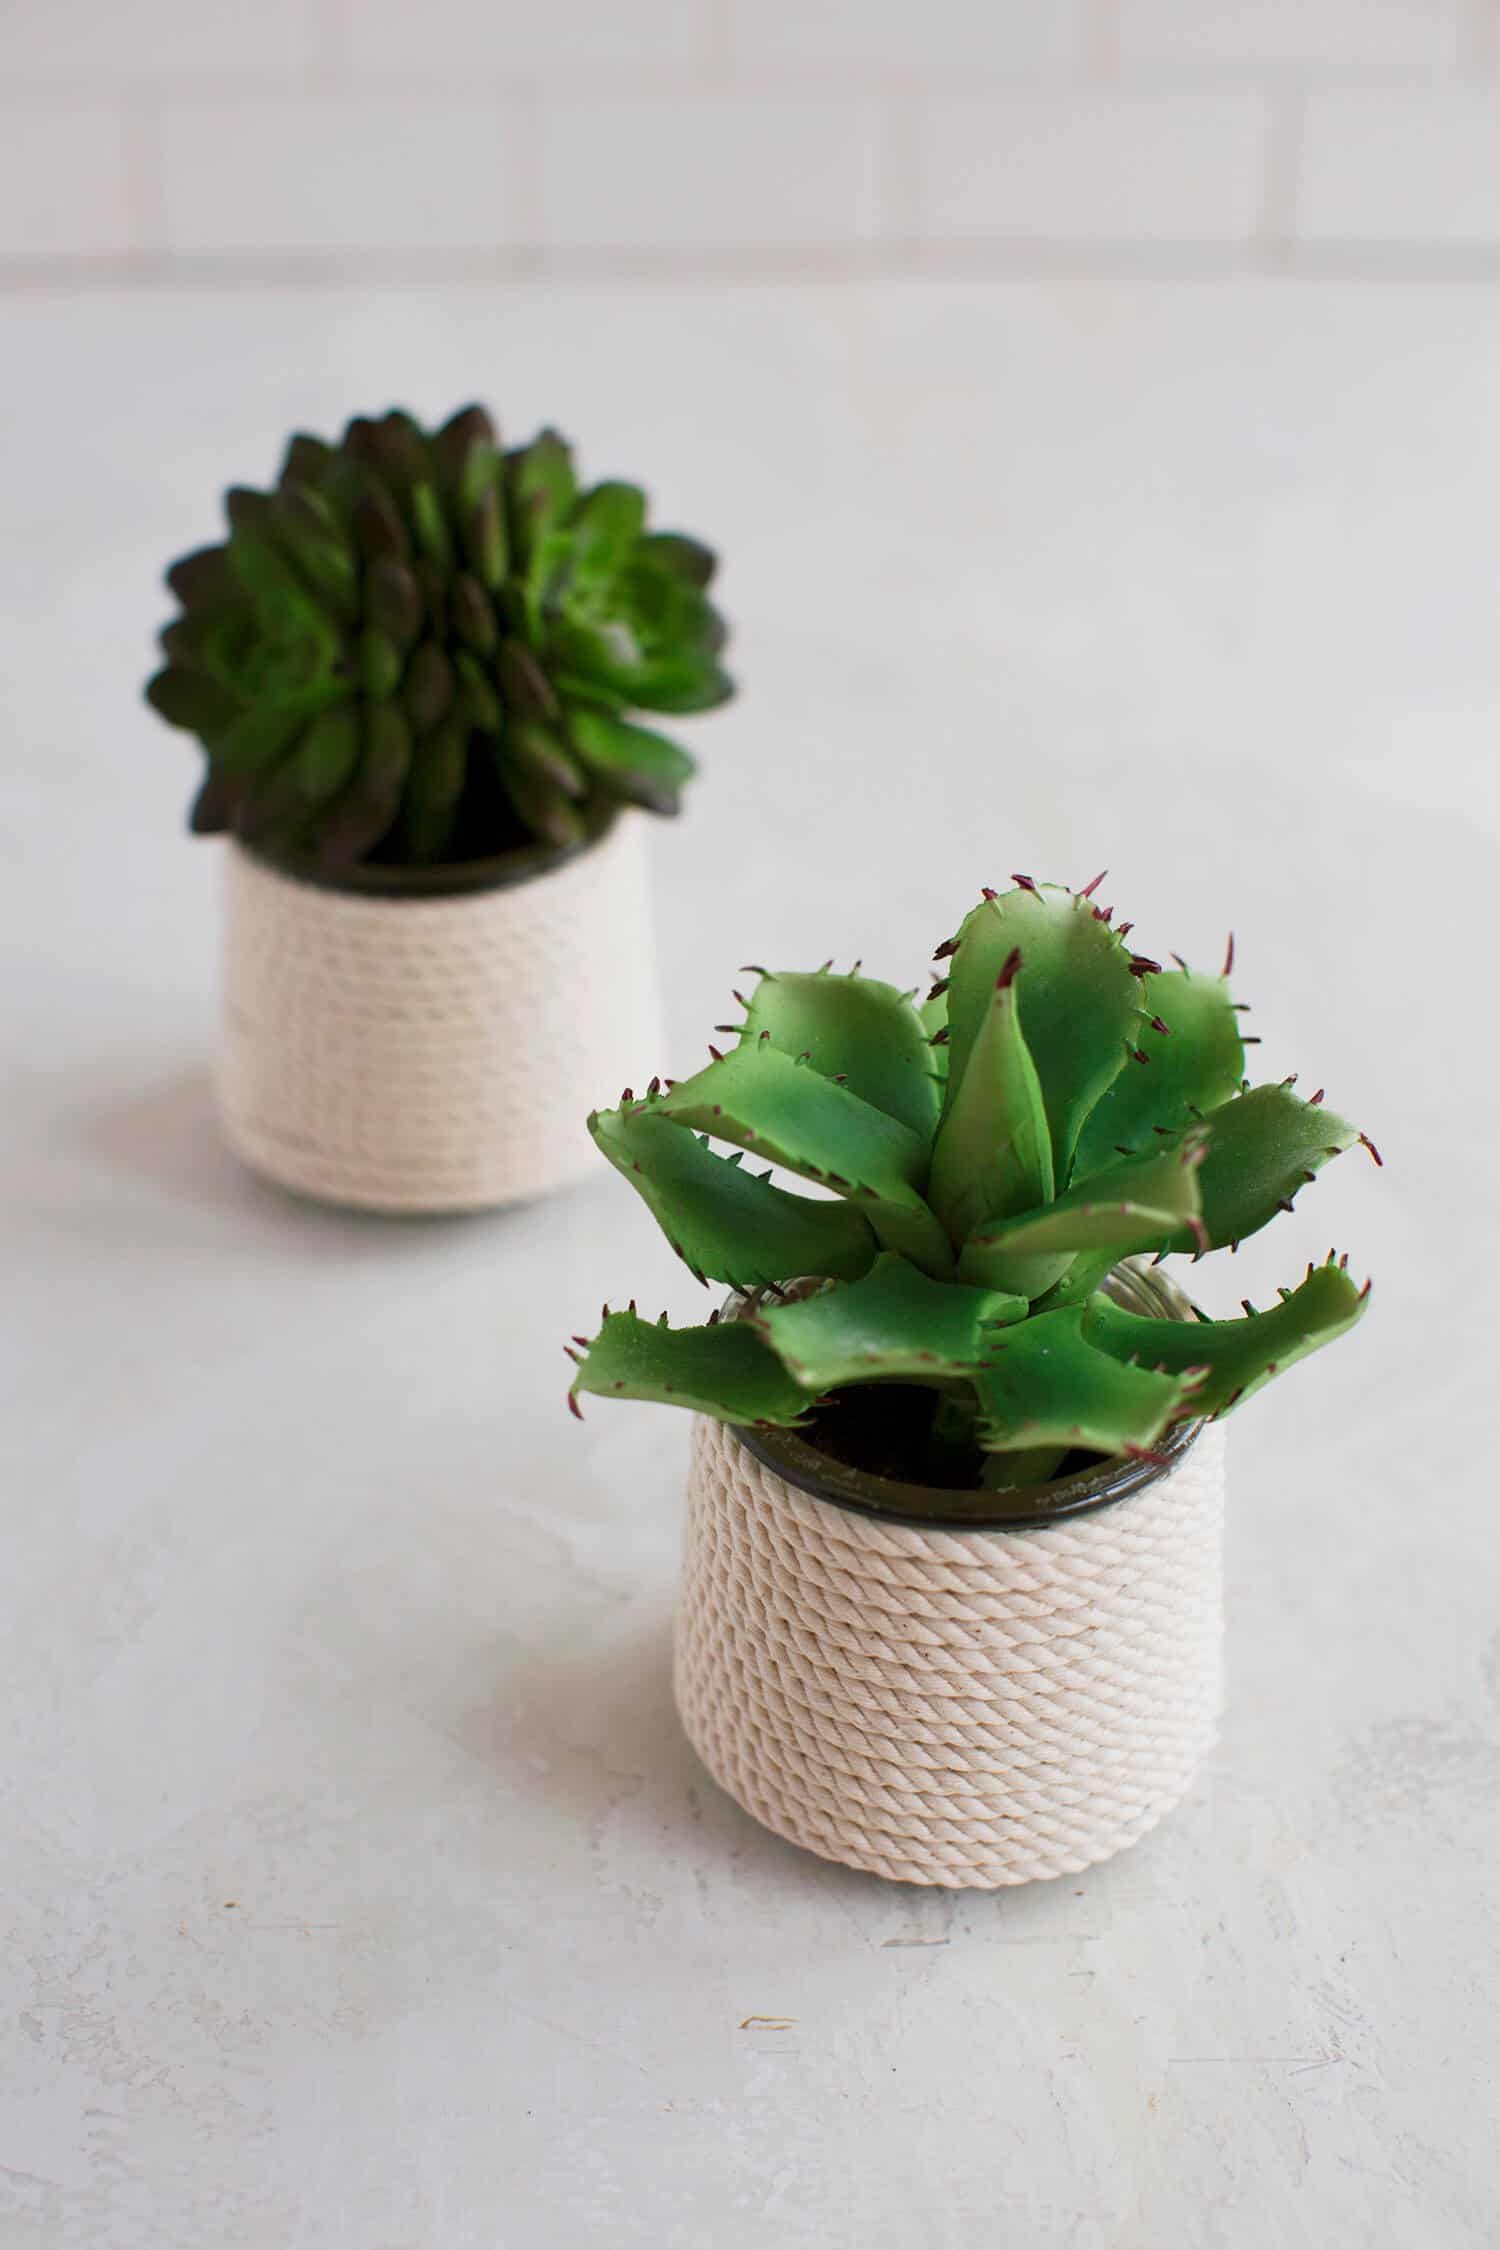 Simply wrap the rope around the jar, gluing in the ‘back’ of the jar as you go. Once you get toward the end, cut the rope and glue in place. These are super simple but the rope adds a really nice, subtle texture. You could jazz these up by dyeing the rope, or partially dyeing for an ombre effect.
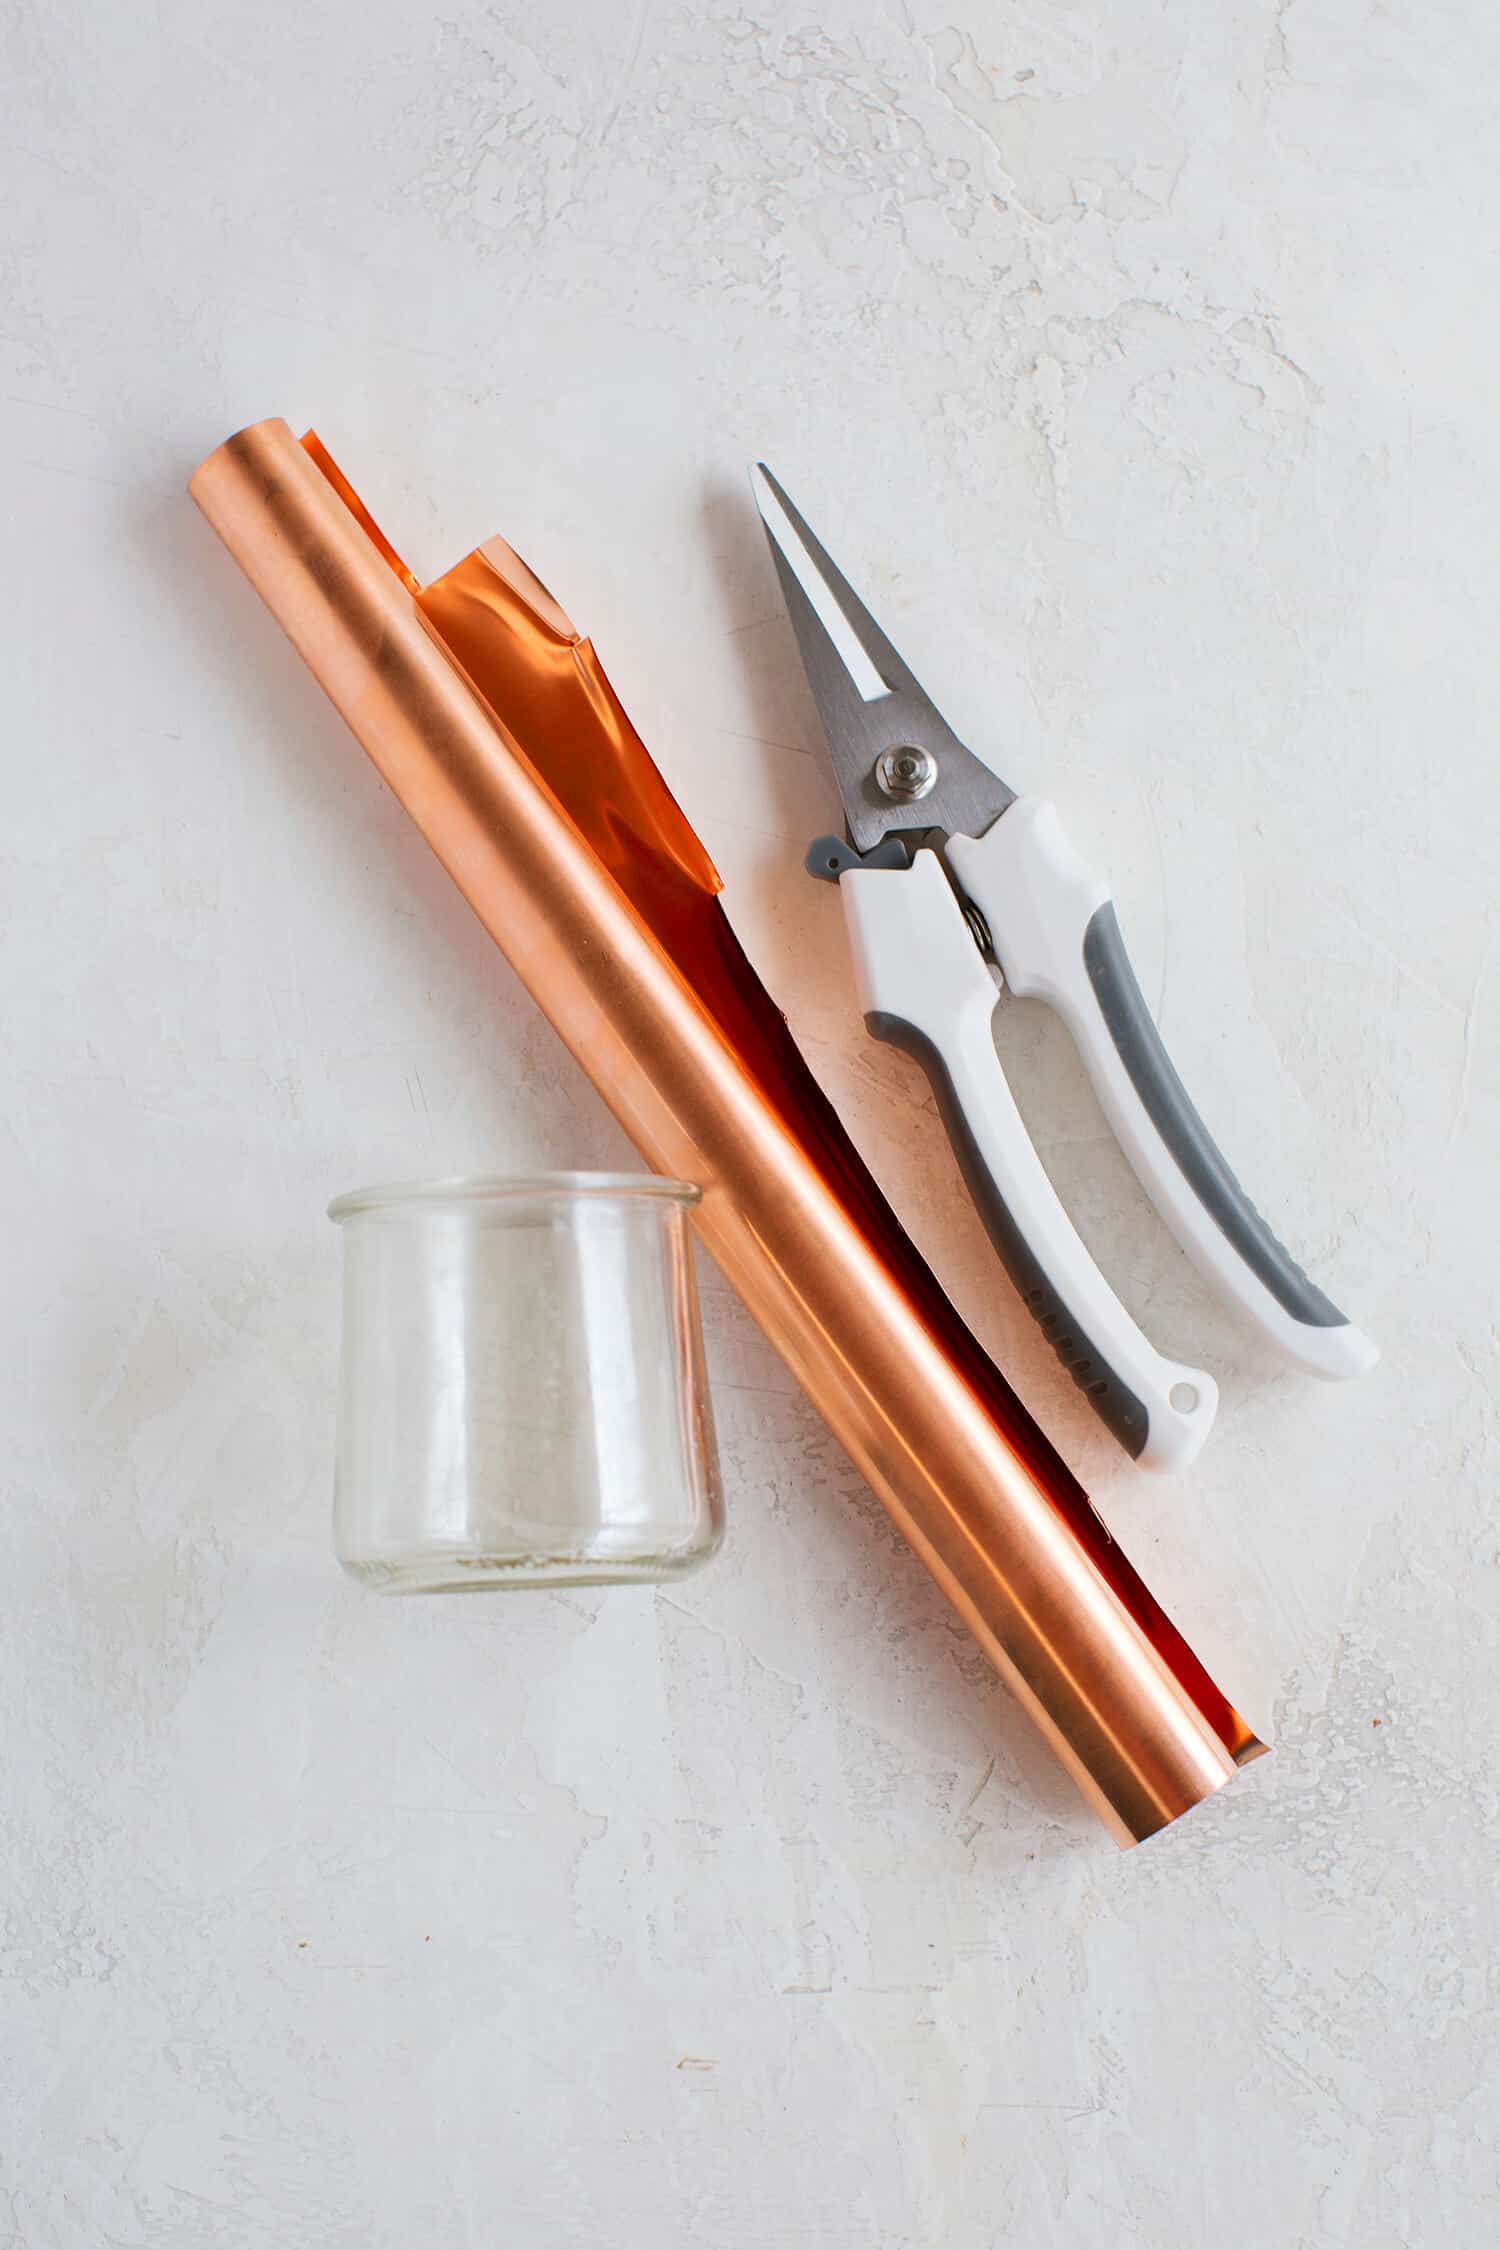 Copper planter supplies:
-clean Oui by Yoplait glass jars
-copper sheet metal
-metal snippers
-hot glue gun
Here you want really thin sheet metal—the kind that is sold at craft stores (not hardware stores). The sheet metal is really easy to work with and cut, but you still may want to consider wearing work gloves.
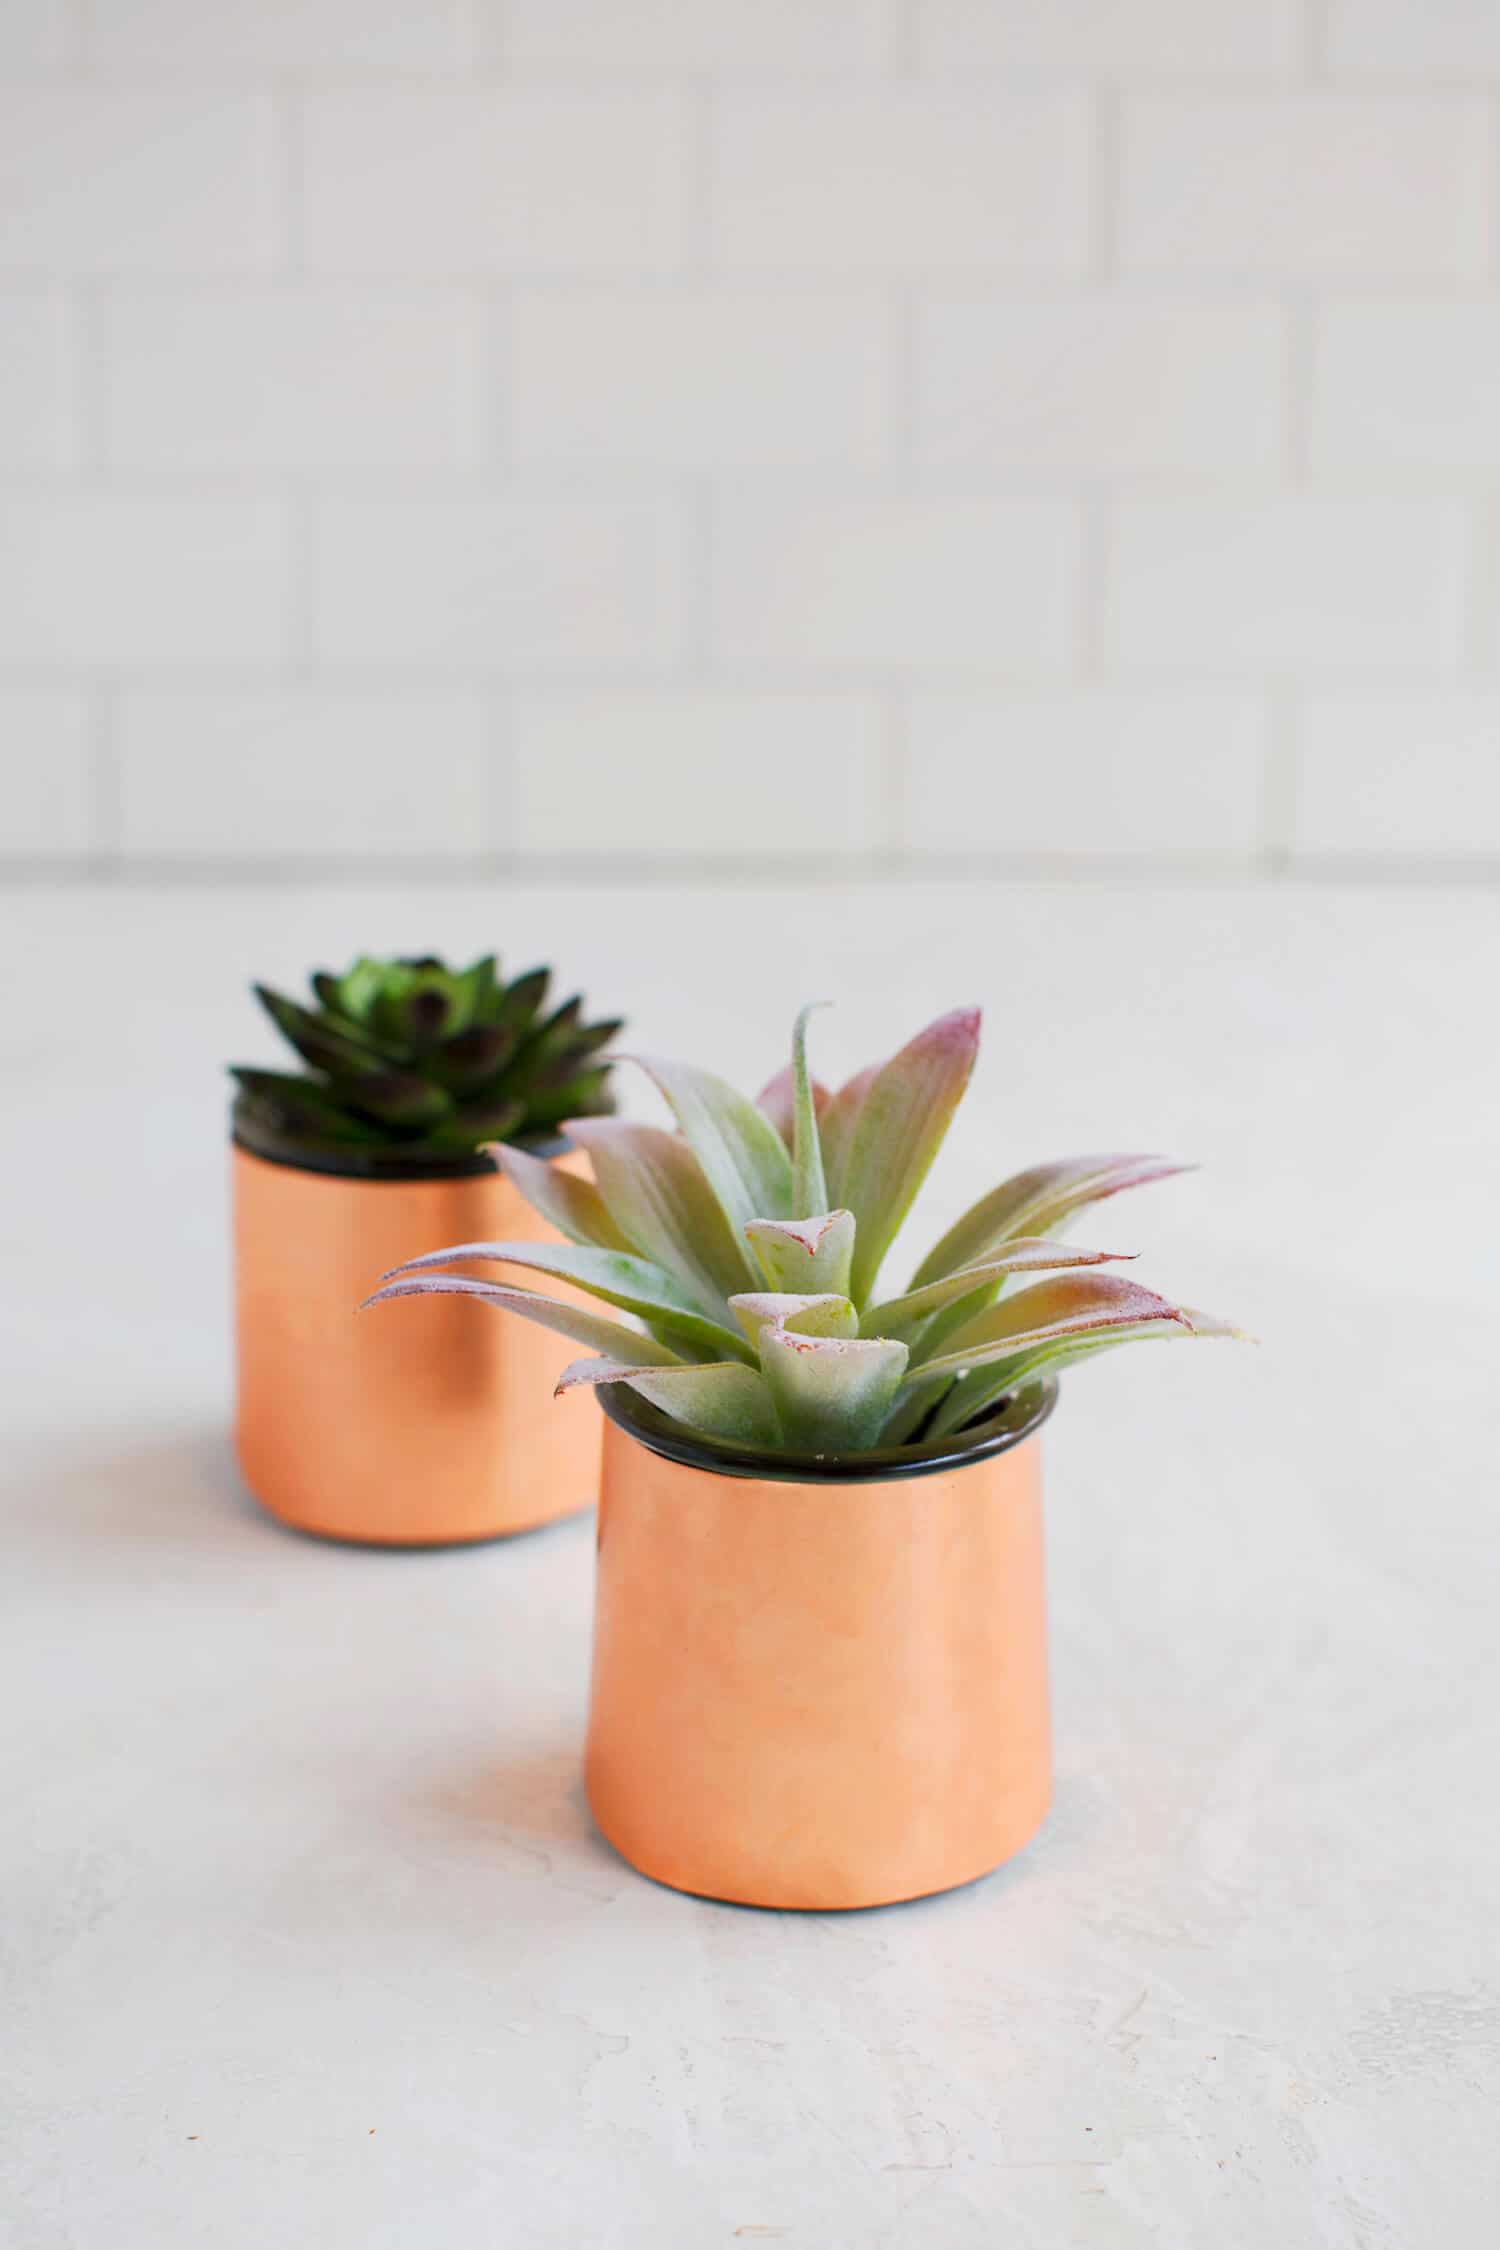 If your jar has a shape, like these have a slight taper, it’s best to create a paper template first so that you can see how the metal will wrap around the jar. Then cut out your copper and glue in place. We have quite a bit of copper accents around our home, so these turned out to be my favorites.
 So there you go, five easy planter DIYs to try this weekend. Happy crafting! xo. Emma
28 Comments
These are so easy and would make such a fun weekend activity. Love that it’s upcycled too. My favourite design is probably the tape transfer planter or the rope planter! Or you know, just plain glass, because that’s minimalism at its best imo! 🙂
Charmaine Ng | Architecture & Lifestyle Blog
http://charmainenyw.com
I don’t care for the texture of Oui but I still find myself getting them now and then for their cute little glasses! Maybe I just need to find the right flavor.
Great little tutorials! I also keep them as traveling water jars for painting!
What a great idea to reuse those beautiful jars!
These are so cute! Love the idea of reusing the jars for this. I love the painting one and hanging ones the best! Definitely going to be trying these this weekend!
Such cute ideas! I need to get more plants for around my house.
xo
Kristina
eyreeffect.com
Love this idea! The copper ones and the tape transfer are my faves. 🙂
Thanks for the fun and easy ideas! More planters means I can go buy more plants right? XD
Why did I just buy new planters…?
Great ideas. thanks for the sharing.
The ones with the faces are absolutely cute, and I also love the copper ones! A brilliant idea for old jars!
https://www.makeandmess.com/
These are the cutest planters! Love the one with the face on it!
I absolutely love planters, and having cute pots are the best!! Love these, they are so cute! xx
https://zoe-ware.blogspot.ca
I LOVE the repurposed yogurt jar idea!! I’m all about reusing and repurposing, and these ideas could work with all kinds of jars, especially used-up candles!
These planters are amazing!
Paige
http://thehappyflammily.com
You can put some orange essential oil on labels and they will rub right off!
Oh my goodness, these are such cute ideas! I love how you conserve these containers. I would love to try this will my old candles.
xo Logan
https://peculiarporter.com
Love these so cute x
Too cute! I love this!
– Grace | The Keen Kind
Wow, cool tips for the ones with a green thumb! btw, I loooove succulents, and you have such a variety of them 🙂
there soooooooooooooooooo cool but I think the kissing ones are weird !!!!!!!!!!!!!!!!!!!!!!!!!!!!!!!!
I love Oui, but even more I LOVE the little pots. What great ideas for re-using them. I have a few saved, but I hadn’t decided what to do with them yet. Thank you for posting this!
I love the yogurt and the project! I finally moved to an area that has glass recycling, so I don’t feel so guilty, too.
I kept a few jars with no plan- I’m glad you tested out sticky label removal, I’ve been struggling to get the glue off but I didn’t want to get a whole bottle of something gross just for a couple of sticky jars.
What kind of paint did you use?
Hi Emma, they are wonderful. Eucalyptus oil will get rid of the sticky residue. I use paper towel apply the oil to it and hold for a little on the residue and then rub.
I have to admit it. You are very creative! I think I’ll give a shot with my kids!
I am making it now. I love the idea.
Great ideas! I just peeled the labels off with no problem.
I propagate herbs (basil, tarragon, sage, etc.). This is a perfect jar for cuttings. I love seeing the roots flourish through the cleat glass. When the roots are established, I plant the cutting.