 I don’t know about you, but I pretty much live in jeans all year round. I’m always on the lookout for a new pair of classic jeans to be a staple in my closet as well as something that looks a little more special too. I love all the current jean trends I’ve been seeing that involve bleach splatters, jean fringe, stepped hems, prints, and strategic distressing and the cool thing is you can do them all at home! Here are five ways you can either DIY a new pair of jeans (just make sure they’ve been washed and dried first) to be the perfect pair you wish the store was selling or transform an old pair of jeans to give them a fabulous second life for more seasons:
Bleach Splatter
 Supplies:
-bleach
-paintbrush
-glass or ceramic dish
-plastic drop cloth
-rubber gloves and protective eyewear
-spray bottle with water (optional)
 Lay your jeans on a large drop cloth in a well-ventilated area (I did mine on my driveway outside). Wear clothes that you wouldn’t mind getting a drop or two of bleach on. If you have a spray bottle, mist your jeans with water so that the bleach will absorb more quickly. Put on your rubber gloves and protective eyewear and pour about ¼ cup of bleach into a bowl. Dip your brush into your bowl, stand over your jeans, and fling your brush at your jeans, splattering them with bleach. Keep flinging the bleach, making sure to change the angle so that you sometimes fling straight at the material and sometimes draw an “X” in the air as well. Once you think you have enough bleach for your taste, leave the jeans for 30 minutes while the bleach absorbs and changes color and then flip the jeans over and repeat on the other side. Once that side has set as well, wash the jeans on the hottest setting recommended for the material and dry.
*BTW, the bleach wasn’t as dramatic on the pair above as I would have wanted since they were already so light, so I just redid it with a slightly darker pair that you see down below.

 Jean Fringe

Supplies:
–jean fringe that matches your color of jeans
-iron or sewing machine (whichever your jean fringe calls for)
-straight pins
-fabric scissors

 Try on your jeans (I used these) and roll them up and pin your fringe at different lengths until you find a length that you like. Mark the top of where you want the fringe to sit with straight pins. Use fabric scissors to cut the jeans ½” below where the pin line is. Pin your fringe to the bottom of your jeans starting in the back so that the fringe goes all the way around and meets perfectly at the starting point again (or you can overlap the starting point a bit if you want). Either sew your fringe on all the way around the cuff or iron the fringe on if the fringe is an iron-on variety.

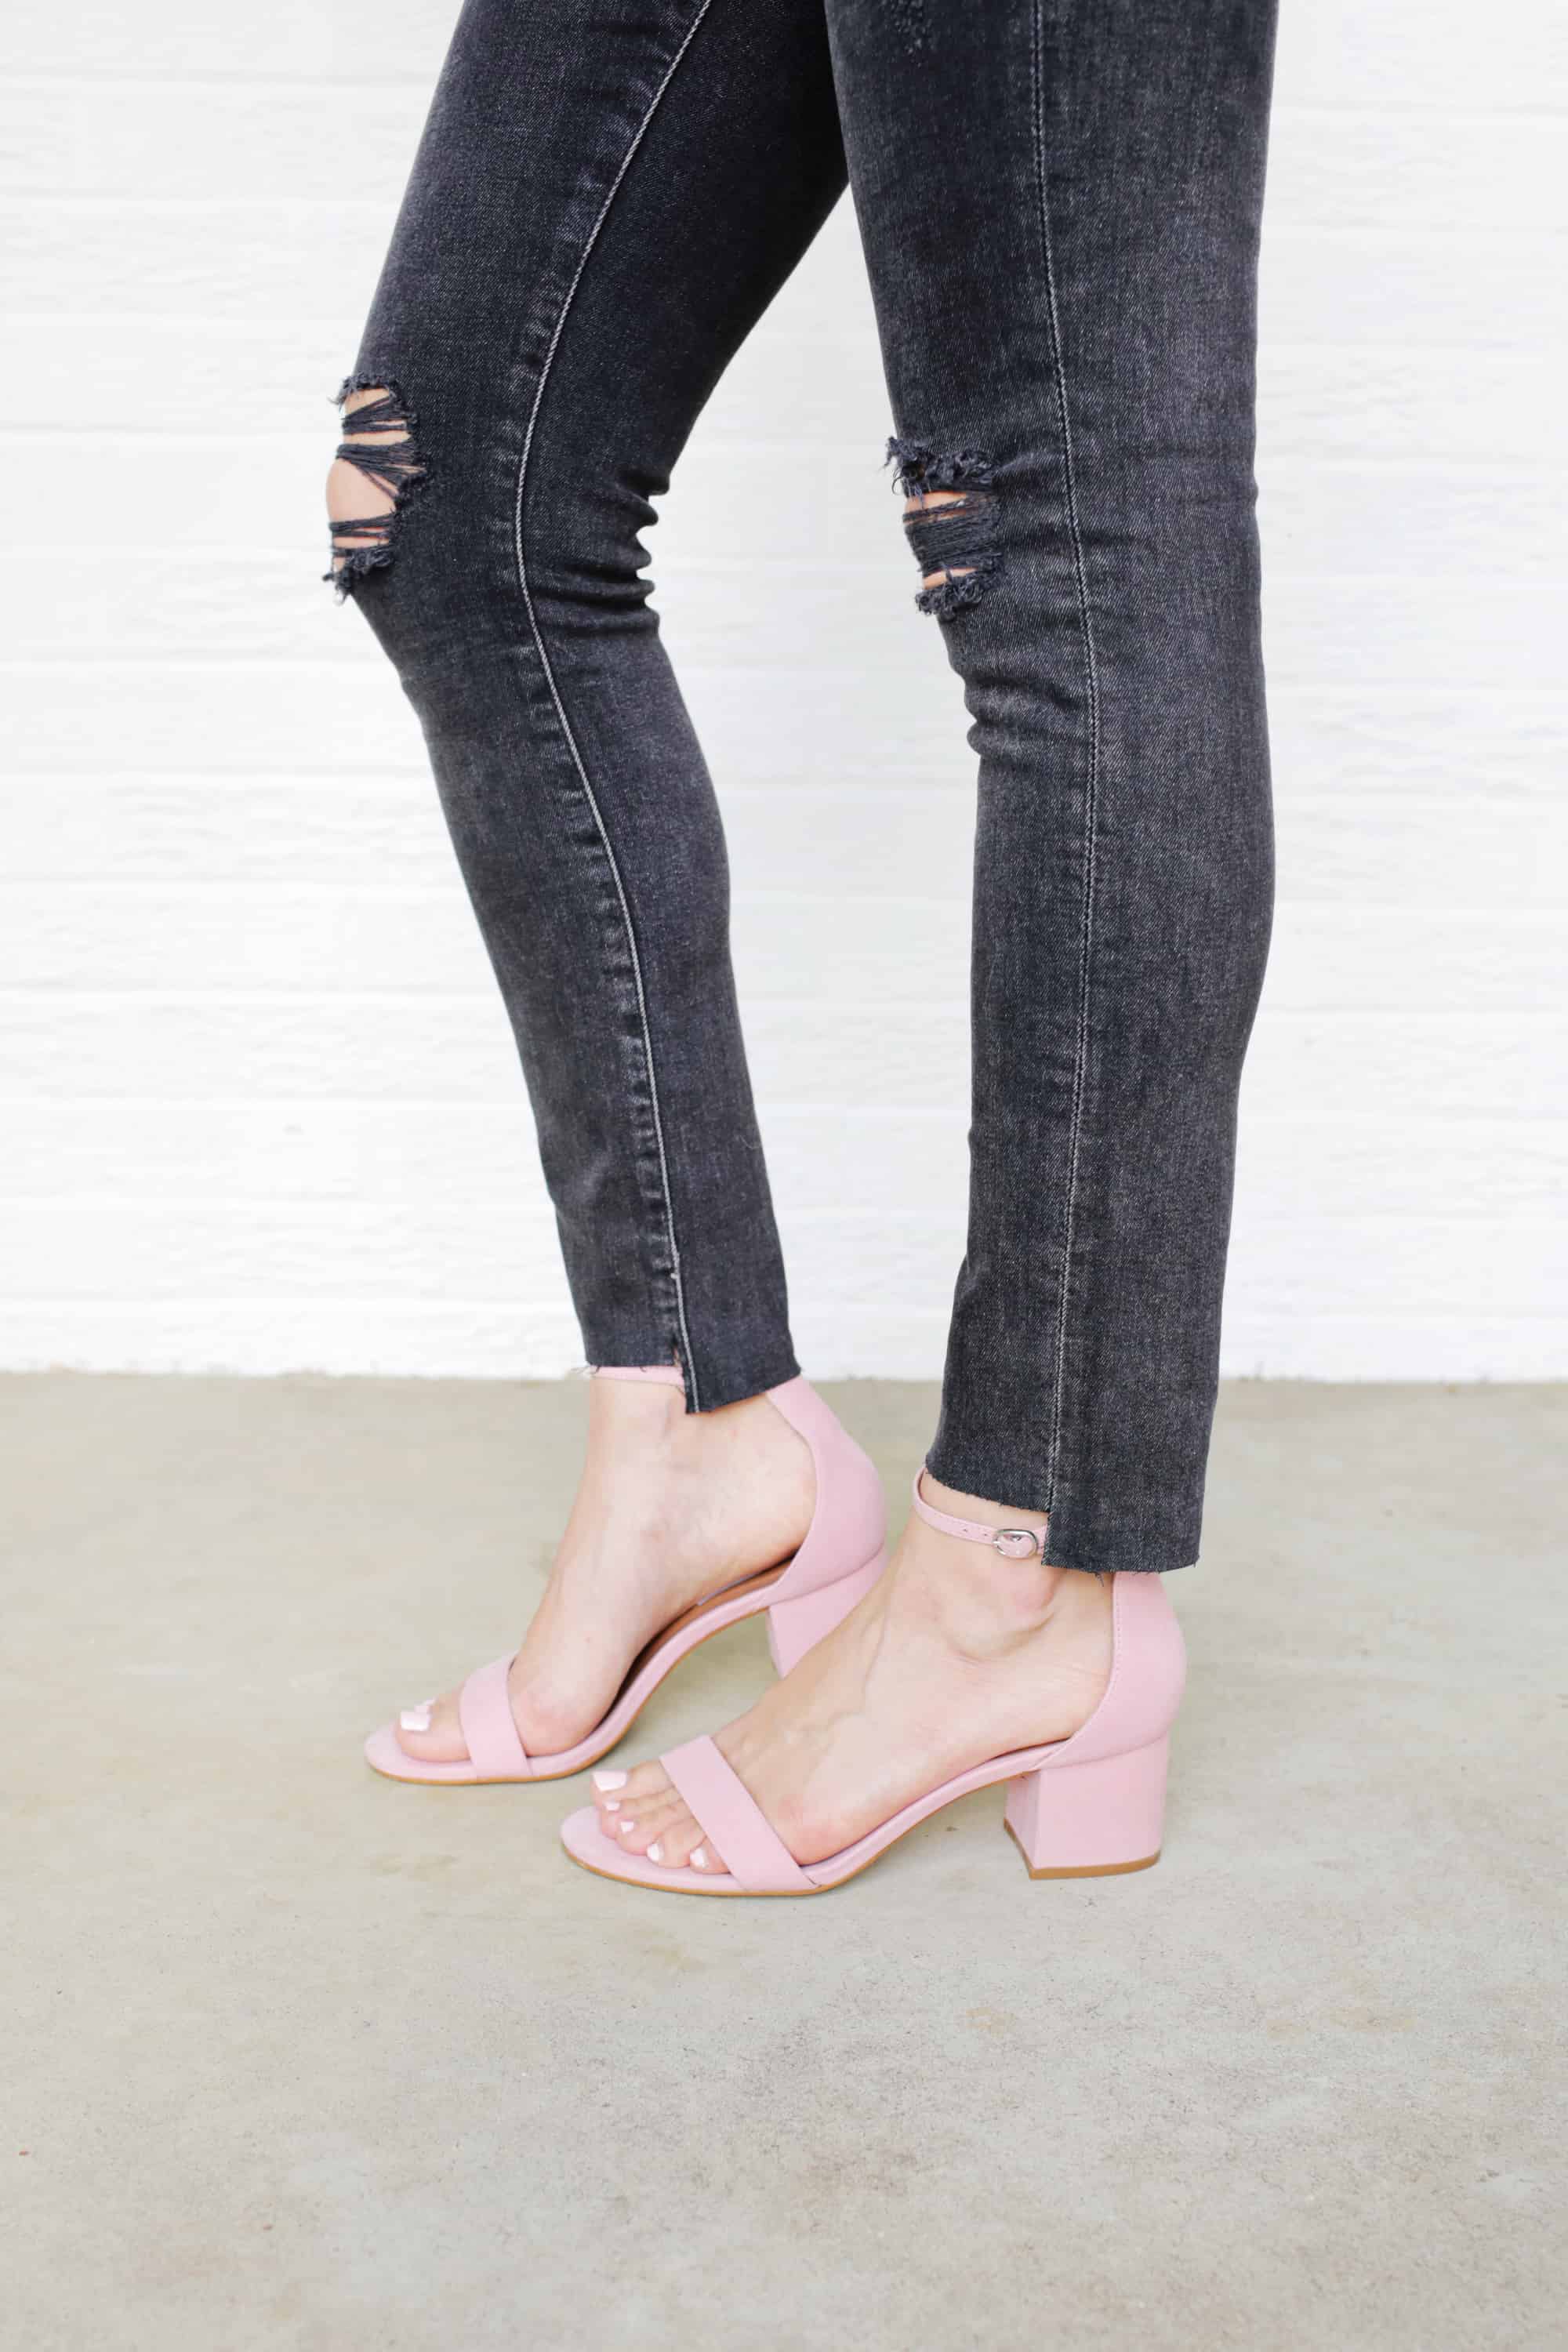
 Stepped Hem

Supplies:
-fabric scissors or rotary cutter, ruler, and cutting mat
-straight pins
-seam ripper


Try on your jeans and decide where you want the front (shorter) hem to fall (these jeans are similar to the ones I used). Use straight pins to mark that length and make sure they are at the same location for each leg so they are even. Cut across your jean legs 1” lower than your pin location. Use fabric scissors or a seam ripper to cut up both sides of each leg, going ¼” past the mark for your shorter front hem. Most jeans have a thicker seam on the inside of the legs than the outside, so just cut in front of that and leave the thick seam intact rather than try and seam rip it apart. Once you cut up each side, cut across at the markings for your front hem and your stepped hem is complete. This method will leave you with a back hem that is 1” longer than the front, so if that’s too big of a difference for you, you can always trim the back hem another ¼” or so for a smaller difference.
 Printed Pattern
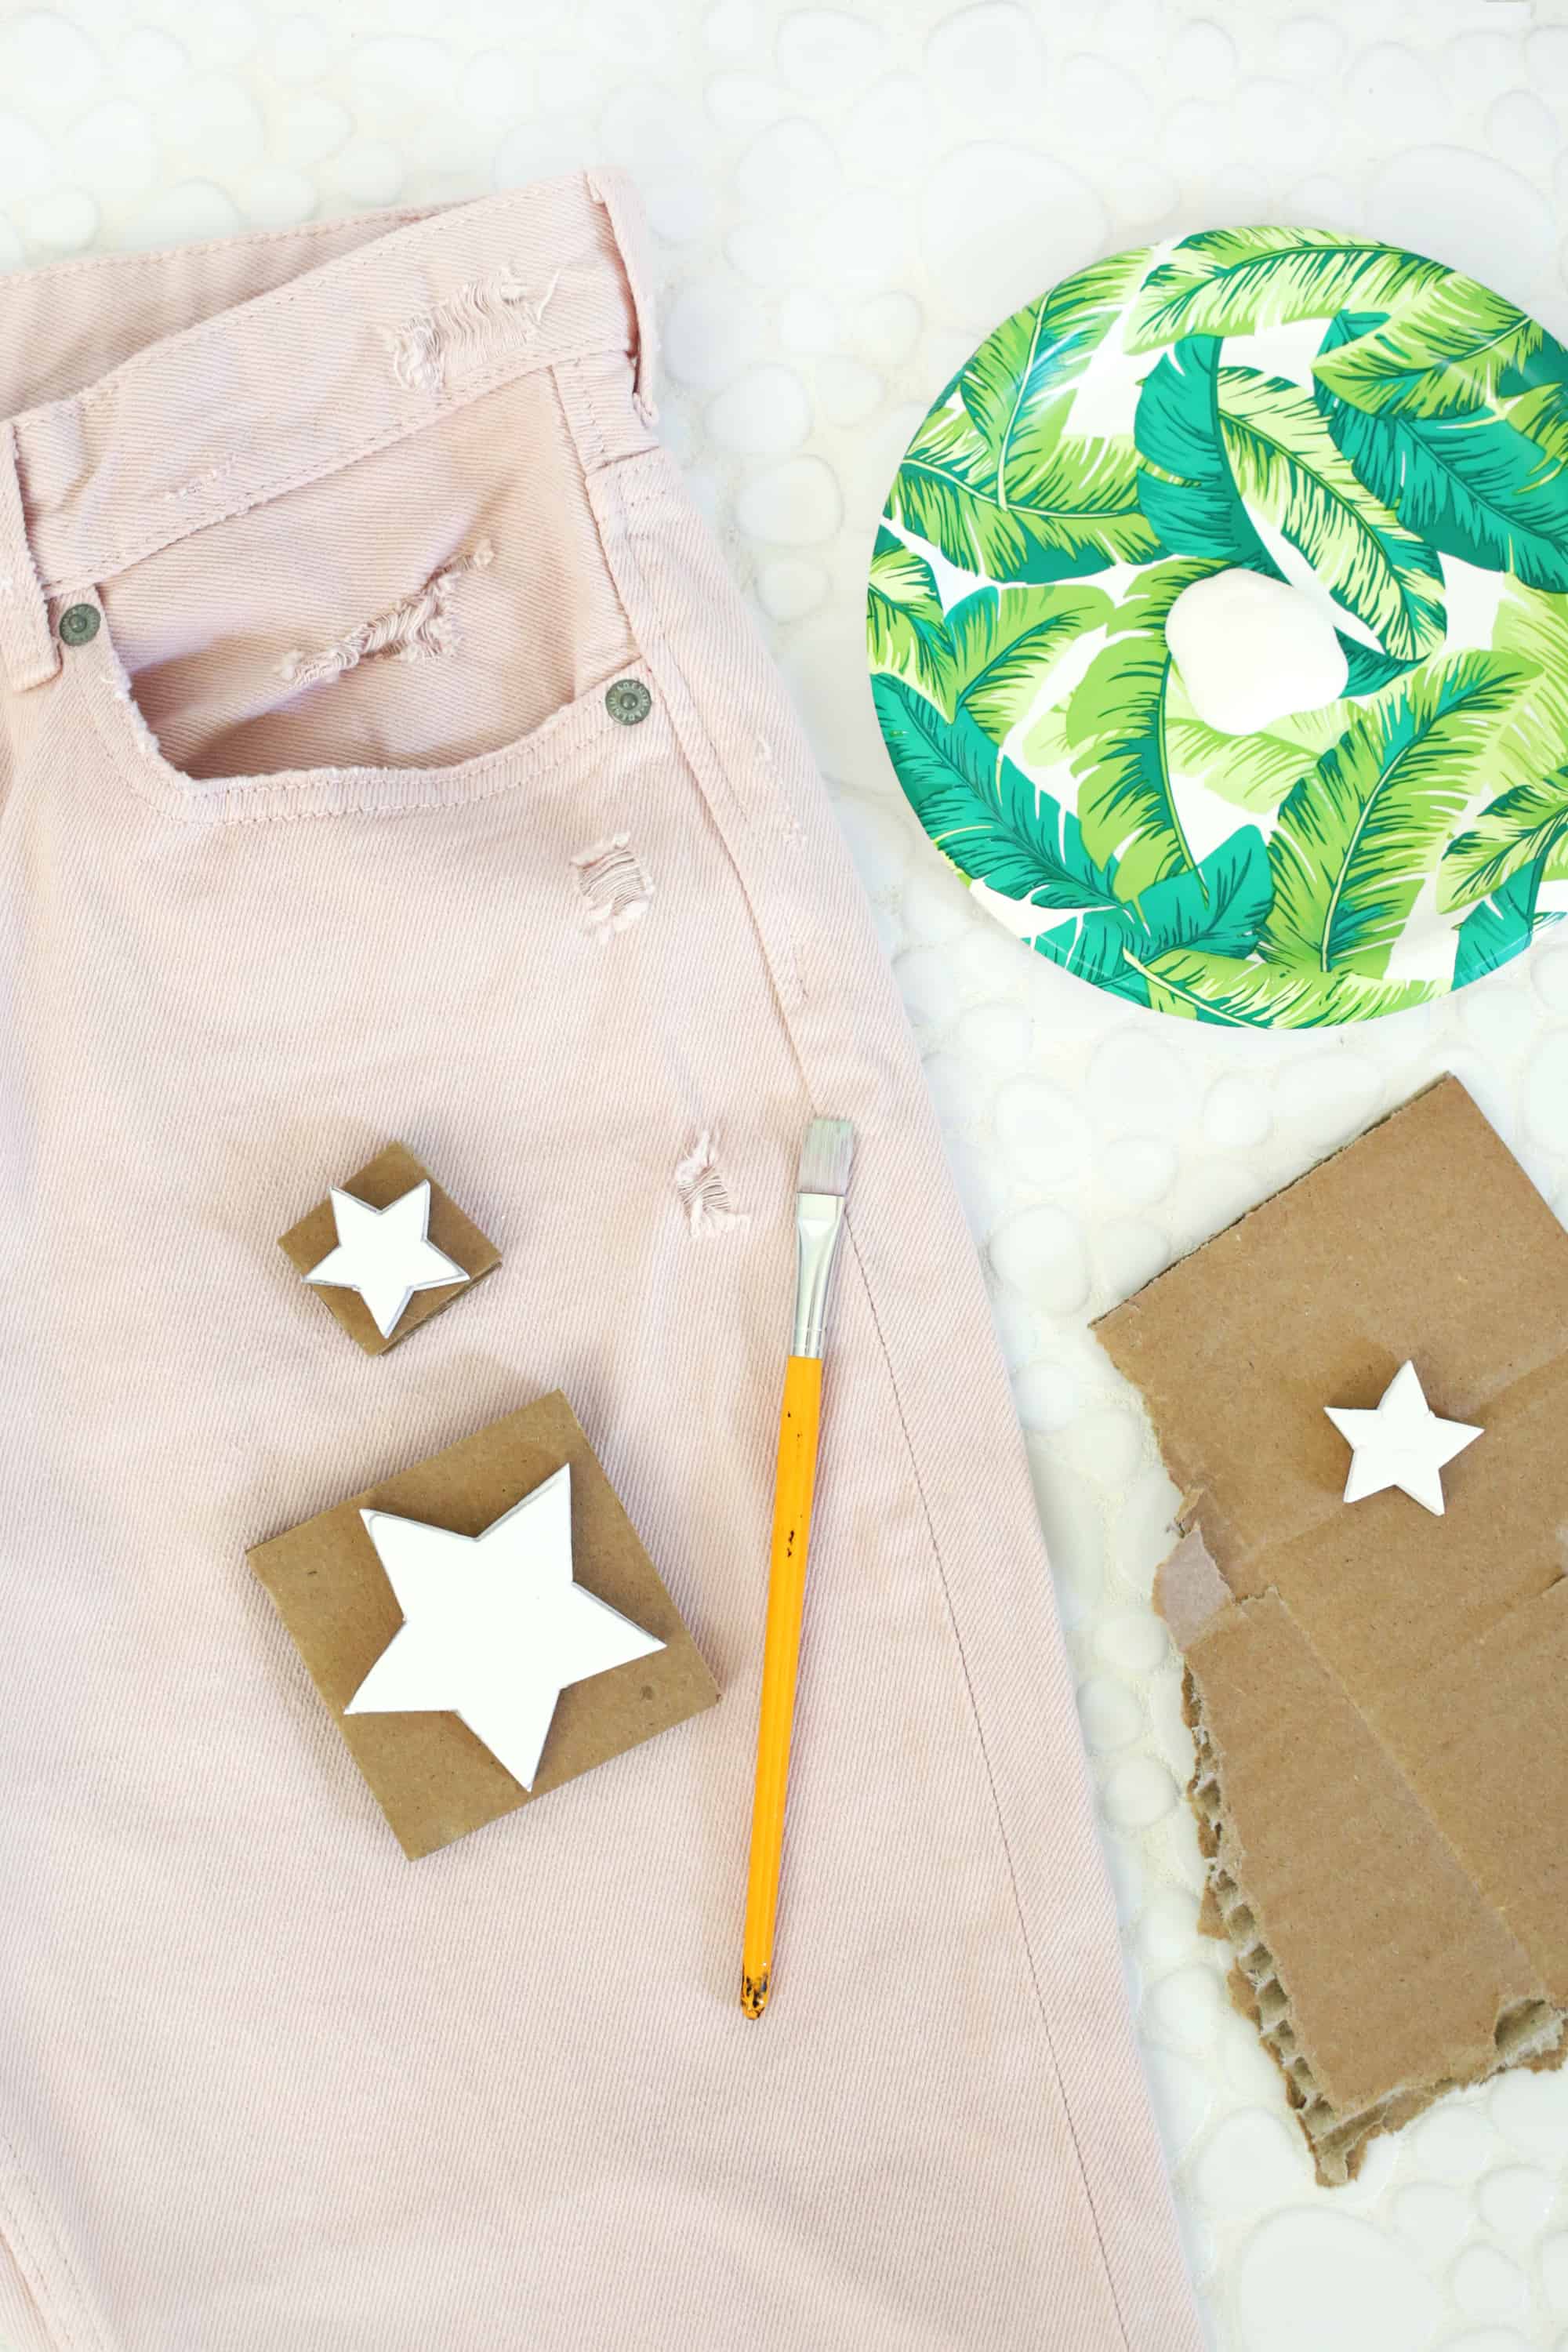
Supplies:
-1/4” craft foam sheet
-scrap cardboard
-scissors
-fabric paint
-glue gun
-paintbrush
 Cut whatever shapes you want to stamp out your foam sheet and cut two pieces of square cardboard that are just a bit bigger than each shape. Glue the two matching layers of cardboard together and then glue your foam shape on top (two layers of cardboard make for a more stable stamp). Lay your jeans out flat and paint your stamp with an even layer fabric paint. Do a couple of test stamps on some scrap fabric to see how hard you have to press and then stamp your jeans with as many stamps as you like on the front, allow to dry, and then repeat the process on the back. I find that it’s best to put it down flat on the fabric and then rock side to side and up and down to get every corner in contact with the jeans (I used these jeans in pink, BTW).

 Strategic Distressing
 Supplies:
-fabric scissors or X-Acto knife and ruler
-straight pins
-tweezers


 First, decide where you want your holes to appear in your jeans (these are the ones I used). I usually do at least the knees but you can do this higher, lower, or on the top layer of your back pockets as well! Try on your jeans and mark the area that you want to remove with straight pins. Use fabric scissors (or an X-Acto knife or rotary cutter) to cut a horizontal line at the bottom of your distressed area, cutting as wide as you want the area to be (make sure to put a few layers or cardboard underneath if you are cutting with an X-Acto or rotary cutter so you don’t cut through to the other side).
Cut a horizontal line the same width at the top of your distressed area. Take your fingernails and scratch and rough up the cut edges of your jeans so they fray a bit. Get your tweezers and grab a vertical blue strand of thread from the distressed area and pull it down and out of the fabric. Sometimes the first few are a little hard to get out, so if you pull and it breaks, just try another strand until you get one that pulls out. Keep pulling one by one until the whole area has the vertical strands removed while the white horizontal strings remain. Repeat this process anywhere else you want to distress the jeans and throw them in the wash to remove the fuzz and continue the distressing process.

 There you have it! Obviously, you can do several of these to one pair of jeans, so don’t feel like you can only choose one! I added a stepped hem to the bleached jeans and I’ll probably eventually add some distressing too. The stepped hem is actually one of my favorite trends right now since it’s a super quick way to hem jeans for us shorties (although knowing how to properly hem jeans is also a great skill to have in your jean toolbox) and it’s a little shorter in the front, which is great for all my spring/summer sandals with ankle straps and my fall/winter ankle boots. Have fun customizing your jeans your way! xo. Laura

15 Comments
All the DIY are great! The denims with the stars are my favourite!
xx from Bavaria/Germany, Rena
http://www.dressedwithsoul.com
I’ve always been a fan of the stepped hem trend, but have never thought of DIYing it! Perfect for me as I can never find jeans that fit me (even size 00 is sometimes too big for me, sigh)! 🙂
Charmaine Ng | Architecture & Lifestyle Blog
http://charmainenyw.com
Although the bleach splatter is a bit too 90s for me, I really like the asymmetric hem!
https://www.makeandmess.com/
I love how each DIY completely transforms each pair of jeans and how there are a wide variety of styles included. My favorite is the jean fringe! It’s so flirty and fun! I definitely want to try DIY’ing that pair! ????
These are all so fun! I need to try a few of these out!
Paige
http://thehappyflammily.com
I’m super short, so I love the stepped hem! Another fave of mine atm is the raw hem, it makes it super easy to DIY a shorter leg without the sewing 😀
Yes, so true! I do that a lot lately!
Laura
Love these! Can’t wait to try a few and maybe a mother/daughter matching set is in order as well!
On a related note, made your Jean skirt DIY a few weeks ago and it’s become my ‘go-to’ this summe with a tshirt and slides. I’m making another tomorrow in a lighter demin because I just love it THAT much. Thanks!
Aw, yay! So glad you love it!
Laura
Love the amazing content
Those a great tips to diy jeans. I wear jeans a lot year round too. Would definitely try this. Sharon Elsie | http://www.diva-in-me.com
Omg these ideas are all amazing! So fun!
The jean holes and star prints are my fav!
http://shannoninthecity.com/
I bought step hem jeans today. But they’re too long. I was just going to hem them in the standard way but perhaps I’ll alter the step hem instead.
I LOVED this post! The fringe jeans are genius! I’ll definitely be trying that one out!