 Chances are, you probably have all your earrings somewhere in a pile or tangled together in the bottom of a jewelry box, but no more! This DIY is here to save the day! Earlier this year, I made a brass pyramid DIY to hold a lot of my earrings and it works great except for one tiny thing … it only holds earrings that hook into your ear rather than the kind that have a straight post and a backing. This earring stand, however, is perfect for that type of earring and looks really cute on your dresser as well!
 Supplies:
– balsa wood board (about 3″ wide, available at most craft stores)
– balsa wood square sticks (about 1/2″ wide, available at most craft stores)
– X-Acto knife, box cutter, and metal ruler
– cutting mat
– acrylic sheet (about 1/8″ thick, available at most home improvement stores)
– marble paper and mod podge or marble contact paper
– drill and drill bits
– white paint
– hot glue gun
 You’ll want a 6×8″ rectangle of acrylic for your earring holder and if you can’t find one that exact size it’s actually pretty easy to cut one down to whatever you need. Just measure 8″ out from the end of a sheet and score a deep line with a box cutter and a metal ruler (go over the line a few times to ensure a good score).
 Line up the score line with the edge of a table or step and snap your acrylic piece off at the line. It is a pretty loud sound, so you may want to wear earplugs or put on some headphones for a second. Score another line on the piece you snapped off to create your 6×8″ rectangle and repeat the snapping process.
 Use your X-Acto knife to cut your balsa wood into a 3×6″ rectangle and cut your balsa square sticks into two 6″ pieces. Those are a little harder to cut with the X-Acto, so you may have to saw at them a bit, but it should work.
 Lay your acrylic rectangle on a cutting mat so you can see the lines below and mark a dot every inch vertically and horizontally so you have a grid of evenly spaced dots.
 Use a drill and a really small drill bit to drill through each hole (put a scrap piece of wood underneath the acrylic first). You only need the hole to be big enough for an earring to go through so you can use a pretty tiny bit for this one. Remove the protective plastic sheets from the acrylic.
 Hot glue your balsa wood square sticks in the middle of your balsa board, leaving just enough room for your acrylic piece to wedge in between.
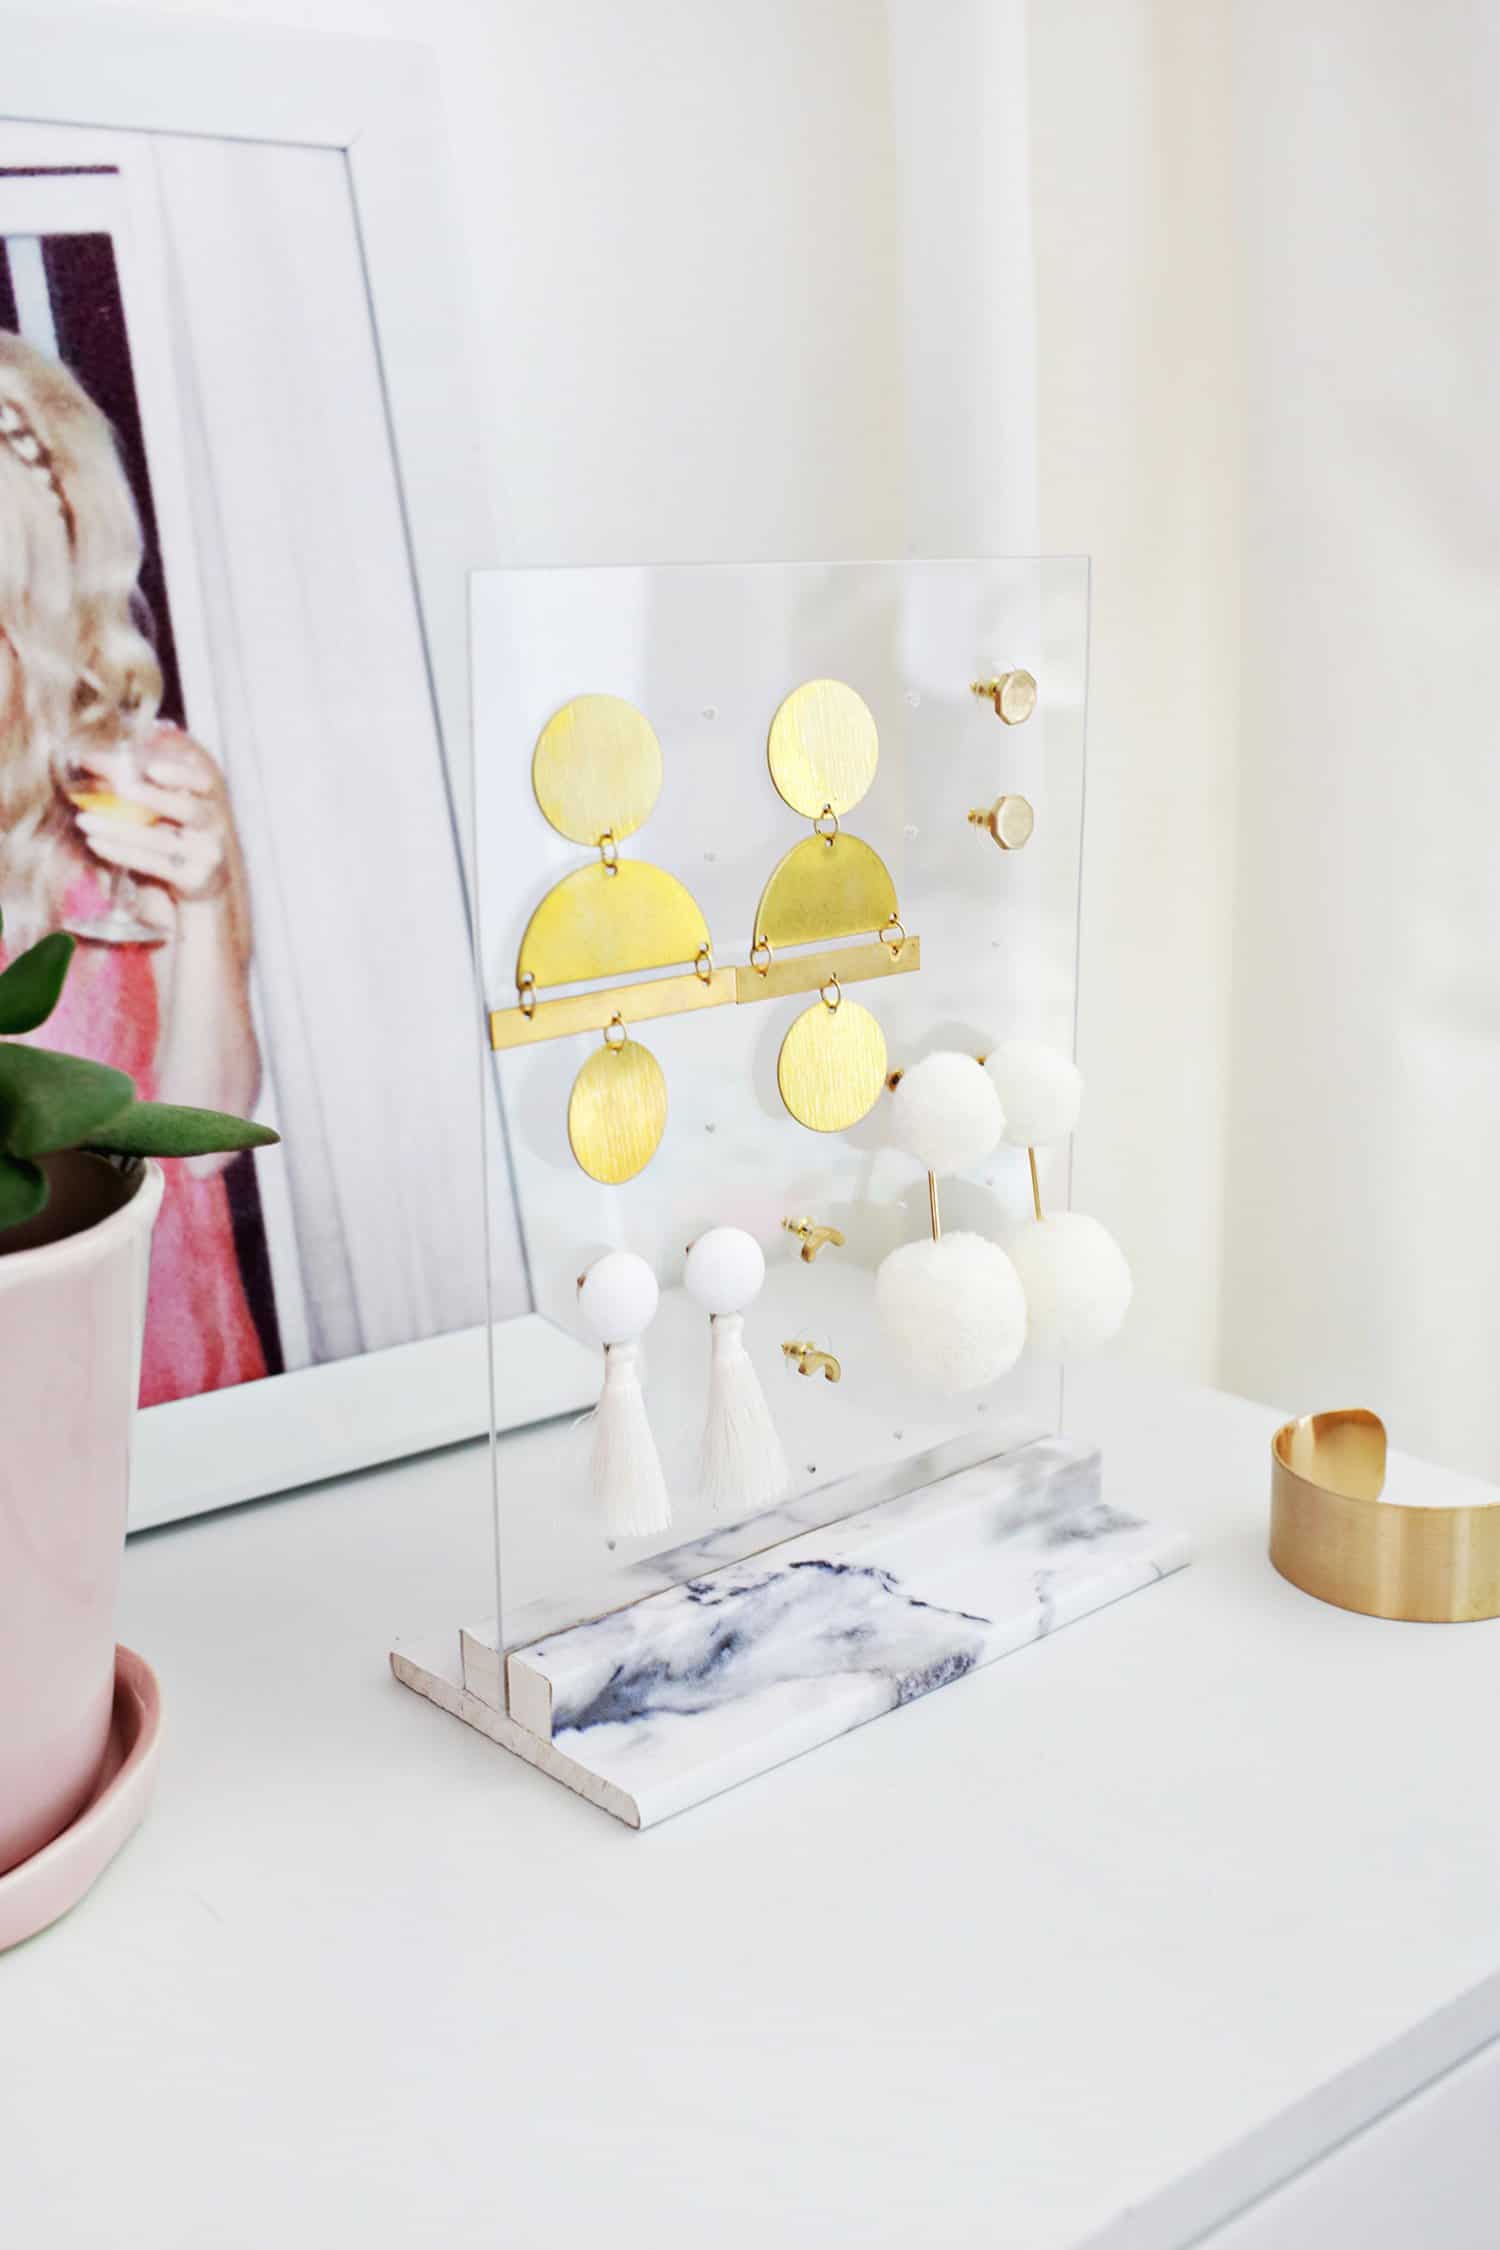
  Paint the sides of your wood (or stain them) and then cover your wood base with either marbled paper and mod podge or marbled contact paper. You can either cut it to size and then put it on or you can cut a rough estimate, attach it, and then use an X-Acto to trim the excess from the sides. Slide your acrylic sheet into the middle slot and you’re ready to display some earrings!
 AGH! So good! I love how my gold geometric earrings look (a DIY, by the way) floating in the air with those pom-pom and tassel earrings nearby. Of course, you can use whatever pattern of paper you want for the base or you could just paint or stain it a solid color too. You could also tweak the dimensions on this and the bigger you make it, the more earrings you could hold! So get your earrings out of that pile and onto one of these instead! xo. Laura
22 Comments
The marble base and transparent acrylic make it look so expensive and glam! Really love this!
Charmaine Ng | Architecture & Lifestyle Blog
http://charmainenyw.com
I love this, it looks so glamorous. And because it’s transparent it doesn’t draw too much attention and take away from the earrings!
Hannah | Whoops It’s Hannah
Love how lovely and functional this is!
YES!!! You have post-pregnancy creative powers, friend!!! I was literally trying to figure out a way to make a cute earring holder (out of necessity!) and just couldn’t and finally gave up and bought one. THIS is the perfect idea!!!
Ahh this is the cutest! It turned out so great!!
http://www.themoptop.com
Love this DIY so much! Thanks for sharing <3
https://www.myblackcloset.com/
YAAAAASSSSSSS
This is super cute. A great way to keep my earrings organized because I’m always losing them.
cute and inspiring! I’m not sure I can get a hold of the supplies needed, but I could probably do something similar using the same principles! yay! Thanks for inspiring me to organize my stuff <3
Looks so great – love it! ♡
Greetings from Germany,
Sabrina
Looks so much more practical than my little bunny holder 🙂
This is the earring holder I’ve been looking for for my statement earrings! Off to the hardware store I go!
Thanks so much xx
This is such a cute DIY! I don’t have my ears pierced, despite having been musing about it for years now. However, my mum does and I just know she will love this if I make it for her. Thanks for the amazing idea, as always your DIYs are perfect.
Holly xox
This looks so stylish and minimal, I love it!
https://www.makeandmess.com
This DIY idea is so cute! I love how chic and modern it is. Also those gold tiered earrings are stunning!! A great storage idea turned fun decor !
http://sarahmichiko.com
I love this earrings!
New post:http://thepinkpineappleblog.blogspot.com/2017/08/haute-couture-2017-street-style.html
Awesome idea for an earrings holder! I wonder if this project technique could be used for making a personalised photo frame,
I actually tried this today as a gift, it looked great! I always always love your DIYs!
Mary | O Blog da Mary
https://oblogdamary.wordpress.com/
It Certainly going to be stored in my life hacks board.
Thanks to all the articles that you serve. I must recommend your website to friends. Good Luck
Amal for Love Marriage
Nice write-up! I really like the many articles or blog posts; I actually beloved, together with I need guidance relating to this, for the reason that it’s beneficial.
Thanks for this tutorial! I always love ABM DIY. I made 7 of these for a friendmas gift exchange and everyone loved them! However instead of earrings we used them to display acrylic pins and it turned out wonderfully. Here are some things I discovered that may be helpful: you can get balsa wood sticks at stores like Joanns but you can get a 1/2 in square dowel at the hardware store for cheaper. My hardware store was also happy to help me cut the acrylic on their machine (I think they were supposed to charge me, but didn’t! hooray wonderful customer service!). I also struggled to cut the 1/2 stick with an exacto knife (it technically worked but was v jagged and took a long time) and since I was making so many I invested in a $10 saw and miter box kit I found at Lowes (created for cutting molding) which really helped and speed up the process. I also used wood glue to put together my bases and that worked great as well.