 When we purchased our home last year, I knew the front room would be a perfect place to put a study. The little room was tucked away from the rest of the house and had a door to separate it from the hustle and bustle of family life. It was the perfect space to house our library with a cozy spot to get lost in a book. I’m happy to finally be able to share with you all of the design considerations for this space, as well as how easy it was to DIY an inexpensive board and batten wall treatment.
Style Considerations
I considered so many options for this room, as far as style, paint color, furniture selection, and arrangement goes. The look I finally settled on is a sort of mod take on a traditional masculine study. Think: mid-century cabin meets surf shack meets Gatsby’s mansion. That’s a logical combination of styles, right?
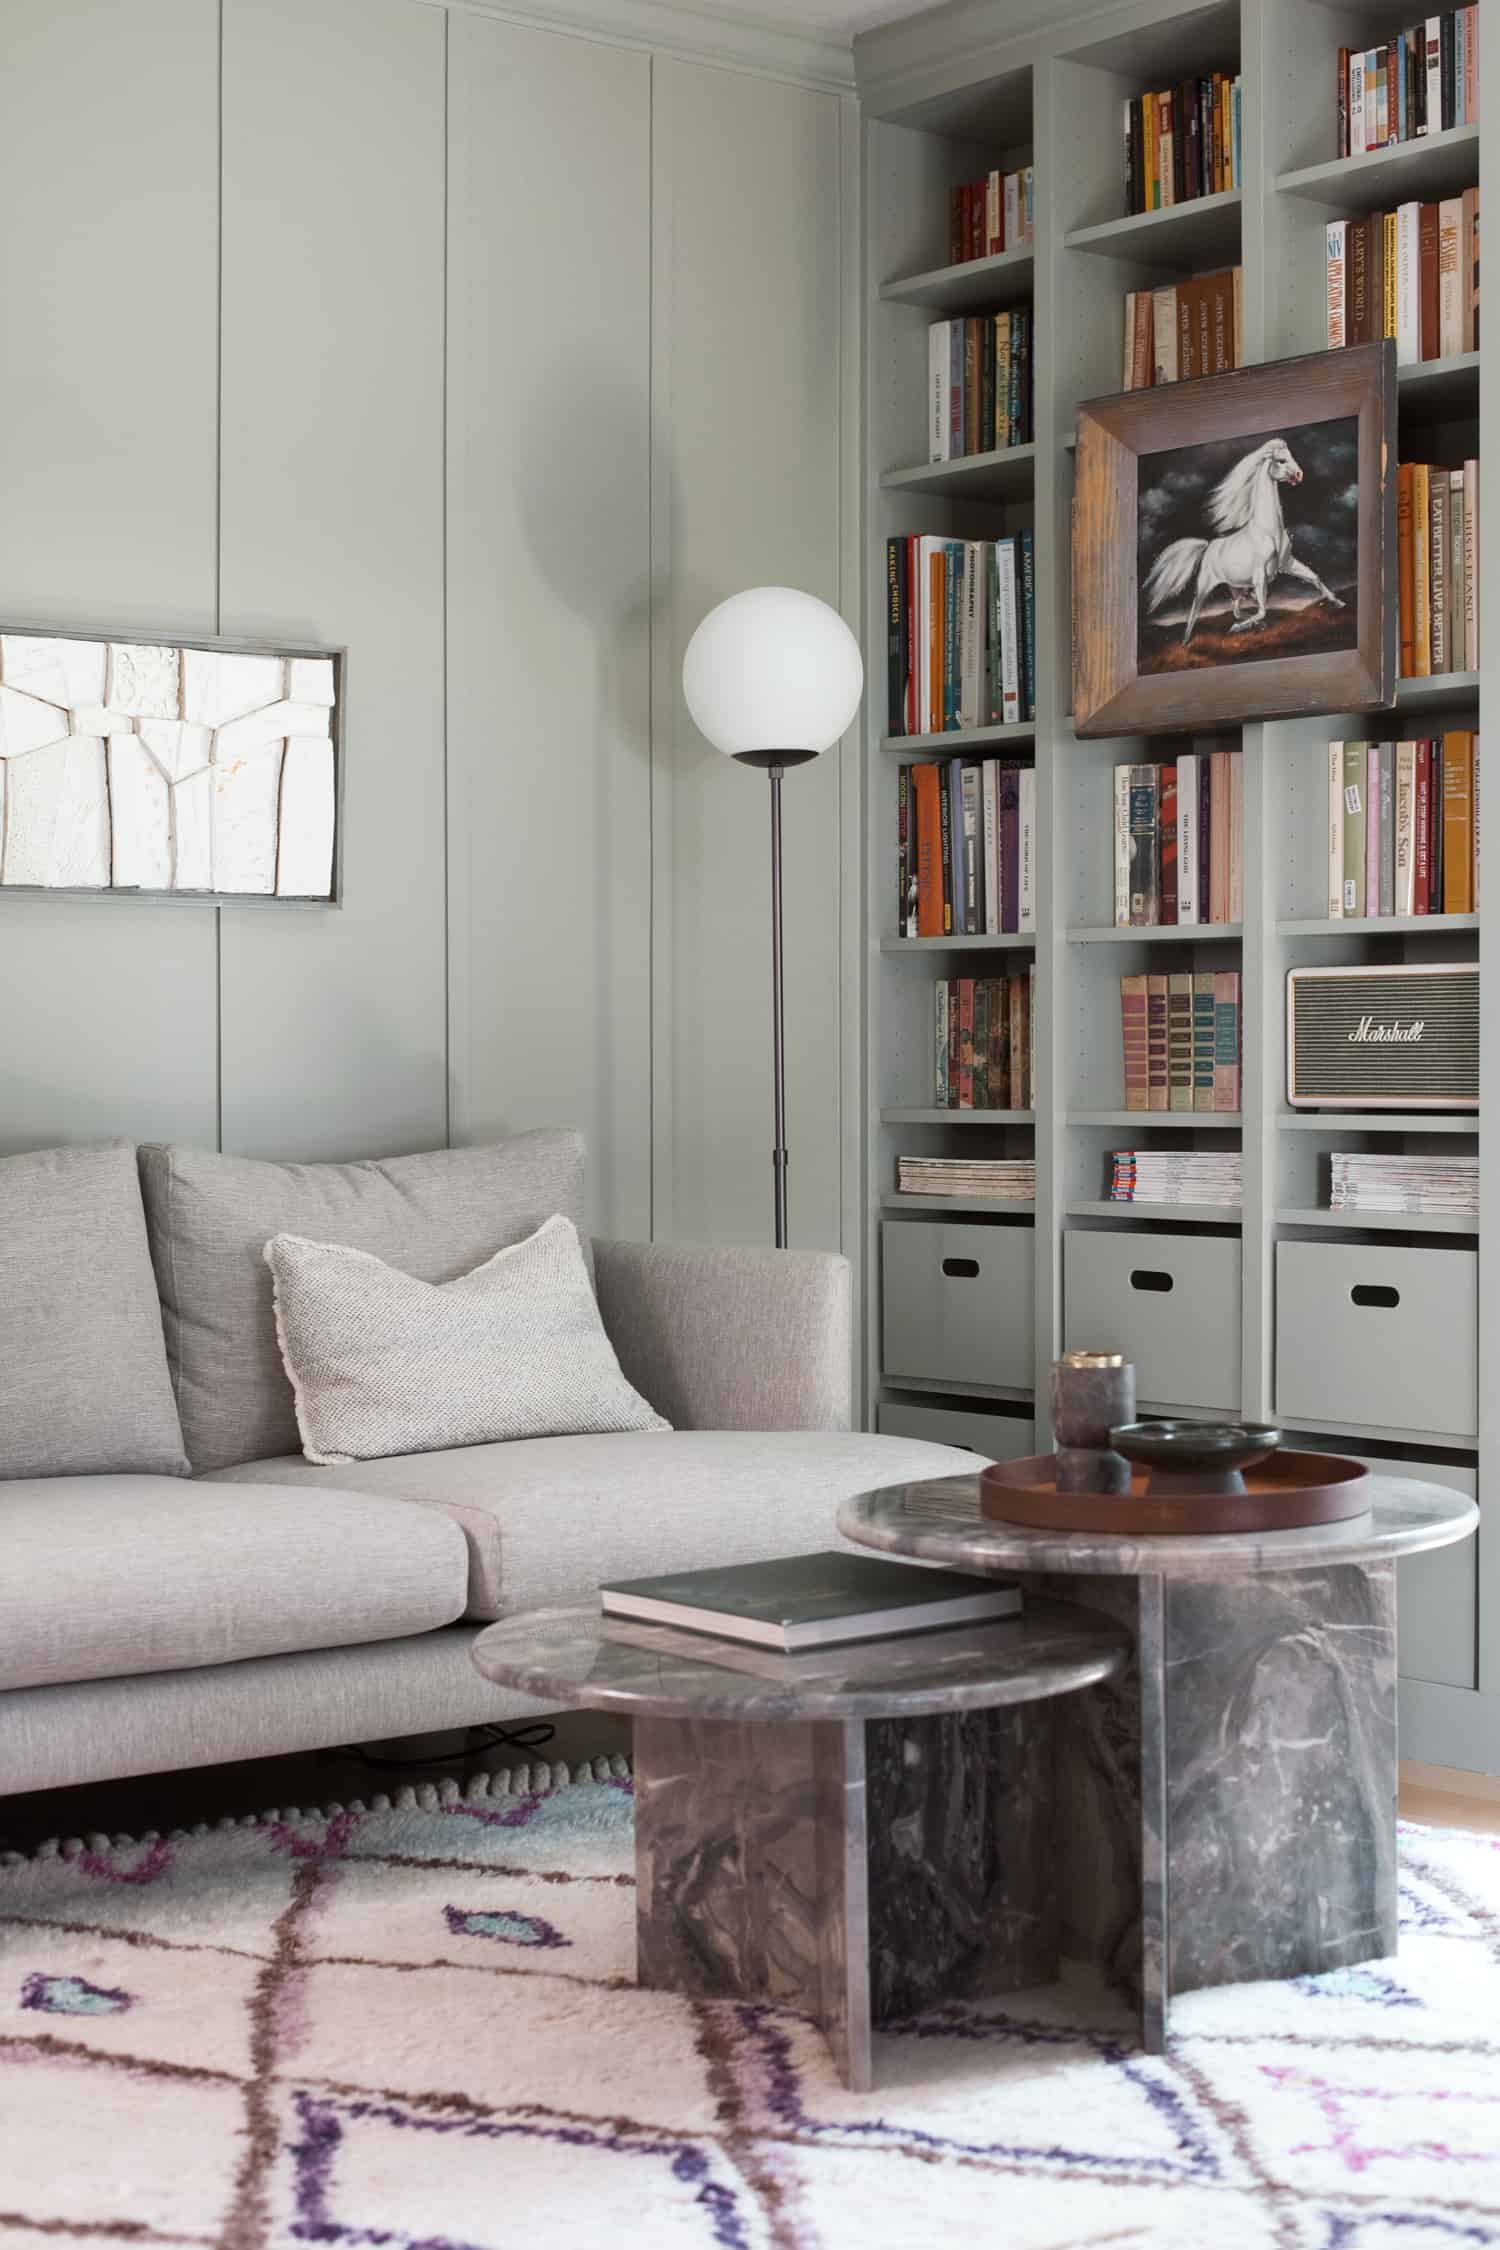
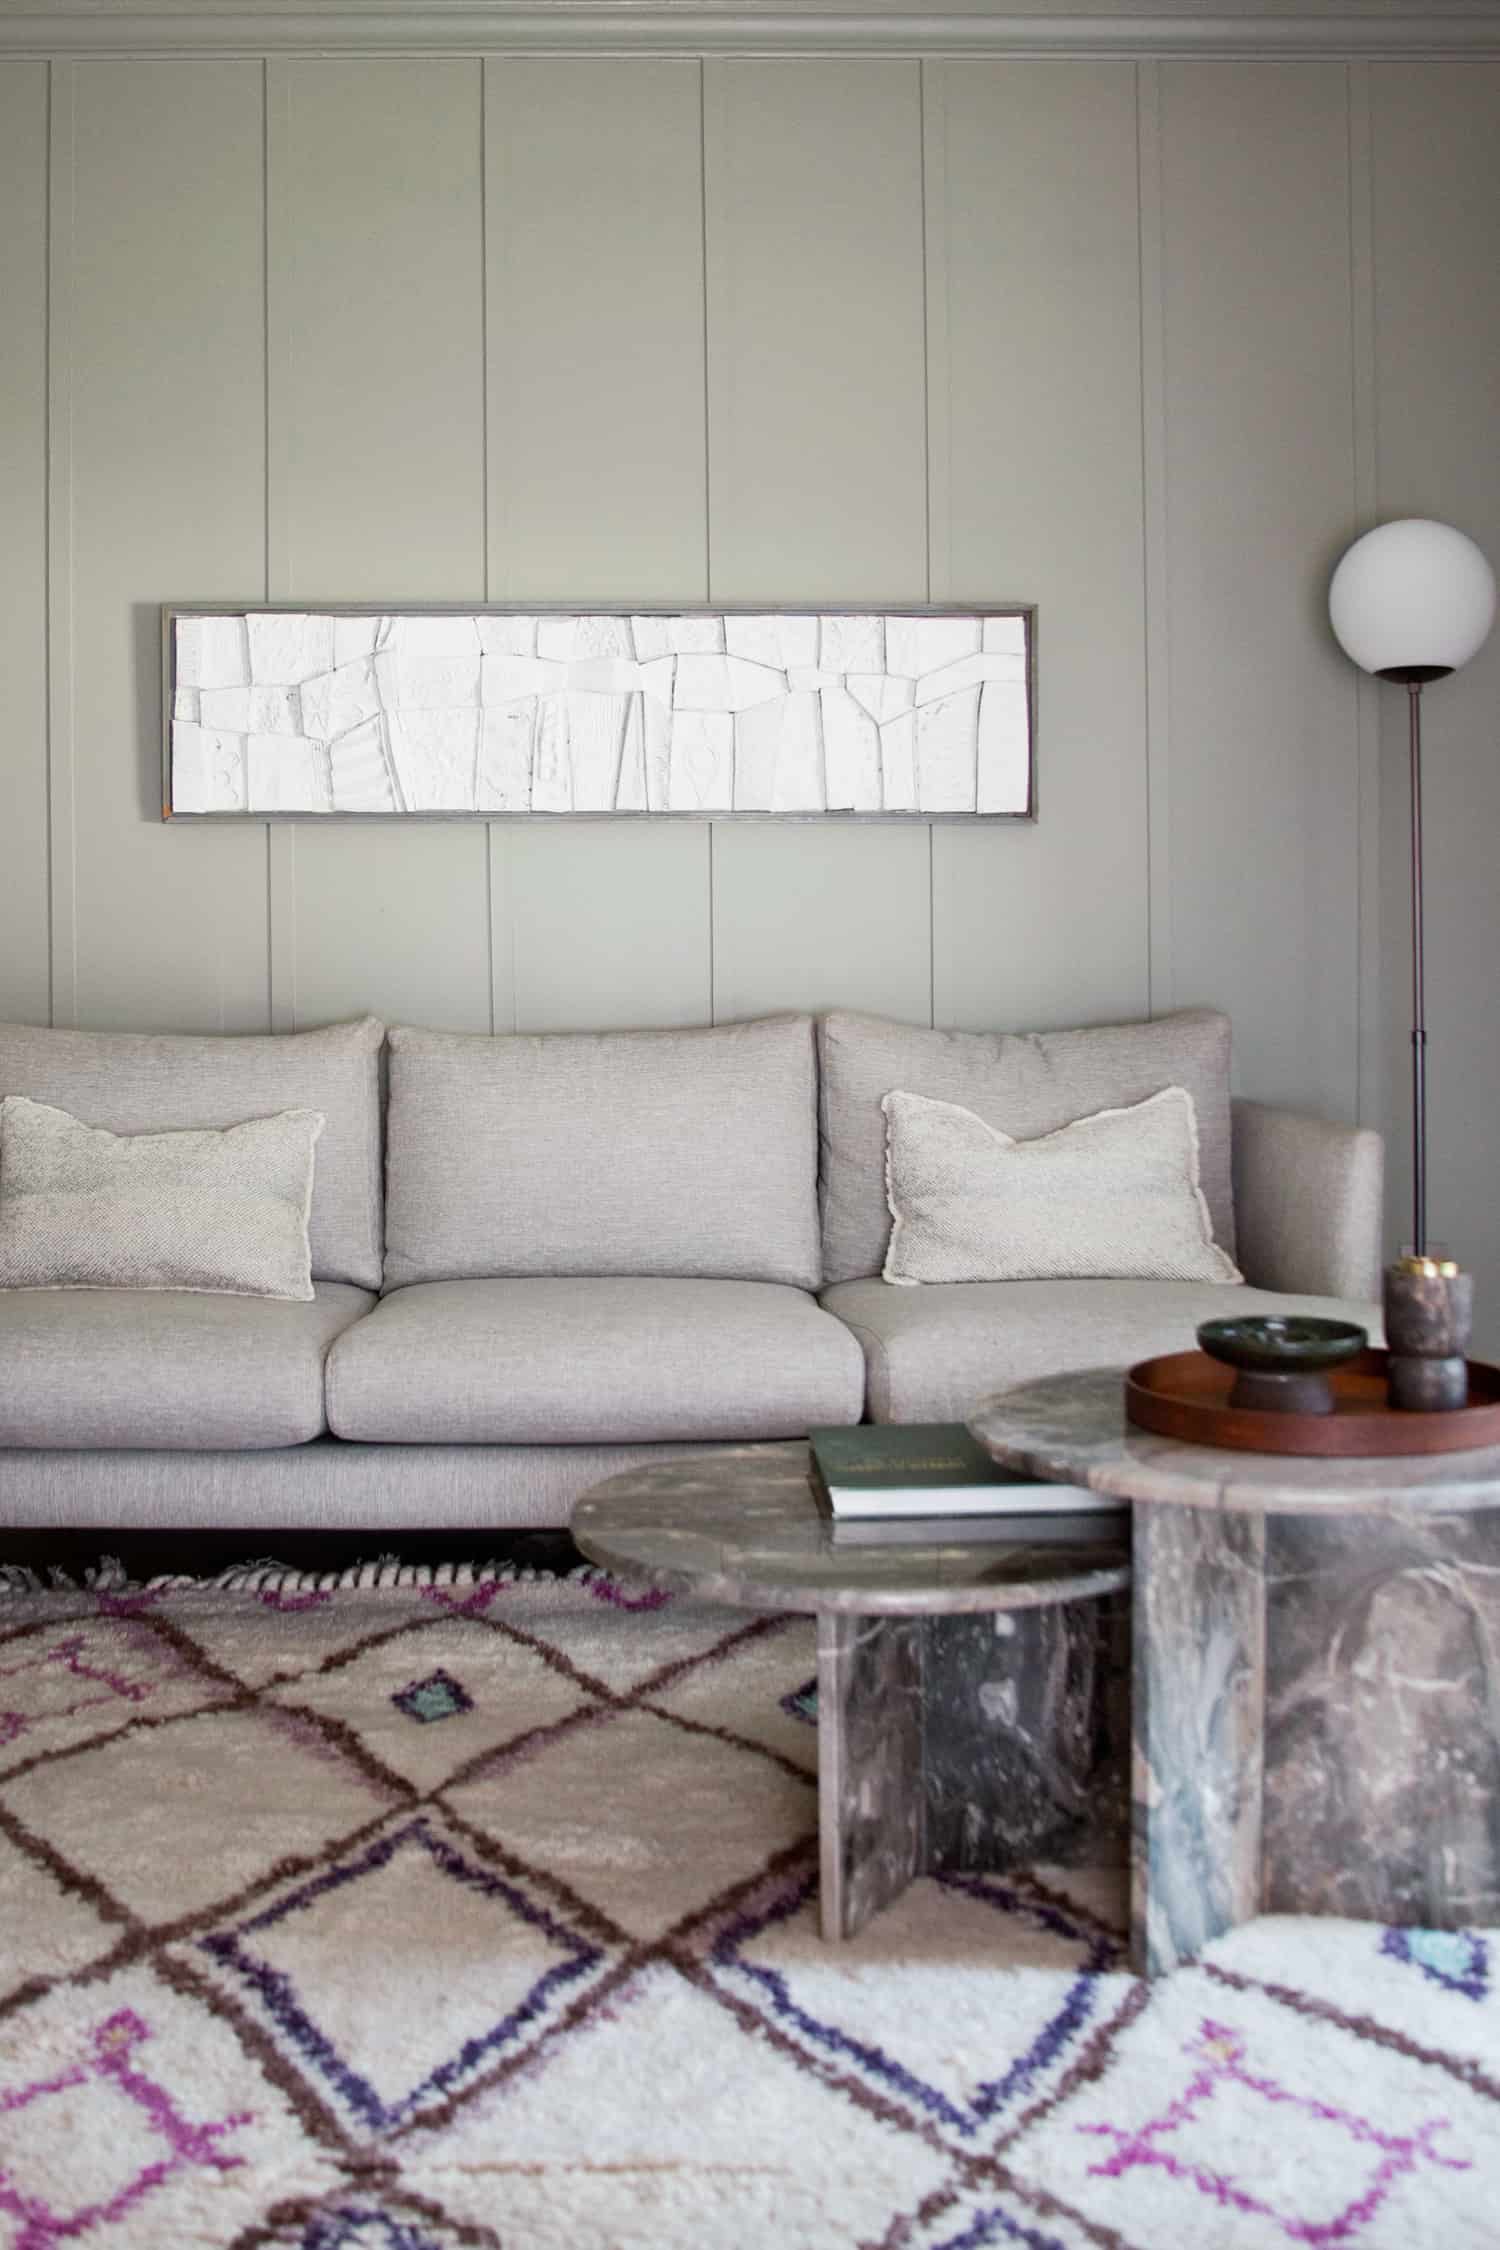
Next, after much deliberation, I settled on Benjamin Moore’s Oil Cloth as a wall color. It’s a medium-toned grayish green that takes on different hues depending on the time of day, but always to me as if it’s channeling a movie set from the ’50s. After deciding on a wall color, I chose this seasalt gray Burrard sofa from Article that had a subtle mid-century silhouette and slim arms to fit perfectly in the narrow room. The smoky quartz womb chair I chose from Rove Concepts obviously has mid-century styling and also closely matched the gray of the sofa. Both furniture colors offer very little contrast with the wall color, which was an intentional choice. I wanted the room to feel calm and unified, as our book collection is quite colorful and would add an element of visual chaos, particularly if paired with contrasting colors and patterns.
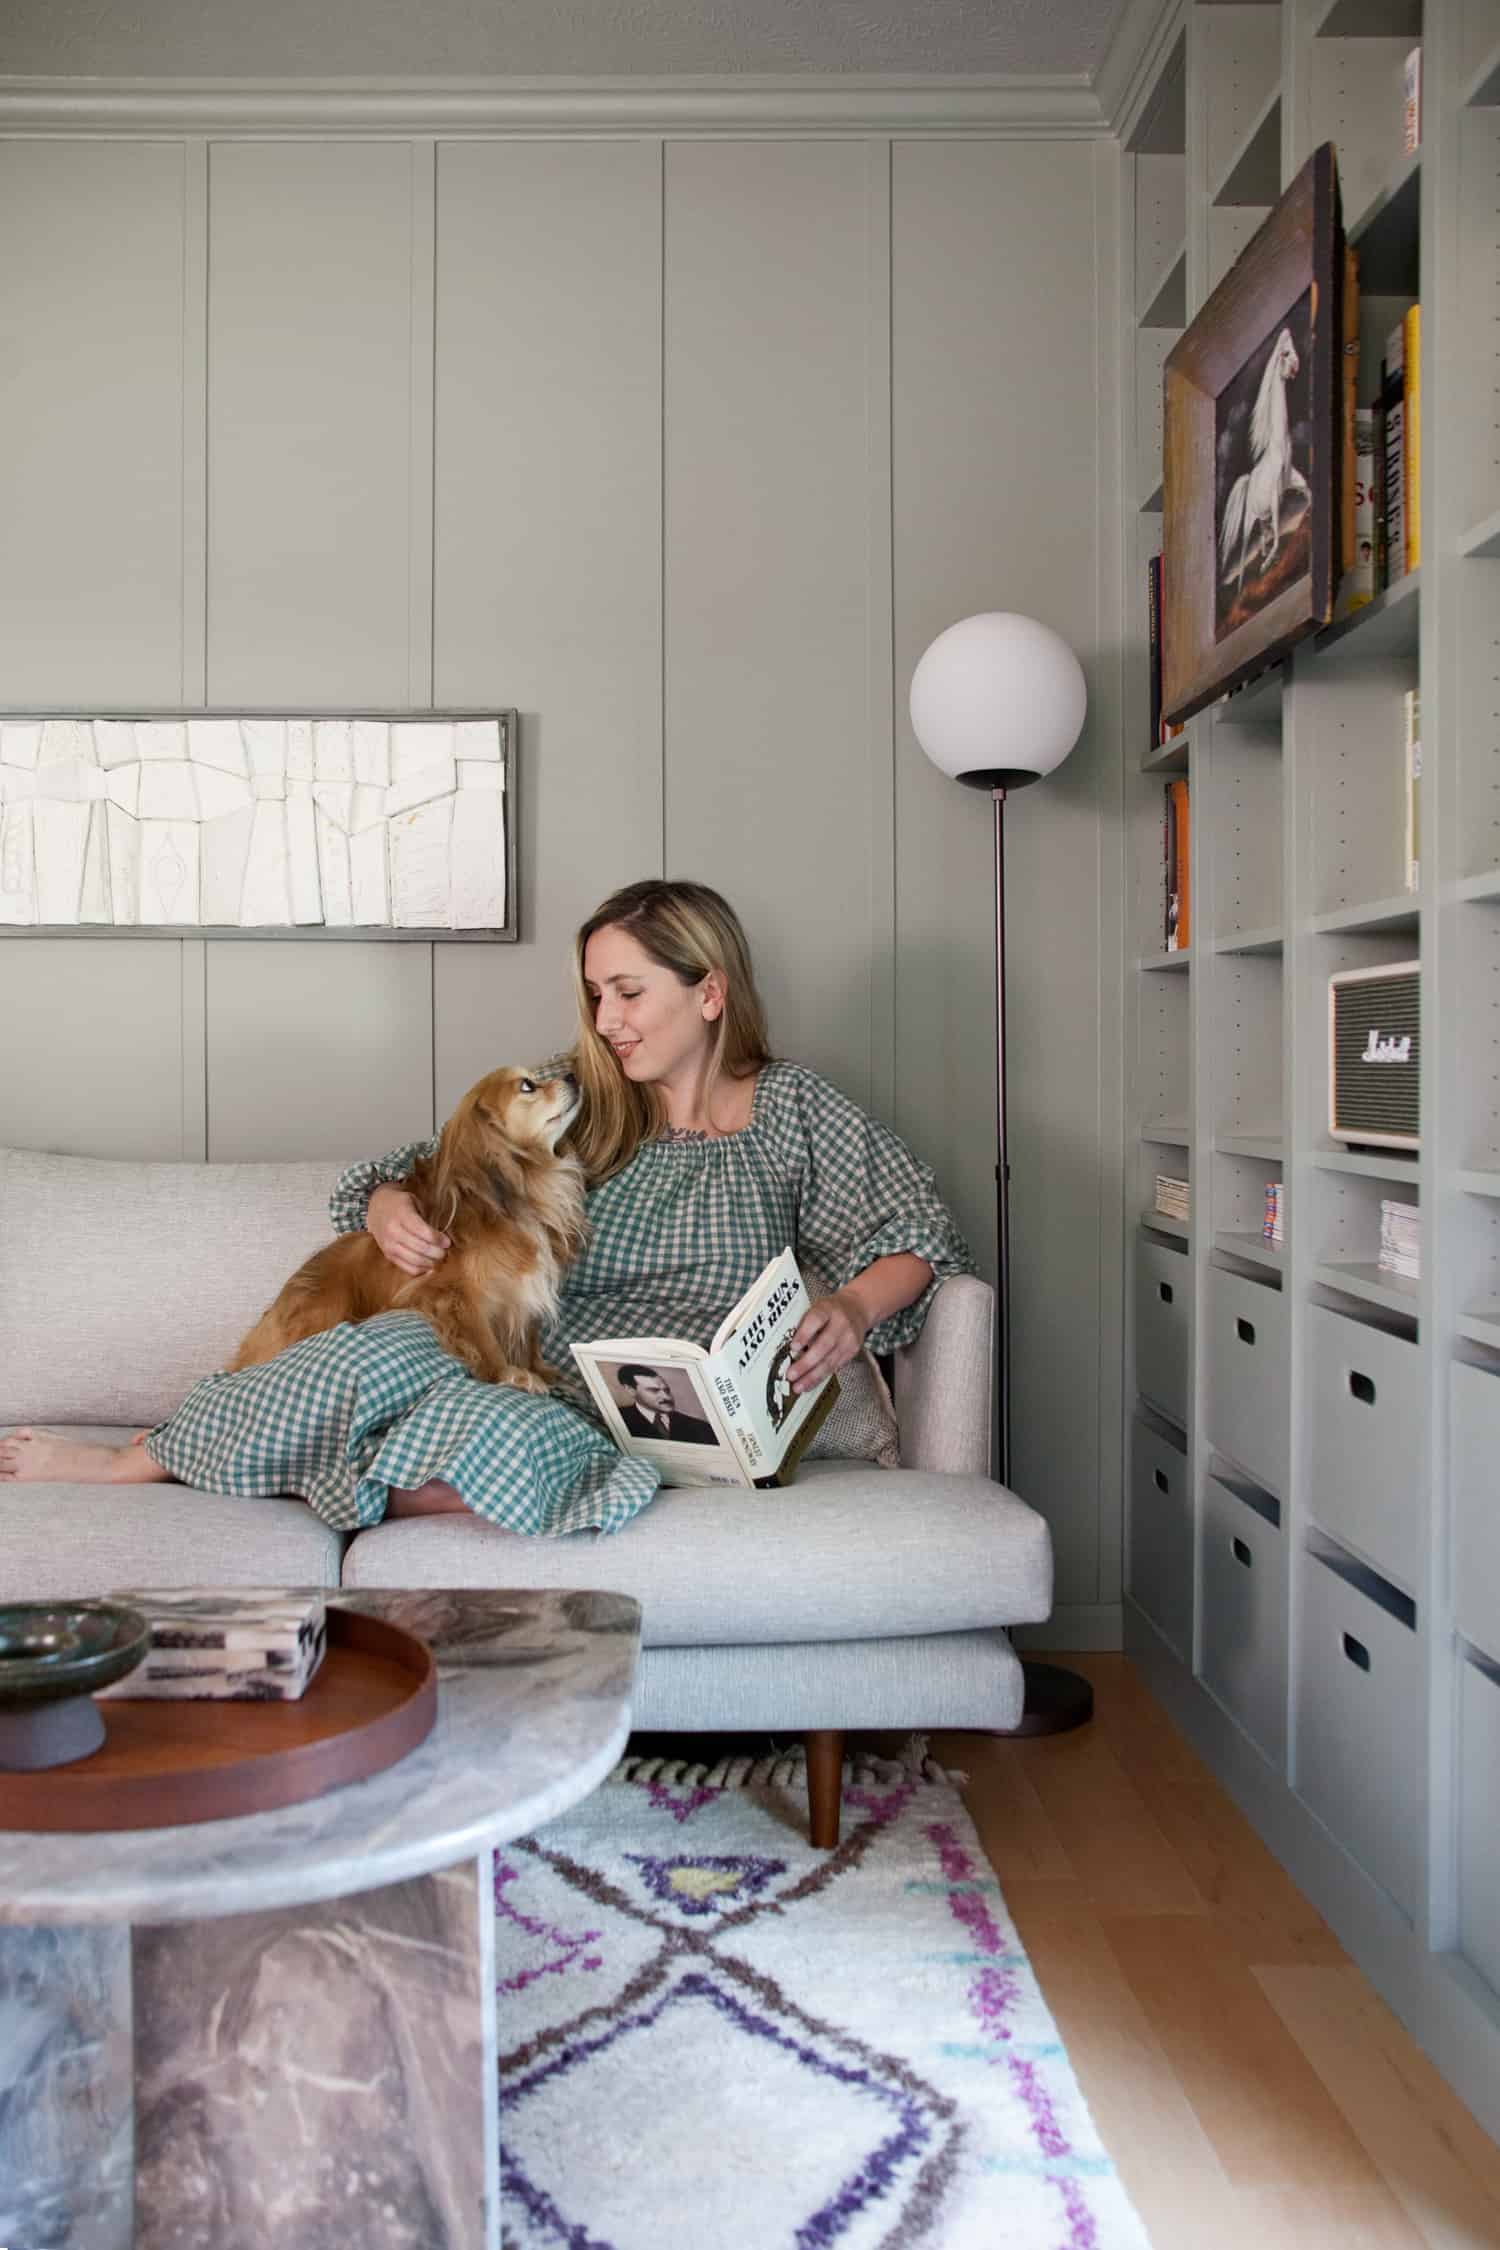
To lend some of the casual California mood that had been part of my style inspiration, I chose woven wood shades from blinds.com. The color I selected (Terra Oak) brings out the wood tones of the window and helps warm up the generally cool feeling from the grays and metals in this space. The art over the sofa is an original mid-century porcelain piece I purchased on Etsy, which alongside the globe floor lamp also adds to the “surf shack” vibe. The moroccan-style rug from Lulu & Georgia feels more bohemian, while the vintage coffee tables I got from my friend Susie in a swap add a modern take on the art deco Jay Gatsby look. (I always think of Jay and his uncut books when I think of a traditional study!)
 Before & After
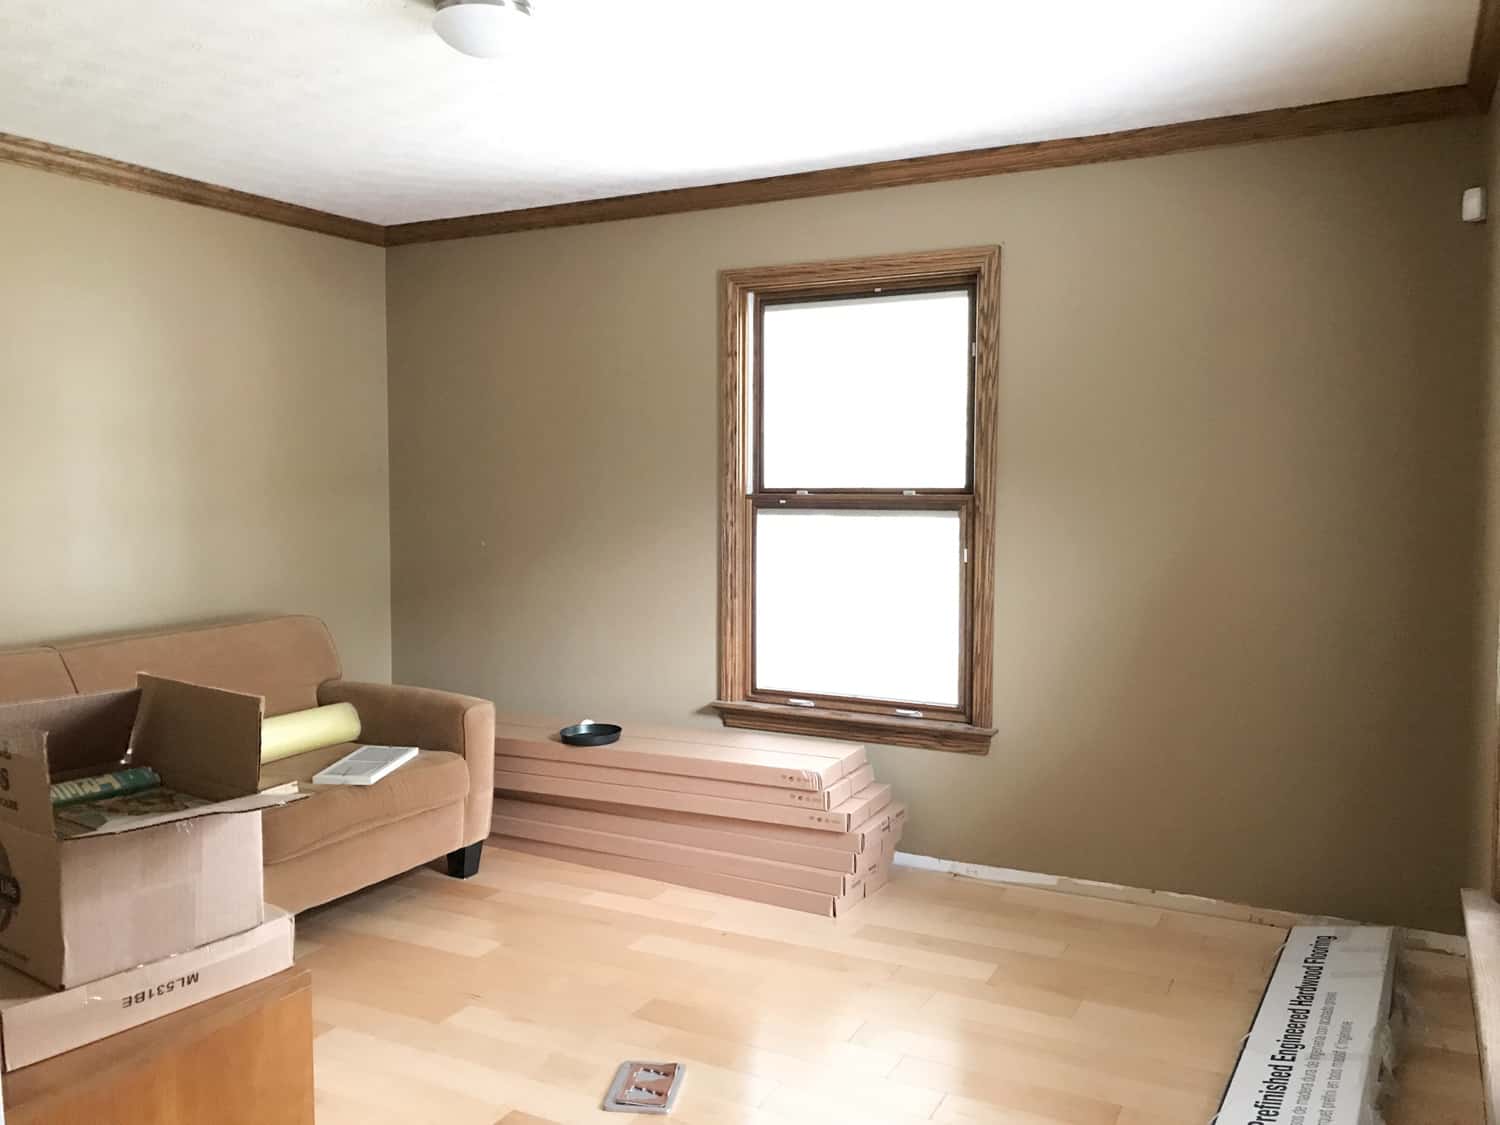
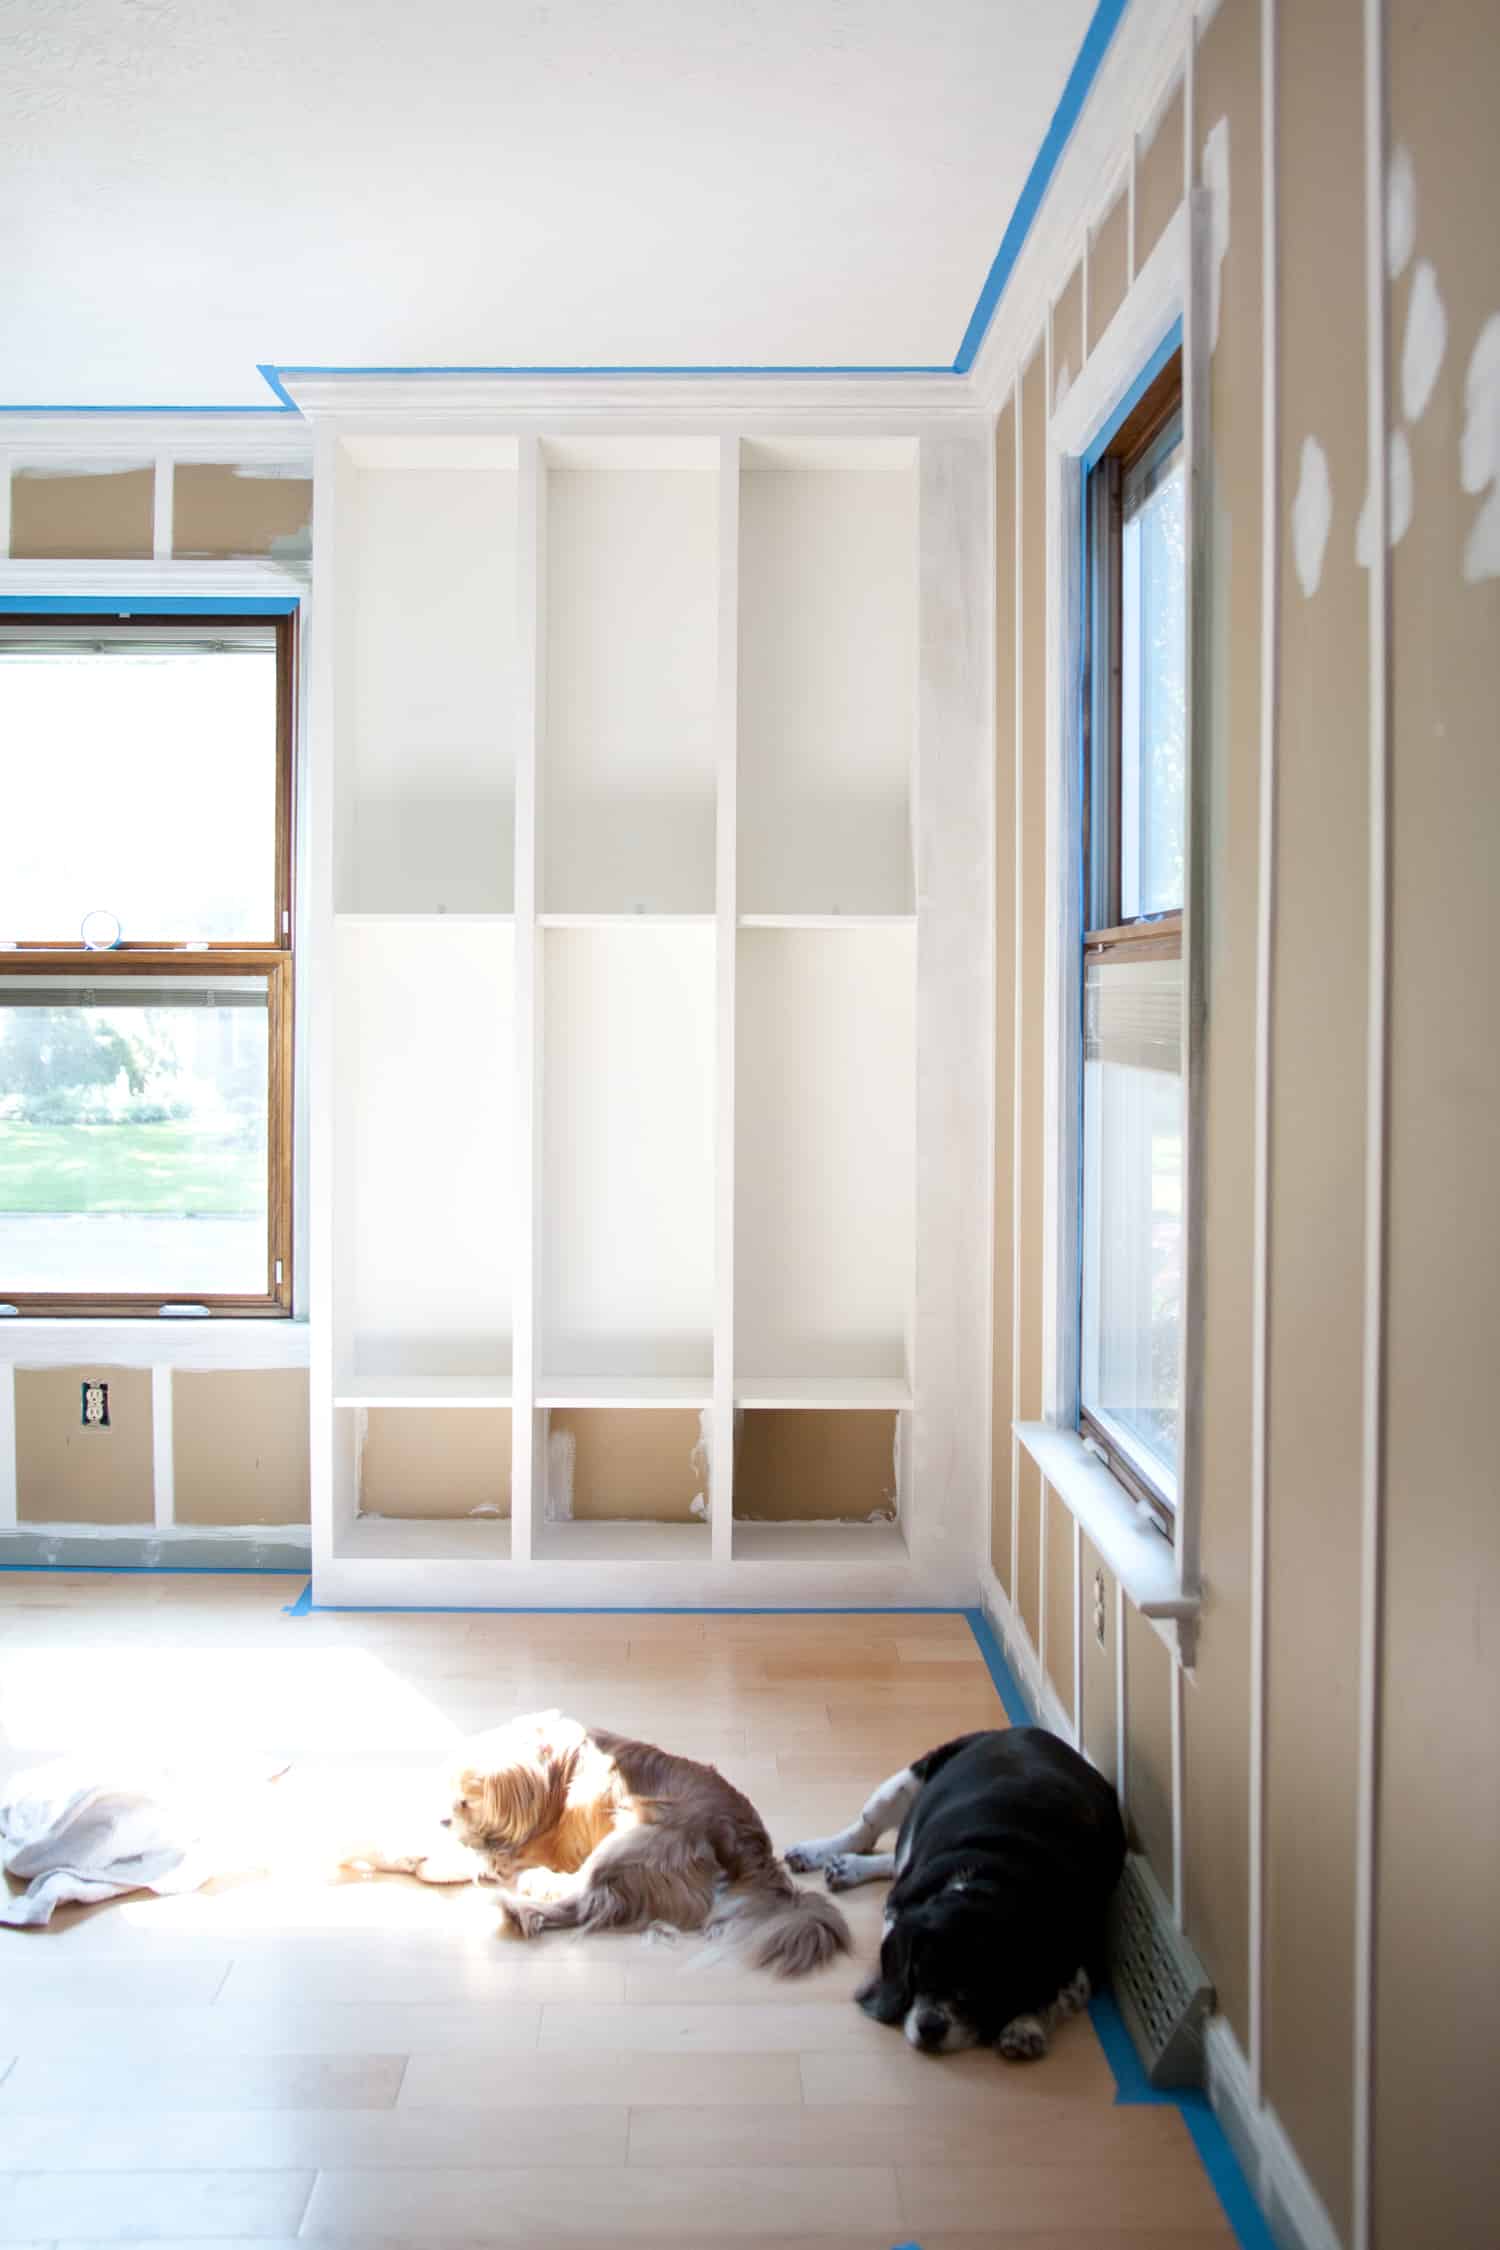
I’m afraid the “before” photo of this room isn’t a true before. The month we moved in, I ripped out all of the carpet on the first floor, and didn’t think to stop and take a before picture of this space first. Just imagine a shaggy brown carpet in here, which tied in nicely with the brown walls and oak trim. (Not sure “nicely” is the best word to describe it, but you get the gist!)
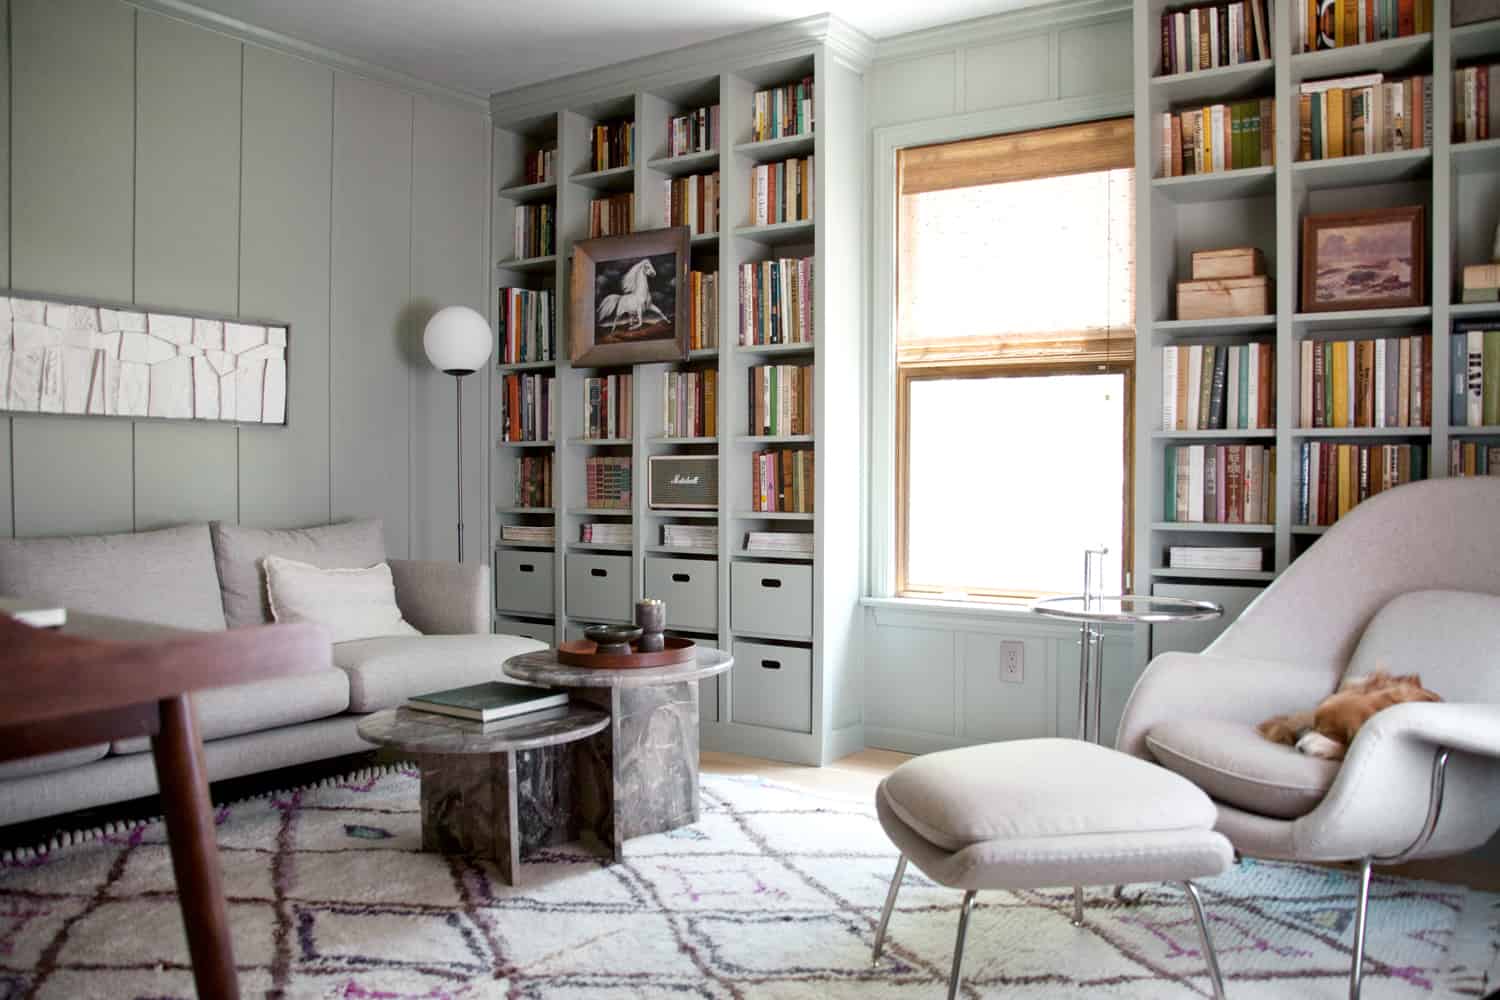
The study is somewhat narrow, and it became even more so when I added bookshelves* to one of the longer walls. I figured the room didn’t need to feel spacious, right? After all, we wanted a cozy study to house our library. Further enhancing the cozy vibes, I decided at the last minute to paint the ceiling too. I hadn’t been happy with the stark contrast of the medium-toned walls with a bright white ceiling. So we rolled Benjamin Moore’s Gray Horse onto the ceiling. Funny enough, the gray sort of reads as white in the daylight in context with the darker walls.
*The boxes on the floor in the before image are IKEA Billy Bookcases! They’re what we used as a base for our built-in bookcase—a DIY project which I’ll be sharing with you very soon!
Board and Batten Installation Process
Adding board and batten moulding really took this room makeover to the next level. I love the monochrome look of painting the walls, bookshelves, and trim all the same color. But the empty walls (without bookshelves) definitely needed something to bring it all together. I knew I wanted to add some type of applied moulding, but for a while I was stuck on the style. Finally, I decided that vertical board and batten would be an easy and inexpensive way to add texture, also in keeping with the mid-century cabin vibe I like so much.
I’ve created a board and batten wall treatment before in our bedroom, but using vertical strips only was much less work and significantly less expensive. This time around, I used pre-primed lattice moulding. Lattice moulding is very thin (about 1/8″), so it will add a textural element to the wall, but won’t stick out so far as to be an impediment for hanging art or to be a collector of dust. Getting pre-primed lattice moulding saved us lots of sanding (and the mess that goes along with sanding), but I have seen treated lattice moulding available at hardware stores for about $1 per 8′ strip. This take on a board and batten look ended up being a super affordable way to dress up a room!
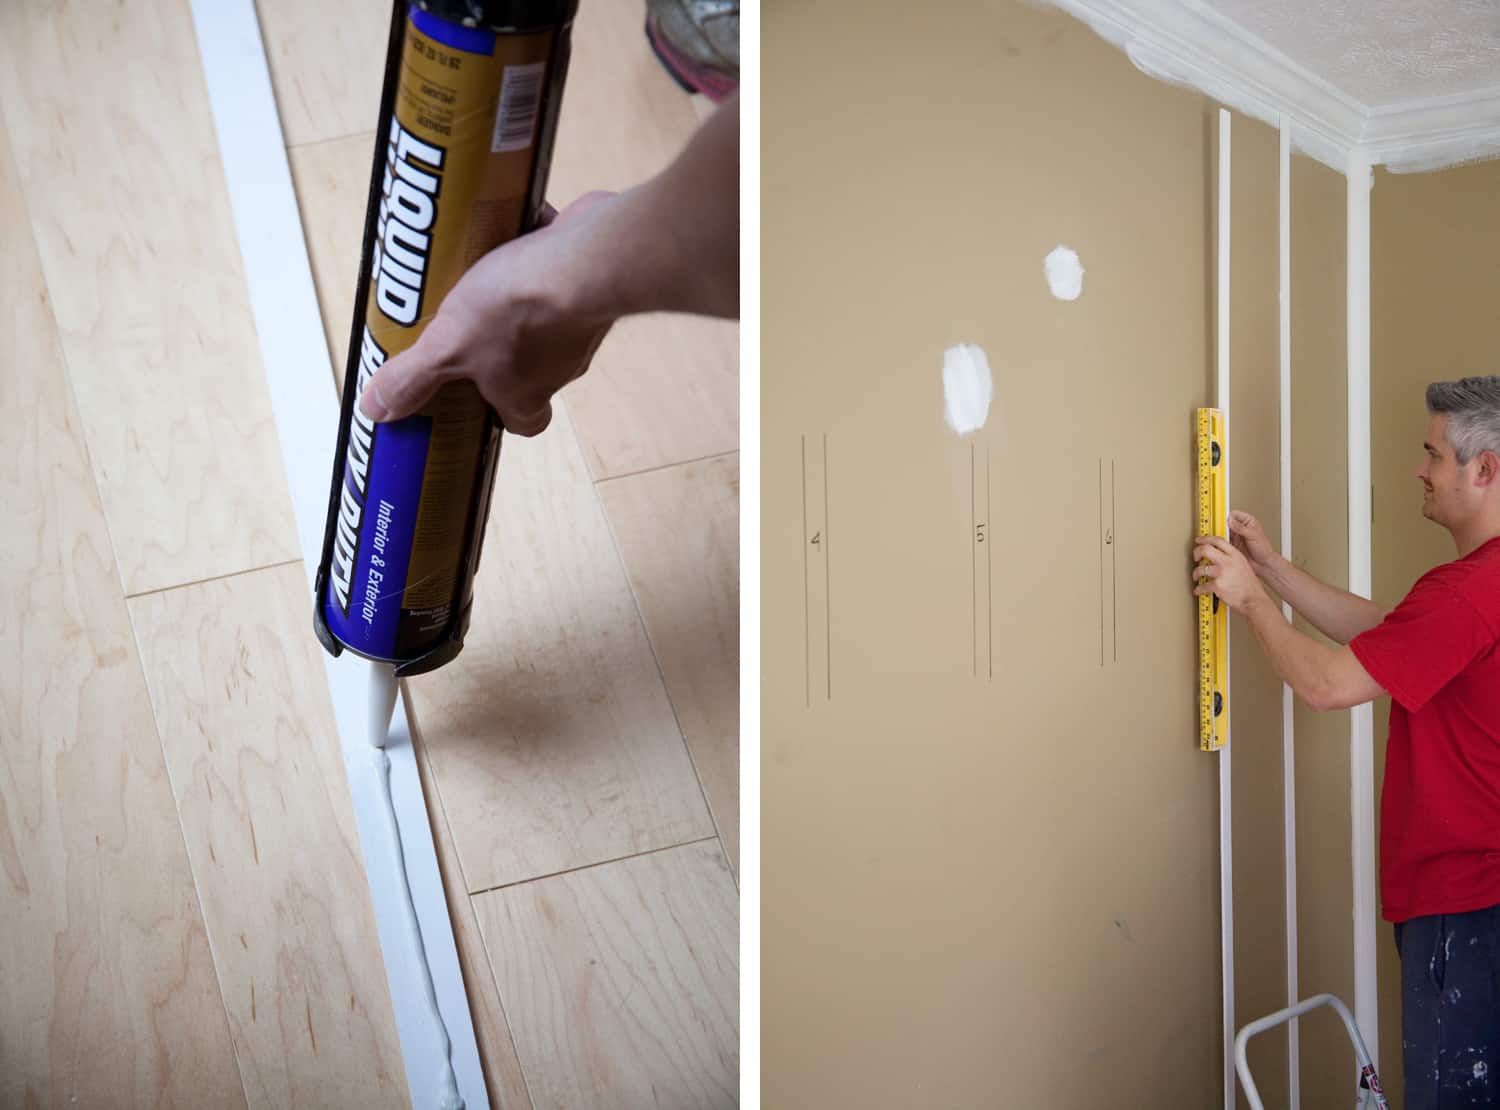 Prepping the baseboards: If your baseboards have a curve on top that is thinner than 1/8″ at any point, you will need to address that before adding the board and batten strips. I had already removed my baseboards before beginning this project, so it wasn’t difficult for me to address this issue. I simply glued lattice strips to the back of my baseboards at the top and bottom so they would come out from the wall far enough to perfectly meet the batten strips. Then I primed and painted the baseboards before putting them up on the wall.
Step One: Before gluing up the strips, I calculated spacing between strips to be as close to 1′ as the wall width allowed. (One wall is a bit more than 1′, another wall is a bit less than 1′ between strips.) Then I took a scrap piece of lattice and marked where each long strip should be mounted. I did use a level when making the marks to make sure they weren’t drawn crookedly on the wall.
Step Two: Apply a bead of construction adhesive to the back of your board and batten strip and use a level when applying it to the previously marked spot on the wall. These strips are lightweight enough that construction adhesive should probably be enough to hold it in place, without the strips pulling away from the wall as the glue dries. However, I’m not one to take chances, so we also nailed them up after placing each strip. We used an air nailer for this, but a hammer and nails would do the trick just fine!
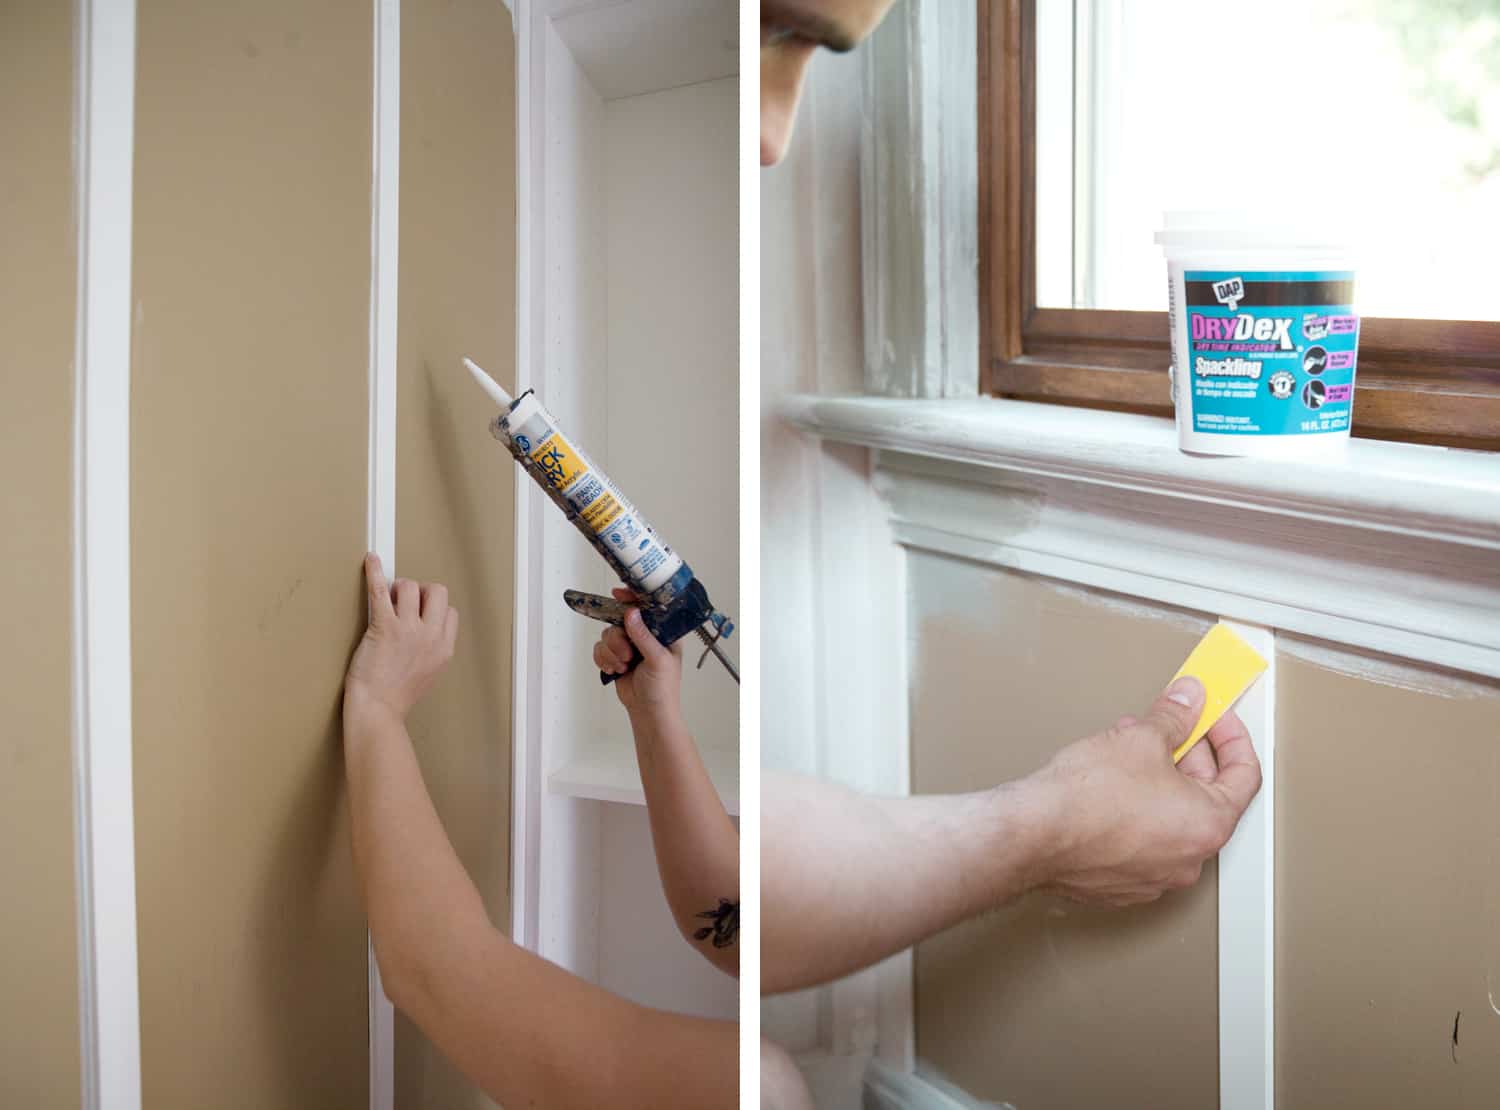 Step Four: After each board is in place and the glue has dried, apply paintable caulk to where the batten strips meet the wall. Caulk is a flexible filler which should not crack over time and will fill the gaps between the board and the wall nicely. I used my pinky to run along the line of caulk to remove the excess, then used a damp cloth to remove any extra smudges of caulk on the wall and batten strips. If you have nailed your boards into place, this is also the time to fill any nail holes with spackling.
 Step Five: Paint! After everything was glued and all of the cracks were filled, my husband graciously taped off the walls for me. I added plastic sheeting to the windows and floor then spray painted this entire room! You can check my highlighted “study” story on my Instagram profile if you’d like to see more behind-the-scenes footage of this endeavor.
Let’s just say the spray painting job did not go super well. The process itself went smoothly, and I thought I had done an amazing job, until the next day when I noticed the sheen varied all around the room. I mentioned it to my dad and he said, “Yeah, spray painting is definitely an art. You have to hold your gun in the same direction evenly across the surface or the sheen will vary.” Ugh, would’ve been nice to know before I began! I was just worried about getting even coverage and avoiding drips. Oh well. I ended up hand brushing and rolling around the board and batten to give the room a final pristine coat of paint.
 Creating a Workspace
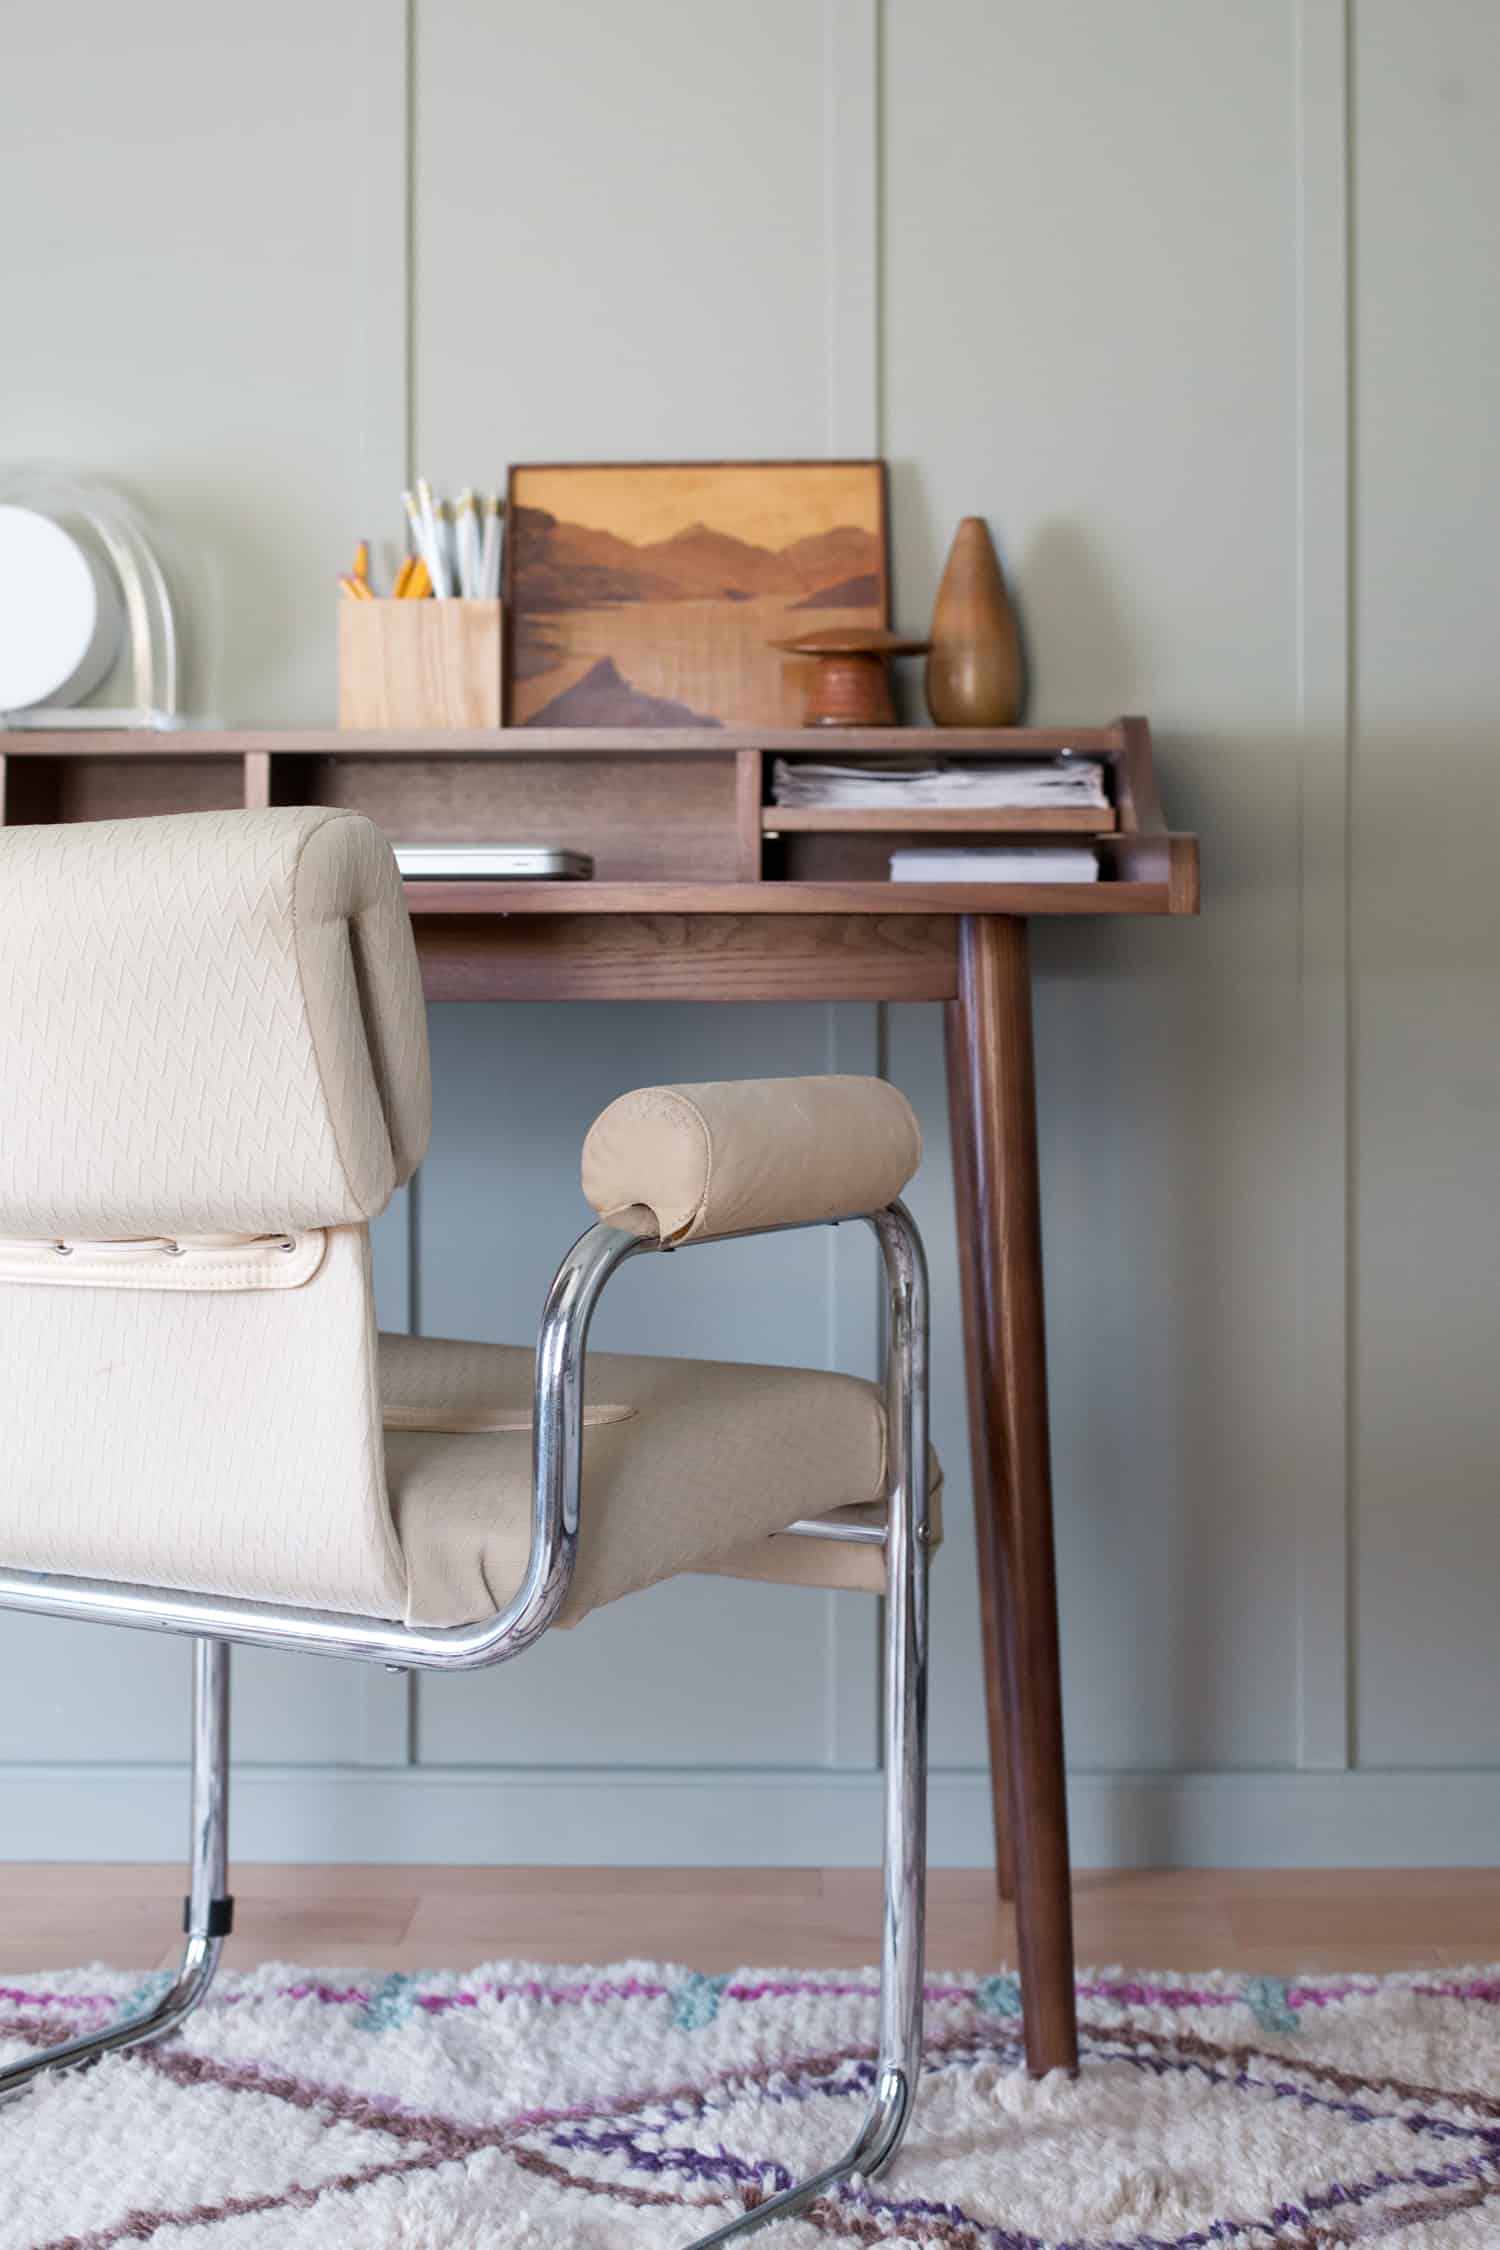
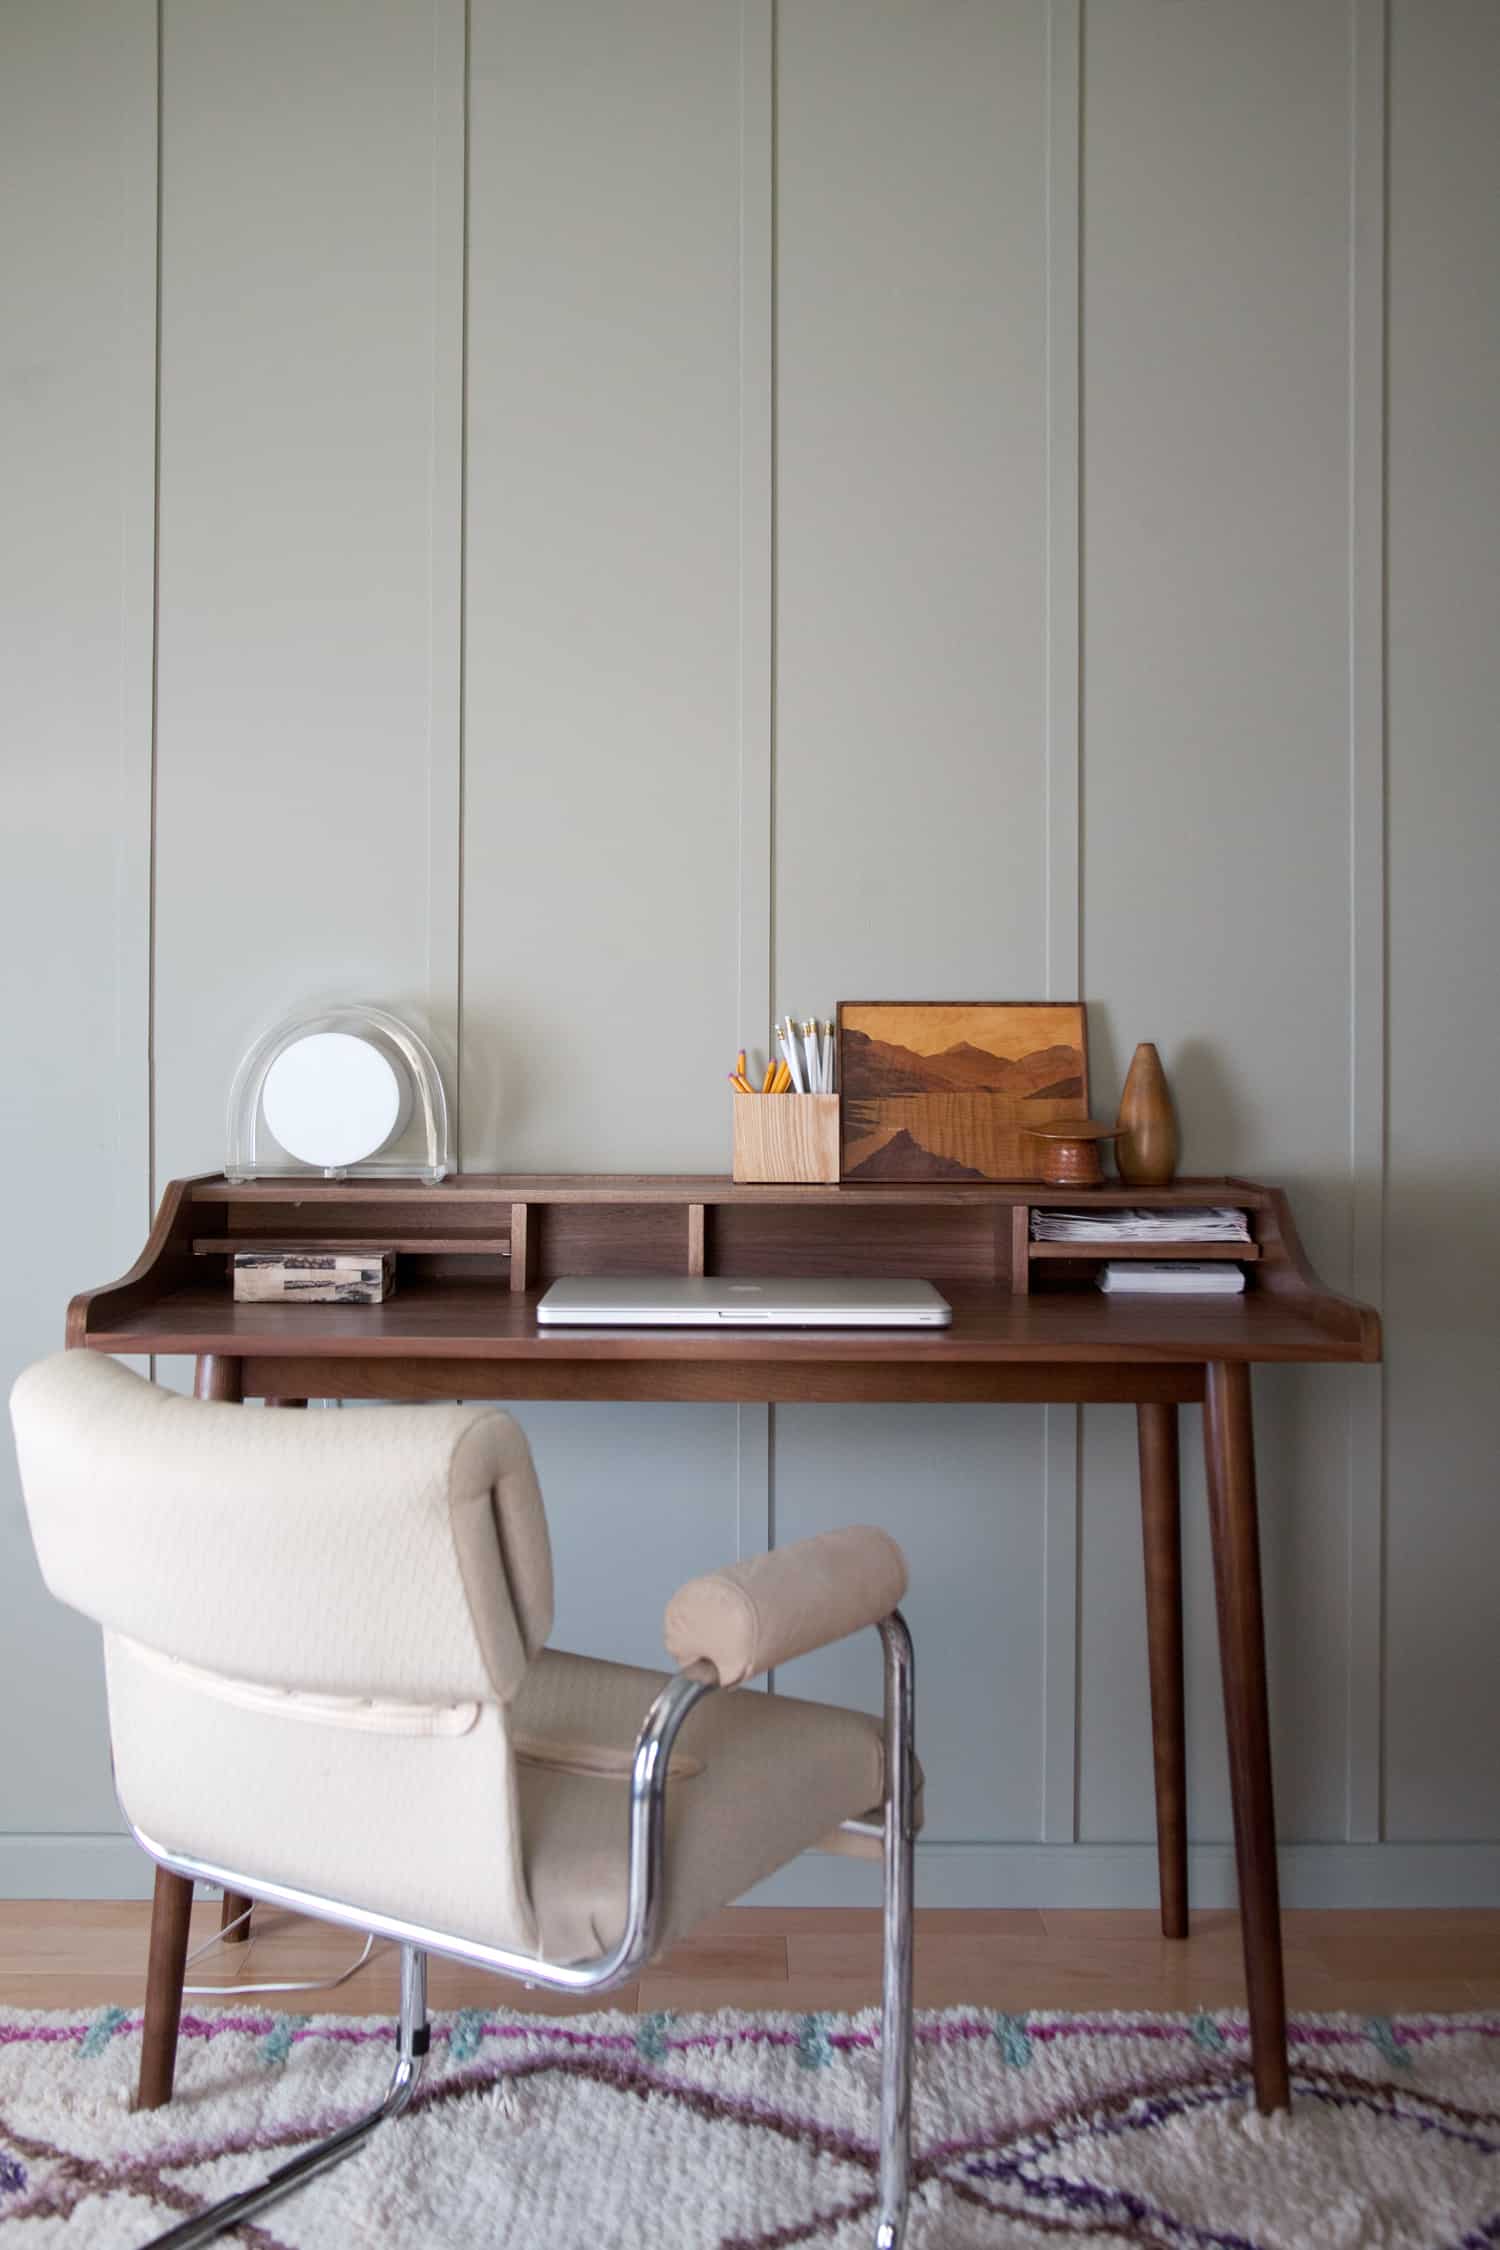
Finding a desk that wasn’t too bulky for our small study was also quite a challenge. My husband works from home occasionally and needs a dedicated office space in the study to set up his laptop and make calls. He also is a mentor for some of his peers, so he needs a private room for confidential meetings, with comfortable seating and access to his library. I decided we could nix a desk with a file cabinet if he was happy with keeping file boxes on the bottom shelf of the bookcase, so then we could get this more minimal desk from Lulu & Georgia. The chair is a vintage find from a local favorite of mine in Canton, Ohio (Main St. Modern), and provides a comfortable place to sit and work for an extended period of time.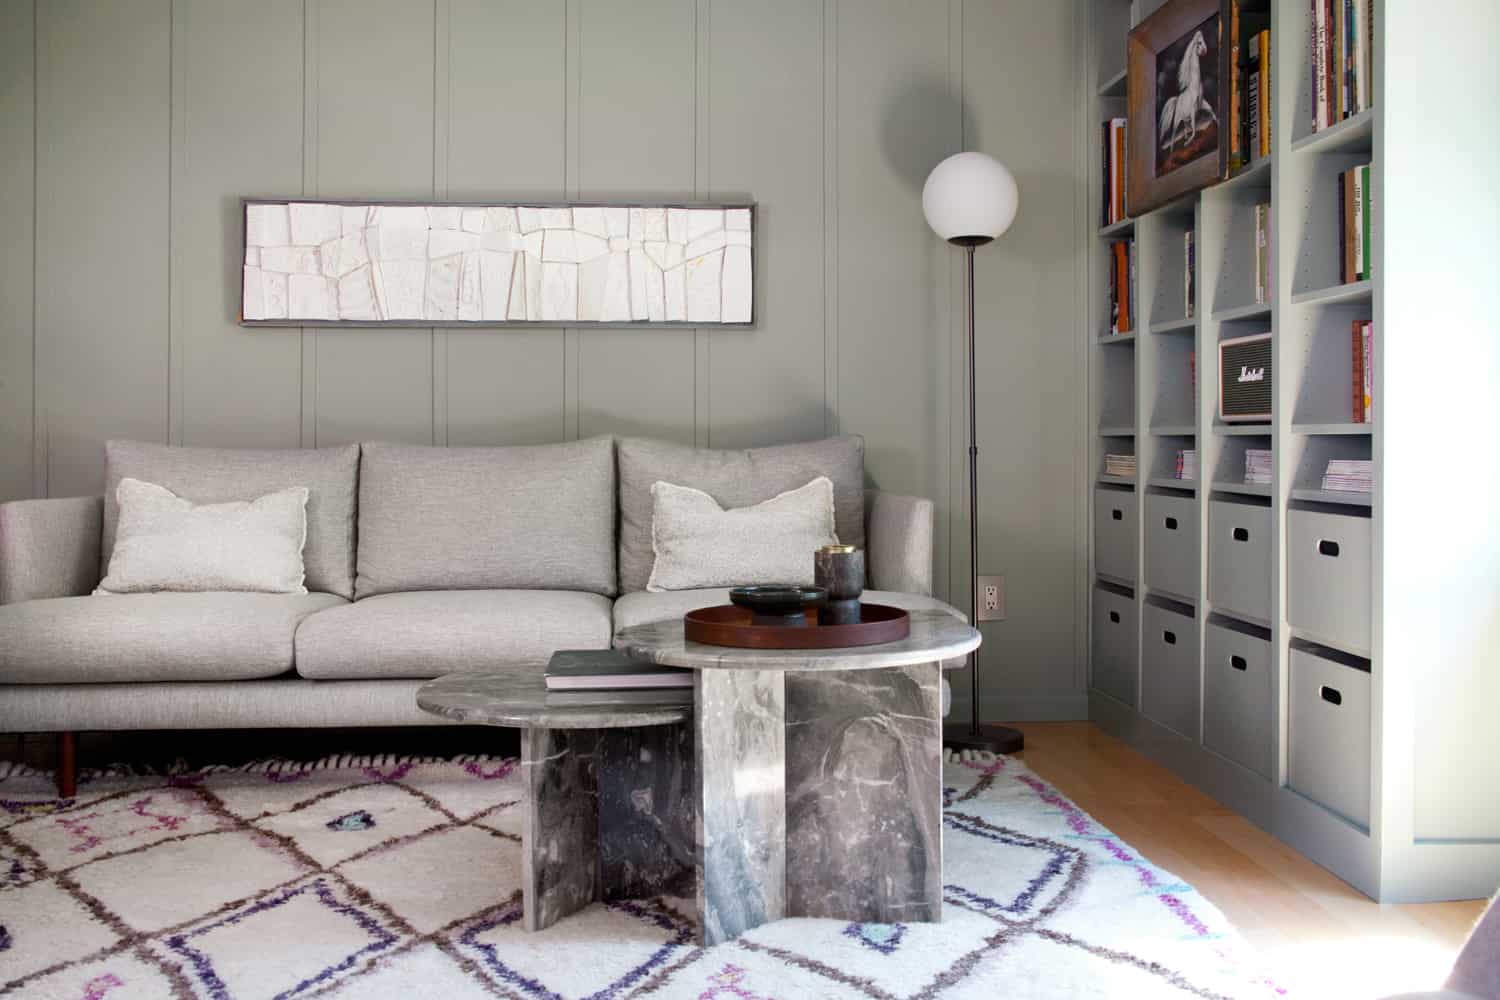

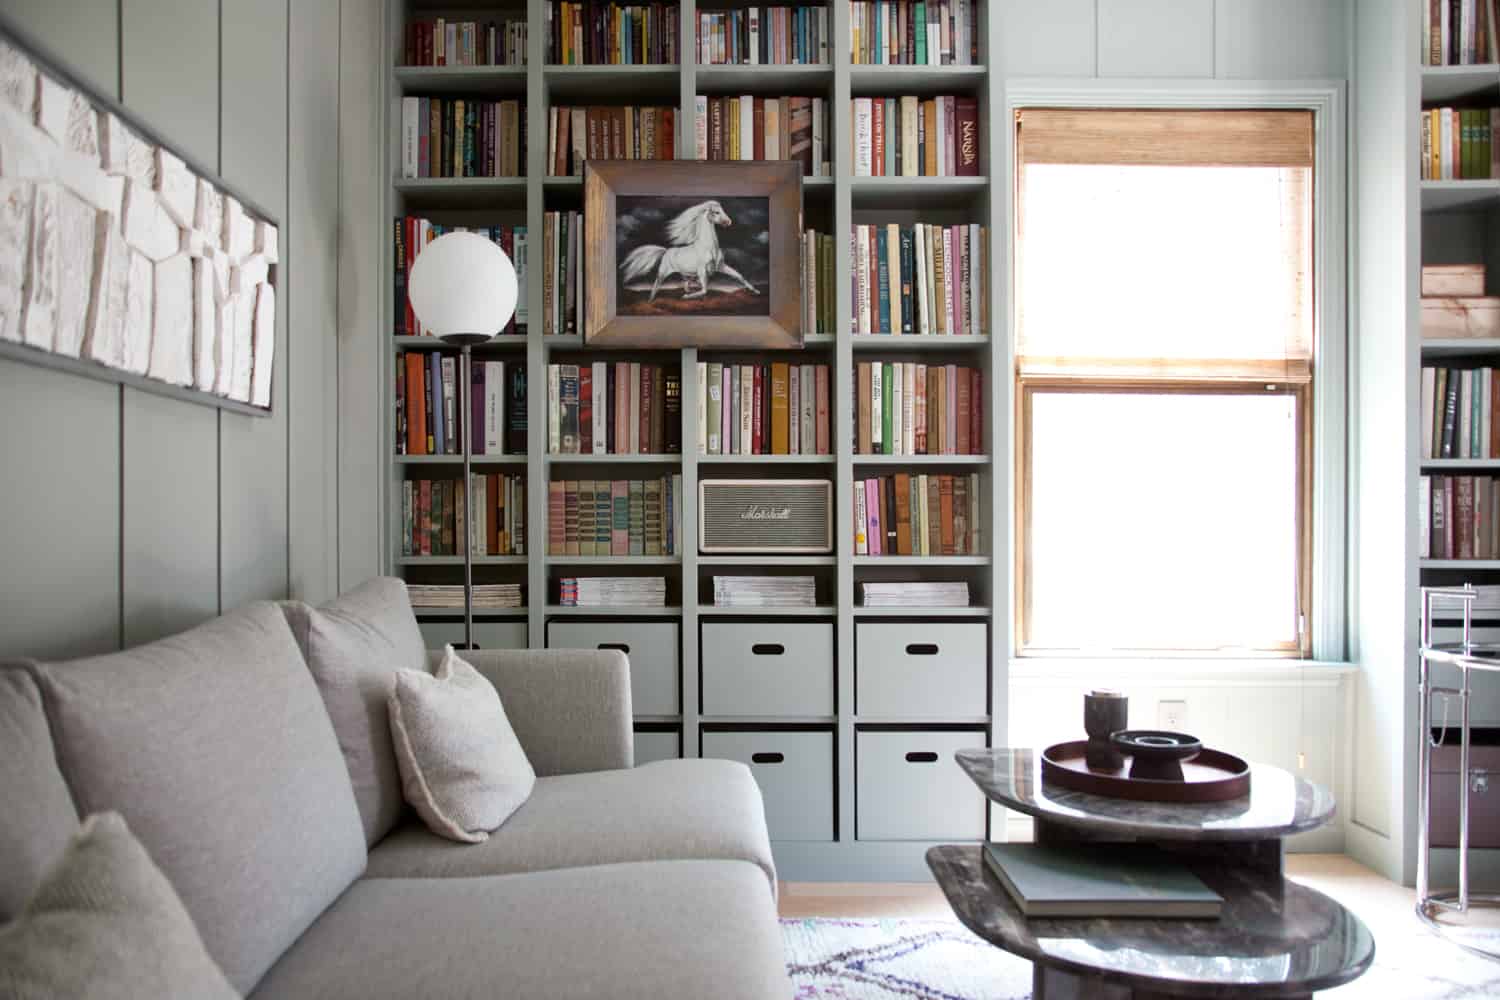 I’m so happy with how the library aspect of this room makeover turned out! I’ll be sharing this bookshelf DIY soon. Adding color to the wall that also encompassed the bookcases really helped make the contents of the bookshelves feel more unified. I don’t have the prettiest book collection of all time, but I did integrate several vintage books to the mix to add a more timeless feel. Most likely I won’t read many of those vintage ones, but who knows—maybe a 1950s book called A Career in Fashion may provide useful to me one day? While thrifting one day, I did stumble on an old copy of The Fountainhead, which I couldn’t resist, even though I already own a newer copy.
 Now that this space is finally completed, I’m excited to set down the power tools and work at my summer reading list instead! Any favorites I should add to my list?
As always, I have included a link list to all of the materials I used in this room. Check it out below. Let me know if you have any questions! – Mandi
I worked with a few brands to gather some items for this space. Those items are noted with a c/o in the list below to signify that they are gifted “courtesy of” items.
Material Sources:
- Wall color: c/o Benjamin Moore Oil Cloth
- Blinds: c/o Blinds.com
- Flooring: Lumber Liquidators
- Rug: c/o Lulu & Georgia
- Sofa: c/o Article
- Floor Lamp: c/o Article
- Table Lamp: vintage
- Desk: c/o Lulu & Georgia
- Desk chair: vintage from Main Street Modern in Canton, Ohio
- Coffee Table: vintage
- Lounge chair: c/o Rove Concepts
- Glass side table: c/o Rove Concepts
- Bluetooth speaker: Amazon
- Gray marble vase on coffee table: 31 Bits
- Art & accessories: all other accessories + art are vintage
- Bookshelf Boxes: DIY (blog post coming soon!)
17 Comments
I’m so in love with those walls, they look amazing!
https://www.makeandmess.com/
The combination of vintage Mid-Century vibe pieces integrates seamlessly into this new space! It feels like an Alfred Hitchcock movie set but with the warmth of the Dick Van Dyke show. Who knew a gray toned library could feel so cozy?? Excellent job 🙂
That is the BEST comparison! THANK YOU!
Ok I’m really looking forward to the bookshelf DIY post! That looks amazing! I am always looking for ways to have built in looking shelves and not spend a fortune on a custom build. Beautiful room!
Such a beautiful room, great job! There’s such a big difference before and after the makeover! ❤️
Charmaine Ng | Architecture & Lifestyle Blog
http://charmainenyw.com
Mandi, this room is STUNNING! Every piece is perfection. Well done!
Love, Love, LOVE what you did with the built-ins! The framing of the window is so well done and love that you matched the adjacent wall with the accents. It all came together so beautifully!
xo,
katrina
http://steadycatalog.com
While it is cozy, I love that with everything the same colour, it still makes it feel light and not overstuffed/overwhelming. Bravo! Would love to have a dedicated space for a library/study one day!
Mandi, I love this room. Great job, as always. I must say, too, that I am so glad you didn’t turn the books around or put them in by color, which I actually like in some spaces, but this looks like a library should, IMHO.
This was so fun to watch on your instagram story. It looks gorgeous! What did you finally settle on for the other side of the couch by the desk??
We’re happy with the Mid Century Wall Desk from West Elm. I’ll do an update next month on my blog with the adjustments I’m planning to make. 🙂
All of mandi’s DIY are my dream home! Very lux look on an affordable budget, love!
-L
wow wow wow. all of your spaces are SO chic. every post on abm makes me think more thoughtfully about home design/decorating. the level of creativity and exciting design is insane!
This is so beautiful! I need to do this in our home!
Paige
http://thehappyflammily.com
This makeover is incredible! I’m a little obsessed with the color palette of your home and love seeing how it’s evolving. I’ll be keeping an eye out for the storage box DIY – I have an old Ikea expedit to fill and need to hide my clutter! 🙂
We recently painted our kitchen and I LOVE the color. But when I saw this room on Instagram my first thought was, oh bummer I like this color better! So I’m a suprised to see here that your office is painted the exact same color as our kitchen, BM Oil Cloth! ☺️☺️☺️ Man that sure is a great color. And your room is absolutely lovely.
I love the ceramic piece over your couch! Do you have the artist name or Etsy shop info for it? And the vertical scrap wood piece is lovely too. Does it have a DIY post? Thanks for sharing!