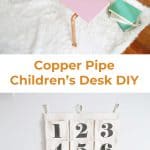
Long live the copper pipe and all its many uses! I designed this child-sized copper pipe desk after being inspired by a vintage set of stairs that were probably taken out of an elementary school’s music department. I made some changes to help with stability and have already apologized to Ruby for deciding I need this desk to stay in my studio instead. Since copper is a softer metal, I only recommend this desk for younger kids that weigh under 60 lbs. But it is a beautiful option for adding a special piece of furniture to your child’s space (or your own)!
The best way to test out a child-intended project is to let the kids loose on them. Smith wasted no time in taking a seat to draw his favorite mama some pictures.
Supplies:
-2 – 3/4″ x 10′ L copper pipe
-8 – 3/4″ copper slip tee fittings
-6 – 3/4″ x 3/4″ 90 degree copper slip elbow fittings
-4 – 3/4″ copper end caps
-10 – 3/4″ 2-hole pipe straps (these are also available in copper but are twice as expensive and aren’t likely to show)
-20 – #8 x 3/4″ flat-head, zinc-plated wood screws
-1 – 3/4″ x 7″ x 36″ cut of pine wood for seat
-1 – 3/4″ x 12″ x 36″ cut of pine wood for desktop
-light pink spray paint for wood
-clear enamel to seal copper piping so it doesn’t tarnish
–pipe cutter
–super glue copper bond epoxy (instead of GOOP glue shown in photo)
-light grade sandpaper
-nail polish remover
-power drill
-5/64 drill bit
Copper pipe cut list:
Pipe A
-10 – 10.5″ cuts from one of your 10′ pipes
-2 – 7.5″ cuts from the rest of 10′ pipe
(One of my pipes is larger than the rest in the photo above, but I cut it down to fit before fitting it all together. You do have a little wiggle room with these cuts but try to be as consistent as possible.)
Pipe B
-2 – 26.75″
-2 – 4″
-4 – 3″
You’ll have leftover pipe from this project, but it is still less expensive to purchase two 10′ lengths than to purchase the exact amount. You might also find you make a wrong cut and will need an extra piece. If you need to cut your pipes down to size to fit them into your car, cut them down at the 5.5′ mark so you don’t have any wasted pipe. Also, don’t cut your pipe down to size and then leave the shorter piece in your cart while rushing home to make dinner because it was dark outside and you were distracted. Not that that happened to me or anything.
Use nail polish remover and a baby wipe or cotton ball to remove the red or blue marks on the copper pipes. They come off easily and will help things look more polished.
Sand down your two cuts of wood and wipe off the sawdust with a damp cloth. Spray paint with 2-3 light coats and let dry according to manufacturer’s directions.
Fit your copper pipe pieces together one side at a time as shown above. Repeat with the other side. Then add the two longest pipes to join them together. This is important for making sure you’ve cut everything consistently enough that nothing is crooked when assembled.
This is how it should look when you’re finished.
Place your desktop and seat where they should be and make any adjustments if needed. Remove your stickers from your pipe joinings.
Take your desk apart and place your pipes in specific zones to make sure you keep the correct lengths in the correct places. Glue your pieces together with your copper epoxy glue (not the glue shown) while following manufacturer’s directions. This can be the longest part of the process as you need to let the epoxy cure for a minute before attaching joints, and then you have to let all of the joints set before applying any real weight to them.
Once the pieces have been glued together and it’s safe to apply pressure, place your seat and desktop in place and make sure they are even on both sides. You should have about 3″ of overhang on each end from the placement of the pipes. Get down under the desk and place your pipe straps over your pipes. They hold tightest when you fit them over the closest pipe fitting available. Due to the nature of the design, the desktop will have a pipe strap attached over the back pipe fitting but not the front as it would be visible. The pipe straps on the seat should fit as snugly over the pipe fitting as possible. See photo below for visual of where to place them. Also place two pipe straps along the long pipe under the seat. Make marks where your screws will go.
Pre-drill your holes.
Place your desktop and seat in place and screw your pipe straps in place. Step back and enjoy your beautiful new piece of furniture!
I love when a project ends up turning out even better than I planned and the fact that it’s both beautiful and practical is a big win!
If you love this type of design but don’t have any little ones, you could make a few adjustments to turn this into a plant stand or display shelf. The warmth of the copper base paired with natural wood would look great in a minimalist or bohemian space or you could go black or navy for a more masculine look. This isn’t a cheap project (around $100), but it’s also one of those that feels extra special and will be enjoyed for years. Now, excuse me, I need to go make sure Ruby isn’t trying to move it back into her room. –Rachel
Credits//Author and Photography: Rachel Denbow. Photos edited with A Beautiful Mess actions.
38 Comments
Mother of all copper pipes, this looks so cool! It proves how many beautiful things you can craft with this material!
https://www.makeandmess.com/
I love this! The pink and copper together are yummy. No wonder Ruby is trying to haul it off.
This is so cool! I never would’ve thought of making a desk with copper pipe, but it looks so good!
That is brilliant, I love it
GORGEOUS. Love the styling too:) Had to laugh at the paint set on white rug, though, ha ha, but love love love this!
Perfect !
You’re right, this would be so lovely as a plant stand, especially in natural wood or black/navy paint.
Nice one!
LOVELY!! i want one for myself. Where did you get that number wall hang?
I love this! Such a cool idea, I love anything copper and this is just so cute! I’ve been busy up-cycling an old stepladder into bedroom shelves, would love if you could have a look 🙂
littlebateaux.blogspot.co.uk
I love this so much! Such a cute and creative idea. Kids desks are so expensive for some reason and I love the idea of building your own.
Super cool. I love this a lot!
The hotel we stayed in recently in Amsterdam, the Hoxton, had the coolest exposed copper pipe in our bathroom and I’ve been obsessed ever since. Love this DIY!
Molly {Dreams in HD}
http://www.dreamsinhd.blogspot.com
fantastic idea ! I feel like I want to have the same desk for me 🙂
http://little-shrew.blogspot.com
This is so pretty!!! This is my favorite “build” on ABM as of yet. I like how cute it is, and functional too. Great for small spaces.
Love this! 🙂
This is gorgeous! I almost wish i had kids just so i could make this!
There is a firm that carries “furniture grade” PVC; I wonder how at would work for a grown-up desk? The copper pipe concept would also be great for displays, with Plexiglas shelves– 6″ depth, 2′ width.
YES. The paint on the white rug is stressing me out. Haha!
This is so cool!
http://www.llindatt.com
OMG ME TOO. I saw it on instagram and literally came here to comment about it.
What a cute project! I’d love to try this. Maybe adapt it for an picnic table or bench!
Thanks for sharing!
Laura
http://laurelandfern.com/
Love the desk, but why the glue switch? I’m asking mainly because yesterday I posted a copper pipe and wood slice table/plant stand that I made with Gorilla glue, and I’m wondering if that’s a bad choice for some reason! I’ve never seen anyone use that copper epoxy.
Guys,
Thanks for this idea ^_^ My kid will definitely like it!
Rachel,
Your plant stand is beautiful! Well done! I got some bad advice from one of the employees at the store where I purchased my copper about what adhesive to use but didn’t find out it wasn’t what I needed until after I’d shot the supplies photo and put the desk together the first time. Gorilla Glue has always been a good choice for me in the past so I’m sure yours will be great!
The paint bothers me less than the cactus for a toddler. Ouch!
This is so cute! http://www.hannamarielei.com
Oh man, I am totally making this for my future kid’s room. I’ve been wanting to make something with copper pipes for ages, and this looks perfect!
This is an amazing idea, love how you can tailor the size to suite your space! Im loving the colour combo
Zoe
http://www.bohomixology.com
Amazing!!!!!!!!!!
http://soldenochedecocrochet.blogspot.com.ar/
Awesome job! It turned out great!
I love this! How creative.
I love this! Such a great place for the littles!
So much creativity around here, thanks so much !
I love this! What an adorable desk! I want my husband to hook us up with one of these for our girls!!
xo dré
http://www.flightoffeather.com
Oh wow, I fell in love with this DIY and got super excited to look deeper into the instructions to possibly give this a go myself….but…this is a lot more expensive than it looks. The supplies cost $100 and that doesn’t even include the spray paint, wood (for bench and table) or enamel. Yikes! Idk, maybe I’m cheap 🙂 I do think this is a gorgeous piece, though and thanks for sharing it and your DIY creativity. Definitely inspiring 🙂
This is incredibly gorgeous!
Sheena Sreekeessoon
http://afashionstudentsdiary.blogspot.co.uk/
Love it! So excited about the idea of using copper pipe for furniture.
Its a perfect desk for child’s and looking amazing one..