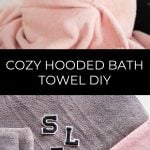
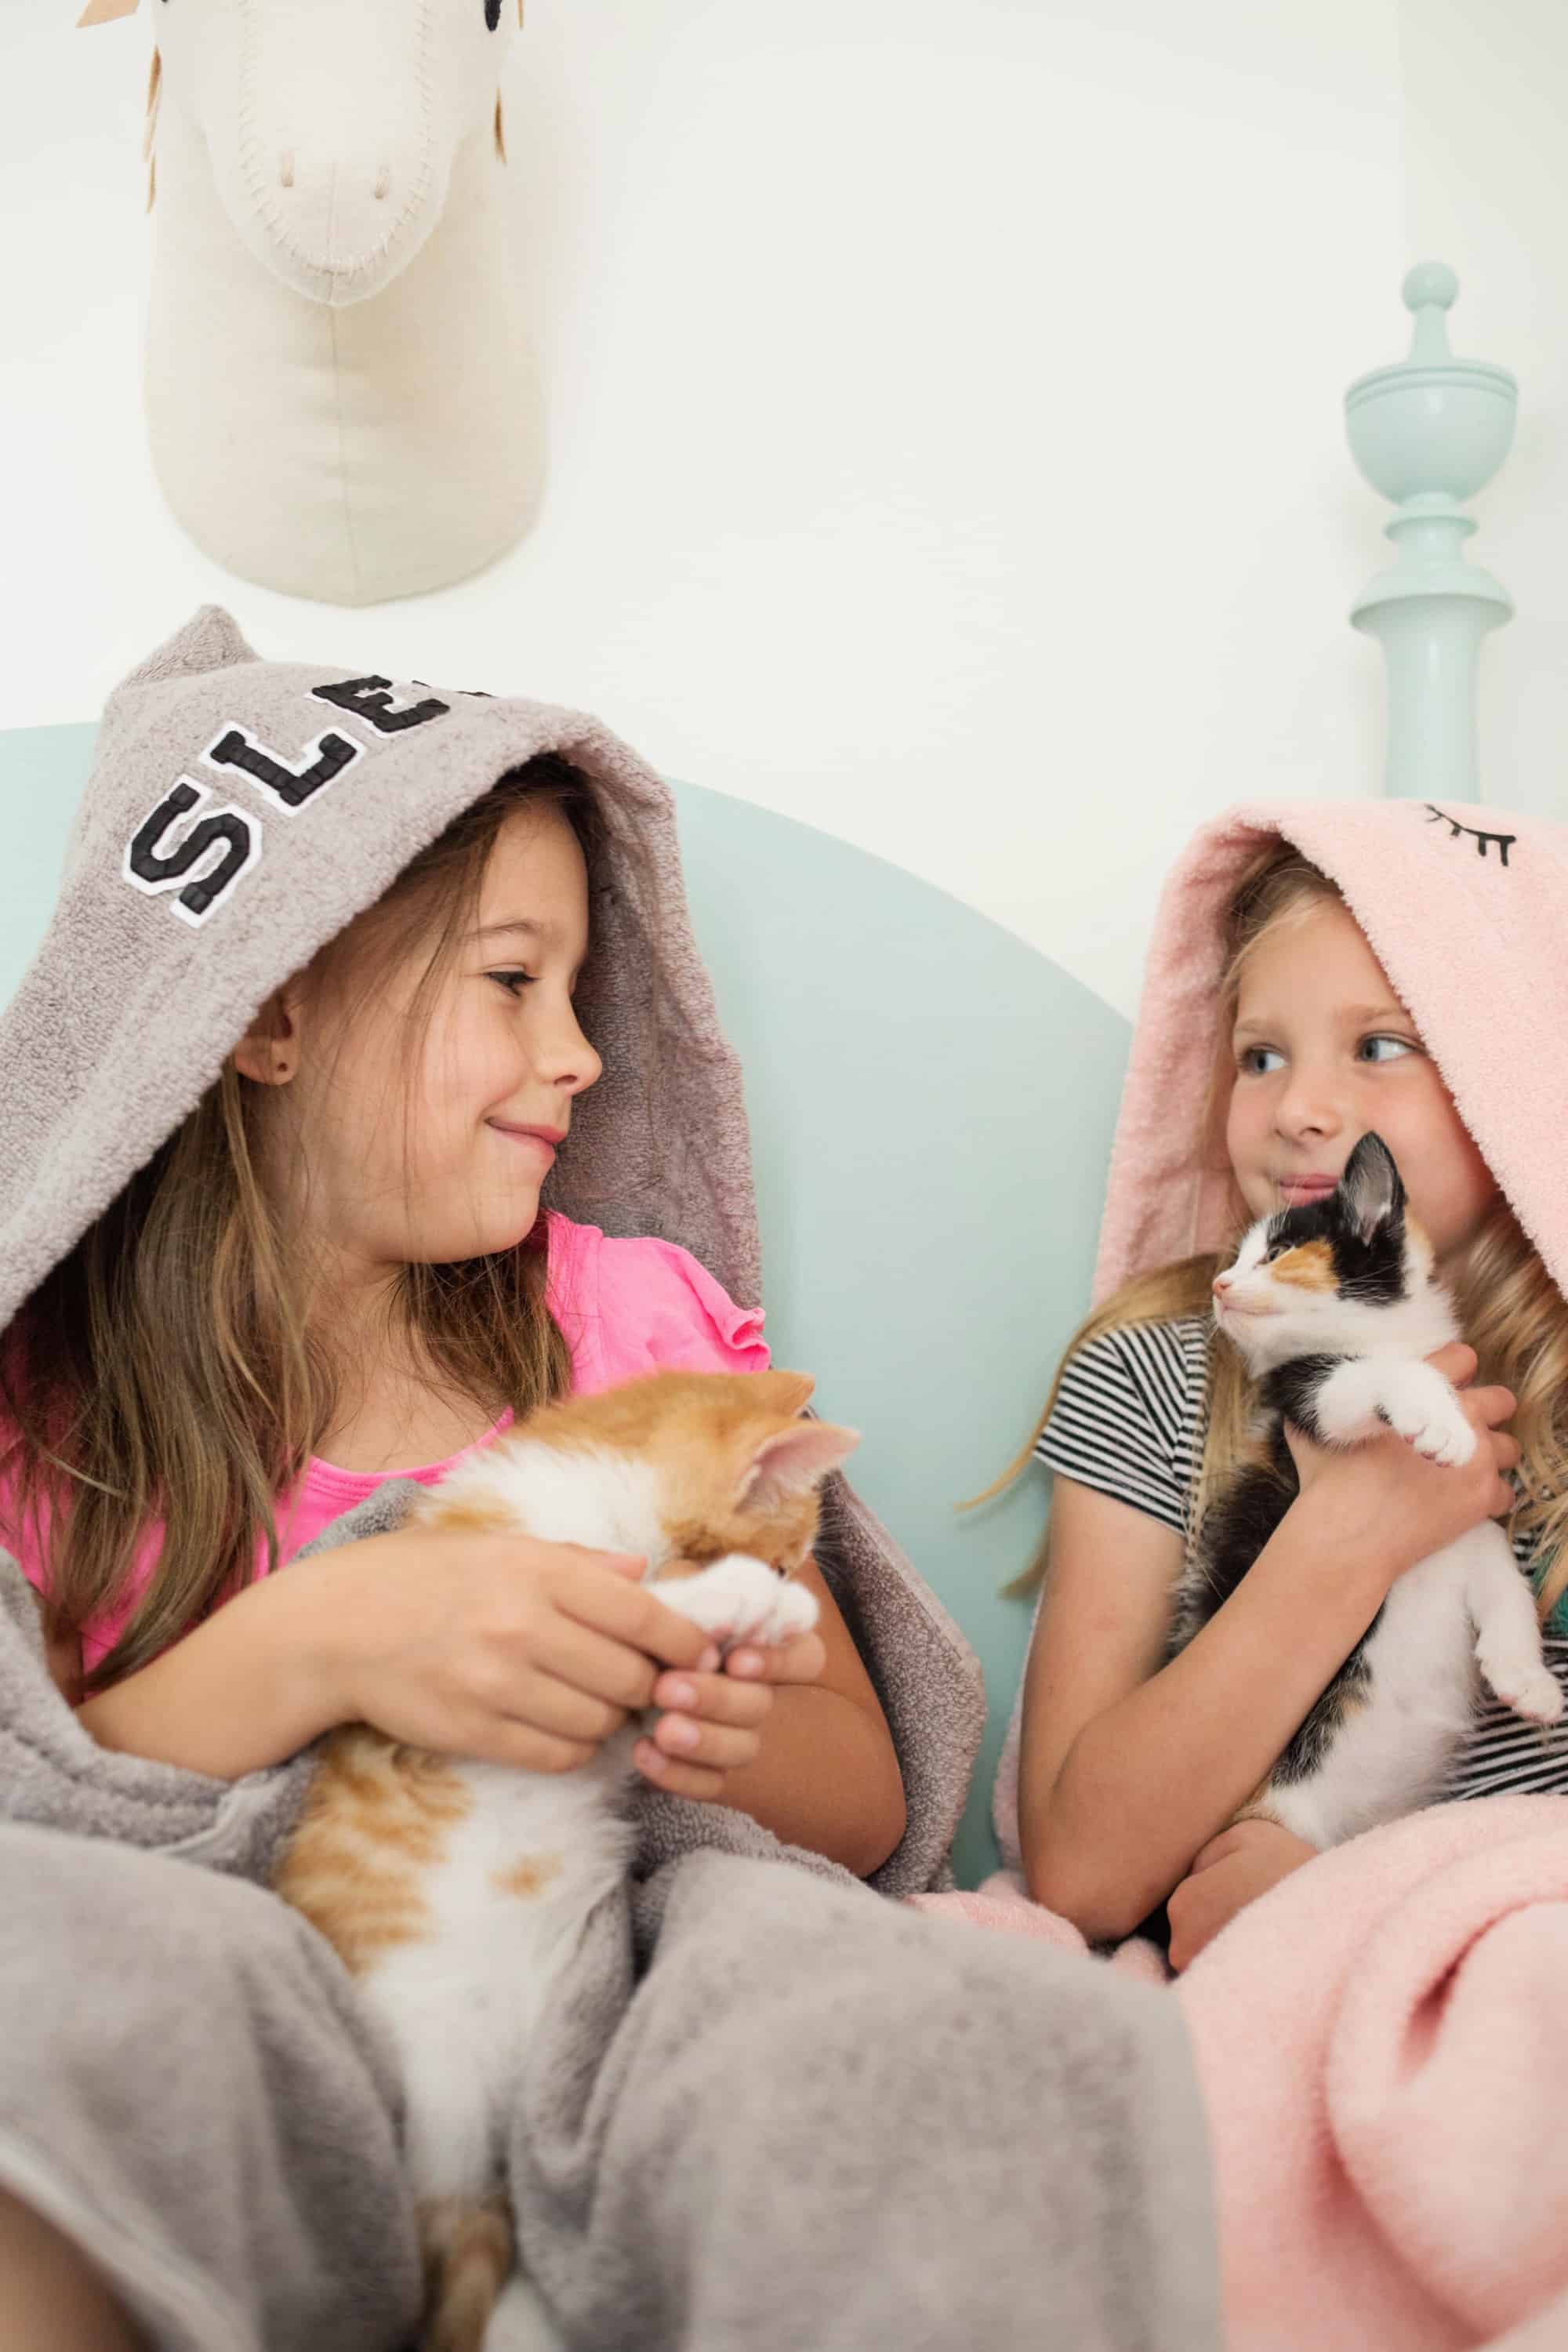
 My kids have had some favorite animal-themed hooded bath towels for years that were looking their age, so I decided it was time for new ones. Instead of going with the cheap versions at the local store, I decided to customize a set for my two youngest that better fit their personalities. It’s just another one of those ways to find a happy medium between their tastes and mine while also adding another special handmade touch at home. Plus, these adorable hooded towels are SO soft and cozy. Perfect for drying off after bath time or even taking to the pool. You’ll be surprised how easy these are to stitch together!
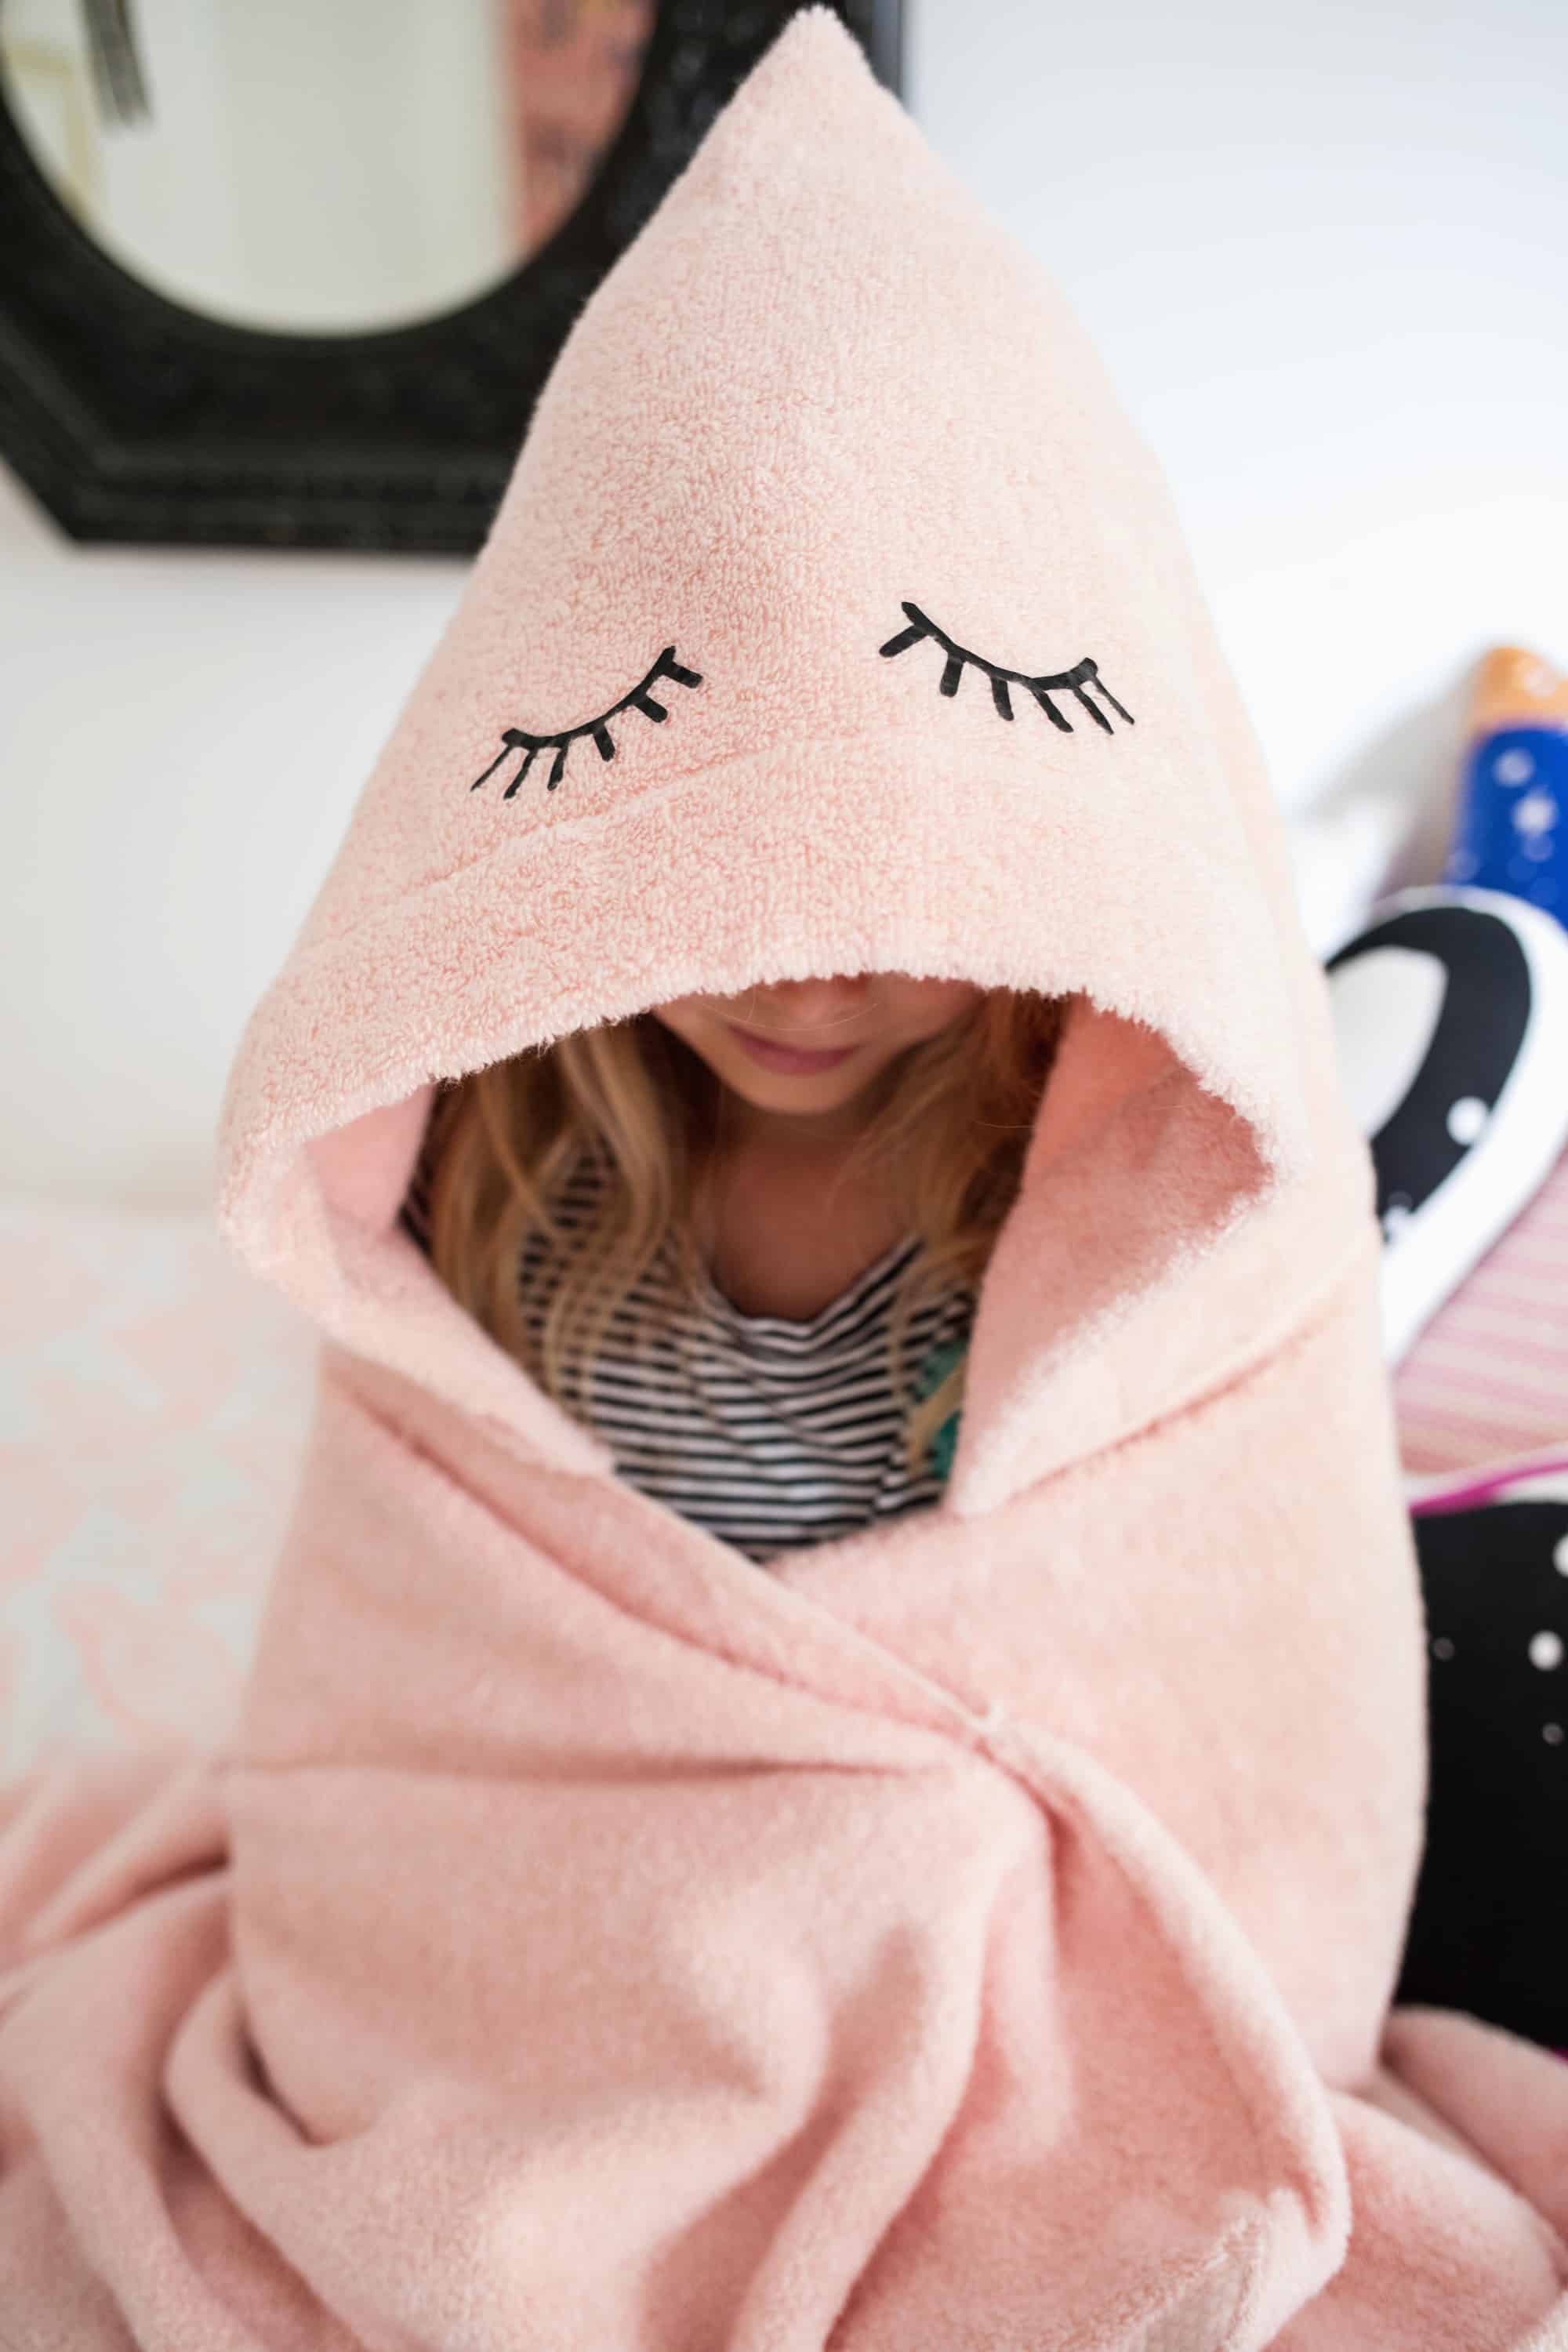
With patches being on-trend again, it’s easier than ever to customize a hooded towel but don’t discount iron-ons! I found these adorable eyelash transfers from an Etsy shop and then picked the alpha up at my local craft store. They’ve both been through the wash twice since I made them and are holding up really well, but I did hand-stitch my alpha to the towel for extra support. This is a great project for beginning sewers, so you could even enlist the help of your child to make it one of those teaching moments. You know, depending on your patience level. Ha!
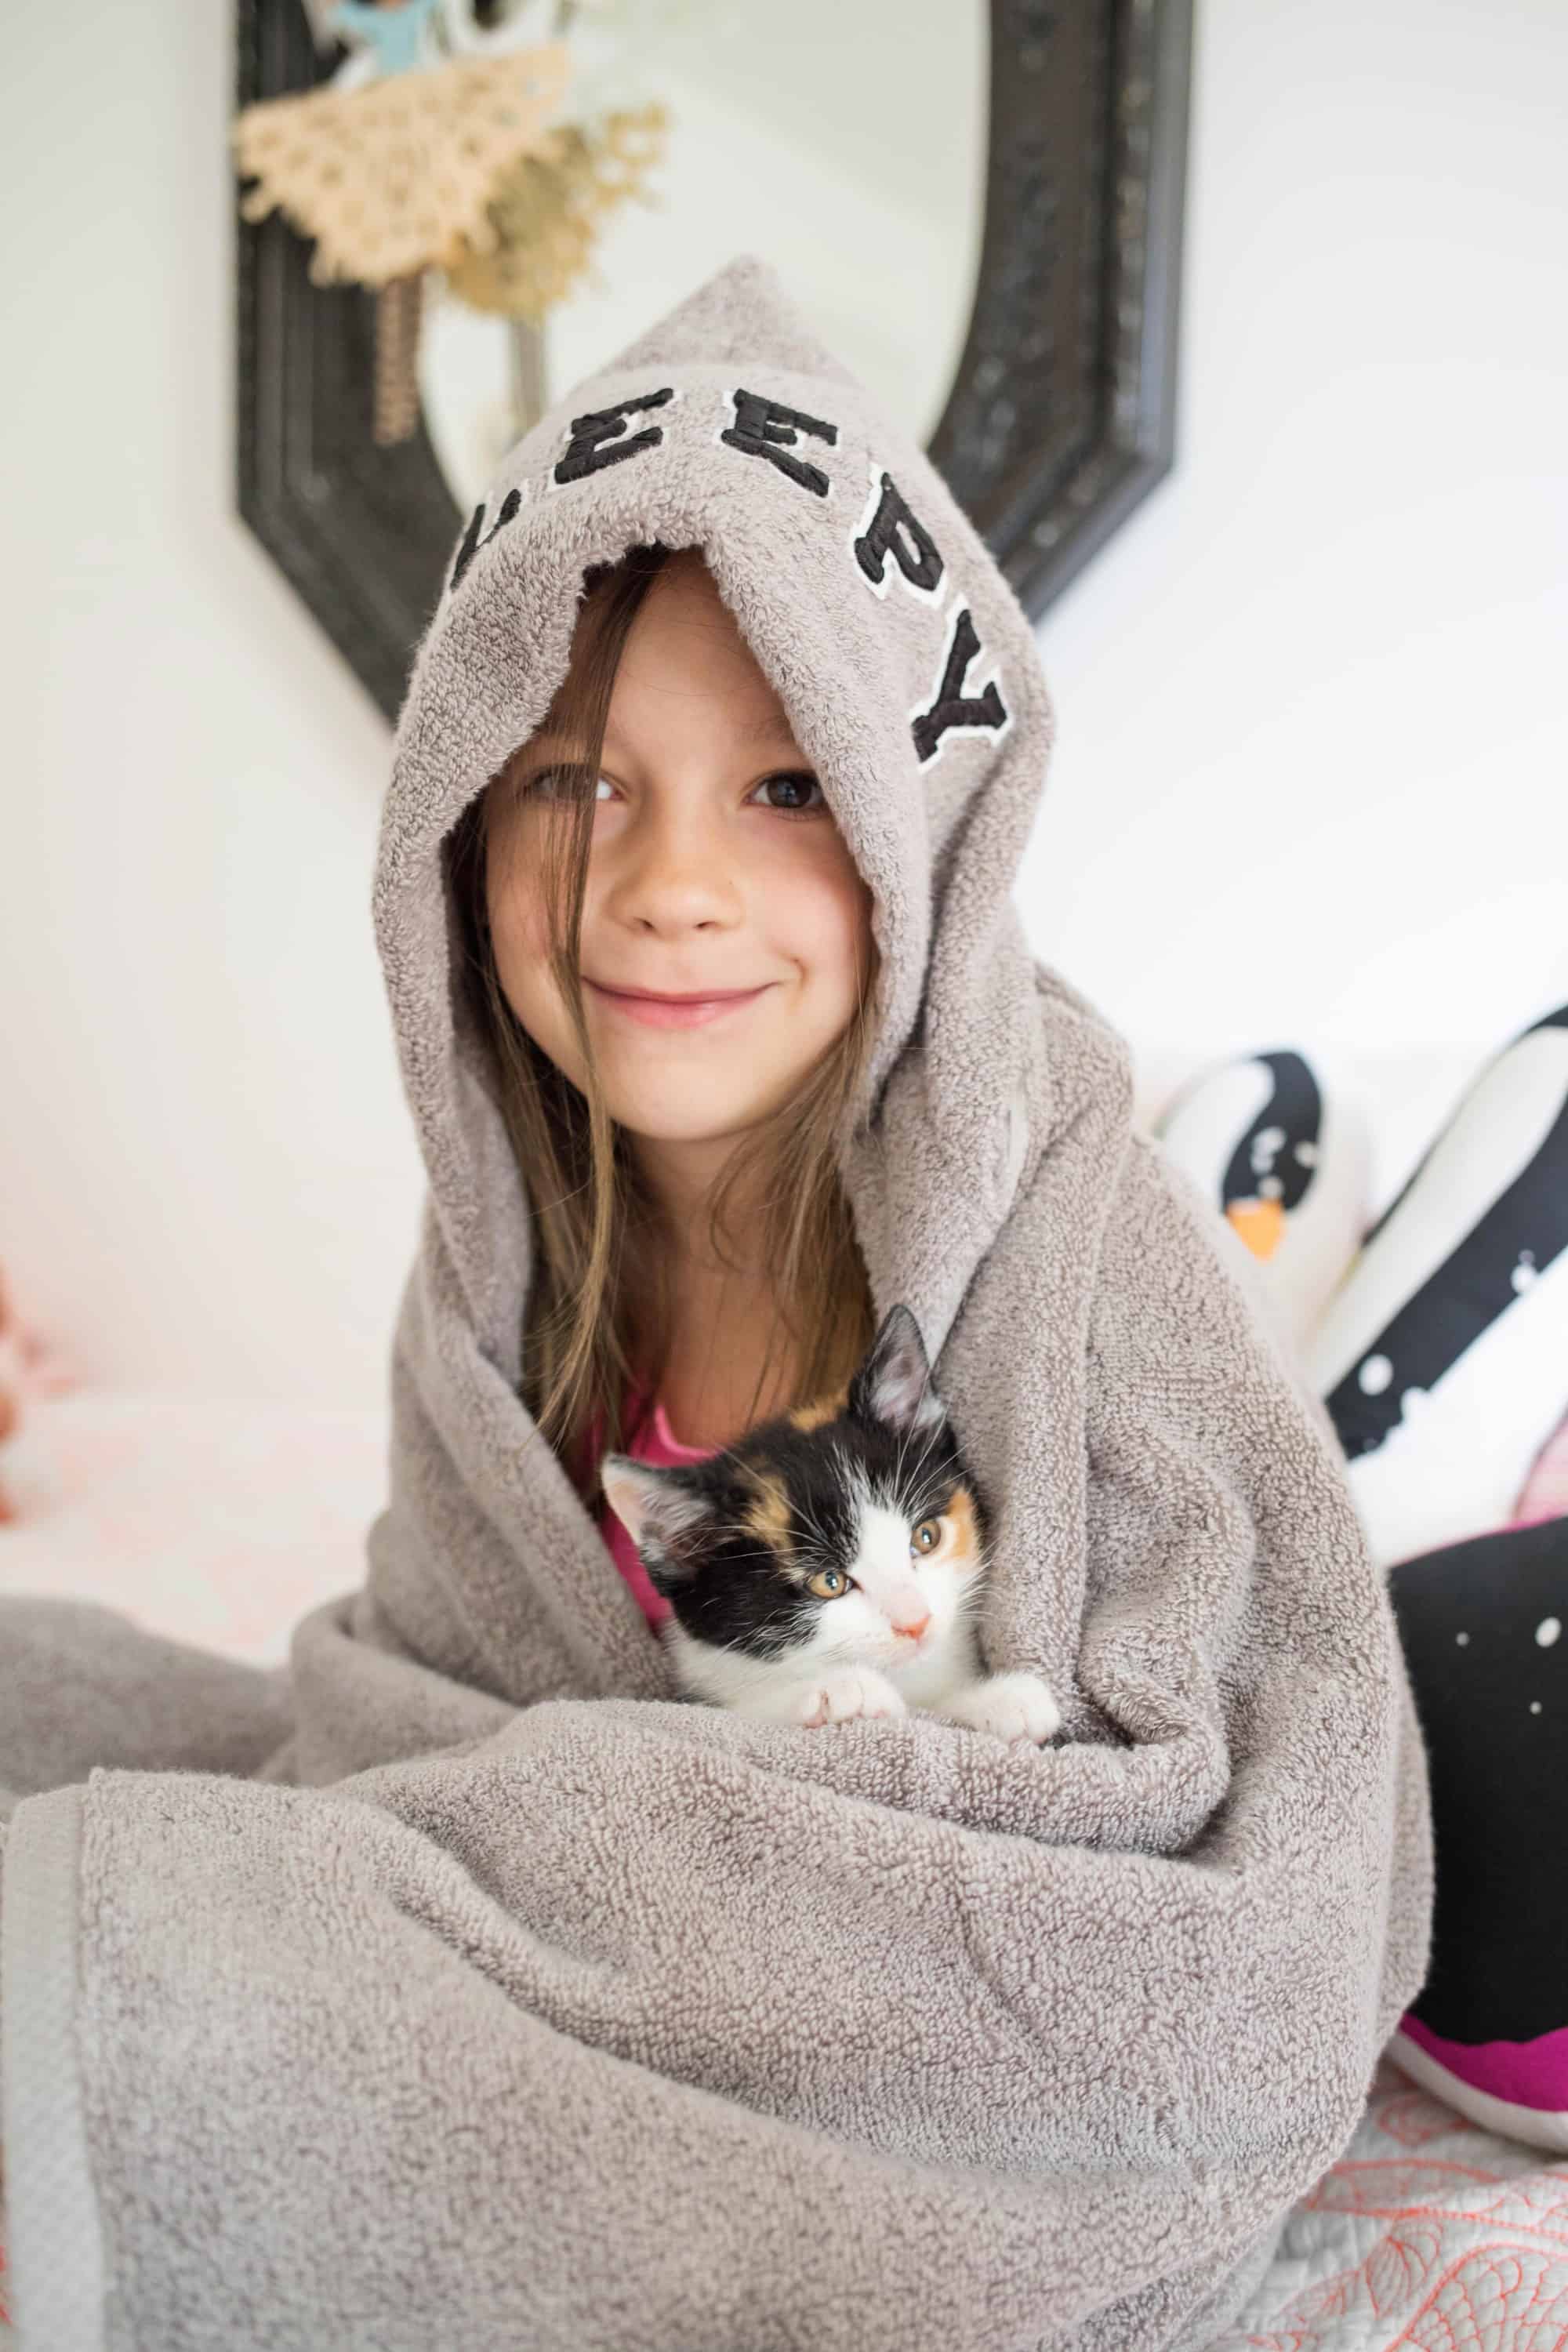
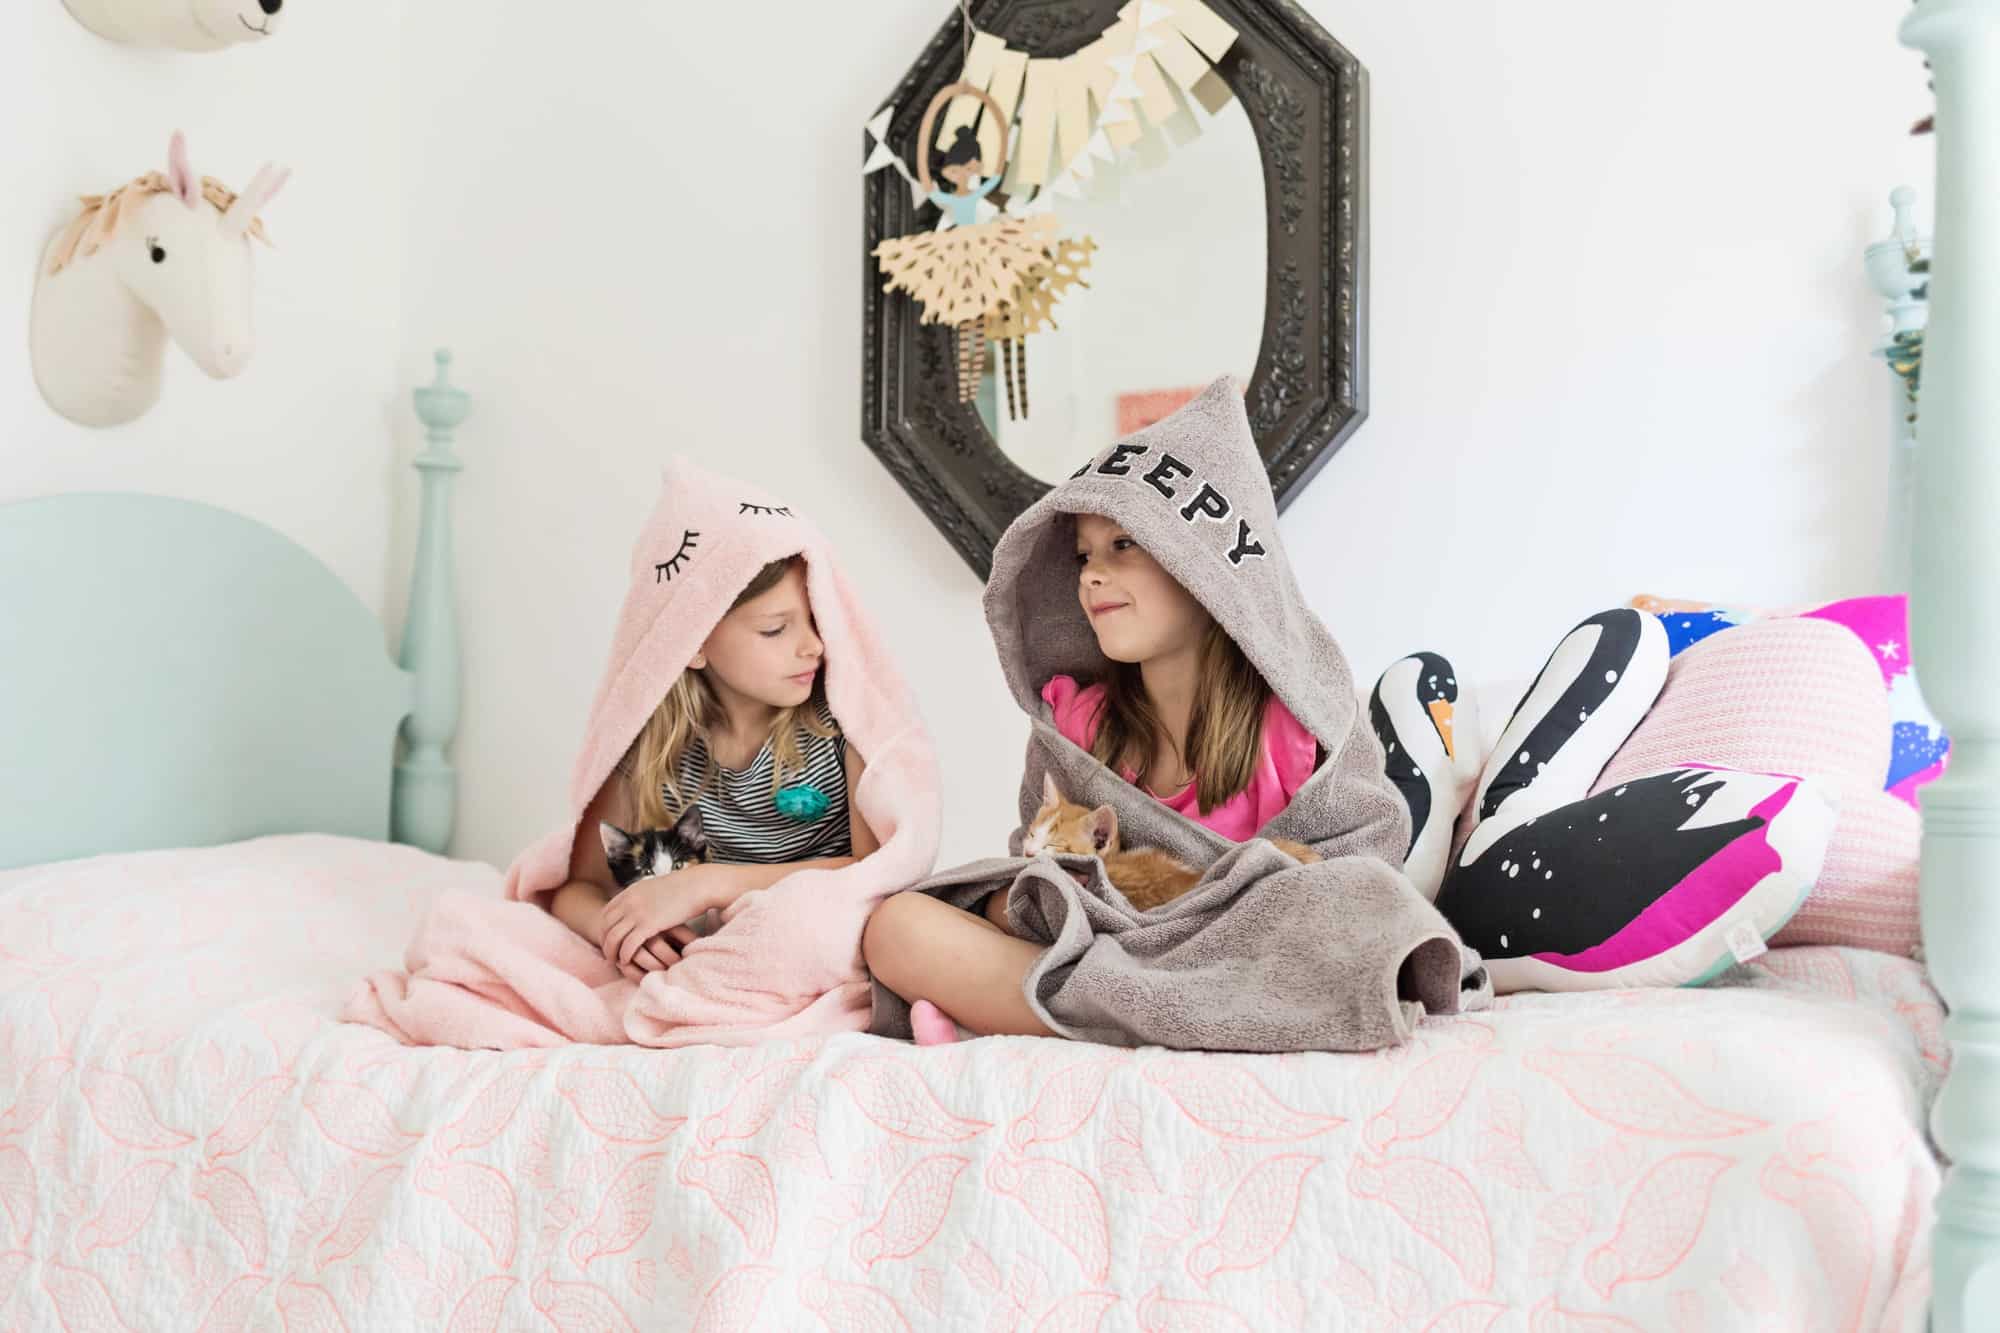 It seems all of our friends are either having babies or have new kittens at their house! I can’t tell who is more cozy, the girls or the kitties! Night night, Steve!
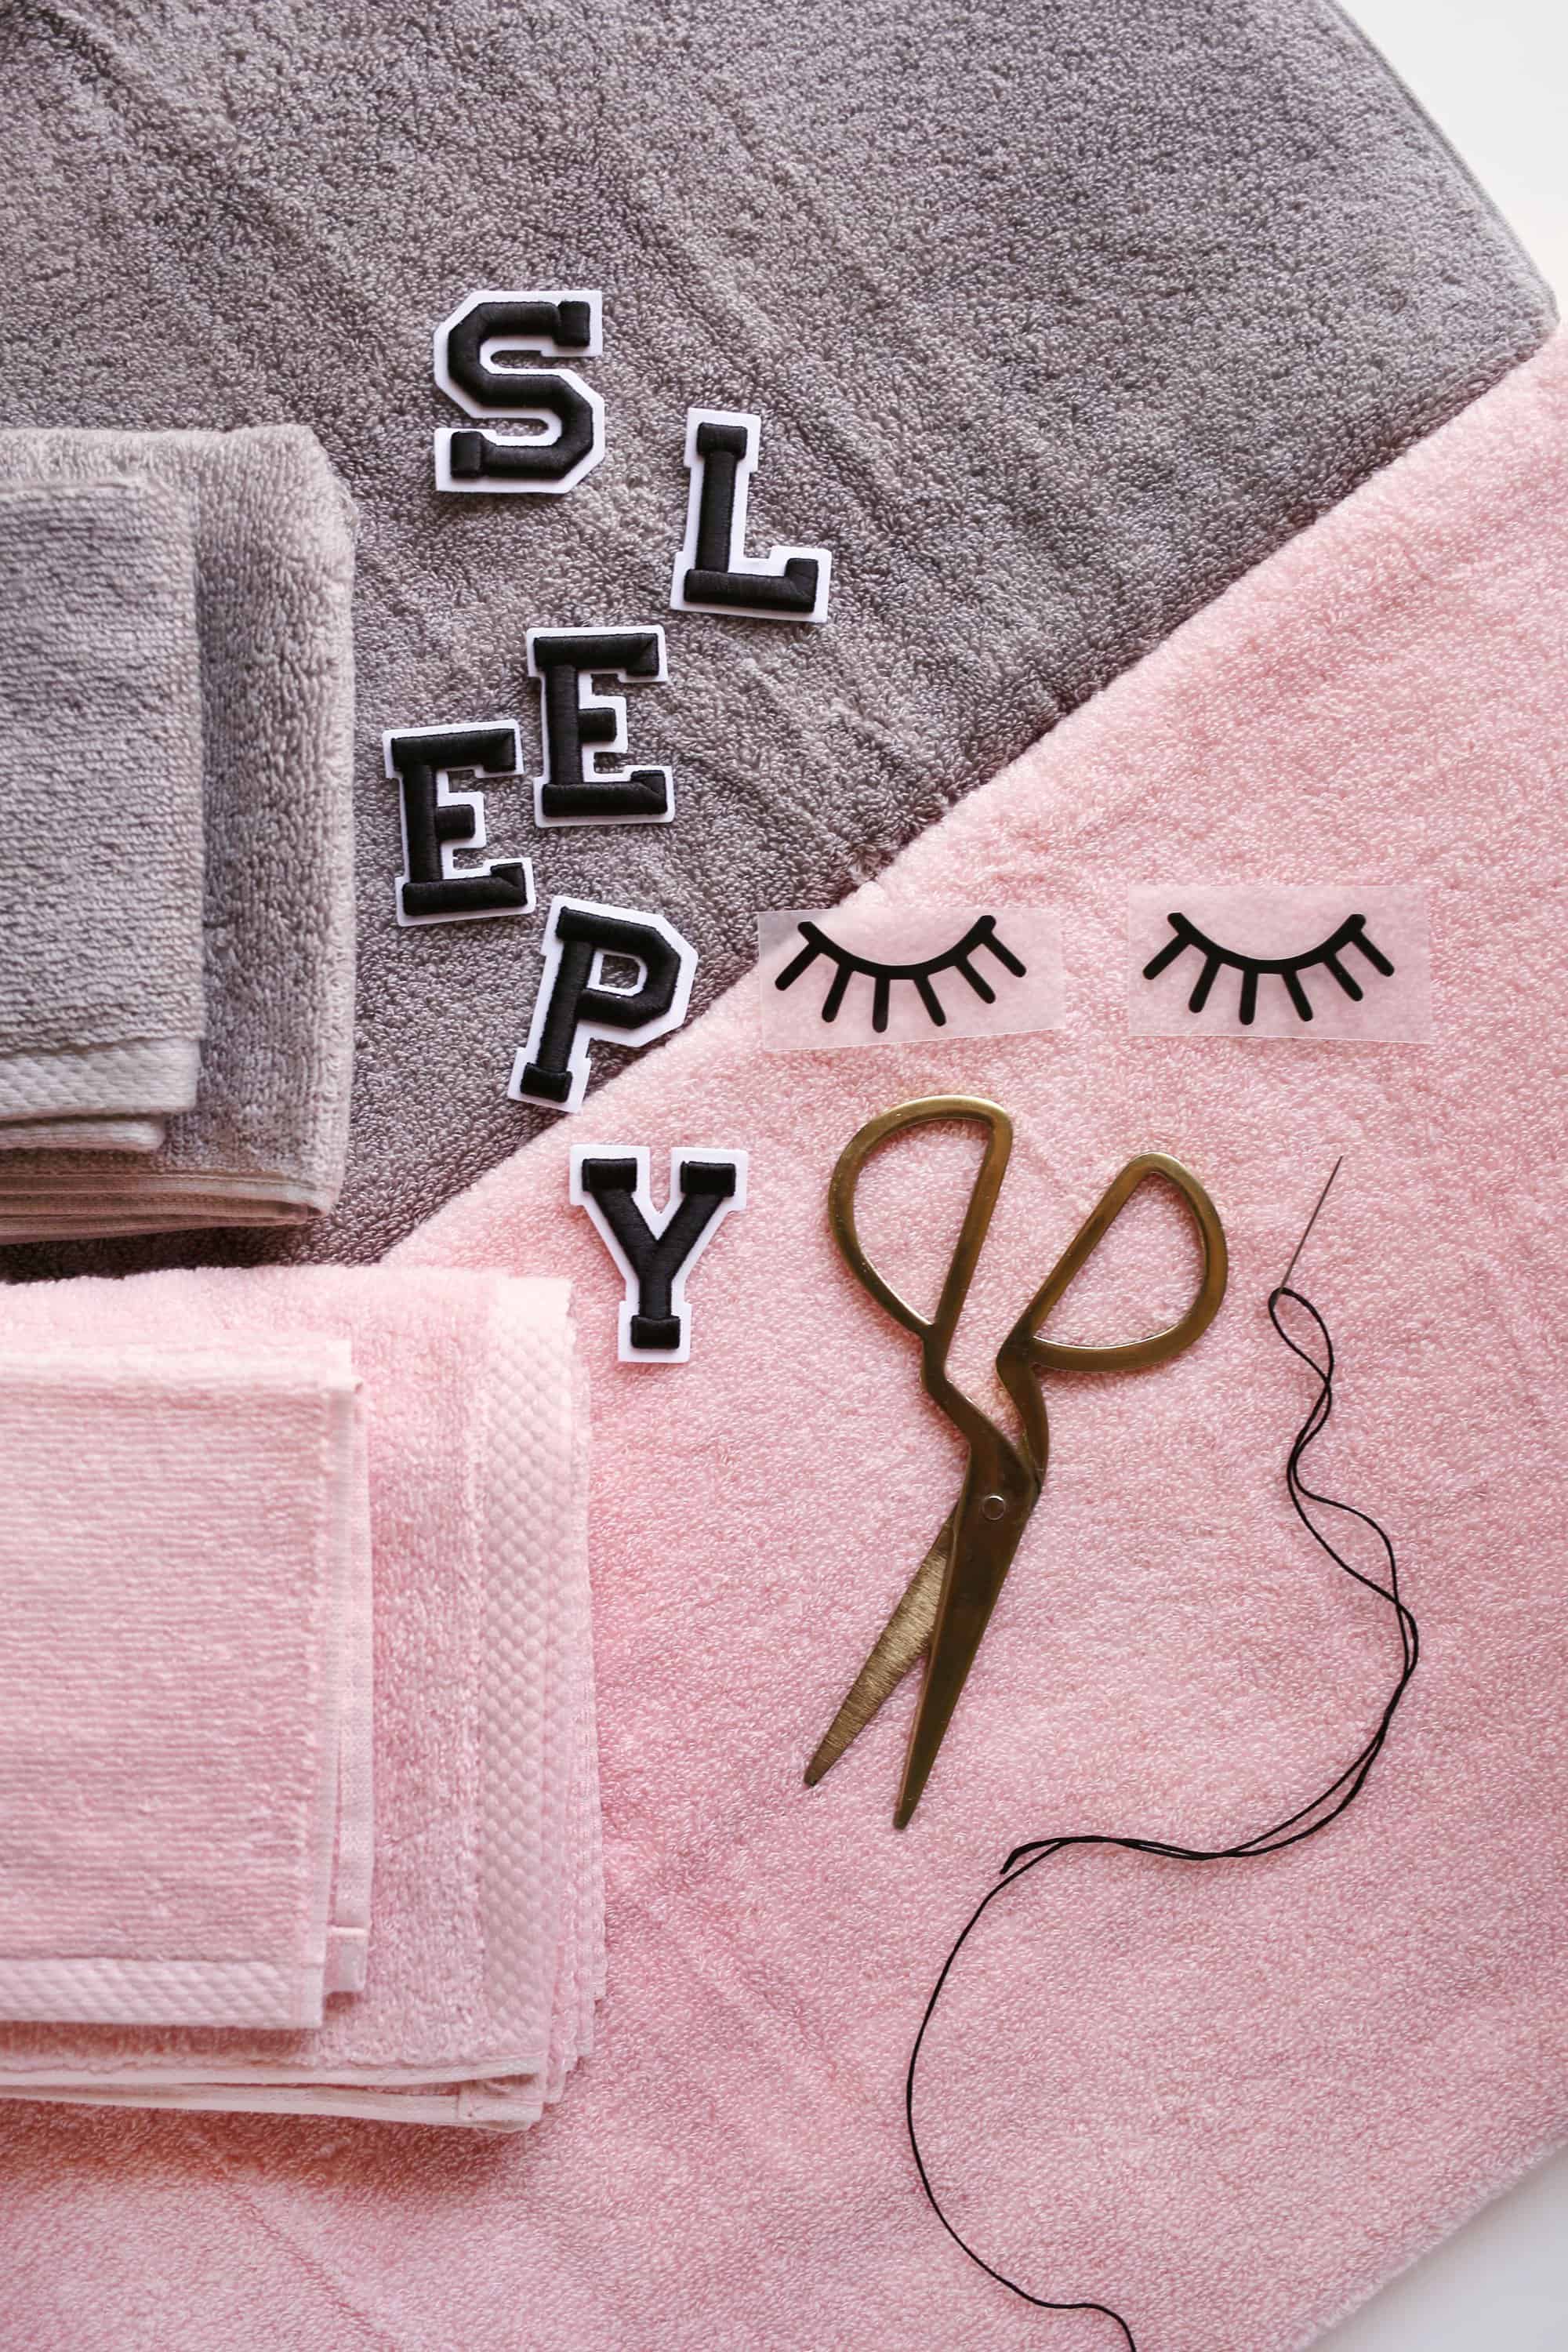 Supplies:
-one standard bath towel (or find a whole set here)
-one standard hand towel
-one standard wash cloth
–iron on eyelashes (2.5″)
-iron on alpha
-iron
-cotton cloth for protecting patches when ironing
-sewing machine and thread
-straight pins
-scissors
-embroidery thread to match alpha patches
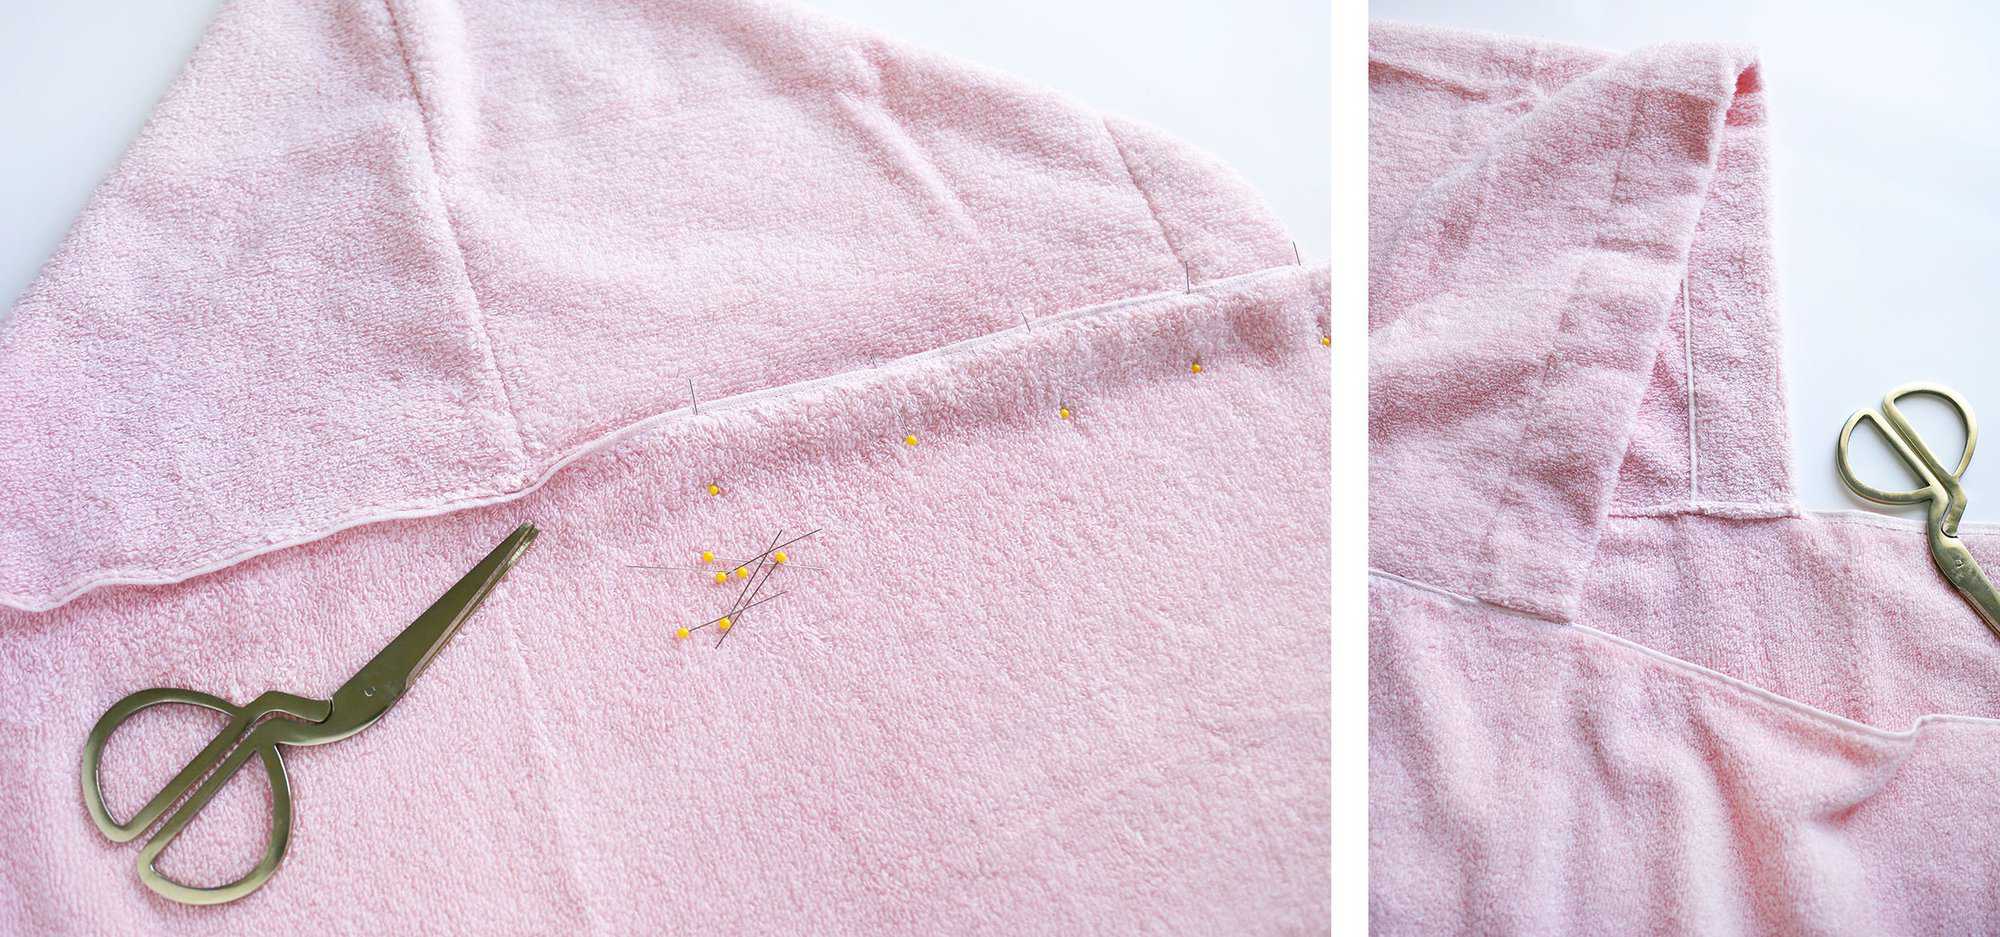
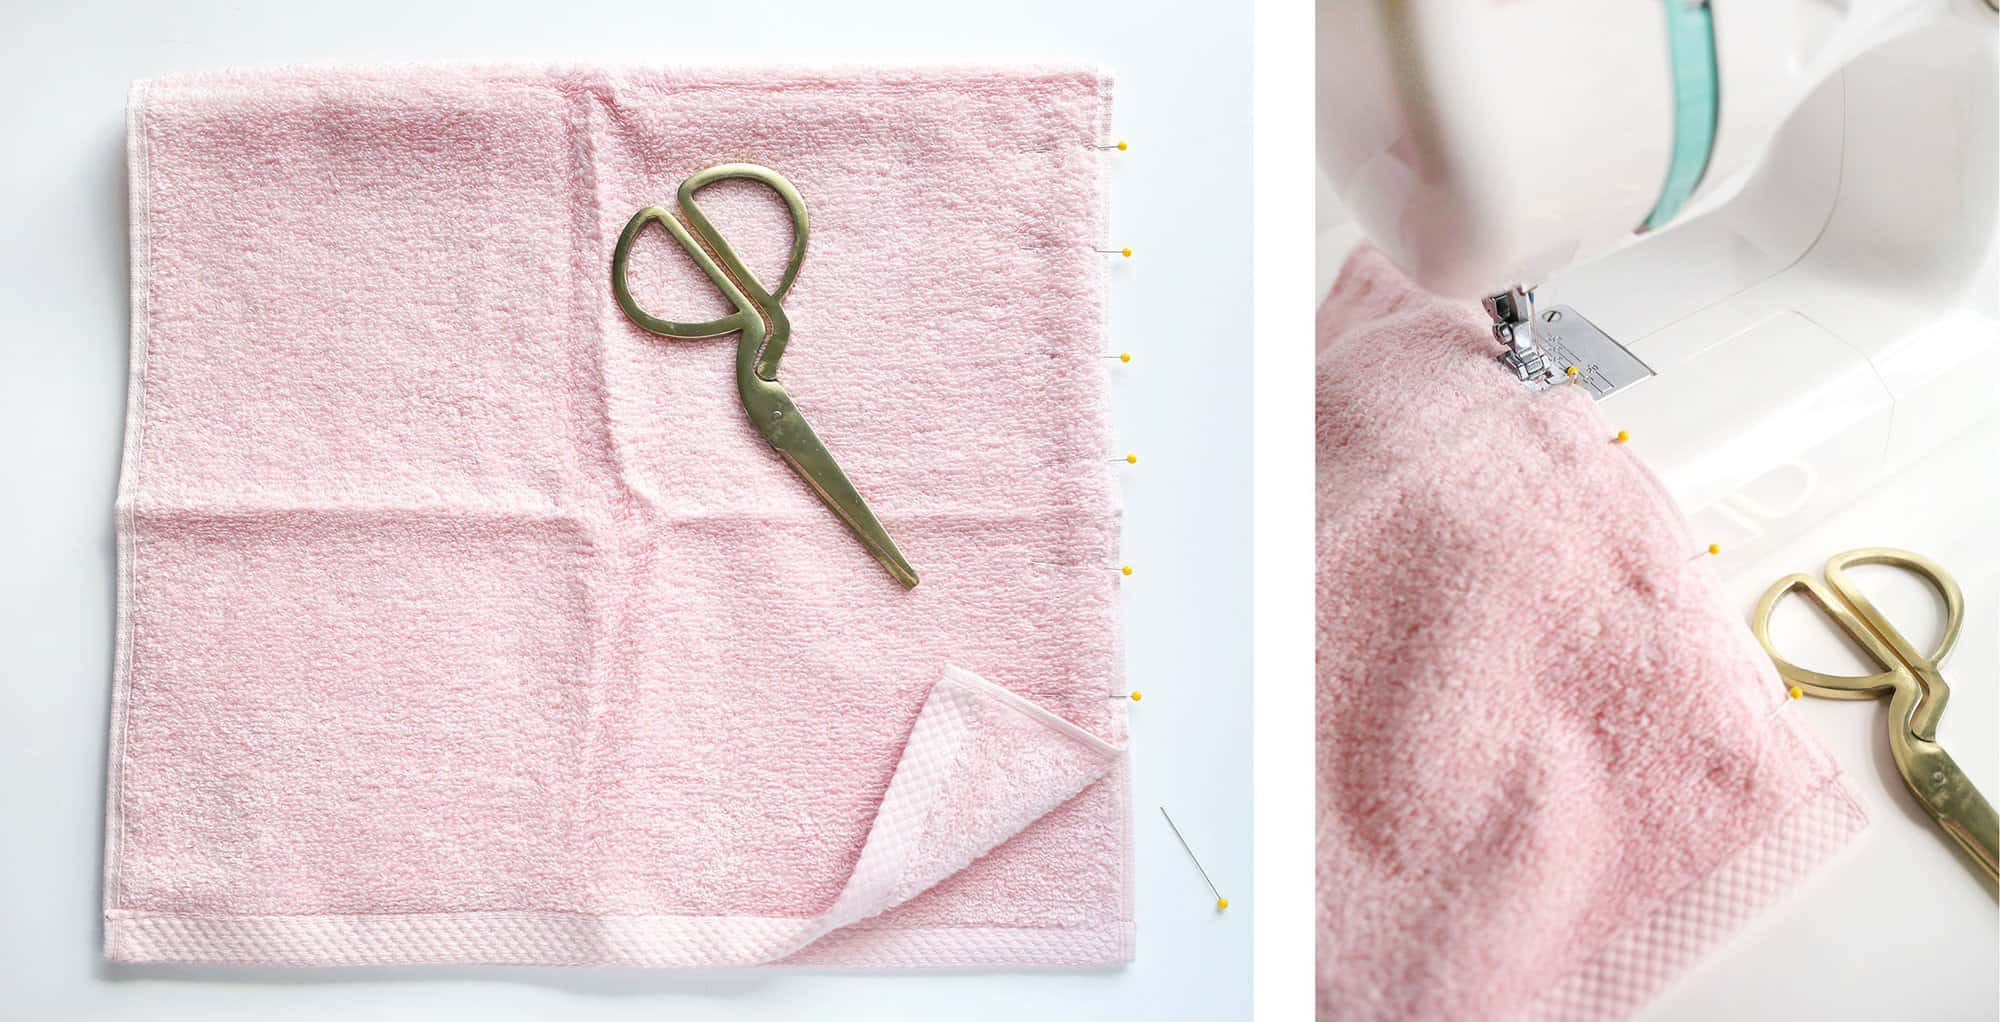 Fold your hand towel in half to make a square shape. Make sure one of the long sides are even and pin them together. These towels will fit children ages 3-9 depending on their size. If you’re making it for a 3-5 year old, you may want to trim off about 2″ from the long side before pinning together for a more shallow hood.
Stitch your two long sides together where you pinned them. Make sure to back stitch where you start and end and sew about 1/4″ in from the edge. Remove your pins. If you’ve cut the edge, you may want to also add a zig-zag stitch near the edge to help it not fray in the wash.
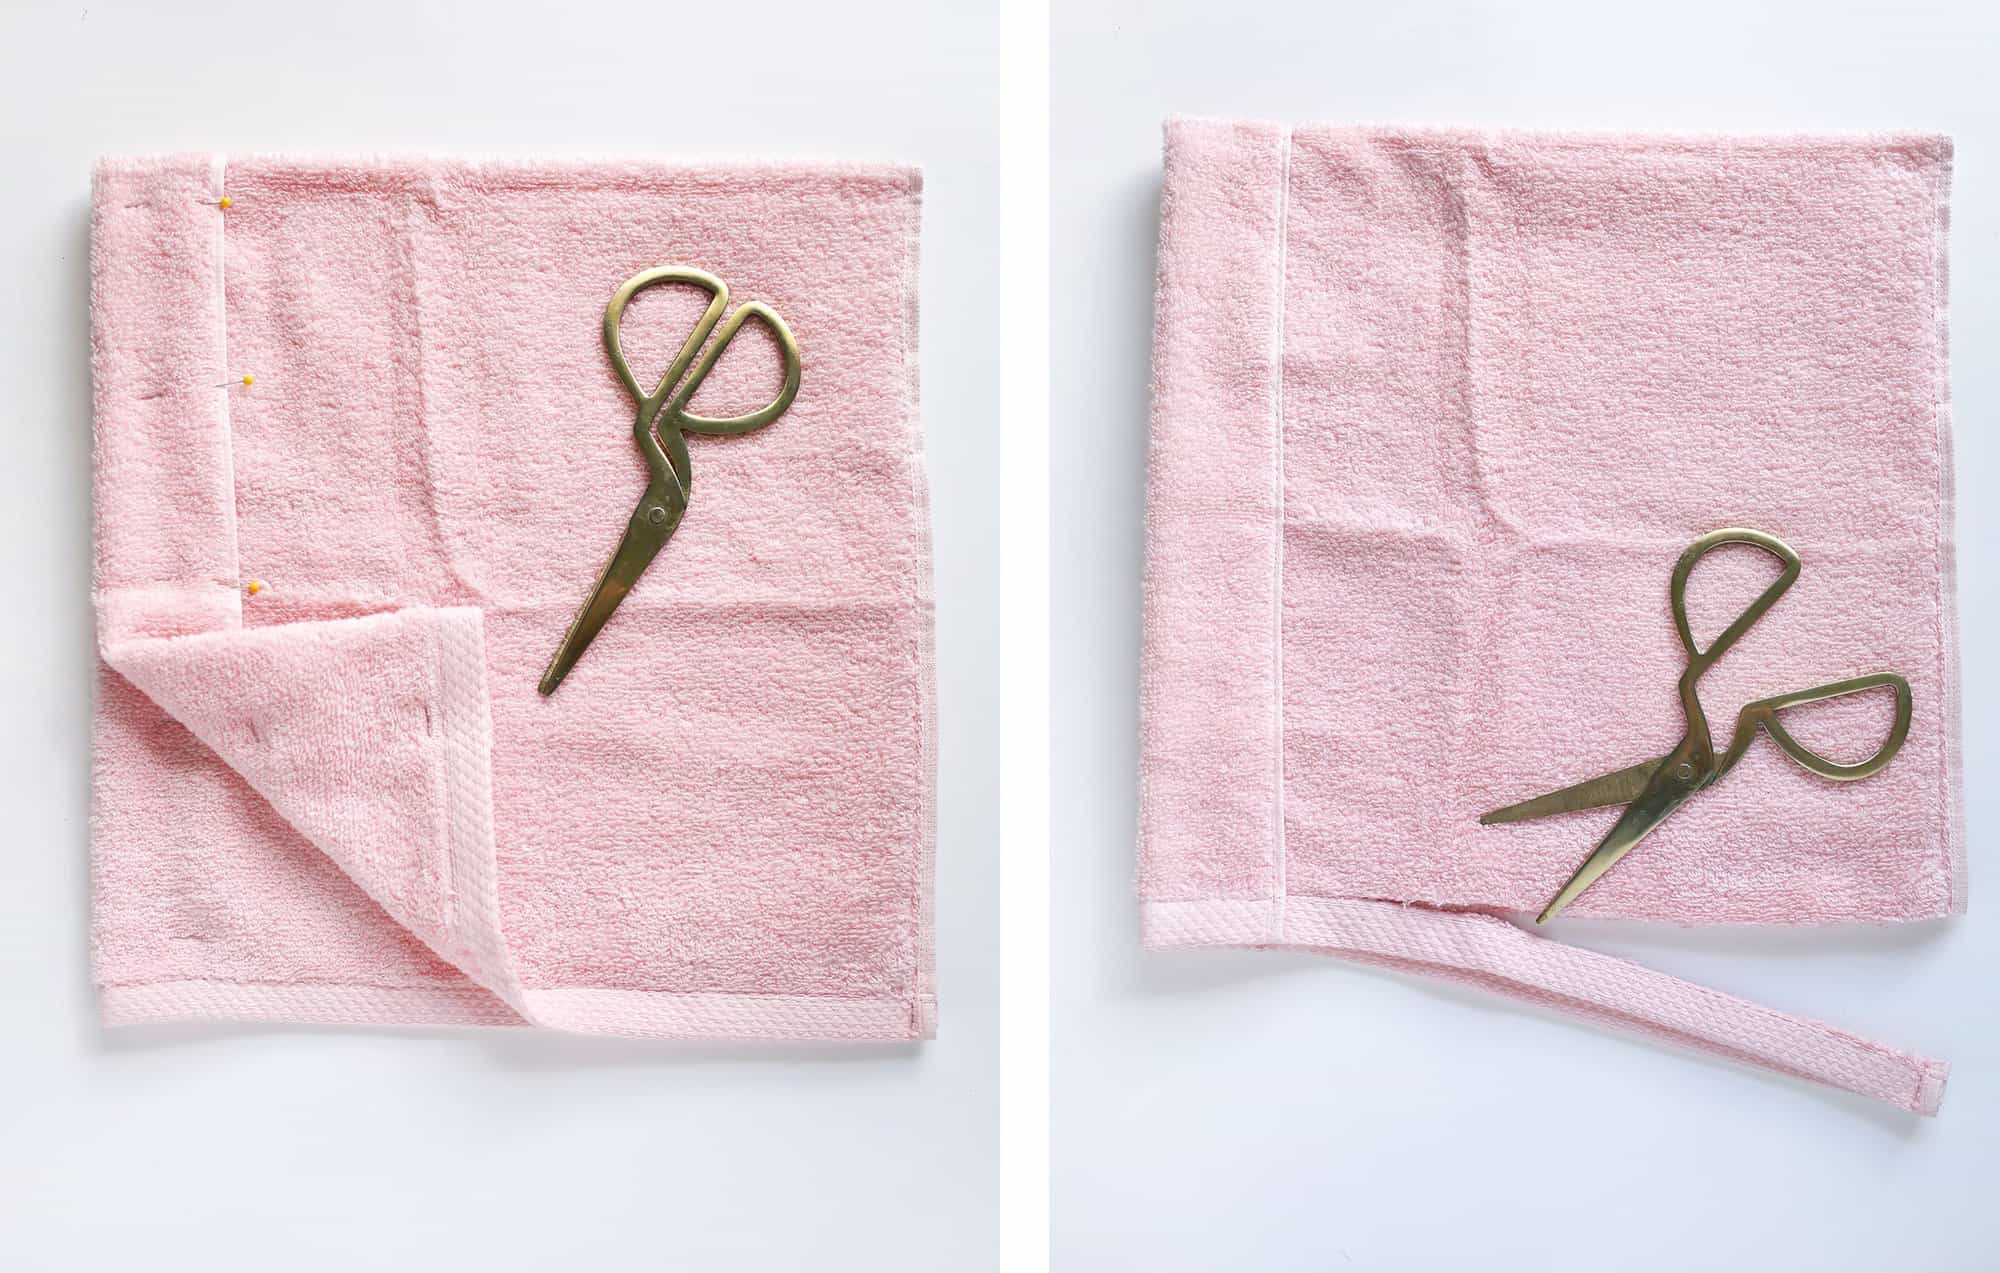 On the other side of your towel, fold the edge back about 2″ and pin down. This will create a softer edge to the front of the hood. Open your towel up and stitch along the line where the finished seam is folded in. Remove your pins.
Trim off the big seams on the short ends of your towel.
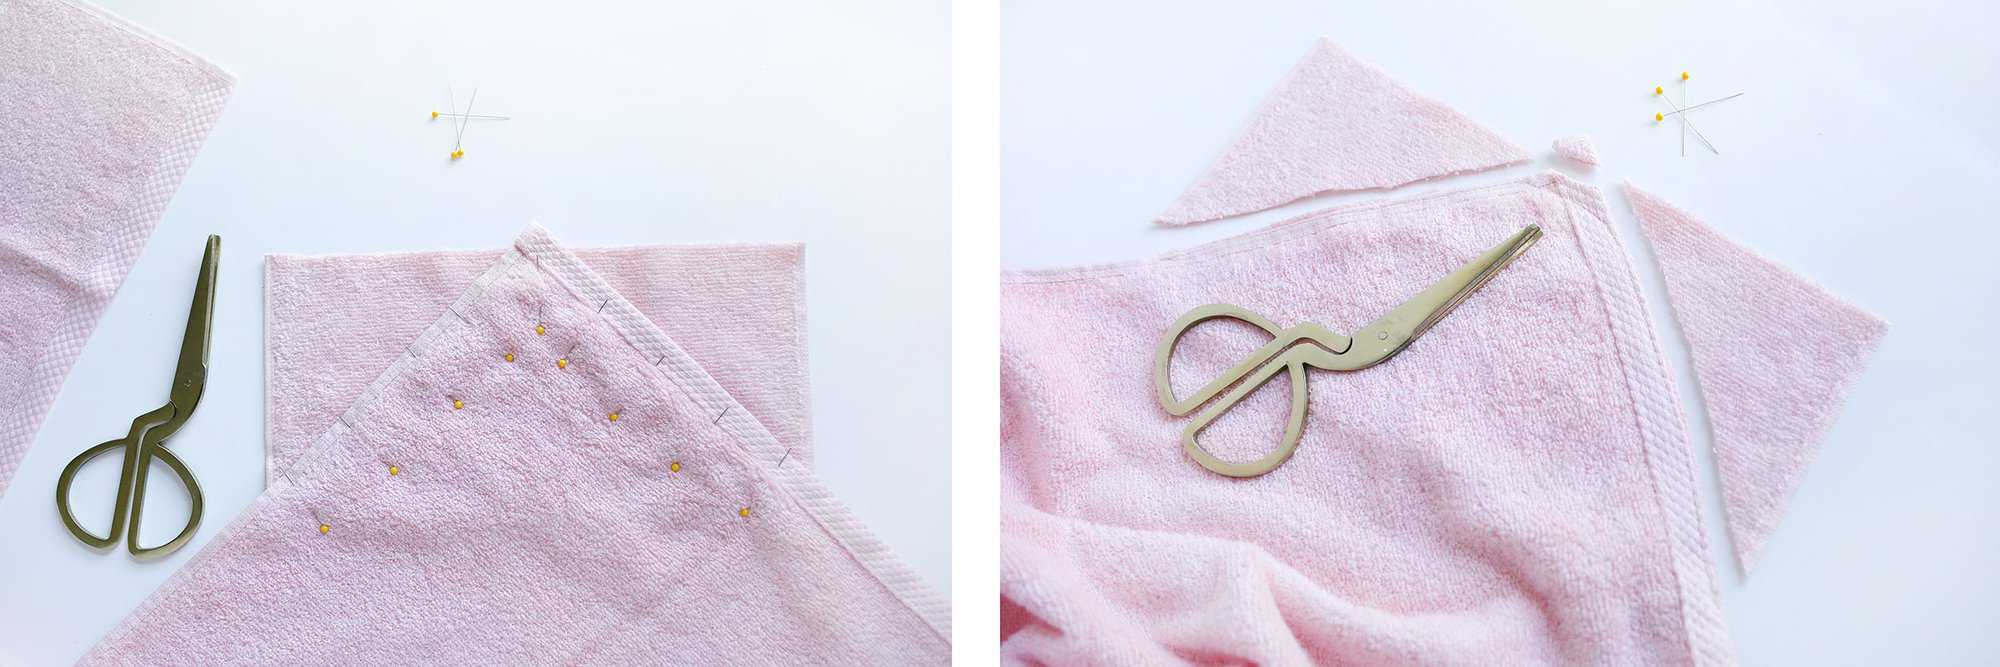
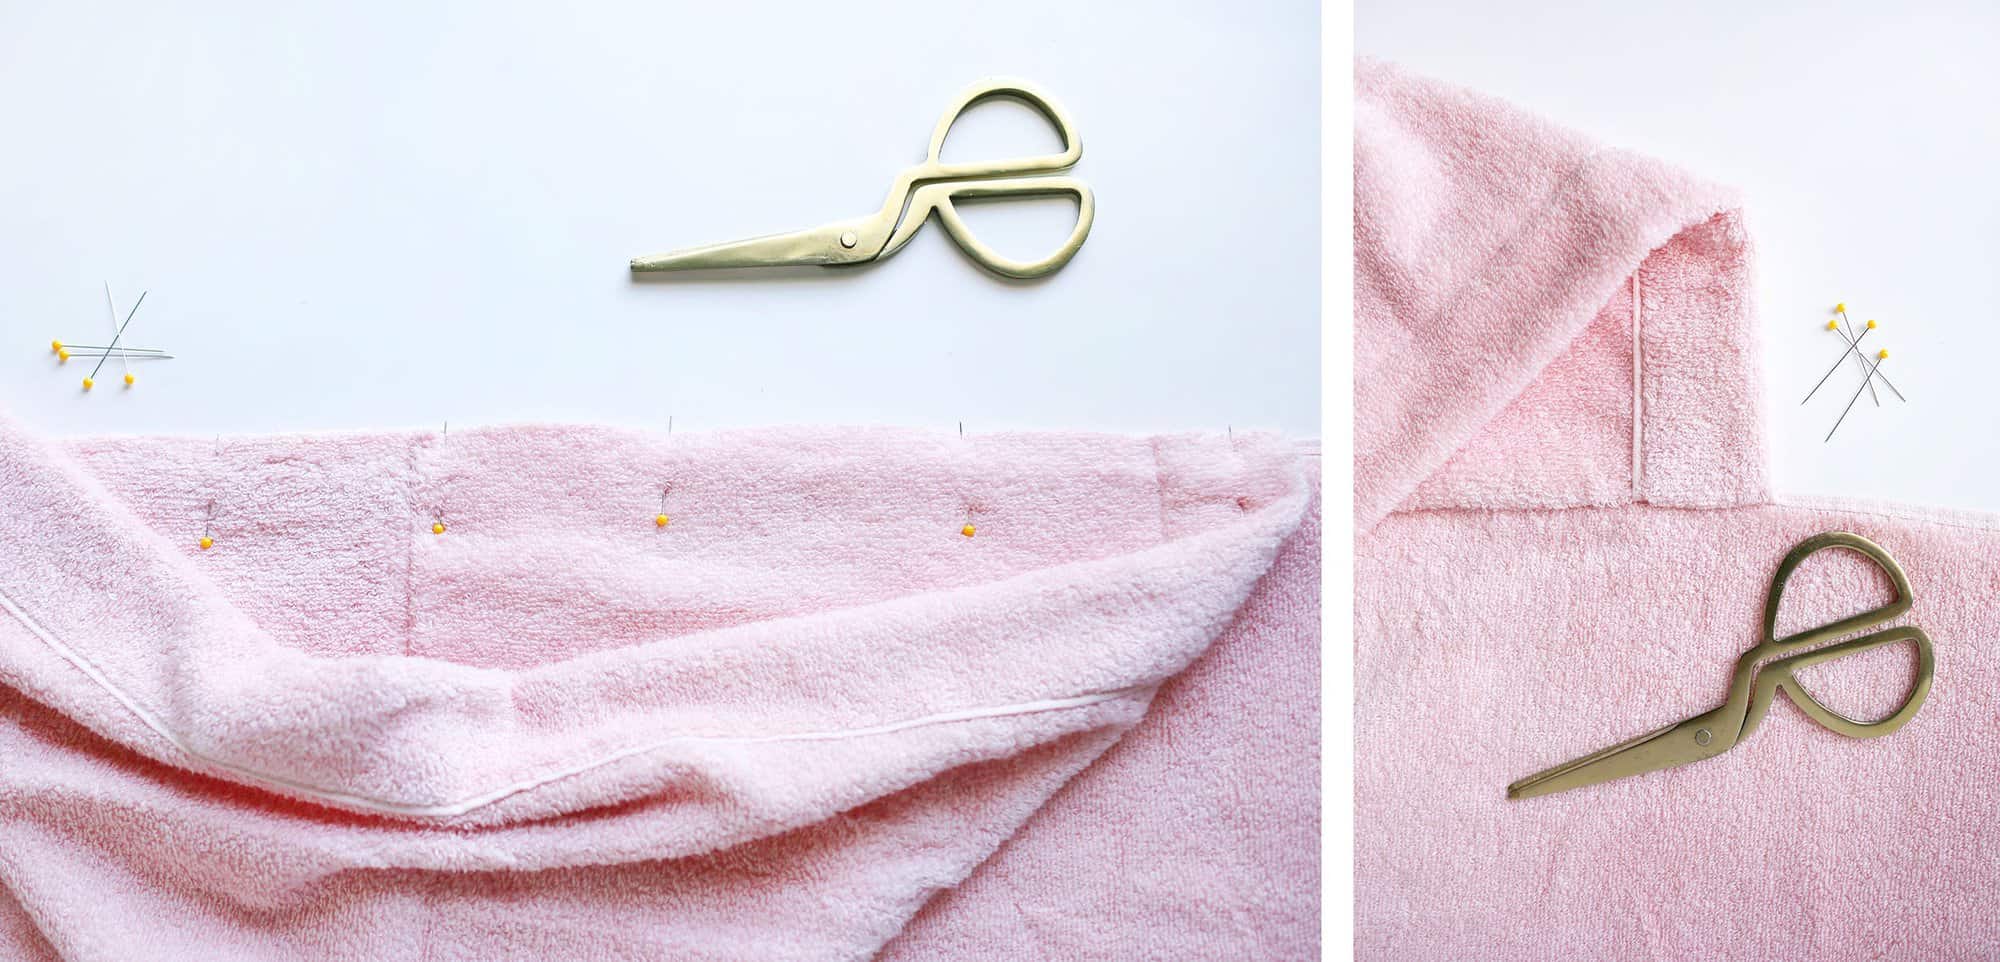 Open up your hand towel (the hood) so that the edges you just cut are lined up and centered on the center of the long edge of your large bath towel. You want the wrong side of your hood (the side with the seams showing) to be facing the large bath towel. Pin things down and stitch from one side of the hood to the other, making sure you stitch about 1/2″ from the edge. Back stitch at the start and finish.
Remove your pins and fold your hood up. Turn your hood right side out so that the first seam you stitched is inside your hood.
 Flip the whole thing over so that the hood is still above the body of the towel. You’ll see the new seam that you just stitched. Push it up towards the hood and pin it down so that it’s flat against the hood. Iron if you need to.
Stitch again from one edge of your hood to the other, making sure to stitch along the finished edge of the body of the towel. This will hide the frayed edge of your hood and not leave a big folded seam. Remove your pins and trim your thread ends.
 Next we’ll make the hand pockets. Cut your wash cloth in half. With your hooded towel open and the inside of the bath towel facing you, pin one half of the wash cloth to the back side of one of the top corners as shown. You’ll be flipping this right side out in a later step to create the hand pocket. You want to use the finished edge of your wash cloth as the edge of your pocket.
Stitch along the two edges with a slight curve at the corner. Back stitch at the start and stop. Remove your pins and trim off the excess fabric and the corner.
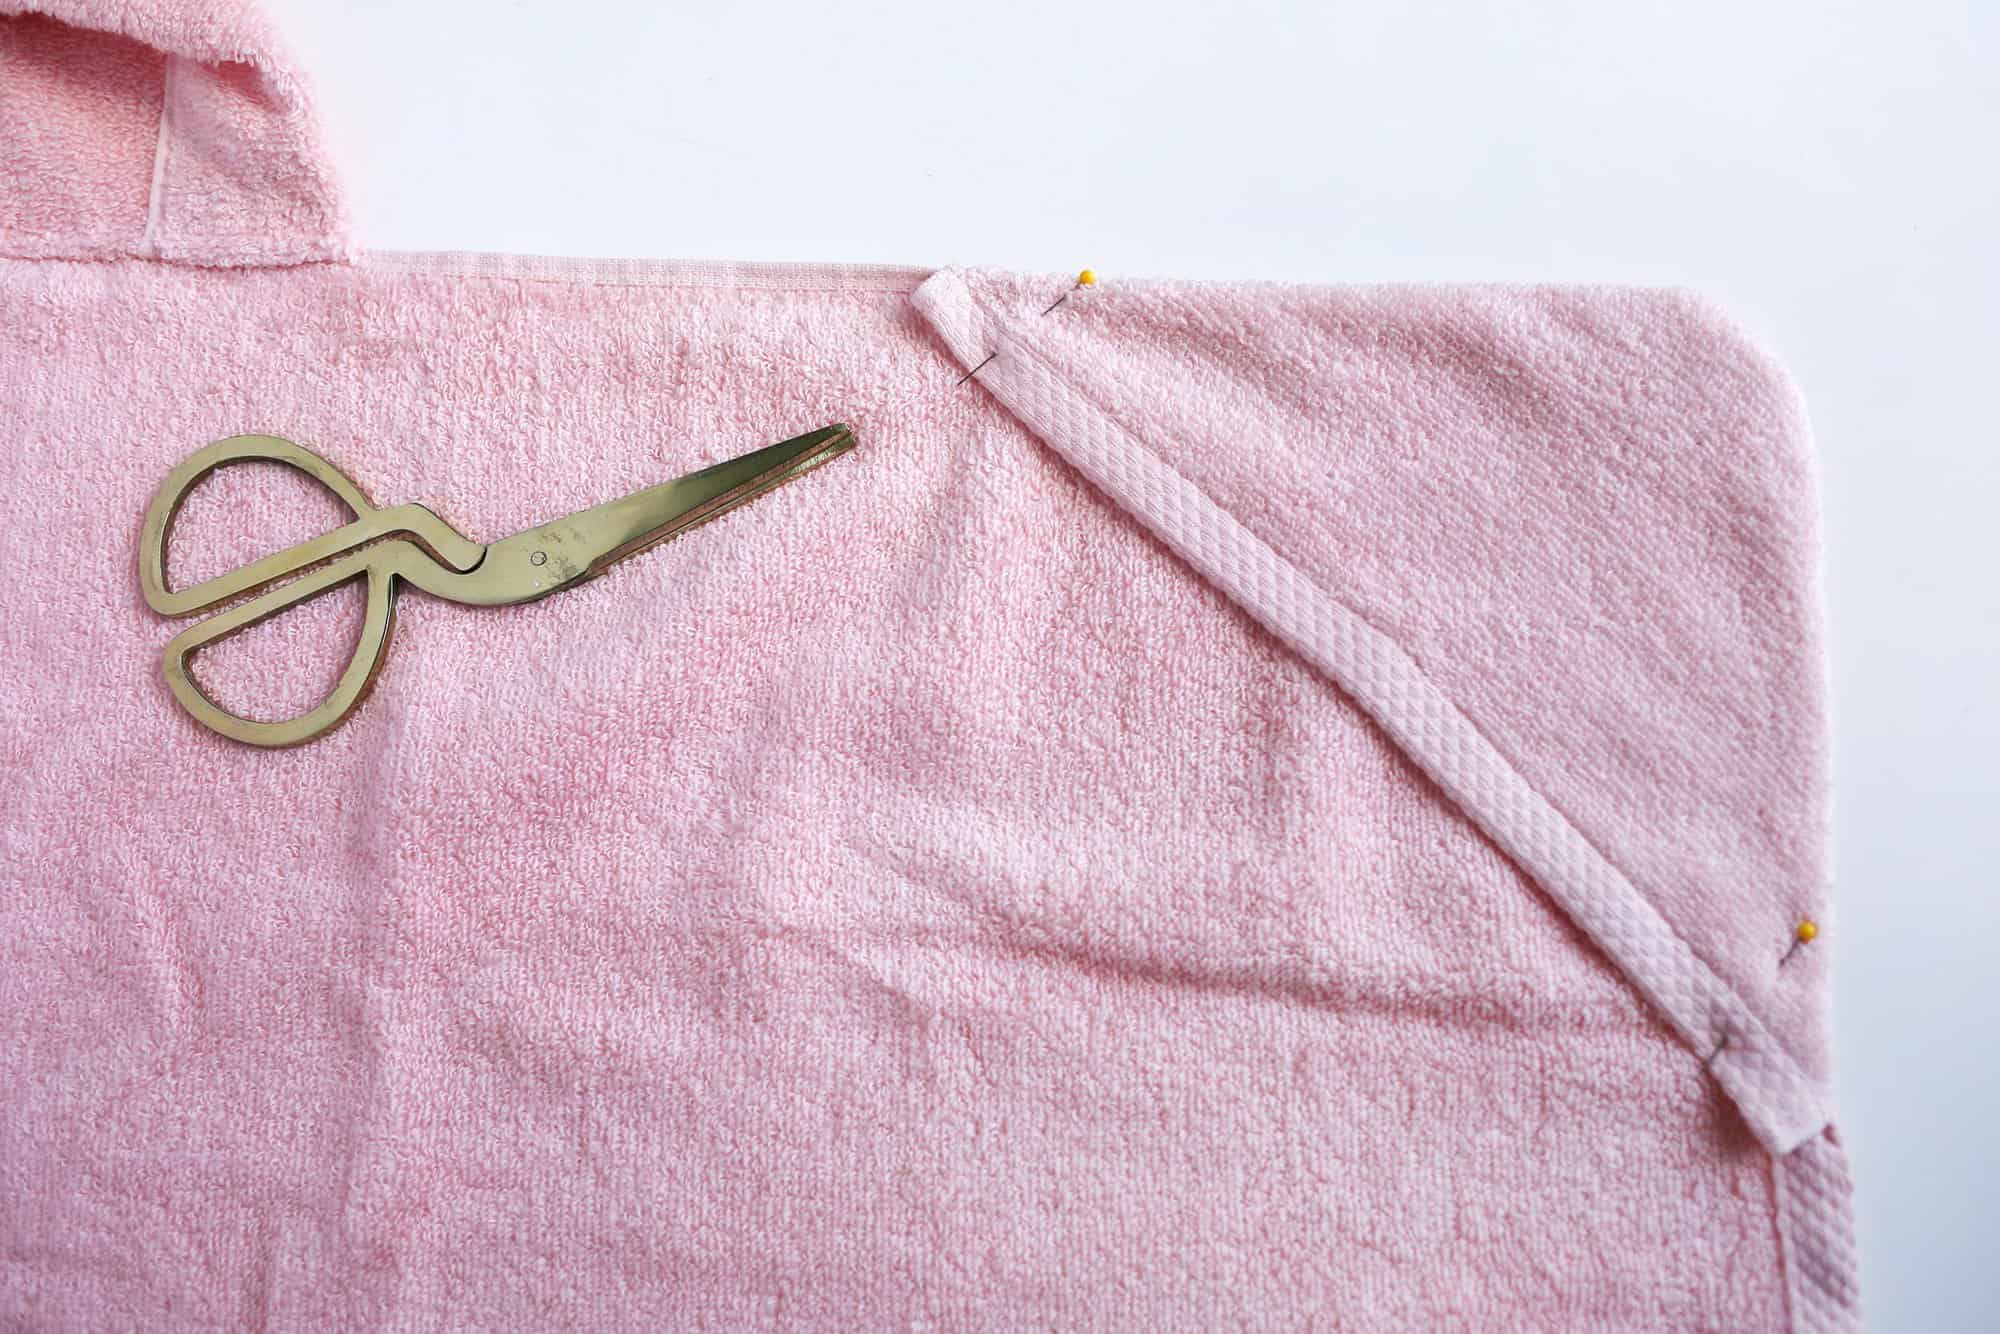 Flip that pocket to the front and push out the rounded corner. Pin down the two edges of the finished part of the wash cloth and just stitch about 1/2″ worth in each corner to secure things. Remove pins.
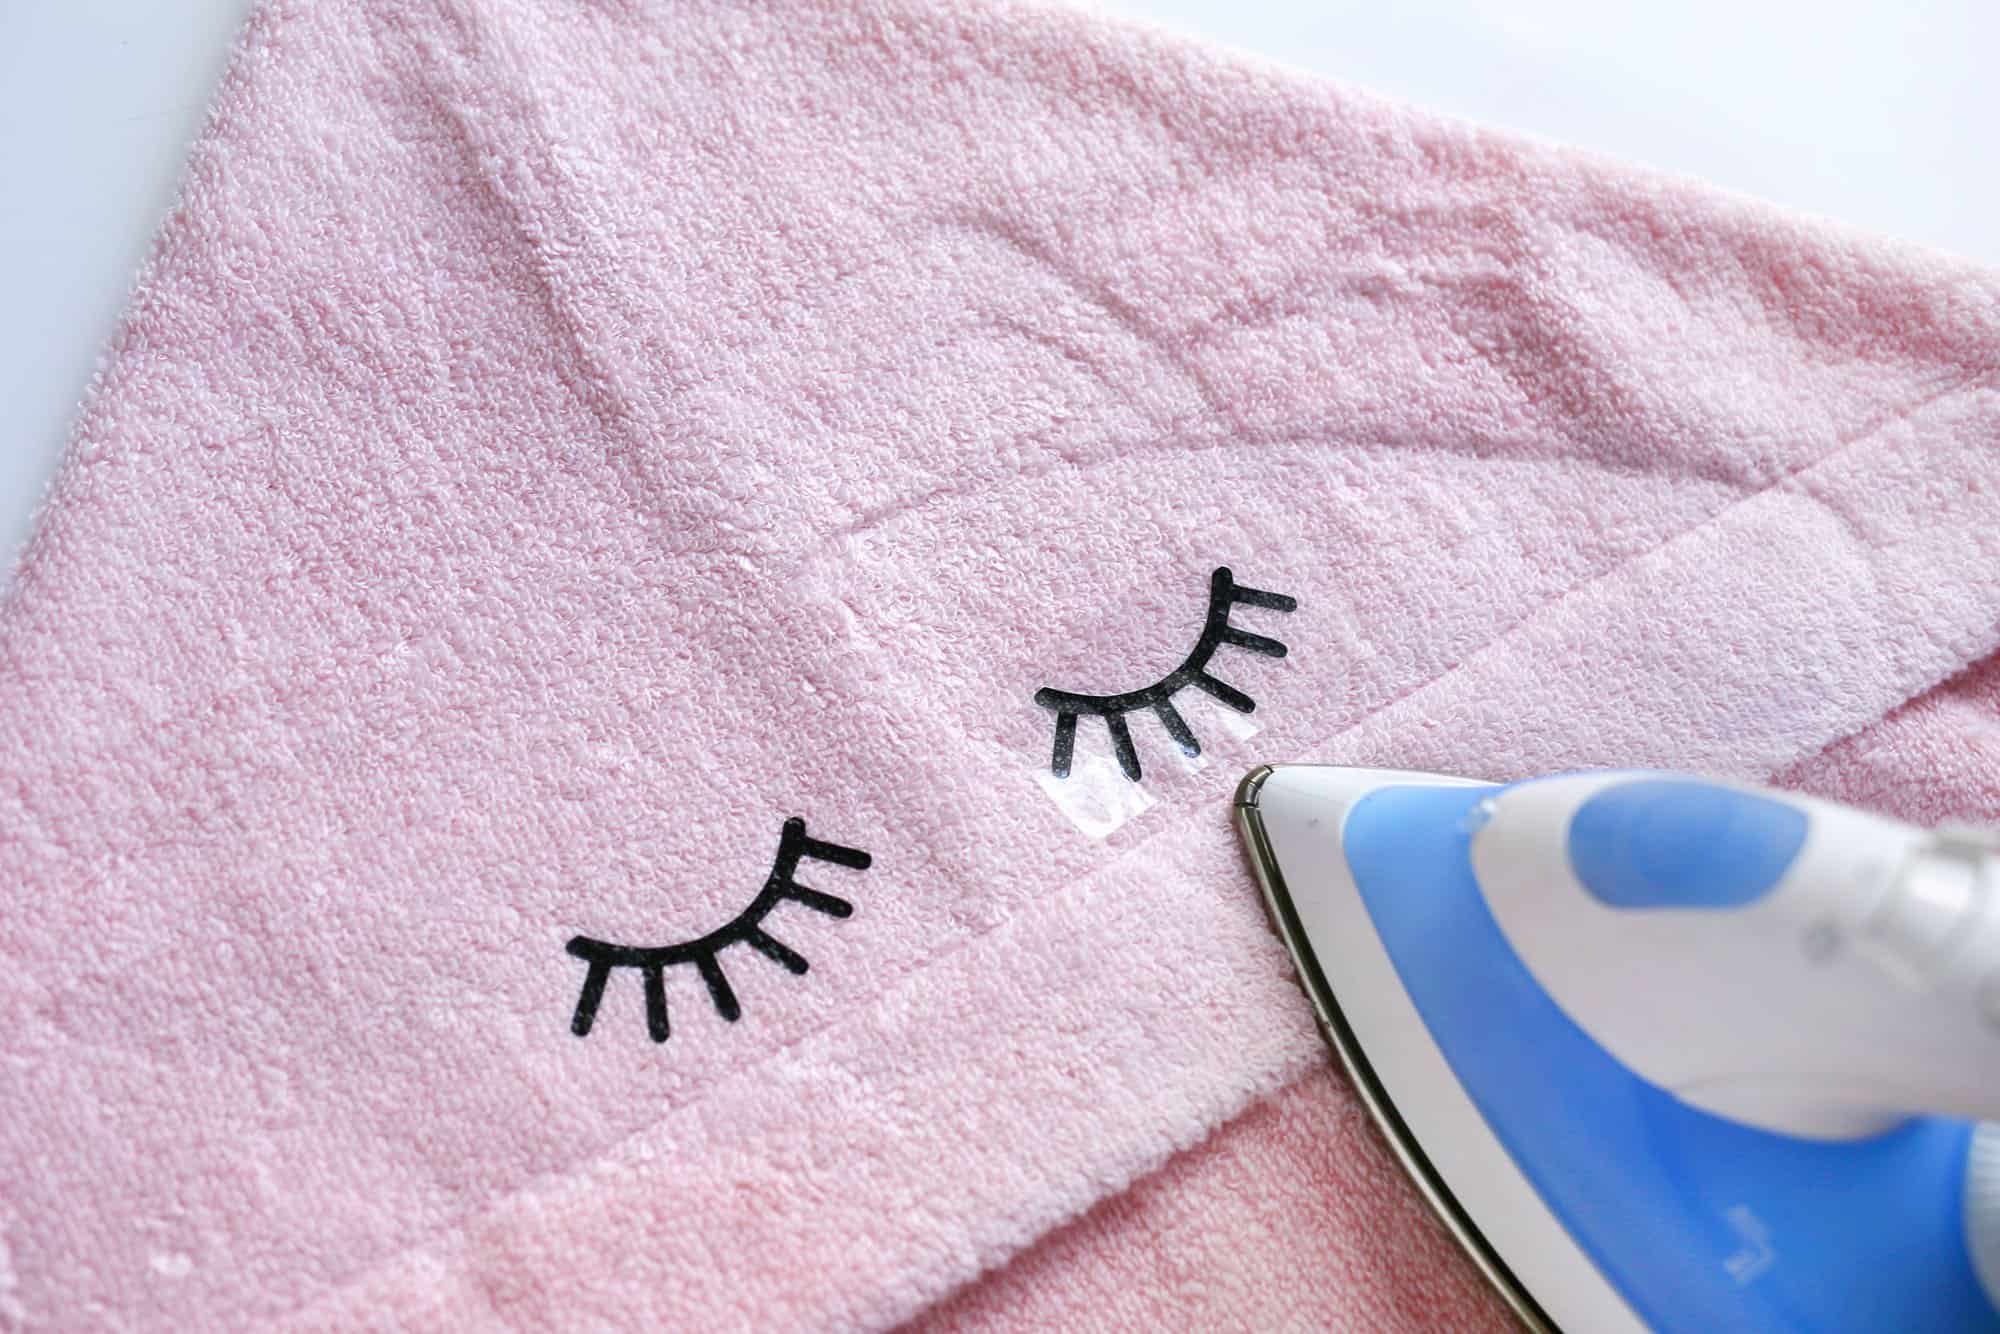 Place your iron-on patches or letters so that they’re centered on the hood and follow manufacturer’s directions for ironing on. You may want to place a cloth between some patches. My eyelashes didn’t need stitching reinforcement, but the alpha letters did. I just added black embroidery thread to a 3″ embroidery needle and stitched from the inside of the hood so that I stitched through the black part of my patches. I added about 6-8 stitches per letter and knotted it on the inside to make it as inconspicuous as possible. You could also try using your sewing machine to stitch through them.
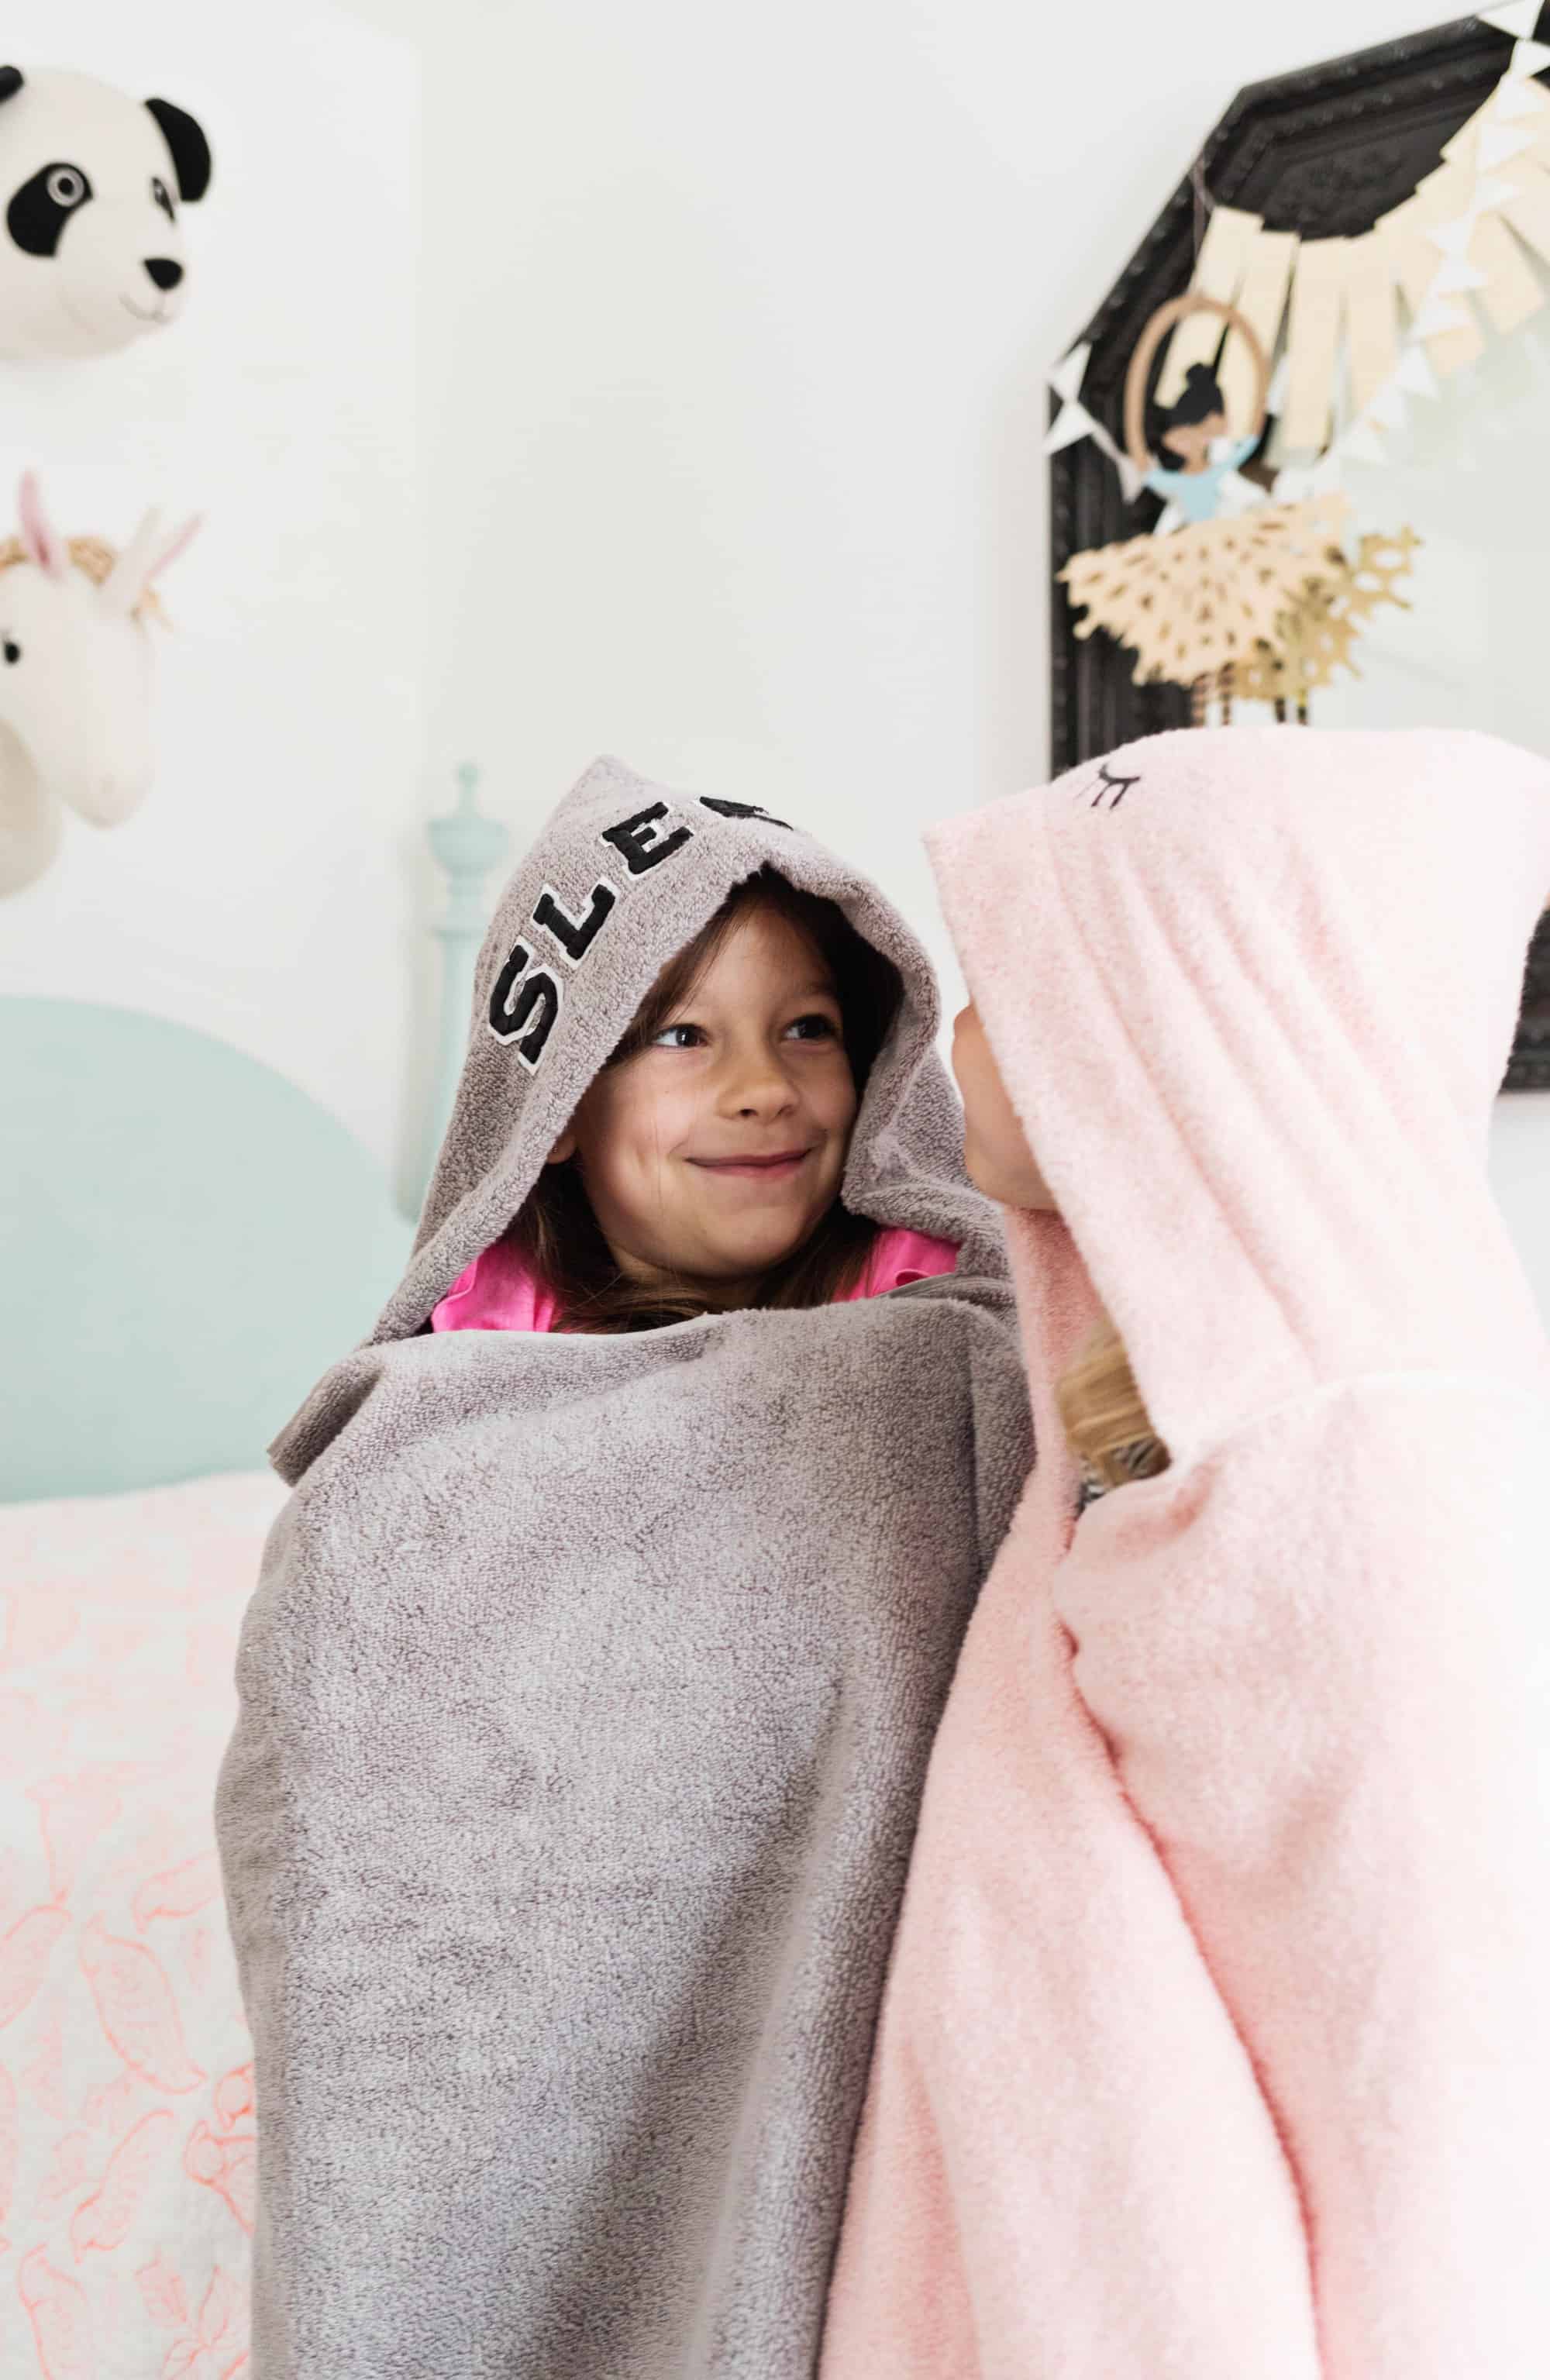 These specific towels are so much more plush than the ones we used to have and ten times cuter! It’d be an adorable birthday gift paired with a few favorite books for a niece or nephew. Seriously though, I need this pink one with the eyelashes in my size! Don’t be surprised if you see me lounging at the pool this summer in my own. Ha!
What would you spell out if you made your own? –Rachel
22 Comments
Great post, i loved
The Pink Pineapple
New post:http://thepinkpineappleblog.blogspot.com/
I love the embroidered lettering! The emotions are endless! And could easily make it in adult sizes too 🙂
It’s adorable, and looks really cosy! No kids, so I’m going to make one for myself!
Charmaine Ng | Architecture & Lifestyle Blog
http://charmainenyw.com
Ahhh this is so adorable I’m in love! It doesn’t look “DIY” at all, what a gorgeous idea! I especially love the color of that pink towel. I bet kids would love these <3
Joanne | Life in Blue Skies
Awww this is so sweet, I love how personal it can make a gift!
xo
Phyllis
http://desgeulasse.com/
How cute are those photos?!
https://www.makeandmess.com/
This is the CUTEST, I am definitely going to give this a try. Maybe even try and make a bigger one for myself. Thanks for another great post!
Holly xo
The Art of Being Holly
Omg! This is so adorable, now I want to make one for myself
So glad to see this! I recently bought quick dry camping towels for the whole family for camping trips, but wanted to “kiddify” one for my toddler! I’ll definitely be using this simple tutorial!
That towel is adorable! I totally want to make one for my little girl!
Paige
http://thehappyflammily.com
Great idea! I love this gift idea for older kids.
I used to loved hooded bath towels when I was younger and I’ve been looking for a really cool one for my young cousin but I love this idea of making your own!
Jess x
http://www.acornlifefitness.com
This is absolutely so cute!
When I was a kid I really wanted one of these so I’m determined to make a giant adult-sized version of this so I can be cozy when I have no heating in my student house!!
I love the watermelon potholder and the eyelash hooded towel. I am going to make that latter for my grandaughter’s birthday. Is it possible to download the directions as a pdf? I would certainly make it easier to follow.
Hi there.
We don’t have a PDF, but please feel free to print off the blog post.
xx!
Cutest DIY ever!!
Kisses,
Sarah
EverydayStarlet
Hi !
I really love the post and I am maybe a little jealous of the light pink one…
I would just add something to your post. It’s quite important to wash the towels (or anything you’ll sew) before actually sewing.
Like I said, I really loved your DIY and I think it’s really easy for people who don’t sew as well.
This is the cutest, creative, fun idea for kids. Thanks for sharing.
Omg! Cute
I just started looking for ideas to make towels for grandkids for Christmas. The girls will love the eyelashes as do I! Thank you!
Thanks for sharing. This is so cute. I’d like to make this for my older girls for Christmas! The eyelashes are so cute!