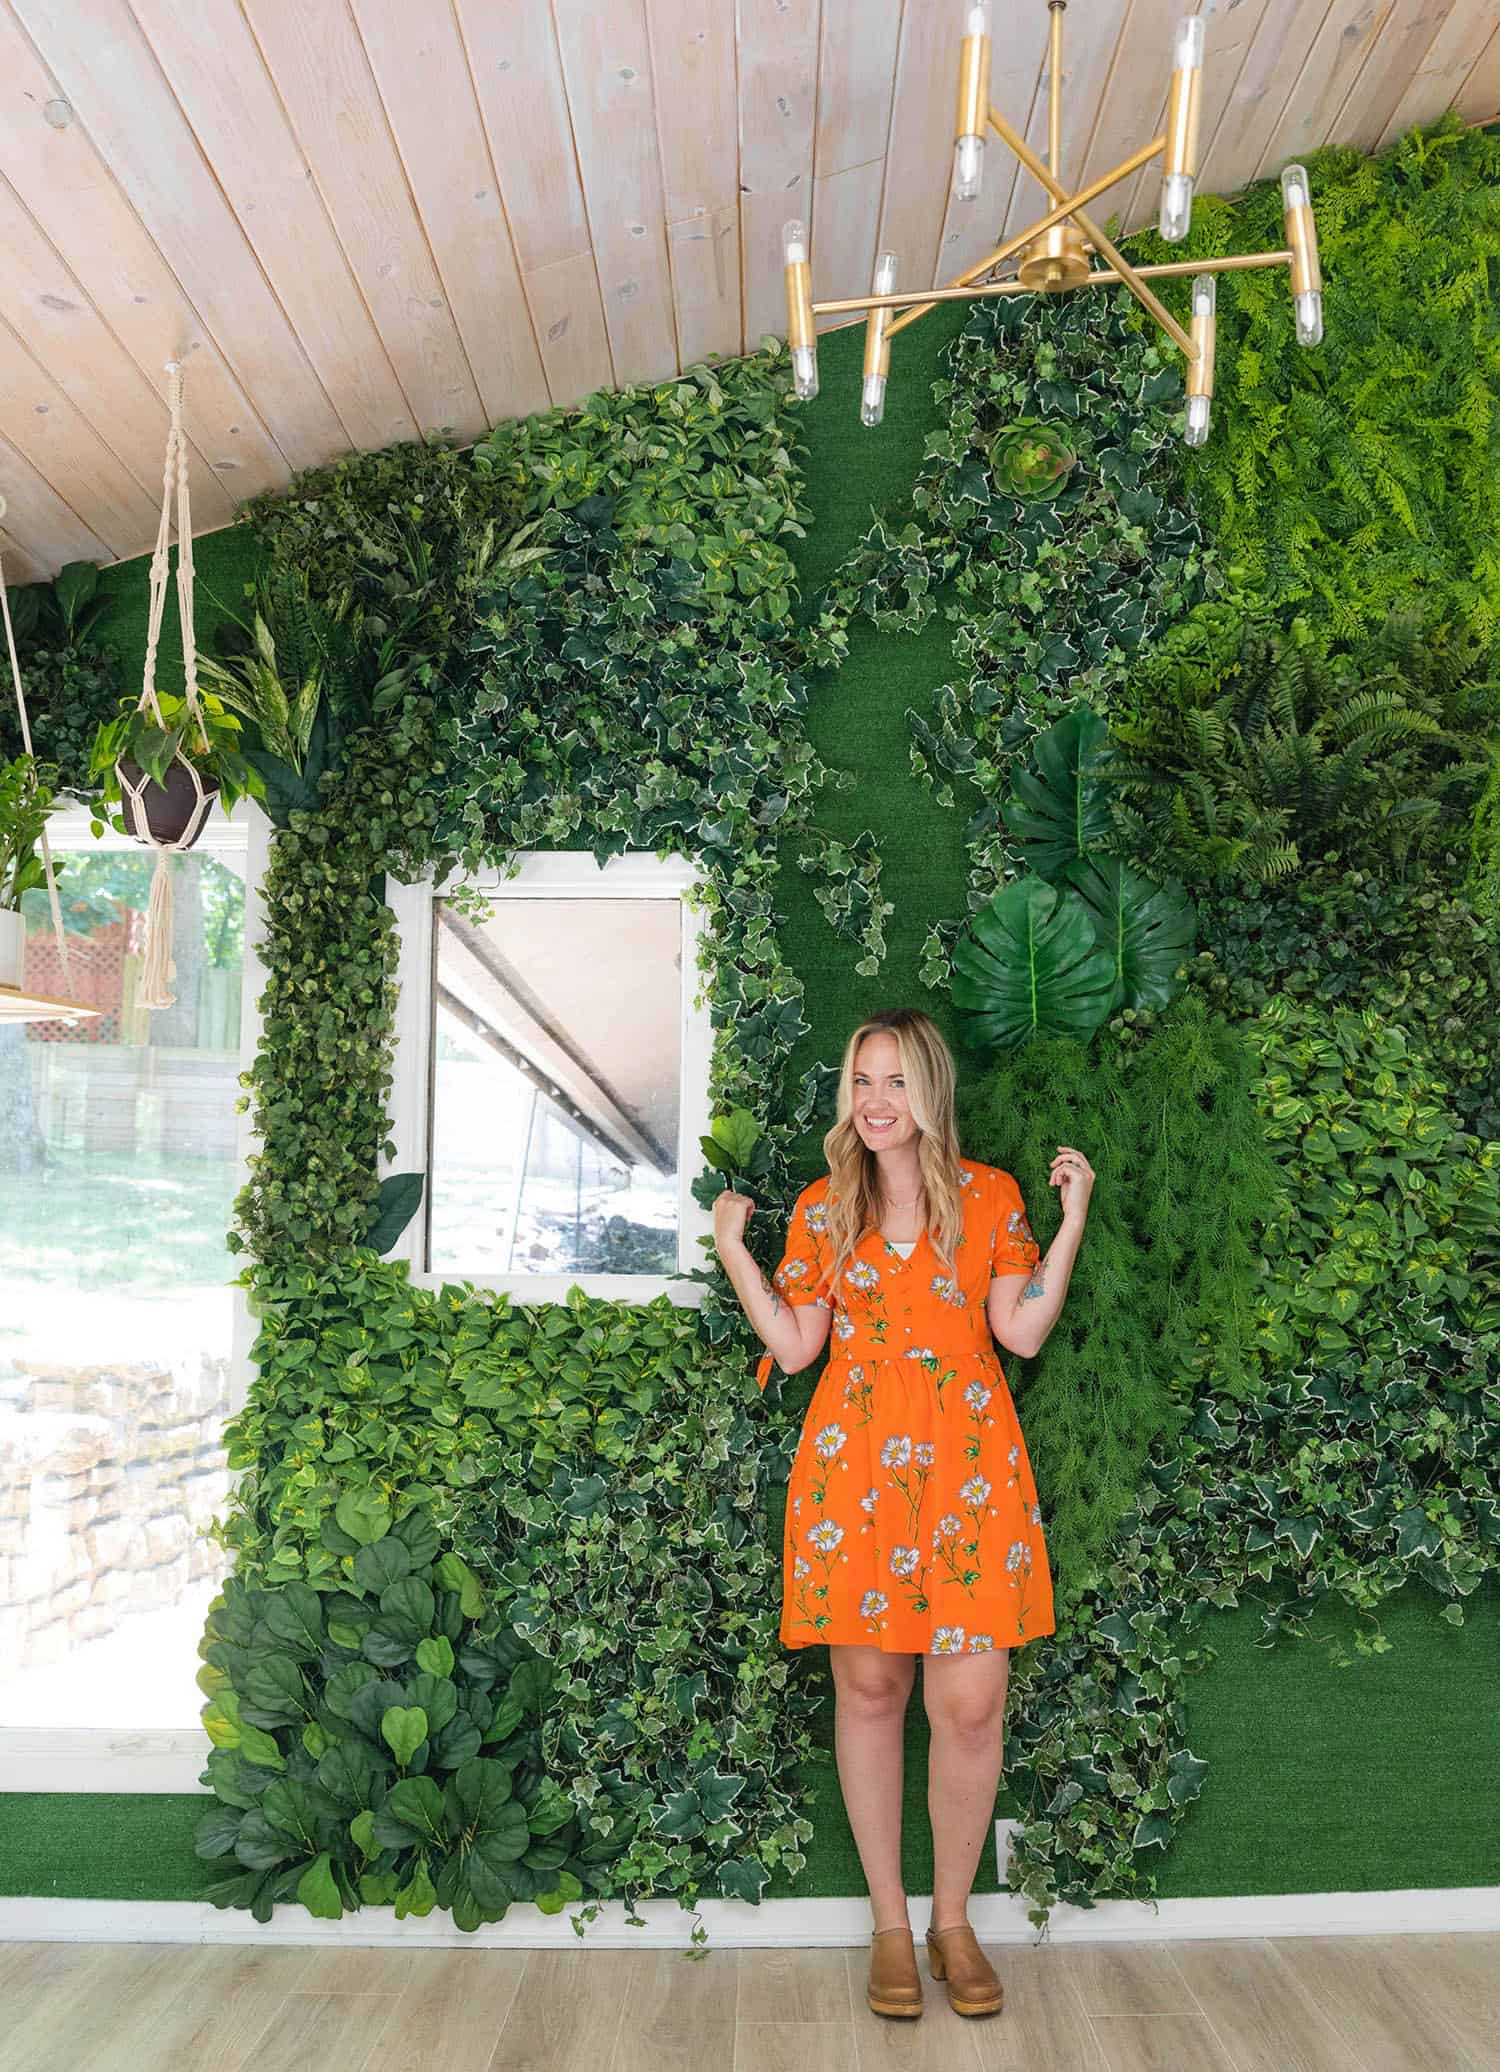
 Over the last few months, I have been working on a pretty epic accent wall in my home office space. I’ve been sharing little peeks and progress on our Instagram account, so many have seen this faux living wall coming to life (pun!). I completed it about a month ago and am finally ready to share the finished project with you. I’m going to show a little office tour soon but I wanted to also share how I made this DIY faux living wall in case anyone out there wants to add something similar (maybe a bit smaller though? this one is quite large) to their home or office. I actually think this would be really pretty in a retail space as well. I also think this project is great for any of you aspiring plant ladies out there who tend to kill more plants than you care to admit.
(Raises hand sheepishly.)

 I’m just going to share how I made my wall, but there are definitely some things you may need to modify if you make this in your space. The two big factors that I think could make a difference is what material your wall is made of (I had drywall in my home, but if you had concrete or brick that would change things) and also how big the wall is that you want to cover. But here’s what I used and did for my DIY faux living wall.
Supplies:
-Astroturf
-3/8×2 project (pine) board, enough to outline the top and bottom of the wall
-Wall anchors or long drywall screws (depending if you have studs in the wall or not)
-Hex netting (in the outdoor section, often used for chicken fences)
-Power drill
-Box cutter
-Wire cutter
-Staple gun + staples
-Faux plants*
-Dark green or black pipe cleaners
*The amount of faux plants I would need for this was easily the thing that I had no idea about. It’s not exactly something you can easily measure. I knew the square footage of my wall, of course, but not how much coverage I would get from various faux leaves, vines, and other faux plants. So what I did was buy a LOT when they were on sale and I made sure the return policy would allow me to return any that I didn’t use. I bought all of my faux plants from Michael’s during a Memorial Day sale and I was able to use another coupon I had received in the mail. I bought about $800 worth of faux plants, even with the sale and coupons. (I know, crazy!) I ended up returning a little over $300 worth after I had finished this wall.
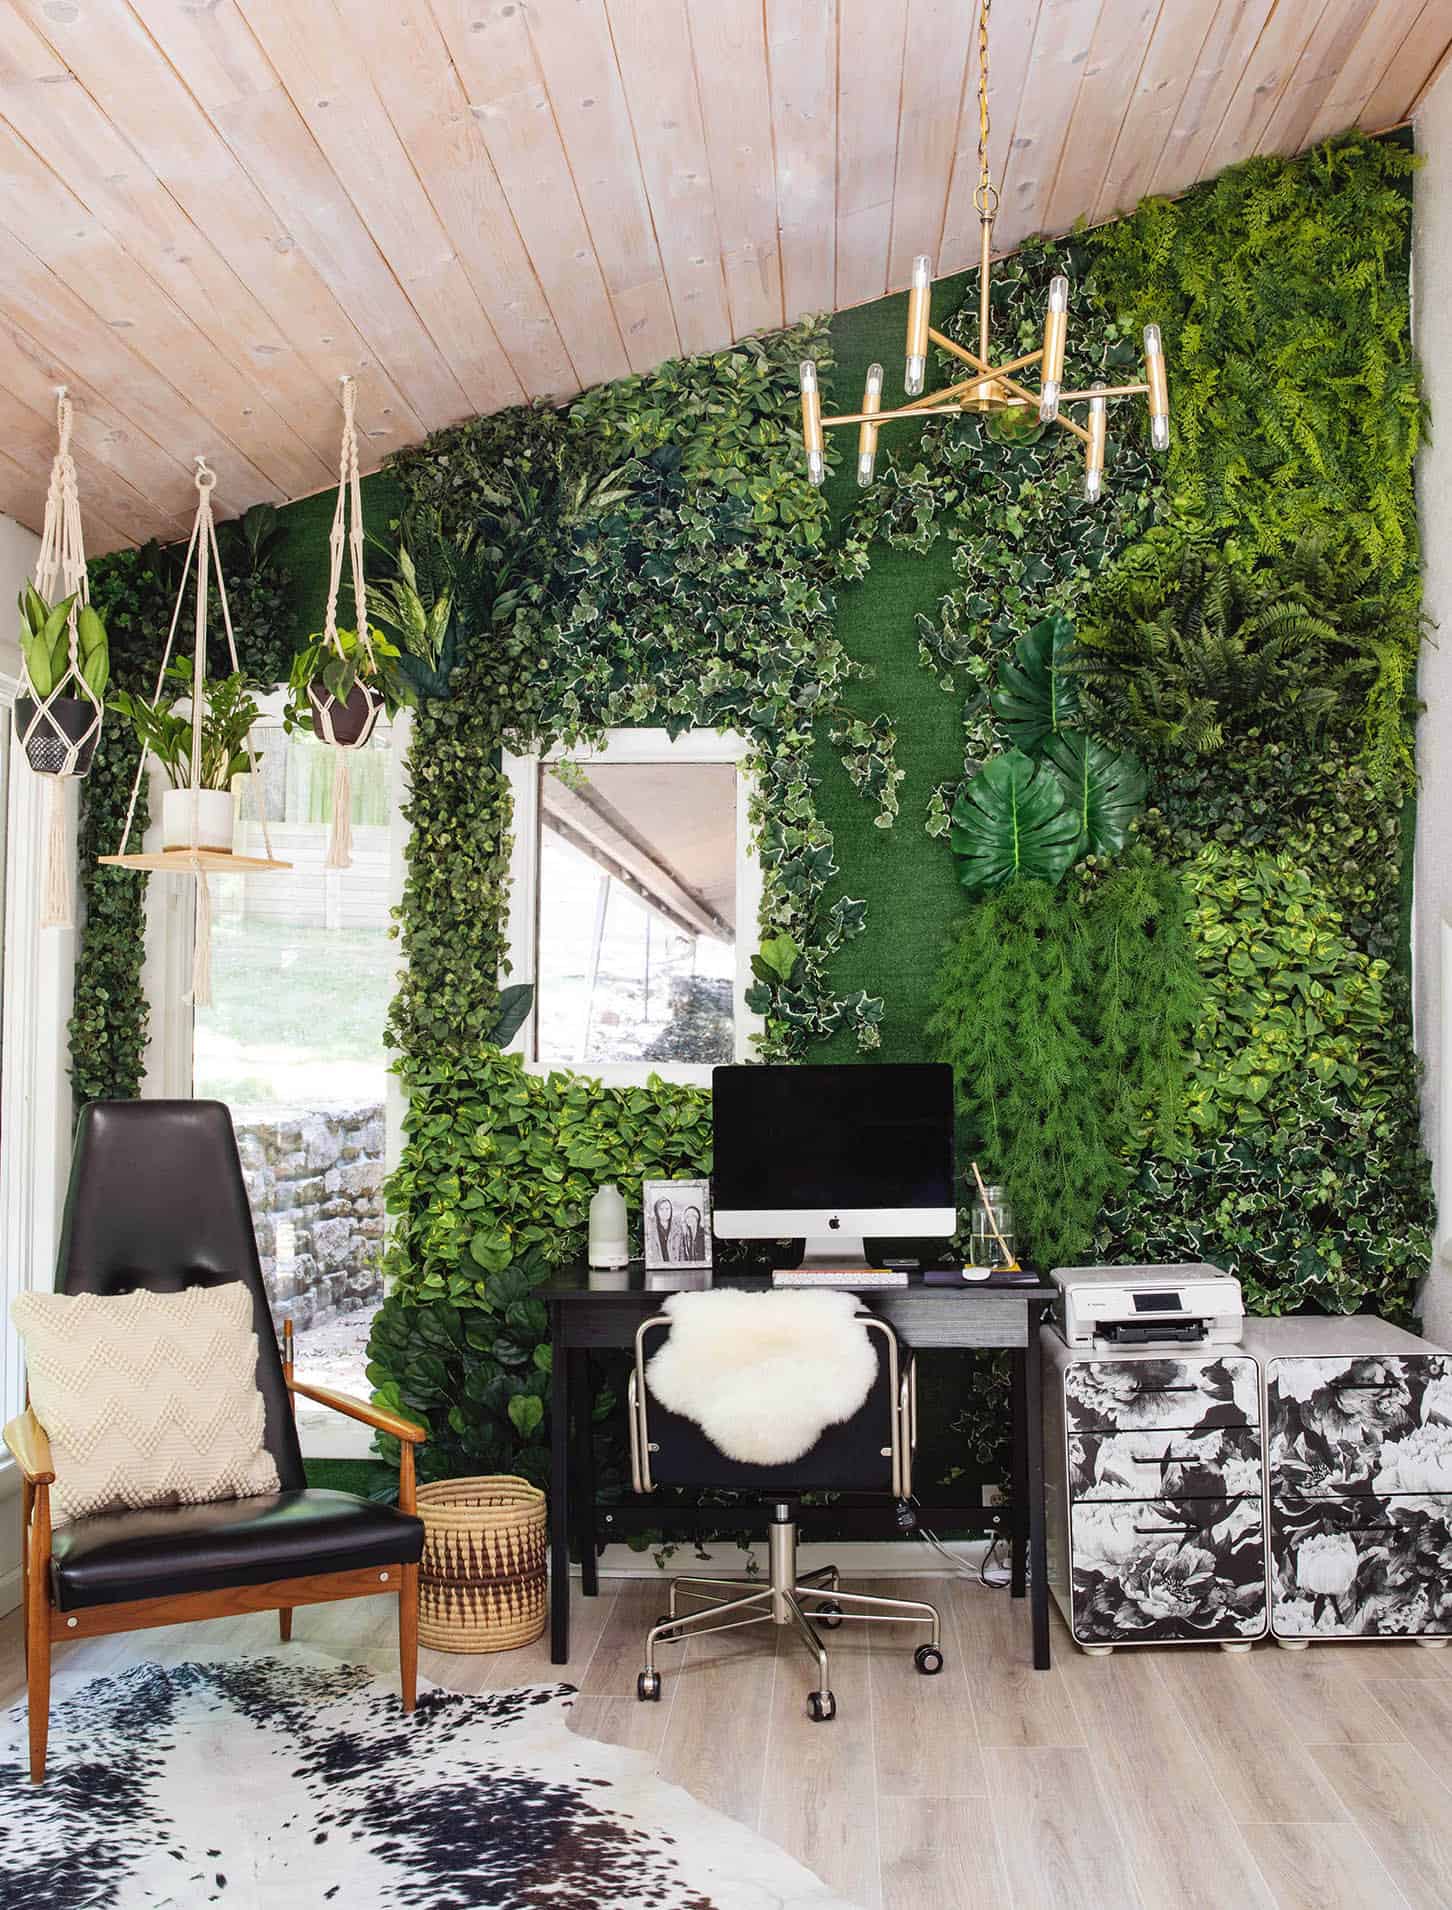
The other supplies (not including tools) cost $120. So in the end, this entire wall cost around $620 to complete. In case you’re curious my wall is about 90 square feet, although it’s a bit tricky to calculate exactly as it has a substantial slant and two windows. But hopefully this gives you an idea. I do think you could probably find even better deals on faux plants to decrease the cost. It’s not the cheapest project I’ve ever done, so I did want to warn you. 🙂 For me, it was totally worth it though because I LOVE how it turned out! But if the price tag scares you, I’d consider maybe making a headboard or doing a much smaller wall instead.
 Step One: Line the wall with the project board. Basically the goal here is to create a trim on the top and bottom of your wall that the Astroturf and netting can be hung on. You could hang it directly into the wall but my thinking was this would add a little more strength and would be easier to remove later (I plan to keep this wall for a long time, but I know myself well enough to know I won’t keep it forever). Use wall anchors or drywall screws as needed, but do keep in mind that a good amount of weight will be supported by this by the time you hang all the faux plants.
Step Two: Hang the Astroturf. We simply hung up the Astroturf in long pieces and stapled to the wood trim we had installed (using a staple gun). Then we cut out the windows, one spot for an outlet, and large slits around a wall vent. If your wall doesn’t have any windows, outlets or vents, then you won’t have to mess with that as much. 🙂

Here you can see how we also waited to staple the bottom edge to the wood trim until after we had cut out the necessary spots.
 Step Three: Add the netting. This we hung in strips over the Astroturf in the areas I knew I wanted to add plants, like over the seams. We stapled the netting to the top and bottom trim again, just like the turf.
Step Four: Add the faux plants to the netting. Many of the plants you can simply tuck or hook into the netting, but if it’s heavier or just wants to sag or pull away from the wall, cut a small amount of pipe cleaner and use that to tie the plant to the netting. Take care to make sure your pipe cleaner is hidden, so the overall impression is that it’s a REAL living wall. 🙂 I also tried using green floral wire for this step but ended up preferring the pipe cleaners because they worked just as well, but were easier to use and softer on my hands. I have a hunch they will also be easier to remove one day when the time comes.
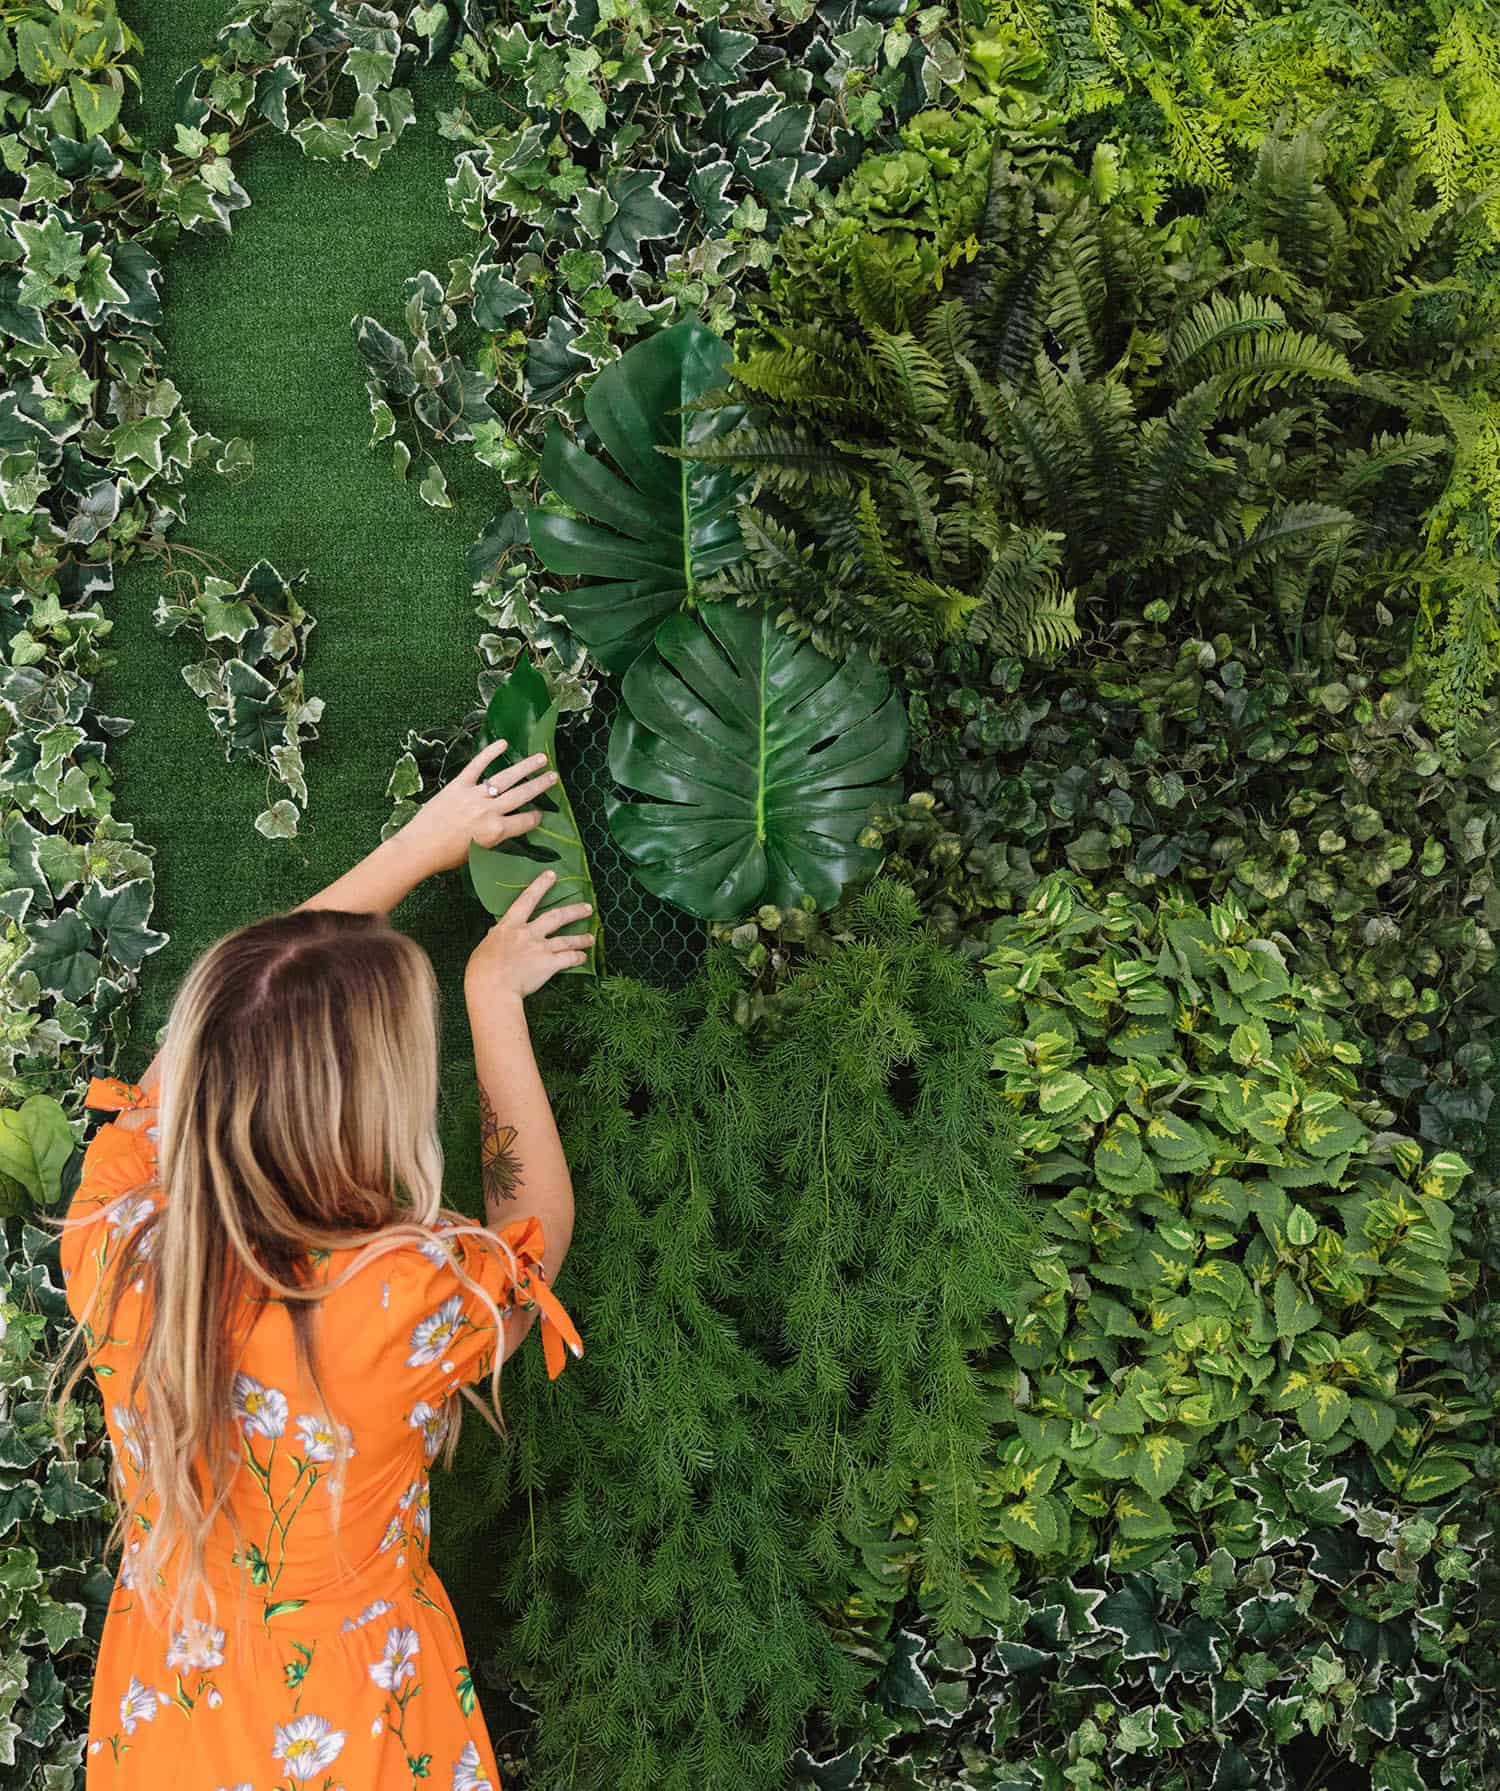
Hanging all the faux plants was the step that easily took the longest. I probably spent about 10 hours total hanging all the plants. It’s pretty fun though! Like a giant floral (or plant) arranging project. Plus, I was listening to an audiobook the whole time, too.
 As I mentioned, I’ve only had this DIY faux living wall in my home for about a month now, so I haven’t needed to clean it yet. I did have a lot of people ask how I would clean dust off of it and the real answer is “I don’t know yet” because I haven’t needed to. I have a few other faux plants in my home that I’ve had for years and none of them are super dusty, so it’s not a major concern to me (we have a lot of dog hair on the floor and rugs, but not much dust to speak of … don’t really know why on the dust, but I do know why on the dog hair. Ha ha). I had thought about just using a feather duster from time to time or maybe cans of air, like you use to clean a computer. But the cans of air probably aren’t great for the environment, so then I started rethinking that. Anyway, if you have any cleaning/dusting suggestions, I will gladly take them so I can try them out as needed! Thanks for letting me share. xo. Emma
34 Comments
My boyfriend is a landscape architect – he’d love this DIY! I just wish we actually had a place big enough to do a wall like this. It’s amazing! 🙂
Charmaine Ng | Architecture & Lifestyle Blog
http://charmainenyw.com
I was totally thinking you’d just lightly vacuum it? I know what you mean about everyone’s house being different with dust. People look at some of my DIY projects and say it would get dirty in their house (like open shelving) and I don’t get it. I think ventilation and age of house and environment all makes a difference. I love the wall. What a statement!
Yes, I have a little attachment on my vacuum that may work… but it might be too powerful. Idk. I’m def gonna try it when I go to clean this. 🙂
I love this! Turned out so good! All the hand claps and heart eyes!
Awe. Thanks friend!
Wow this is stunning!!! I feel like it will be such a happy place during the dreary winter months. Well done!!
Gosh I hope so. Winter months are sometimes hard, right? I love the four seasons but winter (after the holidays) is my least favorite for sure.
Hi! I love this post. Do you mind sharing what the square footage of your wall is? It’d be helpful to estimate what the project would cost on other walls.
Thanks!
Yes, it’s about 90 square feet. As you can see from the photos it has a pretty substantial slant so calculating it exactly is tricky. Plus it has two window, one being pretty large. I’ll add this to the post in case other’s are curious too!
This turned out so good! Perfect for those moments when you’re at home working and long for change in scenery. Now you’ve got it without ever leaving ????????????????????????. Great job!
Xx,
Leslie / @hautemommie / http://www.thehautemommie.com
This is amazing! I have a shower coming up that I am planning and would love to make a portable one of these! Love it!
Noelle
http://elle-no.com
You could certainly do this same technique / project on large pieces of foam board or plywood. Transporting them would be tricky, I would probably add the plants after the boards are in place. I think this would make a really cute photo backdrop or a bedroom head board. 🙂
But what about… spiders!?!
Hairdryer set on high along with a Swiffer Duster wand for hard to reach areas would be a good way to keep that awesome “ living” wall dust free and looking its best.????
It’s unusual but so inspiring! I think the verdant greenery really gives life to the space. If it were mine, I’d tuck a red bromeliad here and there, or some other tropical feeling not so flowery flower. Haha. I really like the organic feel and the different types of greenery you used.
What a cute idea!! I’ve never thought about bringing this sort of thing inside.
Woof Xo,
Michelle & Watson
https://www.watsonandwalls.com/
This is so fun and cute! I’m obsessed!
Paige
http://thehappyflammily.com
I don’t suppose you took any time lapse footage of this project? Obviously it wasn’t all done in one day but even so would have loved to see the progression on this!
This is amazing!!! My husband really wants to do a faux plant wall somewhere in our home but I haven’t figured out a good spot to do this in yet but I’m definitely inspired now! 🙂
Faux plant cleaner- http://www.michaels.com/silkn-splendor-silk-plant-treatment/10192679.html?cm_mmc=PLASearch-_-google-_-MICH_National_PLA_Shopping_Null_Null_All+Products_General-_-All-Products&gclid=EAIaIQobChMItemYpd_M3AIVB8pkCh0zSw0OEAQYBSABEgIZi_D_BwE
We have a blower that uses our drill batteries that I’ve used to blow “dust” off of hard to clean spots. Such a fun project!
Love!!! I think a sticky lint roller will do the trick if your feather duster and vacuum don’t work out.
Wow, that looks incredible! I’m so jealous, I would love such a wall in my study!
https://www.makeandmess.com/
AMAZING !!!!!! ????????????????????????????
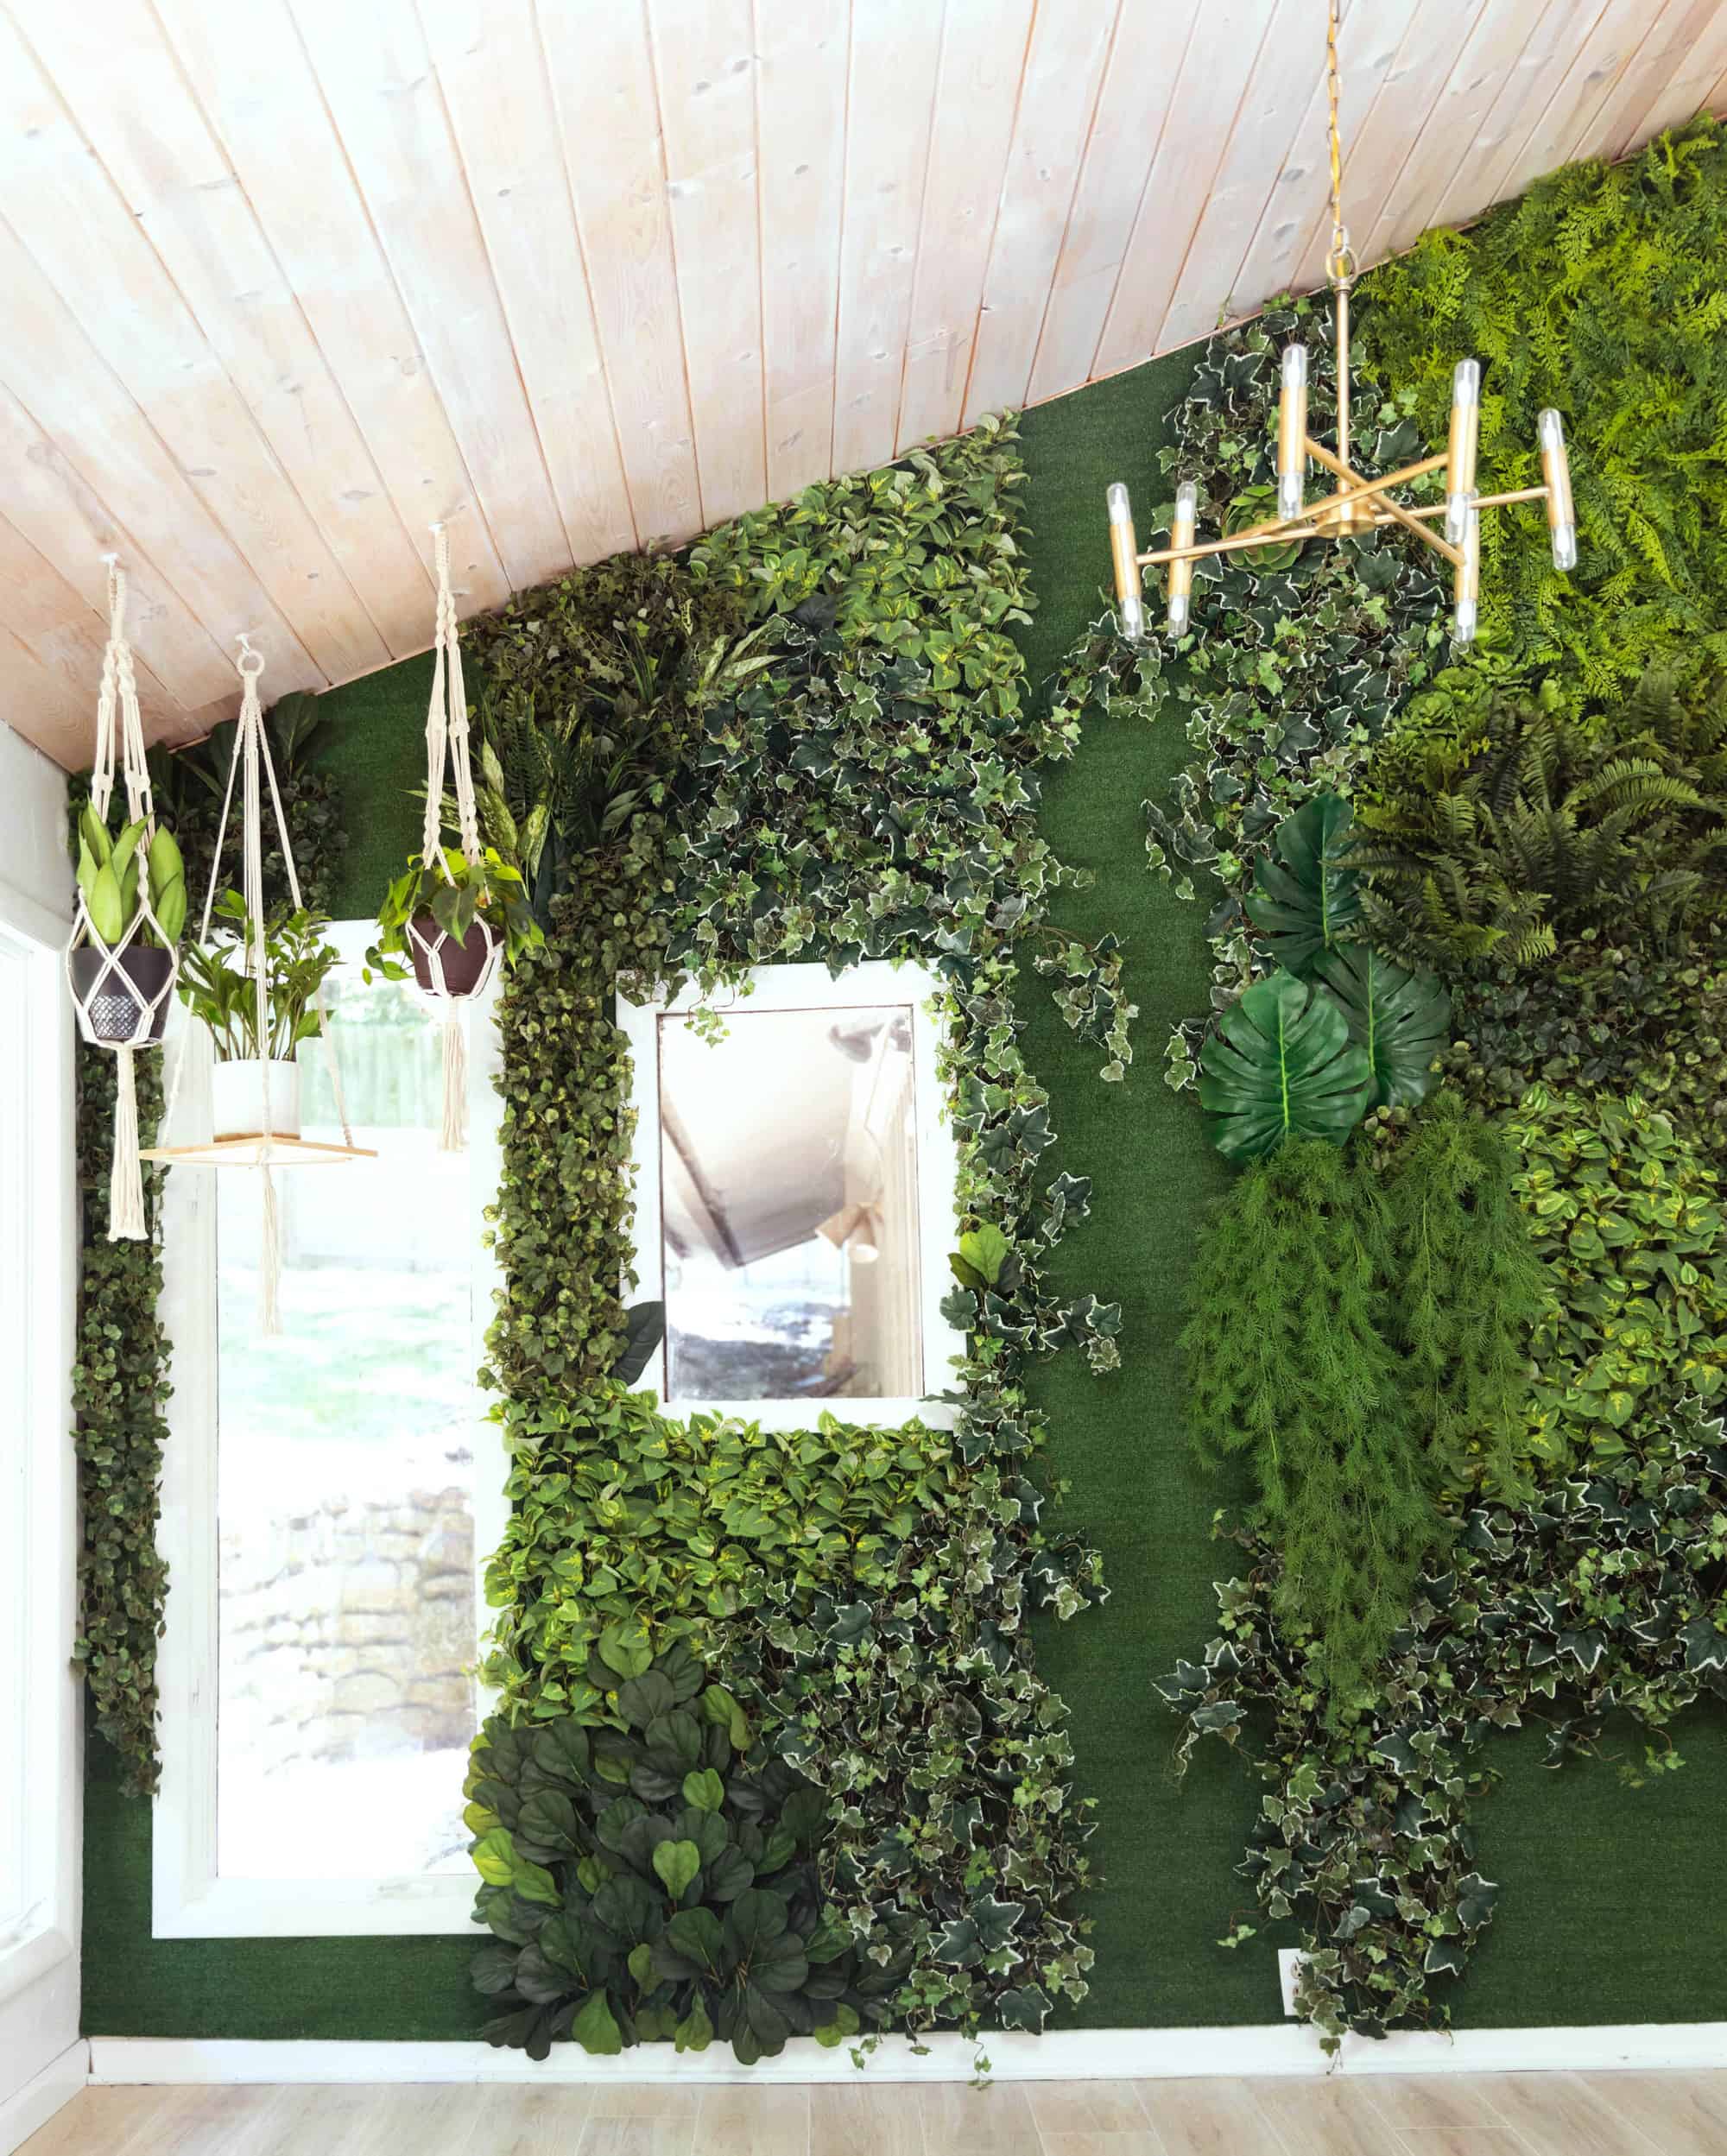
Emma – What an original idea! It really is stunning. I also like the three live plants hanging from hooks. It’s nice to have a mixture of both live and faux.
Have you noticed if you feel happier/more productive in your office now? All of the green just looks so happy and inspiring! Love it. 🙂
You probably don’t want to hear this but Ikea now sells squares of faux plants already grouped together. Would’ve made this way easier. It’s new to IKEA just in the past month.
A few cotton balls with peppermint oil will keep spiders and other bugs away. This is really unique.
So amazing!
This design is looking like natural wall, good to share this great design details.
The recipe is very simple, I will try to do this product well, thank you for sharing it with me
OMG I love it!!!! I would like to have at home!! I’m only have bouquets, I obsessed with http://www.thecolvinco.com
que maravilla de jardin vertical. Es una pasada y precioso!! Me apunto la idea porque con lo que me gustan las flores seguro que lo pongo en práctica.
How do you make a living plant wall?
I don’t know. This tutorial is for a faux living wall (fake plants, not real).