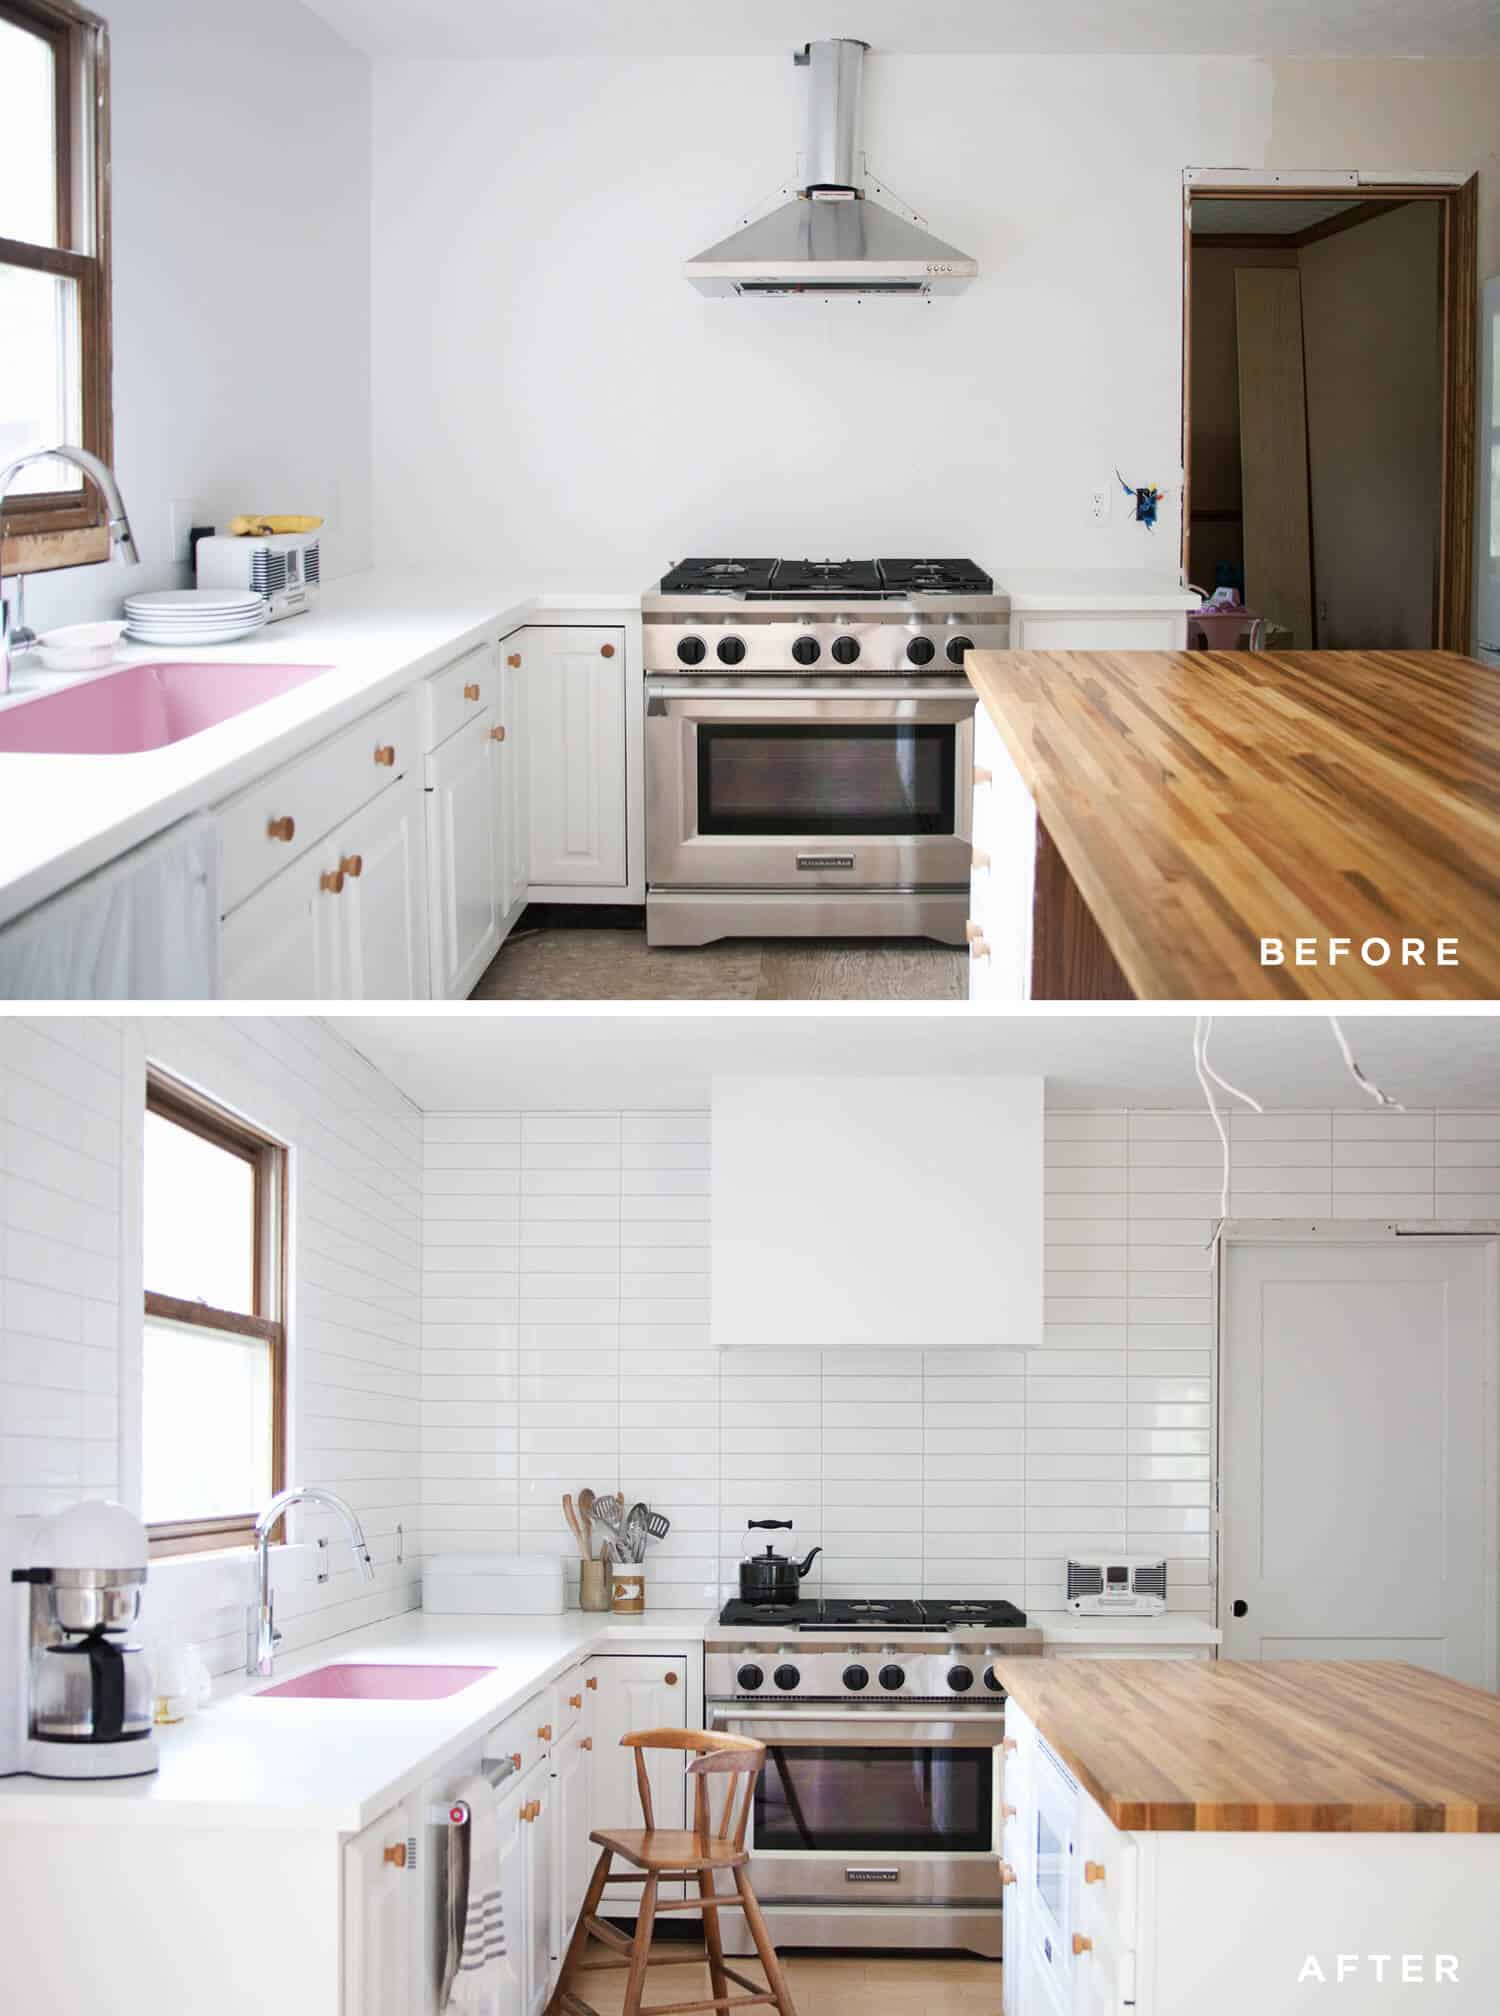
 I’ve longed for the day when more than just a microwave would go above my stove. I love the look of statement hood vents, and contemplated modern stainless steel looks versus copper vintage-inspired units. But then the time came for me to actually design the kitchen renovation for our new home, and I decided what I really wanted in a hood vent was something that felt minimal and didn’t stand out at all. I really wanted other aspects of the kitchen to shine. (Like my pink sink! It’s normal to make a sink the focal point of a kitchen, right?)
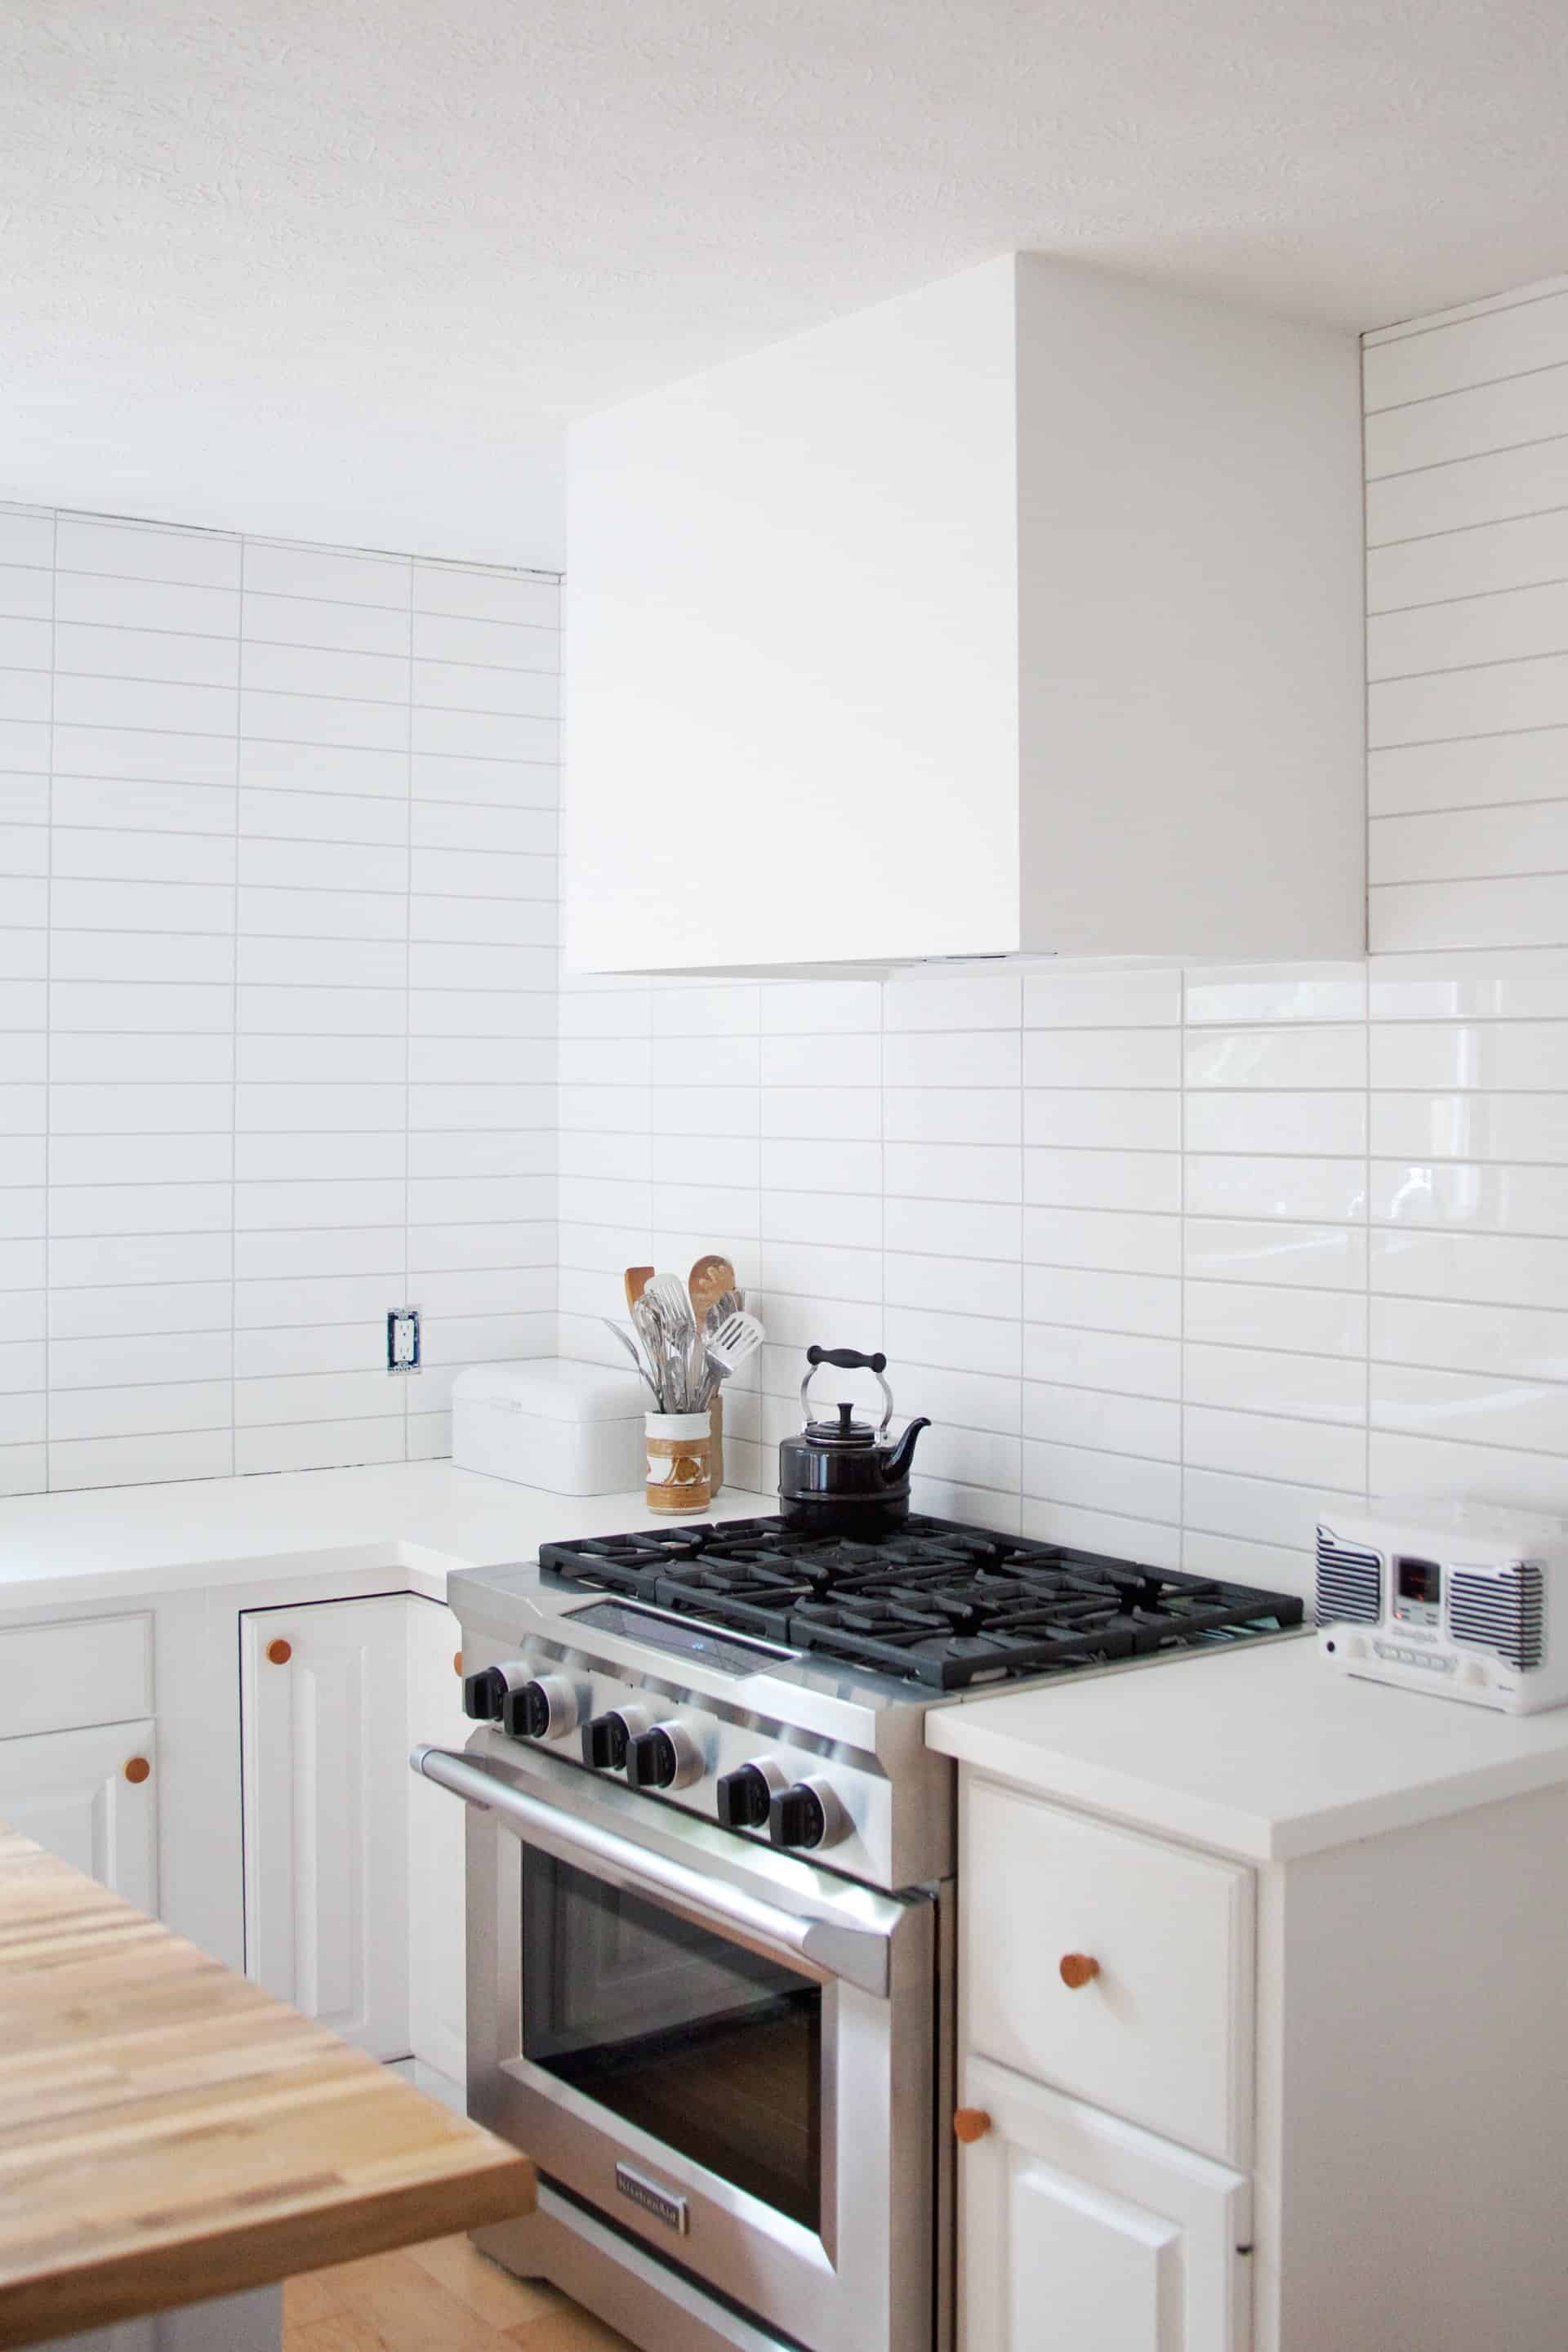
So I built a box around my hood vent, and I’m really happy with how it looks in the space! Turns out it wasn’t so difficult to build, either! Check out how I did it.
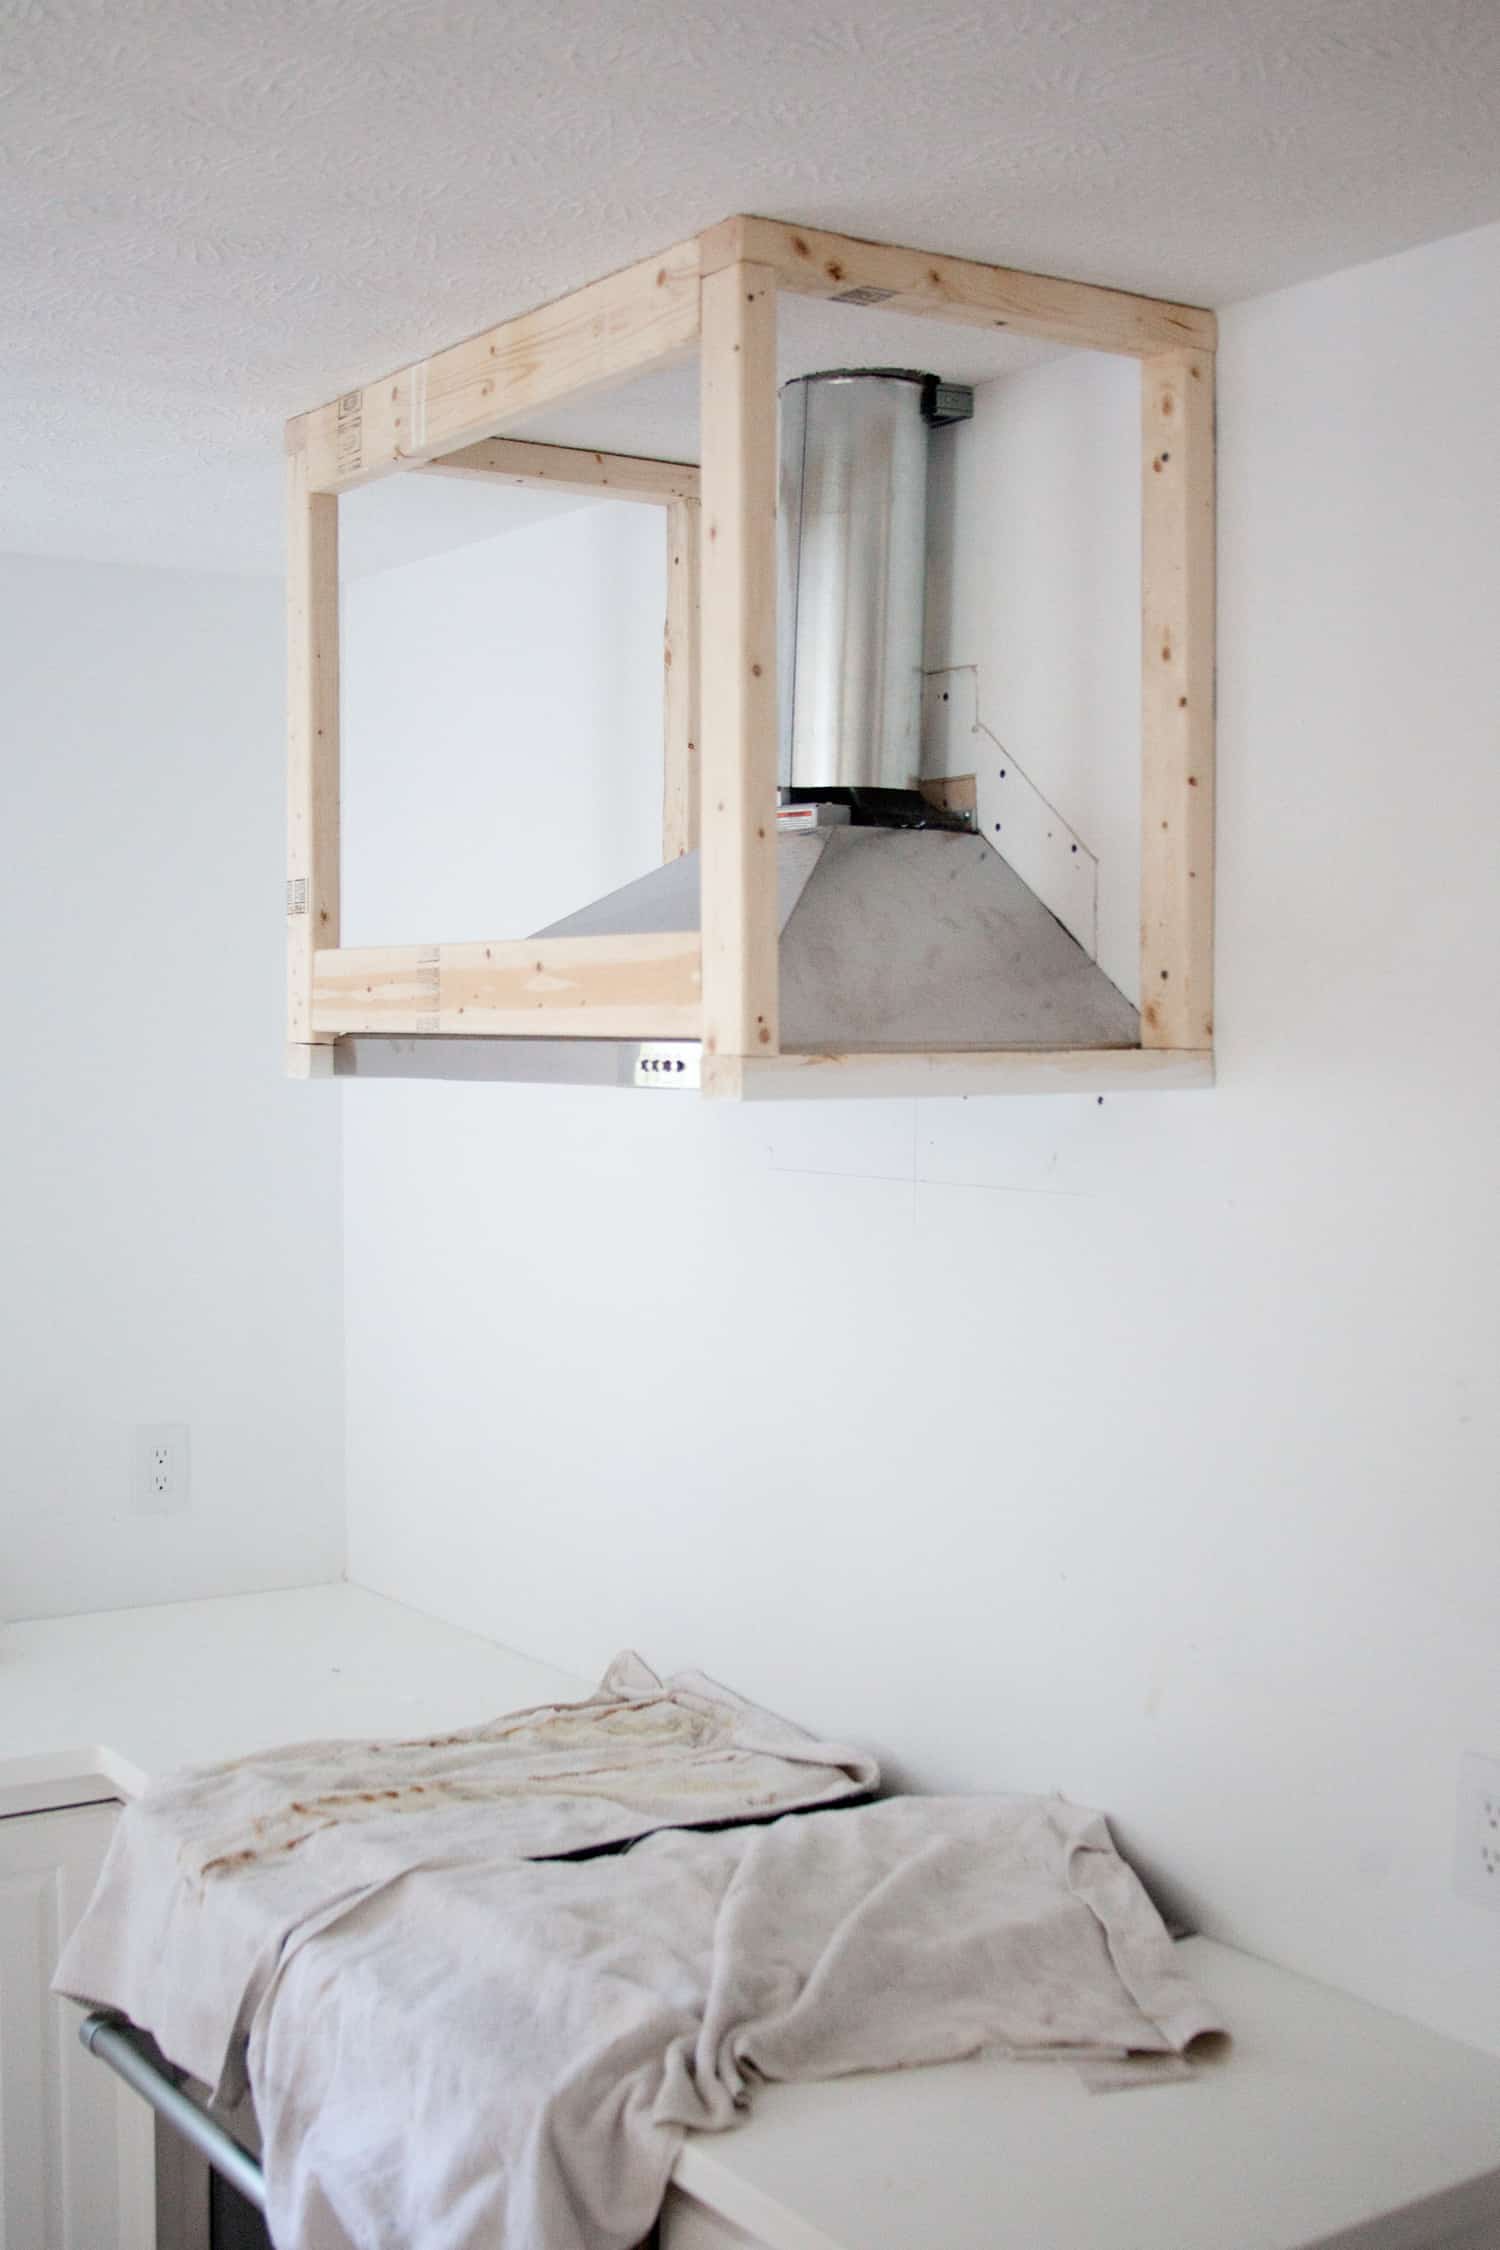 I chose this Whirlpool 30″ hood vent, and was aware that the buttons are on the front and figured I could work around that for the cover. Essentially what I did was build a frame around the hood vent with 2×3 lumber, and tacked plywood to the sides and front to make the box. But let me walk you through the steps.
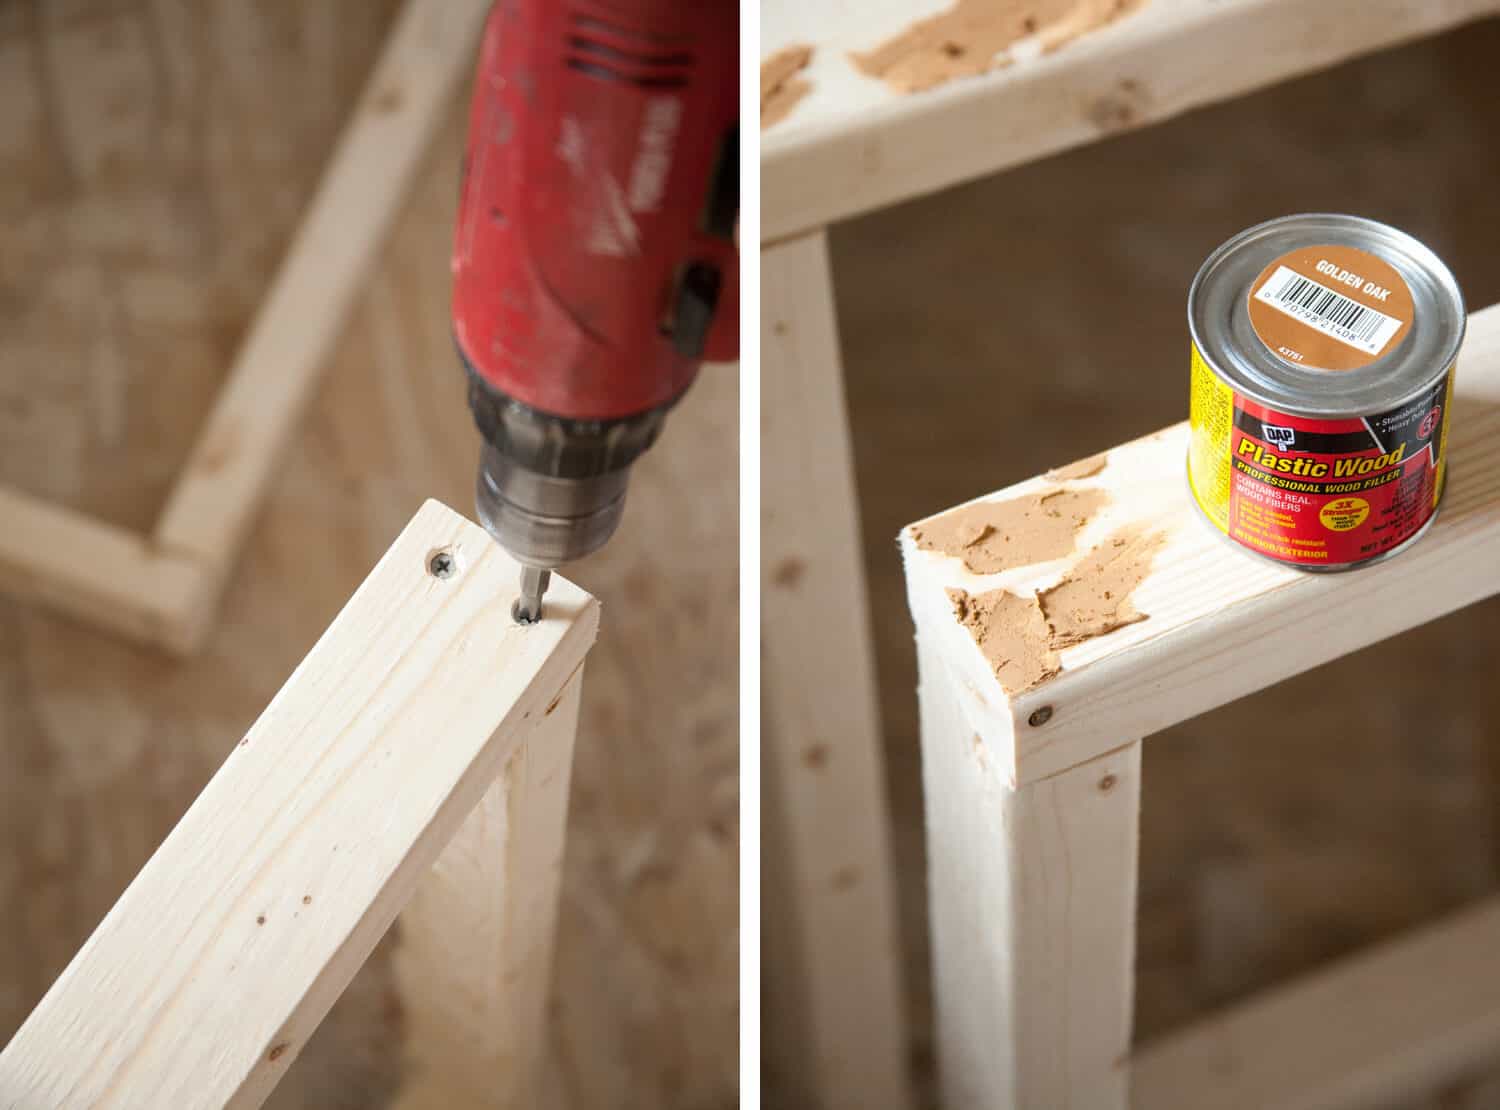 Step One: Screw together the frame for each side of the hood vent. Make sure to countersink your screws deep enough that you can fill the holes to hide where the screws are. I made my frame to end one inch below the hood vent, as well as to extend one inch beyond the hood vent in the front. This is because I wanted to access the buttons for the hood vent, which are on the front, not the bottom of my hood vent.
Step Two: Fill the countersunk screw holes with wood filler.
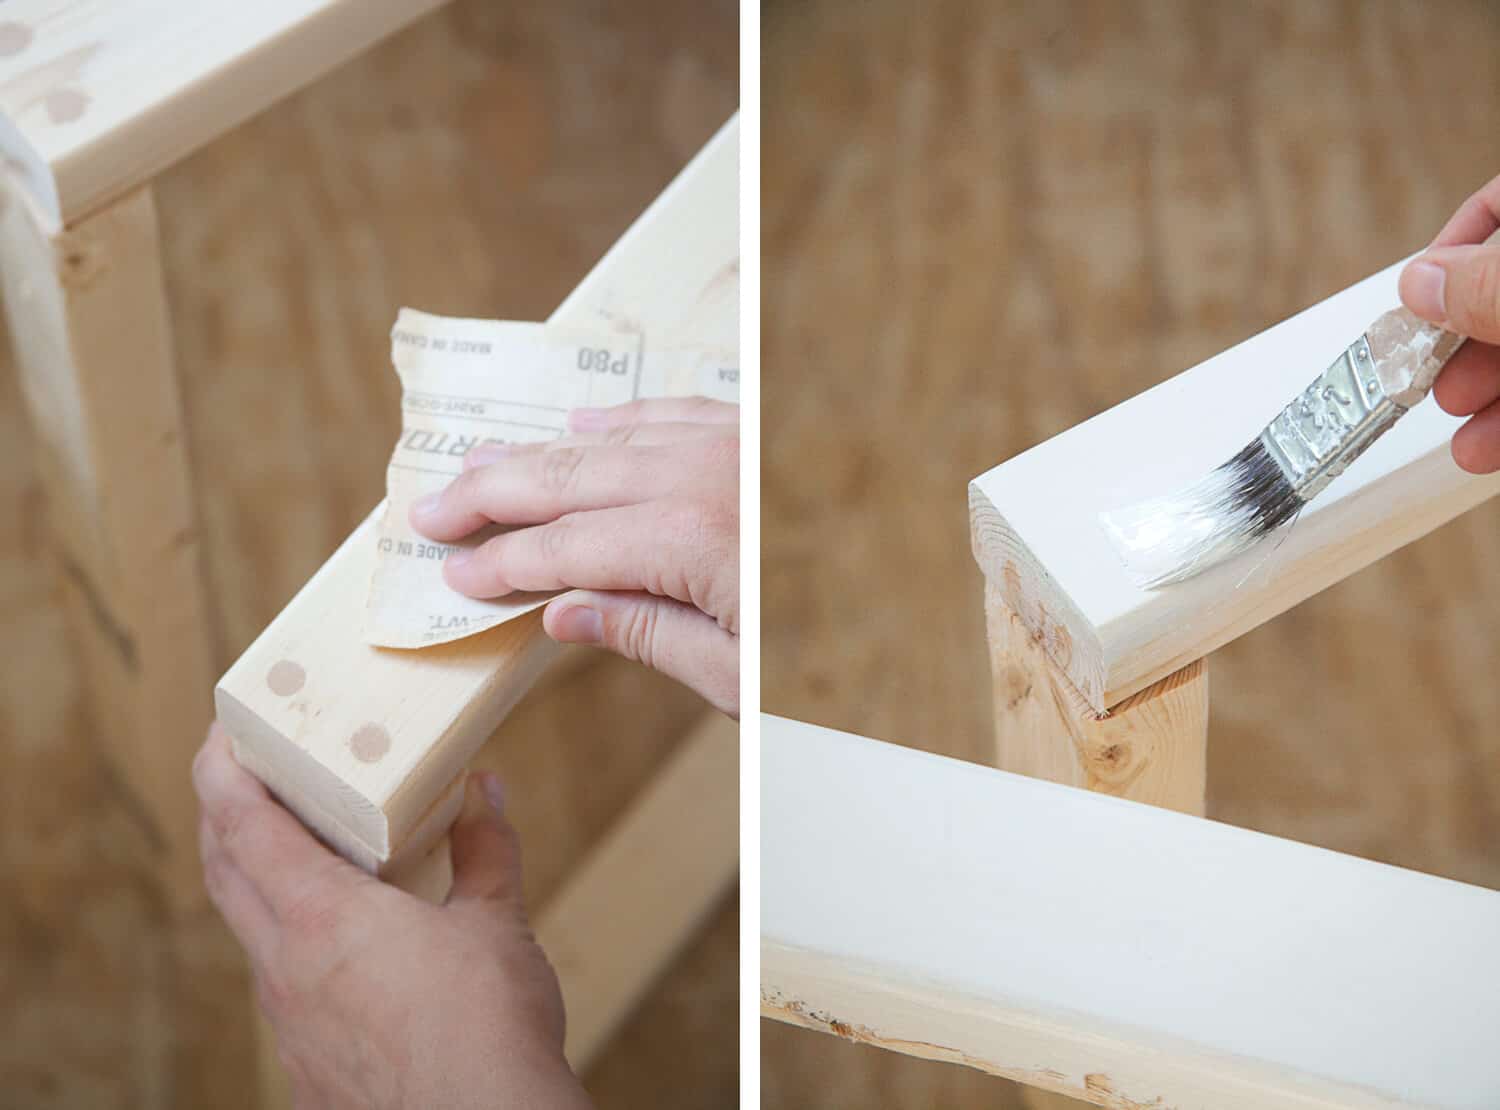 Step Three: Sand the wood filler, then prime and paint the part of your frame which will be visible from the bottom. It’s easier to do this now, rather than taping off the hood vent to paint later.
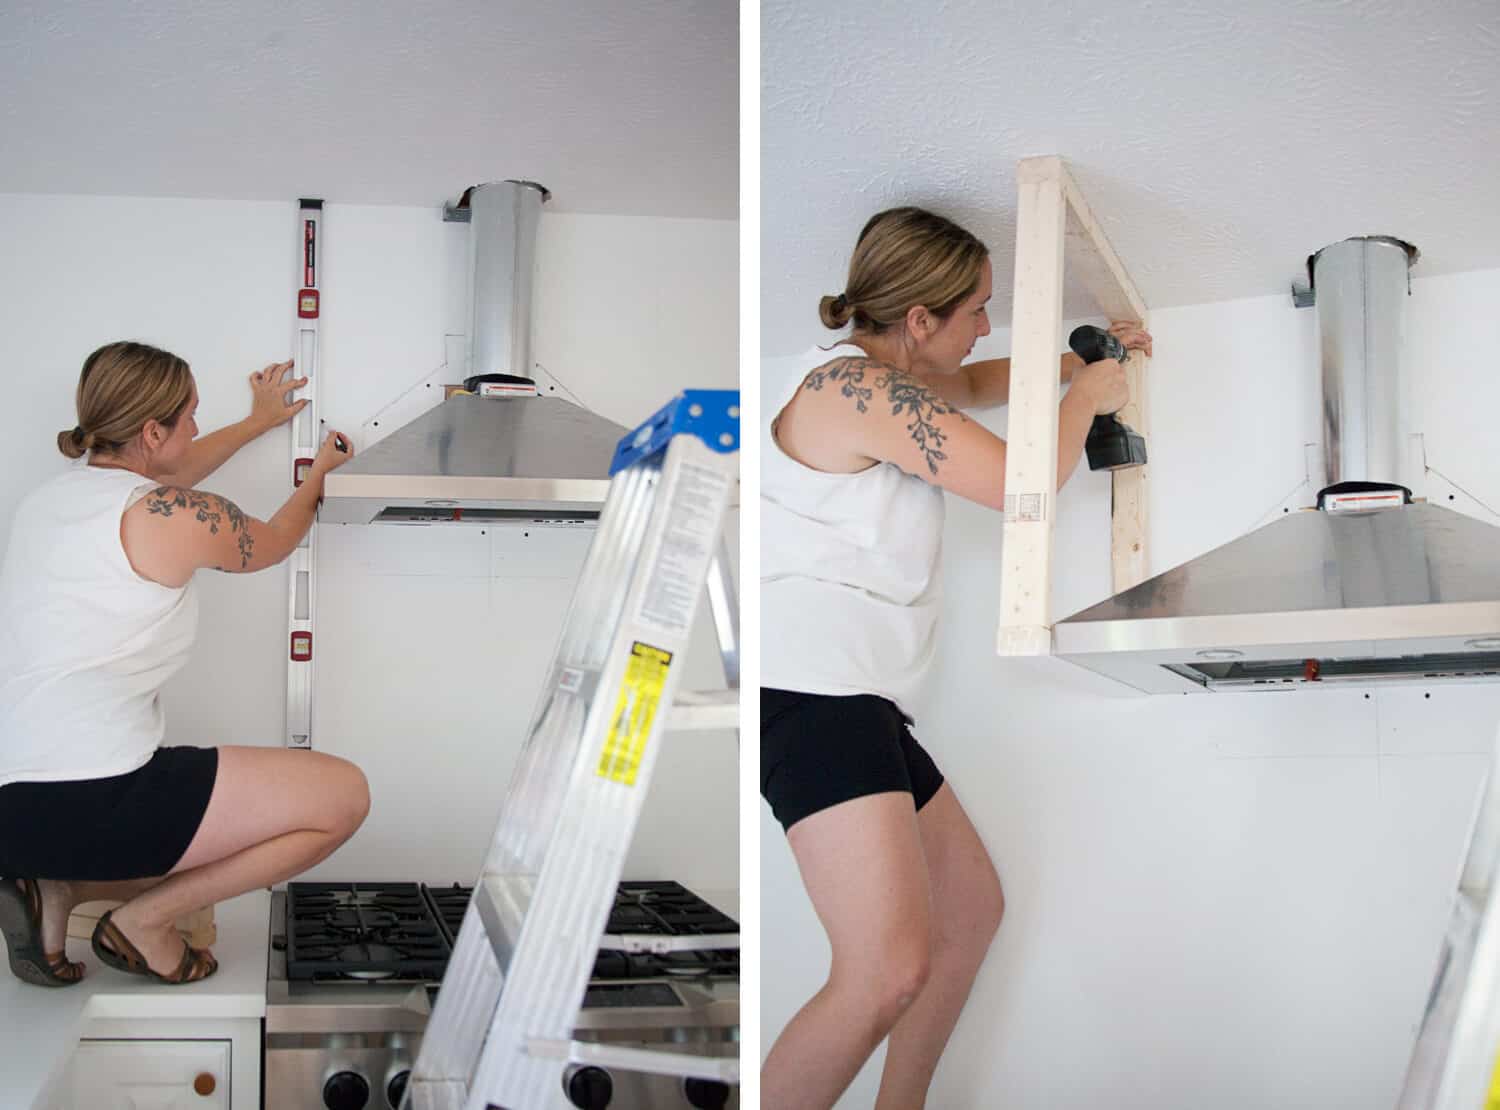 Step Four: Use a level to mark where the inside of your side frames will attach to the wall. I drew a line to act as a guideline for the frame. Then drill pilot holes through the frame and into the drywall. If you have a stud there, great! If not, check out the next step.
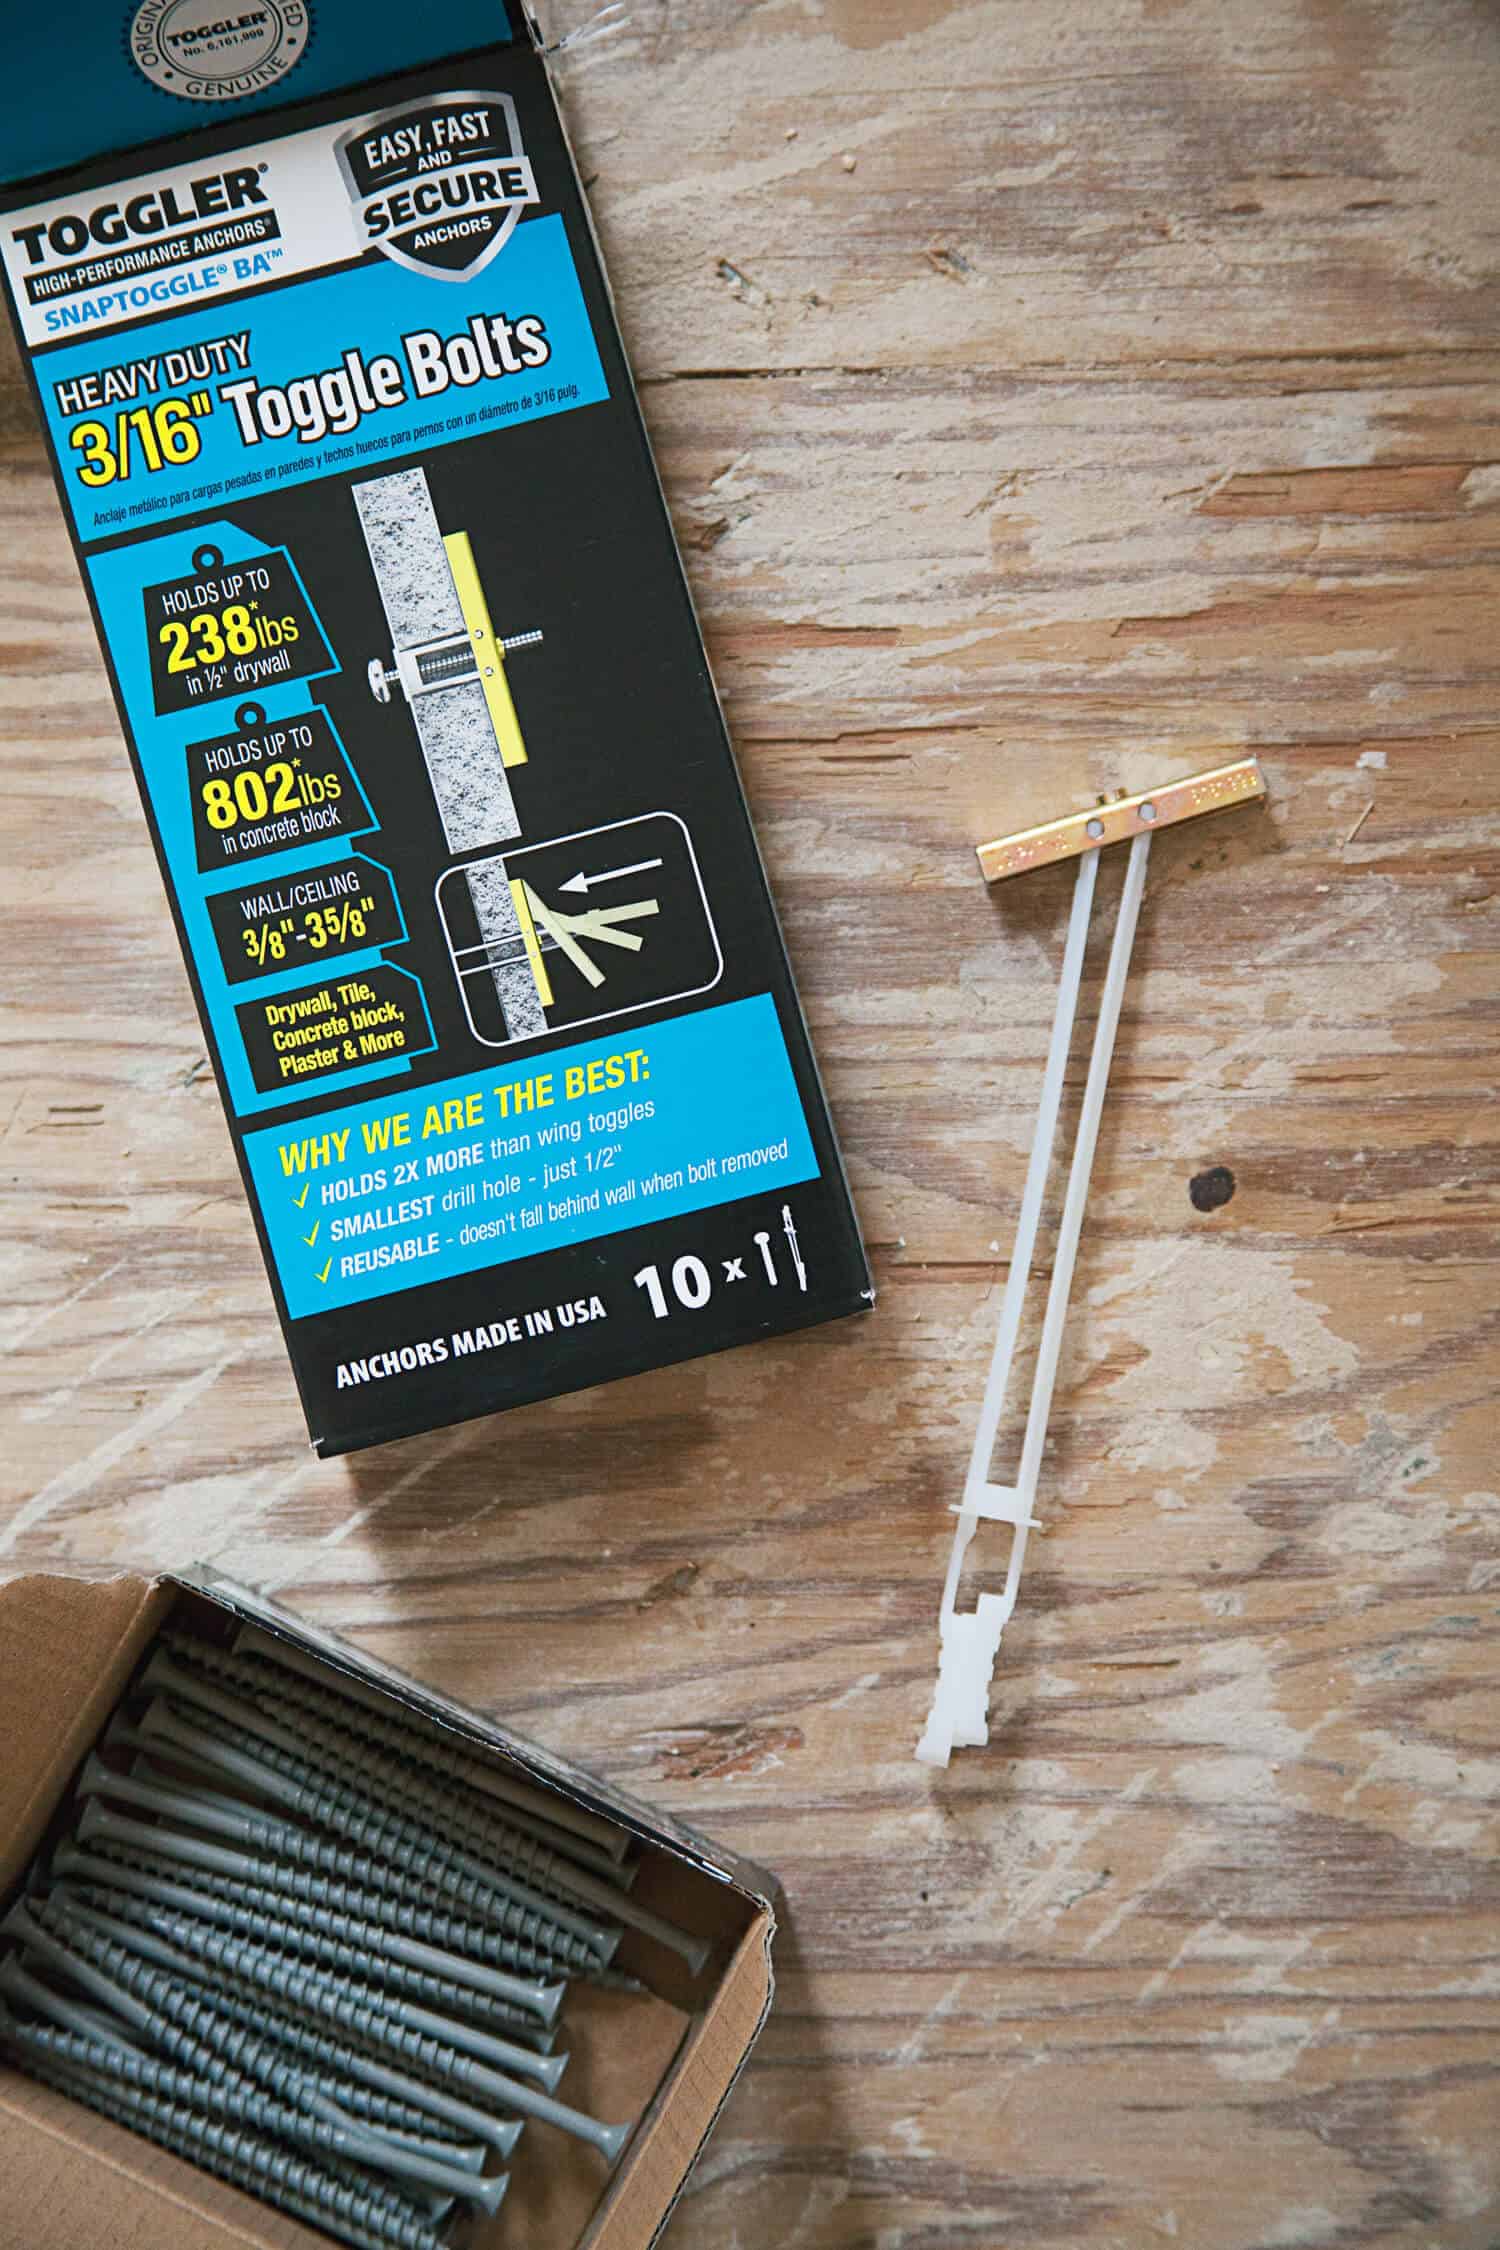 I used toggle bolts to securely attach my frames to the wall, since the studs were not conveniently located where I needed them. Here’s how it works.
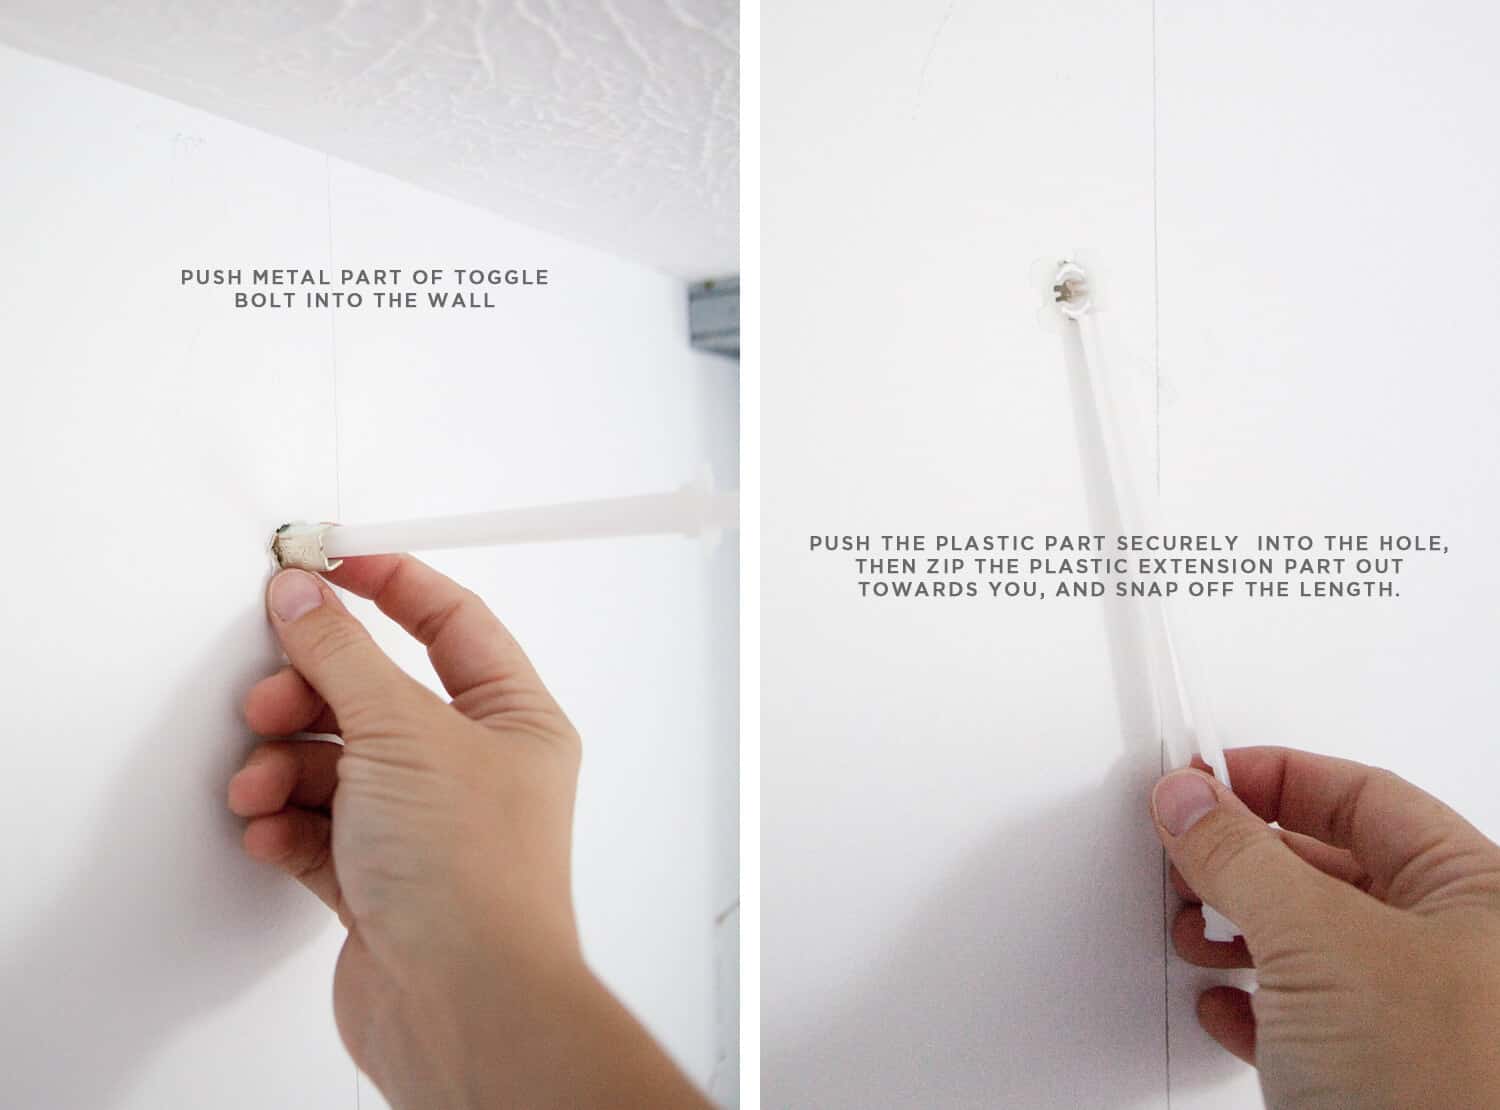 Step Five: Use the size drill bit the Toggle bolts recommend, and bore a hole into the drywall where your pilot hole was. Then push the metal part of the toggle bolt into that hole. Secure the plastic circle into the hole opening, then zip the long plastic pulls out towards you. This will pull the metal part tight against the drywall, bracing the weight of what you will hang, so it won’t break through the drywall. Now you will put your screws through these holes when you attach the frame.
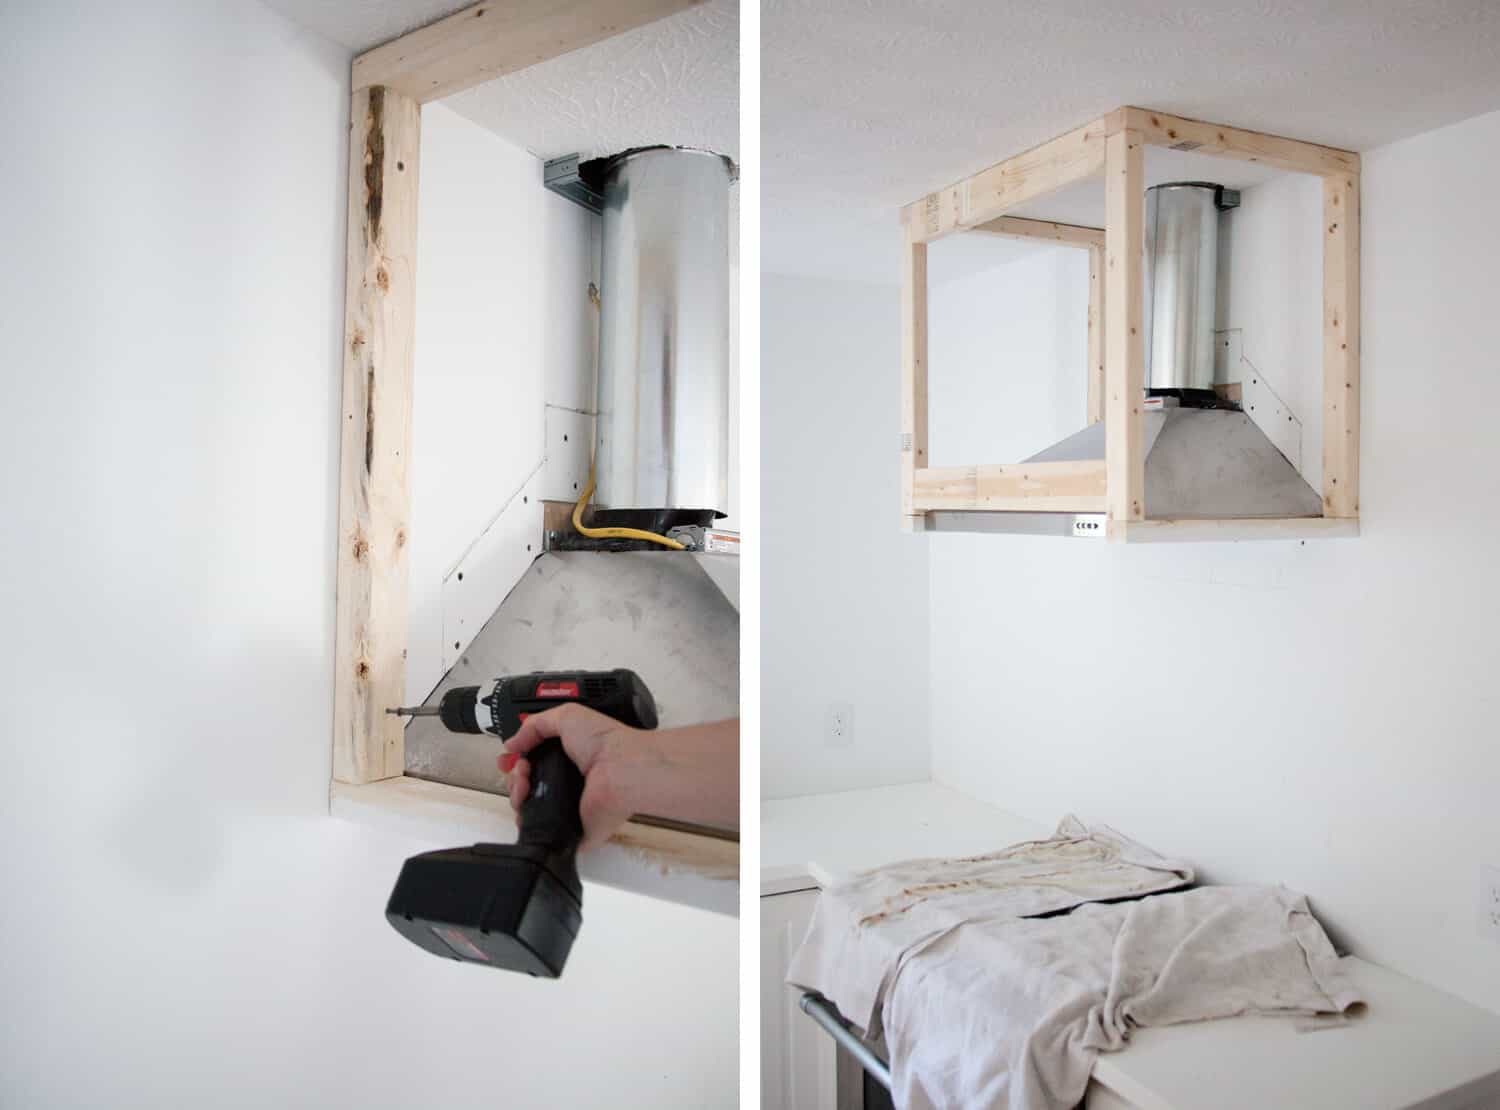 Step Six: Attach the frame to the wall using three-inch screws fit to the diameter of your toggle bolts. Once the sides of the frames are in place, connect them in the front using 2x4s that you attach with screws.
I’m ashamed to admit that I accidentally cleared my memory card of the next steps’ photos, thinking I had already uploaded them to the computer! But it’s very easy to explain using words.
Step Seven: Cut plywood (You can use whatever plywood you have around, or 1/4″ plywood for a slimmer profile) to fit to the side frames, and attach it to the frame using wire brads or a nail gun. Then cut a piece of plywood to fit across the front and nail it into the frame as well.
Step Eight: Fill the holes from the nails, sand, prime, and paint the box. I wet sanded with this sandpaper after priming and before painting, which made my paint finish silky smooth. Also, I caulked around the edges to hide tiny gaps where the plywood meets the ceiling and walls.
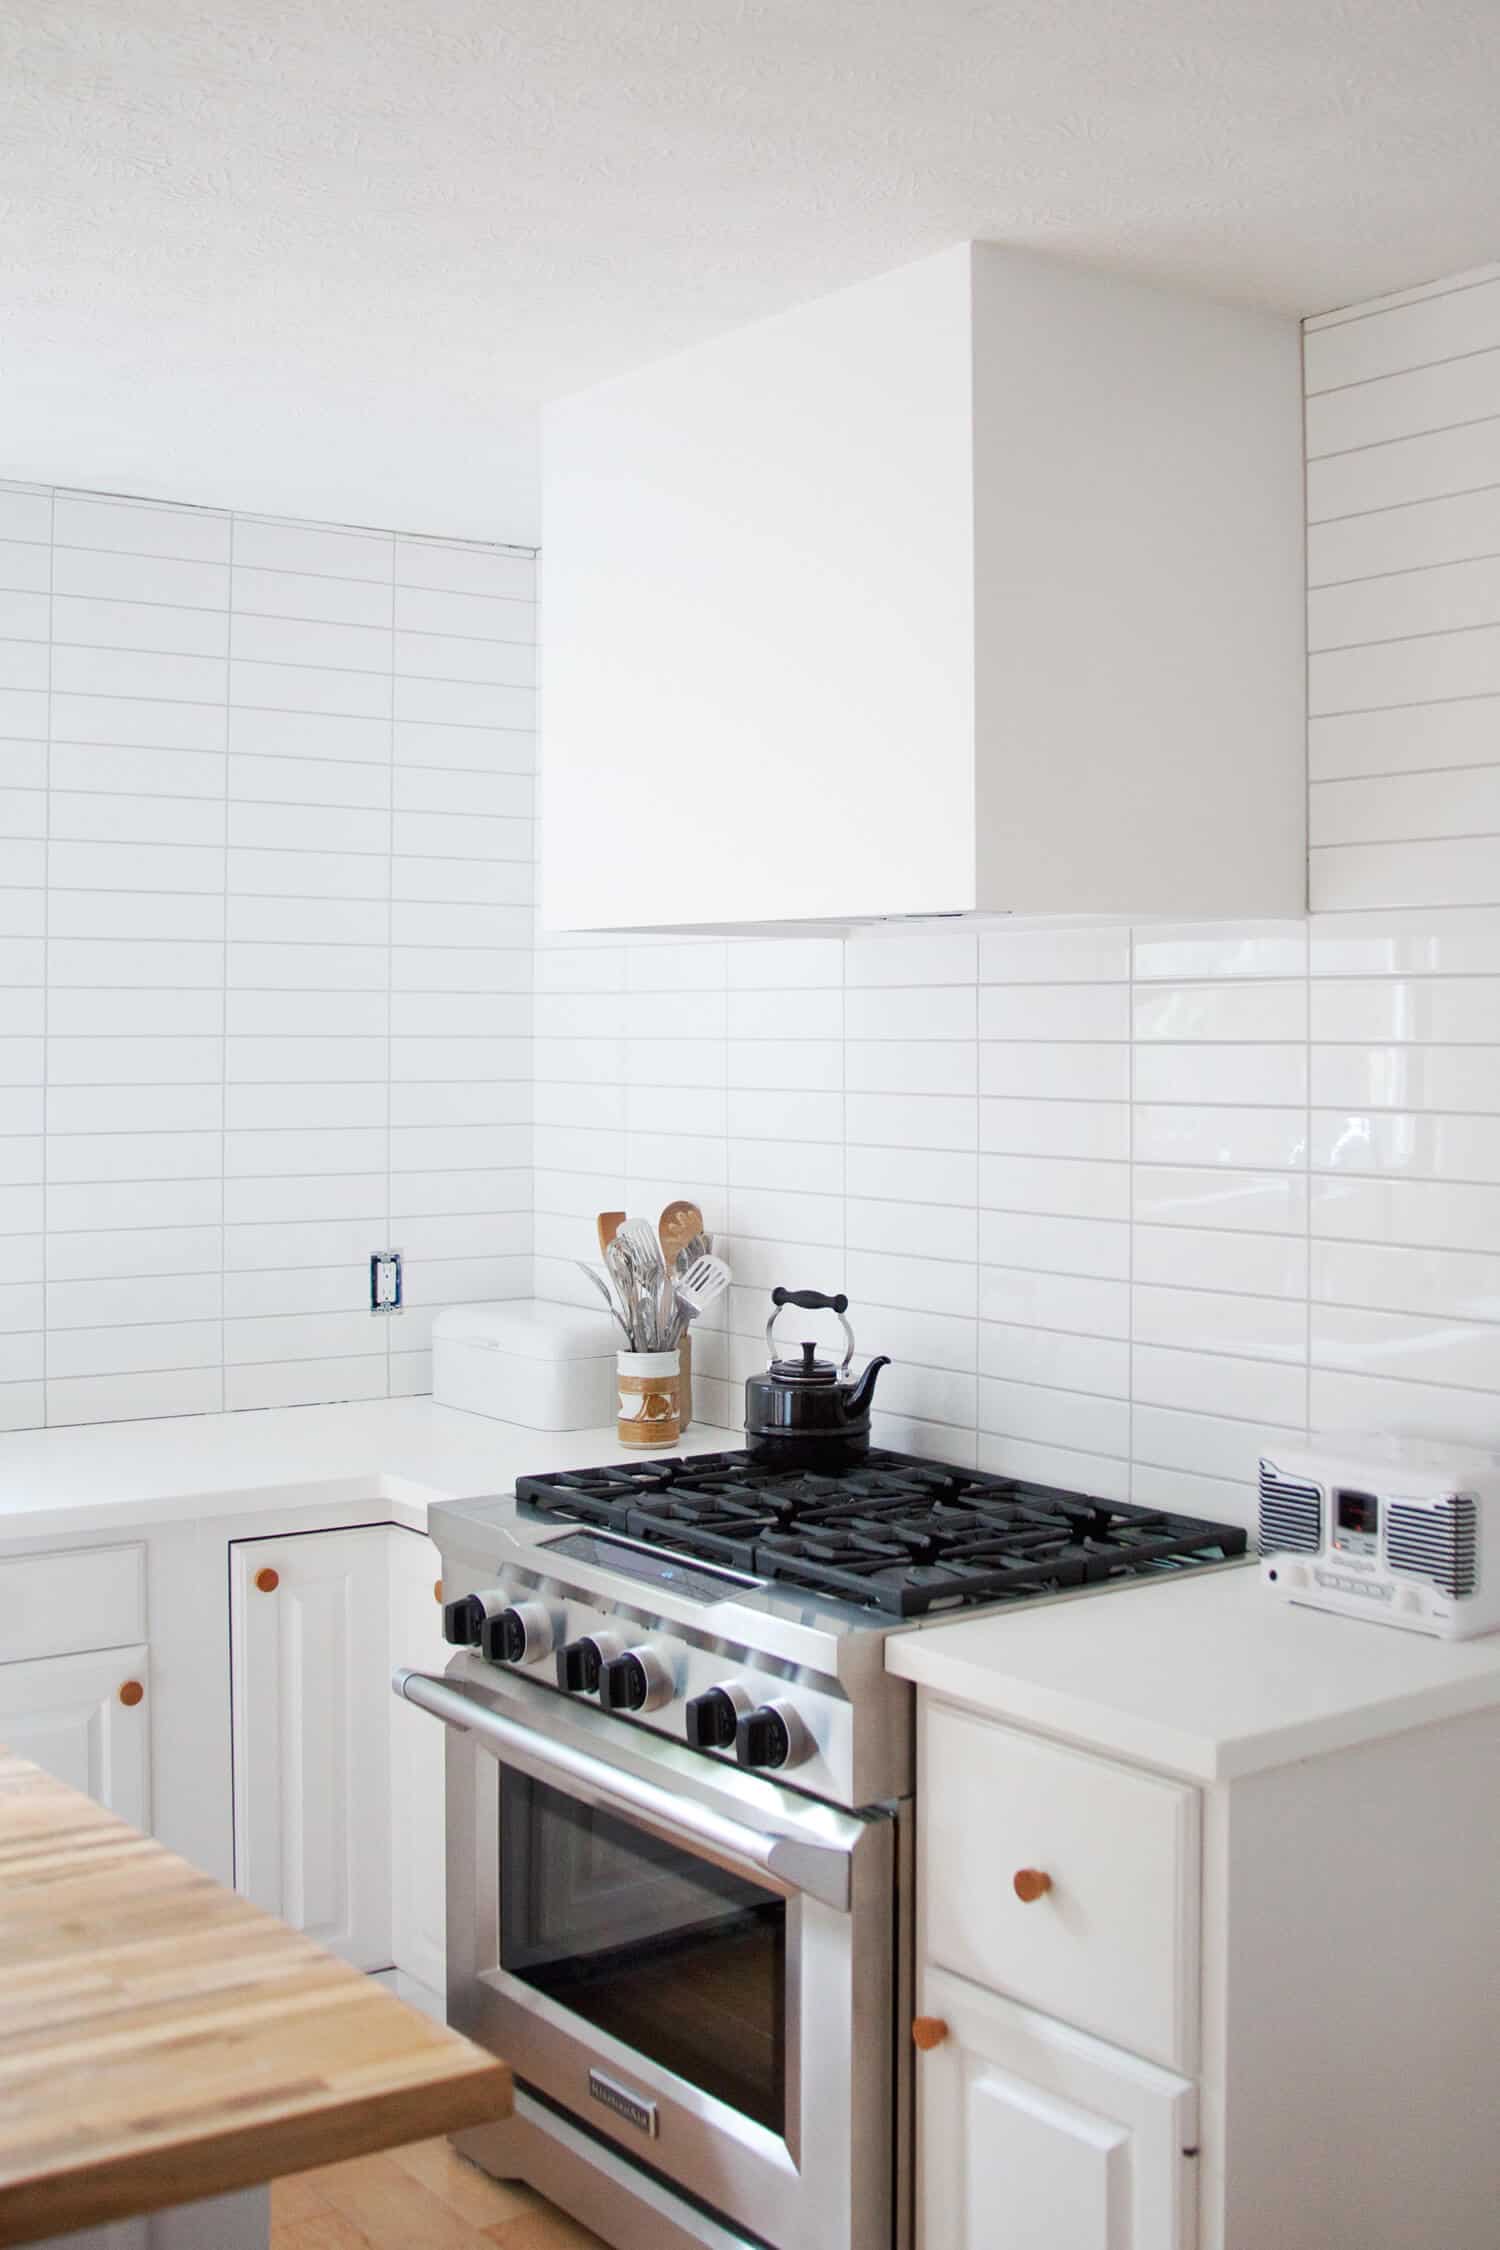
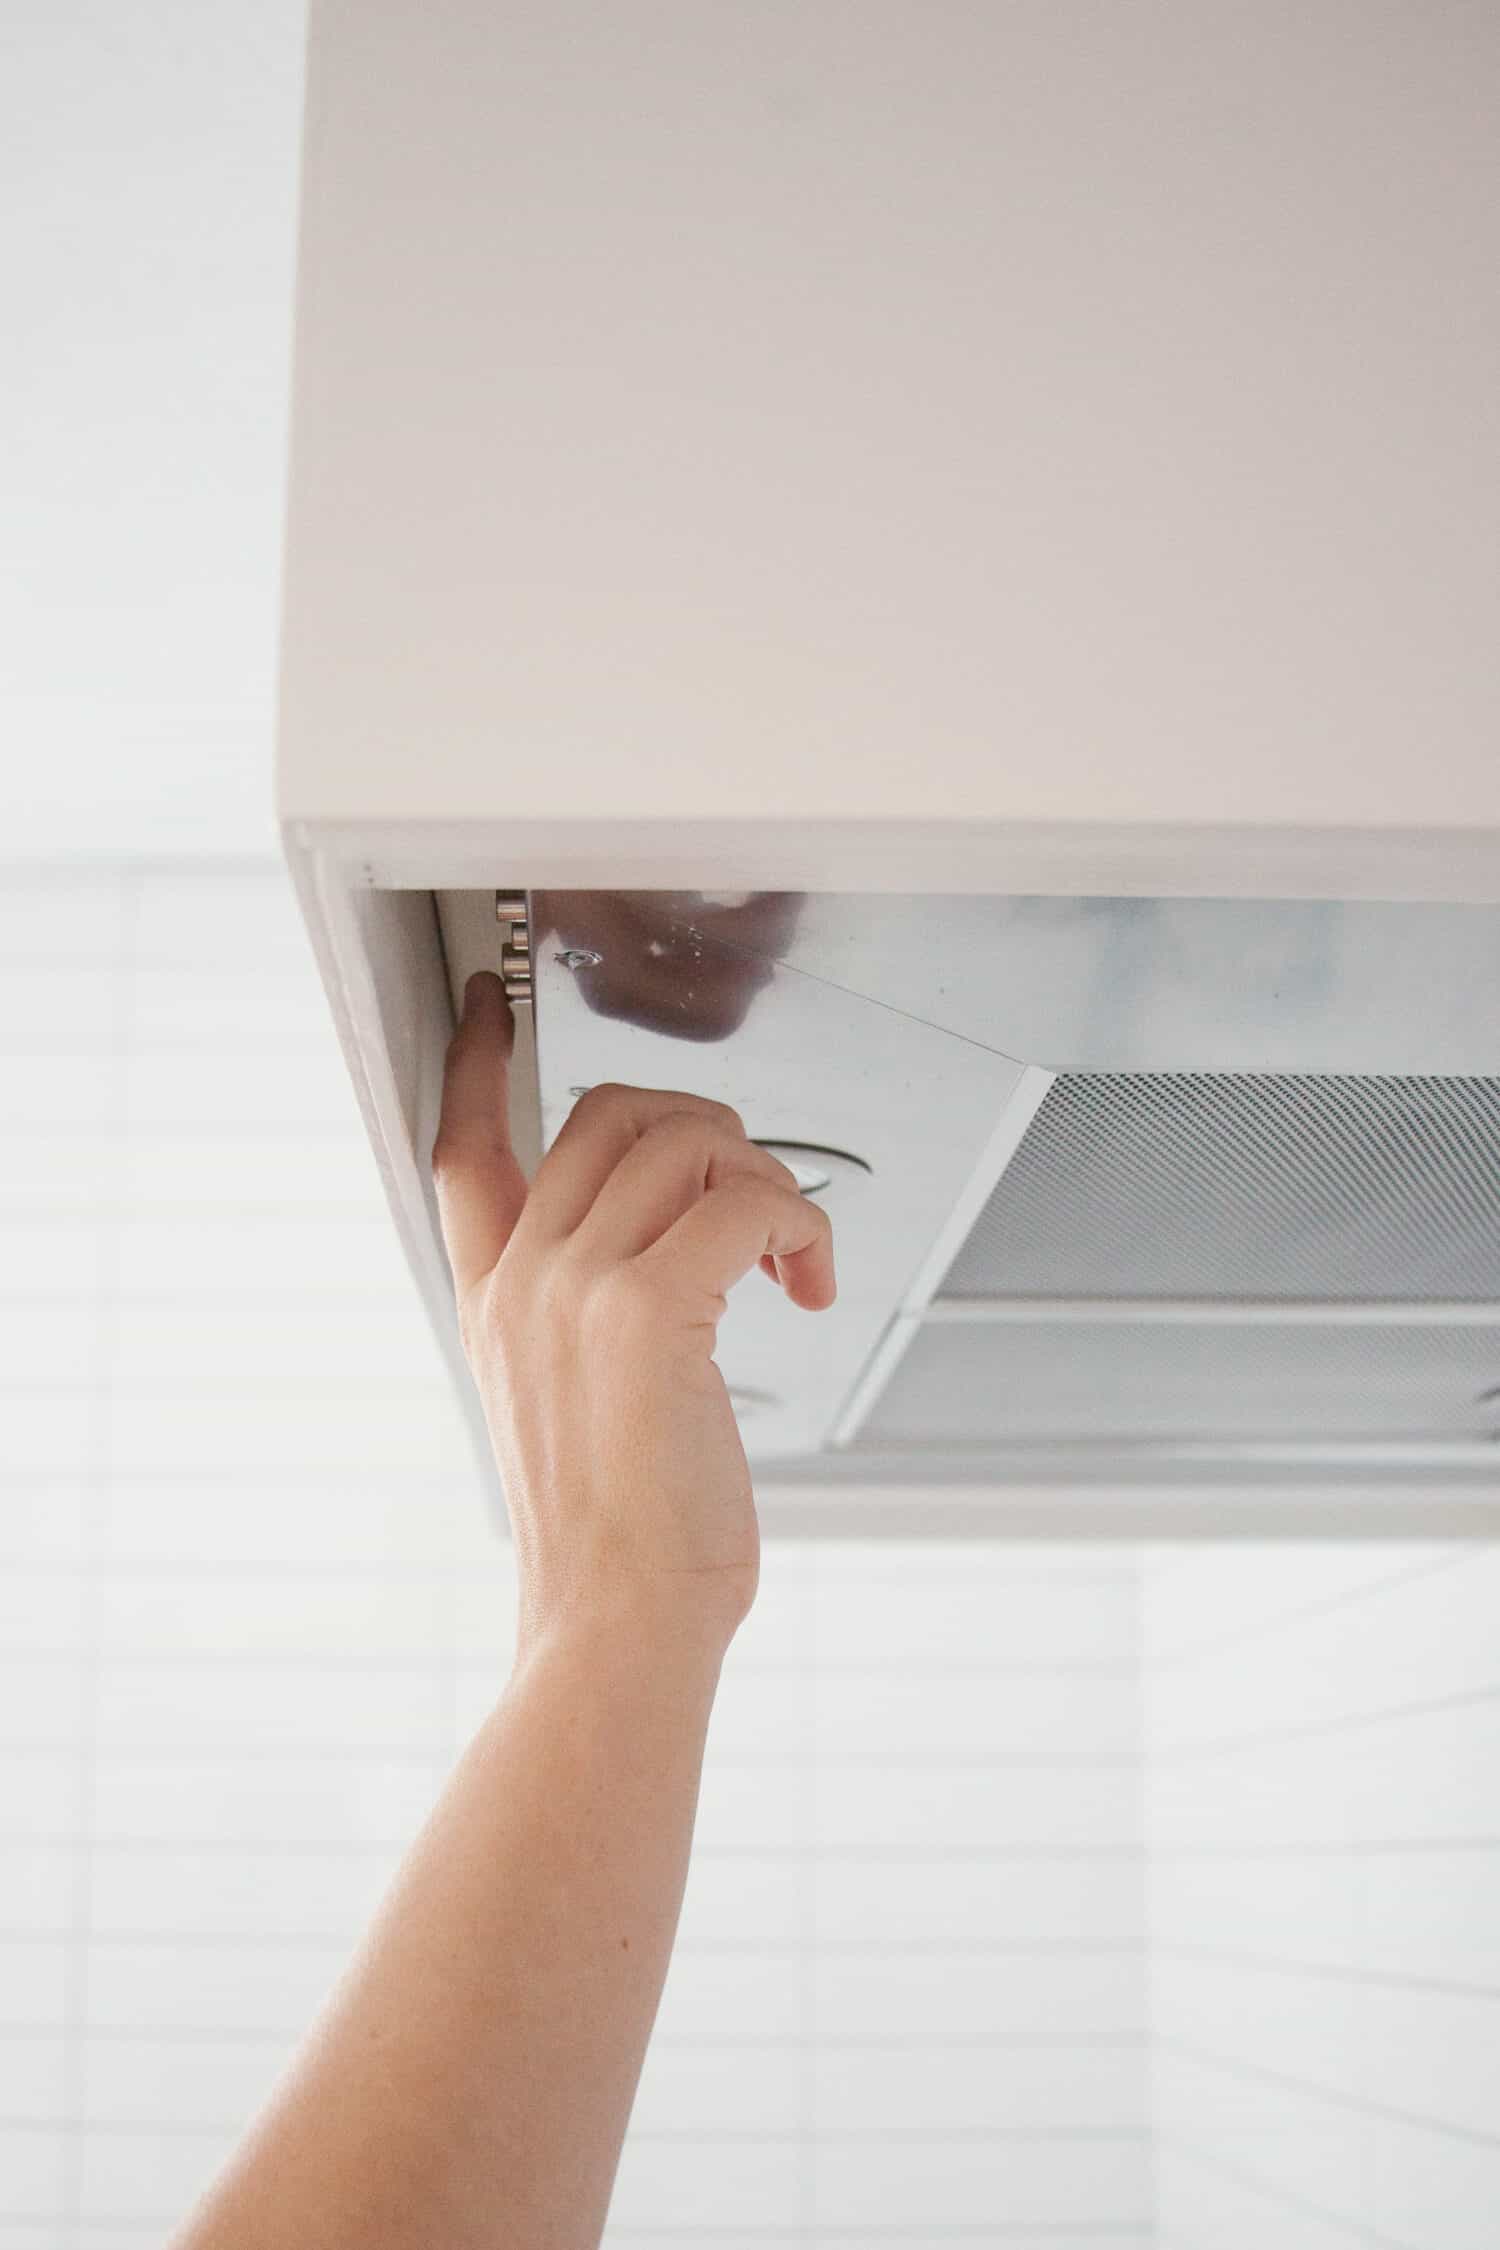 Here you can see how easy it is to still use the buttons on the front of the hood vent. Easy peasy!
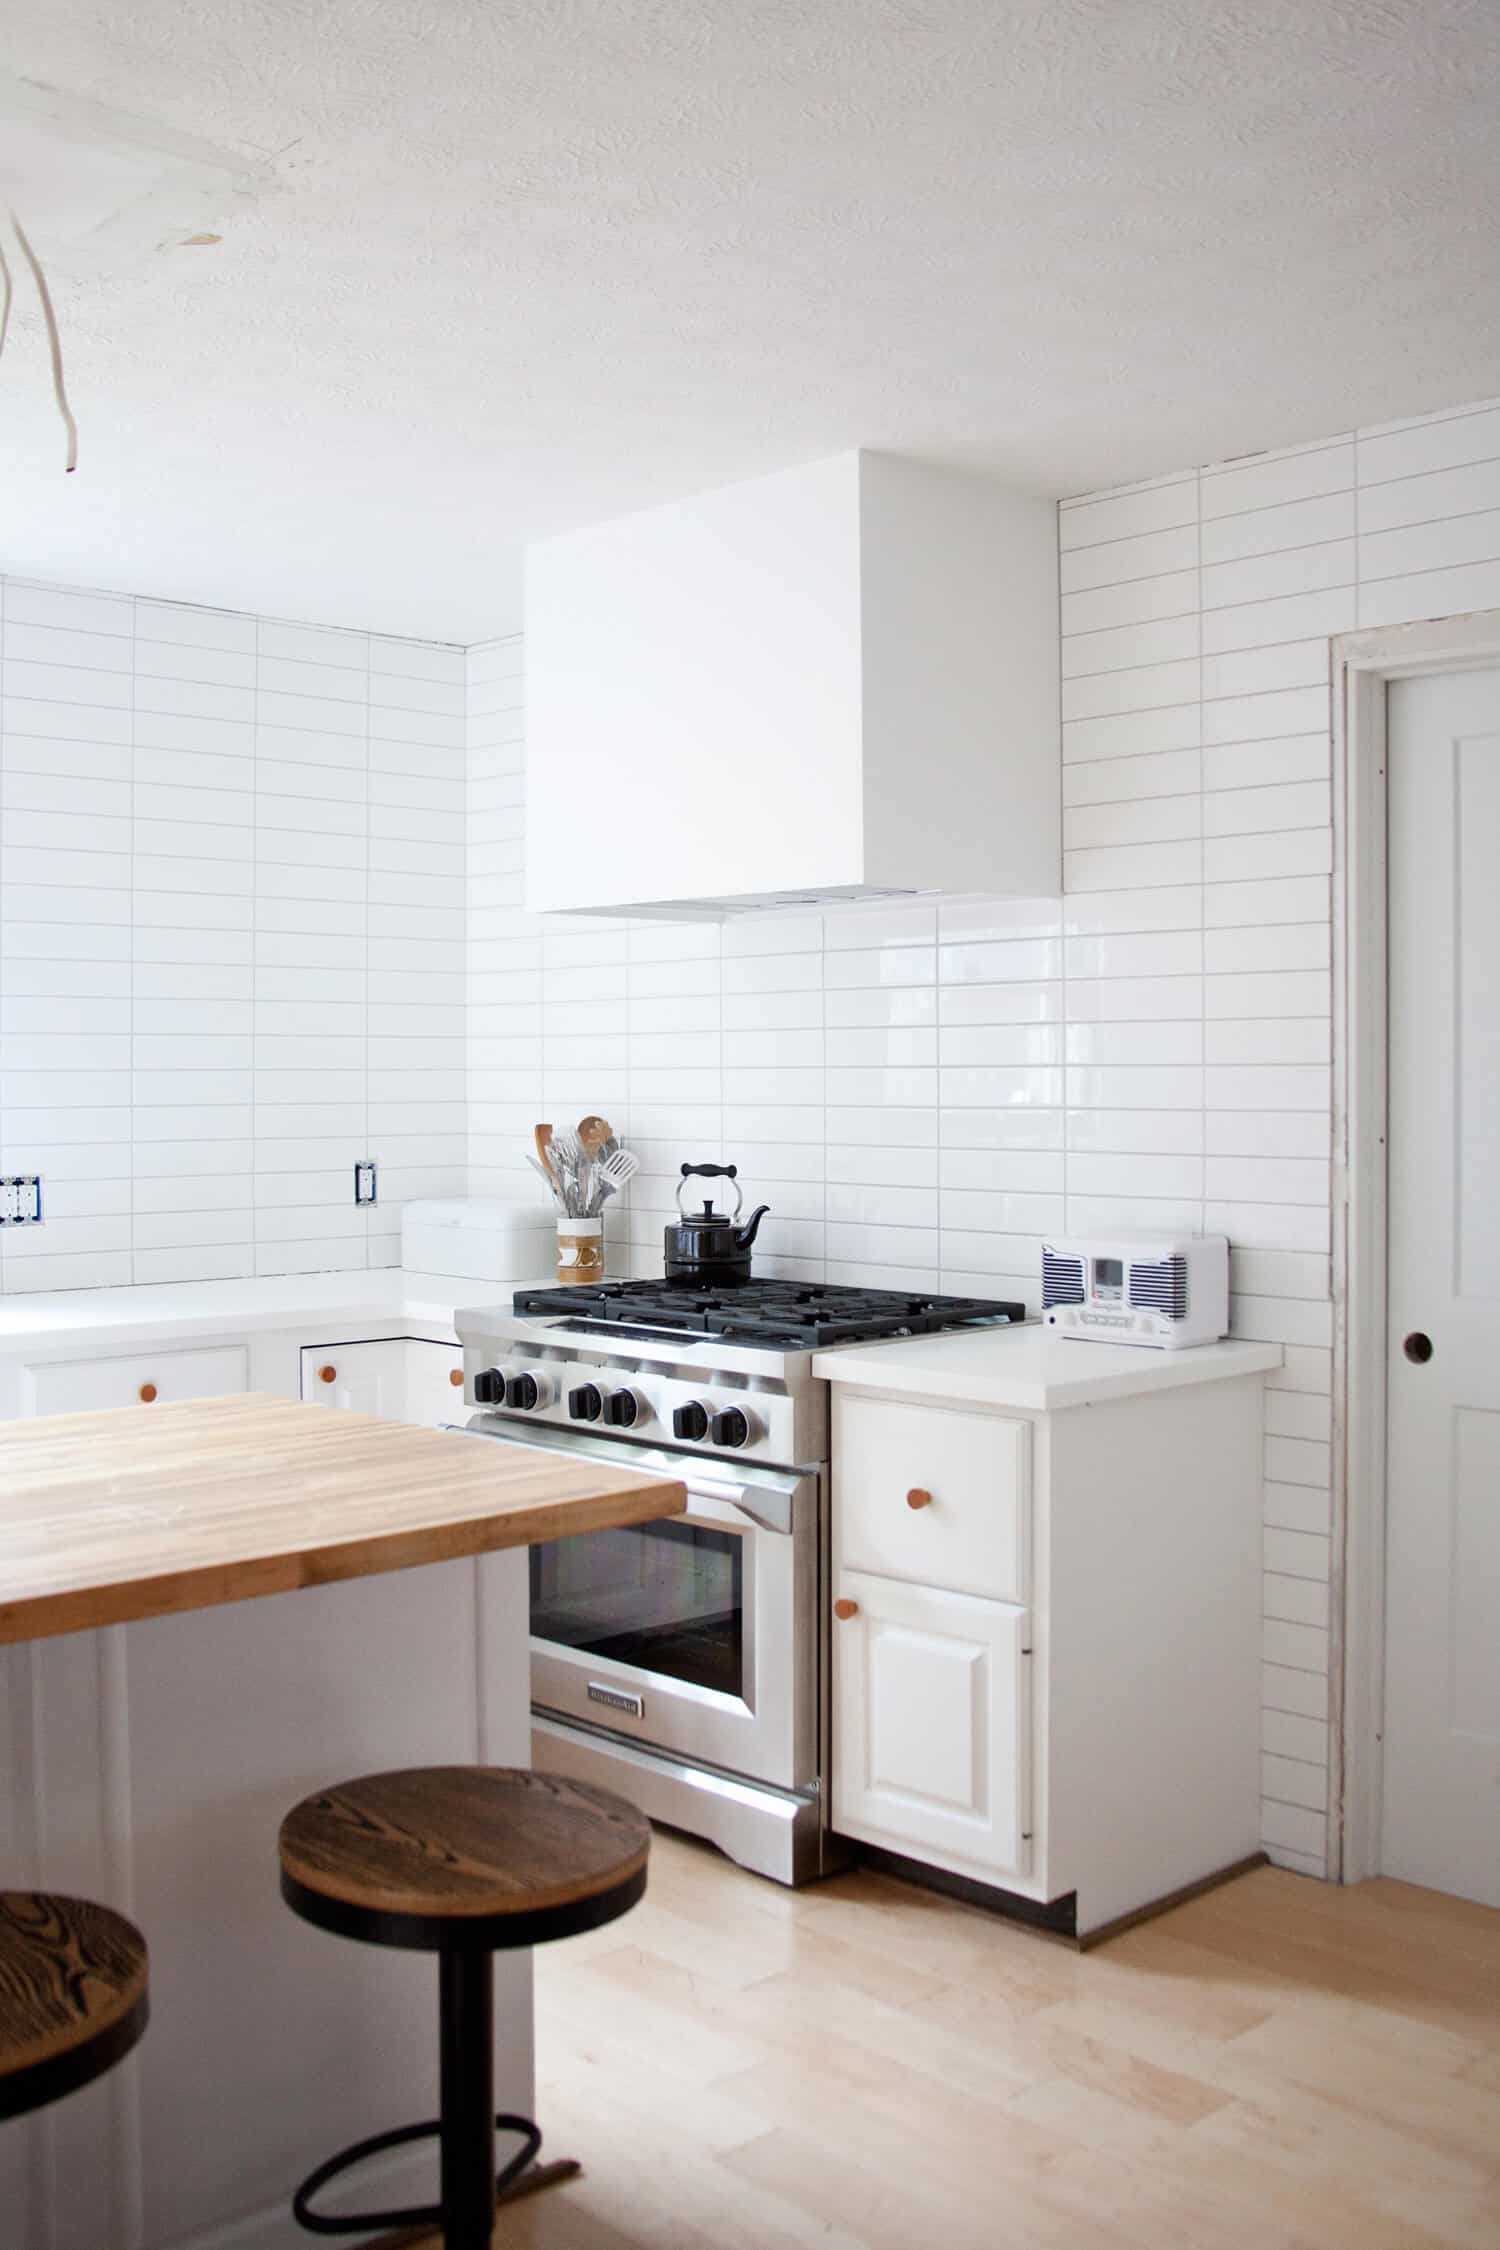
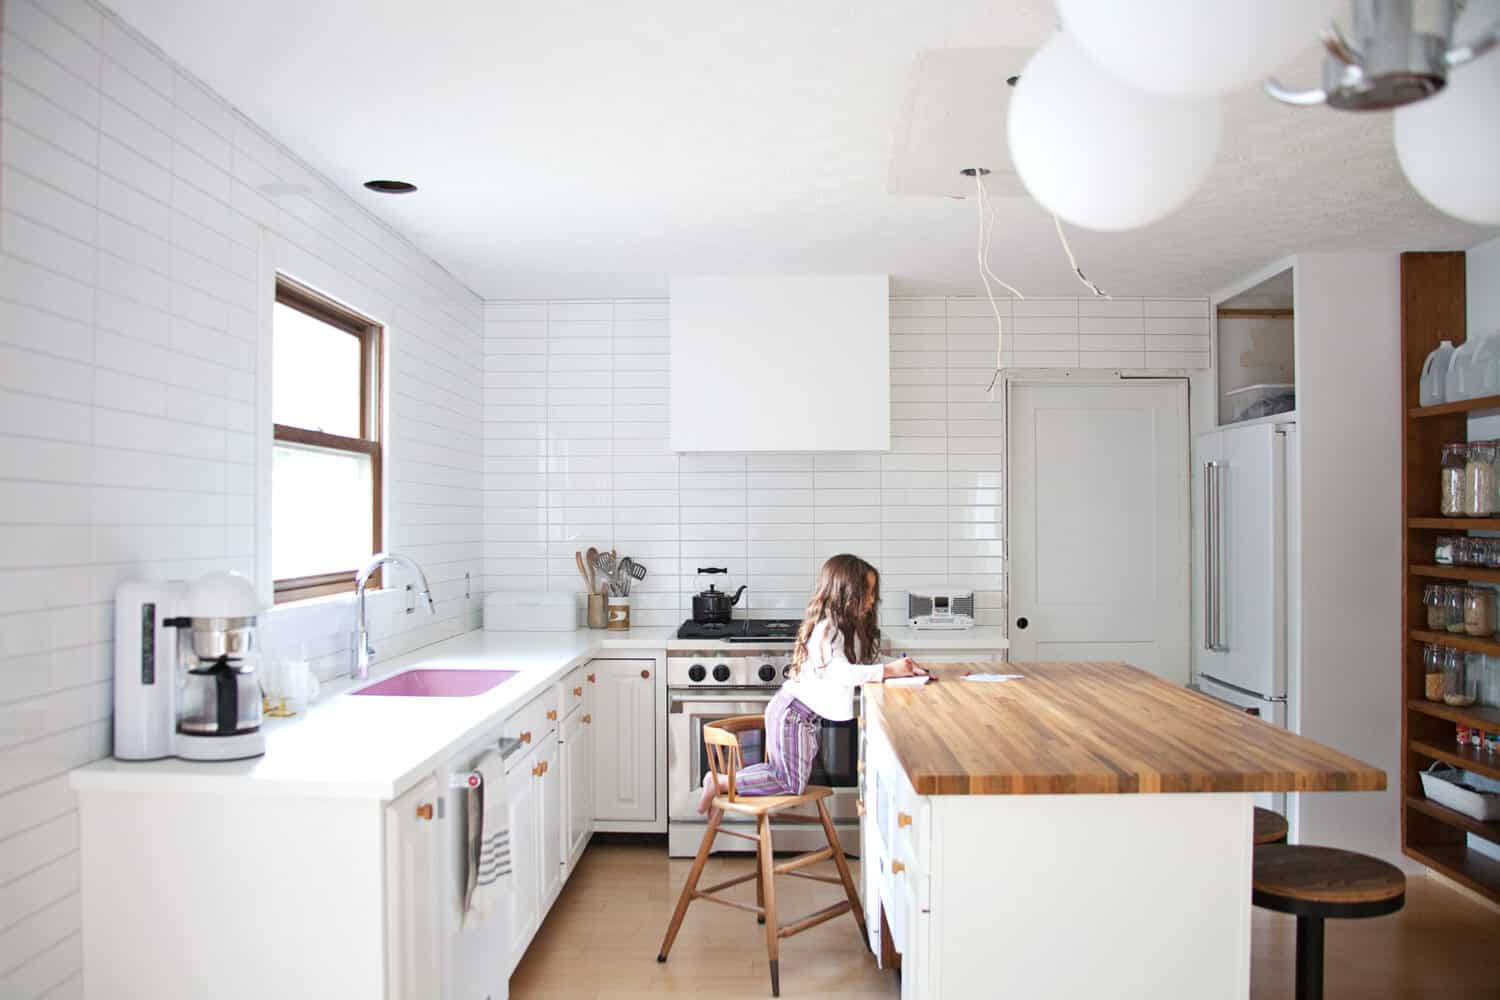 Building the cover for my hood vent completely changed the look of this room, giving me the modern feel that I wanted, and allowing other decorative elements to stand out (BTW this is a great white hood if you don’t want to DIY your own). Next, we plan to mount a floating shelf on the window wall, and I know this minimal hood vent will balance out a little clutter on the shelves. Can’t wait to fully style this kitchen with some retro inspired appliances (this coffee maker and toaster are so cute!). You can see how my finished kitchen turned out here! If you have any questions, I’ll answer them in the comments below. – Mandi
P.S. Check out more kitchen and home decor on our wishlist and shopping pages!
Material Sources:
Wall paint: Benjamin Moore’s Super White
Cabinet paint: Annie Sloan’s Pure White
Wall tile: Home Depot
Tile grout: TEC Silverado
Pink sink: Thermocast
Faucet: Kraus from Home Depot
Island butcher block: Lumber Liquidators sealed with Waterlox
Flooring: Lumber Liquidators maple engineered wood
Knobs: eBay
Stove: KitchenAid from Home Depot
Dishwasher: KitchenAid from Home Depot
Coffee maker: KitchenAid
Island stools: Urban Outfitters
23 Comments
Love the concept. One question for you. What is the space you left from the buttons on hood to the inner edge of your hood cover?
I know you did this hood cover box years ago but wondering if you secured it to the ceiling as well as the back wall? Also, does it look the same as the ones that are drywalled + stucco & painted? I assumed they had to be dry walled and stucco’d for a smooth finish but from your pics it looks like you might be able to get the same effect without the drywall but figured I’d ask before assuming. 😉
Love this!, I’m in middle of a renovation and my mom wants a gold Colored hood?…I’m like, whaaat?!? Then I see how it can be done…Thank u for the inspiration.
Thank you for your tutorial in building this hood. My husband has followed it and is almost done thanks to the “quarantine” . We noticed you mentioned building the floating shelves next. Can you post your pictures? He’s in the middle of building those as well and we’re curious as to how others did it and the way they look with decor and dinnerware along with a “box” hood as well. Thank you!!
Hey Mandi, how much did this project end up costing altogether?
Love your kitchen, could you please tell me the size of your tile on the wall. Thank you so much, jeanette
Hi! Love this hood cover. I’m
Looking to start mine soon. Did you secure the frame to the ceiling too, or just the wall? Looks great!
Beautiful space. Love the stacked tile. Is it 3×12?
We are doing similar tile for our kitchen but we are using 2×8. I AMA curious what size grout you did for yours? It looks amazing!
I don’t know, it looks a little plain to me, but I’m a huge fan of your stainless steel vent hood! I do think it could be really cool, though, if there was an amazing picture on it. Might as well use it for artwork, right?
Absolutely love it,great craft guys!
New post:http://thepinkpineappleblog.blogspot.com/2017/09/nyfw-day-2.html
Blog:http://thepinkpineappleblog.blogspot.com/
Looks great but I expect if you do any fried food it will stick and be super hard to clean 🙁
I painted it with Benjamin Moore Regal Select semigloss paint and can testify from having used that same paint on my old kitchen backsplash, it holds up to scrubbing quite well! It will be easier to clean that the grout on my backsplash. 🙂
Great project! It’s so nice to see how you can customize nearly everything if you put your mind to it! I feel like hoods would be such a difficult thing to choose!
www.shessobright.com
Mandi- I love your kitchen reno and you got it all done so much faster than mine which was happening concurrently (some day my cabinet doors will be back in place!). The only thing that stuck out to me was your use of a 30″ vent hood for a 36″ gas stove- I thought you were supposed to go a size up in vent hood from stove width to cover the burner area, especially with gas where it puts out a lot more heat than electric. Do you find you still get adequate ventilation with this configuration?
Hi Jessie! To be honest, choosing a 30″ hood vent was a mistake and I didn’t realize it was 30″ and not 36″ until after it was installed! It’s embarrassing to admit. I’m SO relieved that it is so powerful (there are three power settings) and covers a large area, and because I didn’t instal it even close to as low as specs allowed (there’s a min and max recommendation), I don’t foresee it ever being a problem here. I was relieved also that visually I could build out the sides with my cover design so that it doesn’t look awkward.
This is a perfect idea, this way the vent fits perfectly into the kitchen and doesn’t stand out at all!
https://www.makeandmess.com/
This could not have come at a better time! I’ve been trying to figure out how to build a cover without blocking the controls. Thank you! Looks amazing.
Yes, it’s no problem at all! I had some skeptical family members ask how I will know which controls do what, but I mean, after using it once, it doesn’t take a phd to remember that the light is on the left and the fan controls are on the right. 🙂
This make the kitchen so streamlined! It even makes it more open, which I’m always struggling with with my tiny galley kitchen. Going to try this fix!
Yes, it was surprising to me how even though this box made the hood vent take up more space, it actually feels more spacious! Must be due to all the white. 🙂
The kitchen looks so much cleaner without the vent showing. Great way to fix up the kitchen!
Charmaine Ng | Architecture & Lifestyle Blog
http://charmainenyw.com
Your vent cover is super nice! I like the clean and simple look of it. And the pink sink: AMAZING!!! I probably will steal that idea 😉
Thanks for the thoughtful and complete “recipe” for the cover. I’ll save that for future projects. It’s great for a vent cover but it’s also super transferable …
GINGER BY CHOICE I FOOD & LIFESTYLE BLOG
www.gingerbychoice.de/en