 Hi, friends! Today, I’m sharing a super simple craft project for dressing up your mobile phone. Not only is this project really cute and we get to use my favorite craft supply (glitter!), but I also think this would be a perfect craft project to do with friends at a little get together or party. I’ll explain more as we go.
I’m working with Canon USA and I’m really excited to show you their new IVY Mini Photo Printer!!!!! You may have seen us using this on our IG account. It’s a compact (and cute) instant printer that can print directly from your phone (through an app) or social media. It prints colored prints that are 2×3 inches and have a peel and stick back. This little printer would be great to take to a party (like for a photo booth) or to give as a gift. I am pretty obsessed with mine already!

 Here is my IVY, I chose the Mint Green color (it also comes in Rose Gold and Slate Gray). As you can see, it fits in the palm of my hand and I have pretty small hands. 🙂
OK, so before we dive into this DIY photo cell phone case project, I have a quick story for you. Recently, I went to a cupcake decorating workshop where we were supposed to learn to create succulent cupcakes. Although it was really fun and we had cupcakes to eat at the end (so I can’t complain!), I did think the course was advanced enough that the designated “instructor” had a hard time keeping everyone on track, and ultimately I didn’t really learn a lot. No biggie, as I said it was fun anyway. But if you’ve ever tried to host a craft night with friends before, or have an easy project for a shower or party you were hosting, you probably know this dilemma. Basically, you need a project everyone can be successful with (so it’s EASY), but you still want the project to be cute and fun and also those who want to go a bit deeper with the project are able to. So that’s why I think this would be a great one for the next craft night. Just tell everyone to bring a clear phone case that fits their phone and you could easily supply the rest. And you could easily print their photos at the party too with the IVY printer.
You can also just make this project for yourself. That’s what I did. 🙂 I already had one person at the gym tell me how cute they thought my phone case was too. So, clearly, a win.
 Supplies:
–clear cell phone case
–business card plastic sleeves
-glitter paper, glitter, or sequins
-craft paint or nail polish
-clear drying glue*
–IVY Mini Photo printer
*I tested both glue types in the above photo and I’ll share my favorite. But there are probably many brands that could work, as you just want something that dries totally clear and doesn’t streak.
 Step One: Print your photo. The IVY Mini Photo printer comes with instructions which are really easy to follow (I was so impressed!). You basically will need to charge the printer, download an app (Canon Mini Print), then follow the app prompts to print your first photo. Then you’re good to go to. The app allows you to print from any folder on your phone or from social media. There are also little frames and stickers you can add to your photos before printing. Here you can see I added a plain white frame to my photo before printing. But you can also just print your photos as is, too.

![]() On my old (yellowing) cell phone case, I decided to test out the glues to see which one would be super strong but not visually noticeable at all. I liked the Krazy glue pen more (it’s the one on the right in the photo above).
On my old (yellowing) cell phone case, I decided to test out the glues to see which one would be super strong but not visually noticeable at all. I liked the Krazy glue pen more (it’s the one on the right in the photo above).
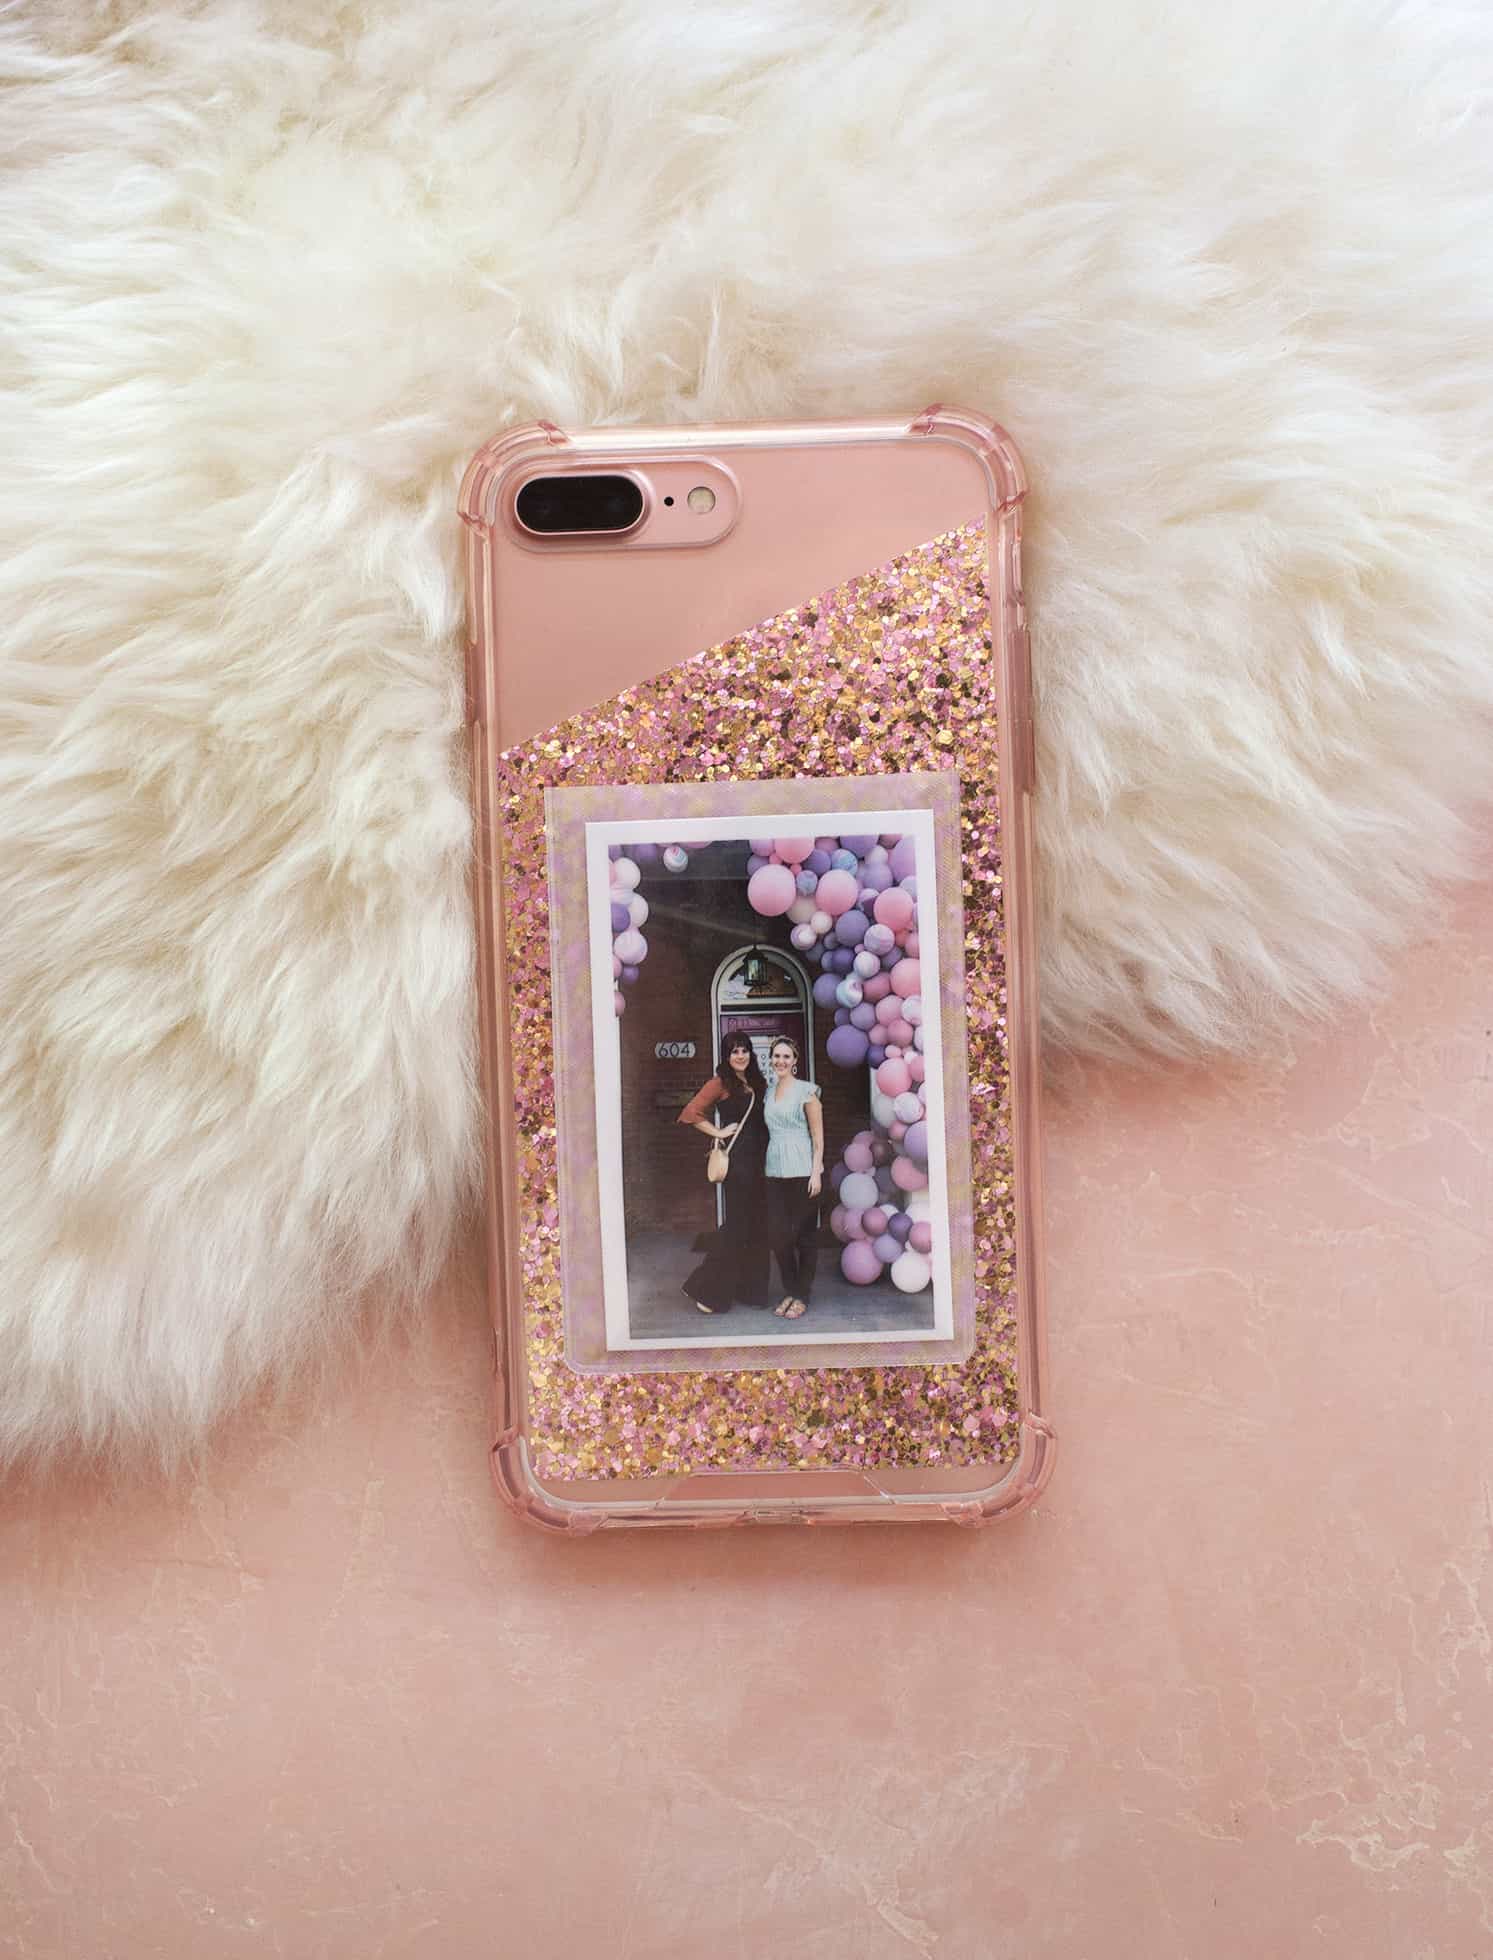
Step Two: Adhere the plastic sleeve to the outside of the phone case. As I mentioned above, the IVY paper is a peel and stick back so you could just stick them onto your case if you wanted. But I know myself well enough to know I’ll want to swap my photo out now and again because I like to change things up. So the plastic pocket is a better fit.
 Step Three: Adorn the inside of your case and assemble. Here’s where you can get creative and use all sorts of materials if you like. You can glue glitter or sequins to the inside of the case, add glitter paper, other craft papers, or thin fabric. Or, you could paint the inside of your case with craft paints or nail polish. If you do glue or paint the inside of the case, make sure to allow it to fully dry before adding your phone.
 If anyone does use this project at their next craft night, PLEASE tag us so we can see! Thanks for letting me share. xo. Emma
P.S. Want more ways to dress your tech? Or would you like to see a more advanced photo printing project? Check our craft archives for lots more!
6 Comments
I really like the personal touch to the phone case. This would make a great gift!! 🙂
Charmaine Ng | Architecture & Lifestyle Blog
http://charmainenyw.com
I’m obsessed with his printer. I wonder if the ink lasts long? And I love that you can switch photos anytime for a new one and basically have a completely different phone case. ????
This is so cute! I totally need to make one!
Paige
http://thehappyflammily.com
This is such a cute idea! I can’t even get over how simple and adorable that turned out! This would be awesome for conferences, vacations, and my kid’s field trips so the other kids could have photos as well!
I love crafts that allow you reuse them! This is perfect because you could always add abstract art or a vintage cutout. I’m ordering clear cases on amazon right now.
That printer is so dope!!!