
 If you have ever wanted to make a DIY light up marquee but felt a little intimidated, then I have a project for you! You should totally make these DIY string art ornaments. They are very much like a mini marquee in that you’ll use a light from your Christmas tree to light up the ornament “star” on top.
For this project, I worked with Fiskars and used two of their DIY tools, their precision hand drill and hammer (with precision nail starter), to create these ornaments. I love the simplicity and design of their tools, they feel like they were created with makers in mind. But if you’re starting to feel intimidated just by the mention of tools, please read on because I promise these ornaments are SO easy to make and I just loved how they turned out!
 You could easily customize these and use any colors for the tree and ornaments that you like. And if Christmas trees aren’t your thing, you could absolutely choose a different design for this string art ornament concept. I also think this could be a pretty cute project to make with friends or make a bunch and gift to others. 🙂
 Supplies:
-small wooden rectangles
-small nails (I actually used 5/8-inch wire brads)
-embroidery thread
-mini pom poms
-super glue
-fine sandpaper
–Fiskars hand drill
–Fiskars hammer
-Fisksars nail starter
One quick note about the wooden rectangles: You can find these at craft stores or online, although I had a hard time finding some the thickness that I wanted so my brads would have a good depth to go into. But I also didn’t want the wood to be too thick. So I ended up buying some the shape and size I wanted and gluing two together for each ornament so the thickness would work for this project. You may be able to find small wooden rectangles or other shapes that work better, but if not don’t be afraid to glue a few together because it worked great for me.
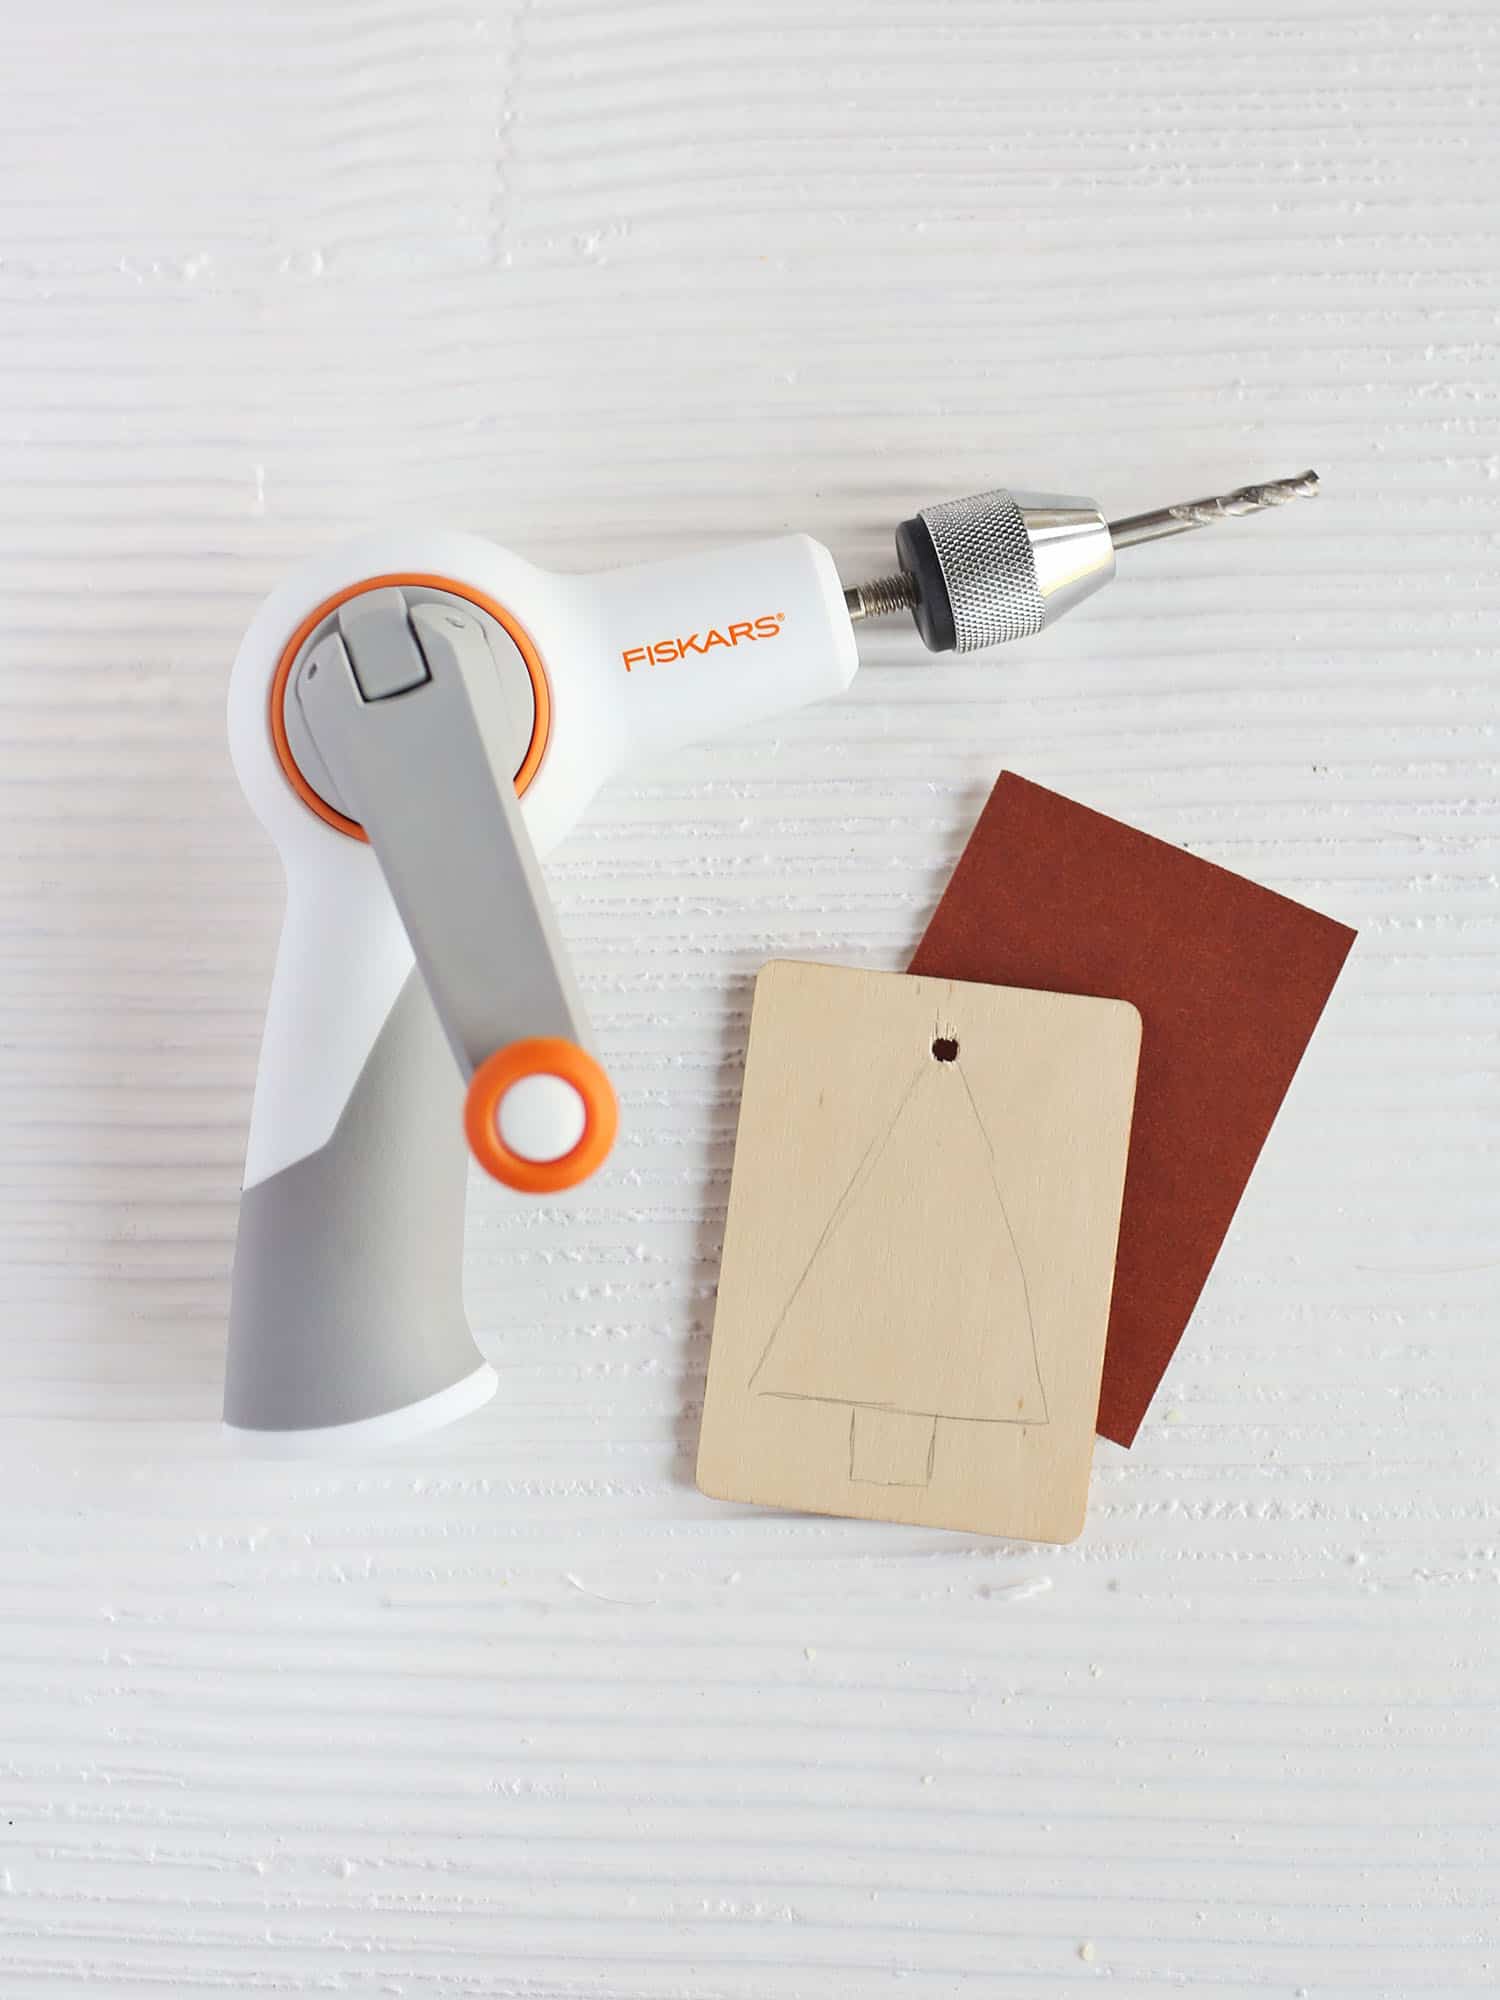 Step One: Lightly sketch your design in pencil and then drill the hole at the top of the tree. If needed, use your sandpaper to smooth around the hole. And if you have difficulty finding an easy way to hold the wood while drilling, I recommend using a clamp and the side of a table. 🙂
 Step Two: Add nails along the outside of your design. The nail starter helped a lot here I found because the wire brads I used were so small. And make sure to lightly erase any lines you’ve drawn as you go (although if you forget I noticed that you can hardly notice them after you add the string anyway, but still nice to try and keep the project super clean).
 Step Three: Add the string, tying once you have your design in place. Then glue on the mini pom poms for the ornaments on the tree.
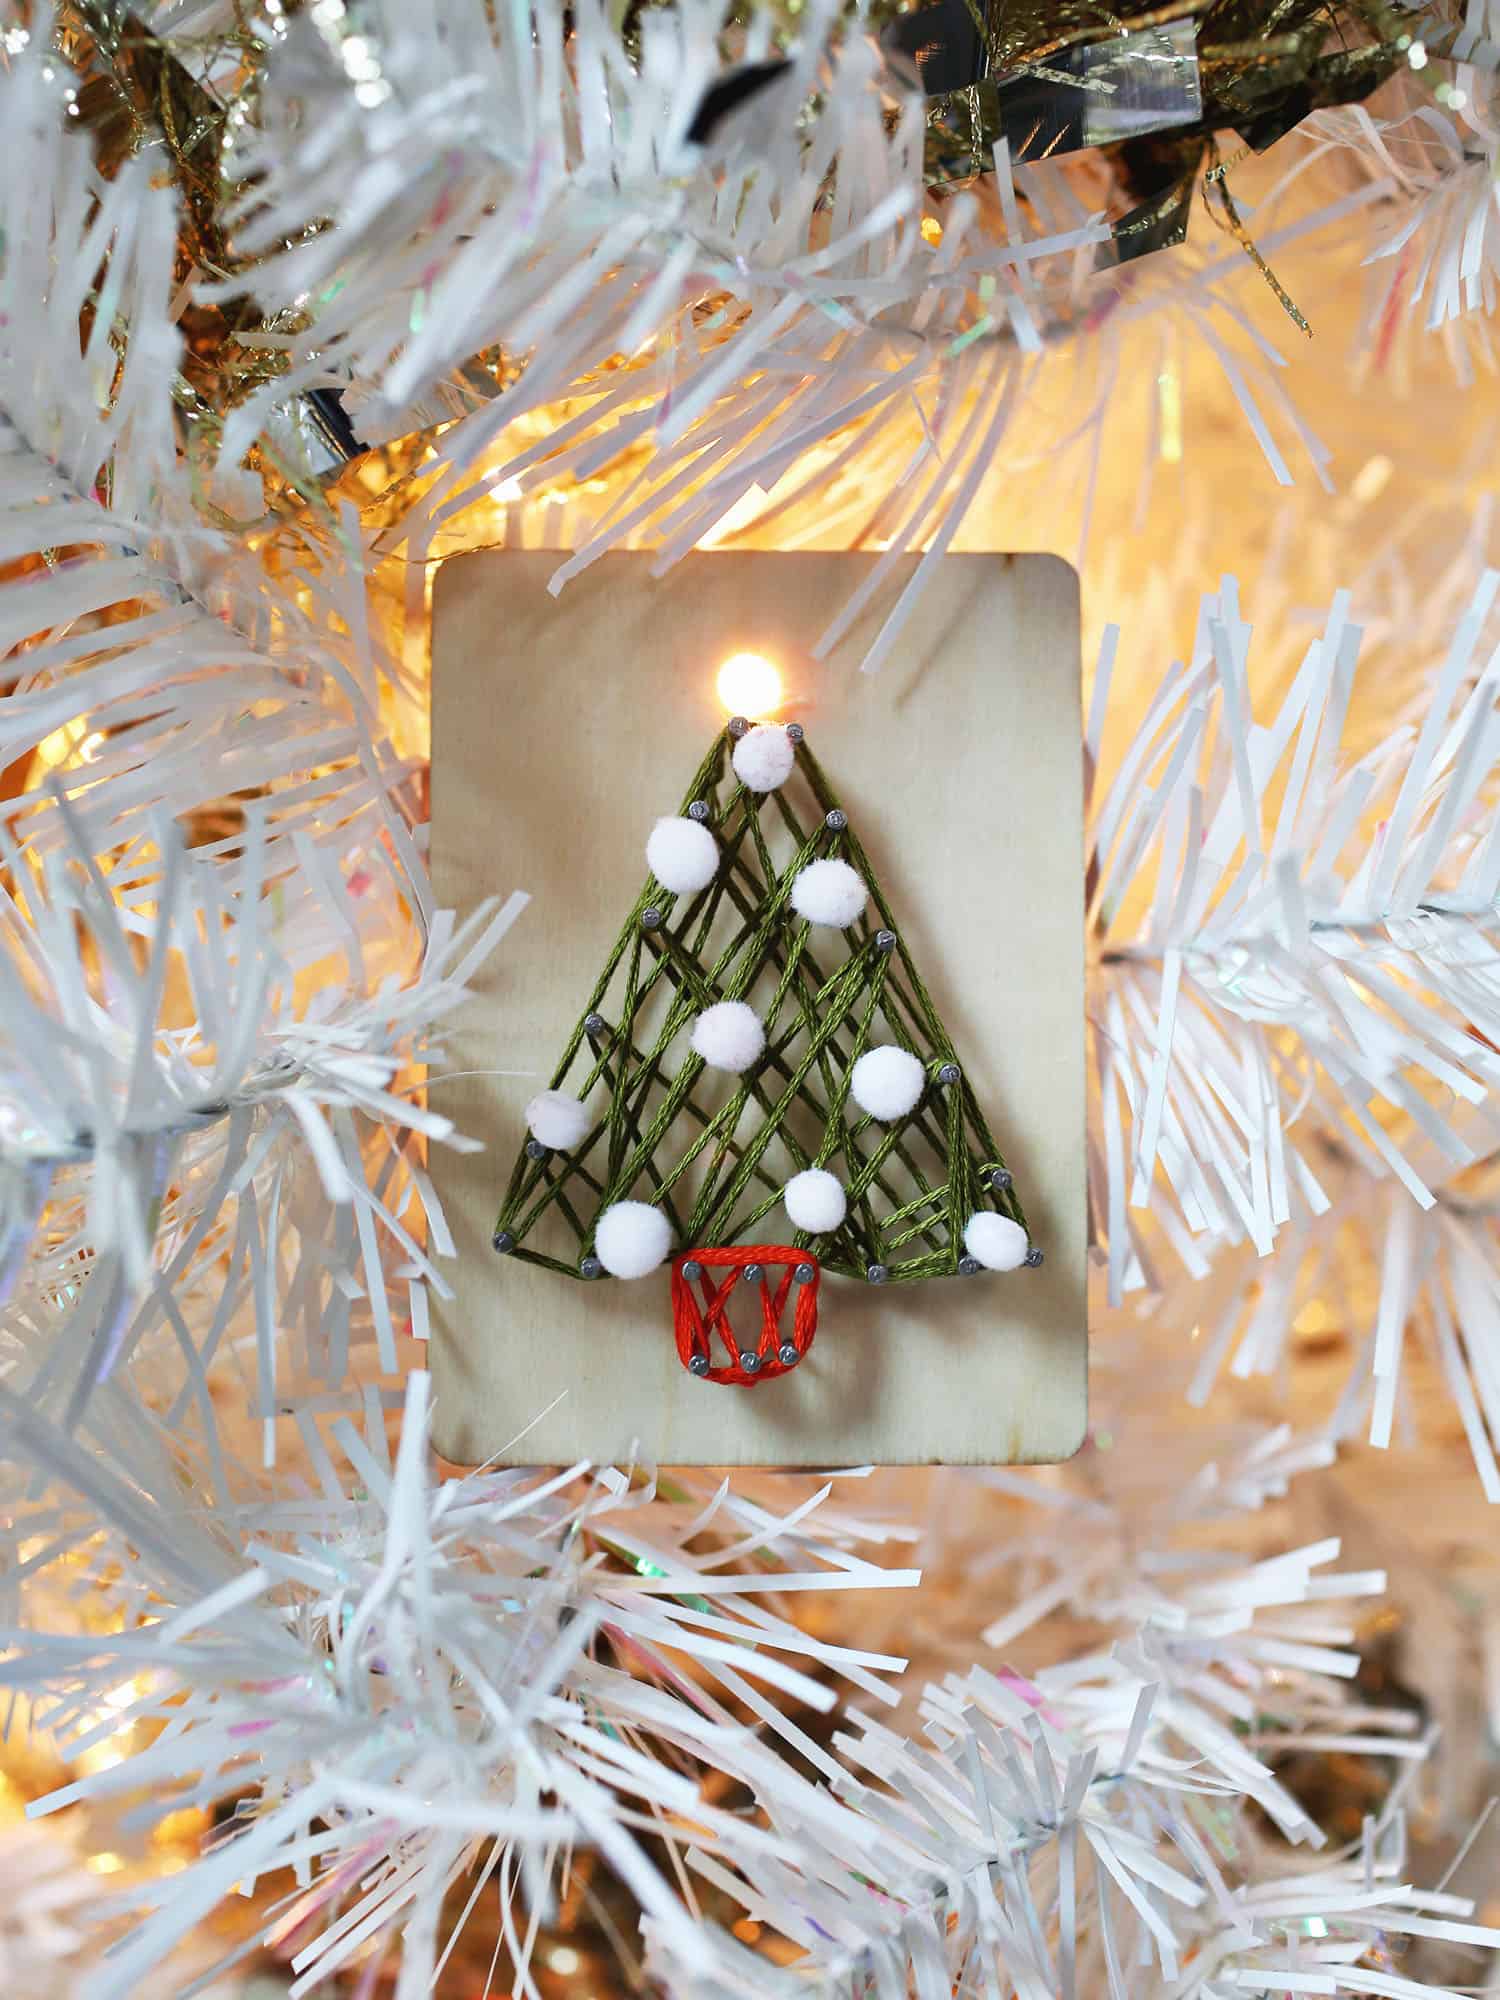
 To hang these ornaments, simply find a light on the tree and tuck the light through the hole (so the “star” on there will light up when the lights are turned on). I obviously have an artificial tree, so it’s really easy to move the branches slightly as needed to help these stay in place. But if you want, you could also add a little ribbon loop at the top to hang these if needed.
As with any light up marquee made with wood and holiday lights, don’t leave the lights on overnight or unattended. This is good advice for Christmas trees too. Everyone be safe this holiday season. Happy holidays! xo. Emma
3 Comments
How cute! ????
Awww, these are the cutest! Thanks for sharing! ❤️✨
Charmaine Ng | Architecture & Lifestyle Blog
http://charmainenyw.com
I love how simple and adorable these are! I will have to give this craft a try!