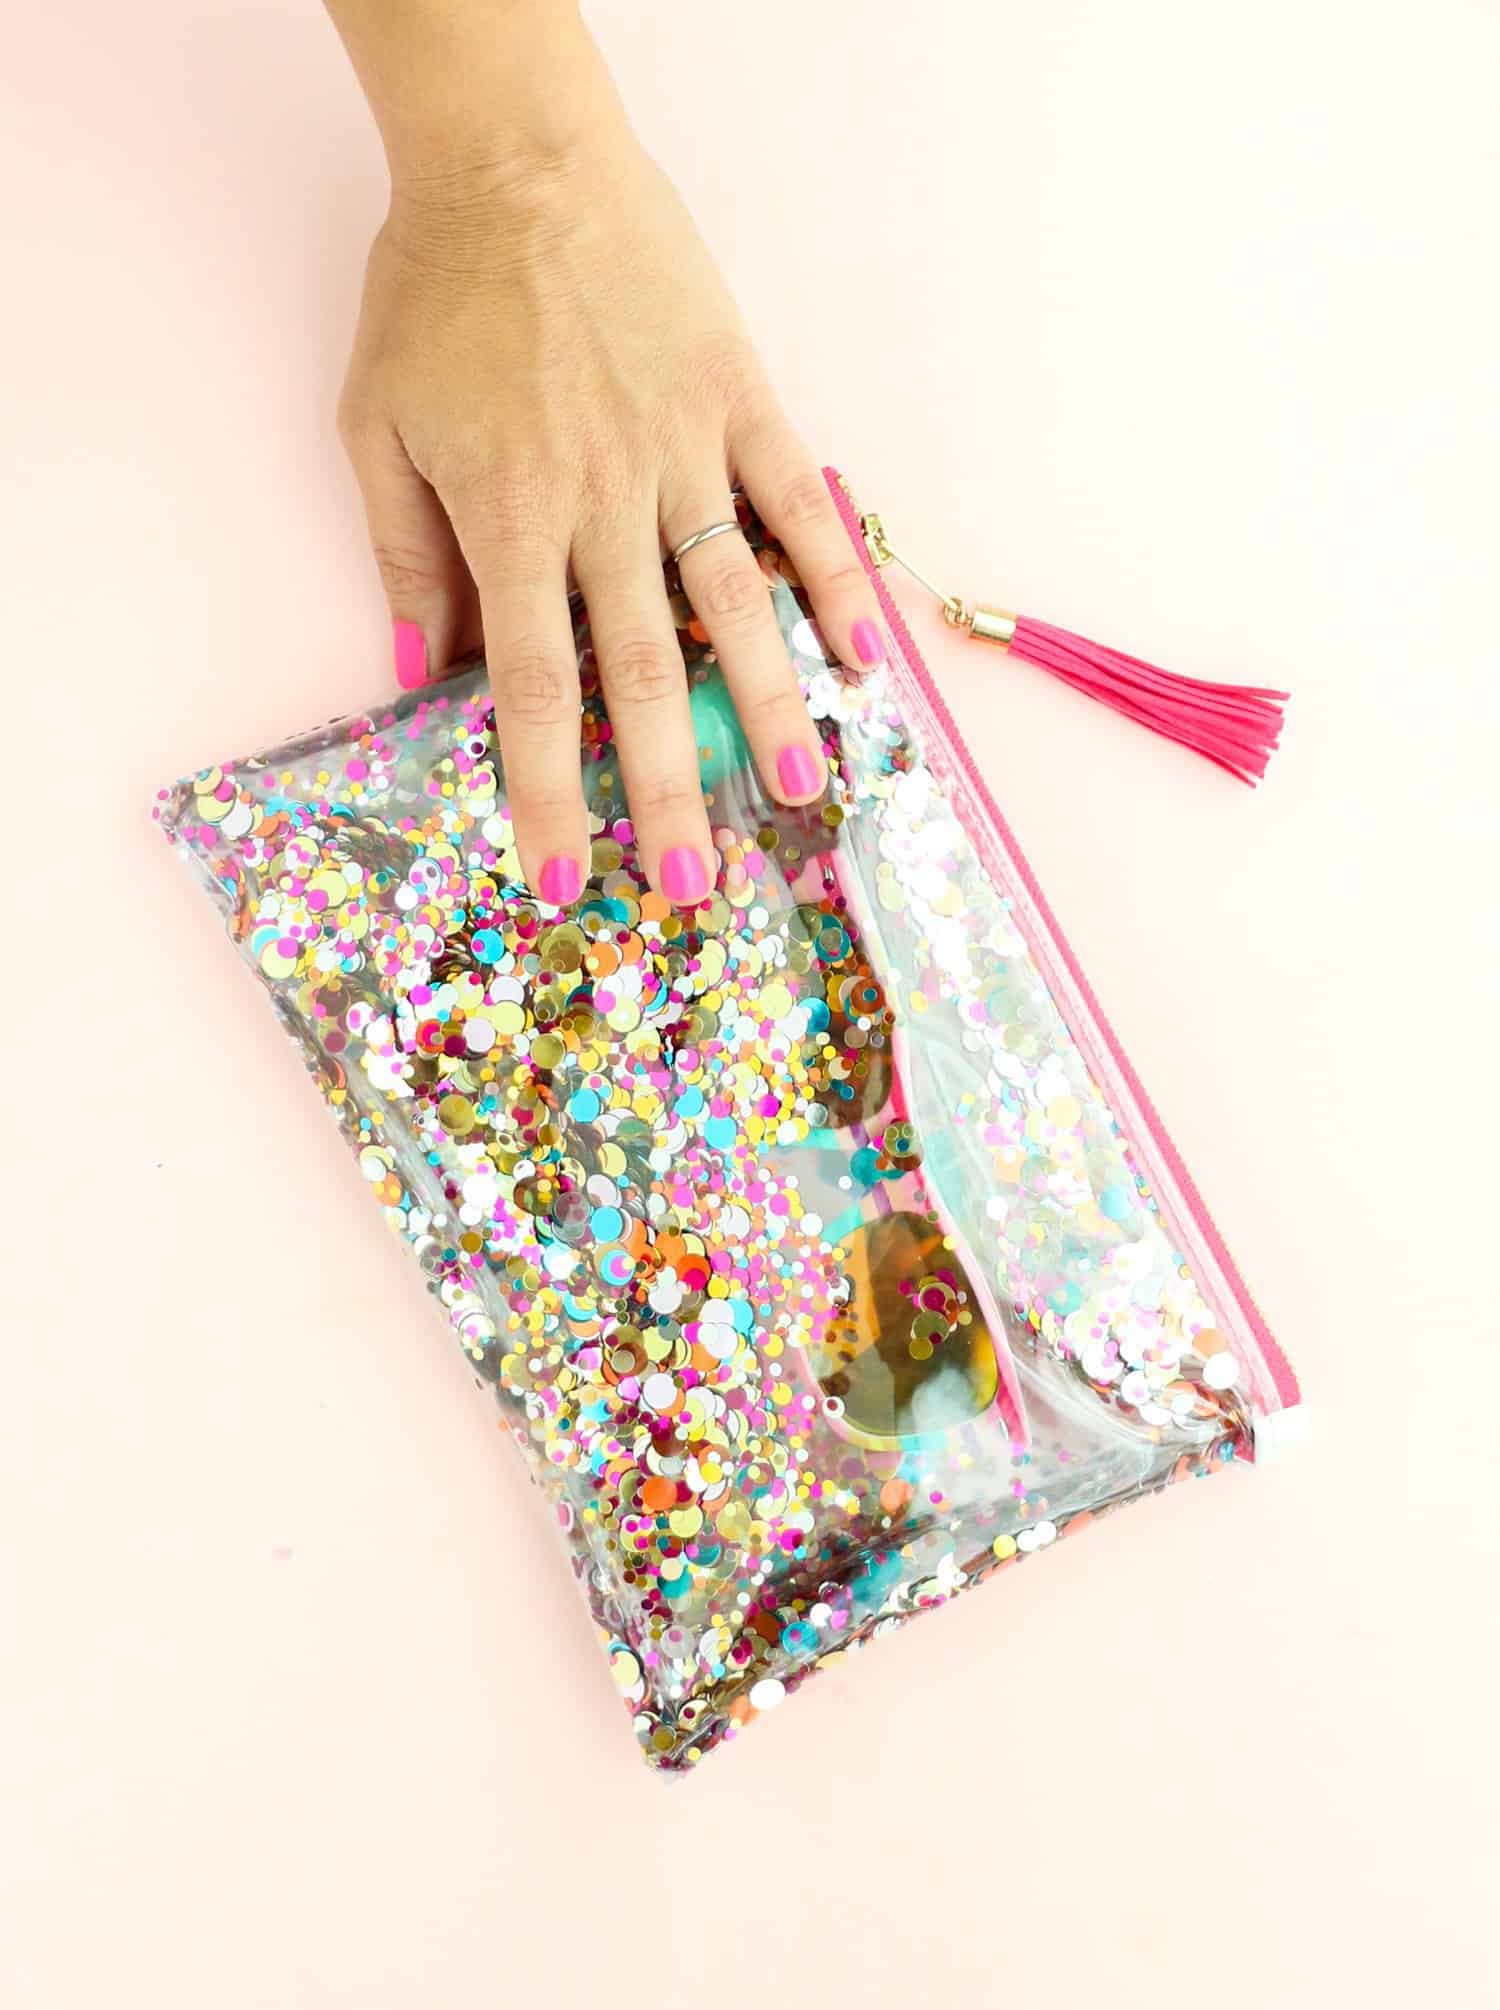
 Summertime is here! I am so excited to spend the summer swimming, traveling, and just generally enjoying the warm weather. These warm summer months mean I need a new summer bag that can keep my belongings safe from water splashes at the pool and look cute at the same time. Enter this DIY water-resistant zip pouch! This confetti pouch is made with clear vinyl and colorful metallic confetti and can be customized just for you! Follow along below as I share my tips to make your own confetti zip pouch just in time for all your summer fun.
 Supplies:
-1/4 yard clear vinyl (you can pick this up at the fabric store)
-12″ colored zipper (I bought mine here)
–metallic confetti
-sewing machine, thread, and scissors
-tassel and jump ring (can be found in the jewelry section of the craft store)
-pliers

Step 1: Cut your vinyl into 4 pieces that measure 7.5″ by 11″ using a ruler and scissors or a cutting mat and rotary cutter. Next, line up your zipper along one piece of the vinyl and pin to secure. Fold over the top portion of the zipper at a 45-degree angle as shown below and pin to hold in place. Then cut a piece of scrap vinyl or faux leather into a 1″ by 3″ piece and fold in half and pin to the other side by the end of the zipper about an inch from the end. Top stitch along the zipper with the needle moved all the way to the side closest to the zipper teeth.
Watch the video below to learn how to install your zipper:

Step 2: Next, lay a second piece of vinyl on top of the first piece. Top stitch along the same line just stitched to secure this lining to the zipper. Once stitched, fold the vinyl over to expose the zipper. Then top stitch the two pieces of vinyl together to create one side of the clutch. Now repeat on the other side of the zipper, first stitching on the exterior to the zipper with the zipper top flap folded over. Then adding the lining, and finally top stitching over the two pieces.


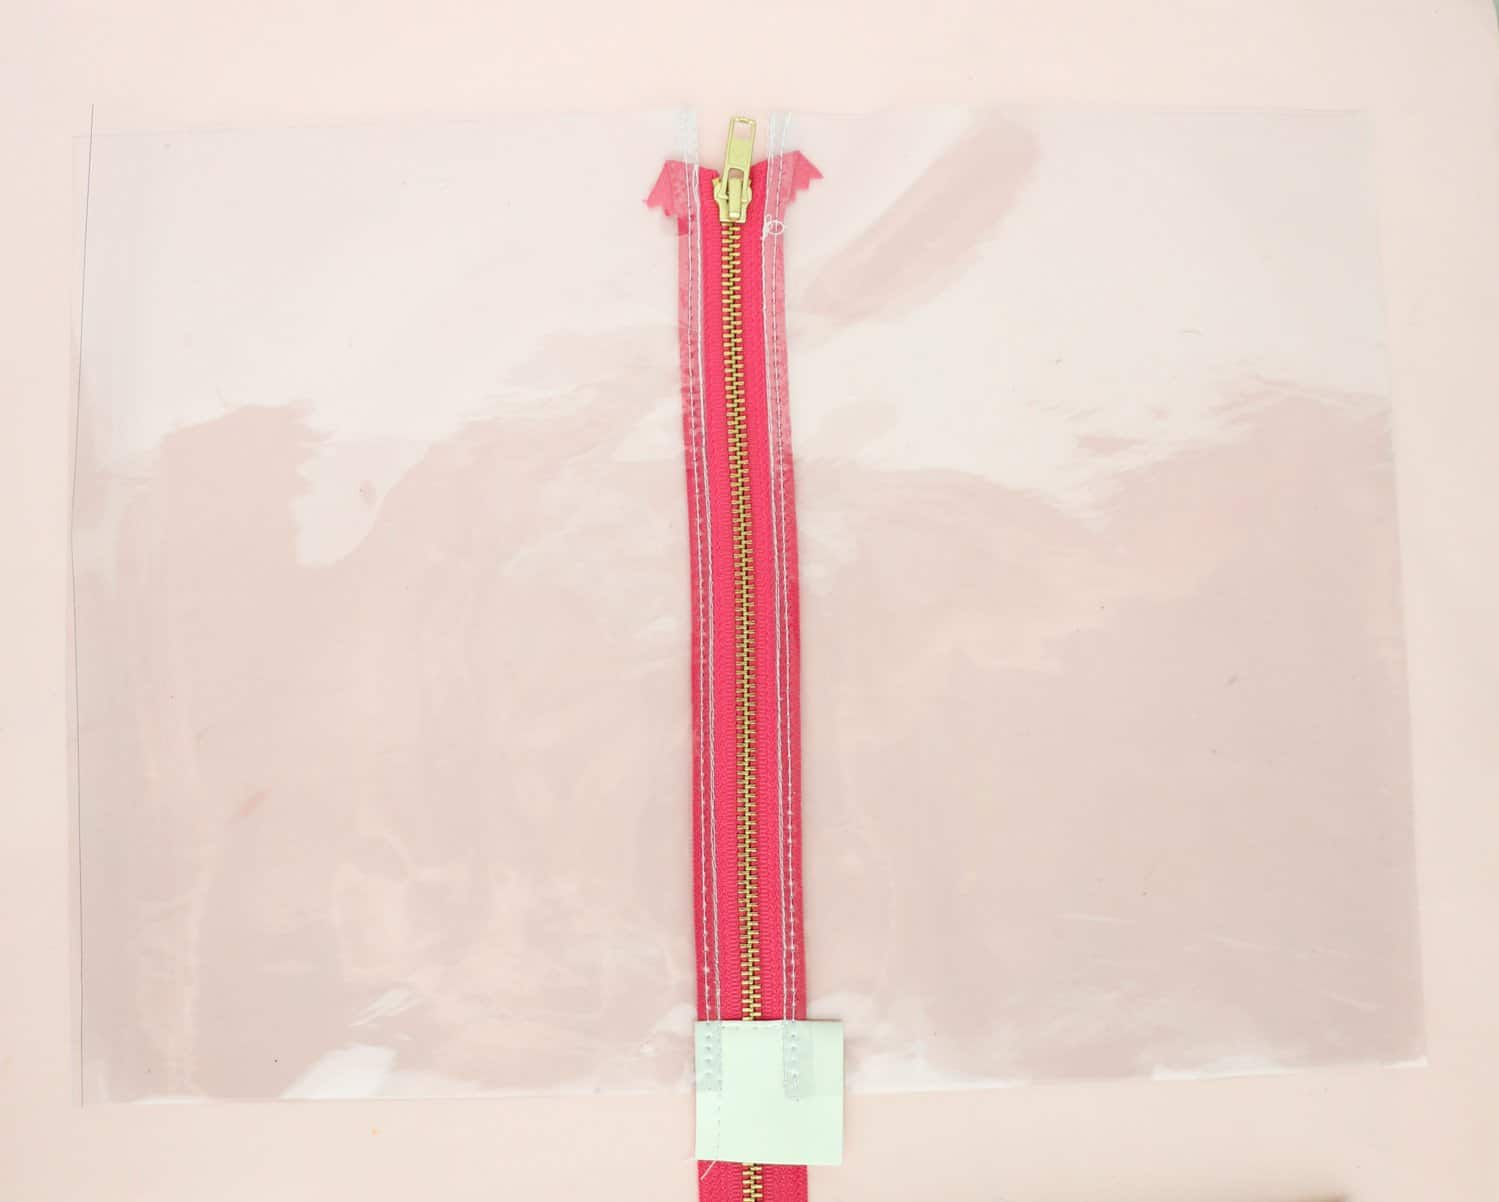
Step 3: Next, stitch across the tab at the bottom of the zipper to create a new zipper end and then use your scissors to cut off the extra fabric and zipper tape from the end.

Step 4: Open up your clutch pieces so that the exterior pieces touch each other and the lining pieces touch each other. Pin to secure the exterior to exterior and the lining to lining. Then sew around the outer edge of the entire piece, leaving a 5-6″ gap at the bottom of the lining pieces. Double back over the seams along where the zipper edges are to give your bag an extra secure stitch.

Step 5: Once sewn, flip your bag right side out through the hole in the lining.

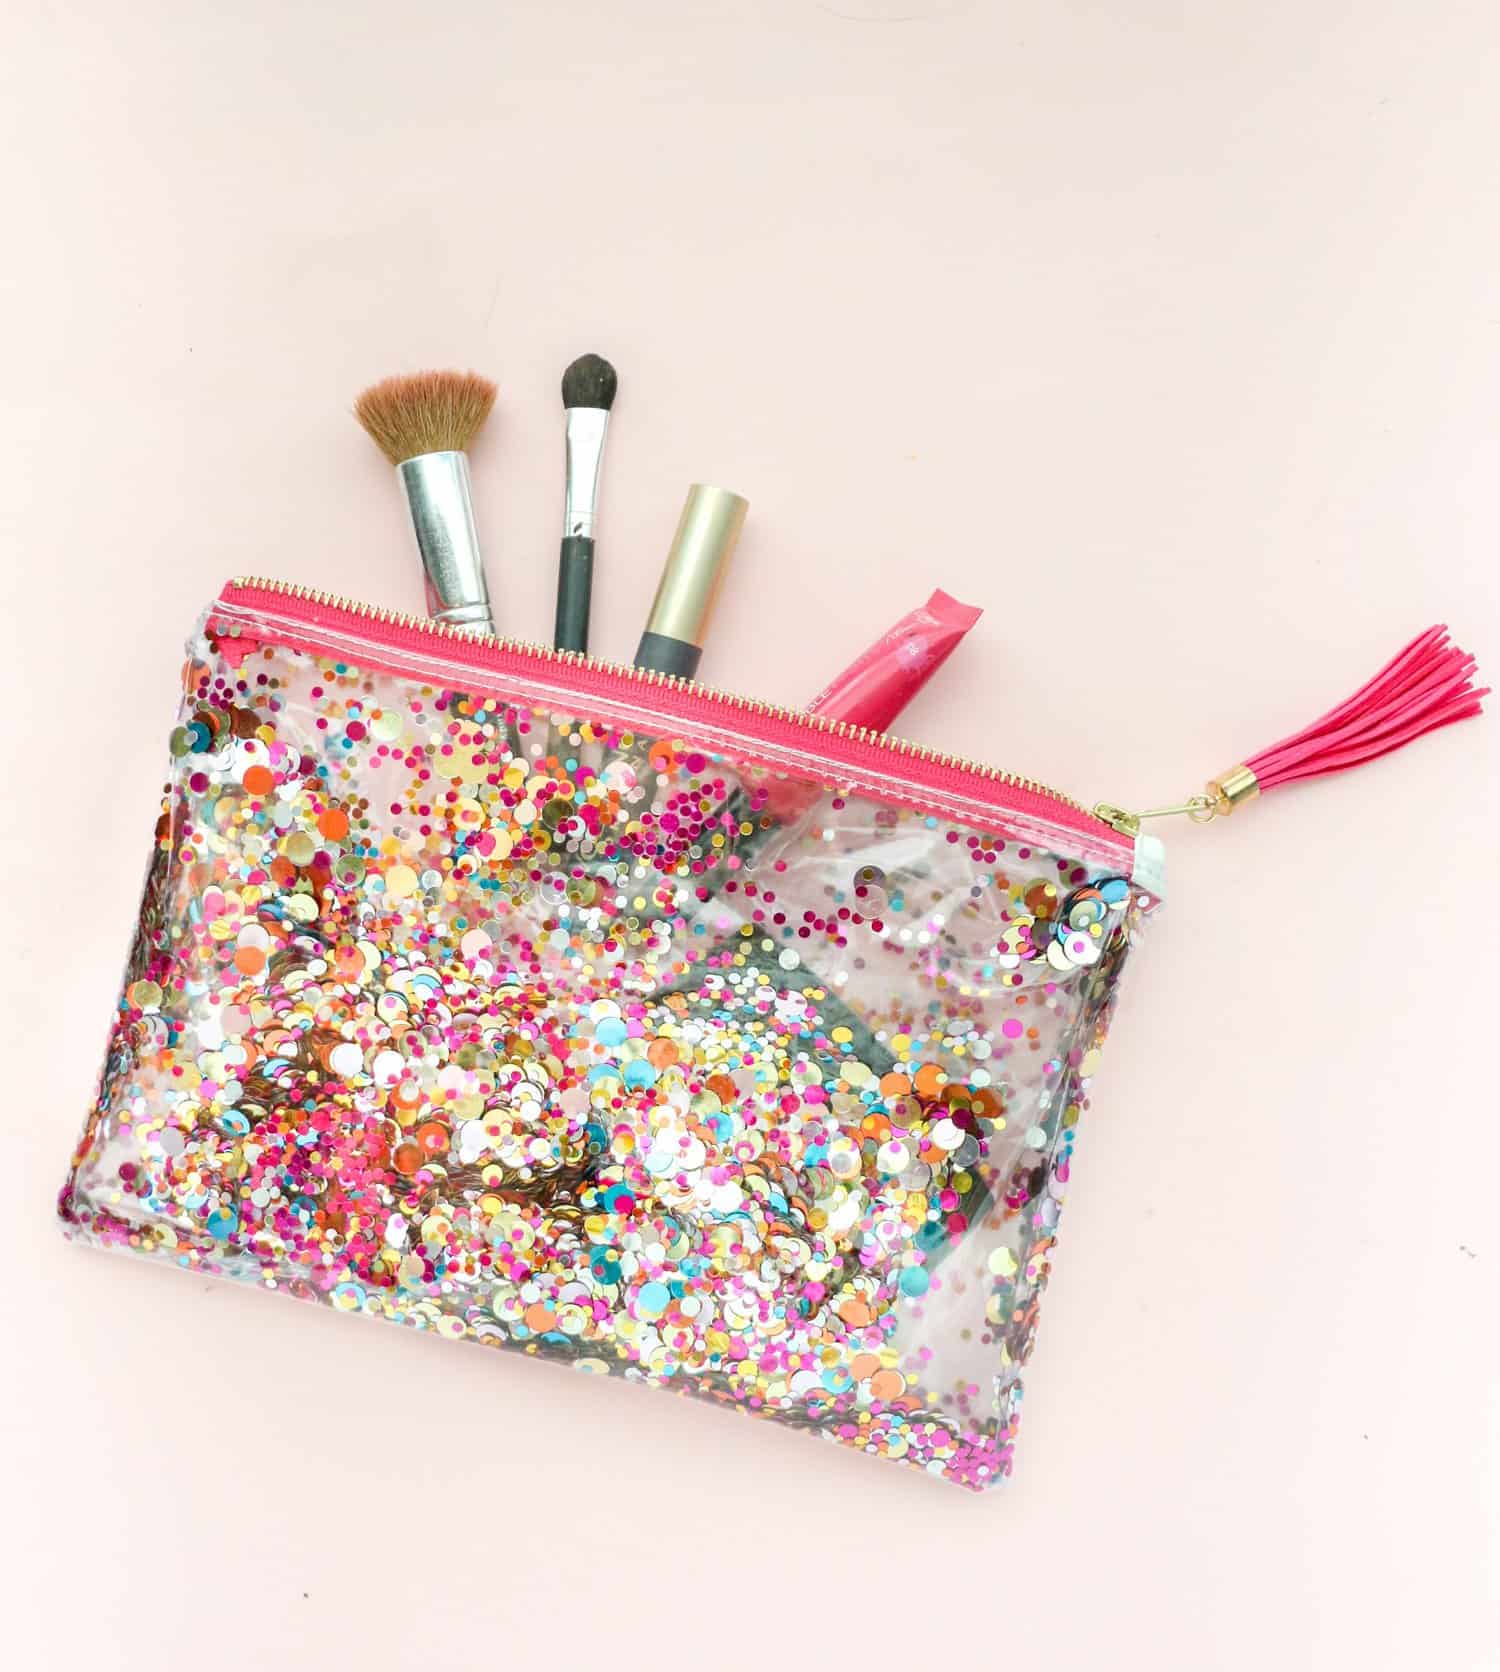
Step 6: Fill the exterior fabric with confetti and then stitch the hole in the lining closed and tuck into the bag. The final step is to use a pair of pliers and jump ring to add a tassel (optional).

Once your tassel is on, your confetti-filled clutch is ready to use as a makeup bag or clutch. You can even increase the measurements to make a large version to hold your wet swimsuit after a swim.
I’m so excited to put my new confetti clutch to use! Now are you ready to make your own confetti zip pouch, too?! xo. Kara

20 Comments
This looks amazing, exactly like a pouch my friend recently got from a store! Love that you can DIY it, I’ll be making her so jealous! 😉
Charmaine Ng | Architecture & Lifestyle Blog
http://charmainenyw.com
Whaaaaaat?! Can’t believe this is a DIY. Great job!!
This is amazing! I love it so much!
I can’t believe this is a DIY! I don’t really understand how to get the glitter and the lining inside. It looks like there’s liquid in the lining? I want to do it so bad but am so confused!
When you follow the steps, you will end up with one large piece that has the exterior pieces sewn together on one side of the zipper and the lining pieces sewn together n the other side of the zipper. The lining pieces will have a gap of about 5” in the bottom seam so that you can turn the whole clutch right side out. Once turned you just have to add your confetti to the clutch through the same opening in the lining. Then sew the lining closed and tuck it into the body of the clutch.
This looks so stylish and expensive, I love it!
https://www.makeandmess.com/
This is so adorable, it reminds me of those pencil cases we had when we were kids with the coloured water inside. Would be great to try with lots of different beads, threads or even natural materials like shells!! Can’t wait to try!
http://www.ginger-muse.com | Hand Embroidery Art & Design
This is so cute! What a fun diy project! I’ve never sewn with vinyl, so this might be a fun first project!
Laura
http://www.laurelandfern.com
I love this so much! Bestill my glittered heart.
What a smart idea!! You could swap the confetti for different shapes and colors too. You’ve got me brainstorming on a new dog treat pouch ;)!
Woof Xo,
Michelle & Watson
https://www.watsonandwalls.com/
LOVE! I’ll have to try this. The bag is SO cute!!
I LOVE THIS!!! I think I will be 90 years old and still be carrying around glitter pouches. ♥♥♥
This is so beautiful. I just love the idea & Kara color combination is looking very nice. Love from – https://stylenrichdiy.com
I wish I knew how to sew so I understood all of this, step 4 is confusing me. The visual I have in mind I just can’t seem to get my head wrapped around it! *sigh*. ???? I’ve been looking for the perfect confetti-filled pouch DIY and this is it! It is SO adorable. ???? Well, someday I’ll learn how to sew and I WILL make this! I’m for sure bookmarking it. ❤️
Love love love the project! I can’t seem to find any confetti like yours!! I’ve searched all over and nothing looks as pretty! Do you have a link where I can find it?! Or do you sell it?!!
Hi Kristi! Here’s a link– http://www.chicoparty.com/party_polkadots_confetti.aspx 🙂
Back again!! Hello, Jacki!! Thanks for the link.. unfortunately, I’ve already purchased those and they are not what they appear… I realized when ordering, they were all the same size which was ok. But, they’re not vibrant colors and not what I now have my heart set on!! Is there anywhere else I can order?!
Thank you soooo much!
XOXO!
Oh no! If you message Kara on IG she can let you know. Her handle is @kailochic
I love this. I think I’m a gypsy at heart. Love the bright blingy things all the time and I’m not young anymore. Still love them. Good job.
Cool idea! I have tried making this and was wondering, what gauge did you use for the vinyl? I tried 12 and 8. The 12 gauge was definitely too thick. The I seemed pretty good. I could see a smaller gauge than 8 working too.