 I’ve gotta say, I think the statement earring trend is the best thing to happen to crafters in 2017! Why would you even need to buy earrings when you might already have everything you need to make a pair you’ll love? You wouldn’t! (Though, do support your fellow crafters and shop from artisans whenever you do inevitably buy a new pair of earrings while the trend is still hot!)
I have, perhaps, an oddly large stash of wooden circles leftover from my foray into dollhouse making and other miscellaneous craft endeavors, so this project was a no-brainer for me! And if you don’t have randomly specific crafts supplies laying around your home, don’t worry! These supplies are super cheap. So check out how simple it is to make your own statement earrings below!
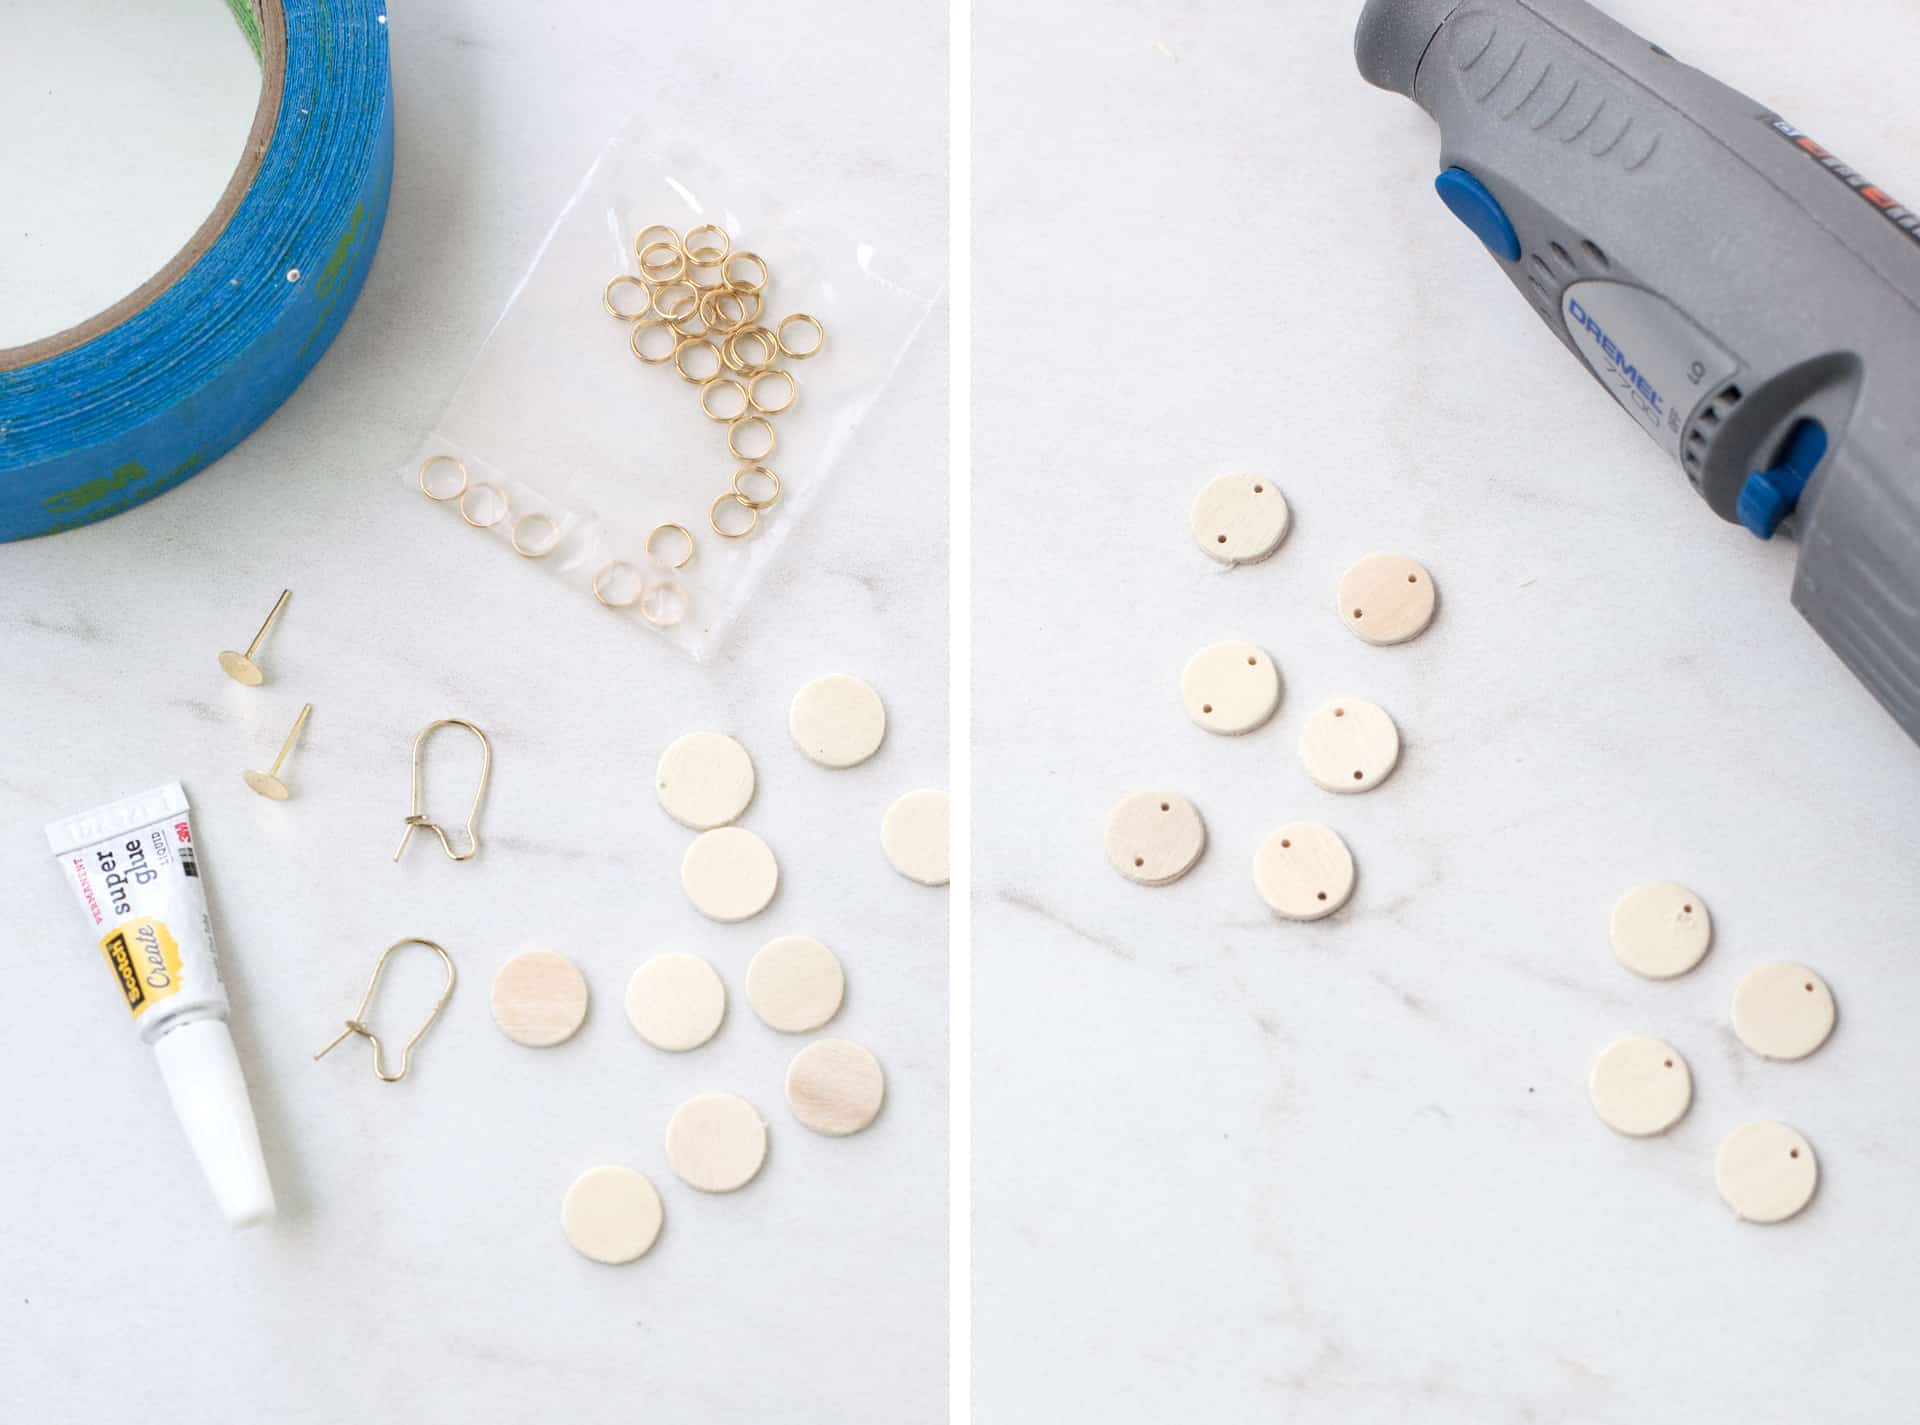
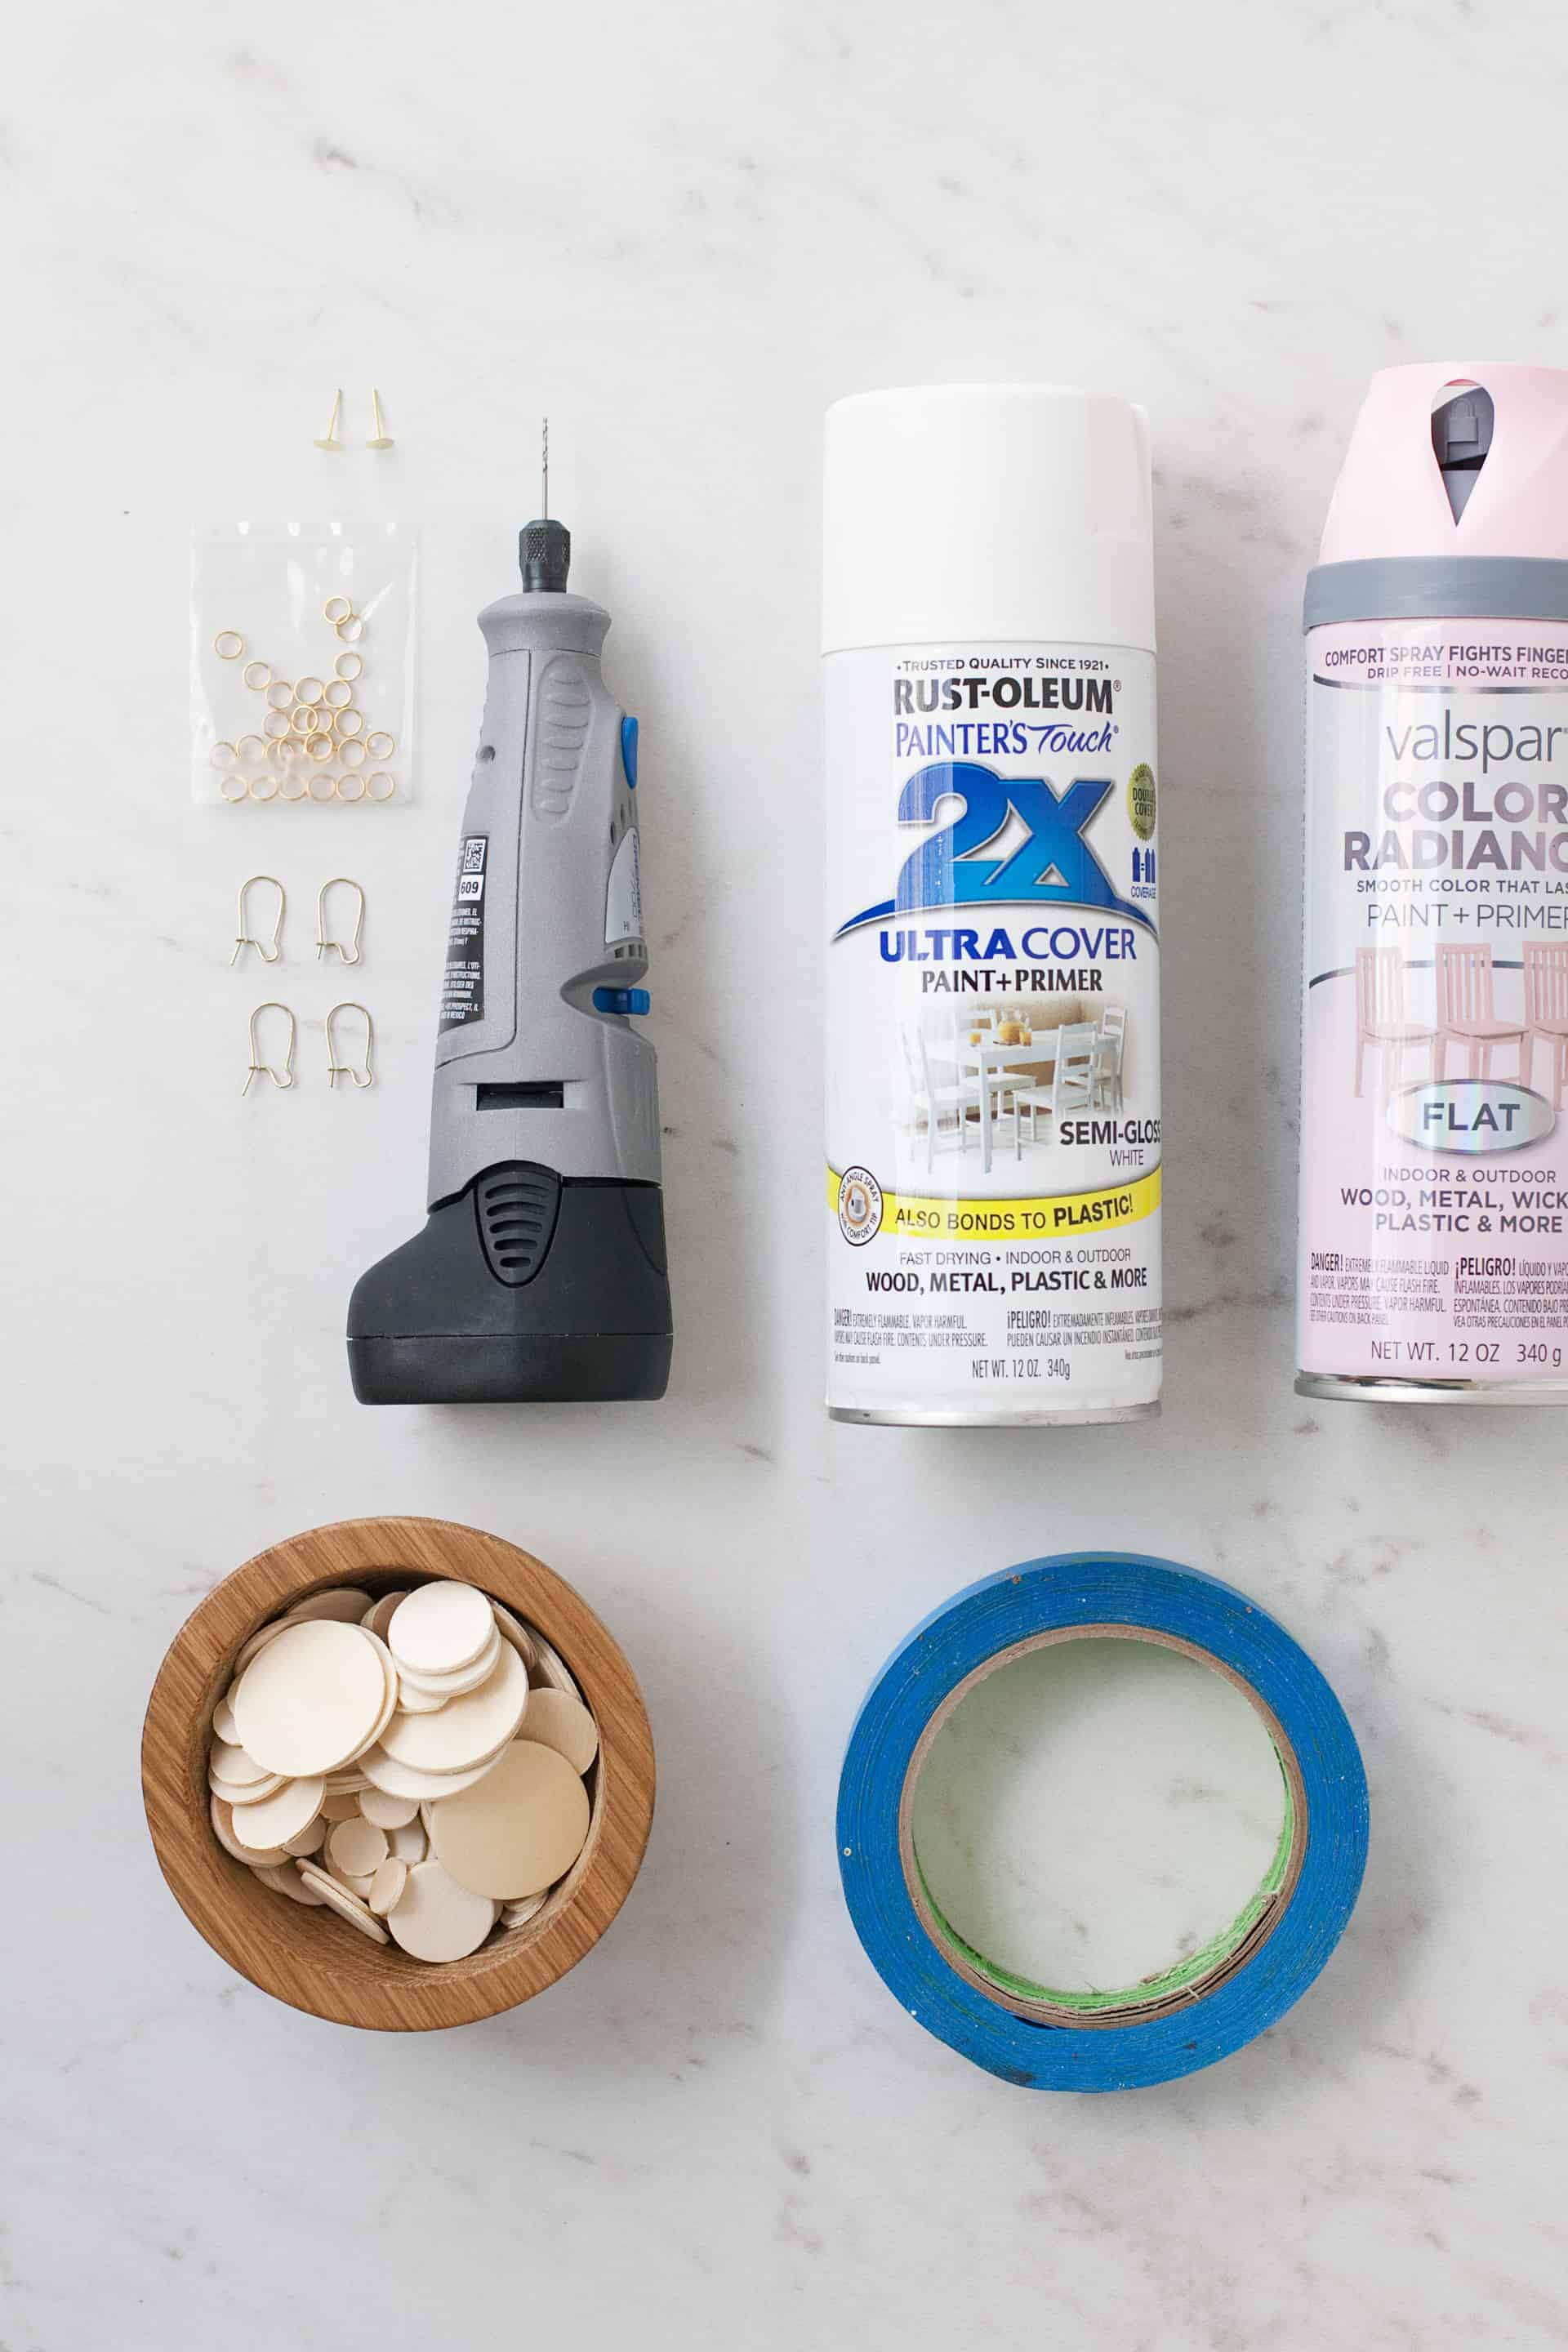 Supplies:
–Dremel with drill bits* (or an inexpensive twist drill)
–ear wires and/or earring posts
–7mm jump rings*
-paint + primer in colors of your choice
–painter’s tape
-multiple lightweight wooden circles (I used this variety pack.)
–super glue (not shown)
*Drill is not needed for third earring style, and jump rings are only needed for second earring style.
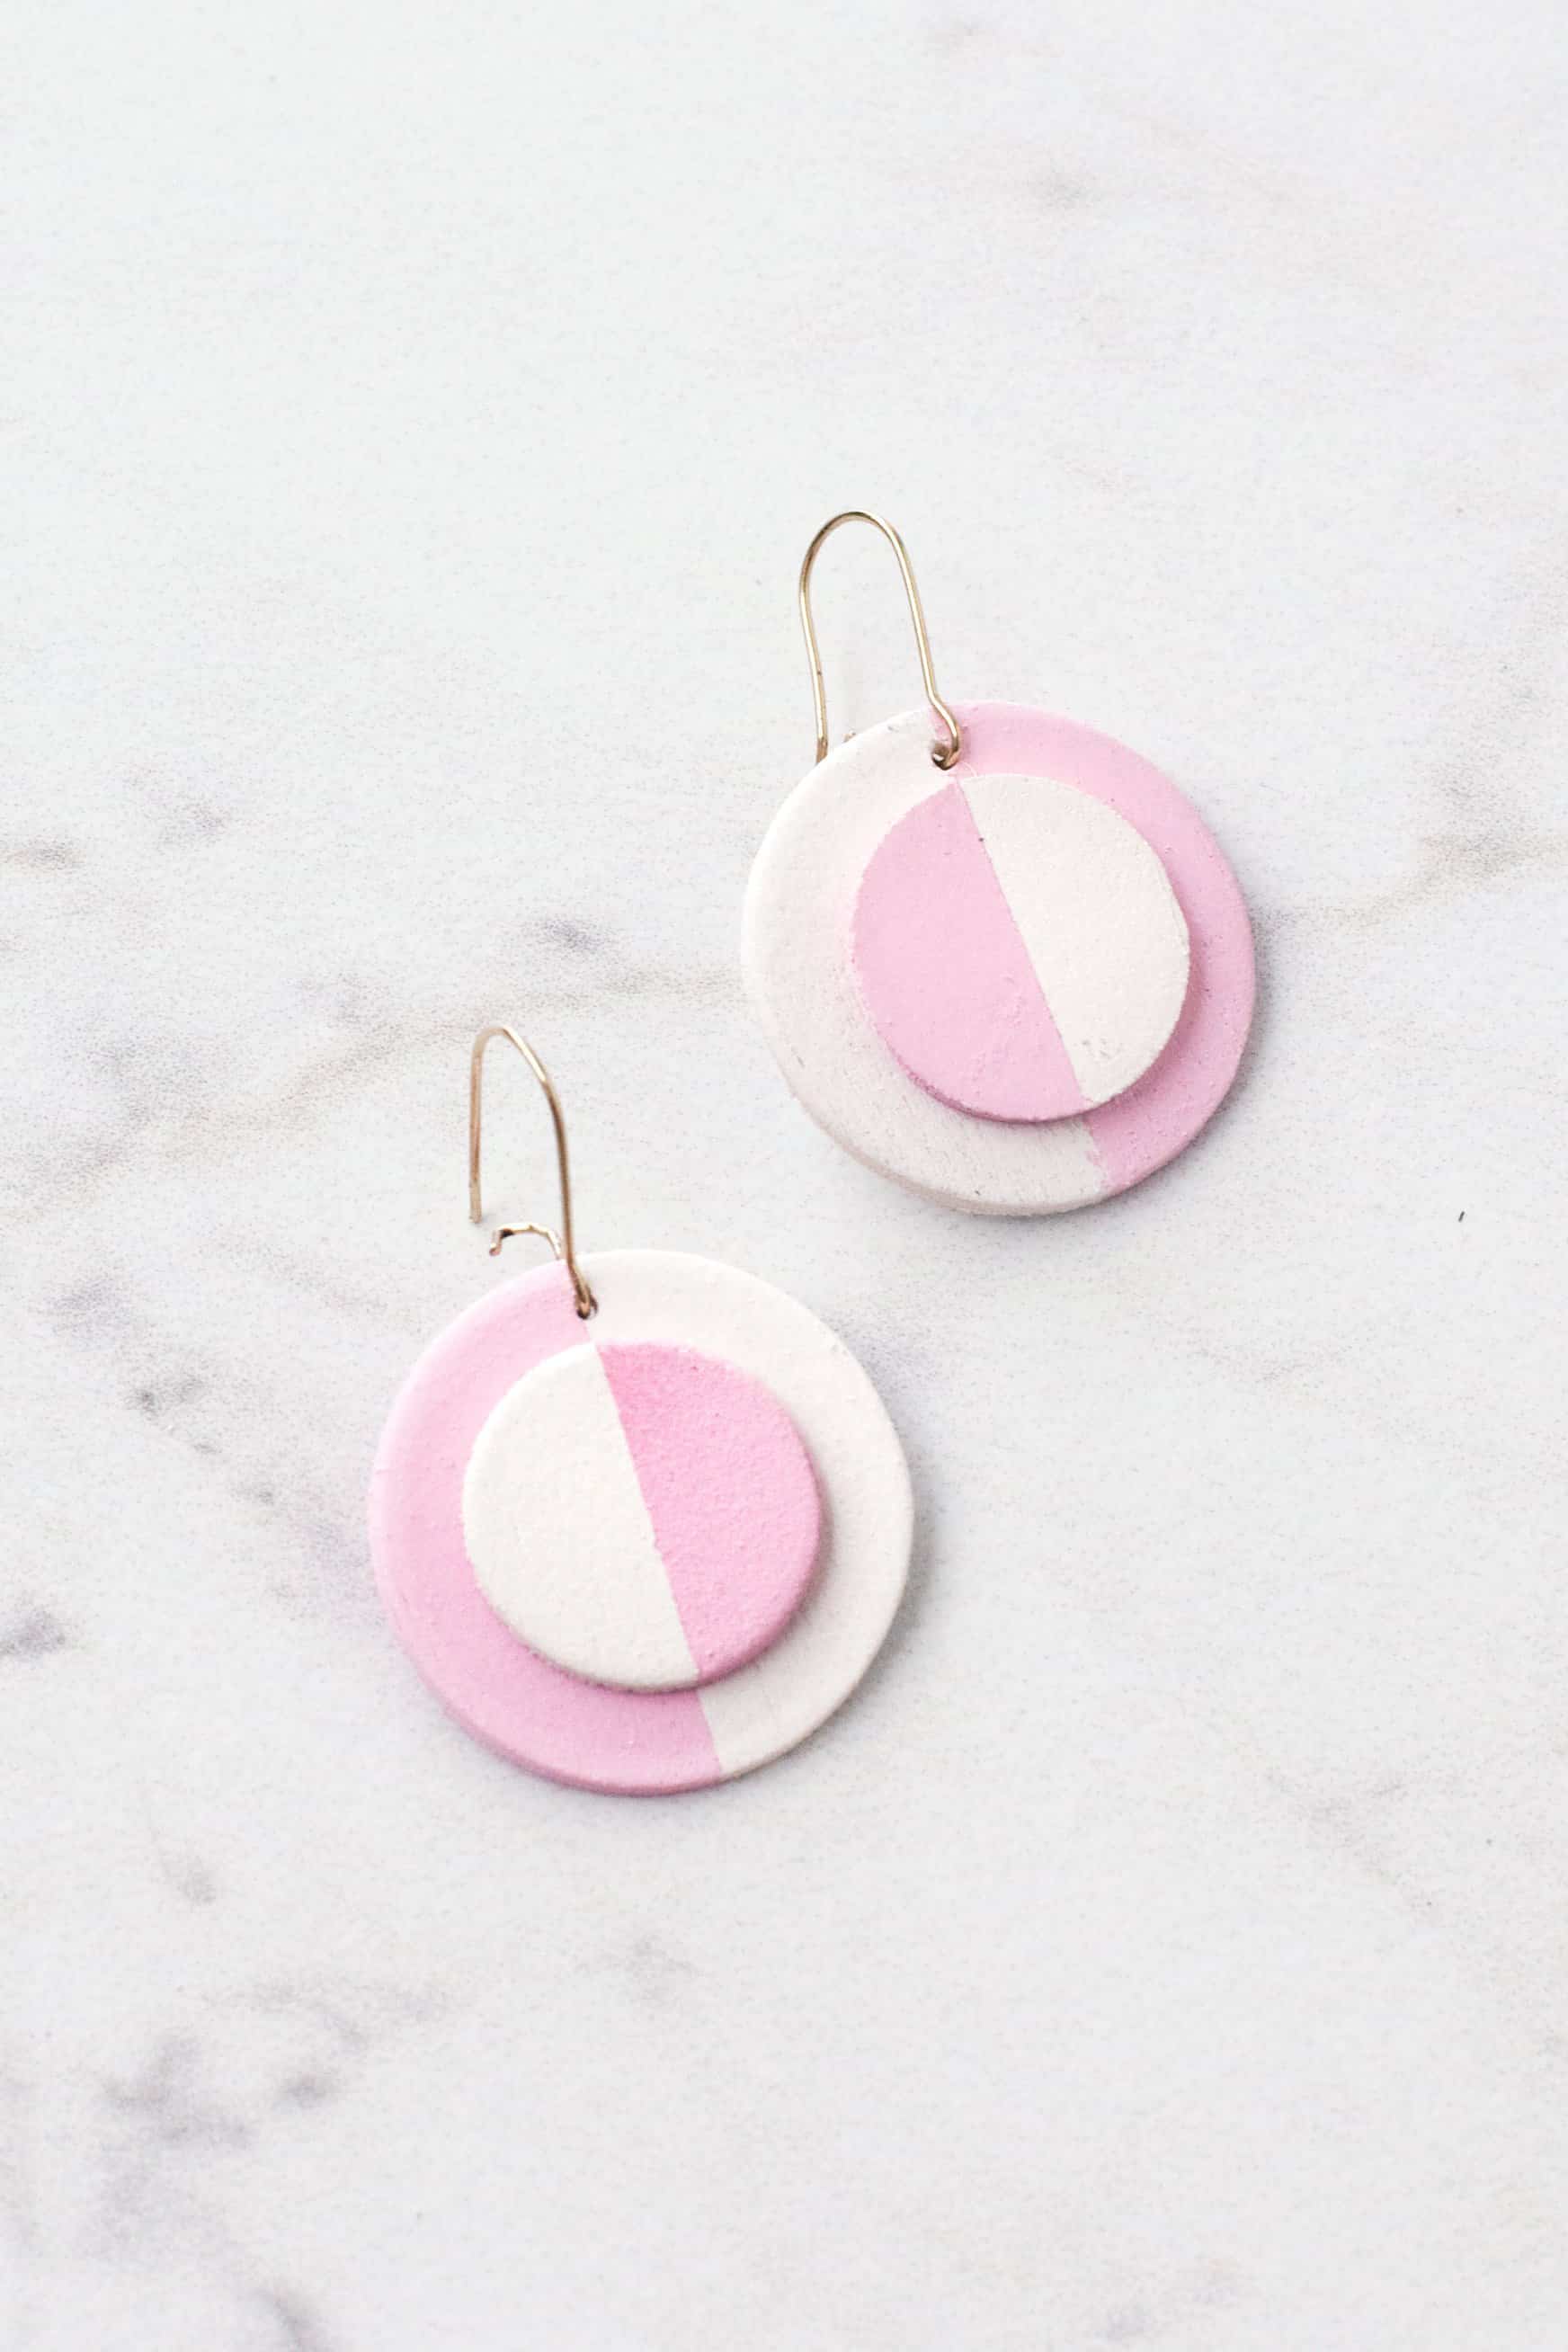
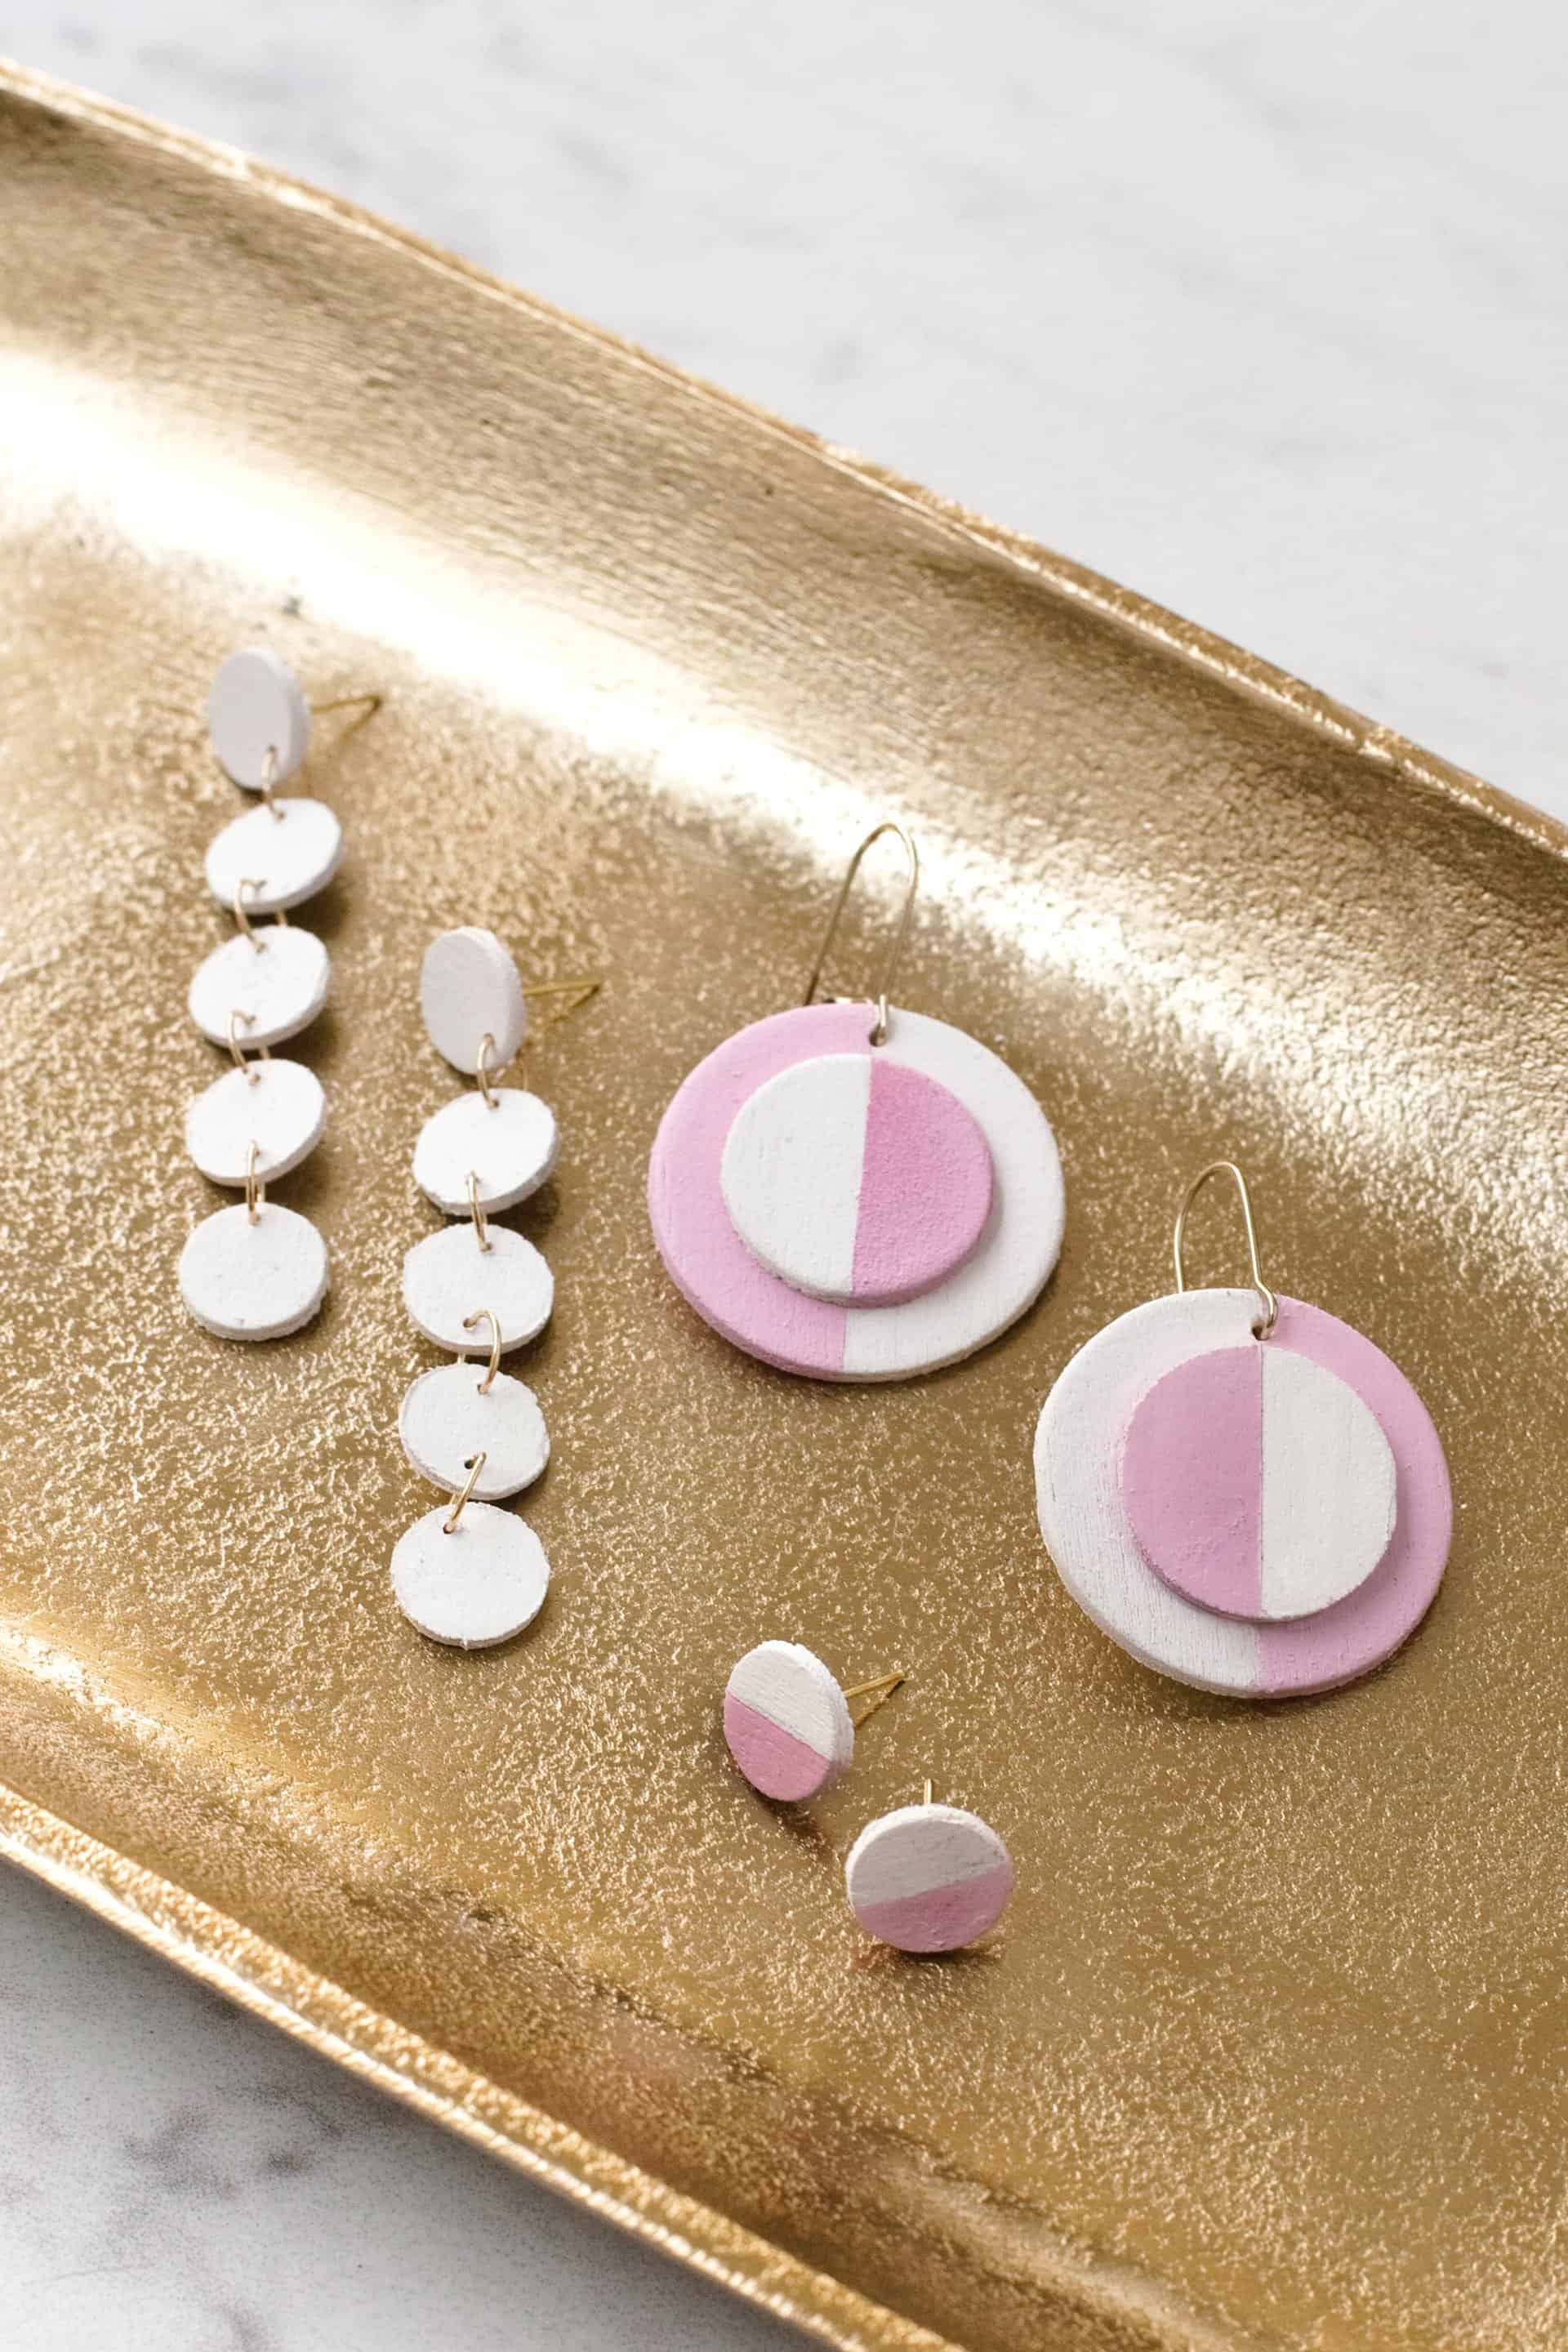
 MOD CIRCLE EARRINGS
I love how graphic and mod this dangle earring is, but it still feels minimal and works well with simple, everyday styles. You can change up the size according to your wants and needs, but remember, in 2017, bigger is better when it comes to earrings!
 Supplies:
-two larger wooden circles and two medium wooden circles (I used this pack)
-pair of ear wires
–super glue (not shown)
–Dremel with drill bits or twist drill
–painter’s tape
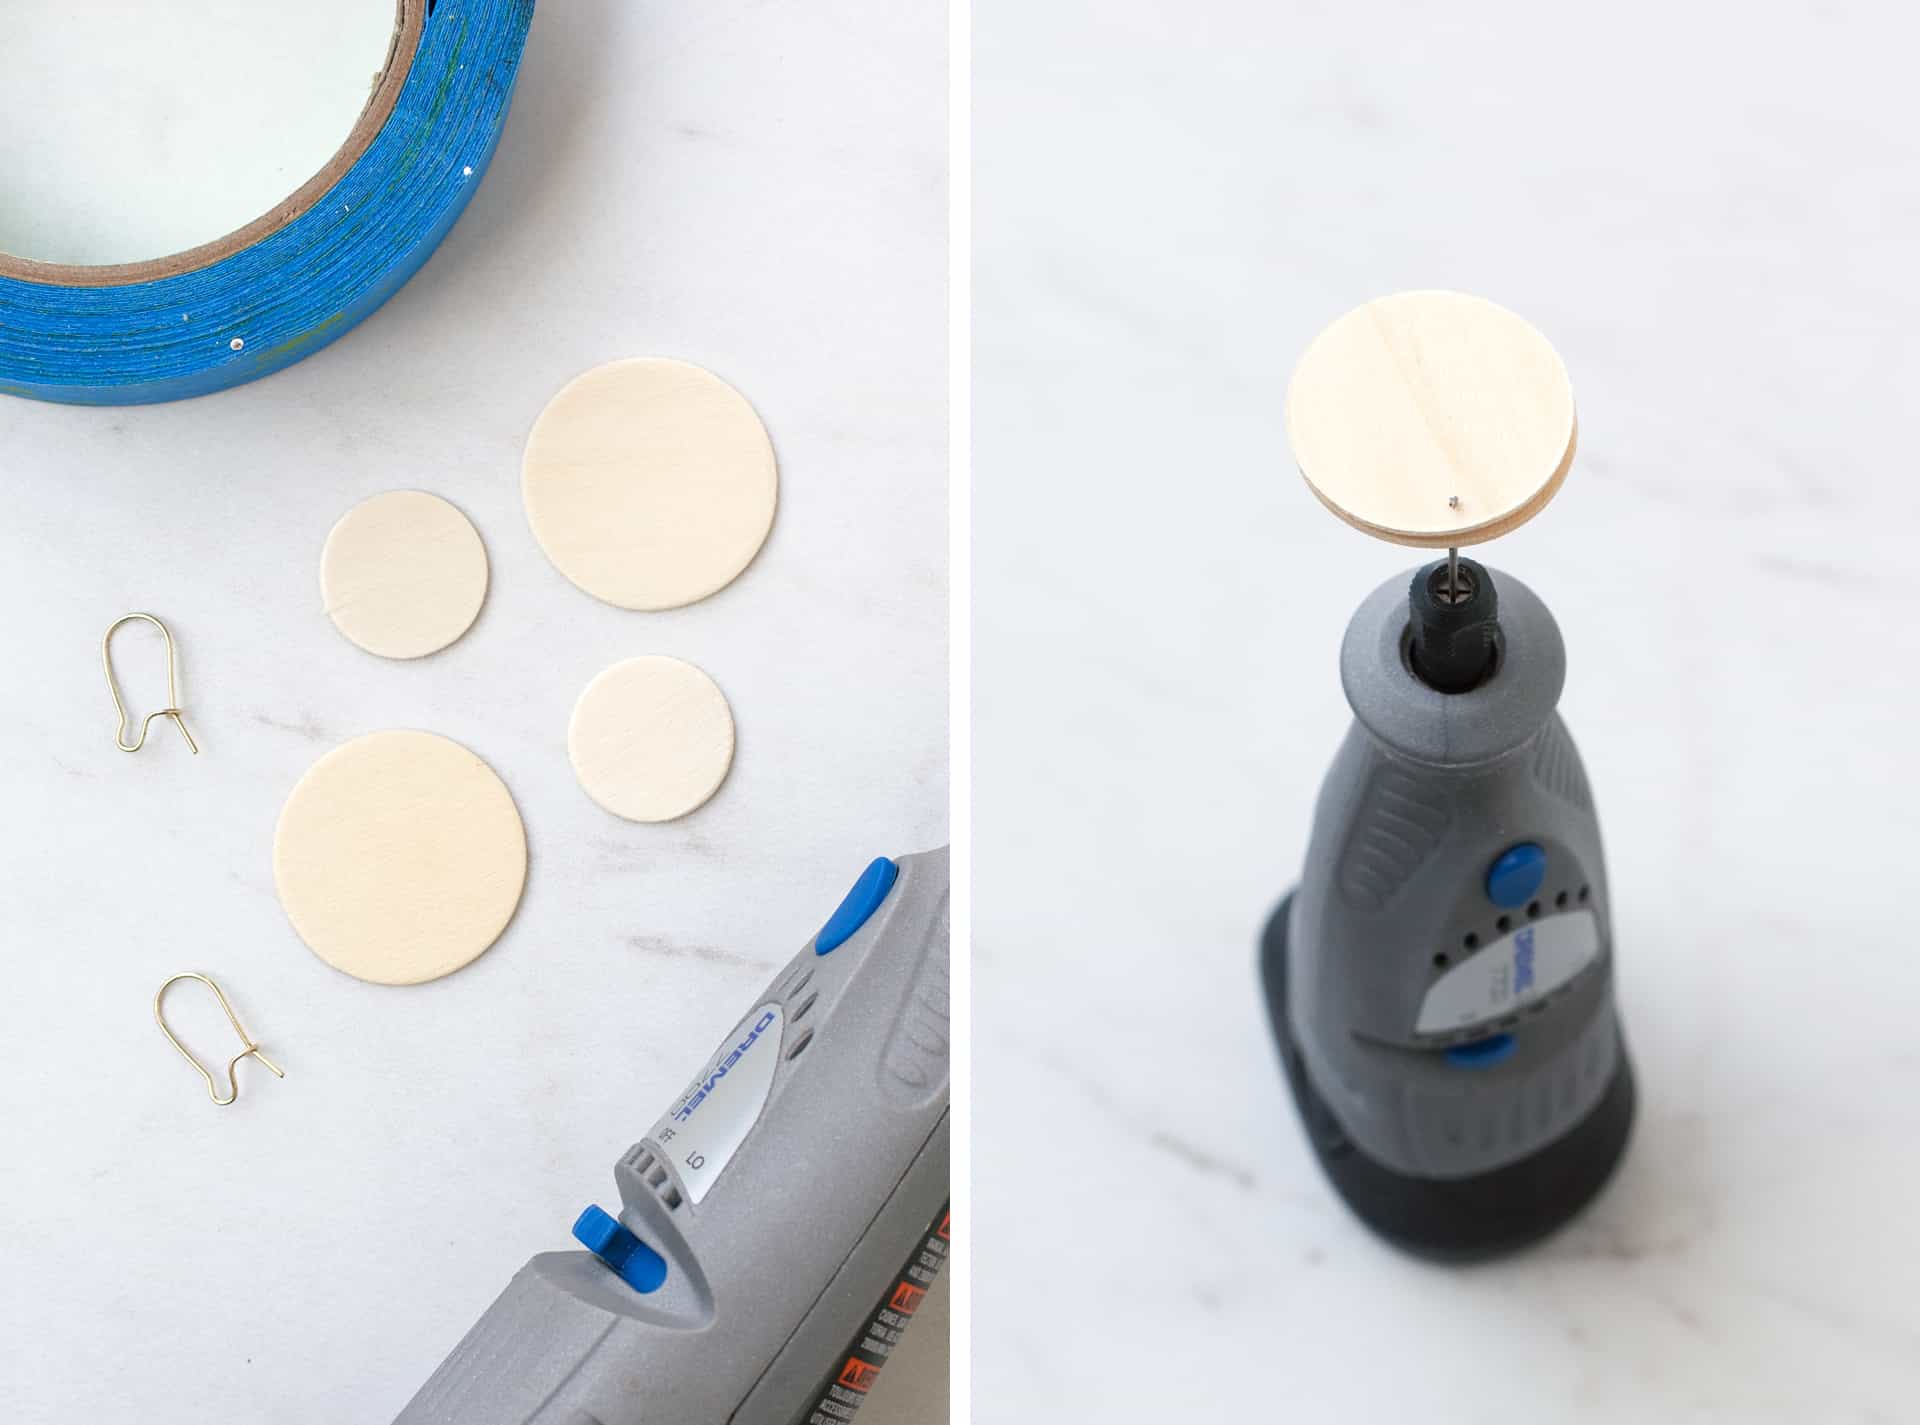
Step One: Stack the larger circles and drill a hole very close to the edge.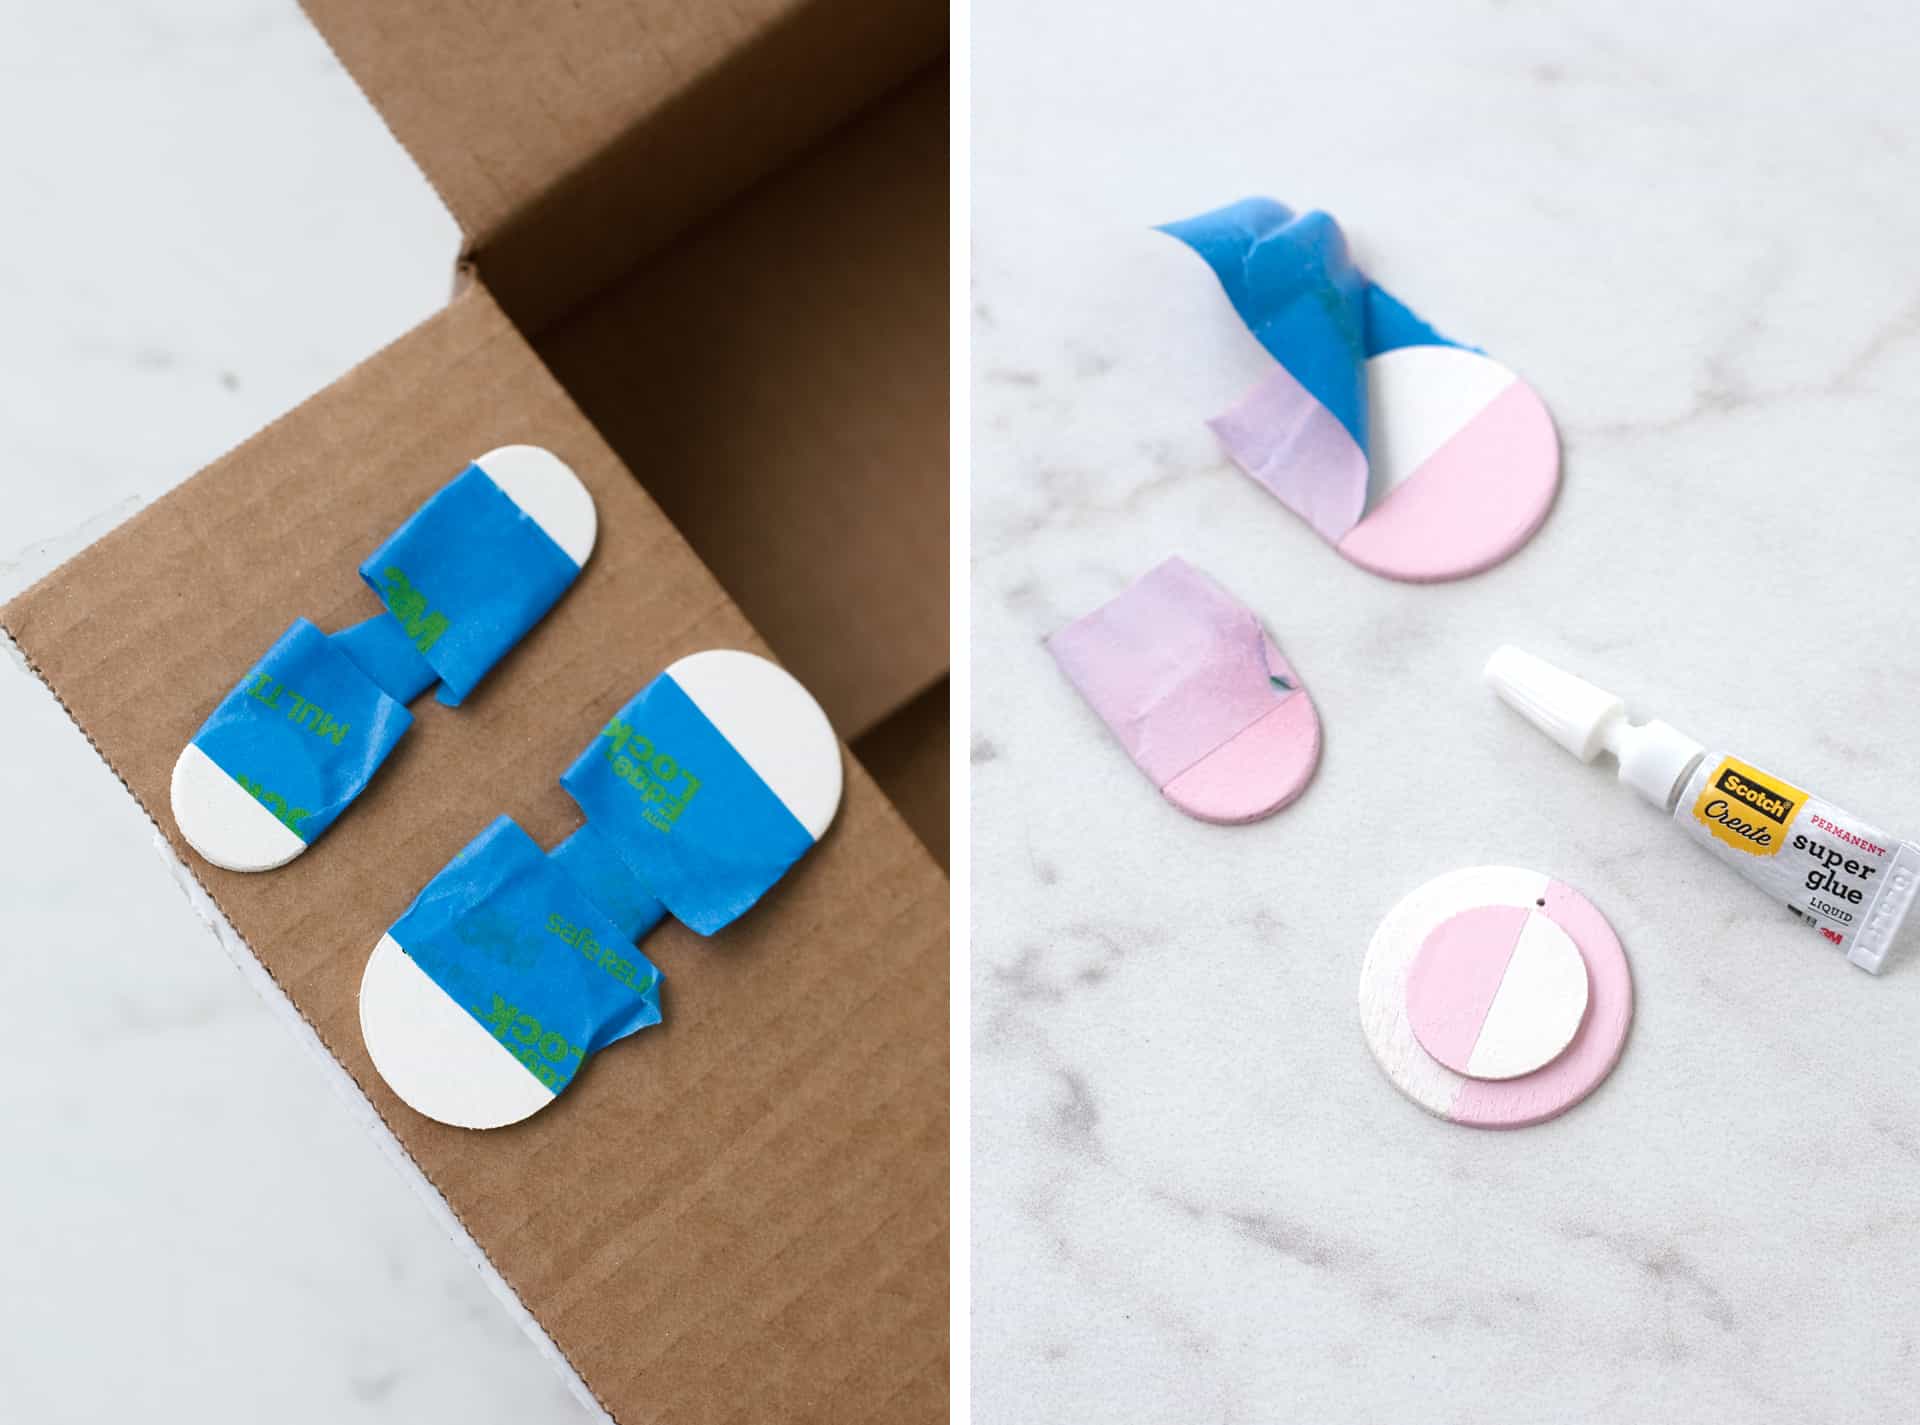 Step Two: Paint the circles with primer or paint + primer, and then after paint has thoroughly dried, tape off half of each circle with painter’s tape and paint with your darker color of paint.
Step Three: Peel off the painter’s tape and glue the medium circle on top of the larger one as shown above right.
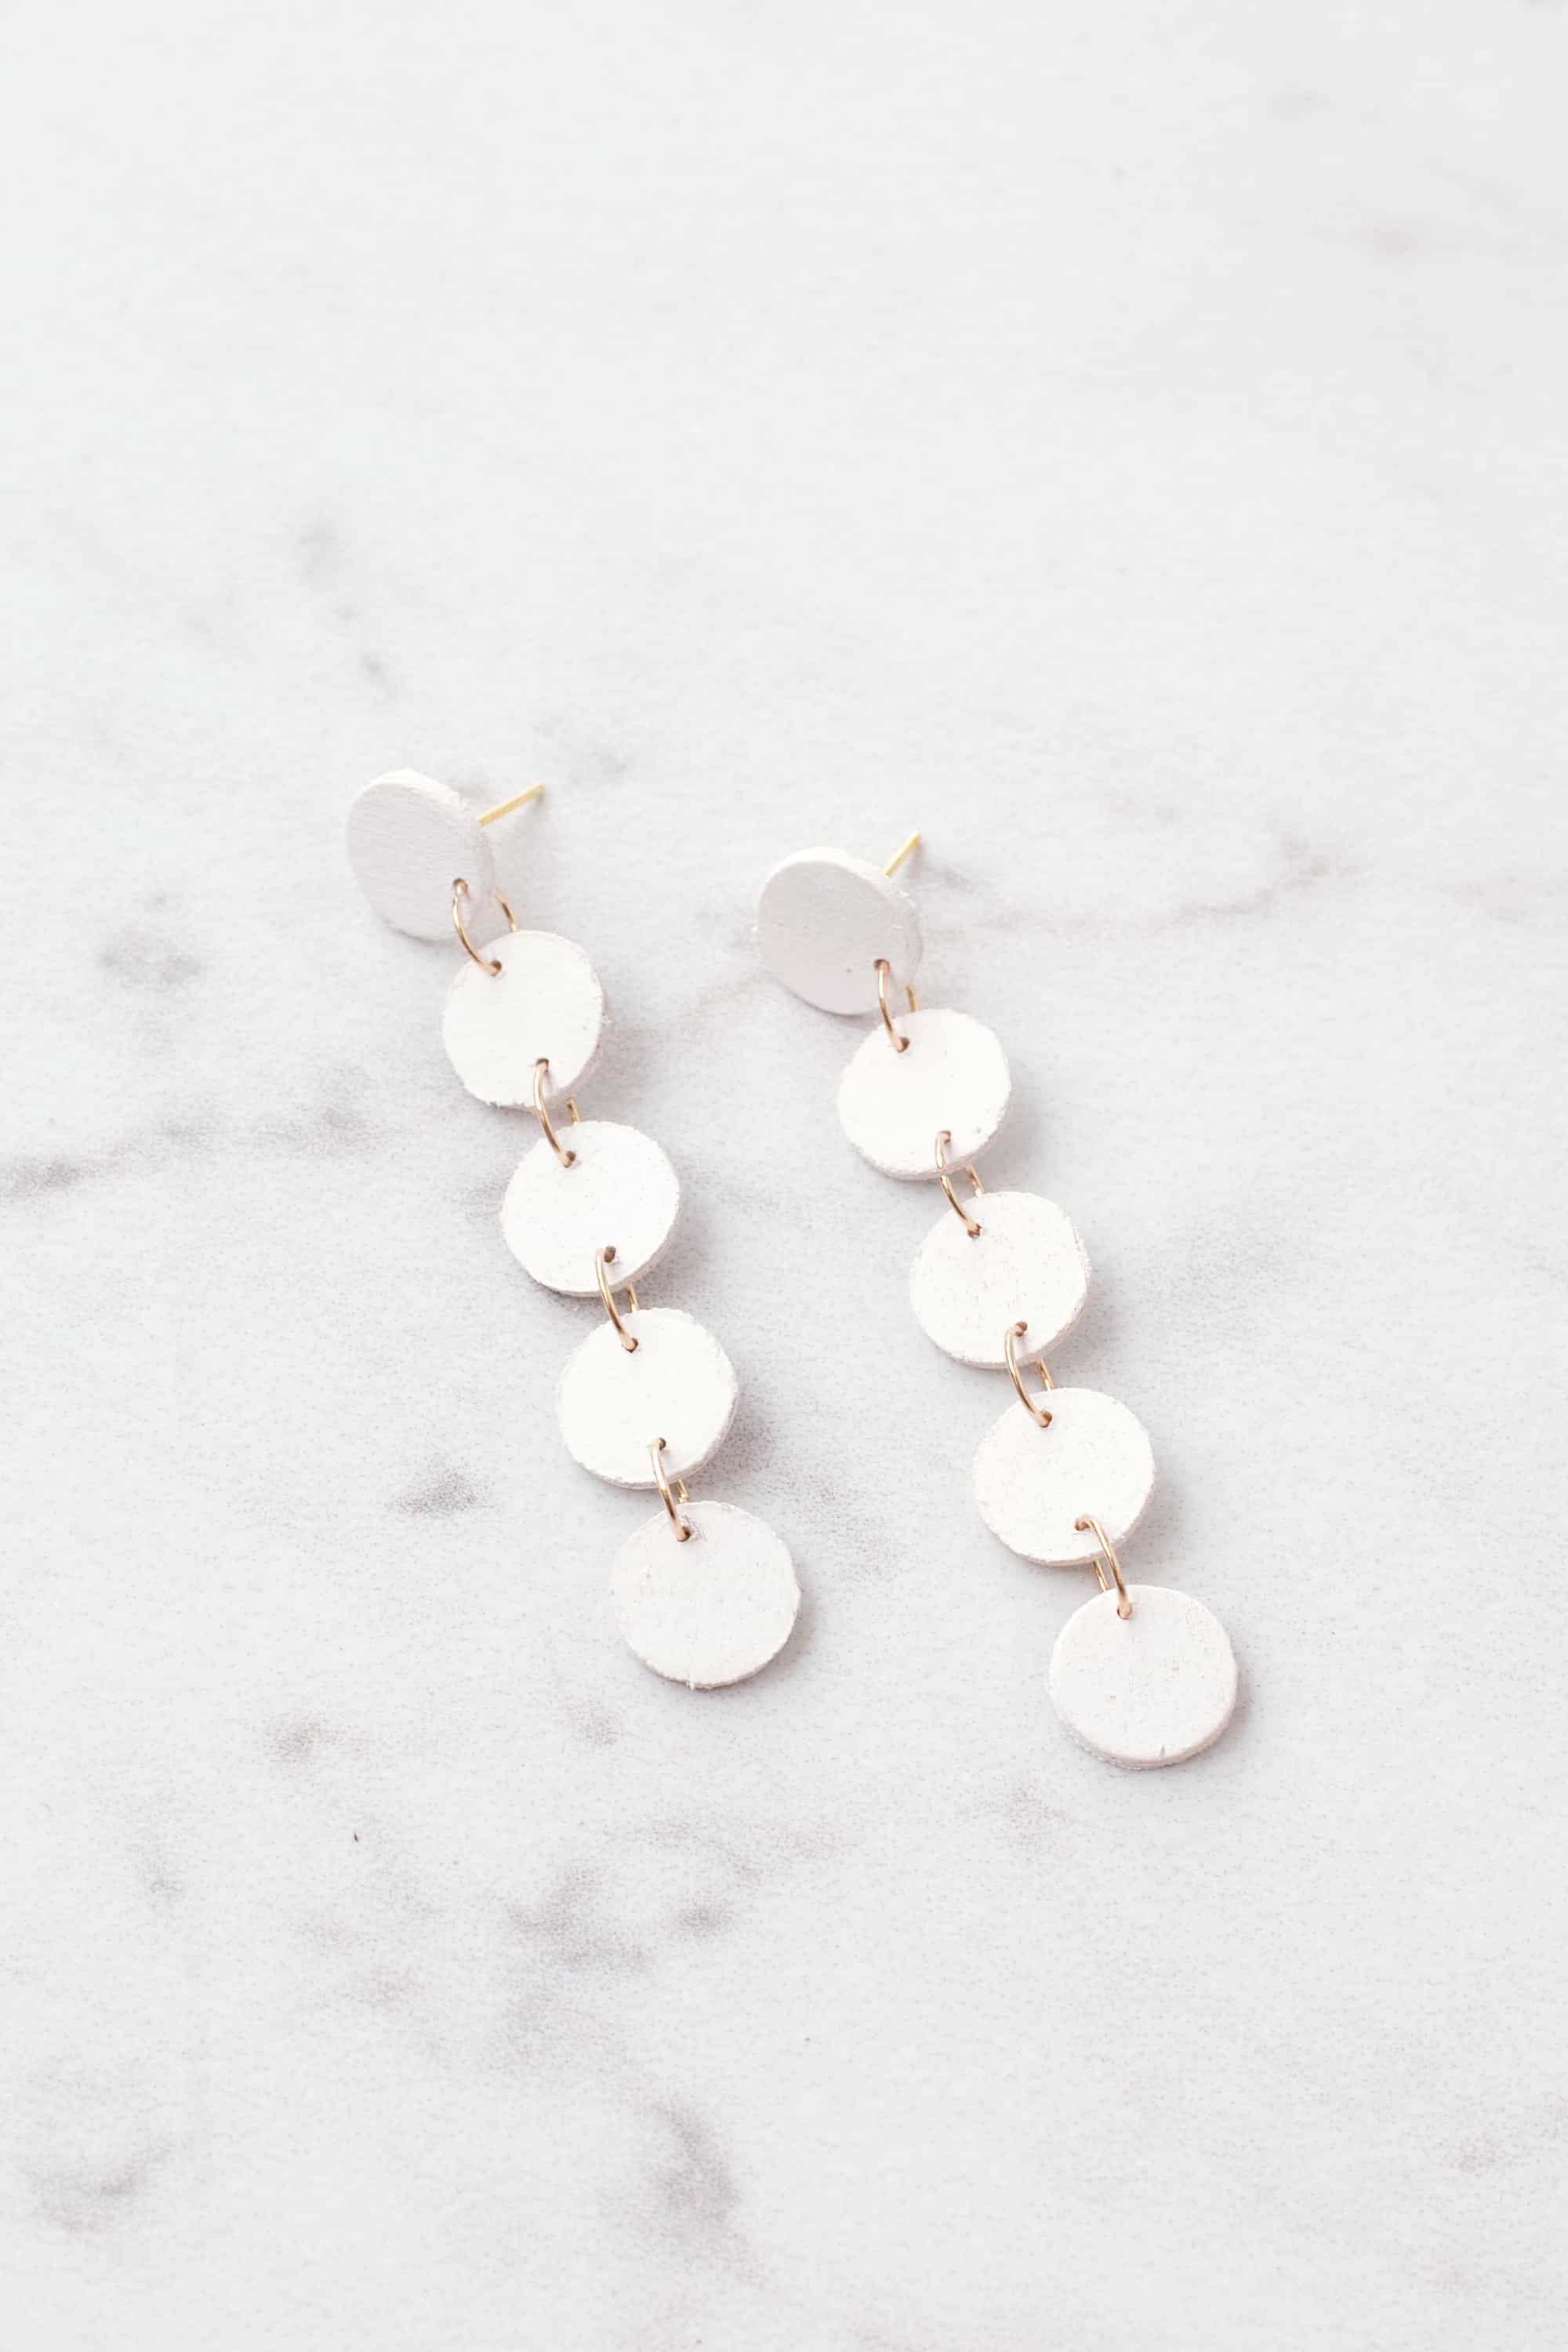
 CIRCLE DANGLE EARRINGS
This dangle style of earring is so simple, but so bold! The simplicity makes it work well with casual outfits, but I think these earrings would be great for a night out too! I’m totally playing favorites, and this earring style is my personal fave!
 Supplies:
-10 small wooden circles (from this pack)
-pair of earring posts or ear wires (your choice, but I prefer posts for these!)
–super glue (if using earring posts)
–7mm jump rings
–Dremel with drill bits or twist drill
–painter’s tape (optional, but helpful)
Step One: Trim a hole on either opposite end of 6 wooden circles, near the edge. Then drill one circle near the edge of the last four. If you are using ear wires instead of posts, you will drill double holes in 8 circles, and single holes in only two.
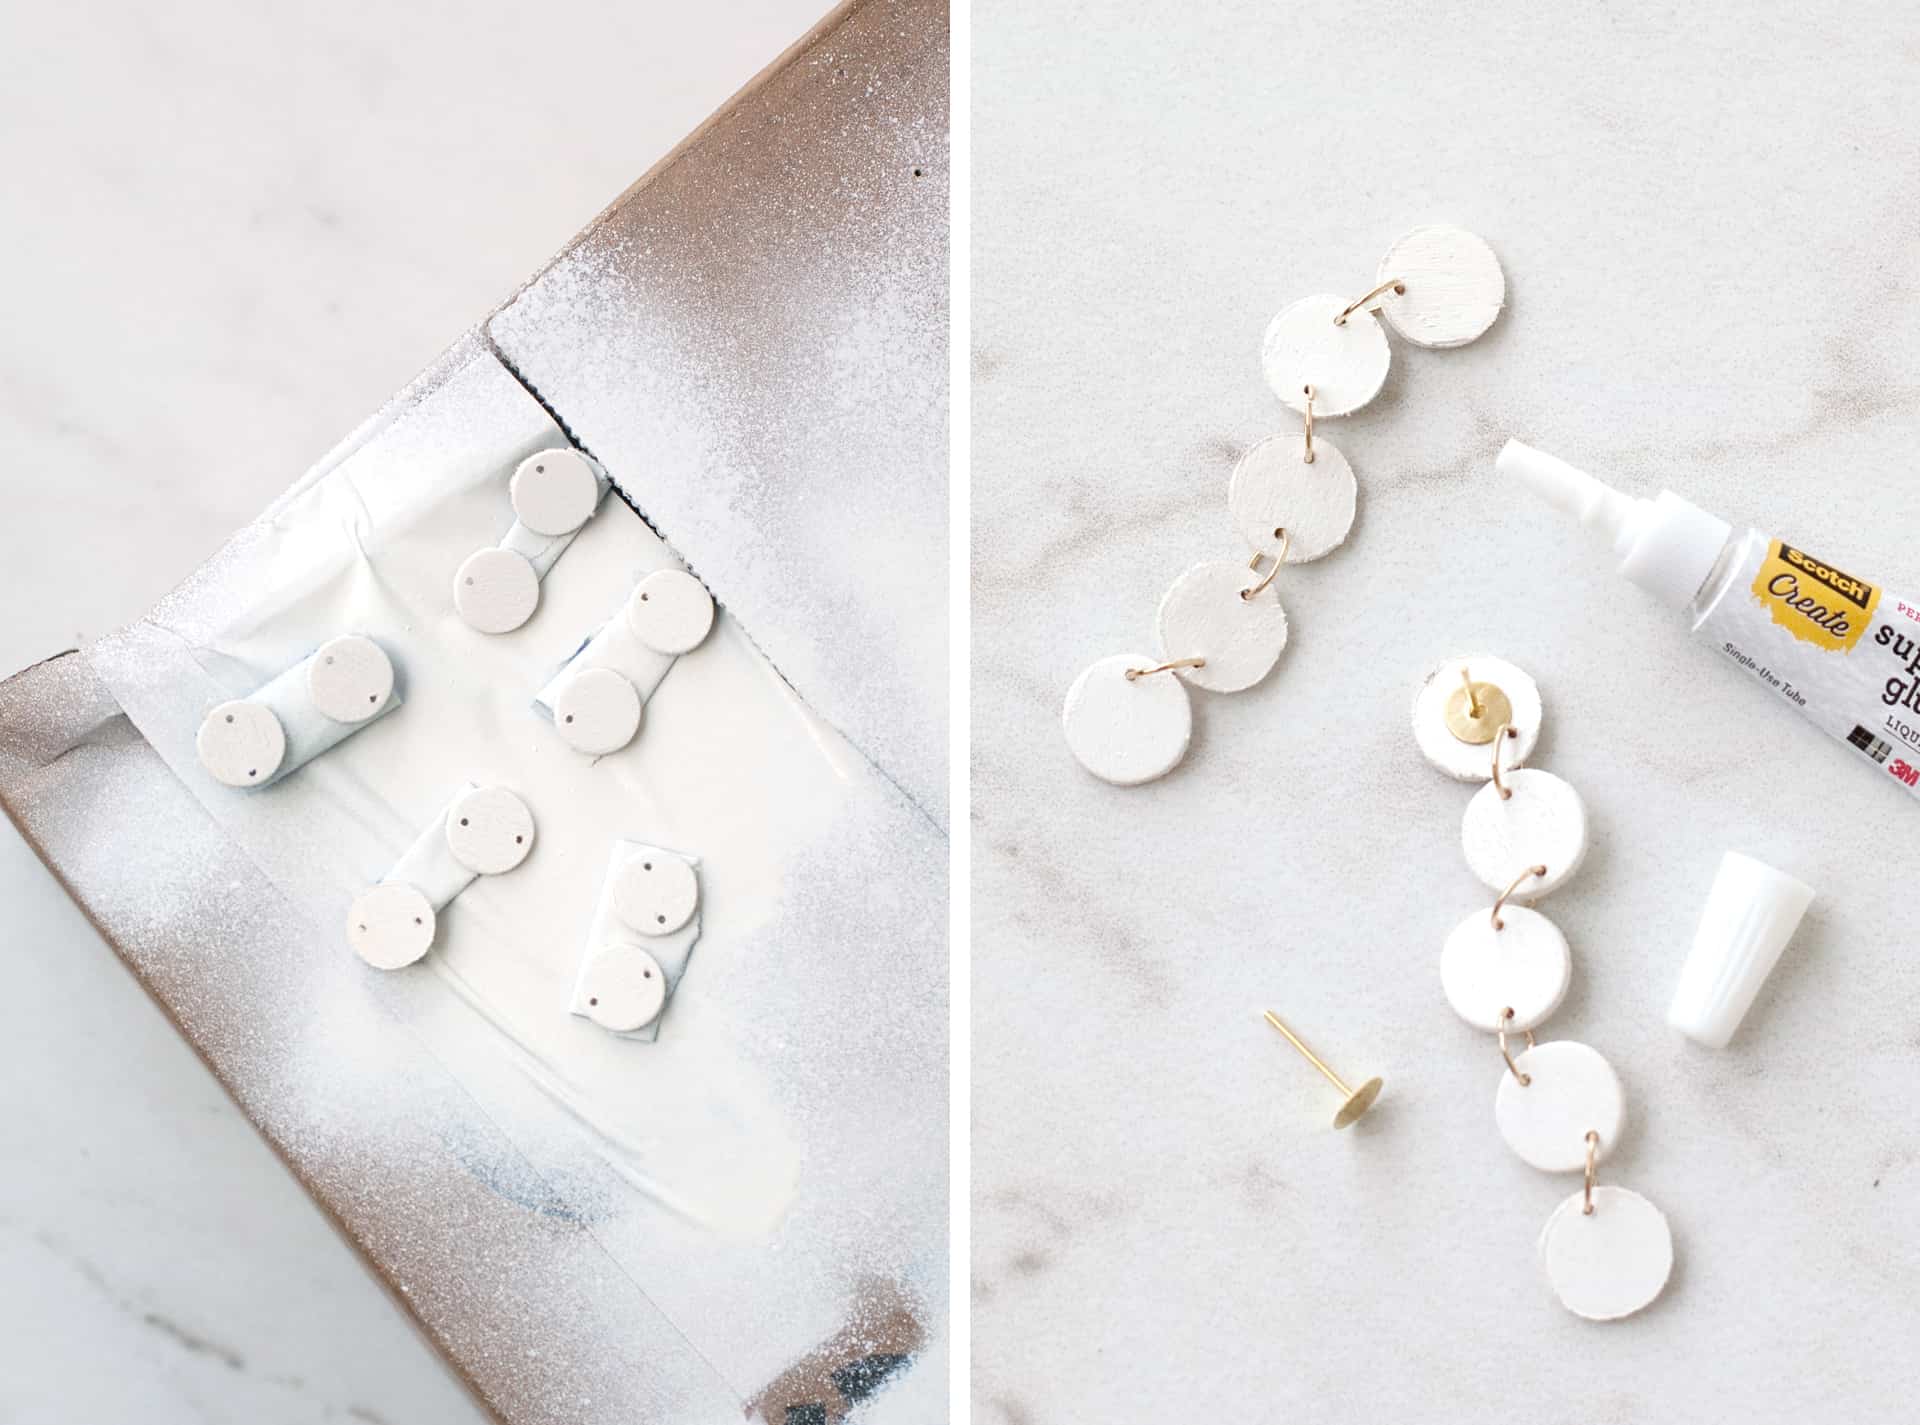 Step Two: Prime or paint + prime all of the wooden circles. I use rolled masking tape to hold down the circles so they wouldn’t blow away from the force of the spray paint.
Step Three: Connect the circles with jump rings. I didn’t need to use pliers for this, just my fingers. It depends on the gauge of your jump rings, though. Then glue the posts to the back of the top circle.
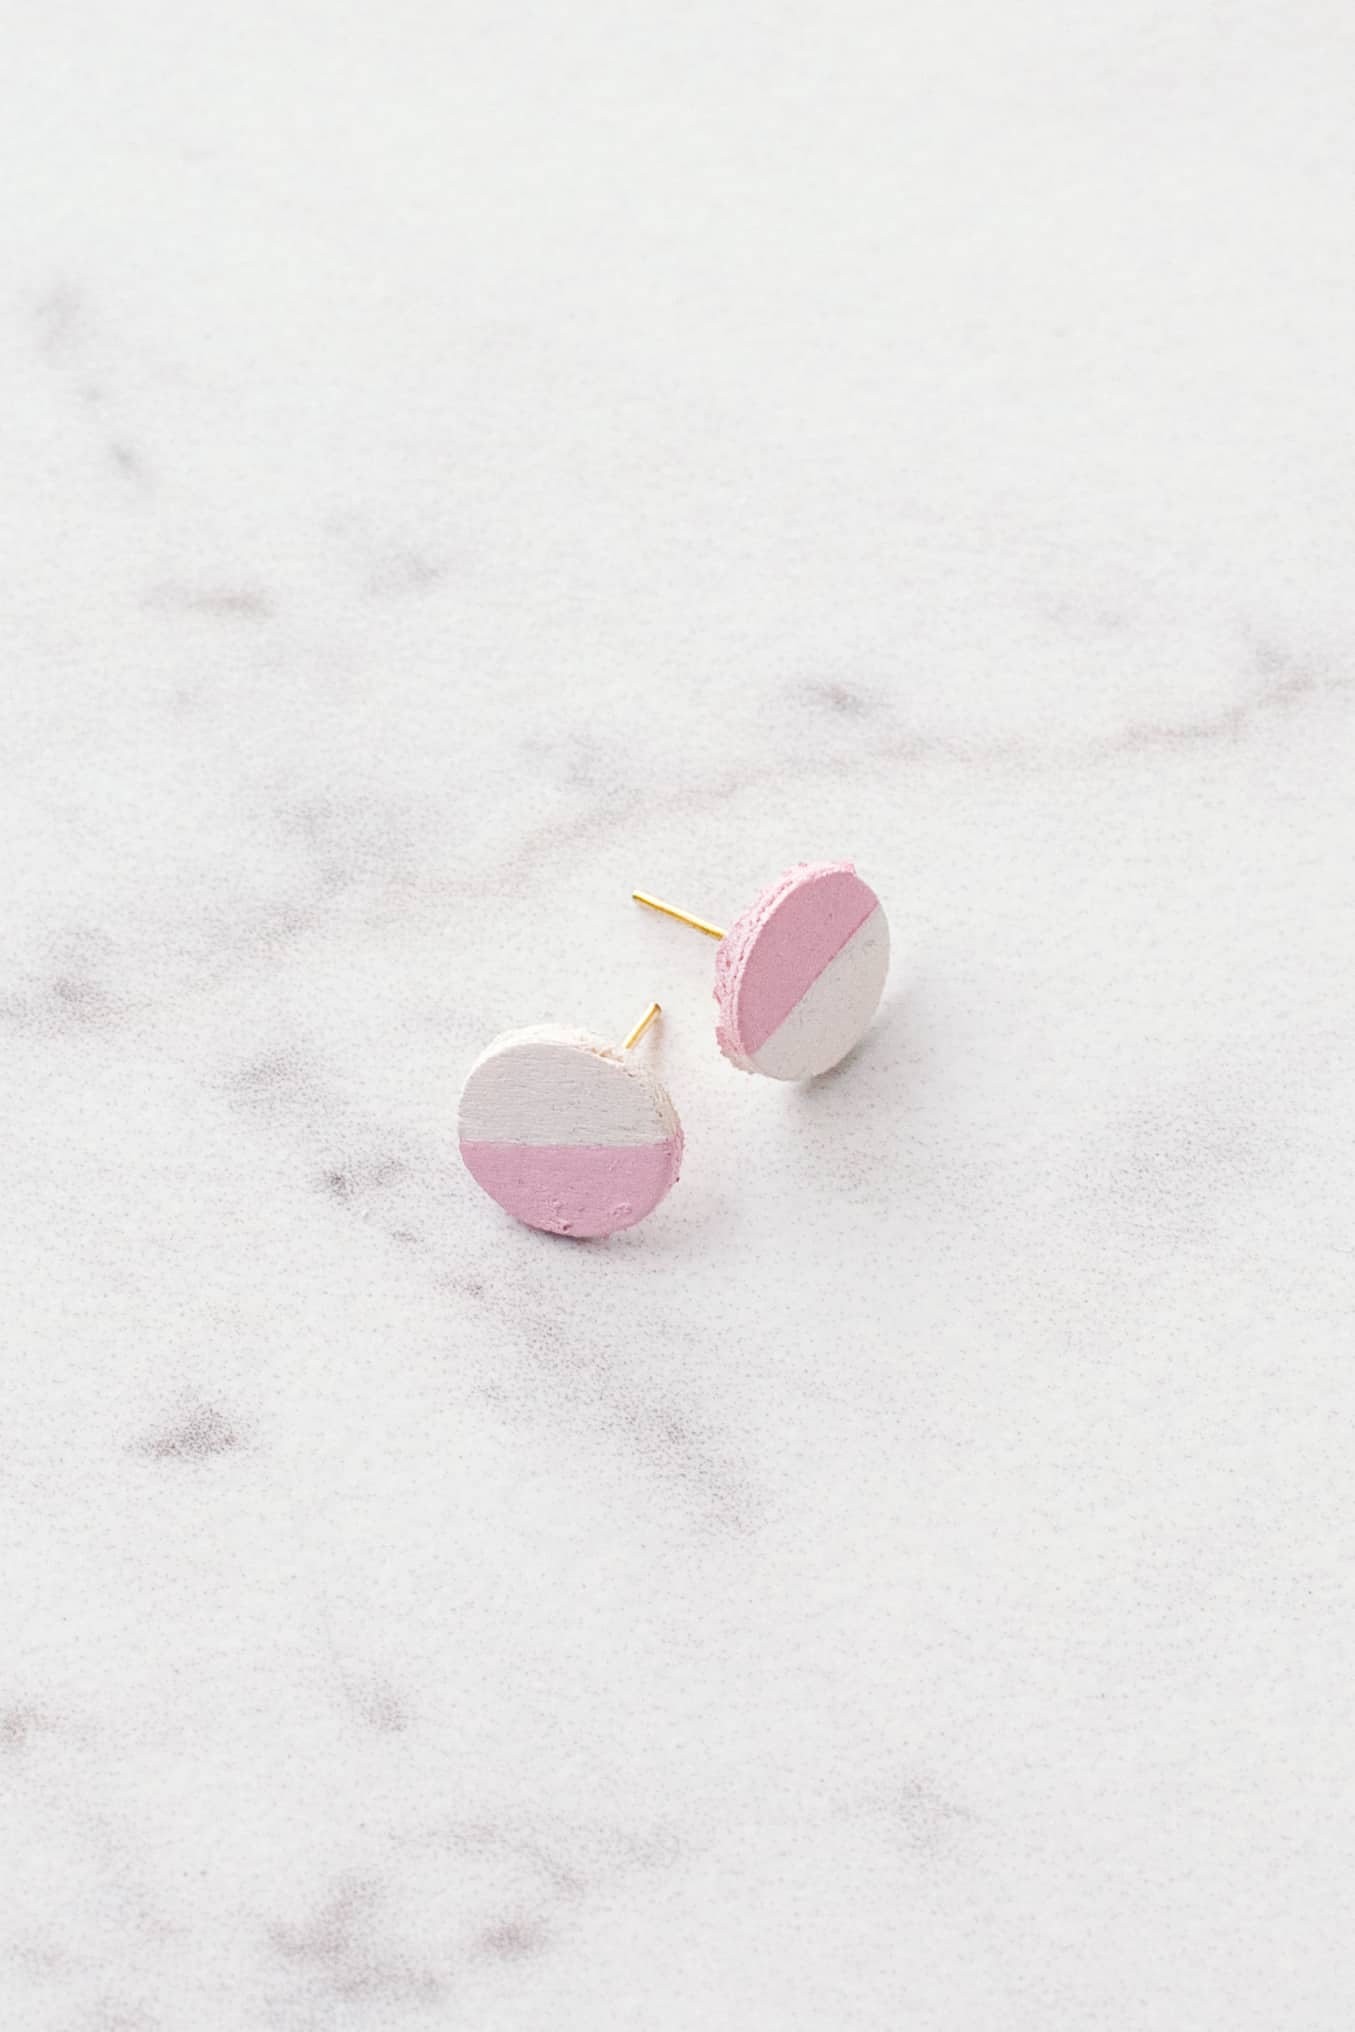
 SMALL GRAPHIC STUDS
When you want just a little something on your ears to signify your coolness factor, these earrings are perfect for the job. They also win the prize for being the easiest to make!
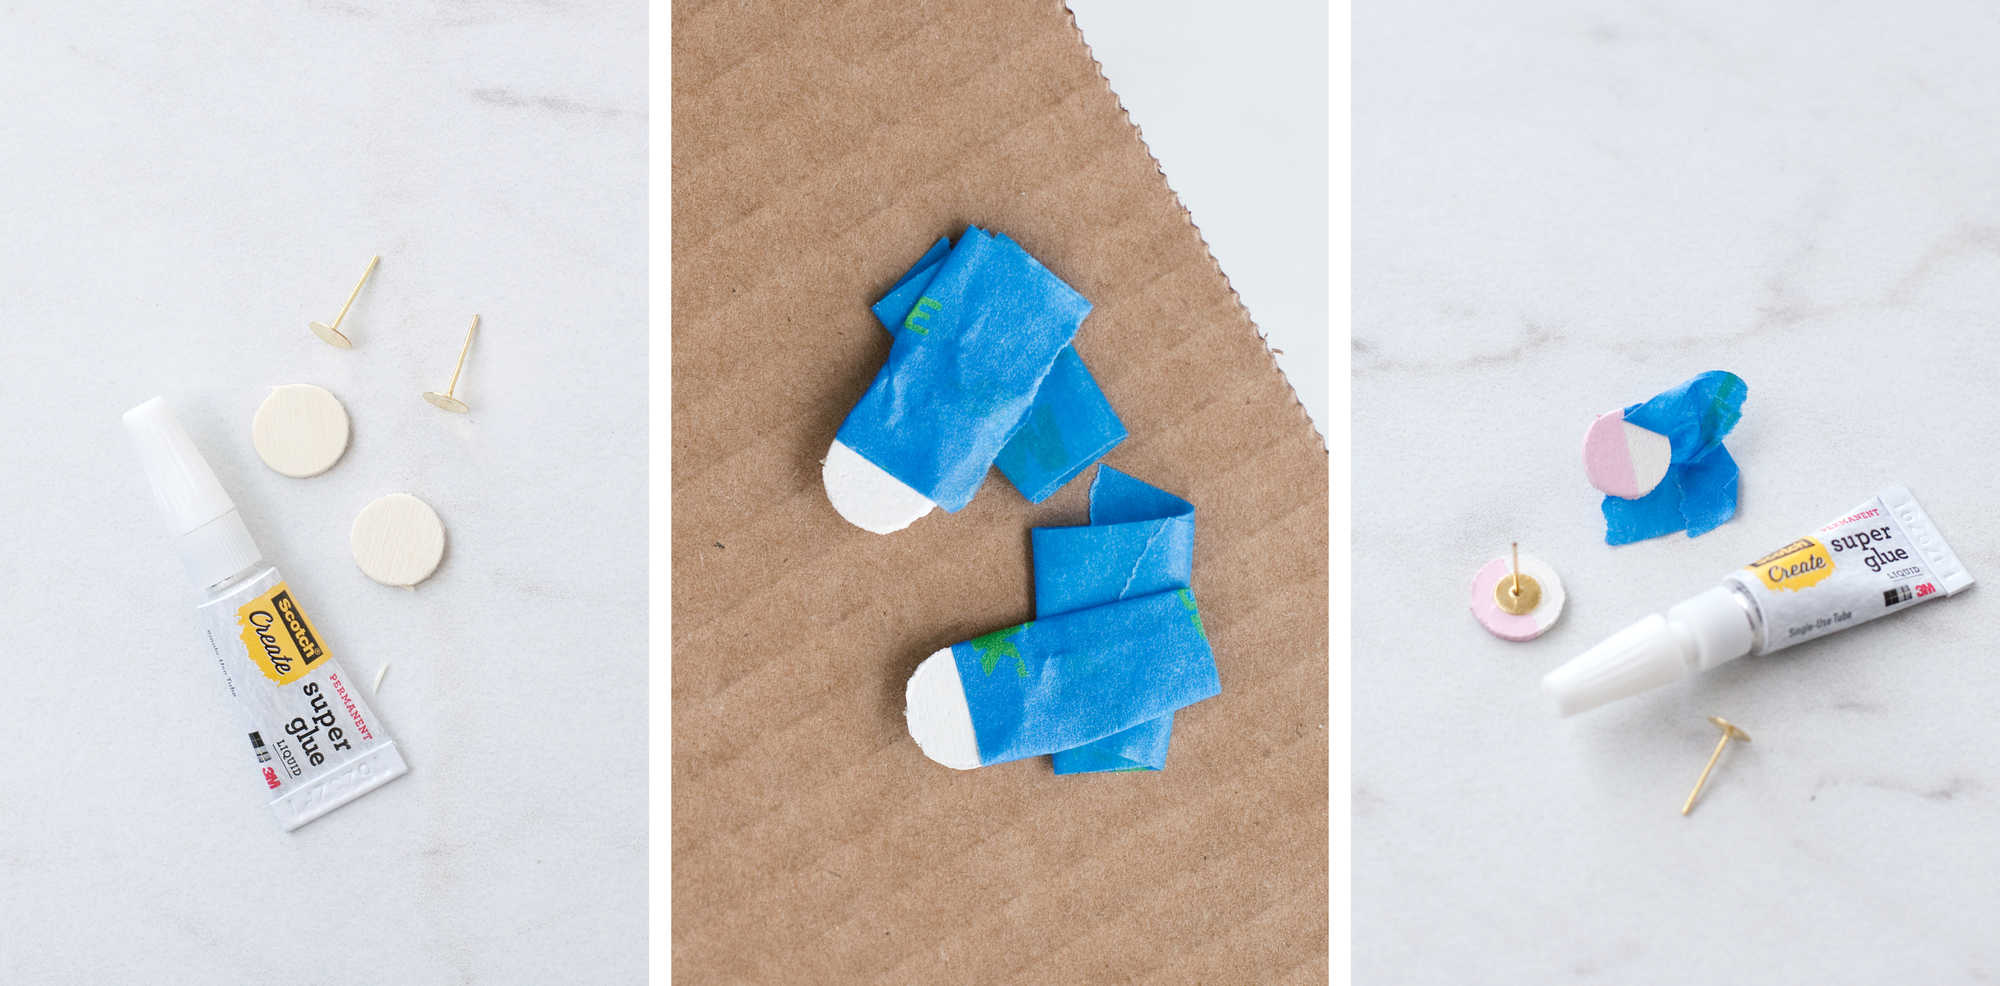 Supplies:
-two small circles (from this pack)
-two earring posts
–super glue
–painter’s tape (not shown)
Step One: Prime and paint the circles, and once dried, tape off half of the circle. Then paint with your darker color.
Step Two: Glue the posts onto the back of your earrings, and voila! You’re finished!
 This project was so simple, I’m already thinking of variations I can try with my leftovers. I think I’ll make a version using wood stain rather than paint! What colors would you use? –Mandi
14 Comments
I love the dangling circle earrings you made. They’re so simple and minimal, yet creates such a glam look!
Charmaine Ng | Architecture & Lifestyle Blog
http://charmainenyw.com
I always avoid danging earrings because they can be so heavy! But these look lightweight and could be dressed up or down. Awesome idea!
These are too cute! I love making my own statement earrings but never would have thought to use wood to make them. I especially love the mod pink and white circle ones and the dangle small circle ones!!!
I would never have thought about making my own earrings! These look super cute though – might have to rummage through my craft drawers! x
Love these! Might have to add something similar (though maybe already painted and drilled) to my Crafts + Cocktails earring/Mother’s Day event in Kansas City! http://thatsfestiveaf.com/mothers-day-kansas-city-crafts-cocktails/
These are so cute and seem pretty easy! Will have to try this out <3
https://www.myblackcloset.com/
How easy they are, and they look amazing!
https://www.makeandmess.com/
SUPER FUN! I’ll give these a try with my daughter 🙂 I have two of the materials handy, the earing posts and wooden circles 🙂
Pinned!
Ursula @ http://kraftmint.com {modern, easy, lovely crafts}
So nice!!!!
I just realized that I find them both yummy and beautiful – always a great combination for my taste on accessories 😀
The earrings look too cool. Almost like candy.
Loved them !!
it is so beautiful love your style !
I know that koocam.com are looking for people who know how to DIY etc…
recommend you to check it out 🙂
Never thought i could be tempted by a DIY to try it .
These earrings are eco-friendly yet pretty. 🙂
I’m seeing Christmas colors!