 Technically it’s a bit of a newer obsession for me as I just started to learn to braid my hair last year (never too late to learn something new, right?), but as the weather gets warmer, the dutch braid (a.k.a inside-out braid) will for sure be one of my summer go-to hairstyles again this year. Once I got the hang of it, I actually found the dutch braid easier to do than a traditional French braid, and it’s the perfect solution for a cute style that can withstand a hot and humid afternoon and look casual or dressy depending on whatever else you decide to wear with it.
 Side note, hair extensions aren’t mandatory at all for this look (I do it without them all the time), but if you have some that you like to use, it will make your braids fuller/longer and it’s pretty easy to hide them in your braid. I part my hair down the side of my head along the path I want the braid to follow and then clip in one of my long tracks down that line. That way you get all that extra hair in your braid and the braid itself goes right over the track so it looks invisible once braided in. Just double check when you are totally done braiding that you don’t see the end of your clips or tracks sticking out the bottom back of your braids. If you do, just unclip the last clip at the end, push it back up into the braid a bit until out of sight, and re-clip it in place. (FYI, this is the brand of extensions that I have, but I consulted with my hairdresser on which color to get and then she toned and dyed them to match my color. I highly recommend asking your hair guru for their thoughts if you want to try out a set of extensions, and they can help you match them to your own hair best).
 OK, so first brush all your hair and remove any tangles. Spray the top of your head with a smoothing spray (or use a smoothing creme) to keep any fly aways from popping up. Separate the front 3″ section of your hair and then separate that section into three equal parts. Take your front section and pass it under the middle section so that the front becomes the middle and the middle becomes the front.
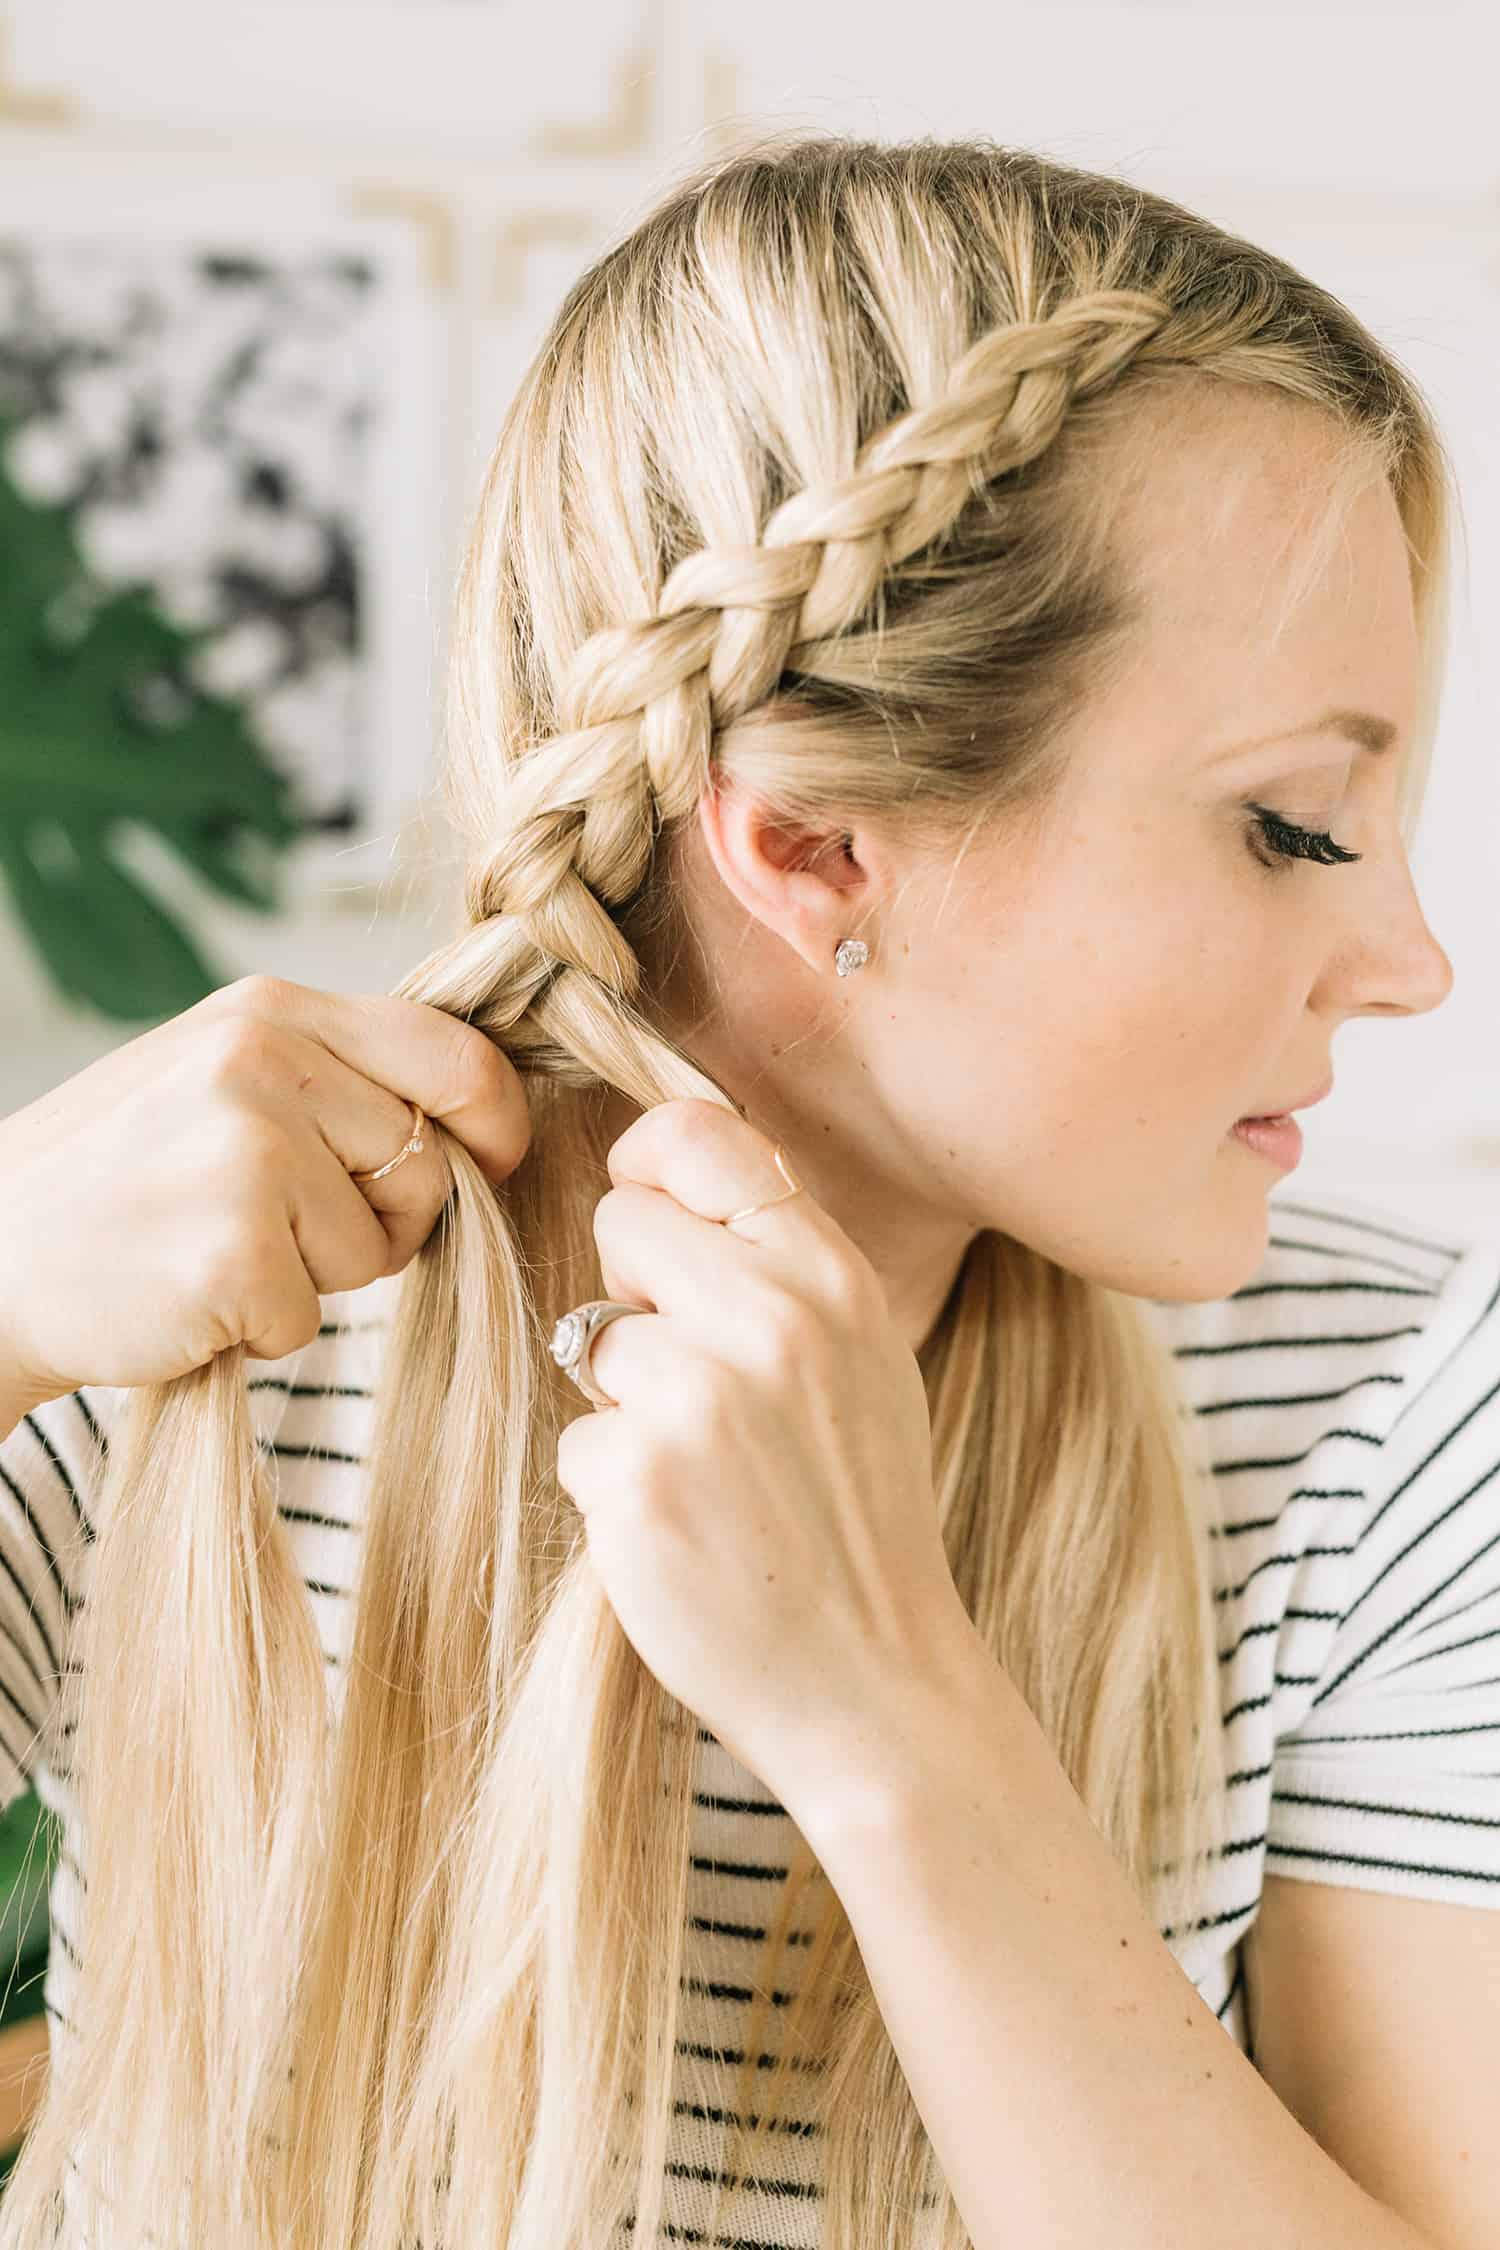
Take your back section and pass that under the middle section so they switch places too. With your thumb, grab a small section of hair near your front section and add the hair into that front section. Pass the front under the middle again. Grab hair near the back section of your hair and add the hair into that back section. Pass the back section under the middle section again. Try your best to keep each section as tight as you can and pull the braid tighter as you move sections around. I’ve noticed that as long as I keep two sections pulled tight, I can let go of the third to readjust or grab more hair and it won’t all fall apart. 
 Repeat process of adding more hair to the front and back sections and passing them under the middle section until you have braided down behind your ear.
  Finish braiding all the way to the bottom of your hair and use a clear hairband to secure. Repeat the braiding process down the other side of your head.
  Slide your clear hairband down about 1″ to give your braid some room to move and sprinkle some plumping powder onto the braids from bottom to top. Gently pull on each braided section to pull out each section and make the braid look thicker. Give a quick spray of hairspray where needed, and you’re good to go!
 I love that these braids can withstand the Nashville humidity that comes with the height of summer and adding some smoothing creme all the way down the hair will also help keep the braids tucked in throughout the day. The other thing I like about braids is that they give you a nice wave to your hair when you take them out, so that can also be a really pretty way to wear it once you’re done with braids for the day. If you don’t get the hang of dutch braids the first time, it’s OK! It’s basically the opposite of how you do a French braid. So if your fingers are used to that, it takes a bit of concentration at first. I had to do several practice rounds in the beginning before it started to look right, but I’m glad I hung in there and I think you will be too! xo. Laura
22 Comments
Such a diva-like look! And don’t worry, I still can’t master the art of braiding… haha!
Charmaine Ng | Architecture & Lifestyle Blog
http://charmainenyw.com
Hi 🙂
I’ve always known those braids as “dutch braids” or “dutch girl braids” and used the term “boxer braids” for two braids that are relatively close to the parting and are way more secure, since they are meant to hold the hair secure while doing sports.
I love the info about how to incorporate extensions! So so helpful!!
Thanks for that 🙂
Best wishes from Germany 🙂
I was thinking the same thing too! I grew up with those braids and called them dutch braids, and boxer braids are way closer to the part! 🙂
Exactly!
This look is so perfect for everything from work to working out. Now that it’s suddenly 90 degrees here in DC it’s awesome for keeping my hair out of my face! Might even add a ribbon to it if I’m feeling festive..
Such a beautiful braid! Too bad I’m suck at braiding 🙁
https://www.myblackcloset.com/
Was going to say the same thing!
Wanted to come back and hope that my previous comment didn’t sound accusatory. I know that ABM produces great content and puts effort into their quality so the mention of ‘boxer braids’ was surprising. This is a great cornrow tutorial for beginners
They look so cool, now I want long hair again!
https://www.makeandmess.com/
I think that hair style is the only thing that makes me miss my long hair… so pretty!! xo
Melodie
http://www.happymelodie.com
Do you catually manage to do this all by your self without need of extra hands to hold strands of hair ??!
+ I have curly hair which makes it even more difficult to do. But this hair style is my dream !!
Very fierce look, I really like it!
LOVING these braids!!
Kisses,
Sarah
EverydayStarlet
These look ace! Nice work.
God the Dutch must be spinning with anger that other cultures have jumped on their bandwagon and adopted their Dutch Braid….
Such a great and easy look. I didn’t get the impression that these gals were trying to make any kind of hateful or political statement or even acting in ignorance. New mommies need hairstyles that will allow them to do what they need to do. GummerGal, you look beautiful!!
Hi everyone!
As you know, Laura is on maternity leave and is not checking in on comments, so I am here to respond on her behalf. I made the decision to change her post title to “dutch” instead of “boxer” braids. It is a change that I think better reflects the purpose behind her tutorial, which was simply to share a hairstyle that many of you have asked about when she wore it in photos. 🙂
As always, we are open to constructive criticism and we have and WILL always be open from learning from our readers. We especially appreciate those of you who voice concerns and criticisms without name-calling or jumping to conclusions.
Thank you so much for reading. We are doing our best. We always have more to learn and I hope you can see that that is very important to us.
Elsie
I love dutch braids but have yet to master them on myself! Maybe one day!
Paige
http:///thehappyfammily.com
Thanks for responding accordingly! 🙂
You’re so beautiful. Not meant to be creepy or anything, just had to say. I wish you all the best with your baby. 🙂
I’ve been trying to master these for ages, I’ve got french braids down, but need to work on dutch! they look so pretty.
http://www.libertylife.me
Every time I try to do a dutch braid, it ends up being a french braid! I will try the lovely new mommy’s tutorial and hopefully I will be able to finally get it.
https://www.youtube.com/watch?v=VUaKCj5G8uk&t=131s Shows how to do it!