 If you’ve ever had the privilege of having or using a built in closet system to organize your clothes, then you already know how awesome they are.
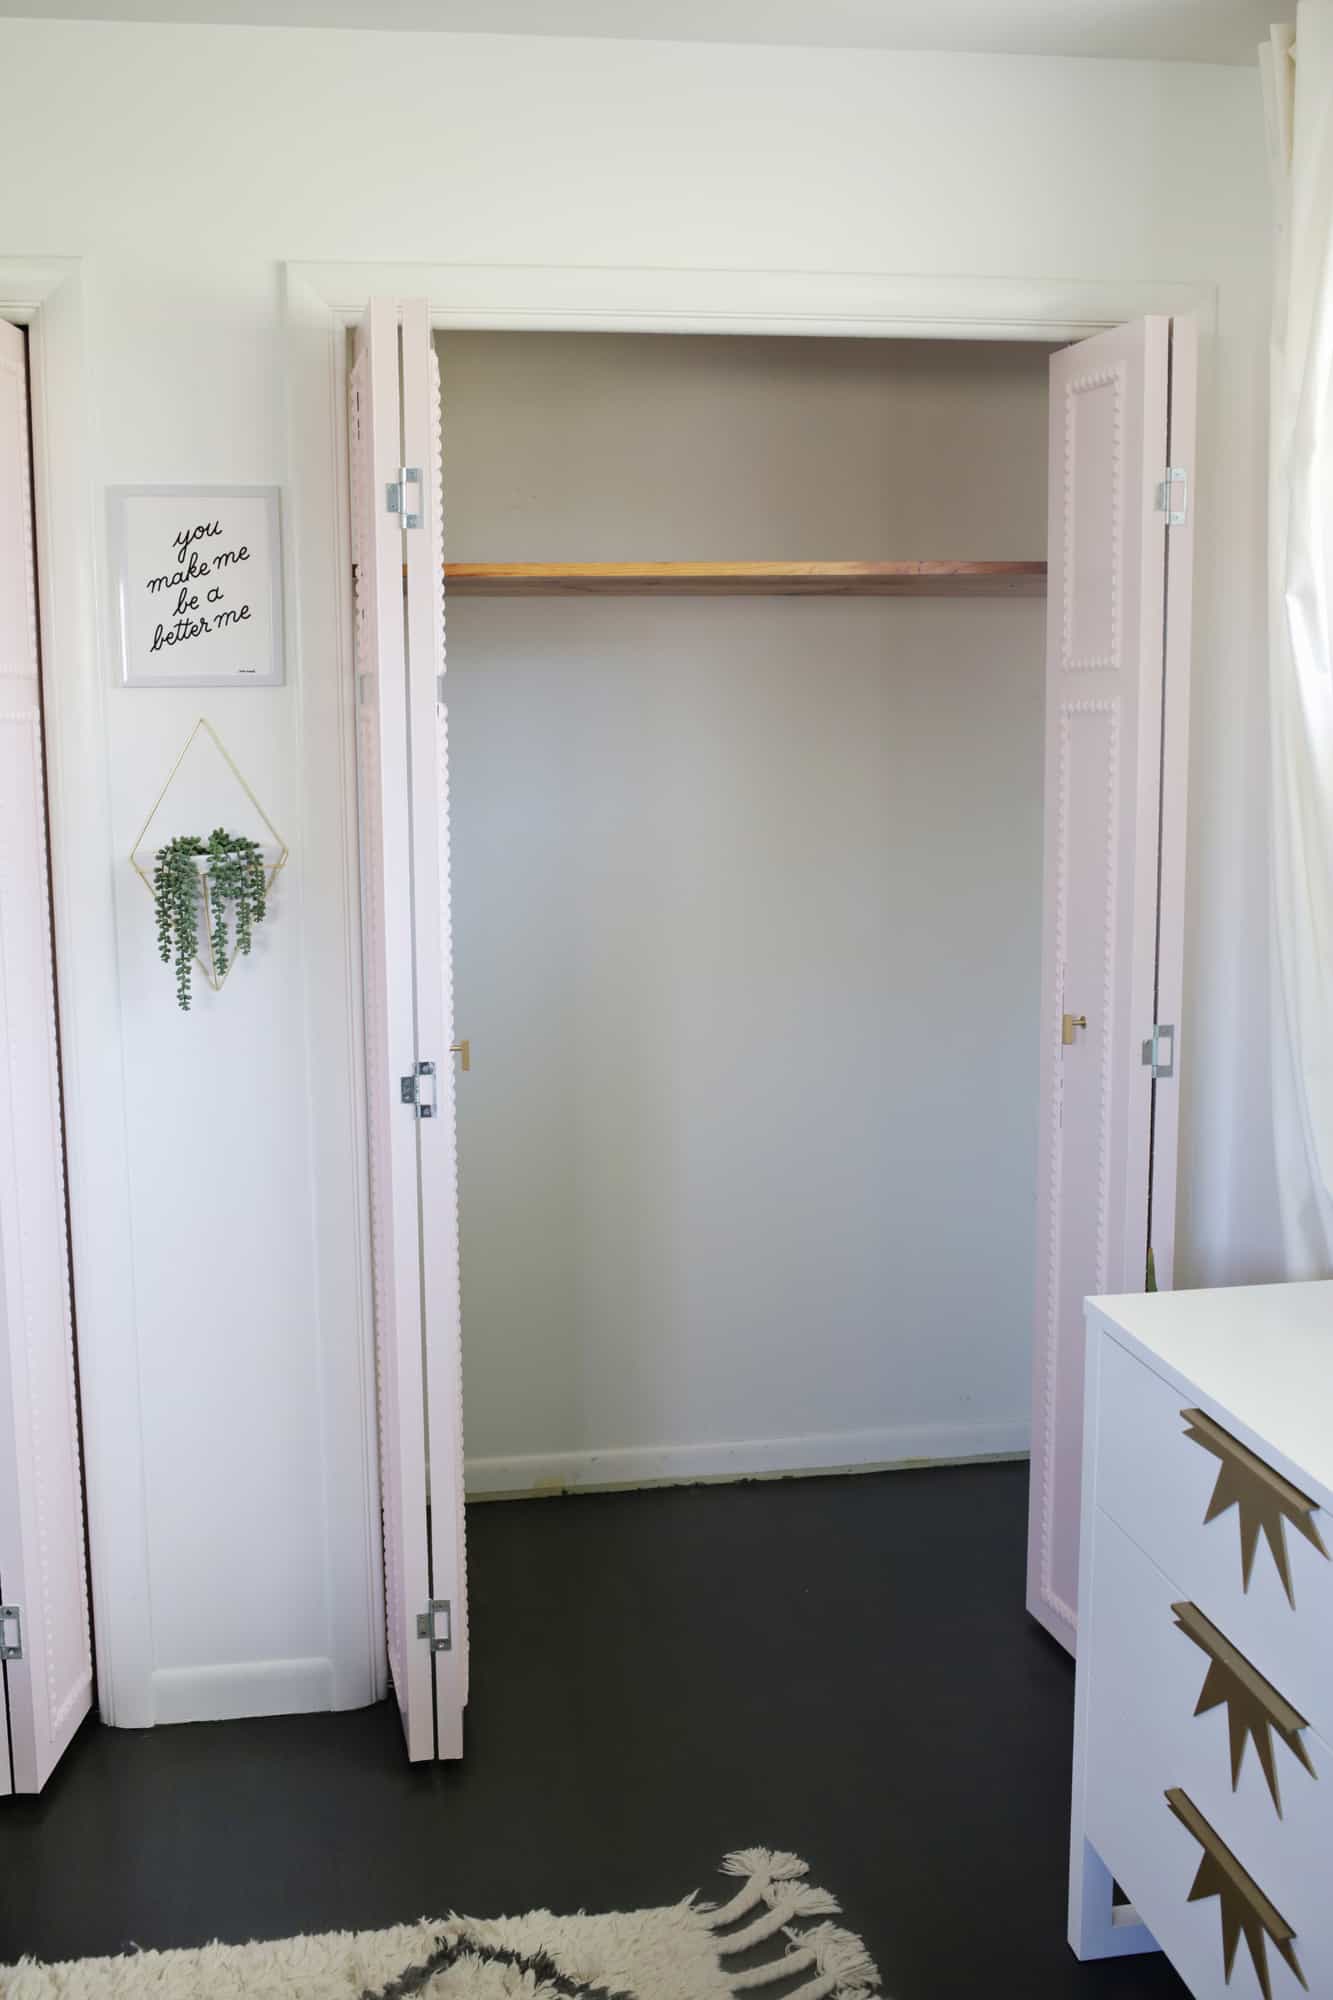
There’s something about having the shelves be a part of the actual closet that makes the whole setup look so much more legit and organized. I am always trying to organize different areas of my house, but it’s been a while (like, a reaaaalllly long time) since I organized my closet. While we have been in our Nashville house long enough to redo our bedroom and do a makeover almost four years later, I still never really got around to creating a closet system that I loved and it felt like it was finally time to tackle that task!
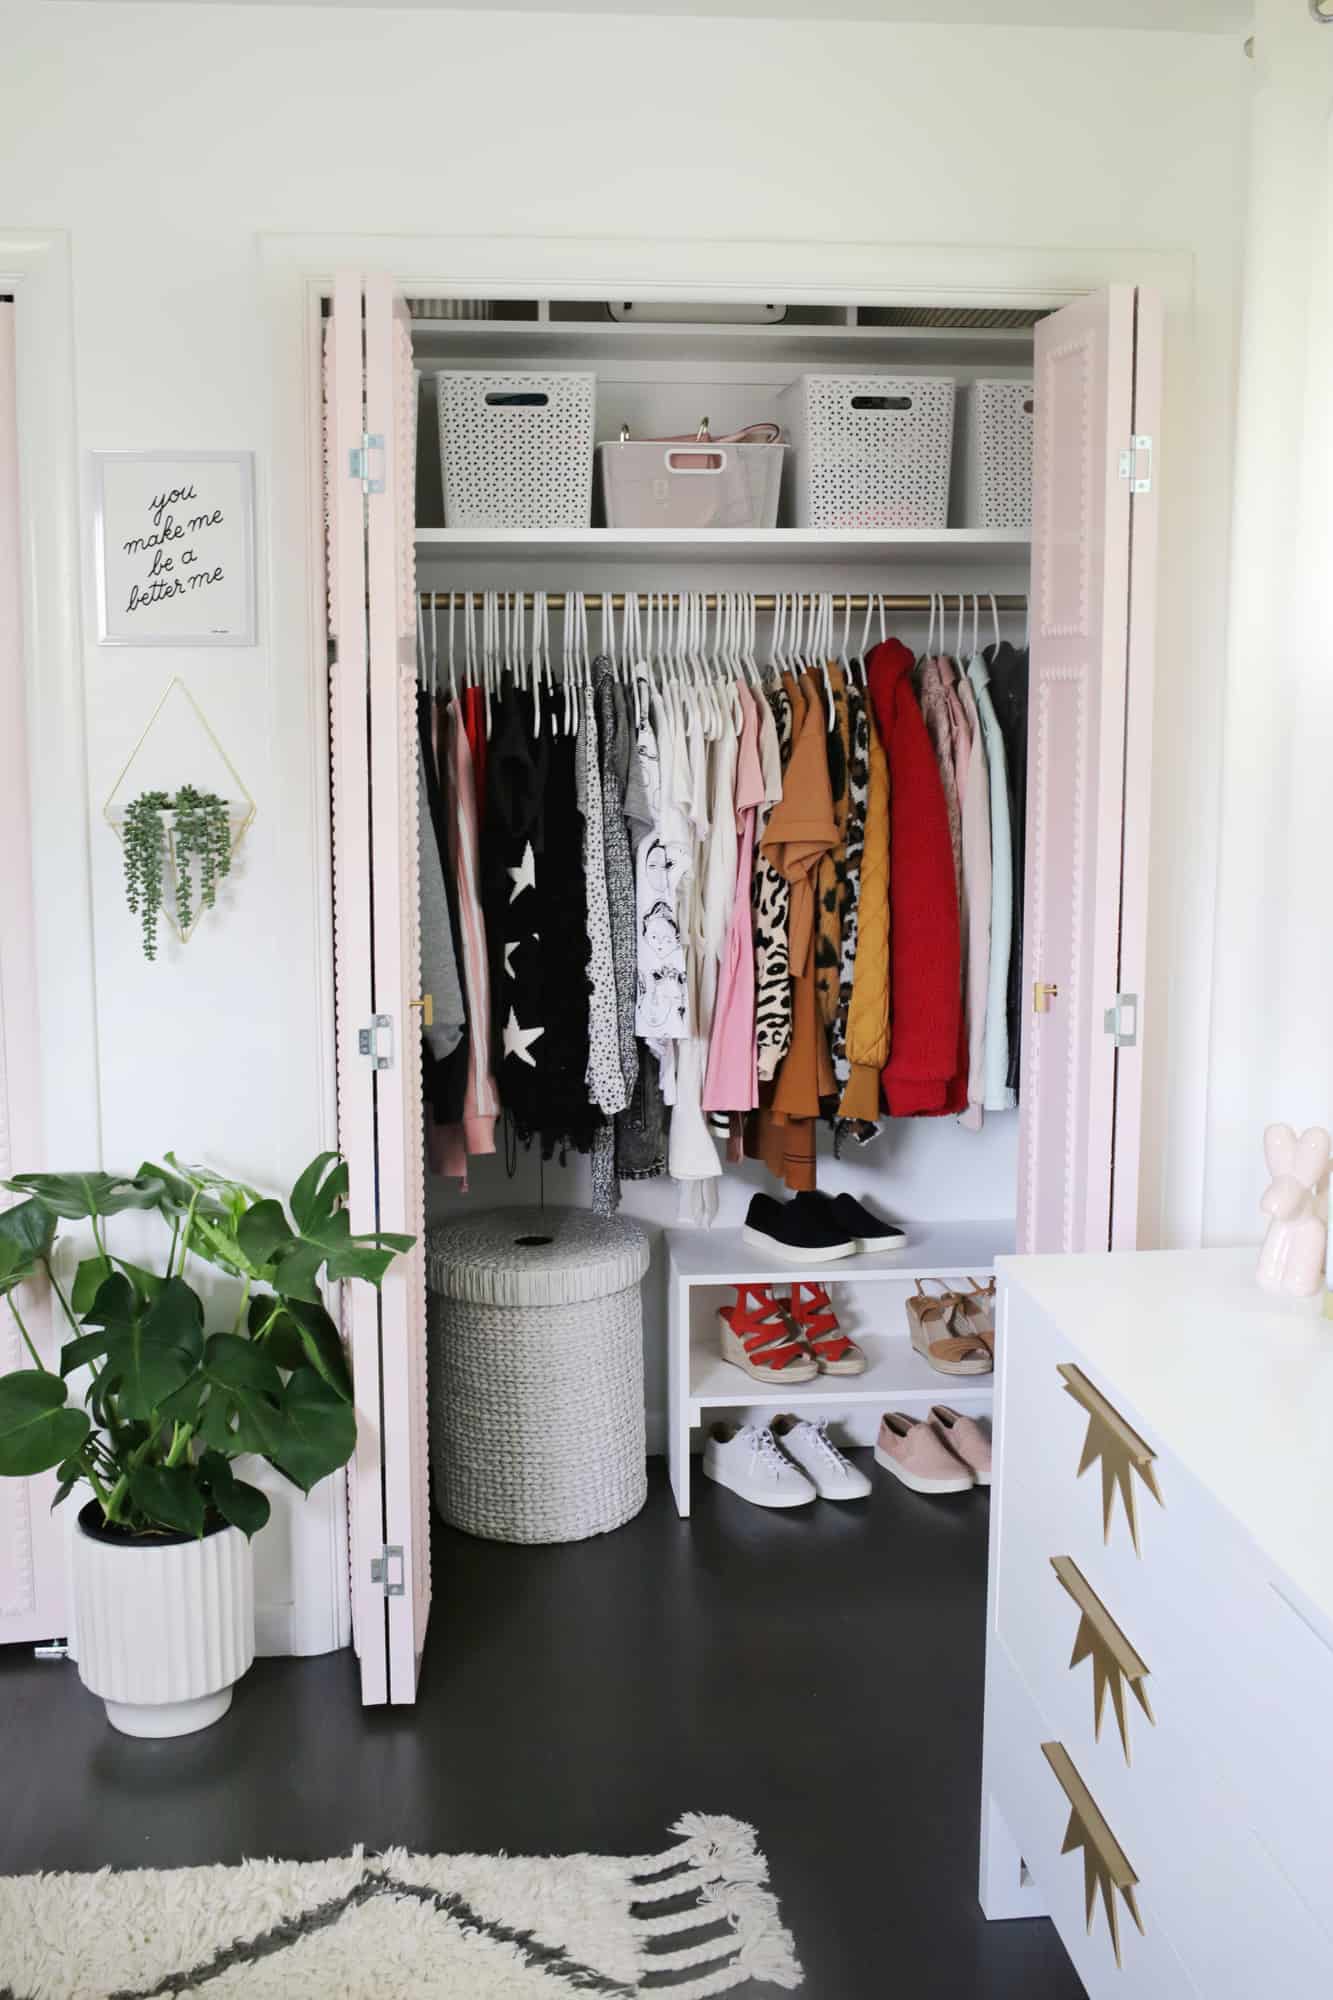
For this organization, we are partnering with Sofft Shoes. They are perfect to work with for a closet redo because when paring down your closet to consolidate pieces it’s a good idea to choose the ones that are the most versatile to dress up or down and to pick brands that are great quality as well. The shoes I have in the closet are The Somers, (black pair, rose pair and white that tie) The Solani, and the red Shandy’s. Through 5/2/19 you can use the code ‘ABM15‘ for 15% off your purchase, if you needed a reason for a cute new pair of shoes. 🙂
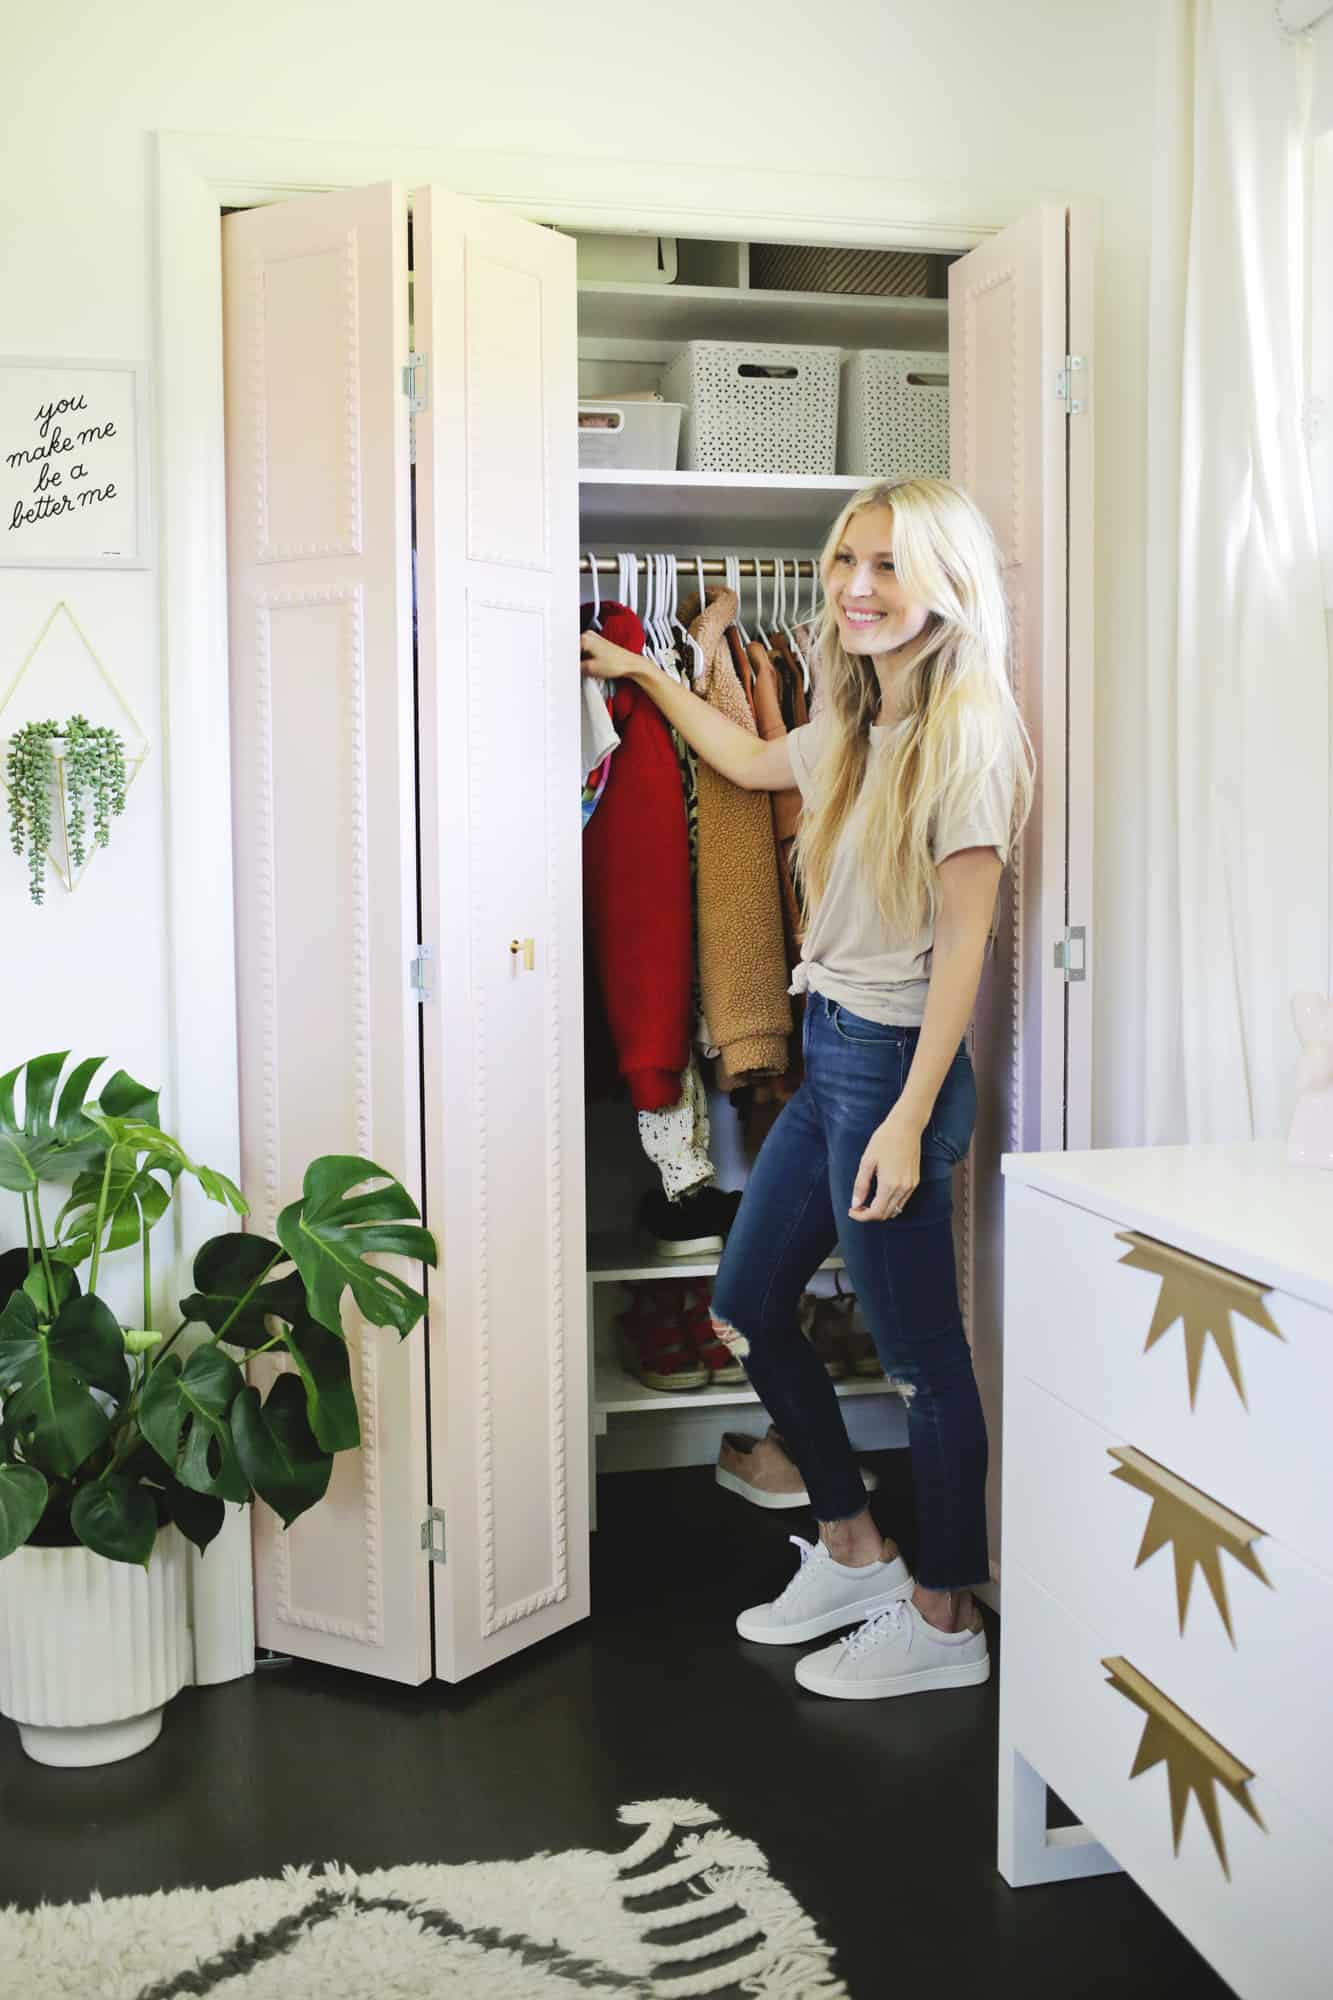
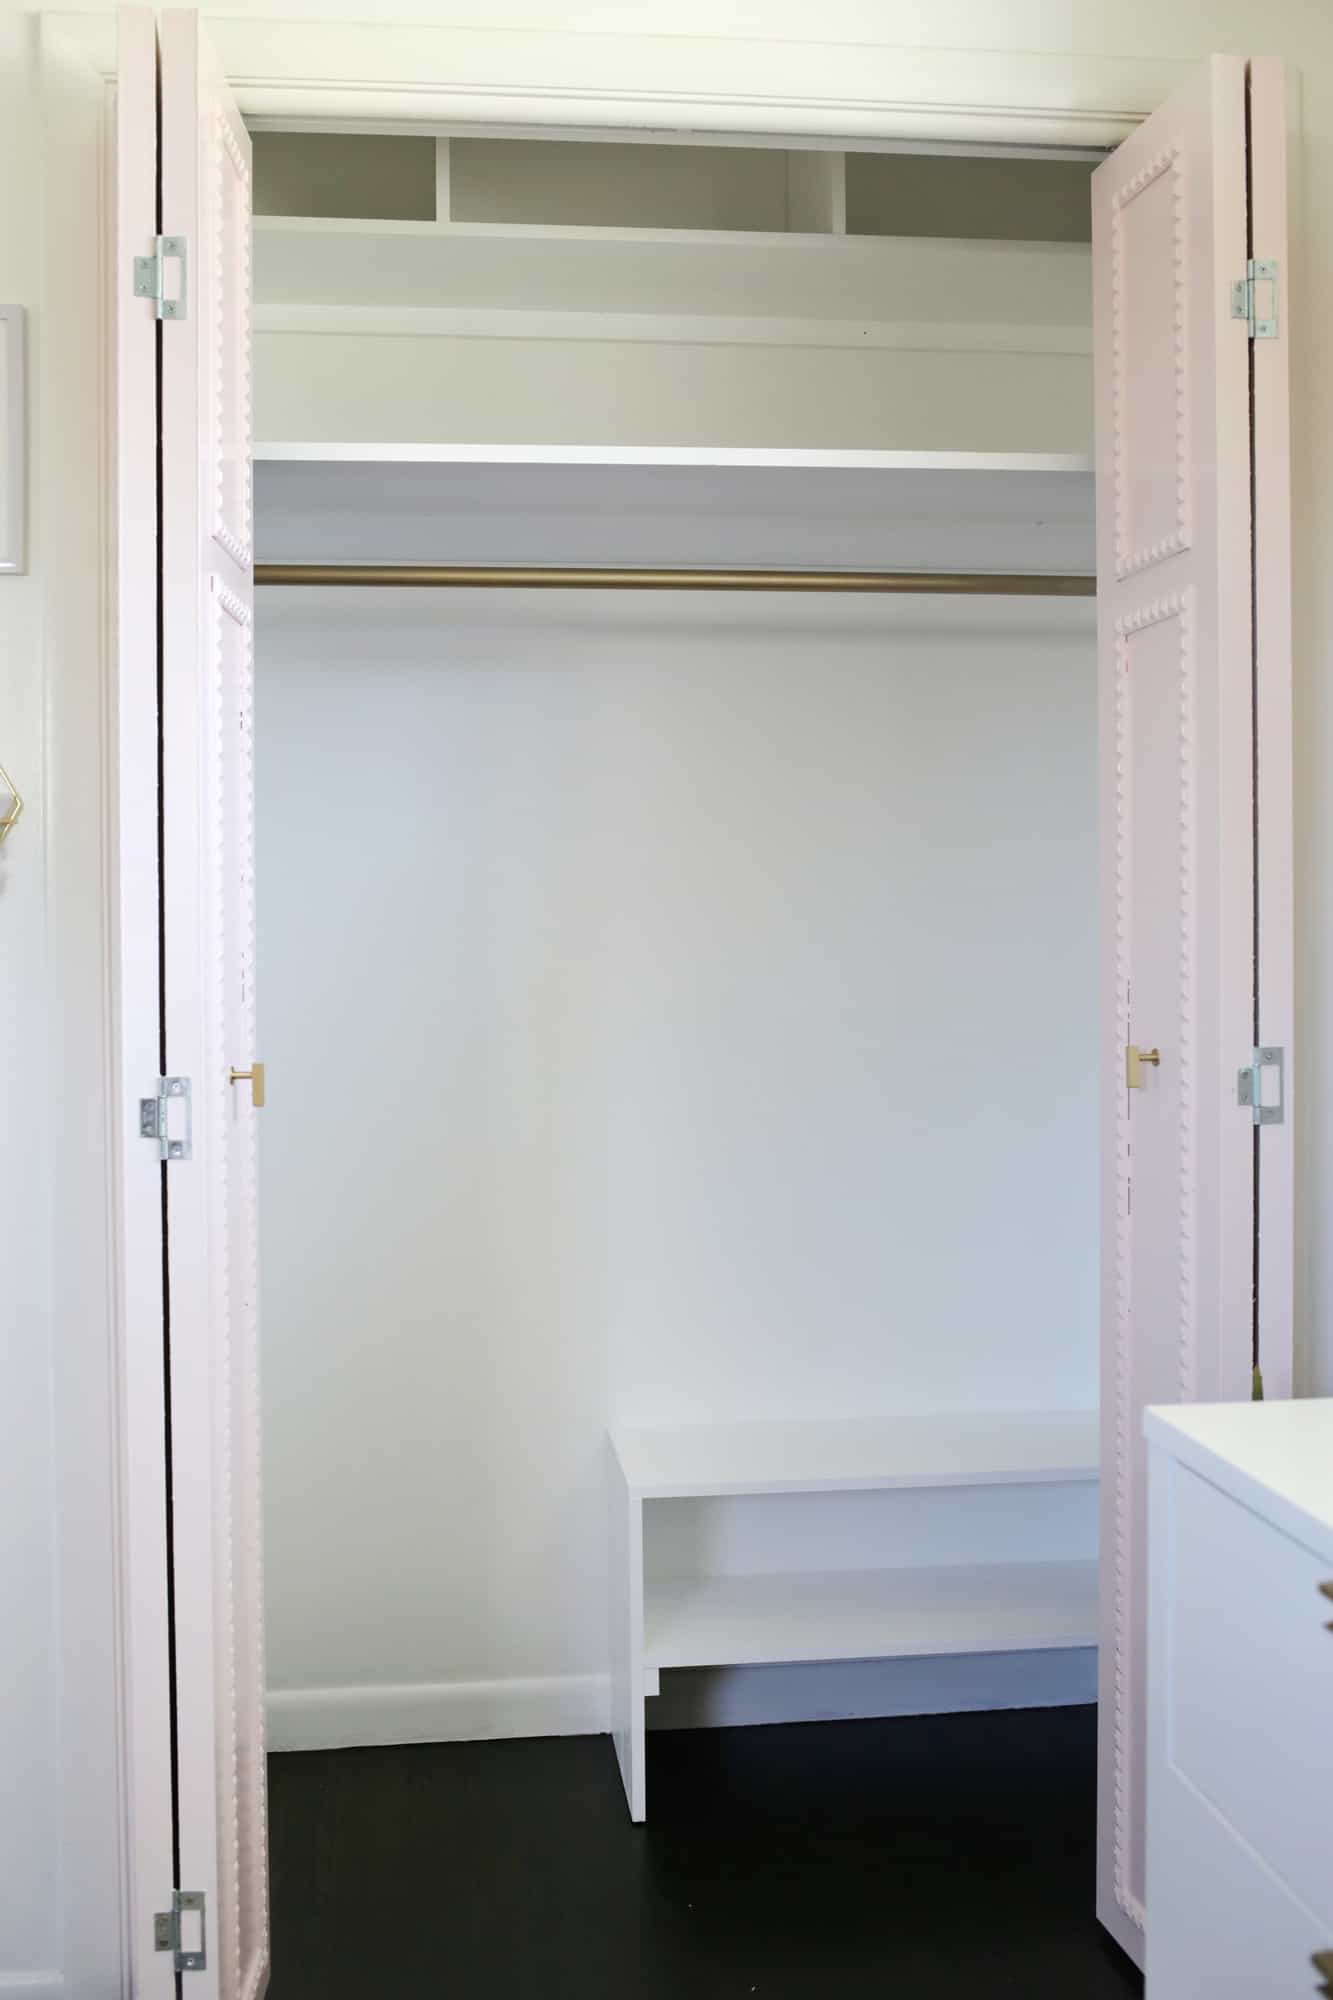
 In my closet, I had been using temporary items (like foldable shoe racks and racks that clip onto existing closet bars), but they were pretty unstable and would move around a lot and collapse on their own, etc. So I thought a built-in system with some added shelves at the top would be just perfect—I’ll show you what we did!
 Supplies:
-1 1/2″ x 3/4″ x 6′ support boards
-12″ x 3/4″ x 6′ shelf boards
–miter saw, circular saw or jig saw
-drill
-level
–stud finder
-screws
–drywall anchors
-semi-gloss paint, paint brushes, and roller
-metal spray paint
–latex caulk
-closet rod and brackets (the rods come in different sizes or you can cut with a hacksaw to length needed)
First, you’ll want to think about how you want to use your closet space and then develop a building plan from there. Do you mostly hang items or do you want shelves? How tall will your shelves be (think about what you want to put in them)? How deep do you want them to be? Do you want large open areas of shelving or smaller blocks of shelving? Once you have an idea of what you want, it’s a good idea to draw out a little diagram of your closet (no drawing skills required, it’s just to mark out some dimensions on paper) and make notes of where you want shelves and then mark how tall/deep/wide you want all those areas as well so you have a little blueprint to work off of.
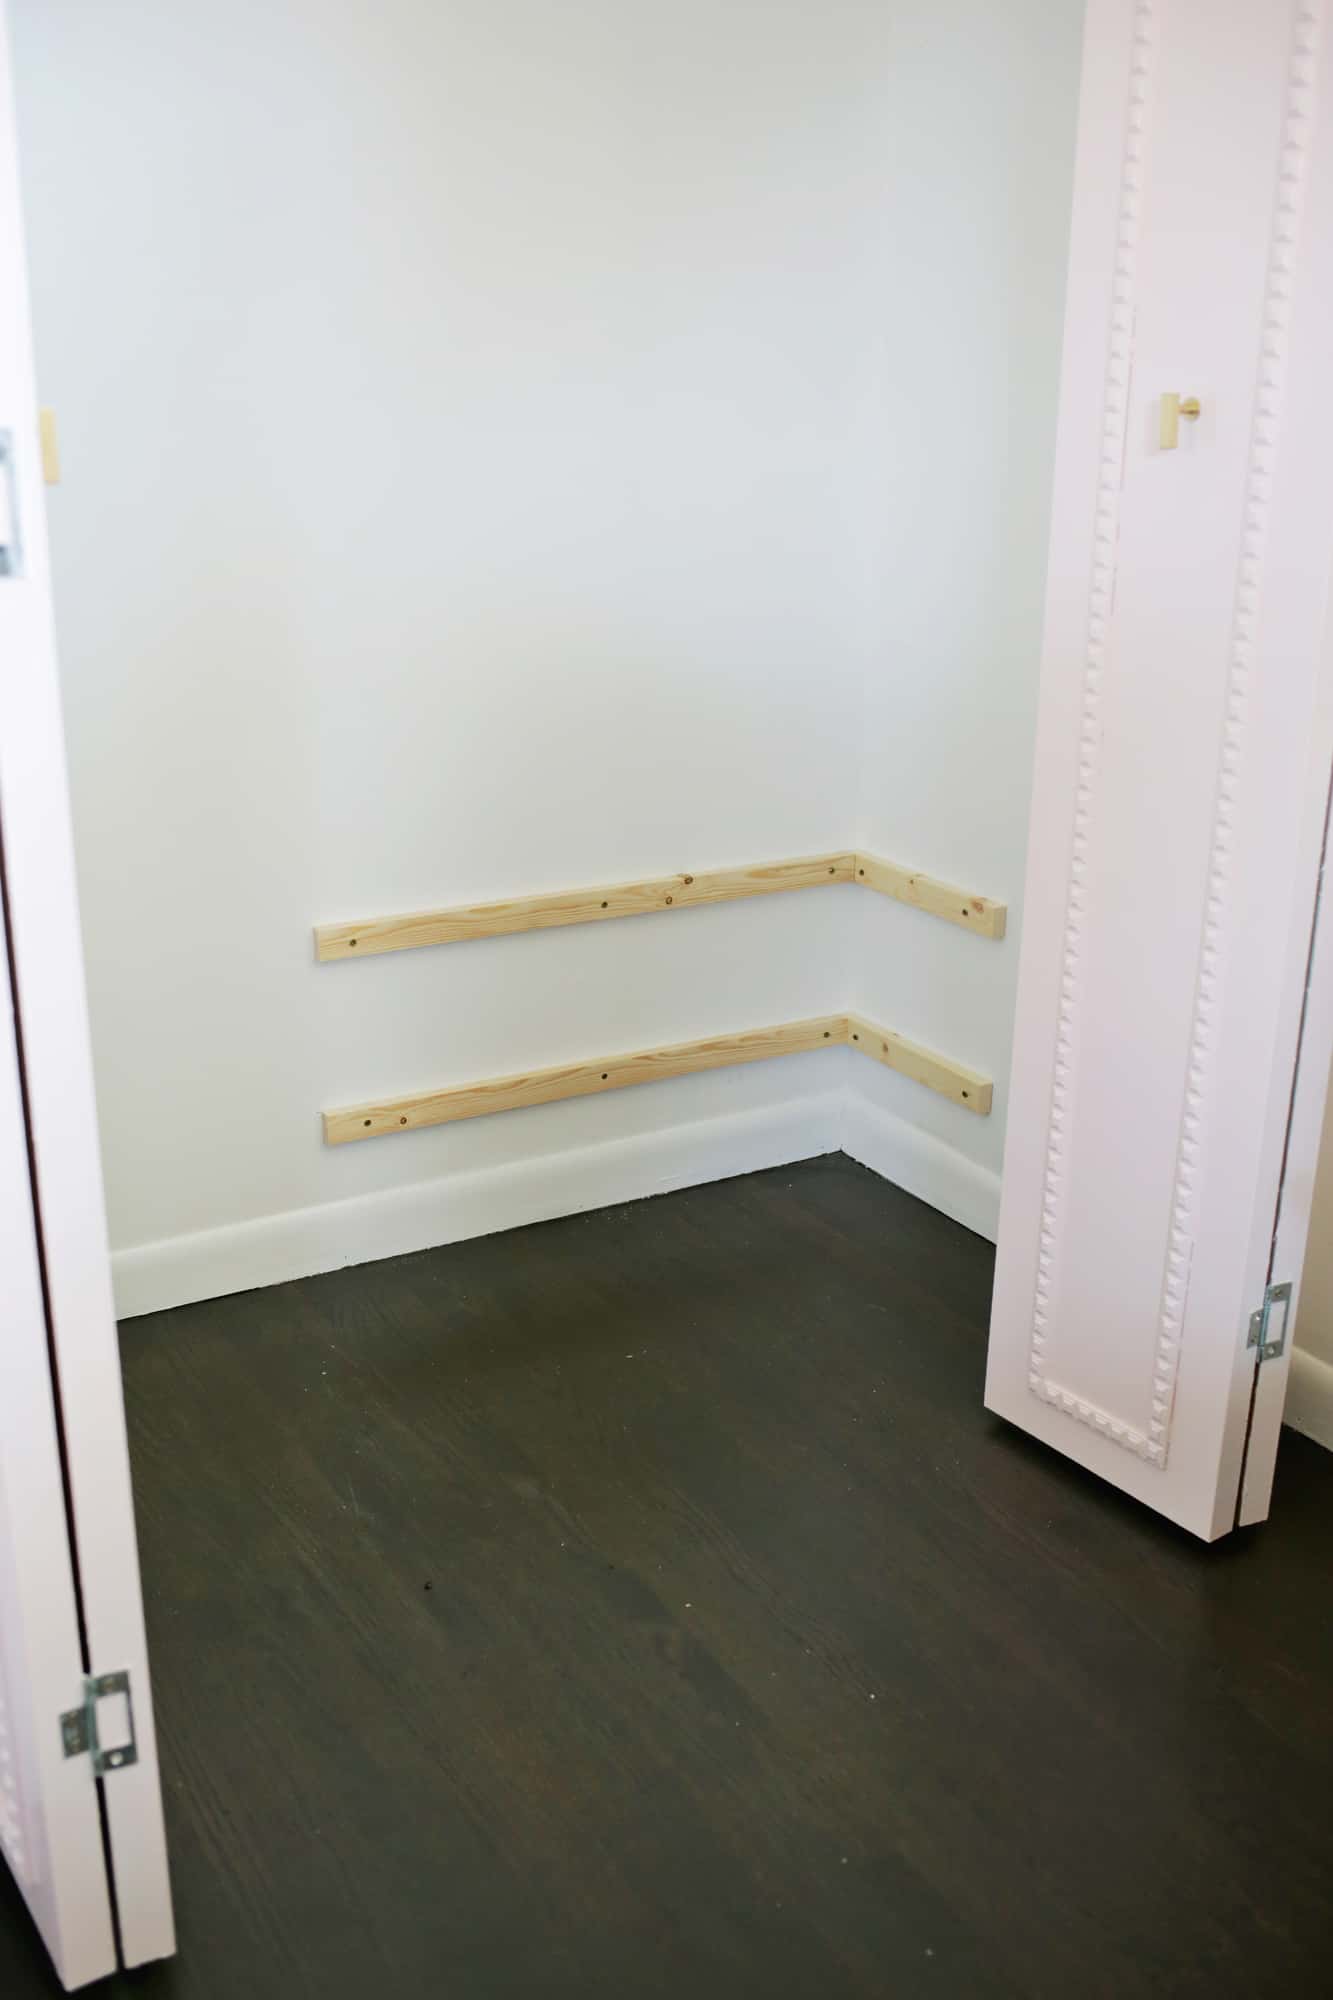
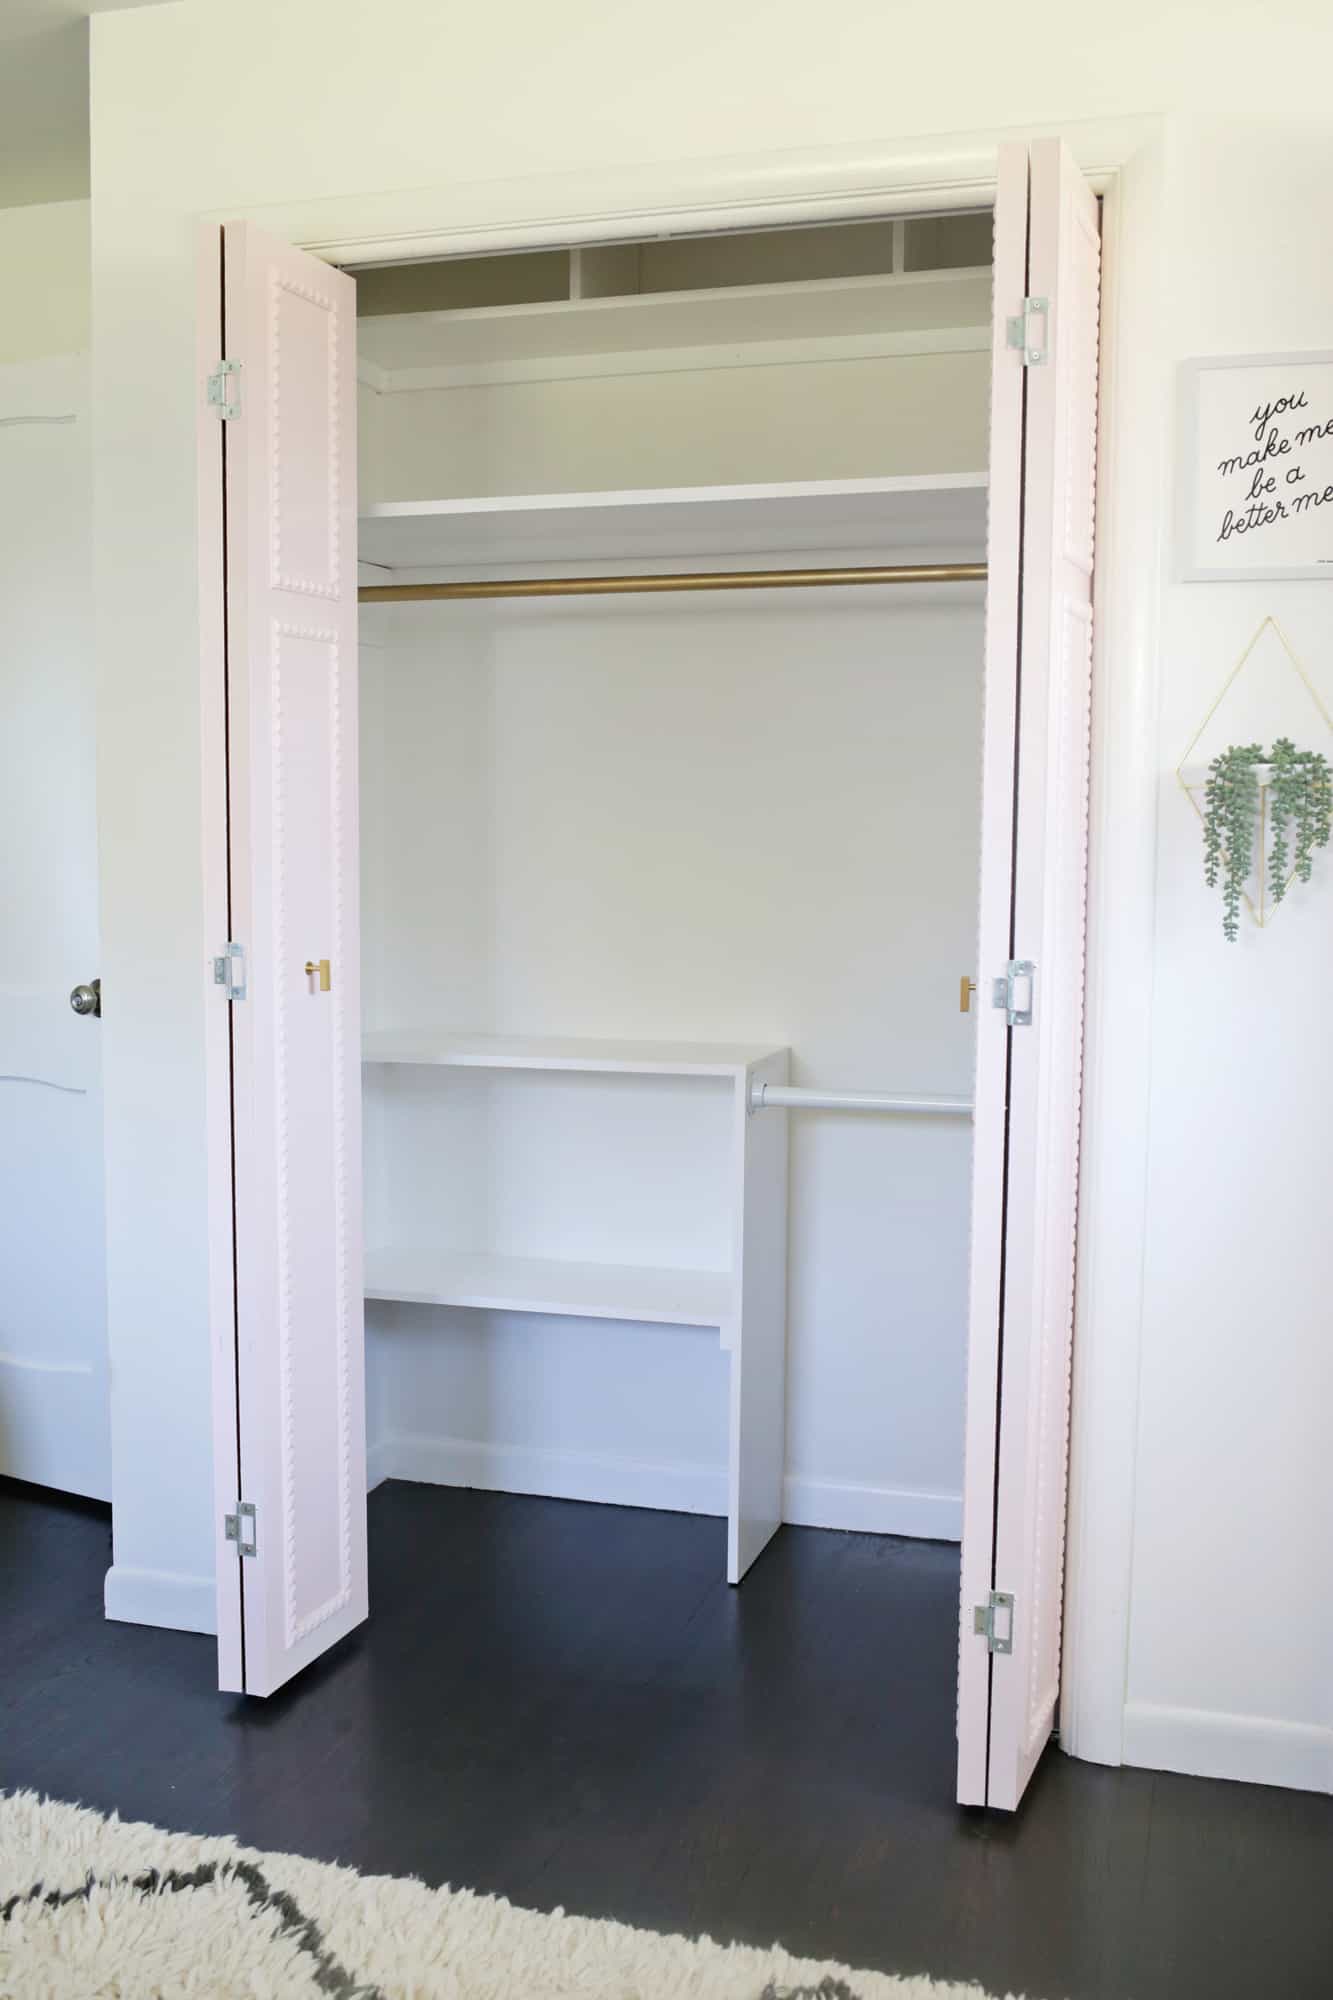
 OK, first step are the shelves! Once you decide where your shelves are going to go, you’ll want to measure the space and cut your 1 1/2″ x 3/4″ x 6′ support boards into the appropriate size pieces for your shelves (you’ll want your 3-sided band of support boards to be the same as your length and width of your shelf that will sit on top of them). Use a stud finder and mark where all of the studs are on the wall for your shelves will be and screw the support pieces of wood onto the wall while using a level and also making sure each screw is screwed into a stud. If you find a spot where there isn’t a stud (which will almost certainly happen), use a drywall anchor in that spot when needed. Tip: It’s best to pre-drill your holes on the support boards first, especially near the ends of the boards because it tends to want to split since its only 1 1/2″ wide. You can see we added the support boards to create a double shelf on the bottom right side of the closet for shoes, and some around the top to create a high shelf for items I don’t use very often.

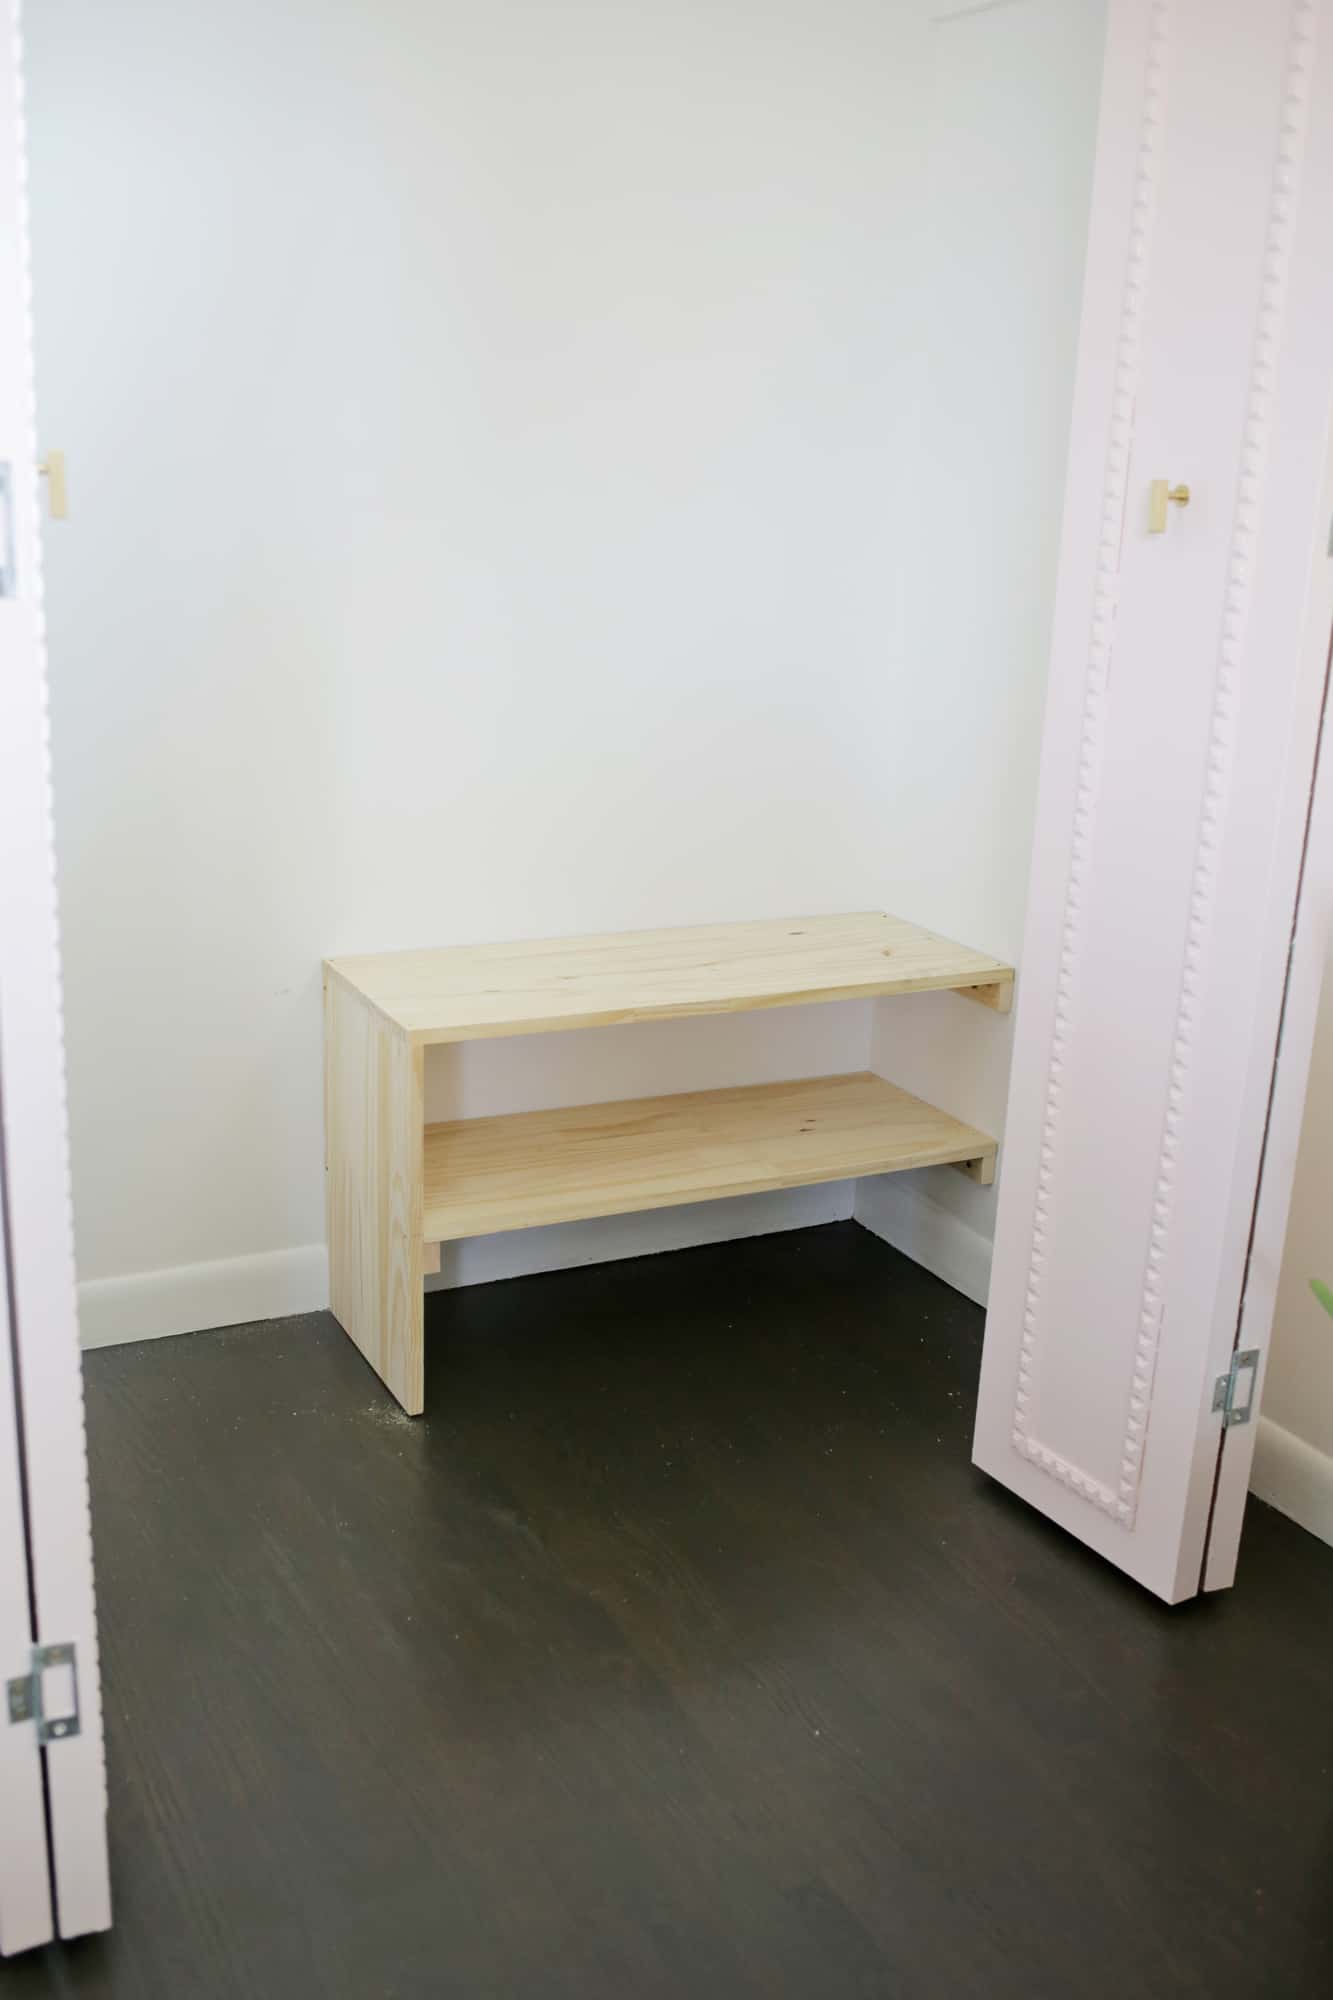 Once you have all of your support boards installed, you can then cut your 12″ x 3/4″ x 6′ shelf boards and simply lay them onto the support boards to create your sides, top, or middle shelf boards as needed. Notice in first photo above we also added a support board onto the vertical side board so that the shelf would have a board to sit on on the left side as well as the ones that are screwed into the wall. Next, to attach your middle shelf and top board to the smaller support boards, put 4 screws through the ends of each shelf board by screwing through the top of the shelf and into the support boards underneath (make sure to pre-drill your holes first to avoid splitting of the wood). You can also leave any middle shelves floating (in other words, don’t attach them) in case you want to be able to remove the shelves easily, and you can even add lot of different levels of support boards so you can adjust the shelves’ height as desired.
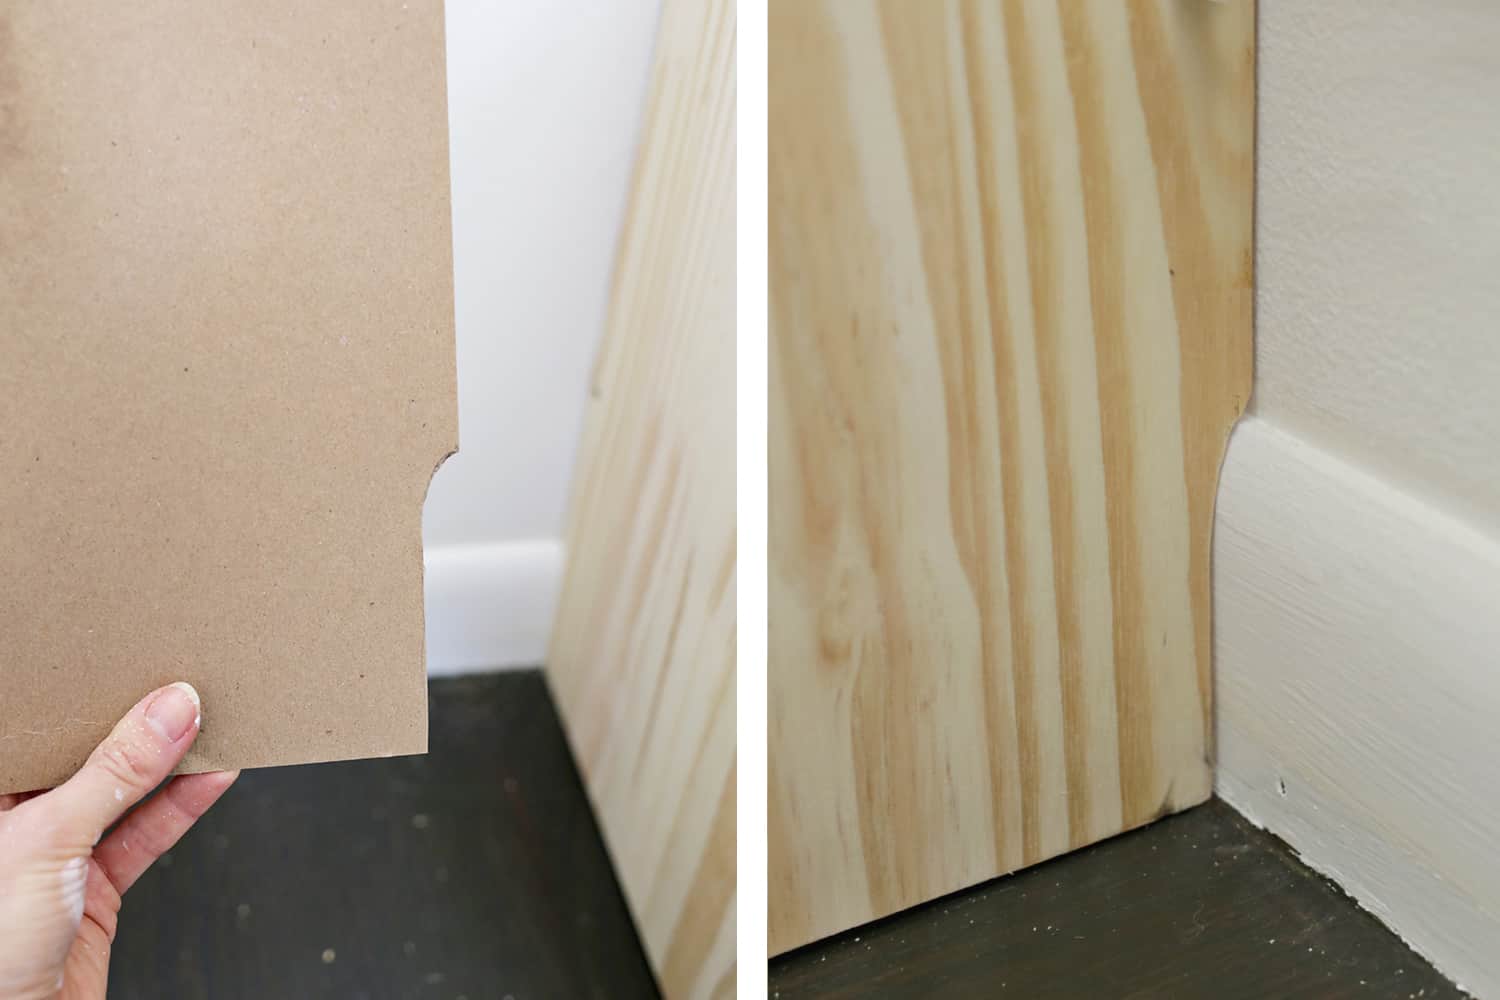
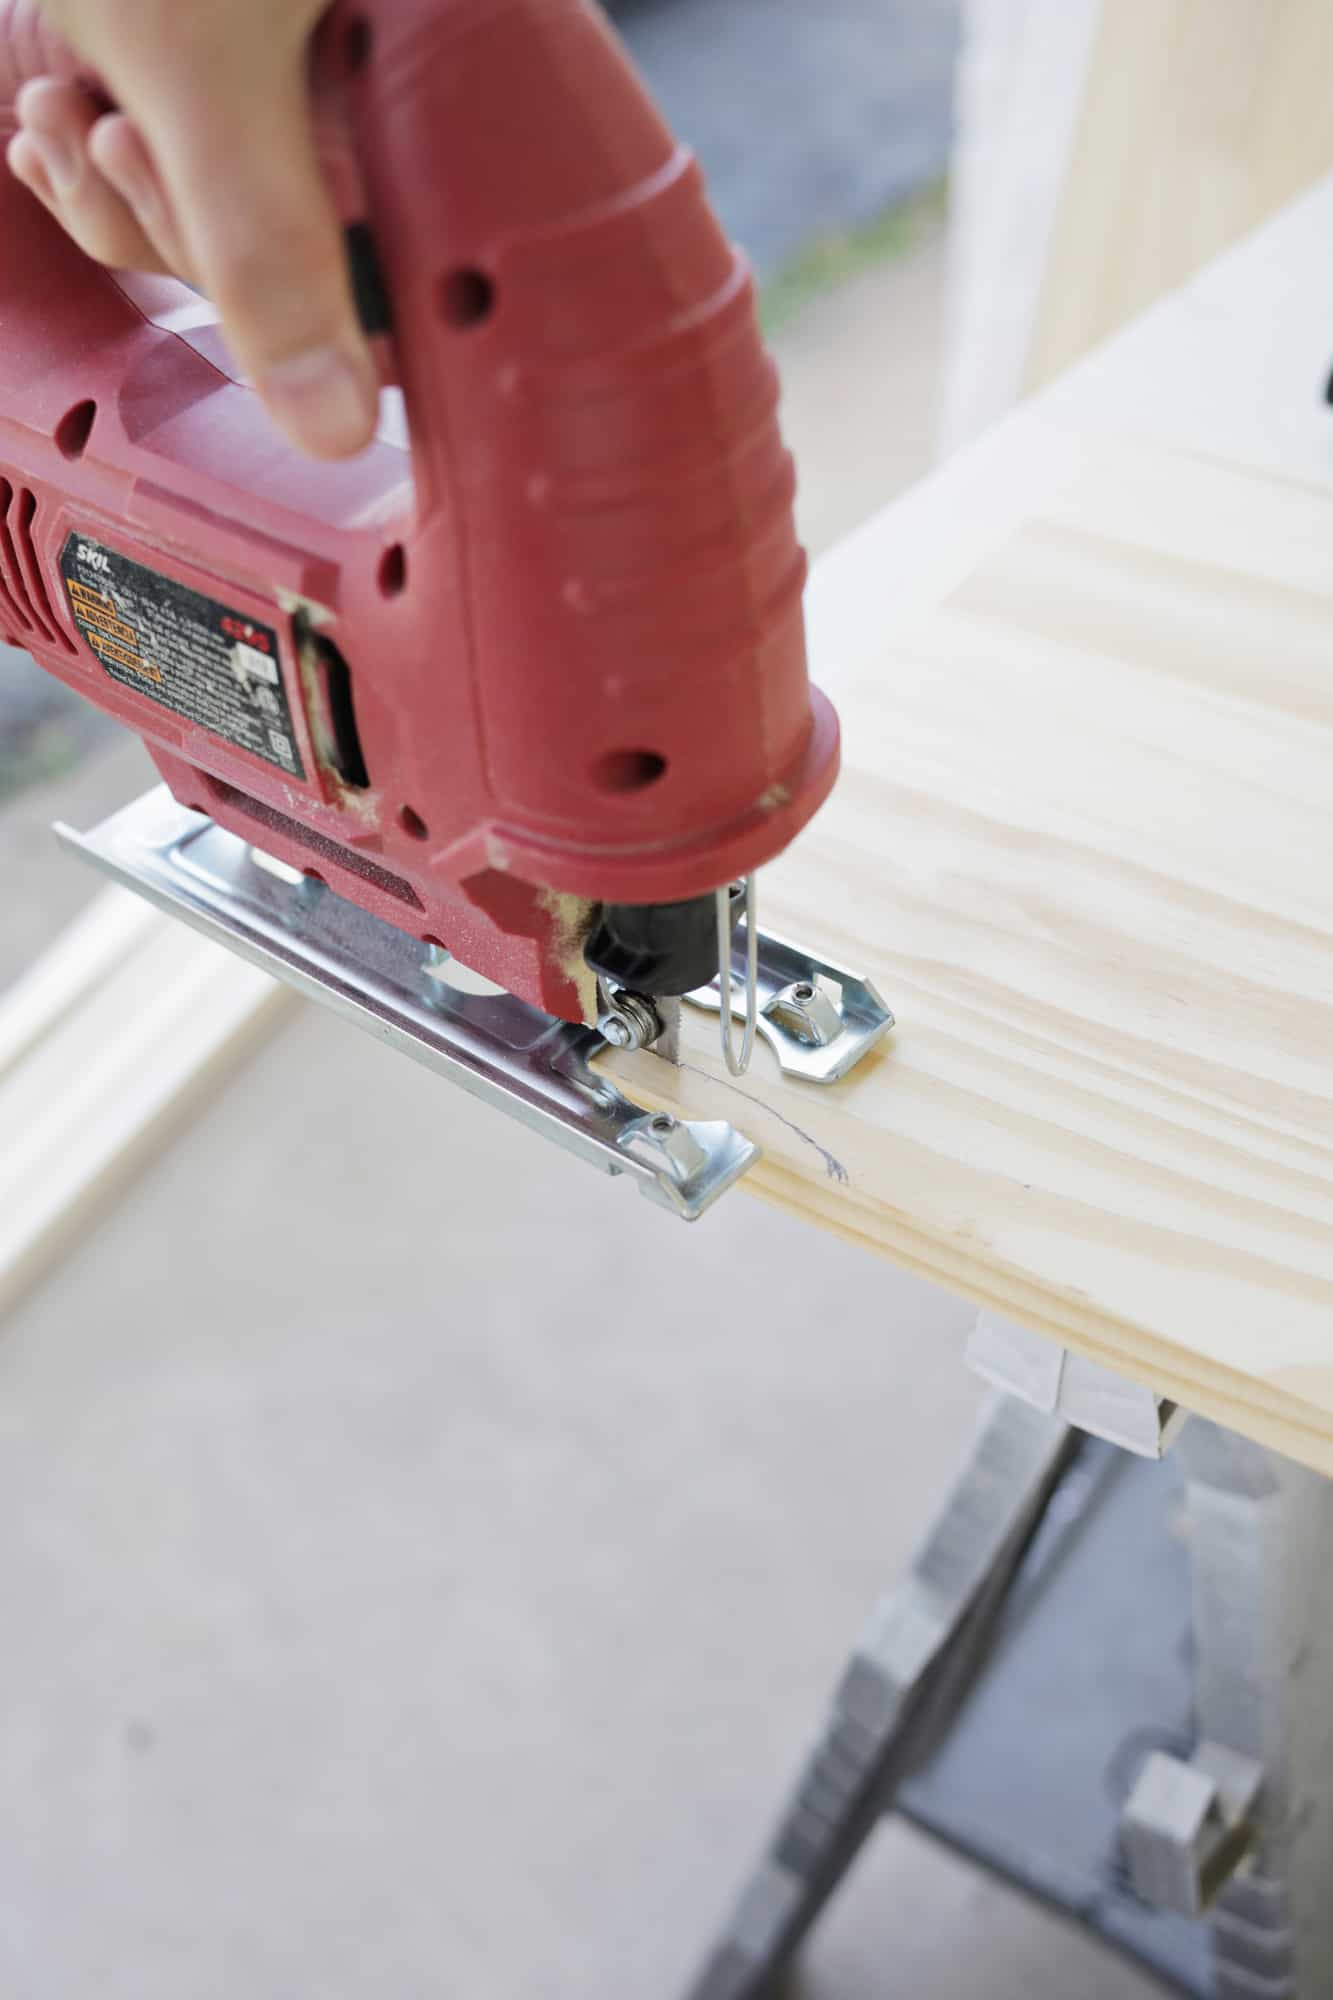 Now, one more note about floor shelves: For a side board that is sitting flush with the floor and the wall (like the board we have on the left side of that floor shelf above) you’ll either have to skillfully remove the baseboard in your closet, cut out sections to fit around where the shelf boards come in contact with the wall, and put the baseboard back in place, OR, you can cheat a little and just use a jigsaw to cut out a baseboard-shaped notch so it will sit flush against the curve of the floor/baseboard/wall all at once. You can just eyeball this curve with a pencil if you don’t feel like you need it to be too perfect, or you can use a piece of paper or cardboard as a template and keep cutting and trying it against the wall until you get the right curve, which you can then trace onto the bottom of your board to cut out. You can also use something like this mind-blowing tool to easily find the perfect curve as well.
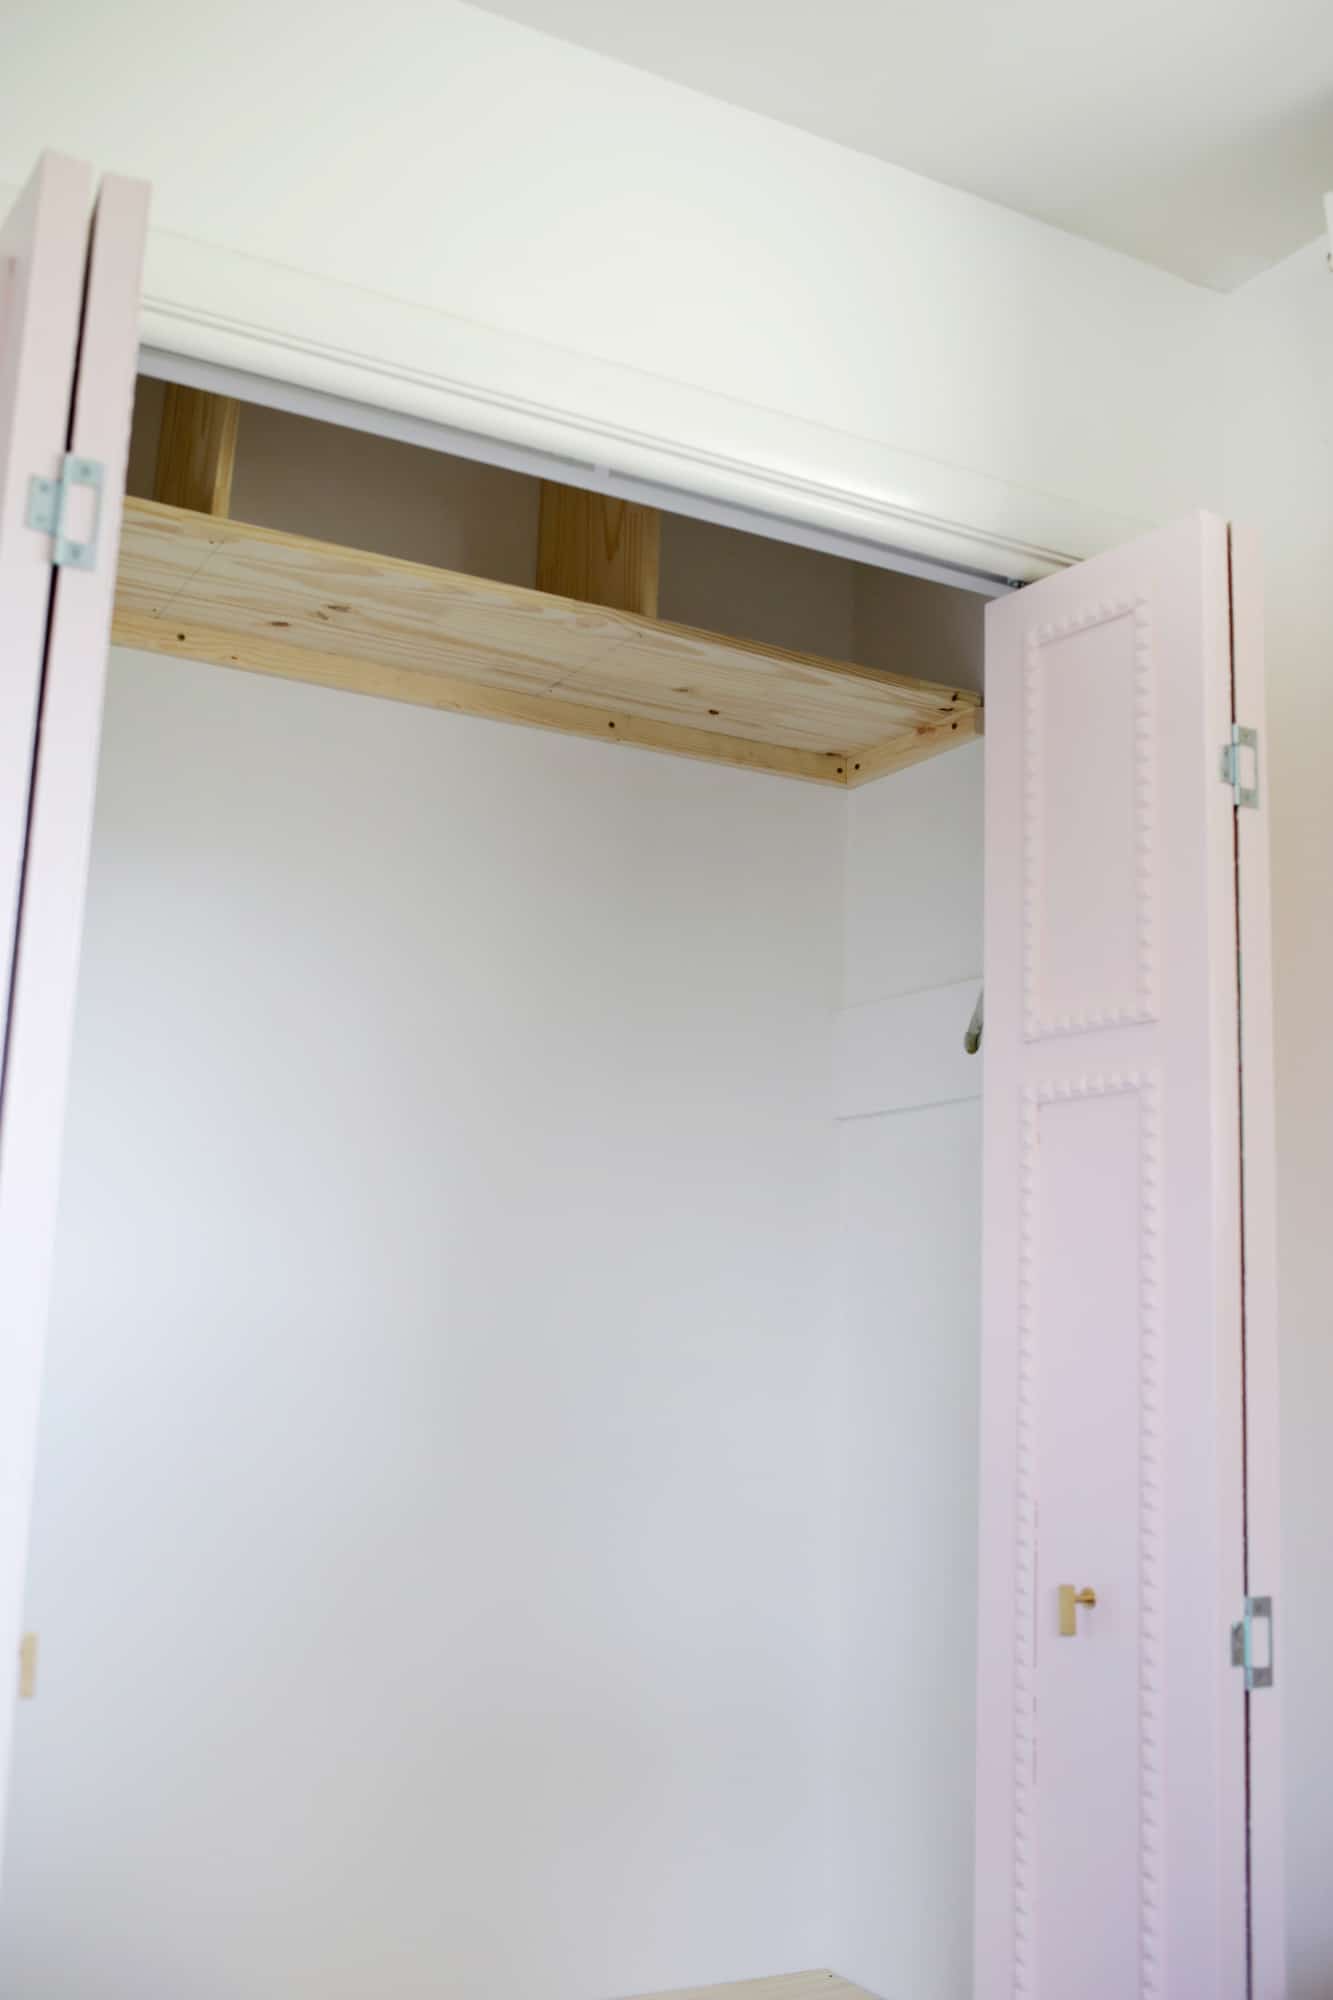
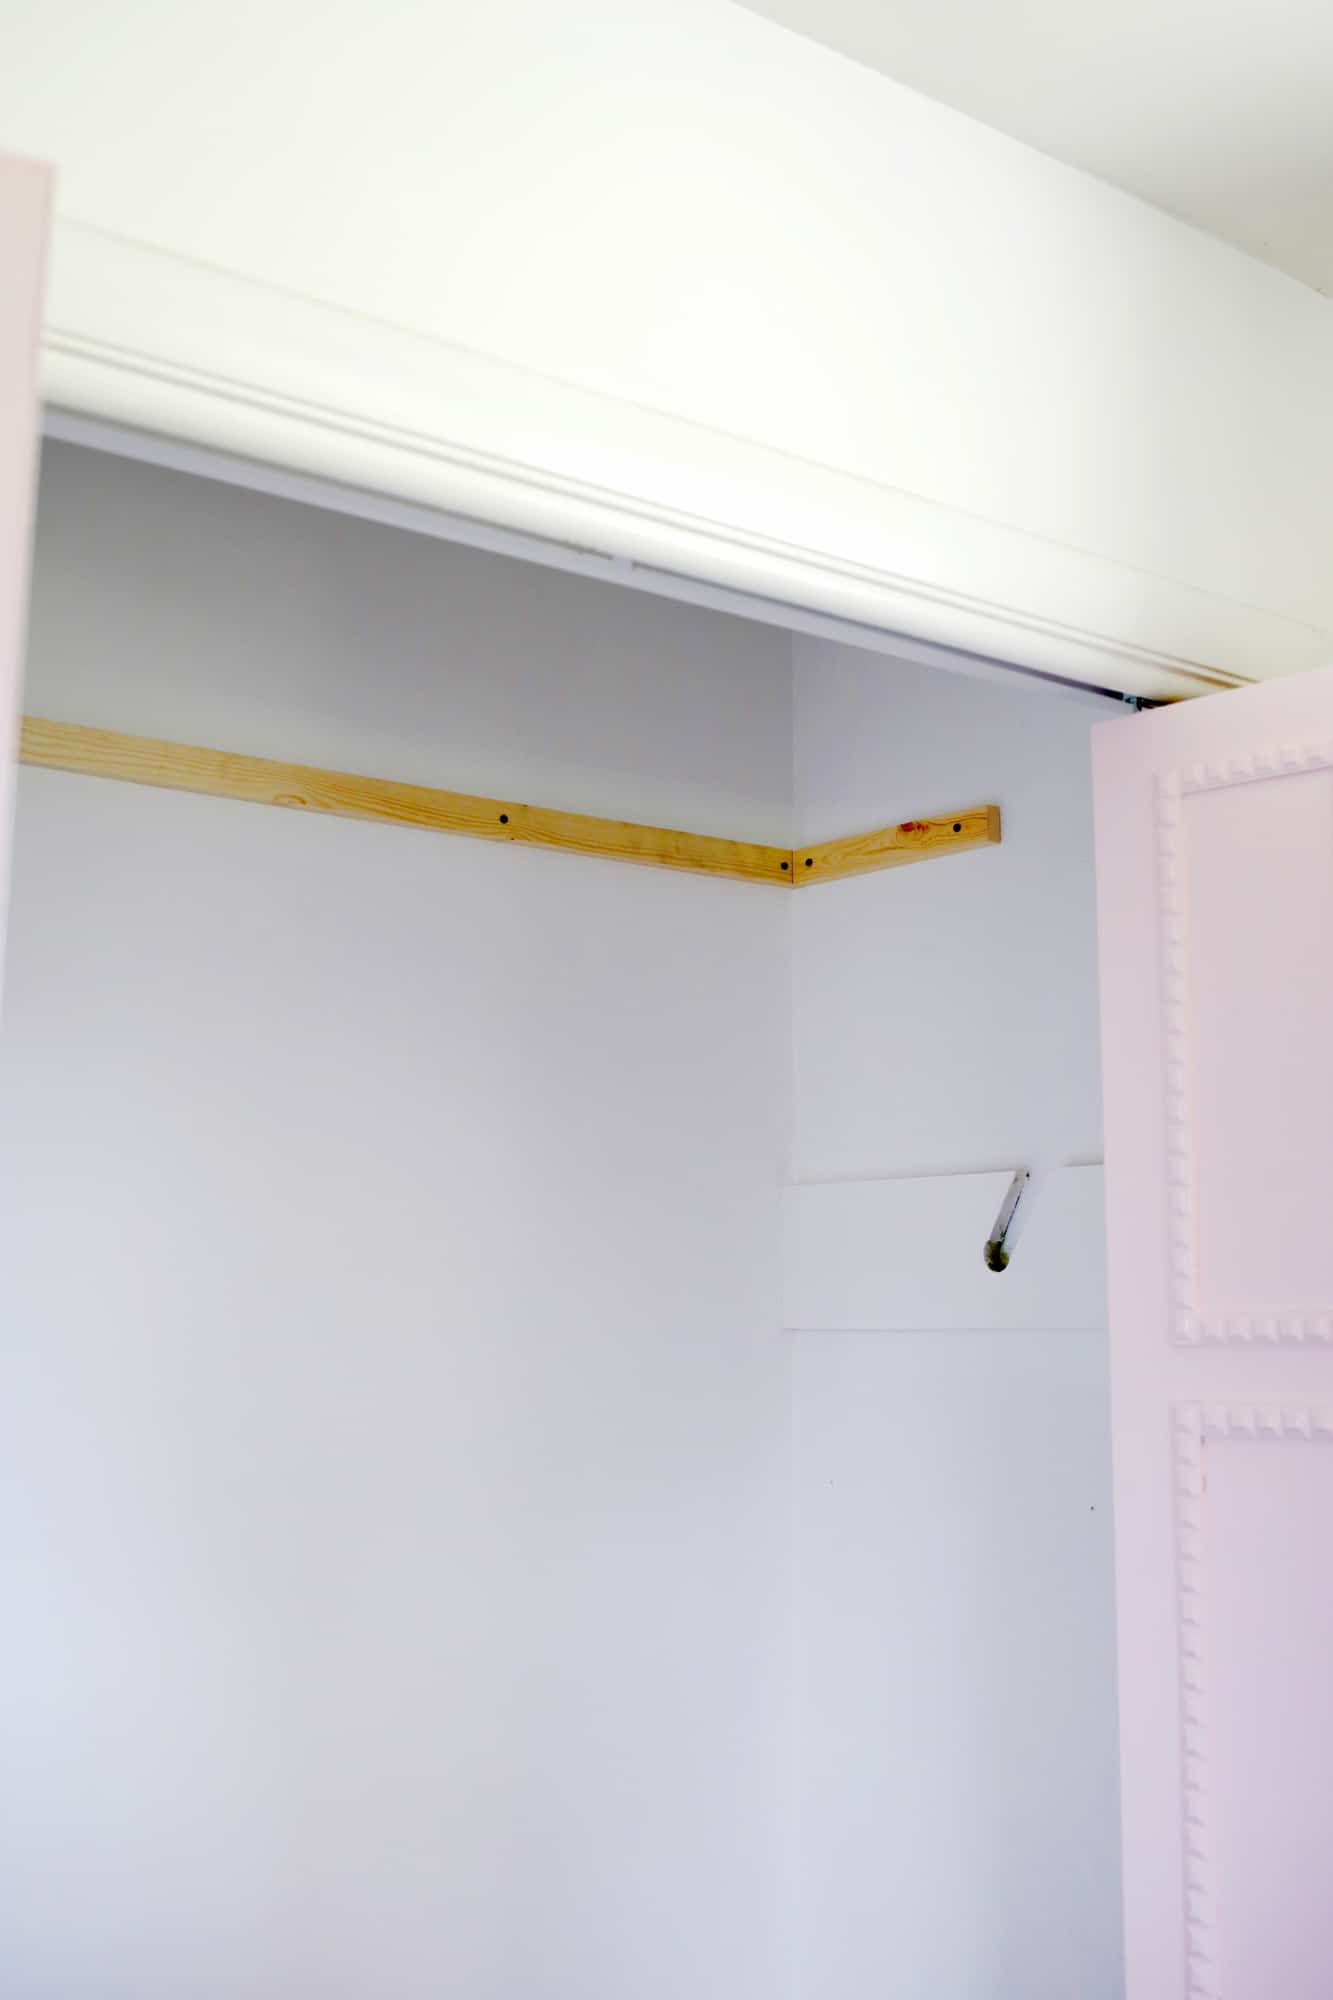
 For the higher shelf, we added our long shelf board and cut two more pieces from that same size board to fit between the shelf and the top of the closet dividing it into 3 separate nooks. We marked where the inside divider board edges were with a pencil on the bottom of the shelf board and then used a few screws to attach the dividers to the shelf board from the bottom. For most closet purposes, just that may be enough to keep your dividers in place. But if you think you’ll be putting heavy duty items up there that may lean on the divider boards a lot, you may want to use some more thin support boards at the side or top of the divider boards to secure them to another board that’s anchored into the wall.
 Let’s talk about rods for hanging items! You can see that I had one area of wider boards already installed in the closet that acted as the support shelves for the one shelf that was in there. But you can also see how they used a hole saw bit before attaching the shelves to make a hole on both sides (and probably used a jig saw to cut those straight lines out from the hole on the one side you slide the pole into) that the steel pipe for hanging clothes has been sitting on. This is one way to add a support shelf with a rod underneath (and then you would have your rod cut to the length you needed to fit), but I’ll also show you what we did to add a rod a bit easier in Todd’s closet on the other side.
 This method is a pretty simple way to add a rod either all the way across the closet or in a smaller area attached to the side of a shelf like we did here. A lower rod in a closet is a great way to store jeans if you like to fold them over a hanger or hang really tall boots from a boot hanger. You just attach the brackets that go with the rod on either side of where you want to mount it, extend or cut the rod to the length you need (you can use a simple hacksaw to cut the rod if you need one shorter than you can purchase) and you’re ready to go!
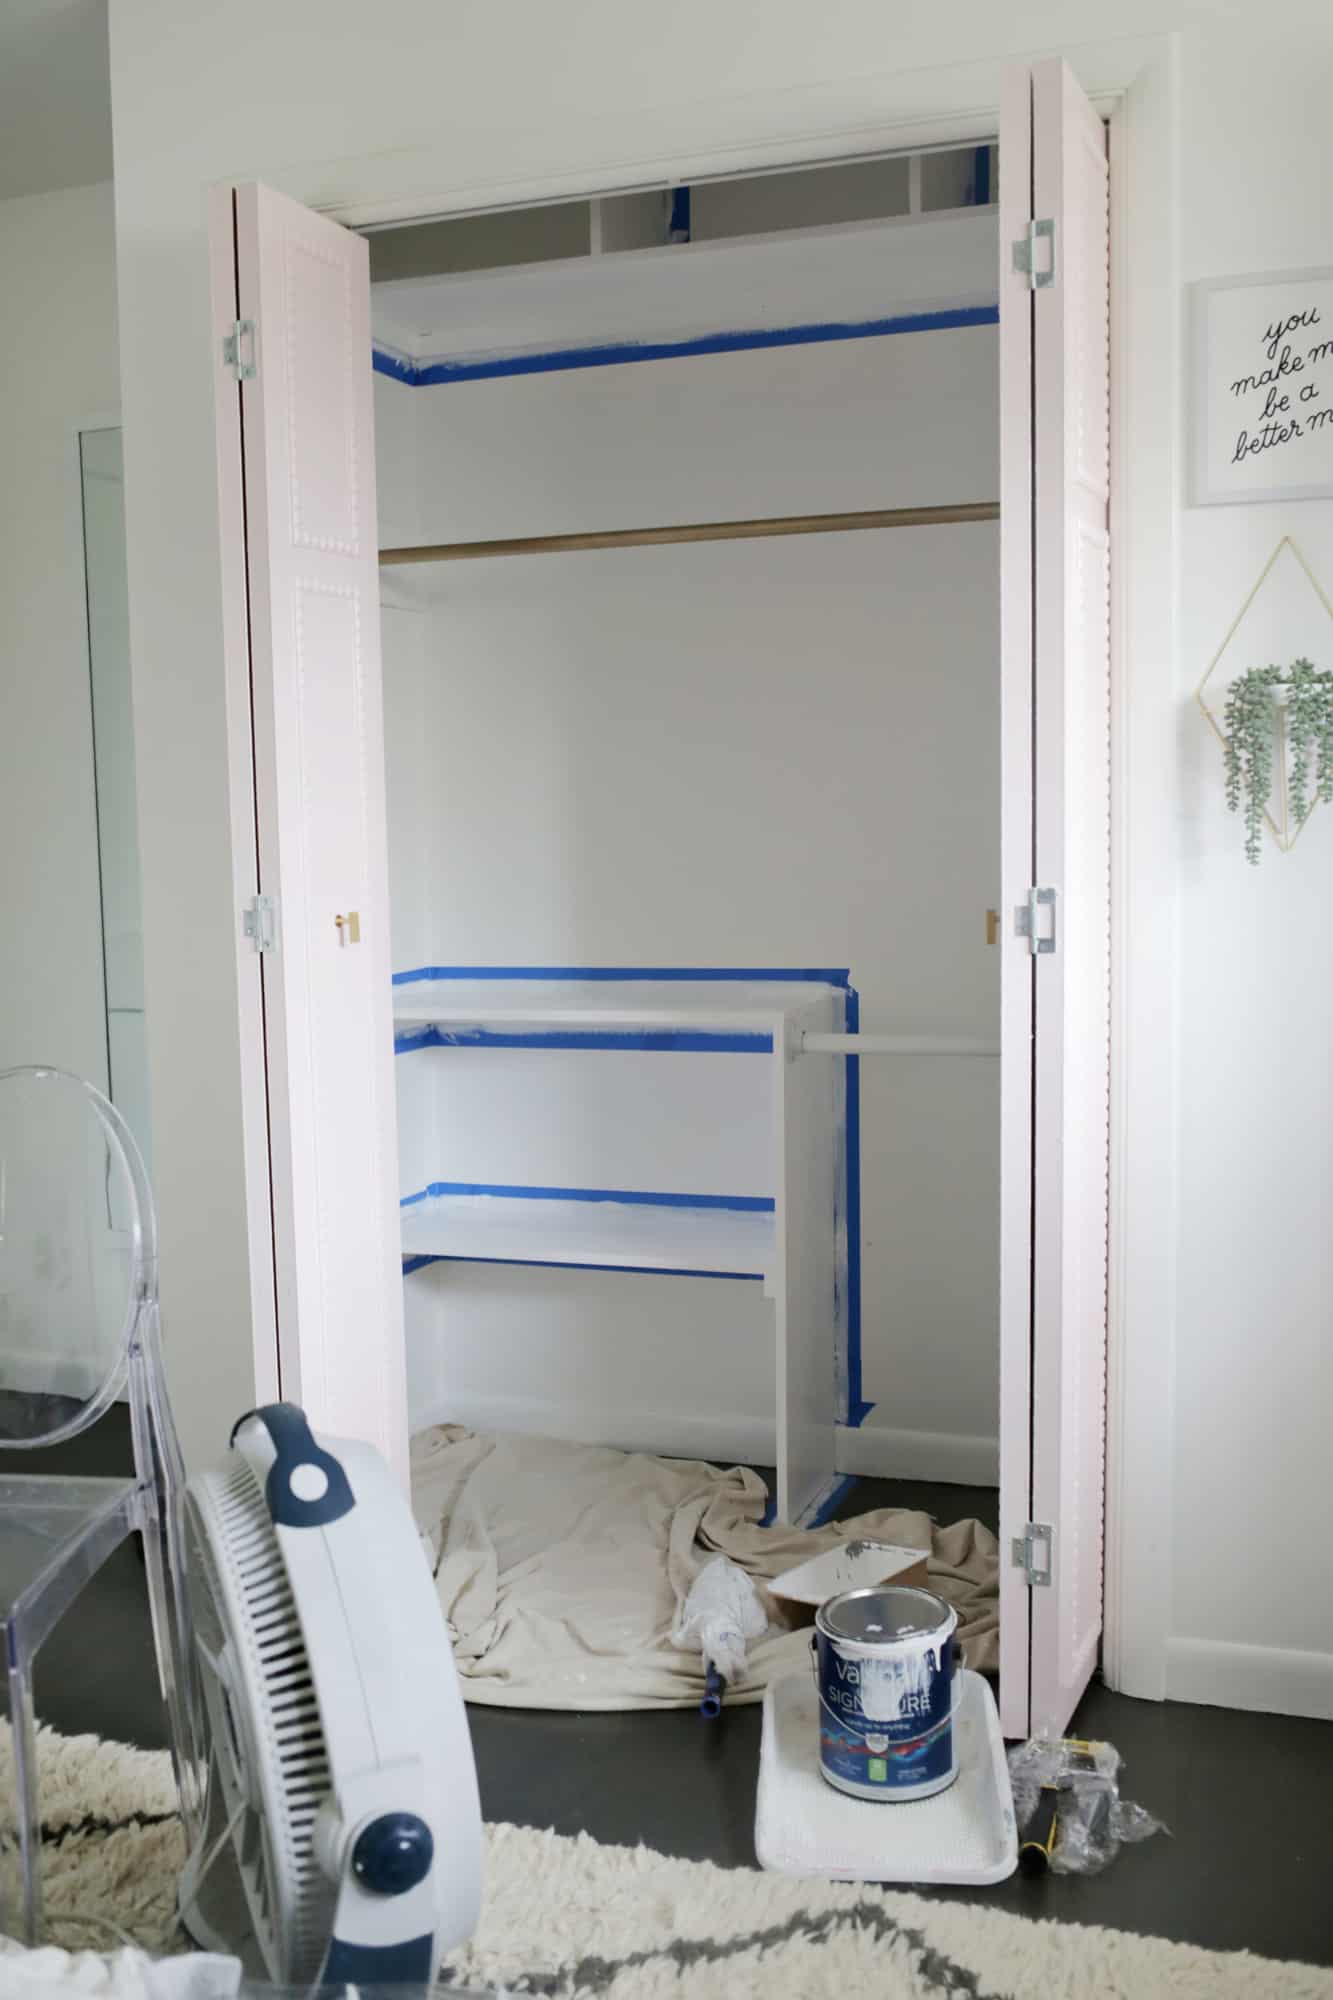
 Lastly, add a few coats of semi-gloss paint and caulk the areas where there are gaps between the boards or between the boards and the wall (I promise that little caulking step will make it look so much more polished!) and give your old closet rod (if you had one!) a fresh coat of metal spray paint. I would definitely suggest giving your whole finish closet at least 2-3 days to cure before adding items back in and while I know it’s a pain to have all your stuff scattered around in the meantime, it will really help the paint solidify and not come off as easily once you are moving items around in the closet.
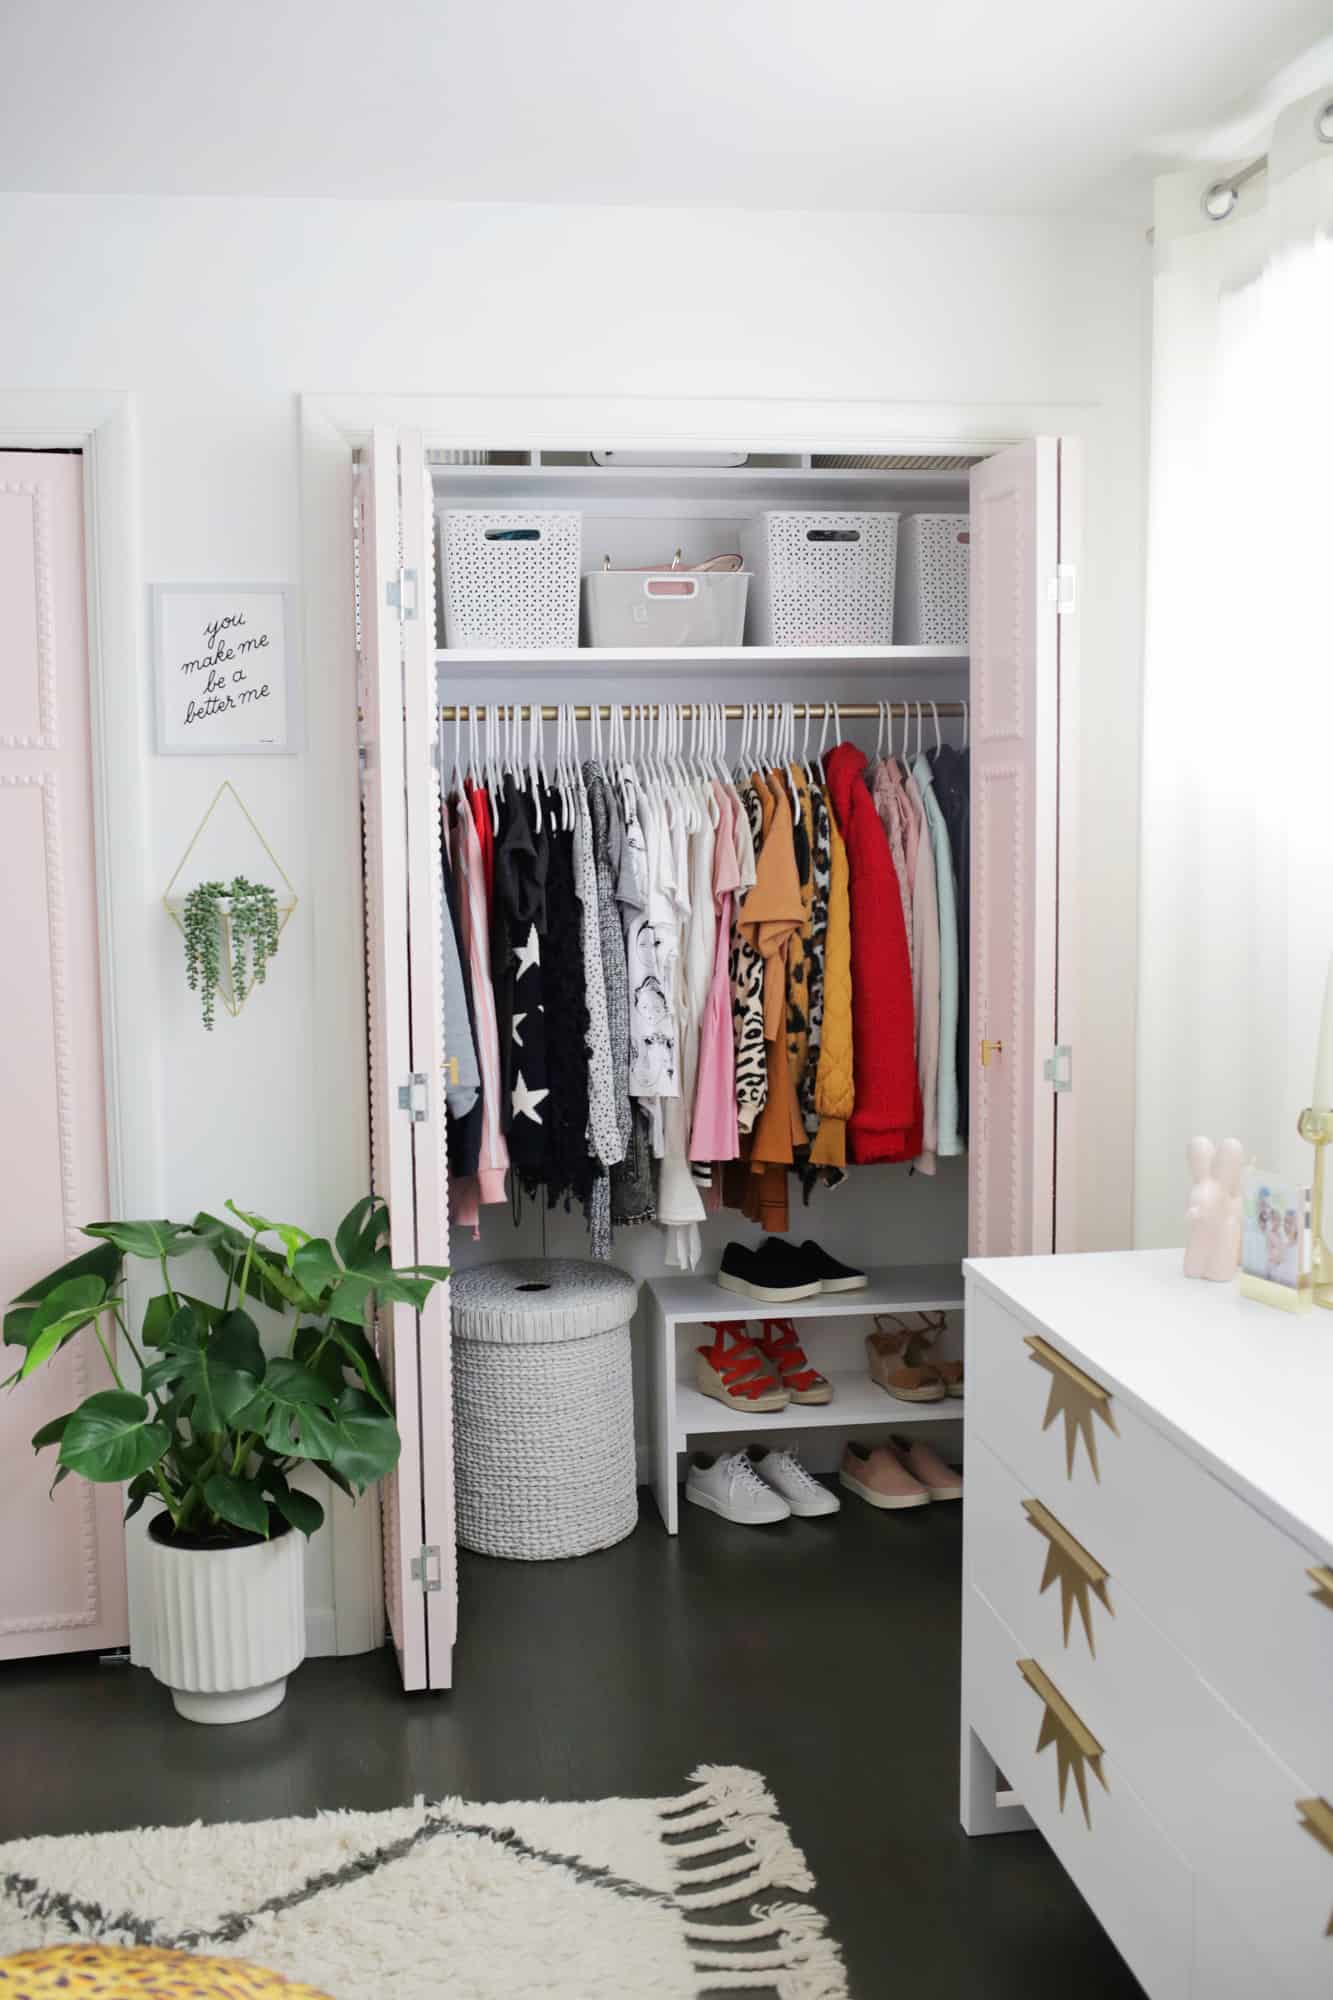
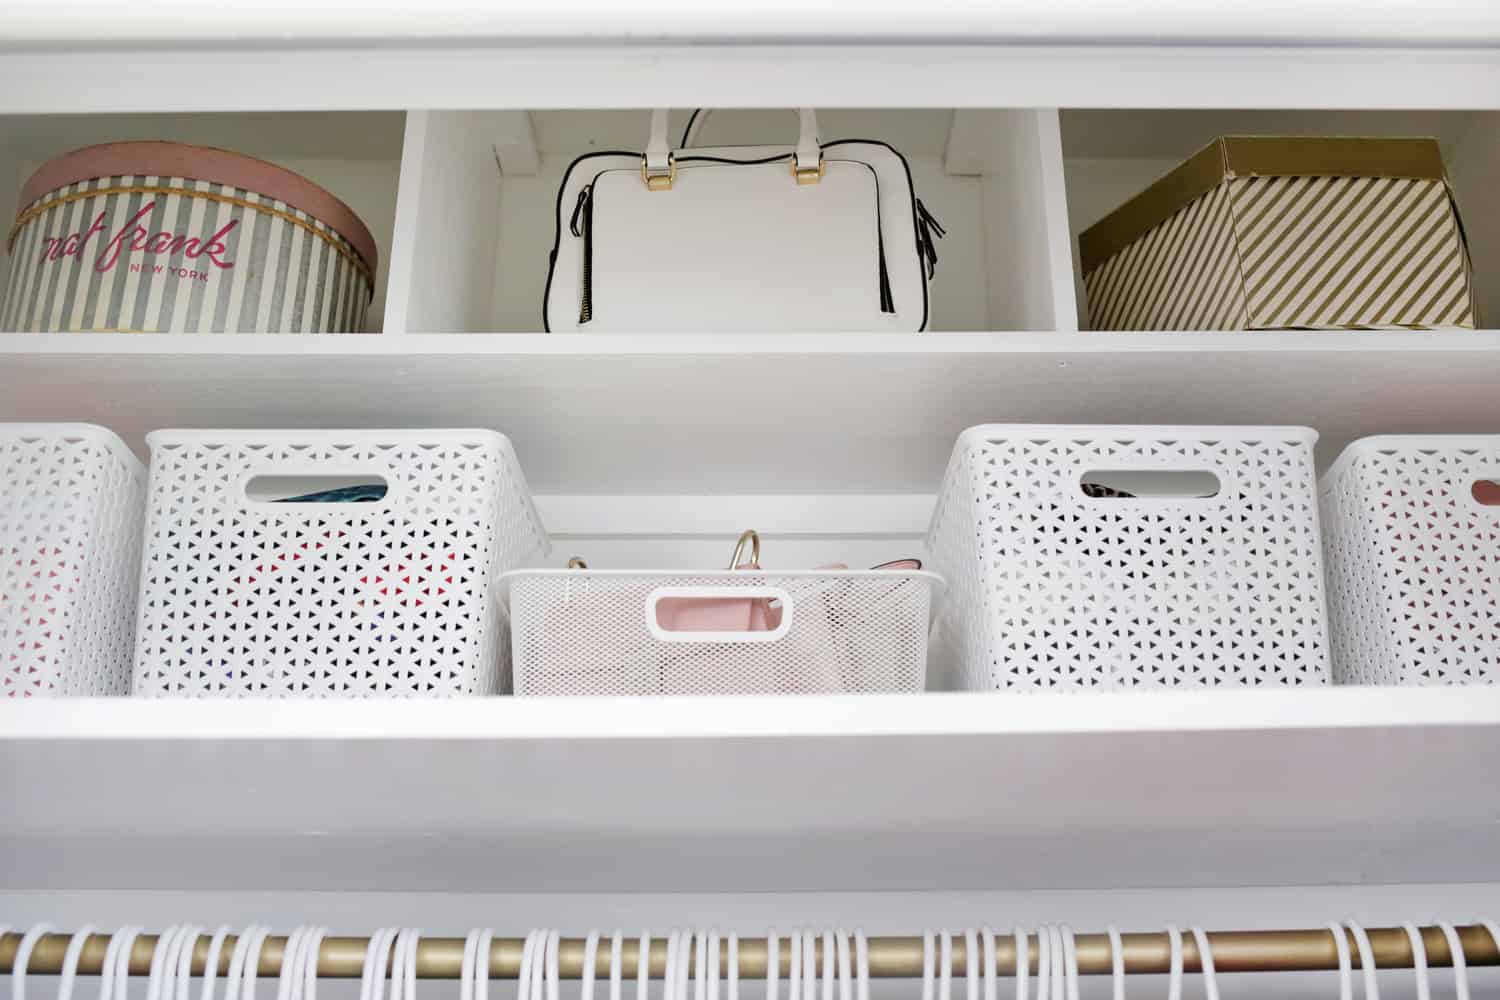
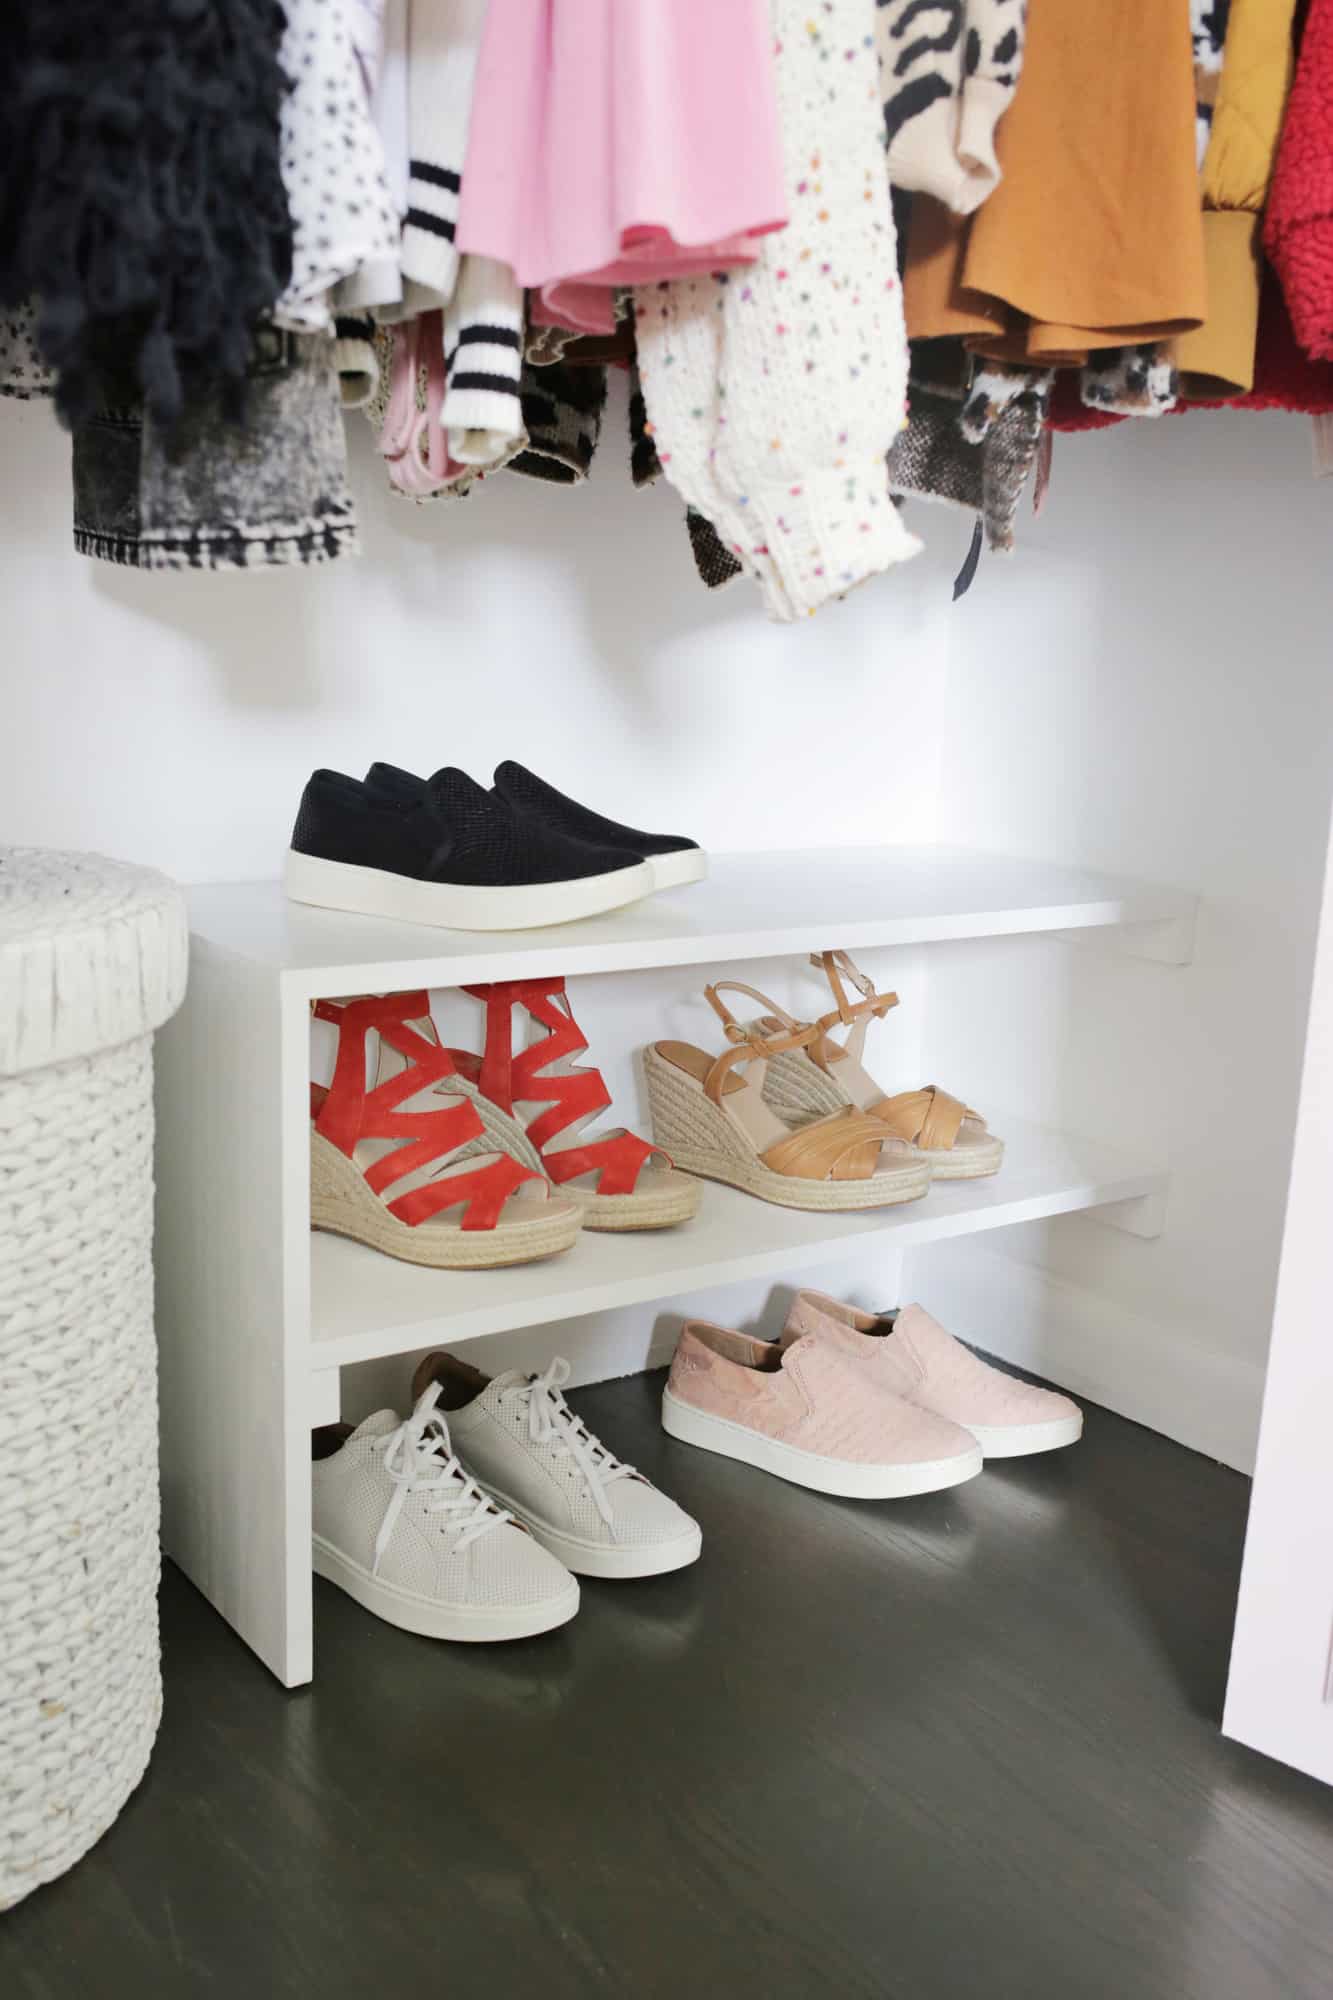
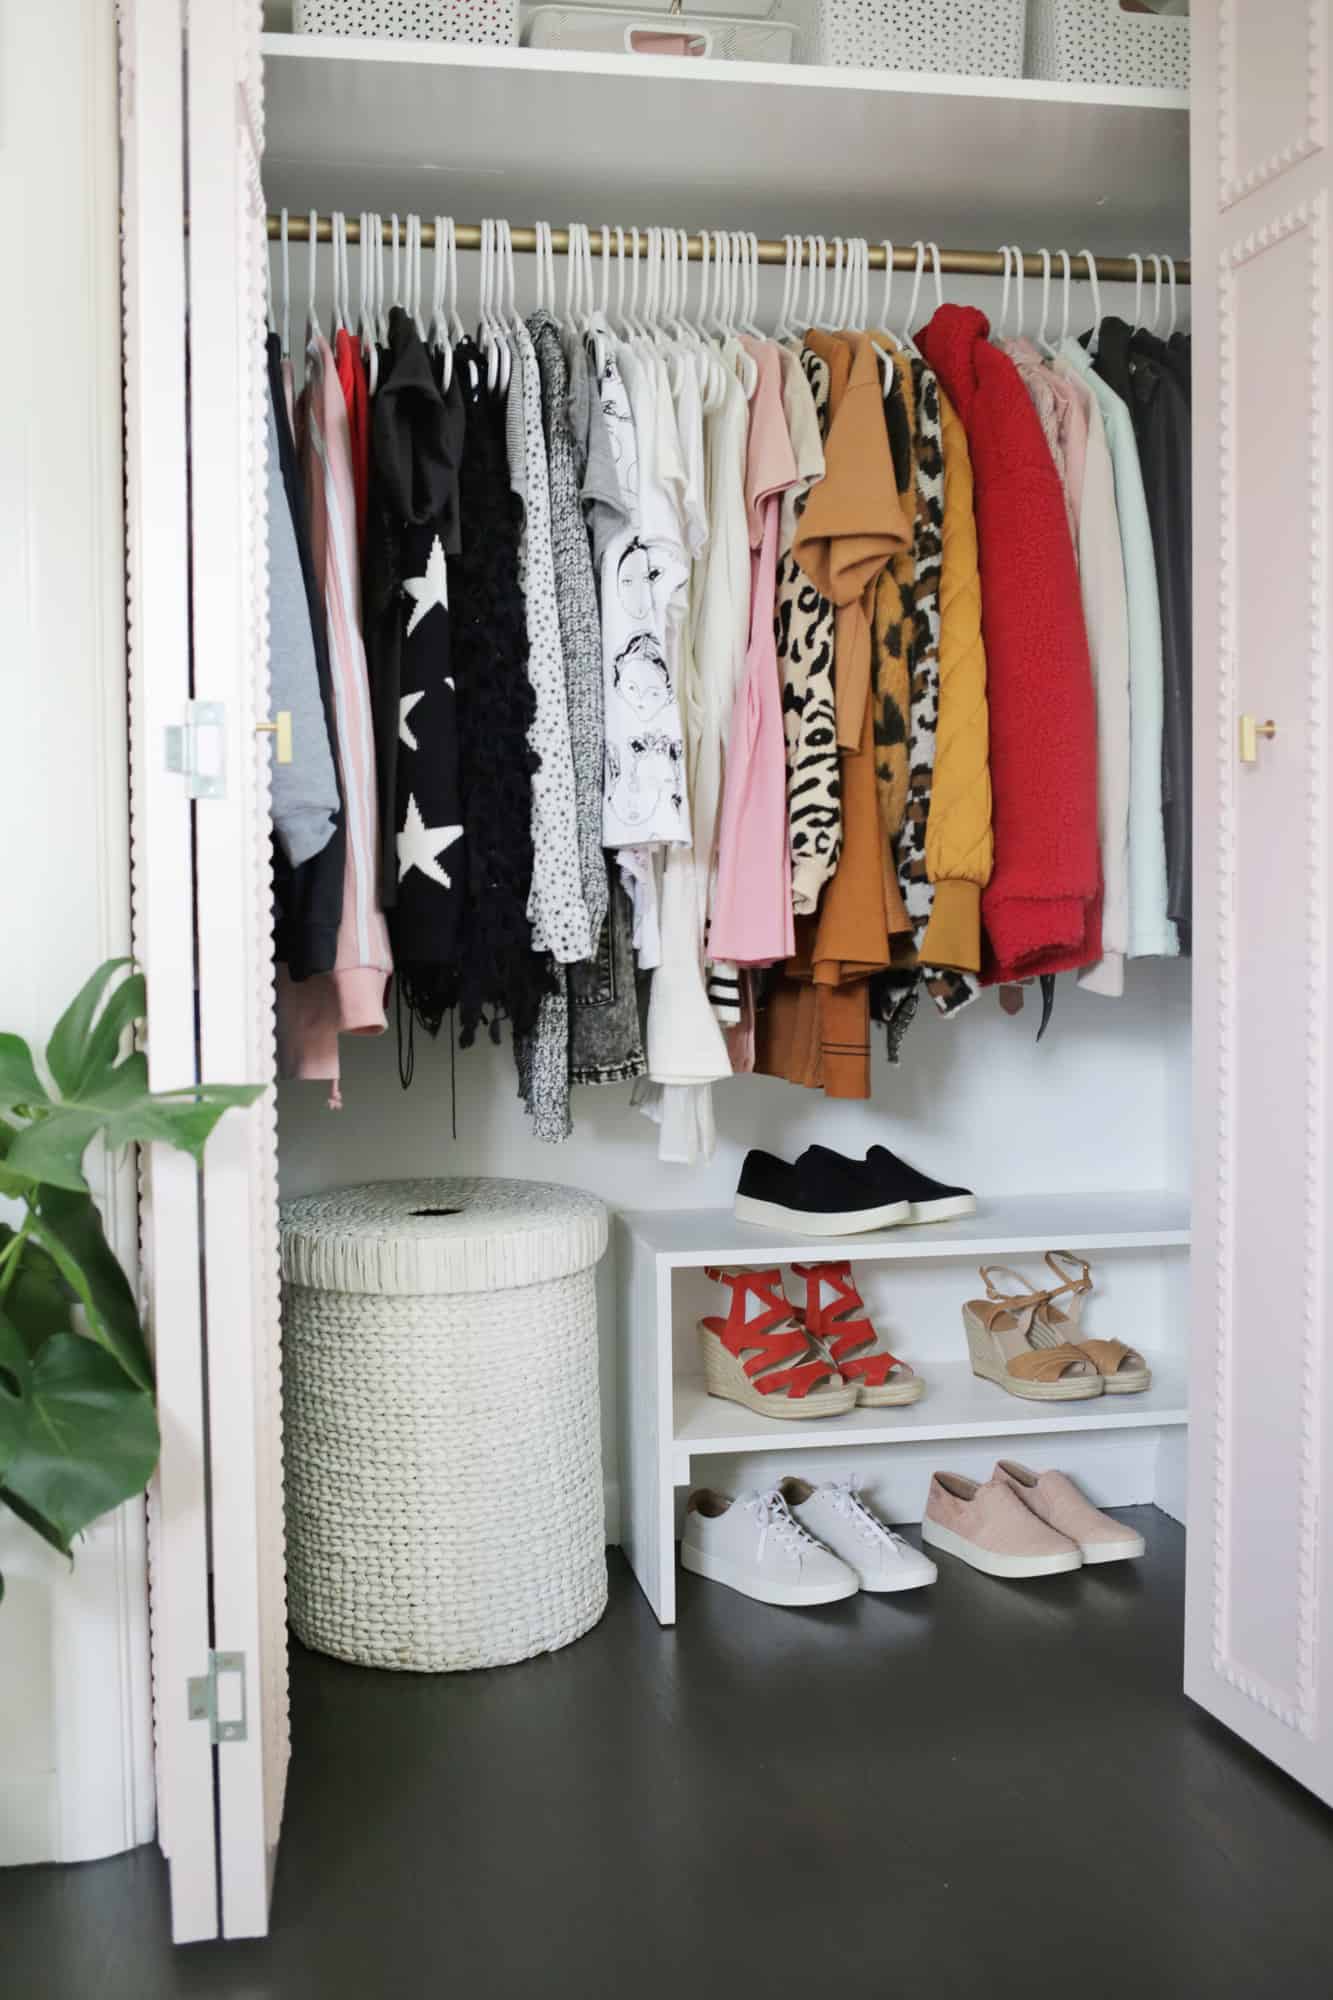
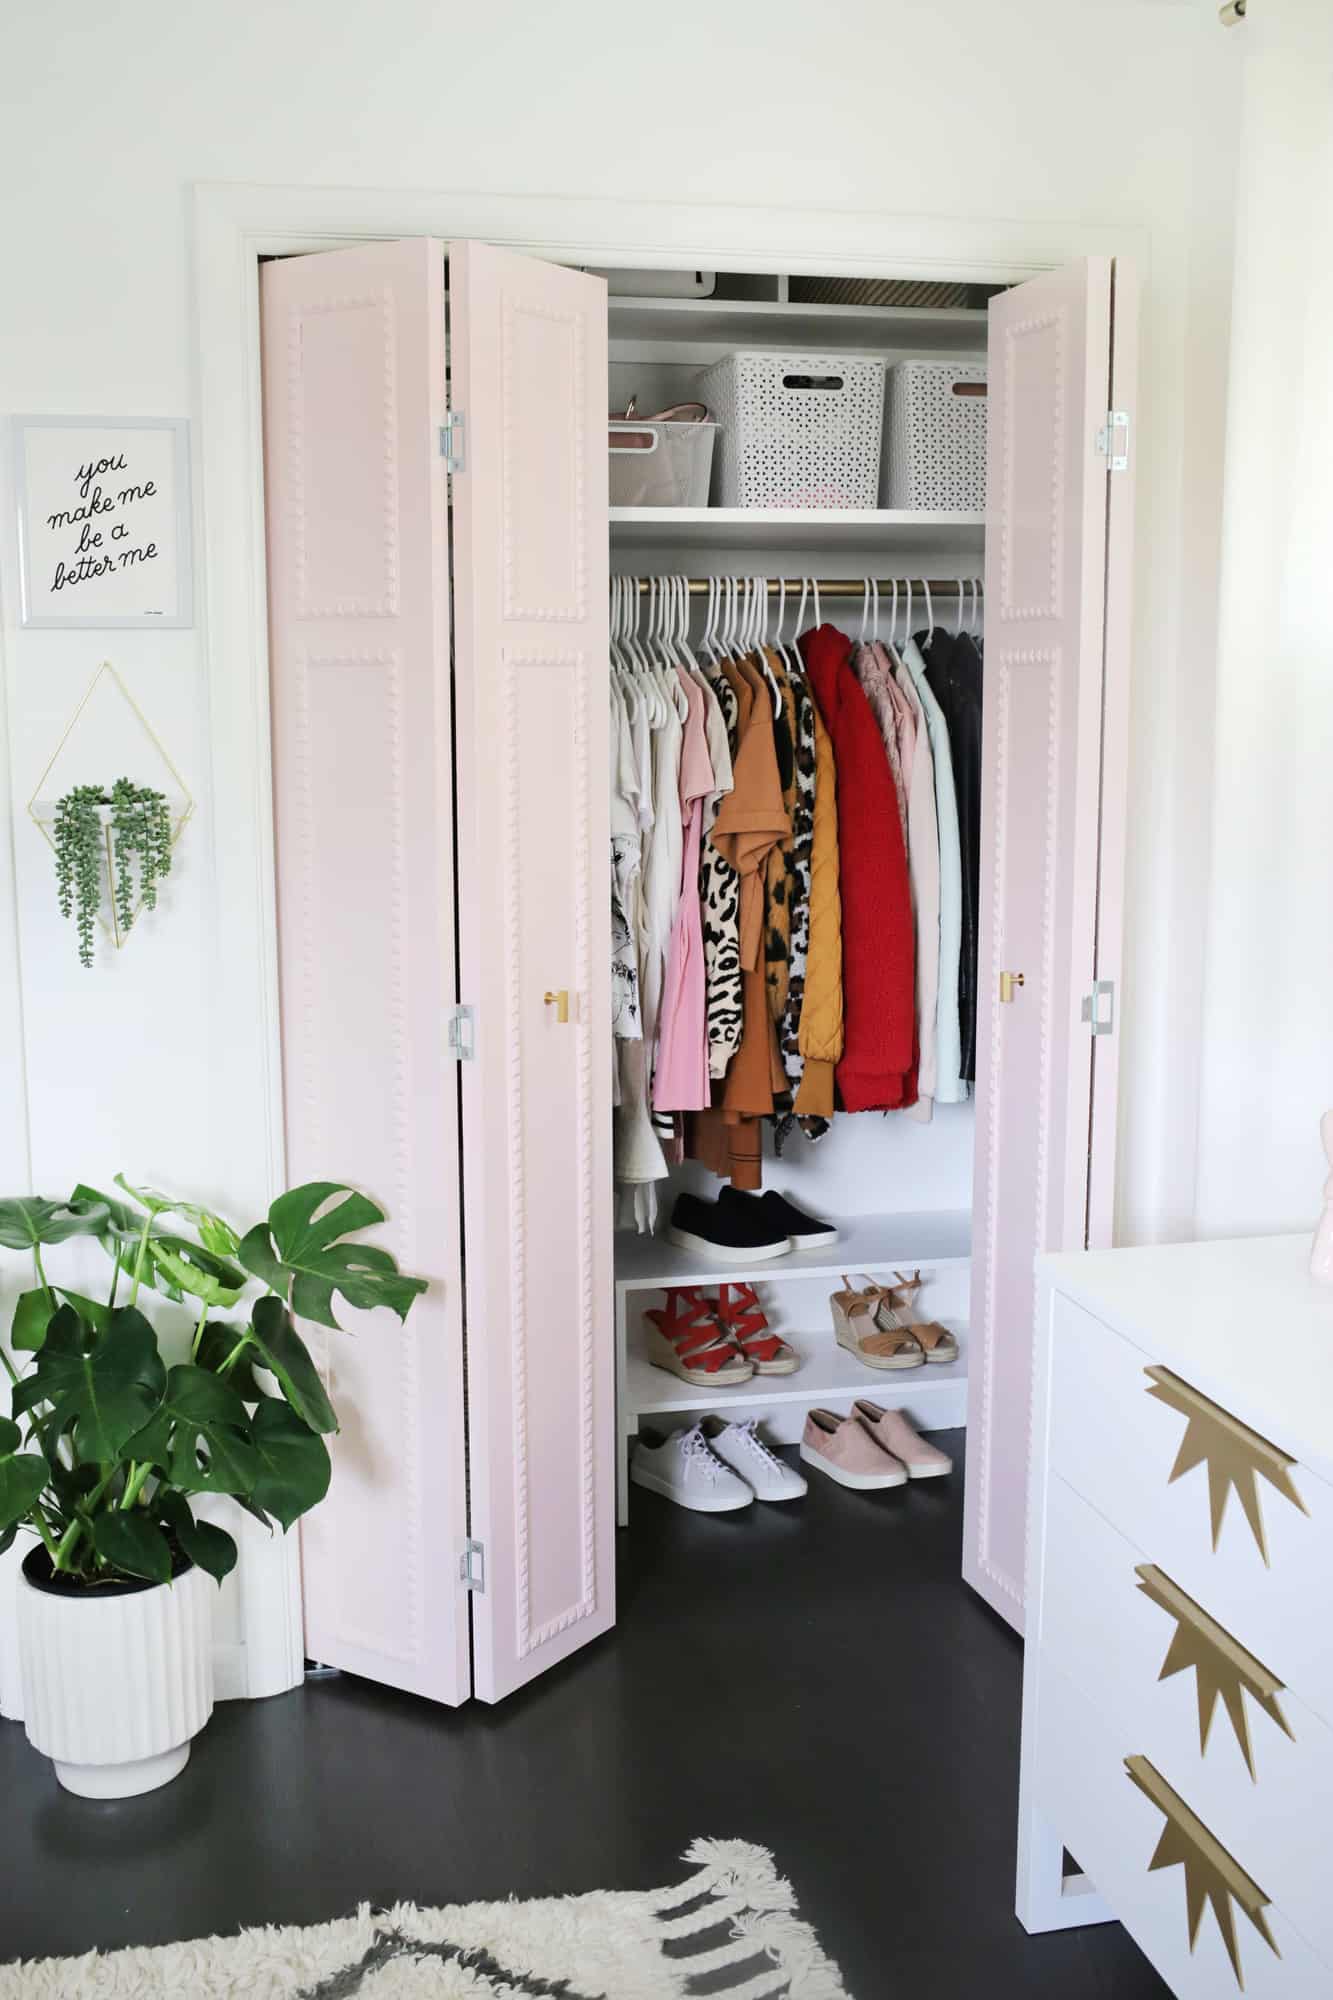 How pretty and organized does that all look?! I love having storage bins up top and official shelves to showcase all my cute Sofft Shoes and I’m actually wearing those cute white sneakers as I type this. They have a multi-layered insole and are SO comfy. Definitely a good style to keep on hand for any project you might have where you have to be on your feet for a long period of time! I love organizational projects that help make home life easier on the eyes as well as more streamlined, so this is a huge win for me. I got my side organized, now it’s time to help my husband tackle his side as well! xo. Laura
11 Comments
Love the look of the closet! If only I had a little space in my home for one too. Haha! 🙂
Charmaine Ng | Architecture & Lifestyle Blog
http://charmainenyw.com
I love how you transformed this! It looks so lovely. Thanks for sharing, hope you are having a lovely day.
-Kate
https://daysofkate.com/
kind of obsessing with this! super damn cute!! 🙂
dorky-and-weird.blogspot.com
xoxo <3
Hi beautiful project! Something about jigsaw projects that are so intimidating. i love your closet doors! Is this a previous project? About to dive into some deep search research, but would love s link share if you have!!
Jig saws just looks scary but they really are not bad at all! And the closet door DIY is here:
http://abeautifulmess.com/2015/09/customize-your-closet-doors-with-trim.html
Give it a try!
Laura
This is such a brilliant idea! And very helpful!
Hey Laura,
Beautiful closet!!! I’m currently redoing mine. Was going to use the same Valspar paint but in eggshell finish. Was wondering what made you choose semi-gloss? Benefits?
Love the post!
Thanks in advance!
That looks soooo amazing, I would love to organize my closet the same way if I had a built-in closet! Unfortunately, they’re rather rare in Germany.
https://www.makeandmess.com/
Wauw your closet looks much better and now it’s a party to choose your favorite shoes whenever you pick-out an outfit!
Any closet space can benefit from extra storage and this is a great design, I find that doing projects like this pre-painting everything before install saves a lot of time. I usually paint the primer and first coat, then install, re-prime any caulking and paint the final coat once assembled.
hi! does anyone know where to get this hamper? im redoing my closet. help a girl out!