 I had a very blank wall in my living room and I decided to create some kind of (faux) weaving for it. It turned out pretty dang cute if I do say so myself, so I thought I’d share how I made it. Spoiler: It’s SUPER easy.
 On the adjacent wall (I promise to share photos soon) I have a mini gallery wall of photos from a recent vacation. So I knew I wanted something on this wall, but I didn’t want anything too colorful or too busy. I thought some kind of weaving or textural art would work best because it could be visually interesting but not overly eye-catching, if that makes sense. I’m always trying to find balance in my decor choices because otherwise things start to feel too stimulating to me. I want all the cozy vibes, but I don’t want our space to feel at all overwhelming—I want to feel totally relaxed in our home.
I was totally inspired by this project that Elsie did in her bedroom a while back, so I used that as my jumping off inspiration. I also sort of loved making all the tassels for this project. It’s kind of therapeutic in a way since it’s so repetitive. Plus, it’s one of those projects you can mostly complete while also watching movies. Ha.
 Supplies:
-yarn for tassels (I used three skeins, two white and one pink)
-small felt balls (mine were actually three garlands I had bought around the holidays)
-plain rug
-wooden dowel rod
-hot glue and glue gun
-wall anchors + paint (you may only need nails depending on the size you do)
The only supply I actually bought for this project was the rug. I actually had everything else in a random craft supply closet. So, if you’re like me and tend to collect random craft supplies, you may not need much to complete this either.
 Step One: Make all the tassels. This is super easy but will be the most time consuming part. Like I said, I made all my tassels over the course of 2-3 nights while watching TV with my husband in the evenings.
 Step Two: Glue the tassels and the felt balls to the rug. It’s best to lay everything out first, to make sure you have enough tassels and are happy with the overall look before you begin gluing.
Step Three: Attach the wooden dowel rod to the top with more yard, or strong string.
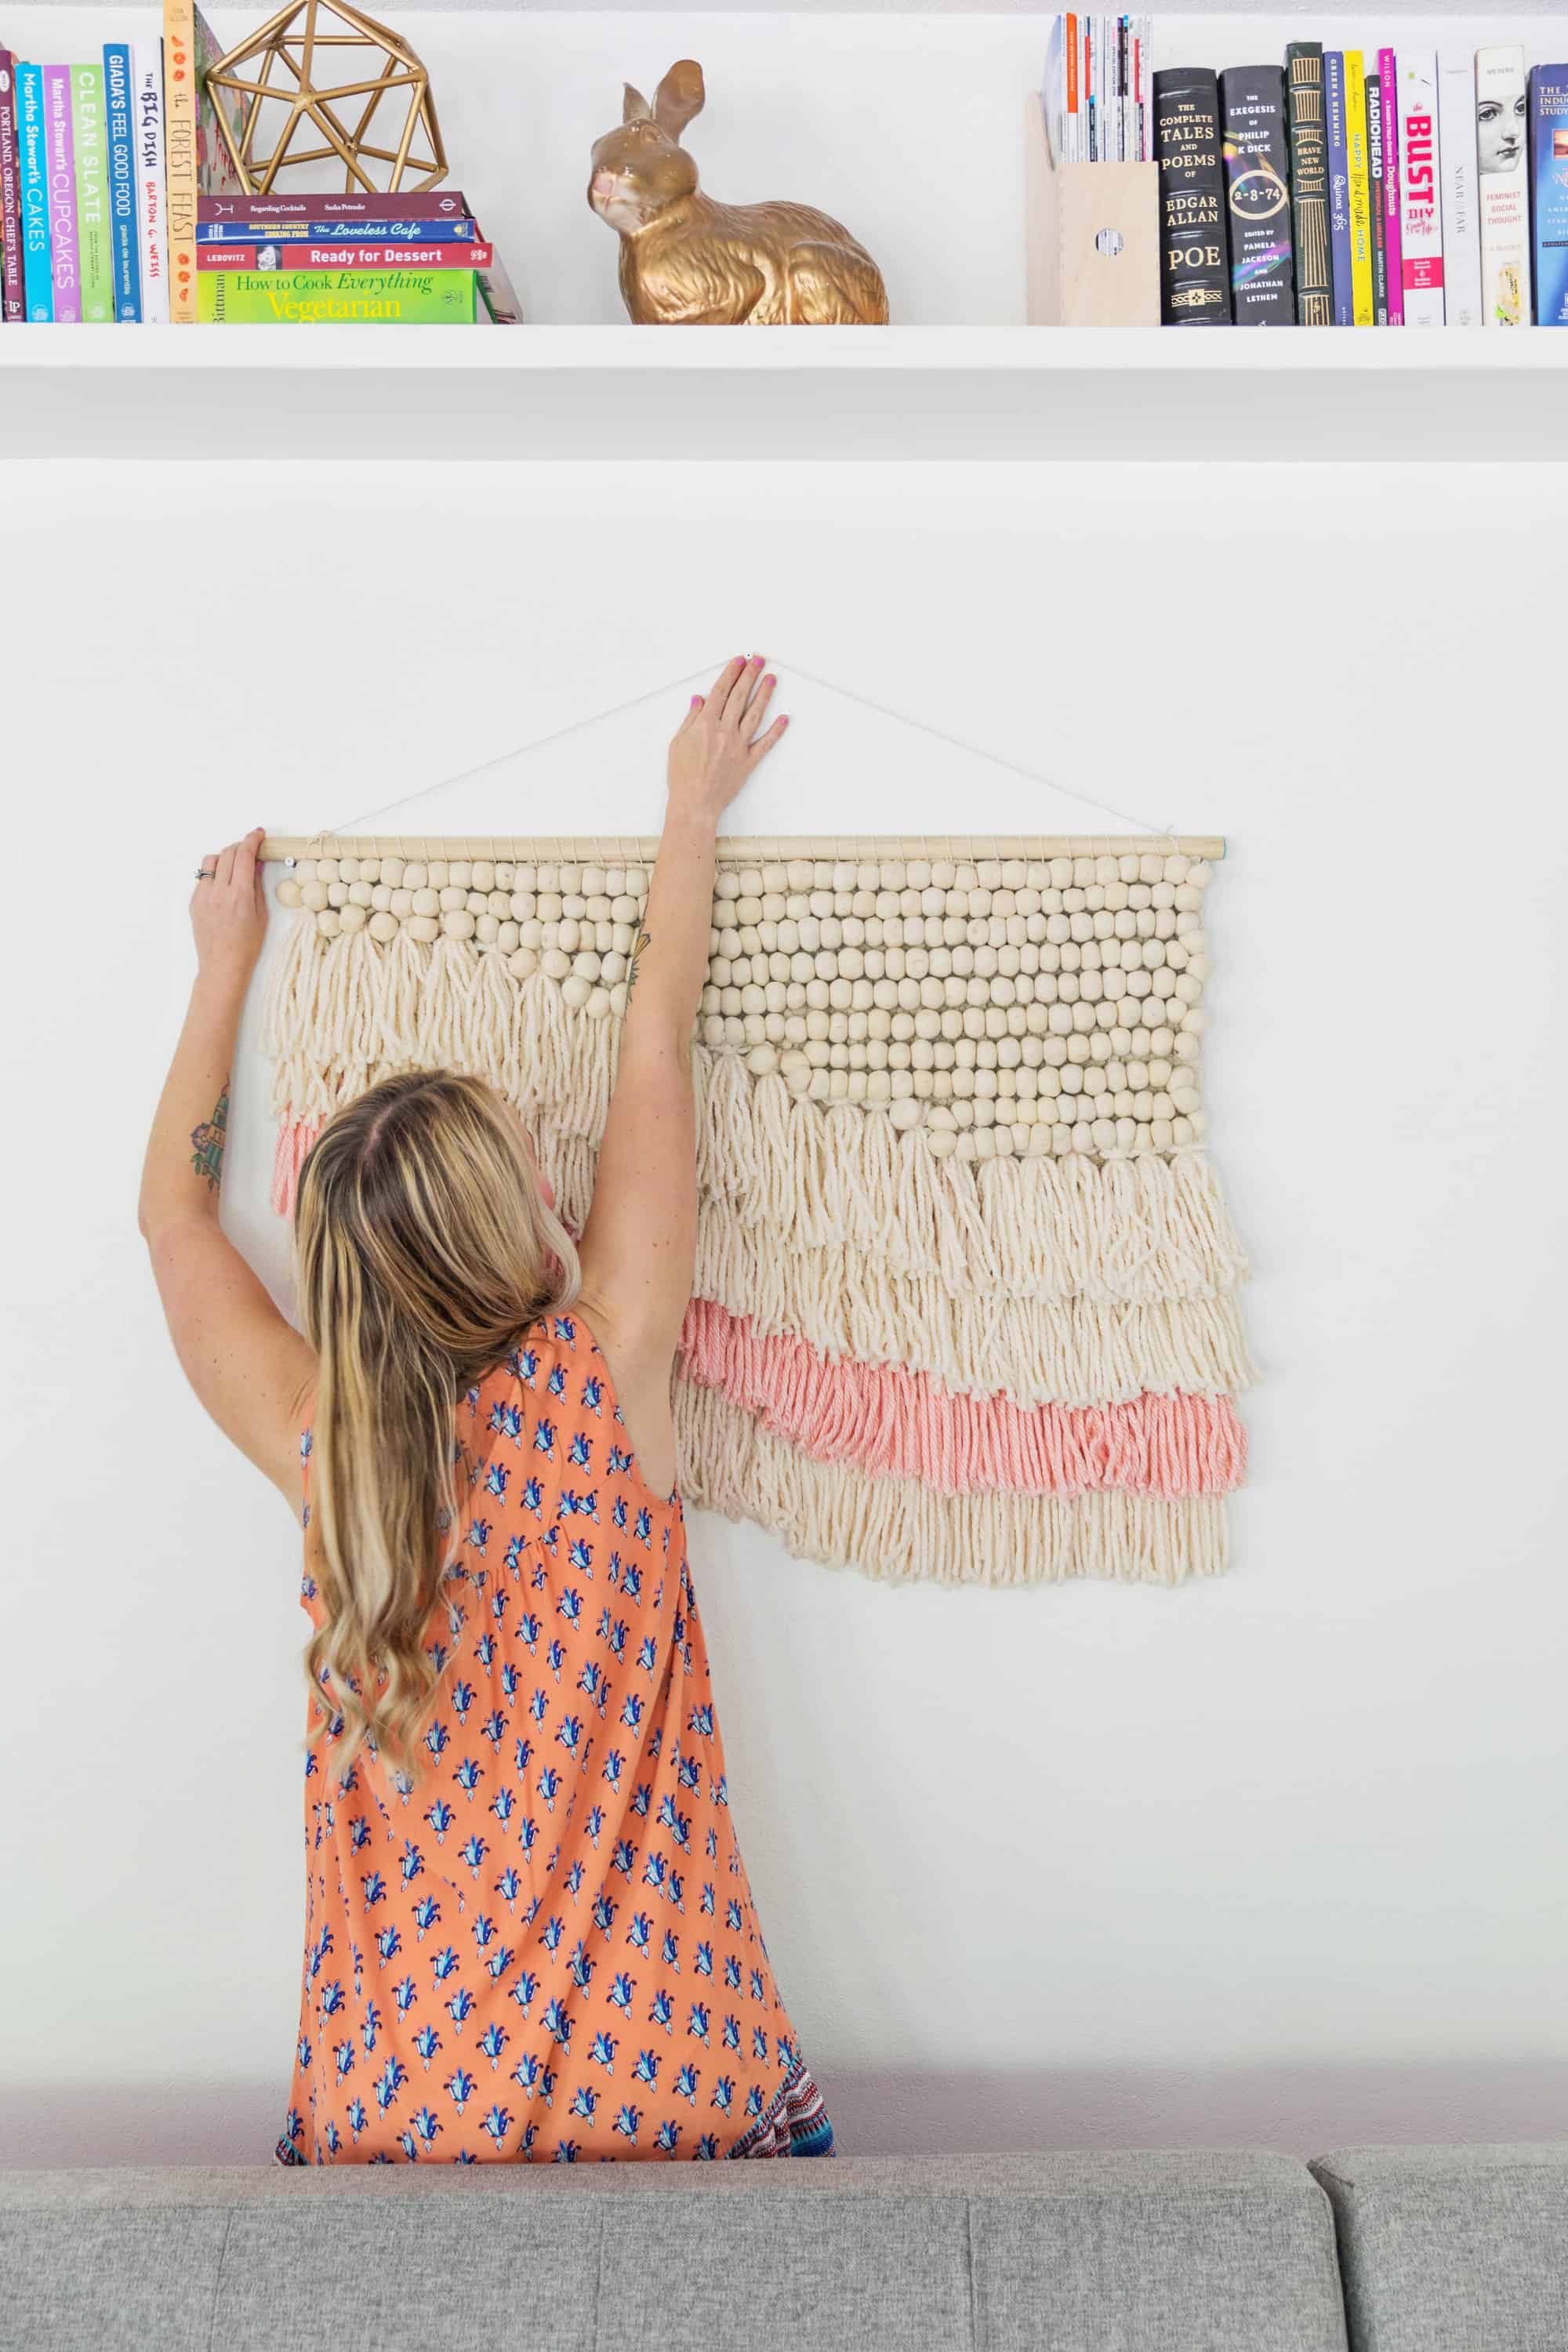 Now you’re ready to hang your project and you’re done! As you can see, mine is pretty big and it ended up being heavy enough that I decided to hang it with three wall anchors just to be extra safe. I painted the heads of the screws the same color as my walls (Bistro White by Valspar) so they would more or less disappear visually. But this may not be necessary depending how big and heavy your project turns out to be.
And if you want to learn how to actually weave, you should check out Rachel’s weaving series, starting with the basics (then just click on the “weaving” tag at the top of the post to see more). xo. Emma

14 Comments
I love how the DIY weaving looks! Definitely such a statement accessory on a blank wall.
Charmaine Ng | Architecture & Lifestyle Blog
http://charmainenyw.com
This is gorgeous! Totally making one of these for my daughter’s room!
Paige
http://thehappyflammily.com
This is so smart! I love the idea to use wood beads!
Amazing how simple this is! And I love the simple colour scheme!
https://www.makeandmess.com/
It’s so lovely! I love the simple colours and the amazing textures 🙂 it creates really soft and natural vibes.
Your couch is wonderful! Do you mind sharing where you got it? (Also, the weaving is beautiful 🙂
Hi Rachel! It’s from Joybird 🙂
Beautiful! My attempts at weaving have been a bit wobbly but surely I can glue things right? Thanks for sharing!
This is just gorgeous! If only I had the time to make it 🙁
This one still blows my mind!!!
Very Interesting and is Easy, Simple. Looking Awesome
Looks so cute. Definitely going to try this.
Love,
Bettie
http://Www.thewildflowerhippie.com
Waooo Its super easy plus an amazing DIY for home decor. Why spending on expensive things when yarn can do the work.
Could you please explain how did you attached the dowel to the rug?