 Here is a super easy Halloween window decor idea that we did over at the holiday house this year. It’s seriously one of the most simple (and cheap!) big impact decor options. This is also one of those projects that’s really fun to make and I think you could modify it to make with kiddos, even young kiddos, if you needed a weeknight project.
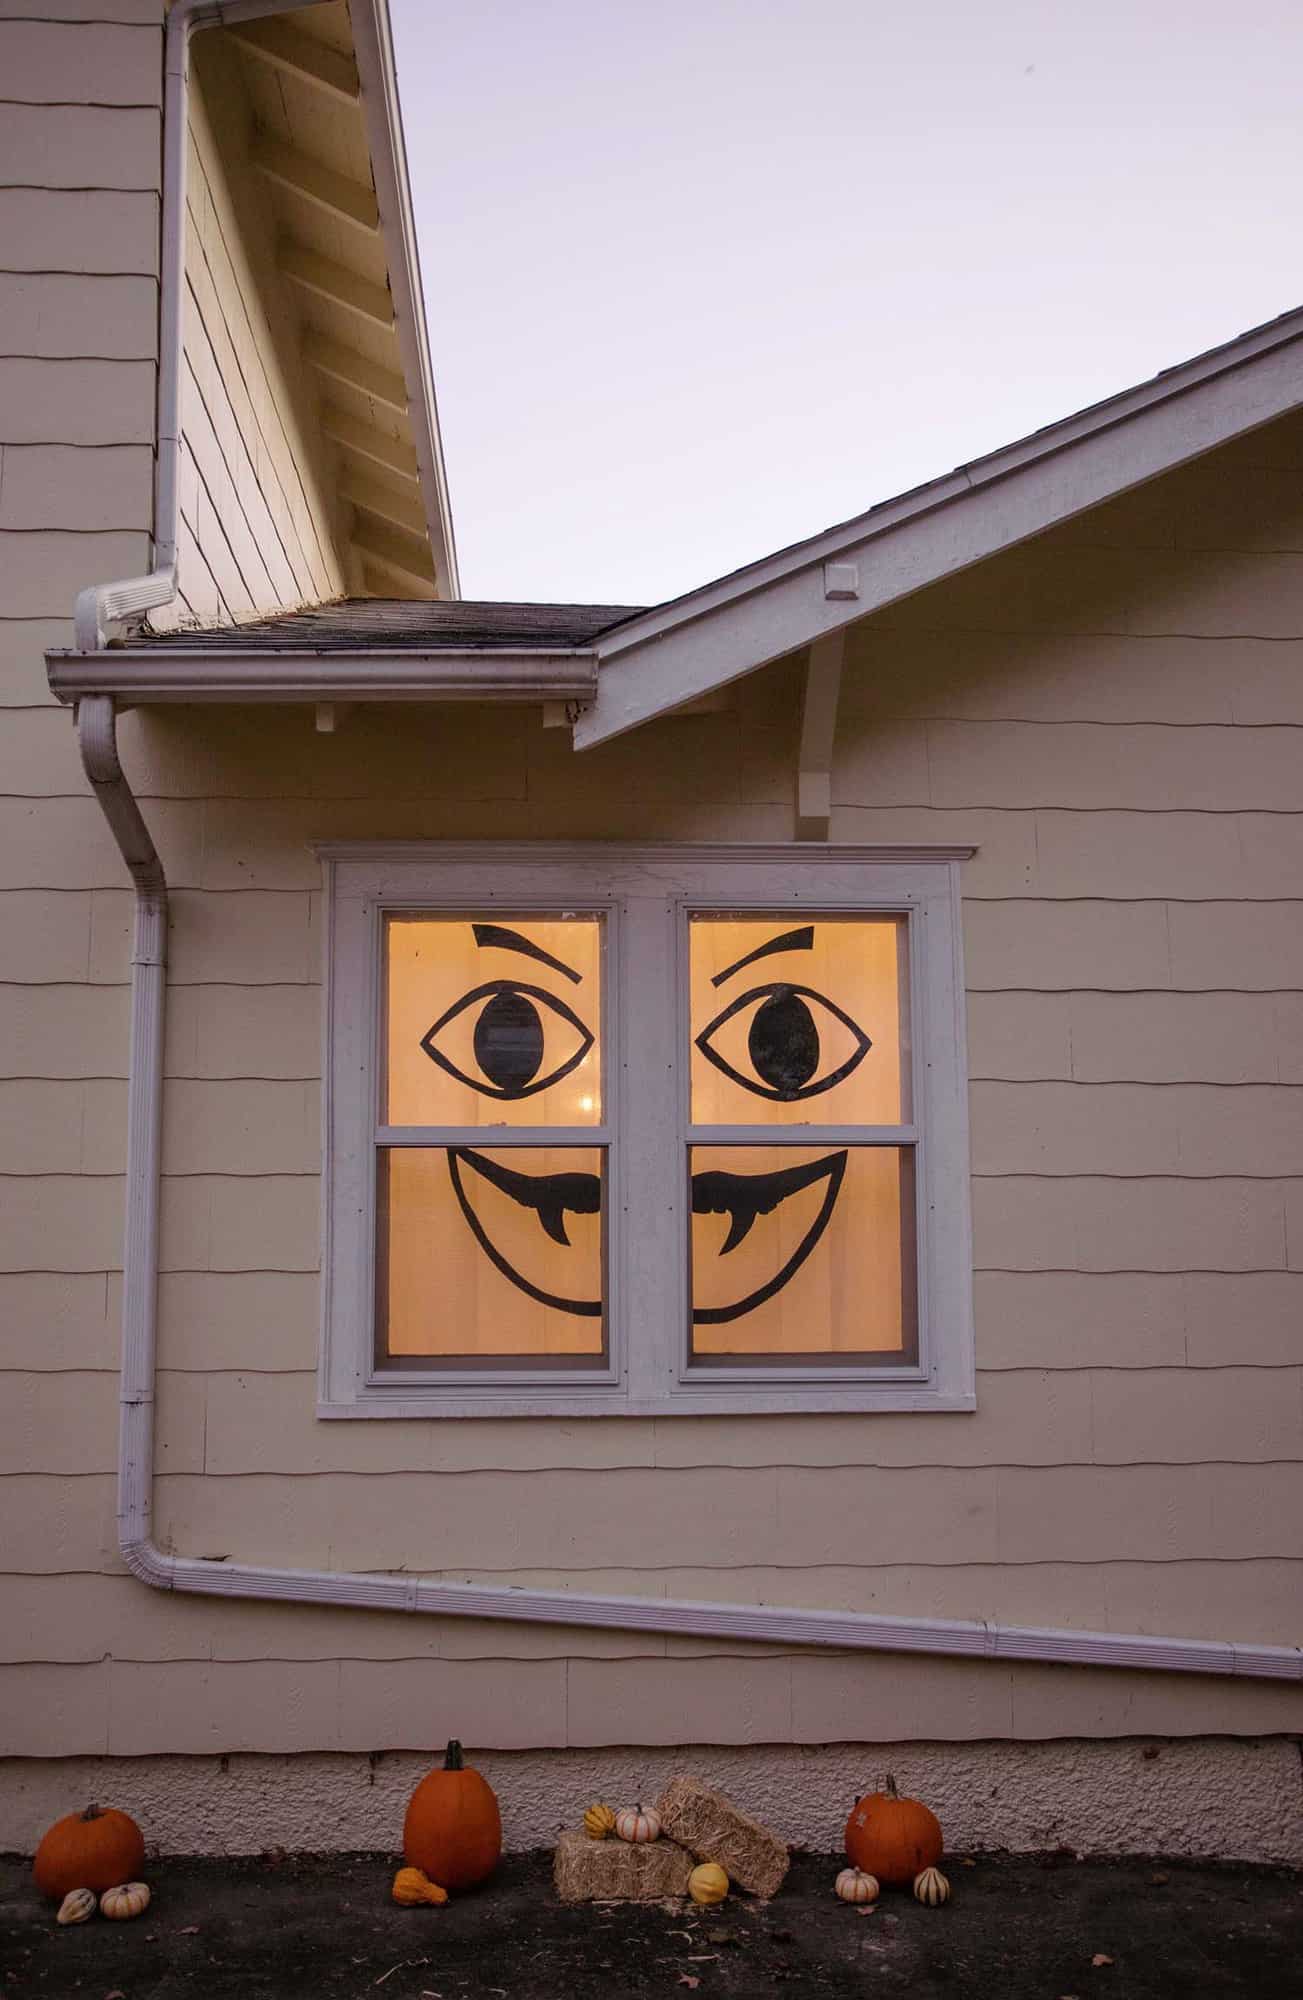
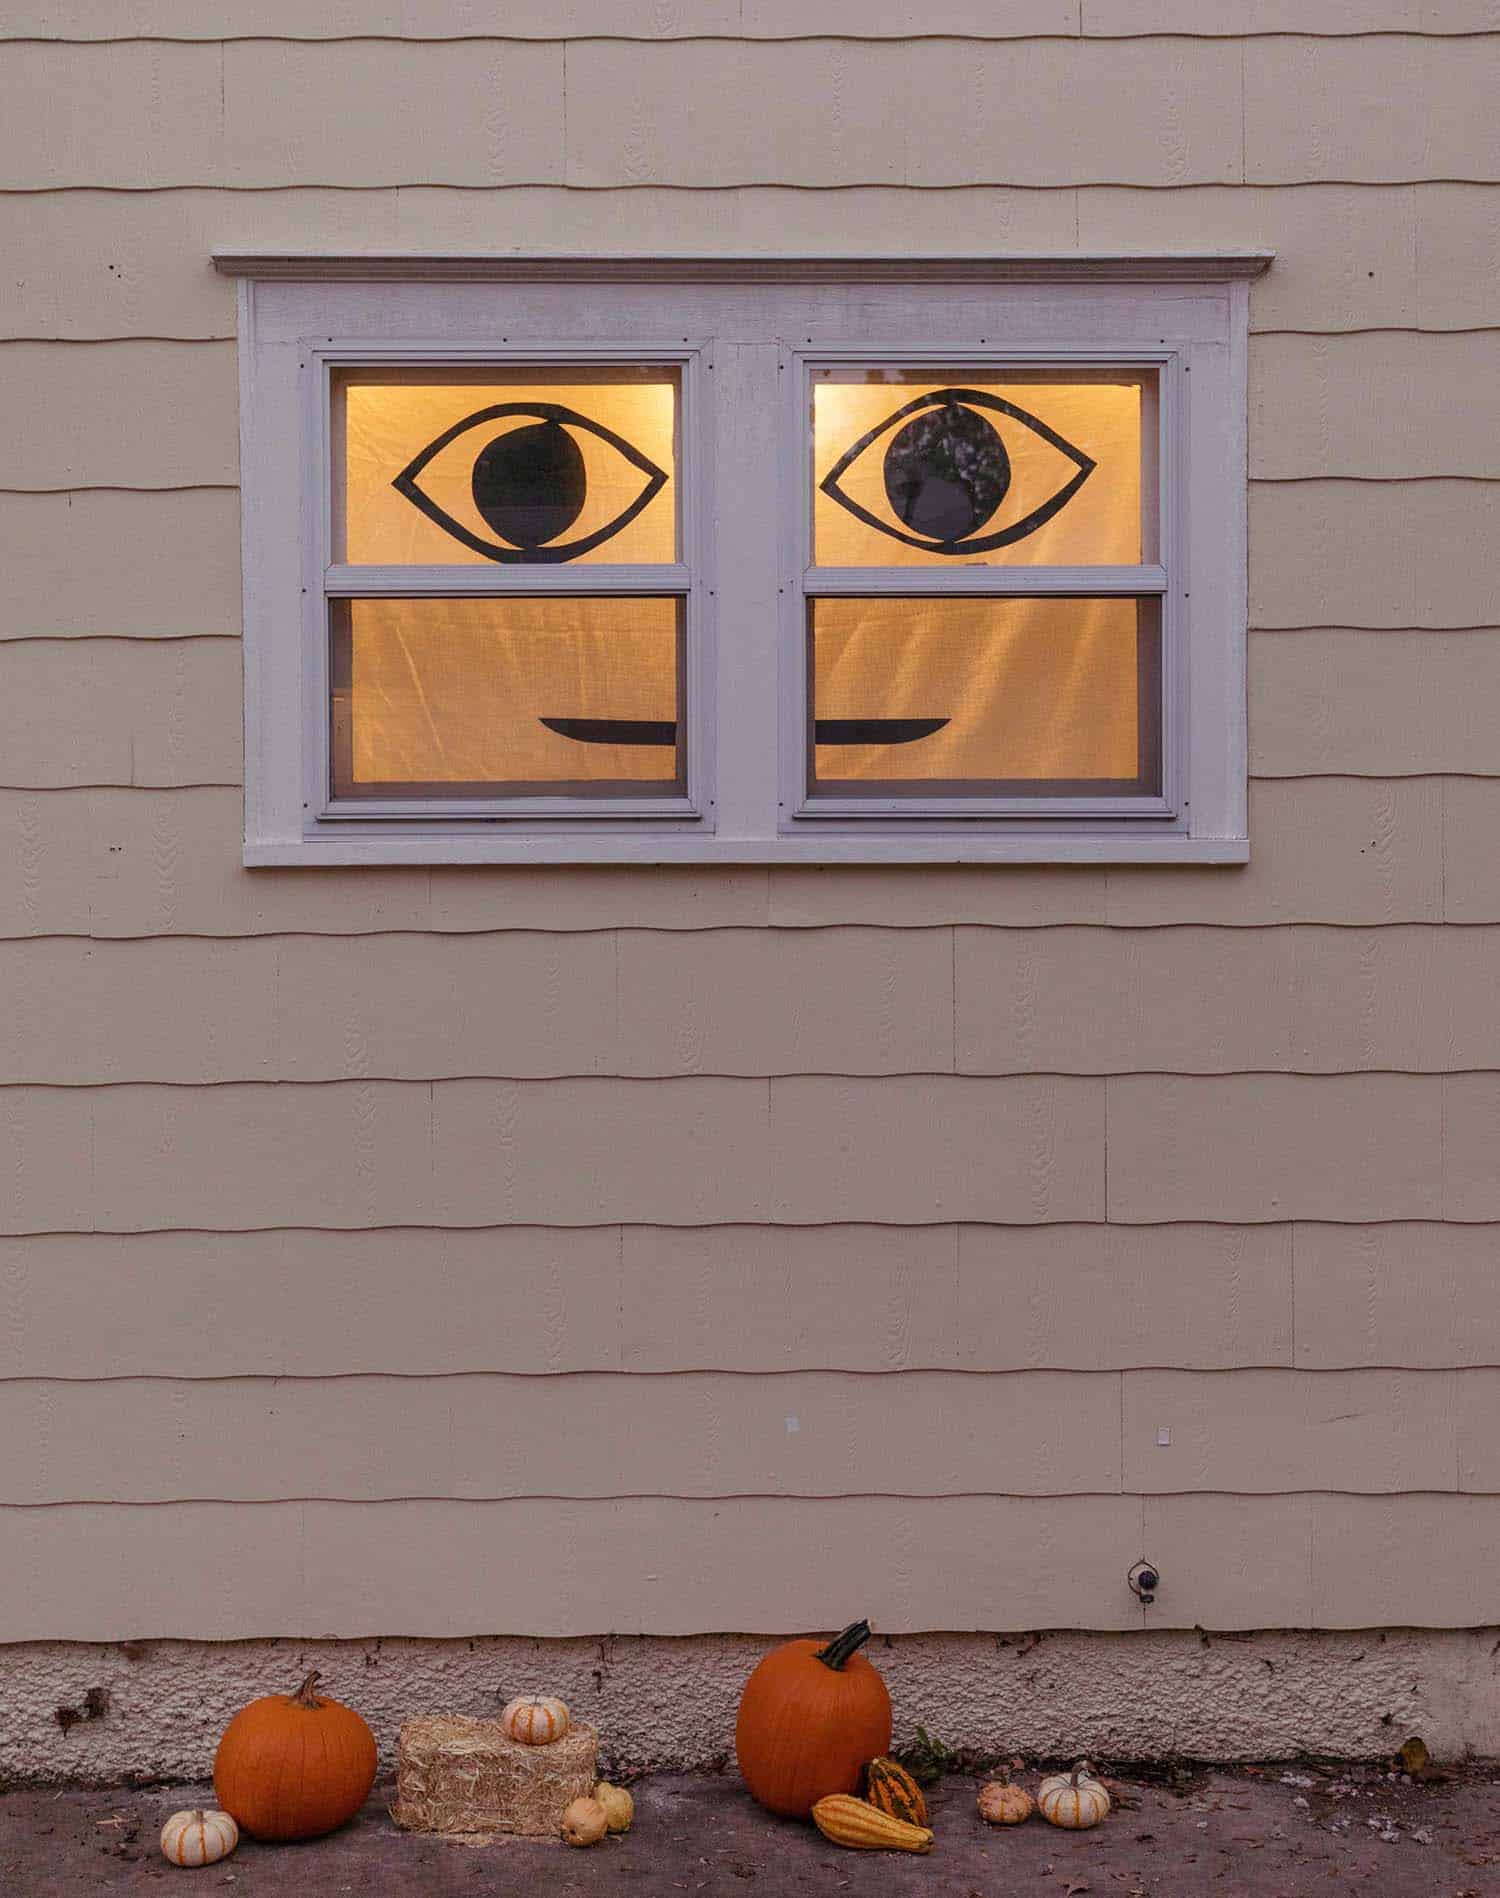
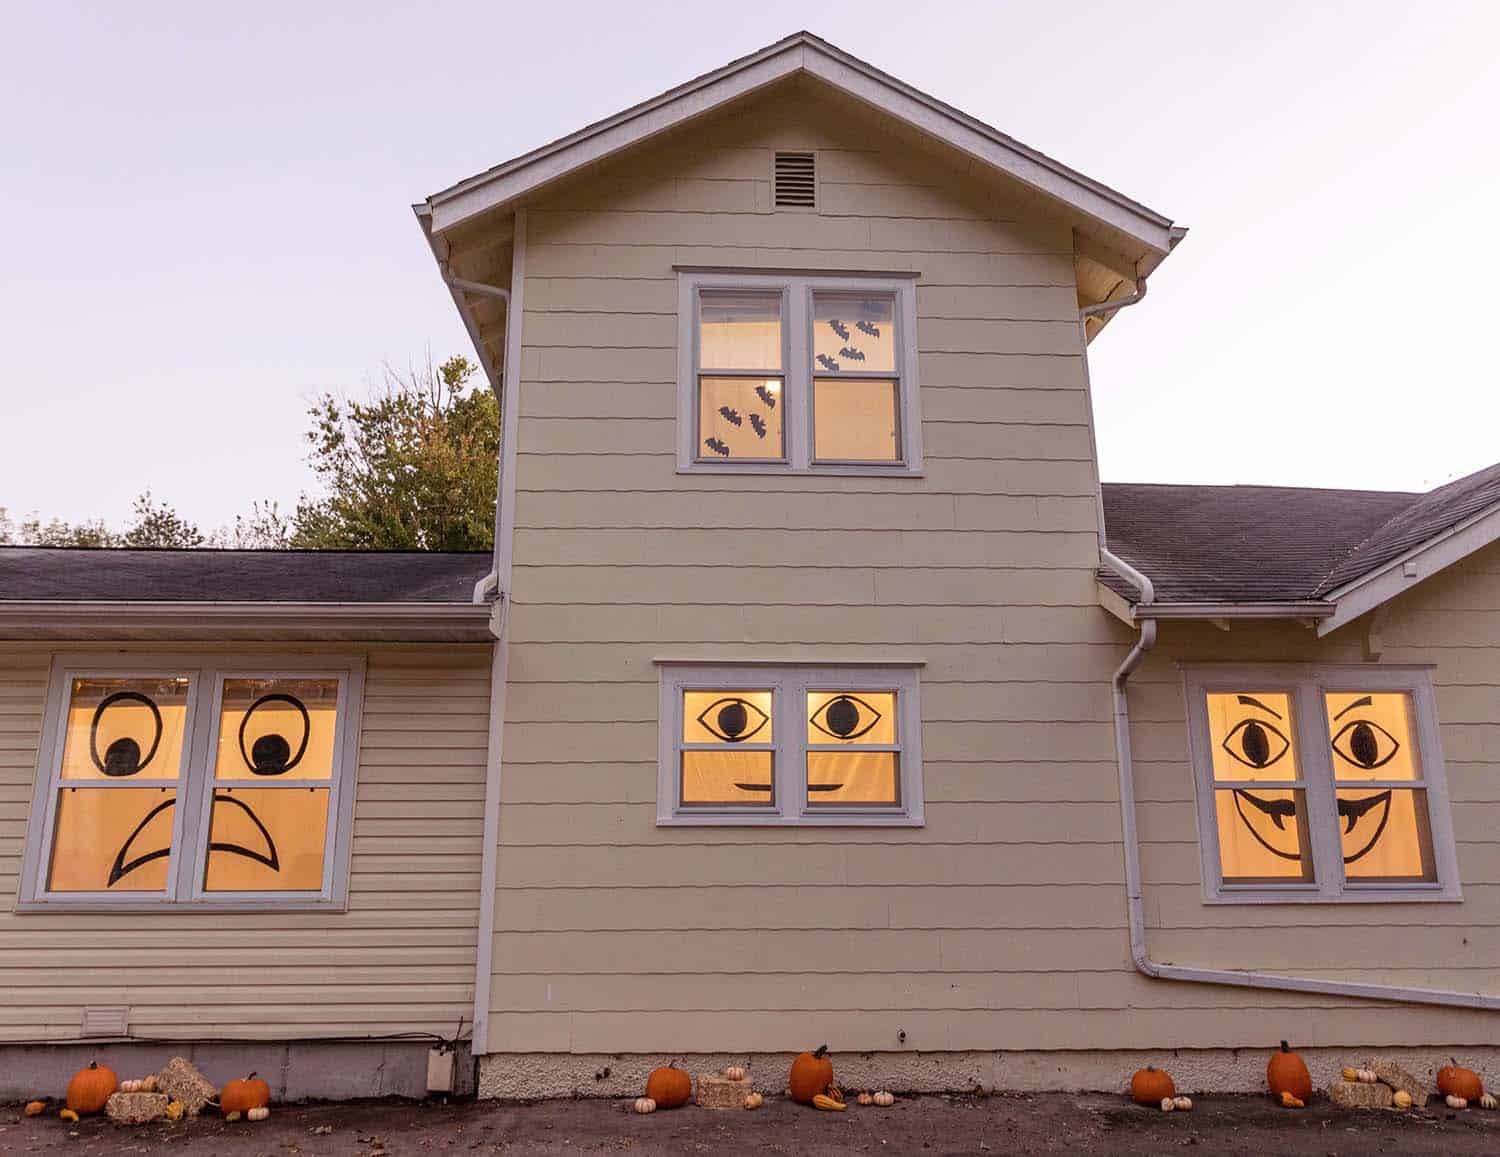
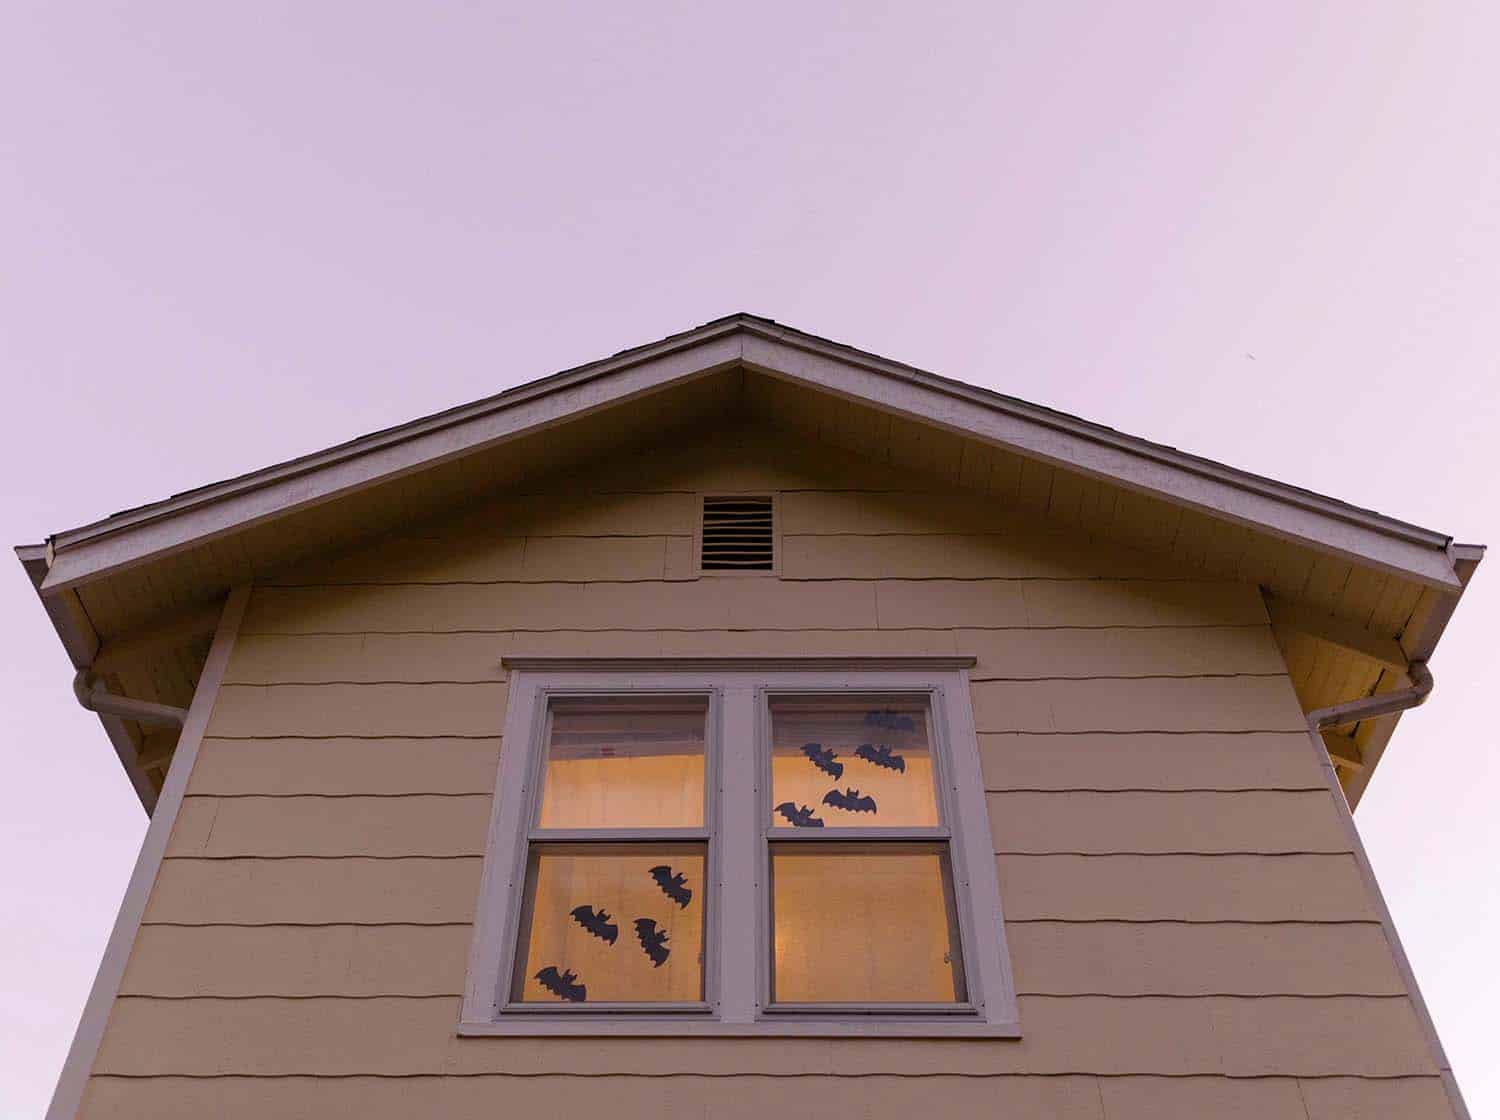 The idea is to create shapes from paper (black or any dark color) to add to your windows, so at night when you have your interior lights on, the shapes can be seen. There are lots of fun ideas you can see on Pinterest—some are amazingly elaborate! But here’s what I did to create our simple face designs.
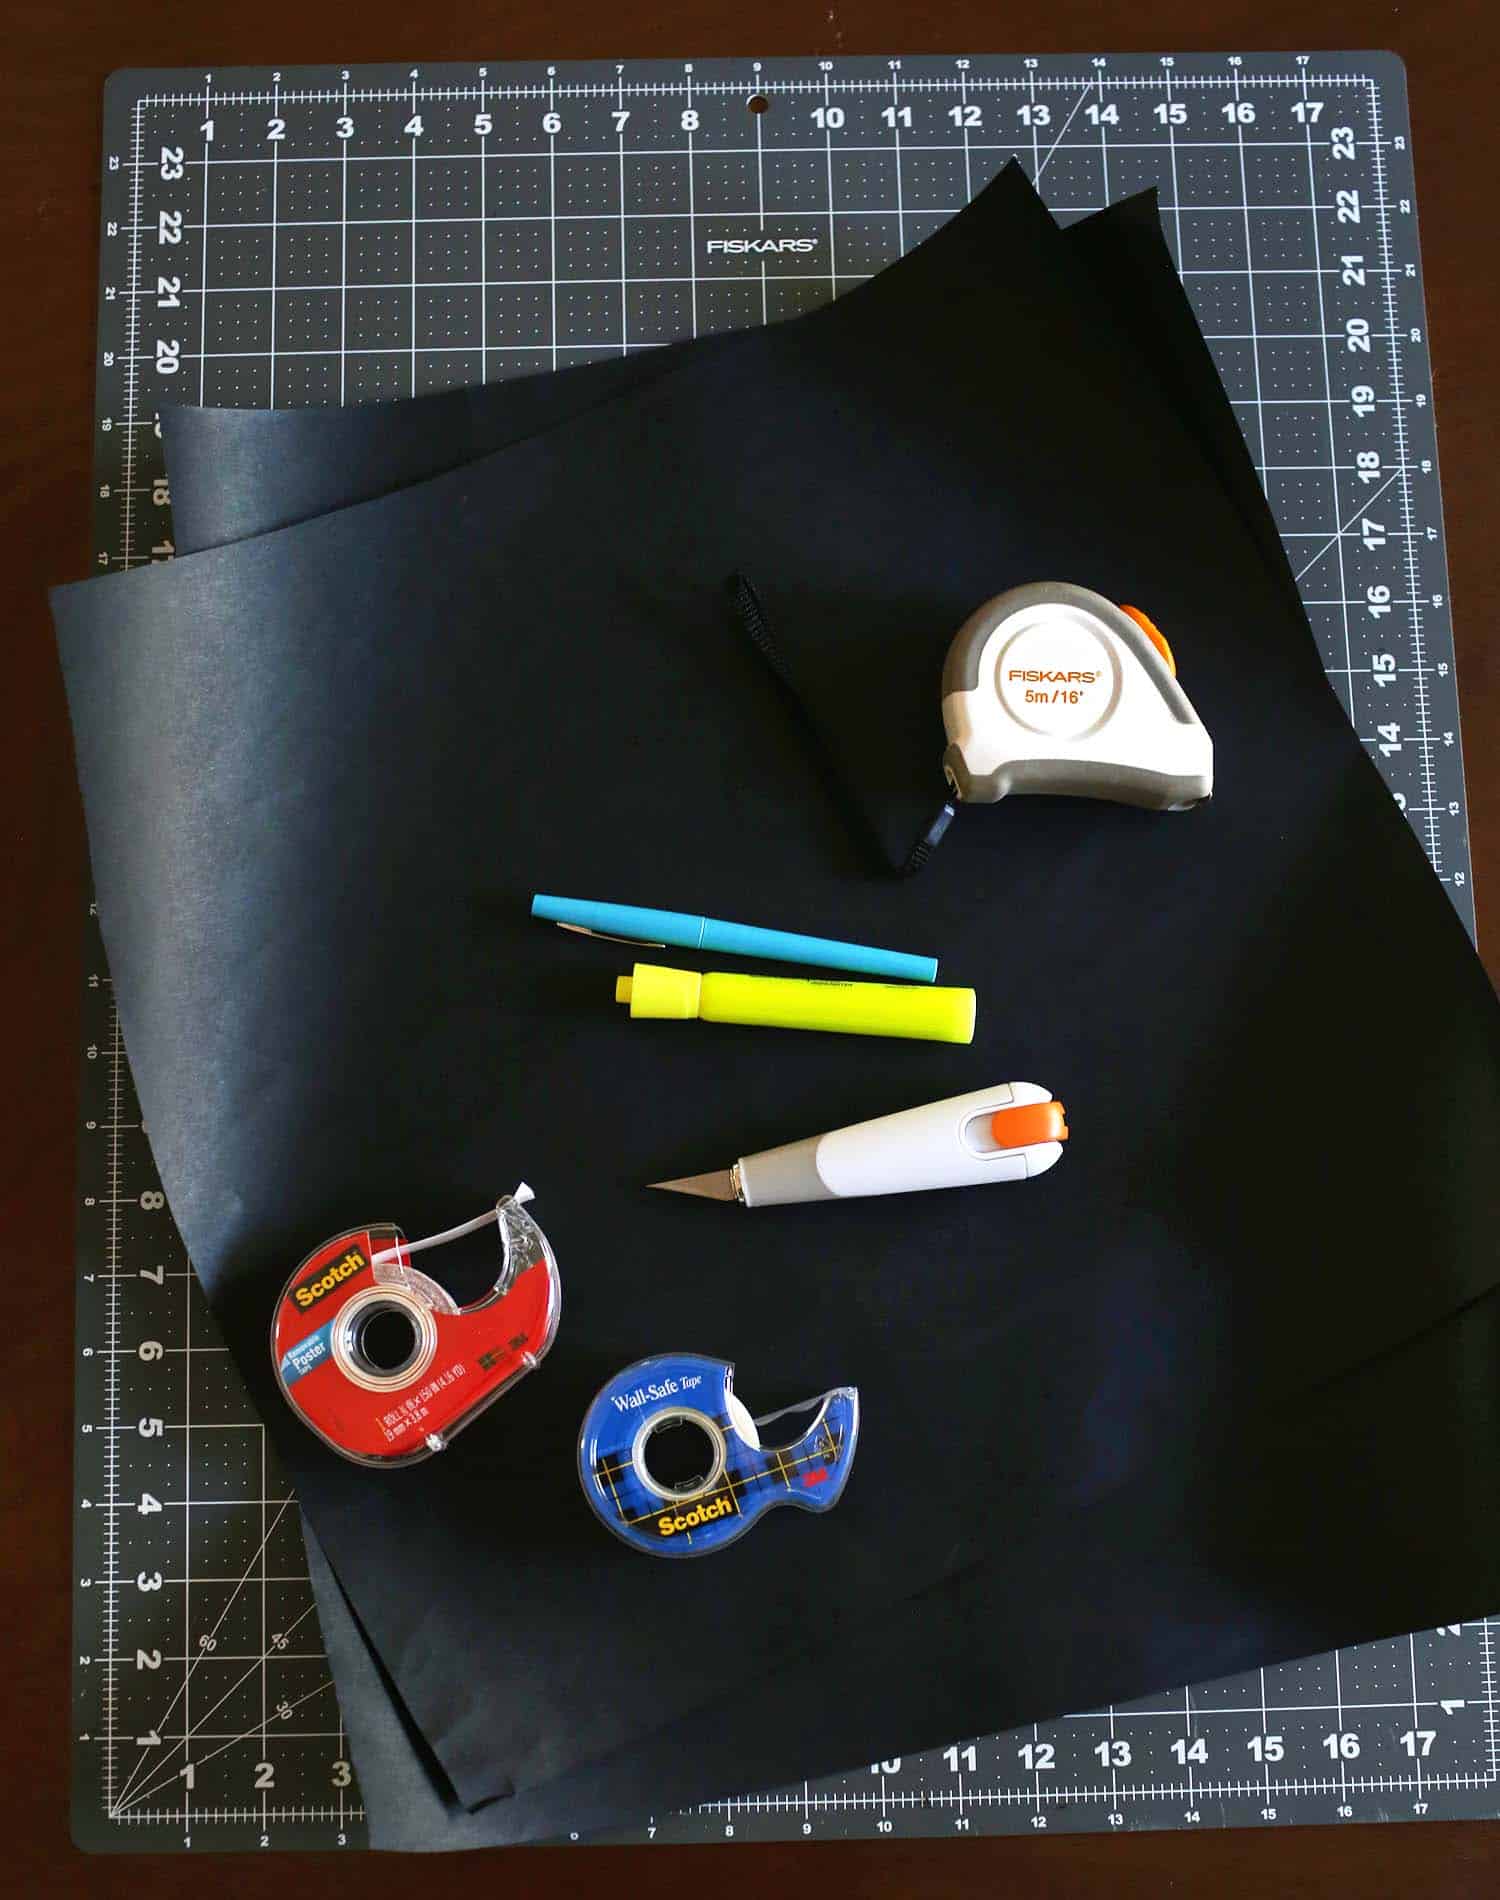 Supplies:
-black or dark/thick paper (you can reuse paper if it’s thick enough, but I bought a roll of this and it’s been useful in a LOT of ways so far)
-measuring tape
-X-Acto knife (I love this one) or if you are working with kids, swap this out for kid-friendly scissors 🙂
-cutting mat
-window safe adhesive/tape*
I really like Scotch removable poster tape for this project. It’s a double-sided tape that doesn’t damage windows/leave a sticky residue (maybe if it’s left up for a long period … haven’t tried that). But there are probably other tapes that will work well, this is just what I recommend. If you are making designs for walls, I like to use Command poster hanging strips. But these aren’t as good for this window project because they aren’t clear, so you can see them at night, which isn’t the look we’re going for.
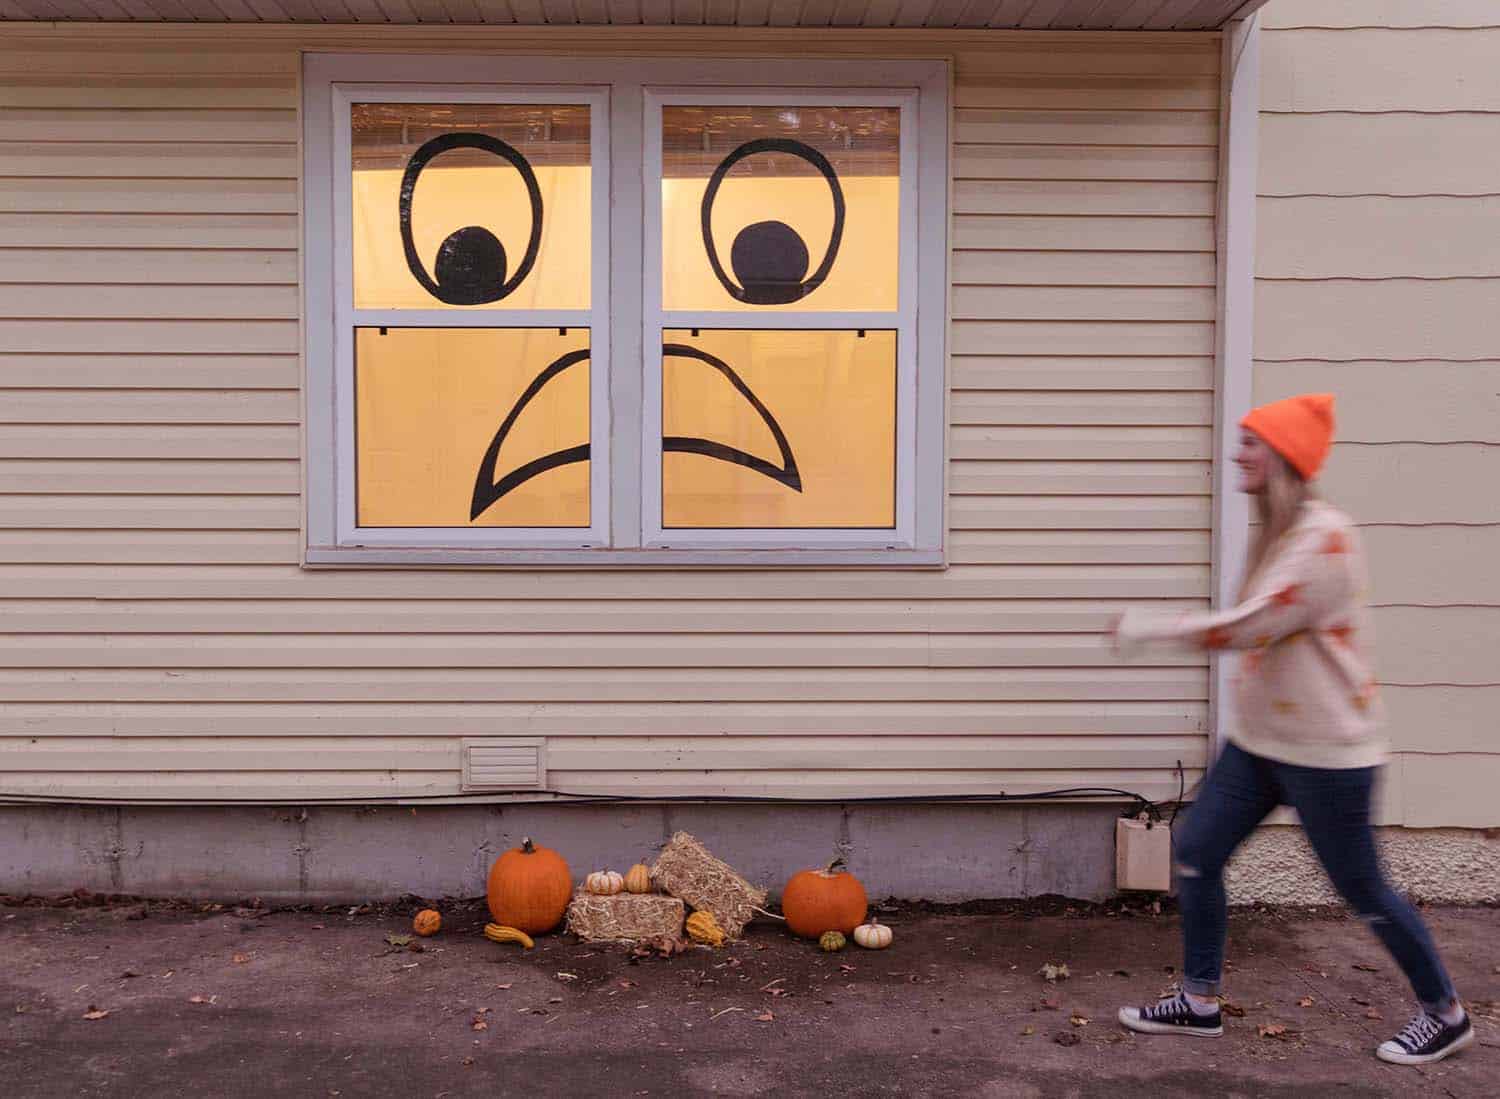
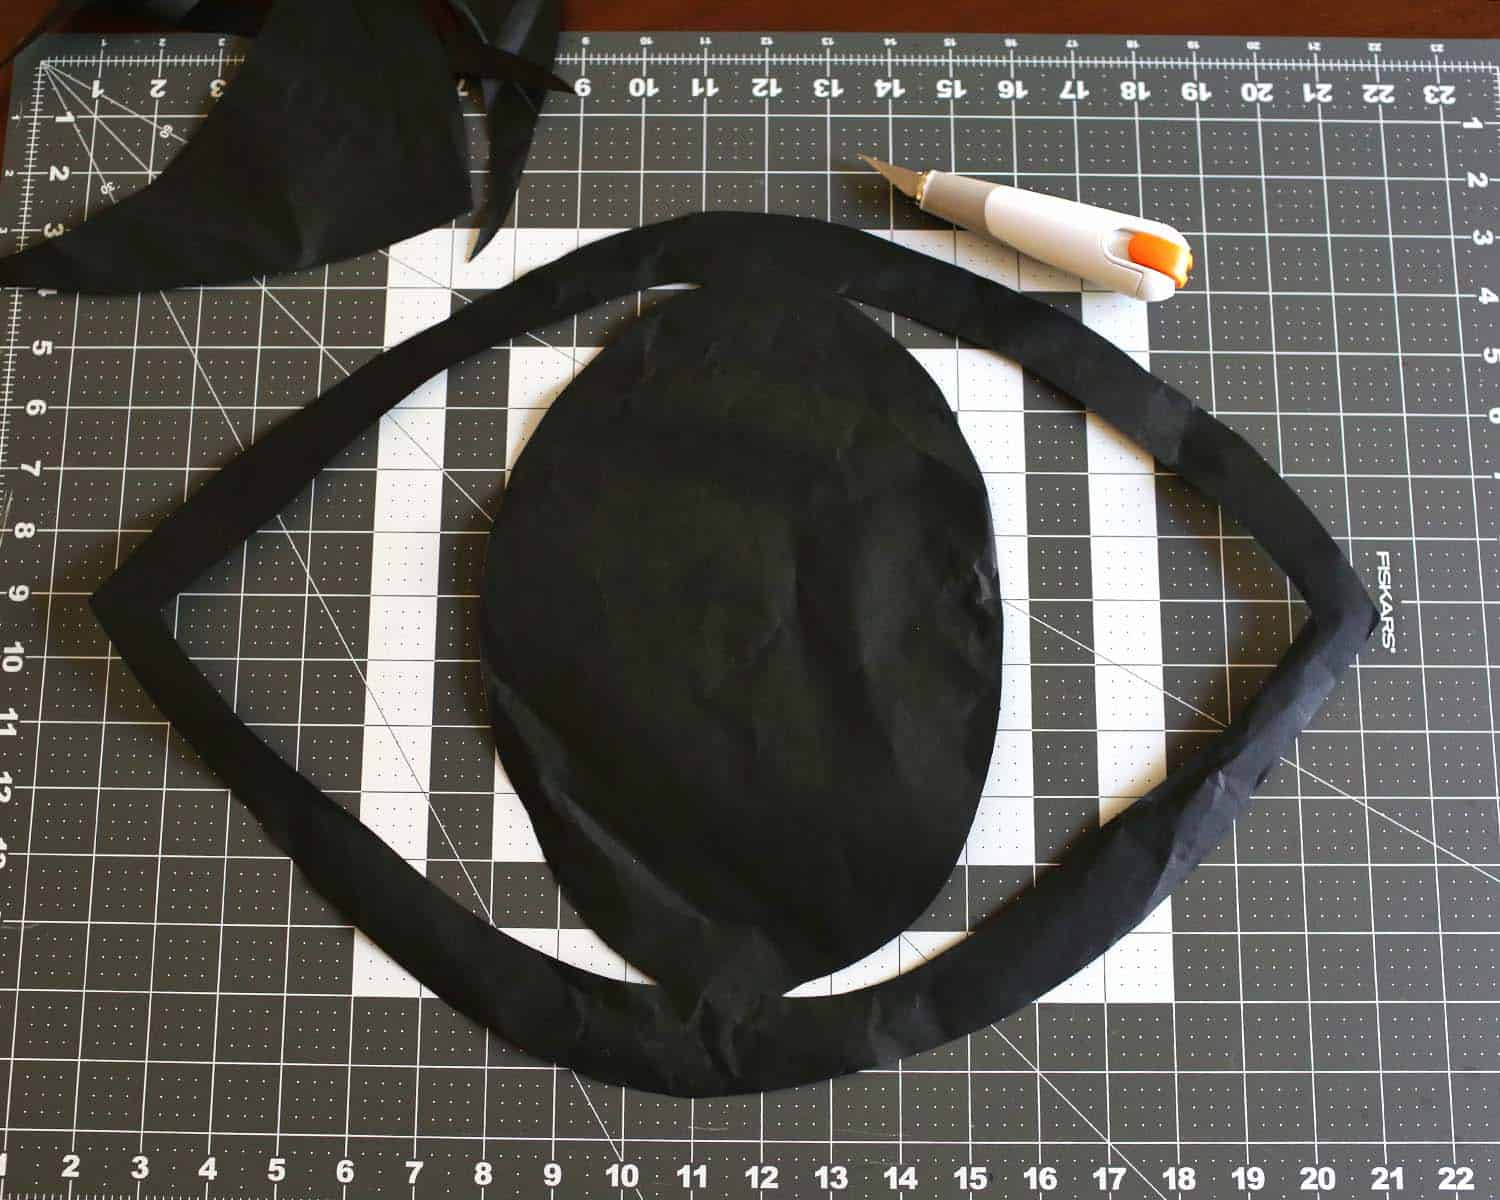 Step One: Measure your windows and decide what kind of designs you want to do. I decided on faces that fill up the majority of the window. But there are seriously SO many different things you can do. A measuring tape helps here to determine the window size (especially if your house is old, like the holiday house, and has lots of different sized windows).
Step Two: Cut out designs. You can be super elaborate with an X-Acto knife. But you can also keep it simple if you’re working with kids and safety scissors. Also, if you don’t have time or don’t want to cut out shapes, just use foam bats. Ha! It’s seriously my favorite cheap Halloween decor item. I have foam bats taped up EVERYWHERE.
Step Three: Adhere your designs to the windows. That’s it! Now just wait for nightfall and enjoy your spooky windows. This is so fun in neighborhoods where you get a lot of trick-or-treaters too, so everyone gets to enjoy your spooky windows.
 Thanks for letting me share! If you decorate your windows this year, tag us so we can see! xo. Emma
4 Comments
Ooh, I love this so much! I wish I could do it on my home, unfortunately I live on the 22nd floor of an apartment haha! So cute though! ❤️✨
Charmaine Ng | Architecture & Lifestyle Blog
http://charmainenyw.com
So cool!!! I feel ya with the foam bats. They are in our living room, kitchen and our boys room and I got another pack for our sunporch ???? they are so satisfying to put up ????
Such a cute Idea. command has strips that are clear if you wanted to use them next time!
I love easy projects that make a big visual impact and this one is fantastic! Houses usually look kind of face-like anyway, so the giant eyes is a natural fit for Halloween!
xoKaelen | https://darlingmarcelle.com