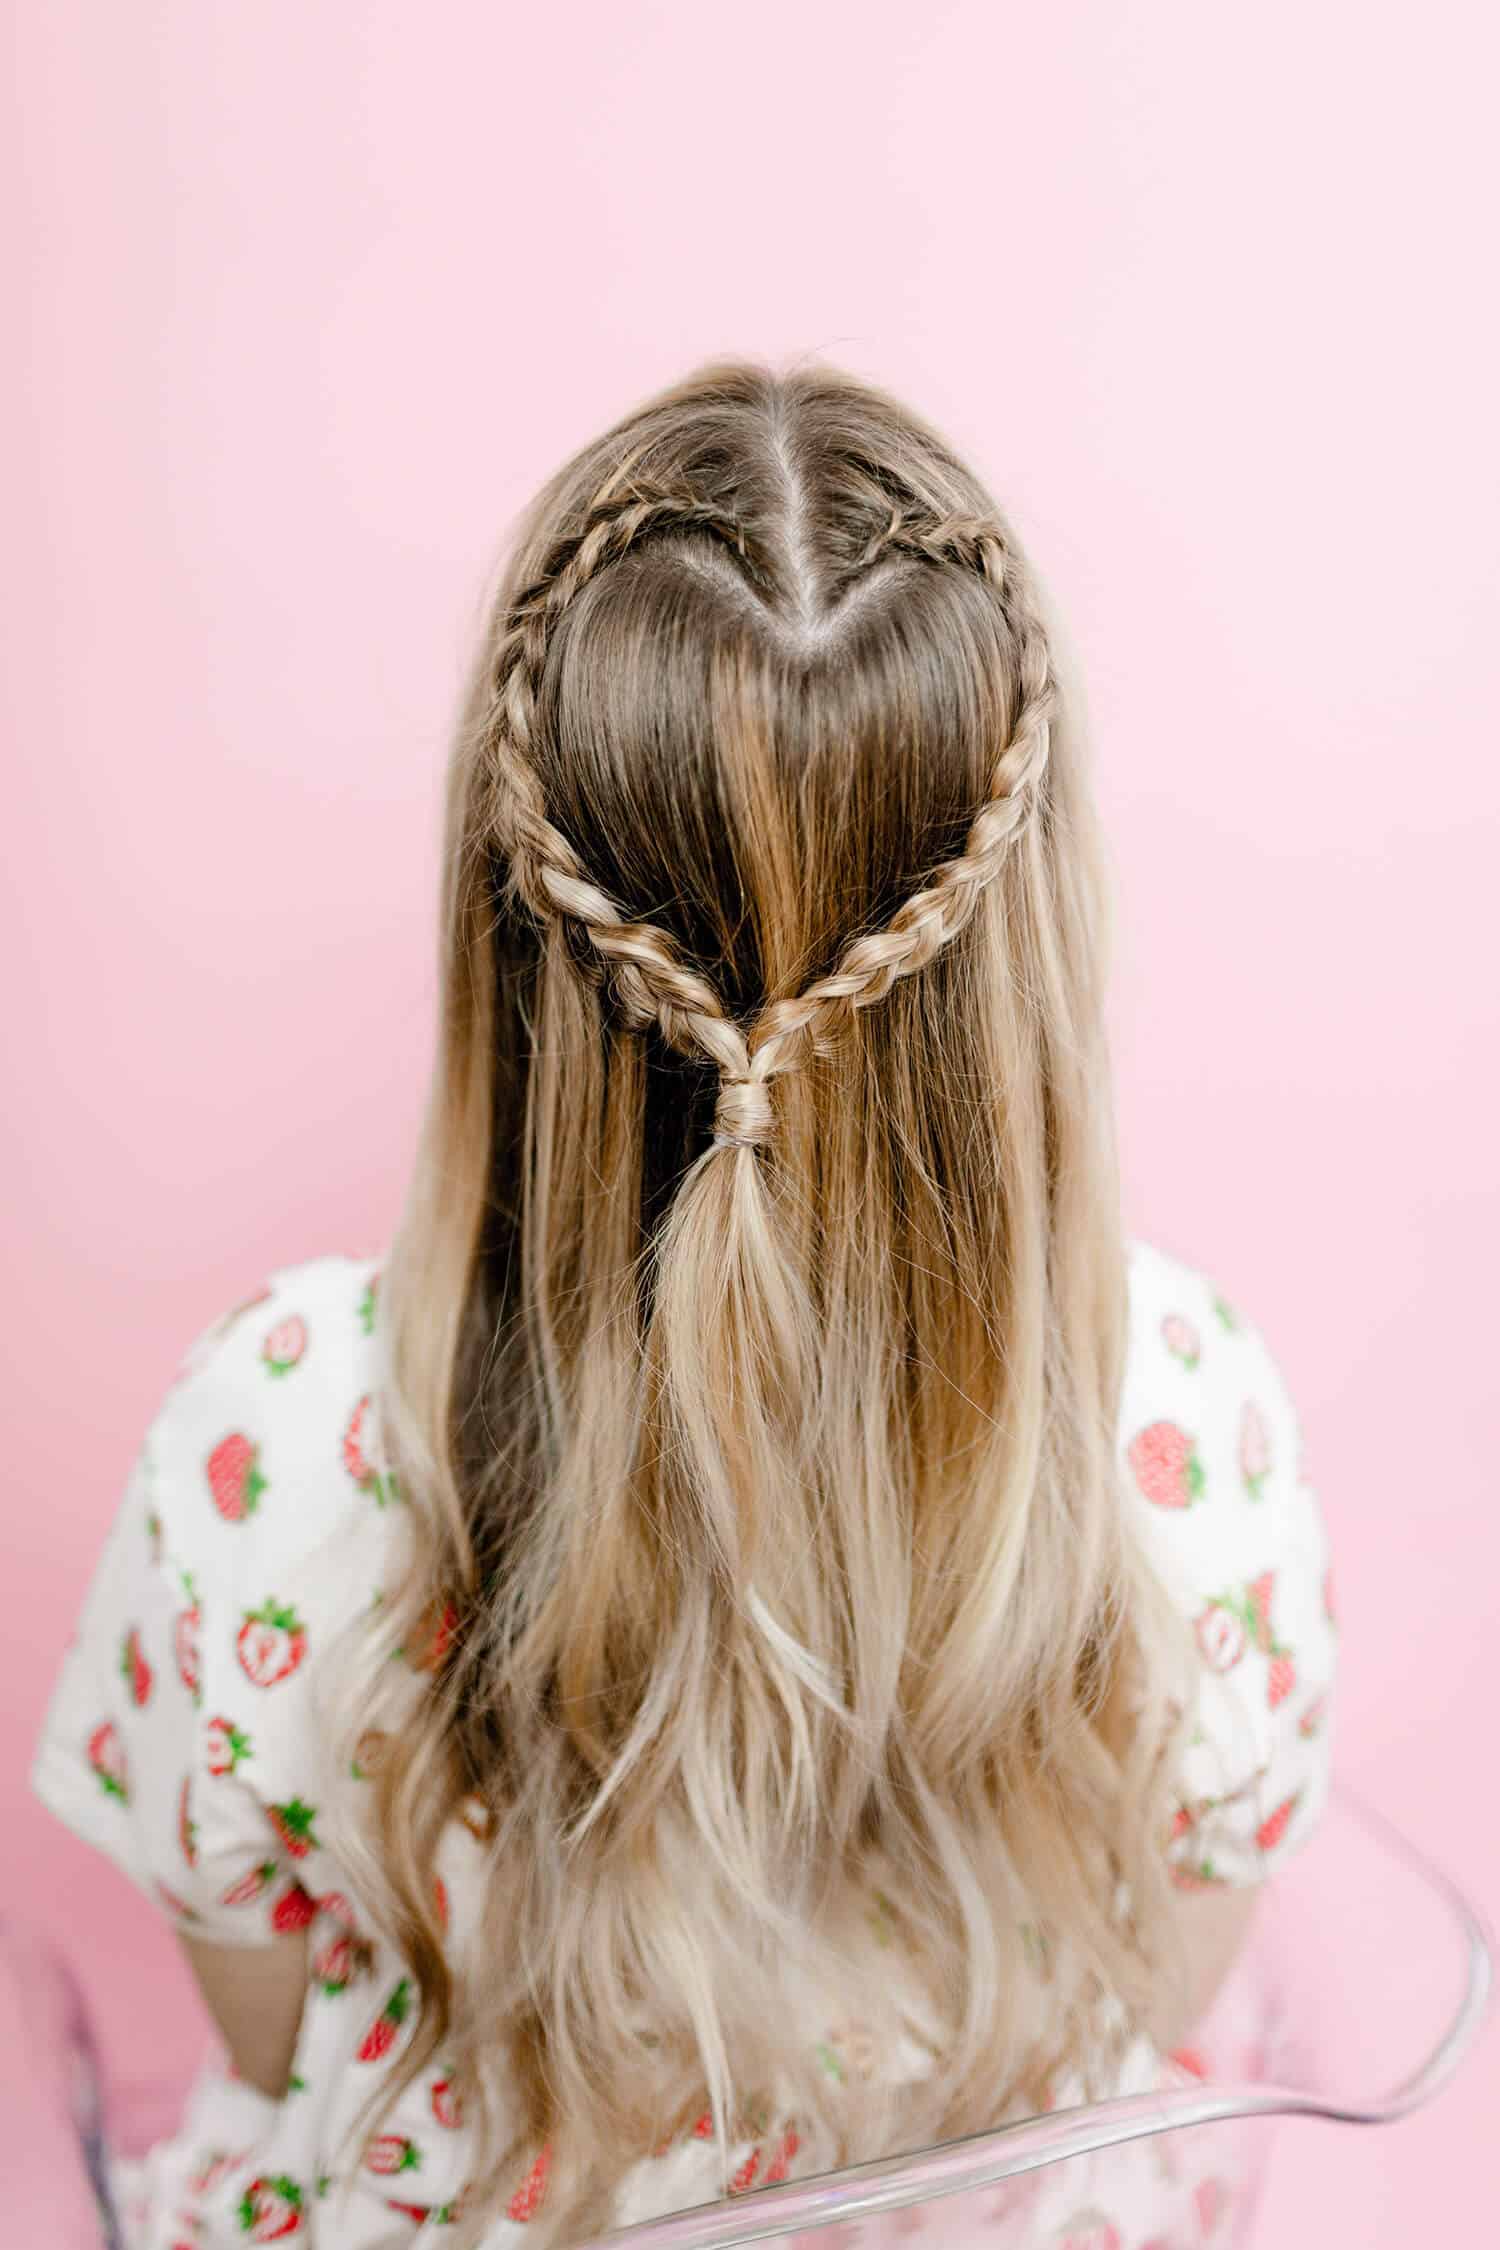
 Hi friends, it’s Emma. Yes, this is the back of my head but I’m still saying hello. 🙂 My friend, Erin Wheaton, is going to share this adorable heart shaped braid tutorial with you. Erin is a stylist at Blu Skies Salon in my town (Springfield, Missouri!) and a national educator for Paul Mitchell. If you love colorful hair or learning from a hair pro, you should also check her out on IG because she’s always doing something fun, especially in her Stories. She’s @erinwheaton.
Take it away, Erin …
 I always feel like those months right in between winter and spring I get the urge to overhaul my style—whether it’s my closet, home, or hair, I always crave something fresh and new! But usually I’ve got so much on the calendar towards the beginning of the year, so there’s not a whole lot of time to get too crazy. And while I was able to do this ultra-cute heart braid on Emma, it’s not as intricate as it might look—which who isn’t all about that?! Work smarter, not harder, right? SO, with this braid, you’ll be able to easily give yourself (or a friend!) a quick updated play off a more common half-up braided crown look.
 1. Begin with a center part, adding loose texture throughout the hair using a wand or smoothing iron.
2. Section a heart shape at the high point of the head—or wherever you’d like to see the finished look live. No need to section out the point of the heart shape, just the two arches towards the top!
3. Take a small section of hair above where the two arches meet on either side and part into three strands that you will use to begin your first braid.
4. Begin a Dutch braid, adding to it only from the side closest to the face on top of the head from the part. Follow the curved arch shape previously sectioned.
5. Towards the end of the arch, or wherever you’d like to begin the edge of the heart into the point, continue into a basic three-strand braid without collecting any hair. Once the braid is long enough to complete one half of the heart shape, secure with an elastic.
6. Repeat steps 1-5 on opposite side to form the other side of the heart!
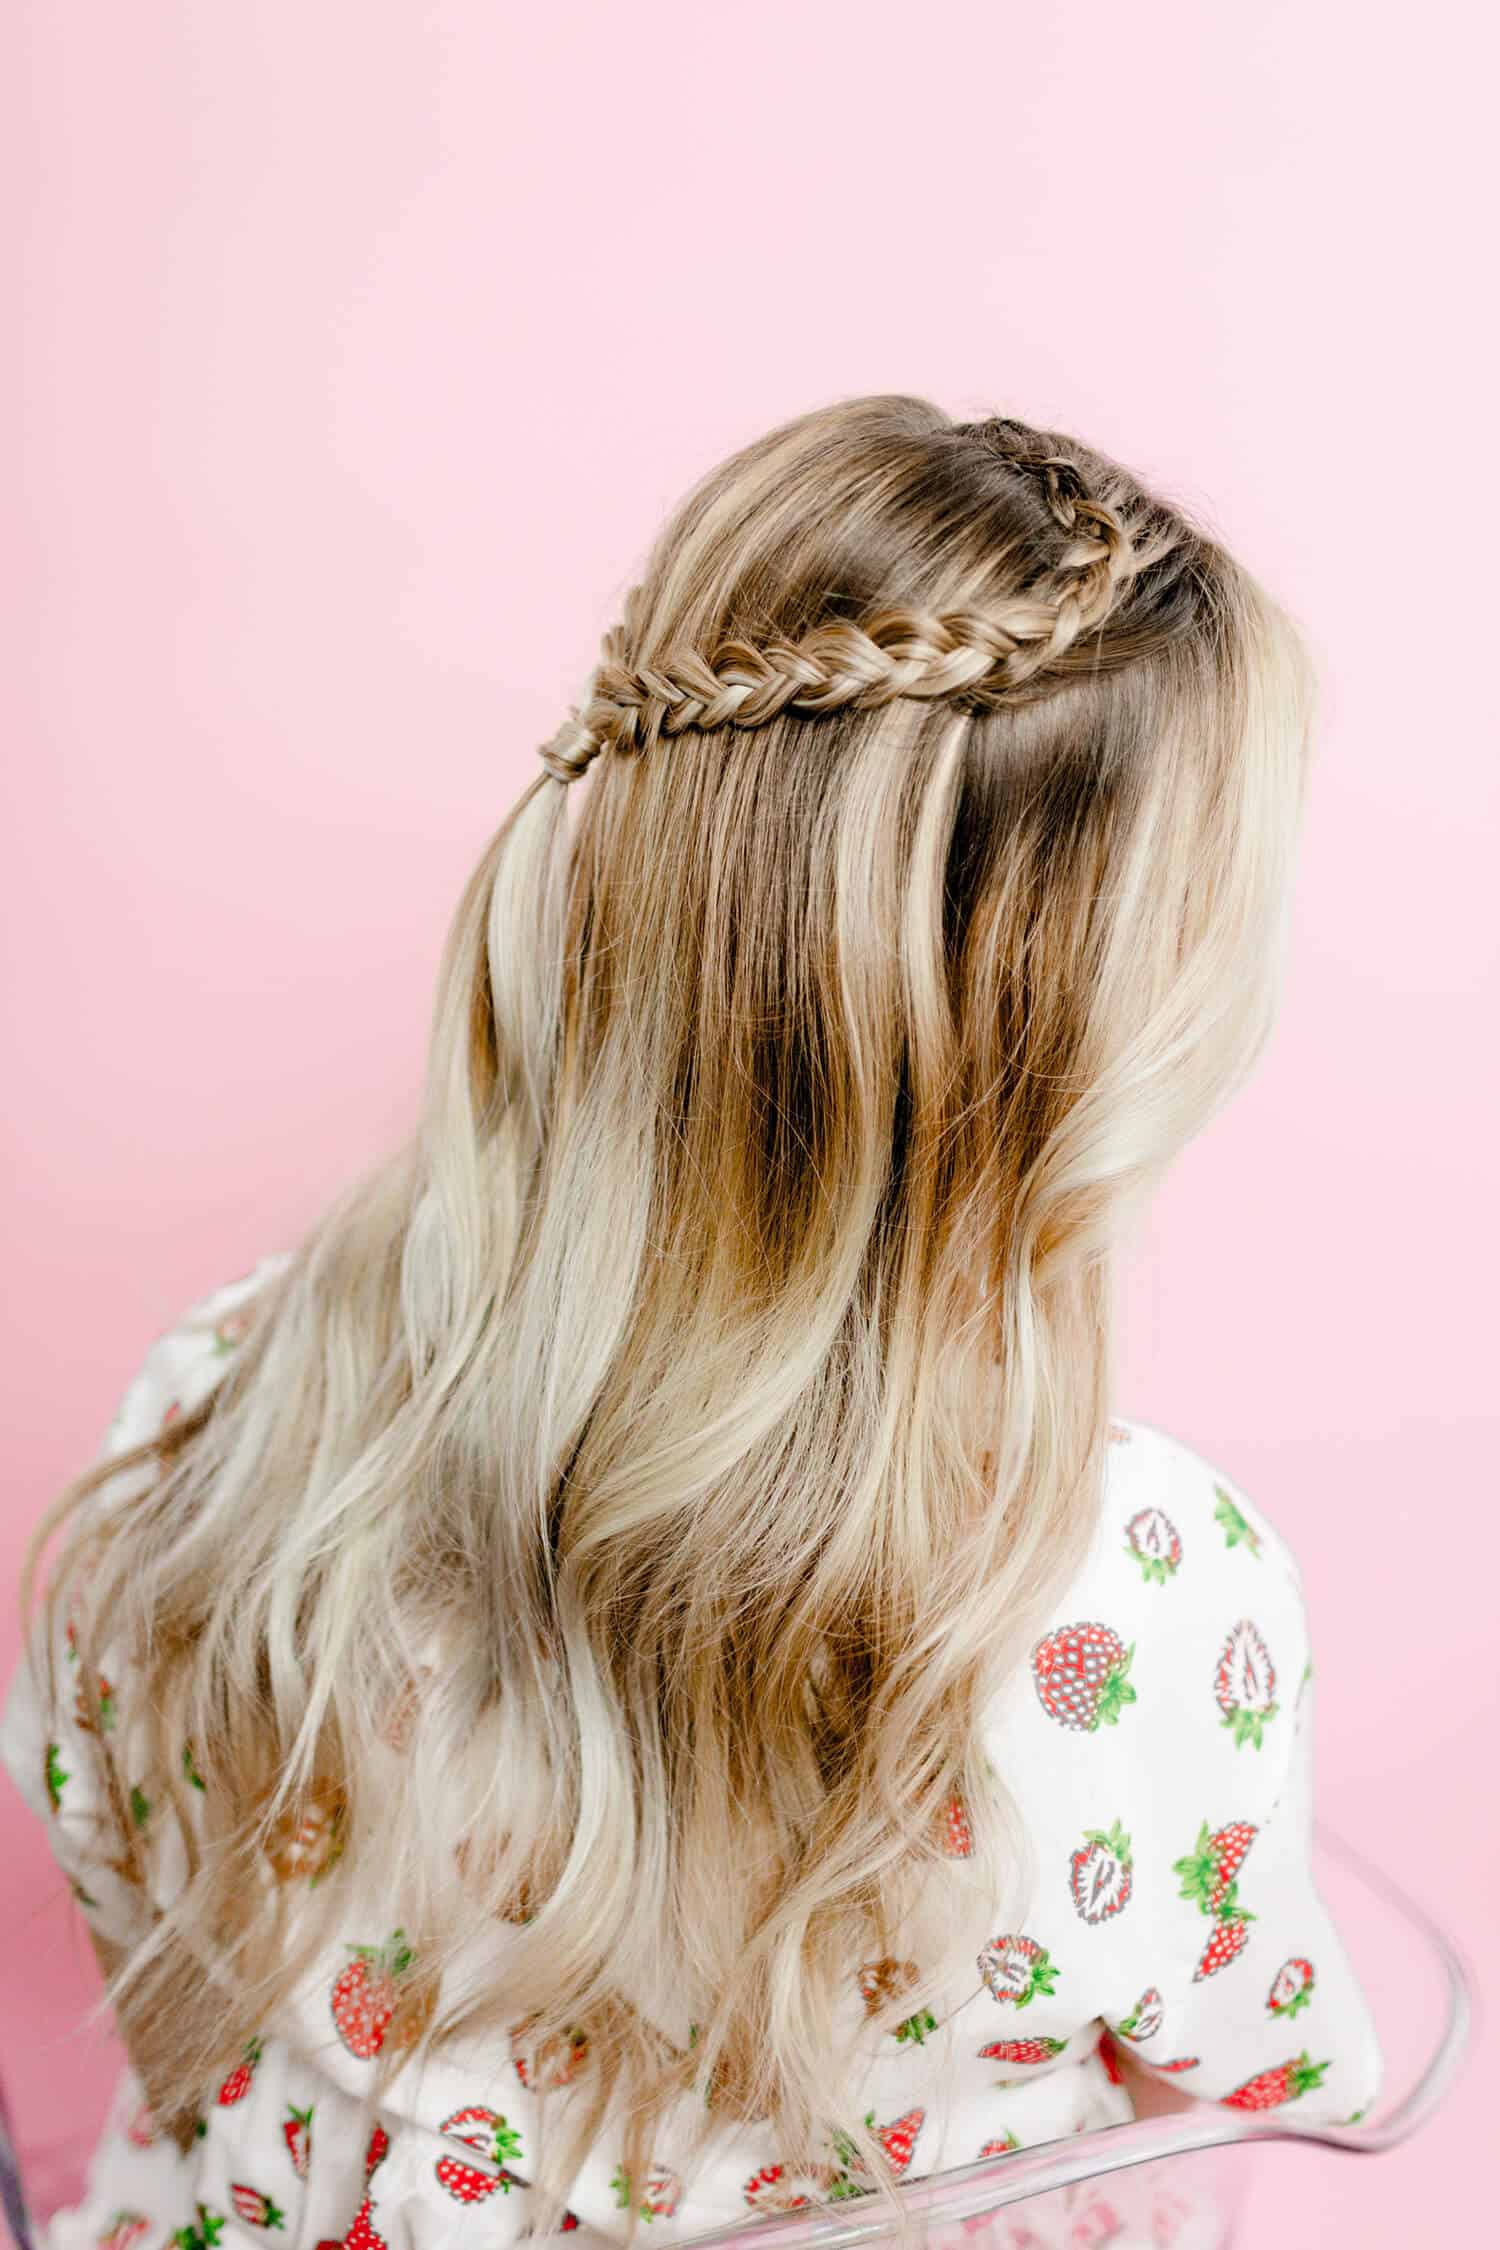
7. After each braid is secured, one at a time, hold the end of the braid and pull each loop out slightly to expand the shape of the braid and add fullness.
8. Attach the braids together using an elastic. If you choose to remove the previous elastics, you can!
9. Take a small strand from the ponytail created by attaching both braids together. Use it to wrap around and hide the elastic band. You can secure with another elastic. Pull the ponytail apart to push up the second elastic band to hide and secure.
10. Use your favorite hairspray to set your heart braid in place and go show it off!
 So yeah! If you’re doing this braid on your own, you may find it easier to use a mirror to see where your sections are. But I feel like this braid is just super cute and flirty and perfect for anything from brunch to date night to just changing up your day-to-day look. Try pulling the rest of your hair up into a ponytail after you’re done for a more casual look, too! It’s kind of like a grown-up way of wearing a heart barrette or accessory in your hair (but like, I’m not against that either!). <3 Erin
13 Comments
I love the look of the braid! It’s been a while since you guys have posted a hair tutorial, have missed those! 🙂
Charmaine Ng | Architecture & Lifestyle Blog
http://charmainenyw.com
Very Cute! Also love the strawberry top/dress!
thanks for this idea. My sister wanted a haircut and I did it for her. we even made a double braid
This is so pretty love it! I use to do styles like this all the time when I was younger! They’re so pretty! xx
https://zoe-ware.blogspot.ca
This is ADORABLE! I’ve totally been obsessed with braids lately so I can’t wait to try it out ????
Girl, Do It | DIY Blog
http://www.girldoit.com
How cute this hairdo is!
https://www.makeandmess.com/
Cute hair Emma! I love strawberry stuff and was wondering if you could please share the source of your adorable top/dress!?
Hi Elizabeth! It’s from SheIn a couple years ago. <3
This really does seem so easy and looks stunning. Thanks for this.
Lisa x
http://www.parentingteens.uk
I love everything about this! Thanks for breaking it down and making it seam like my hair AND hands could actually do this. I may just have to attempt it. Loving the hair tutorials!
super cute!
Such a fun and simple look!
Paige
http://thehappyflammily.com
this is so cute and since i love doing hair this is great!!!! so cute!!!!!<3