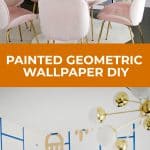
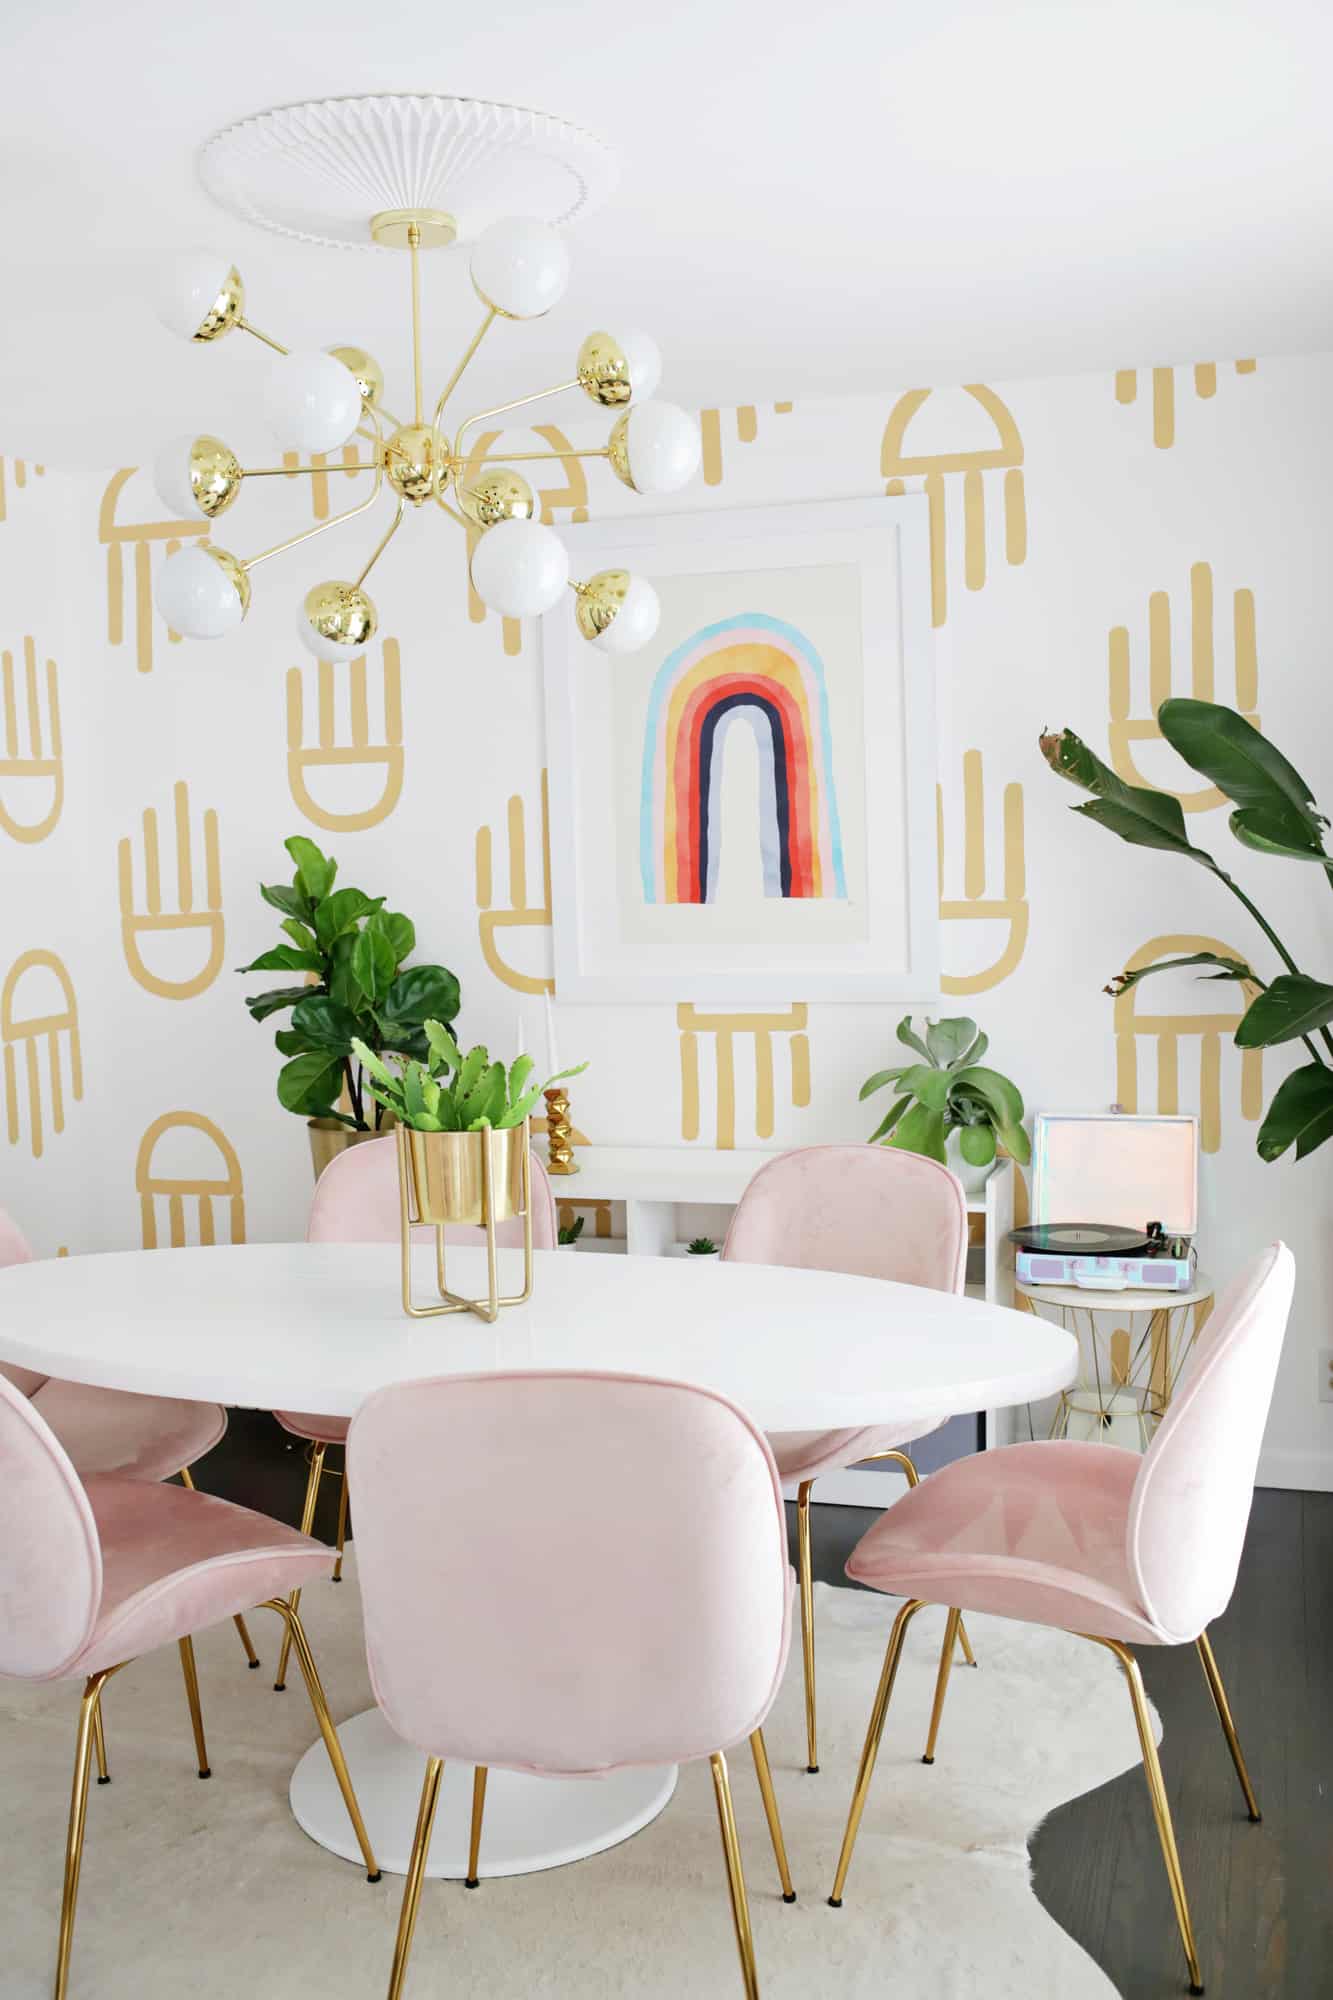
 Yay! I’ve been looking forward to completing this wallpaper post for a long time now and it feels so good to have it finally done! I loved having a pink dining room in our home, but after a while, I could feel that I was ready to make a bit of a change and bring in a little more pattern into the space. While I love the look of an amazing wallpaper in a space, I still always opt for a hand-painted wallpaper option so I can make it exactly how I want at a fraction of the price, and not have to deal with wallpaper removal once I’m ready for something new. Here’s how I went about making a fun pattern for our painted dining room wallpaper!
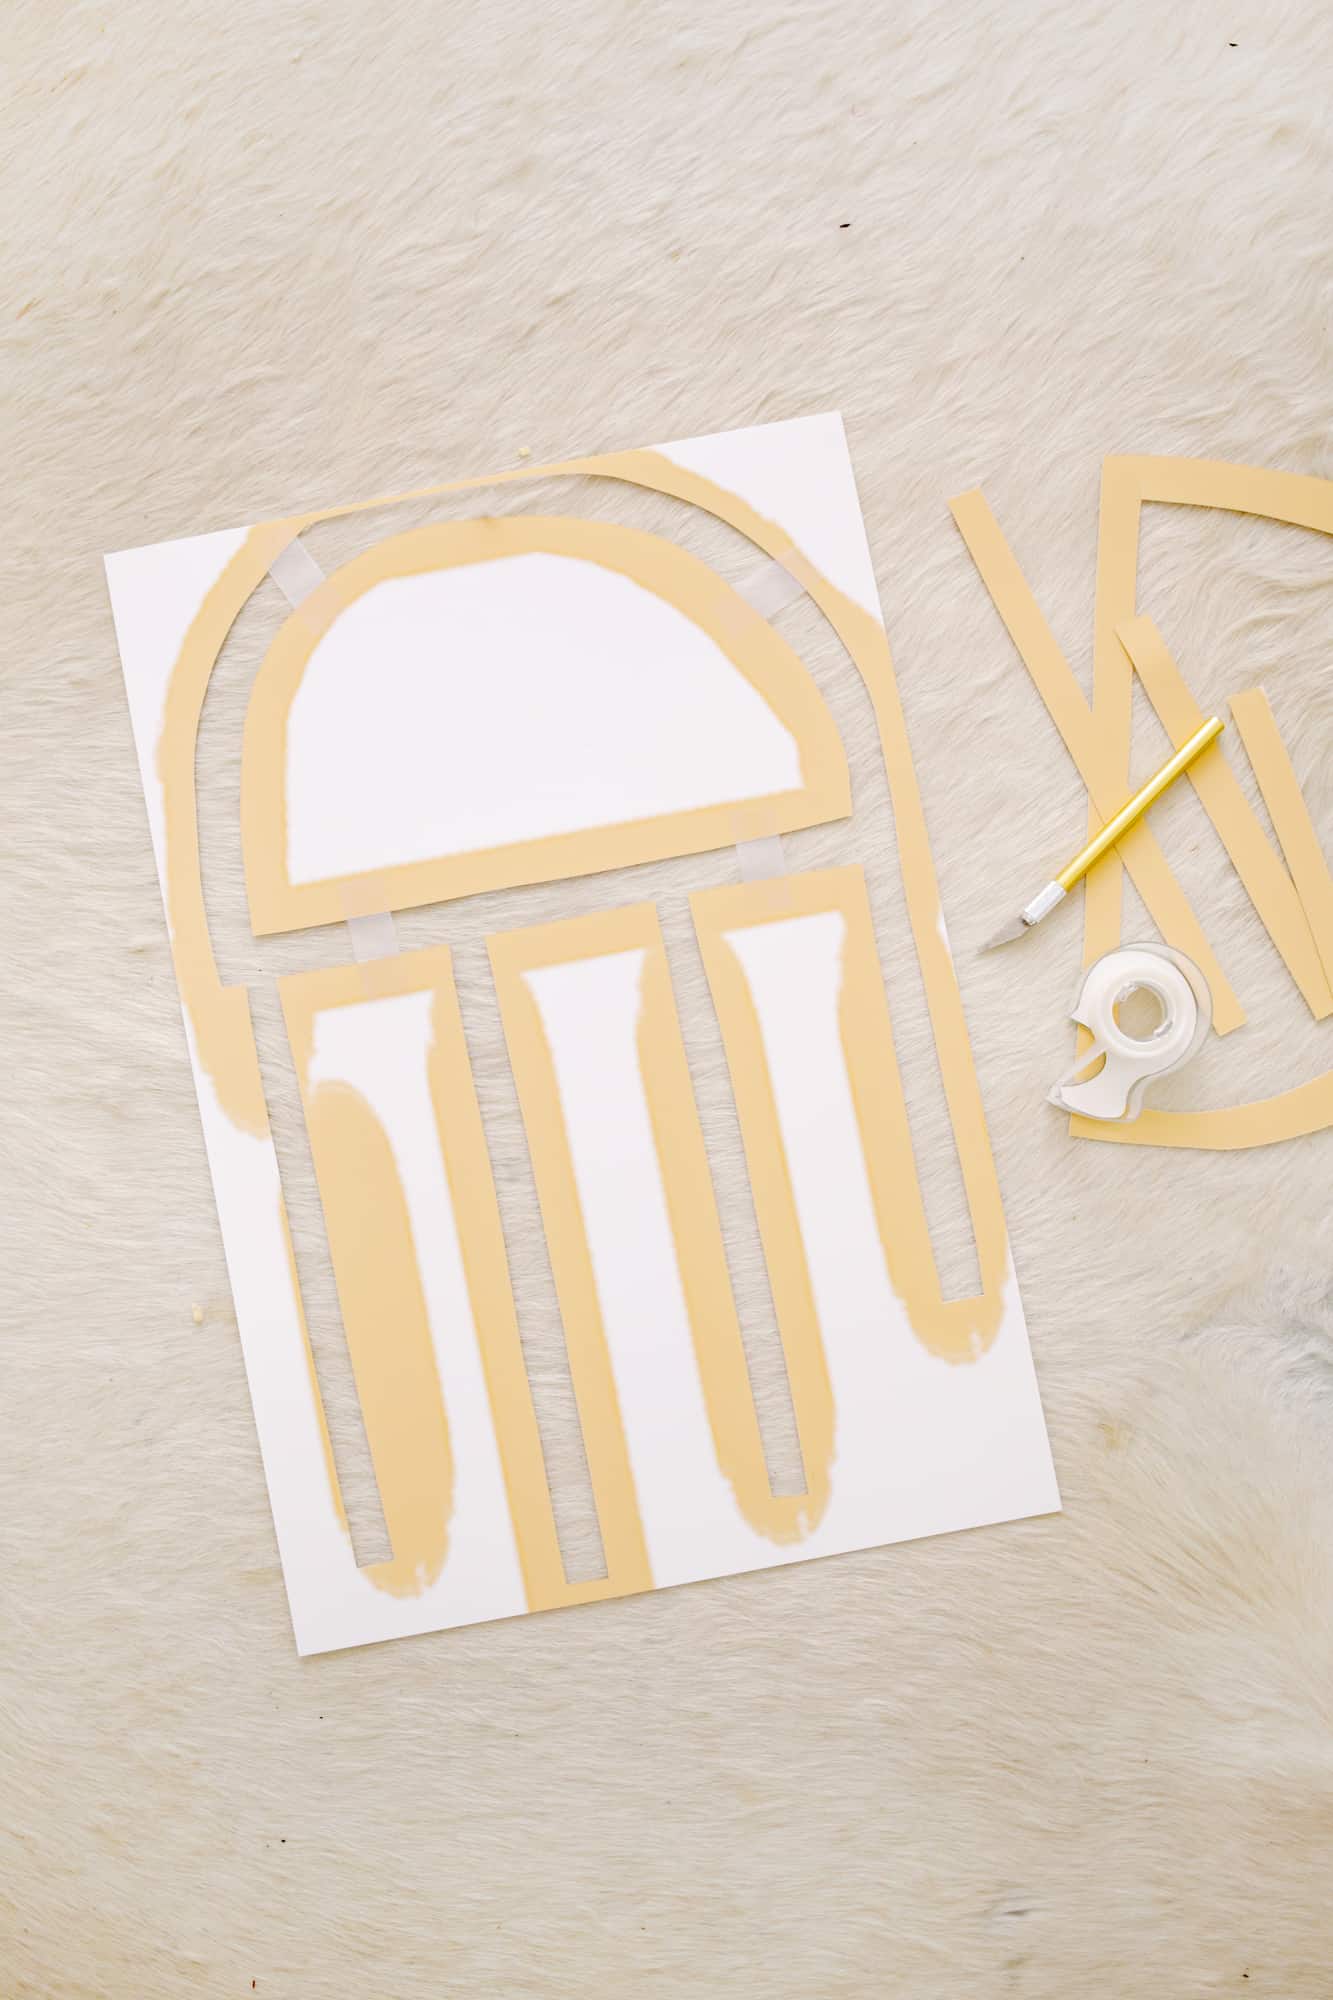
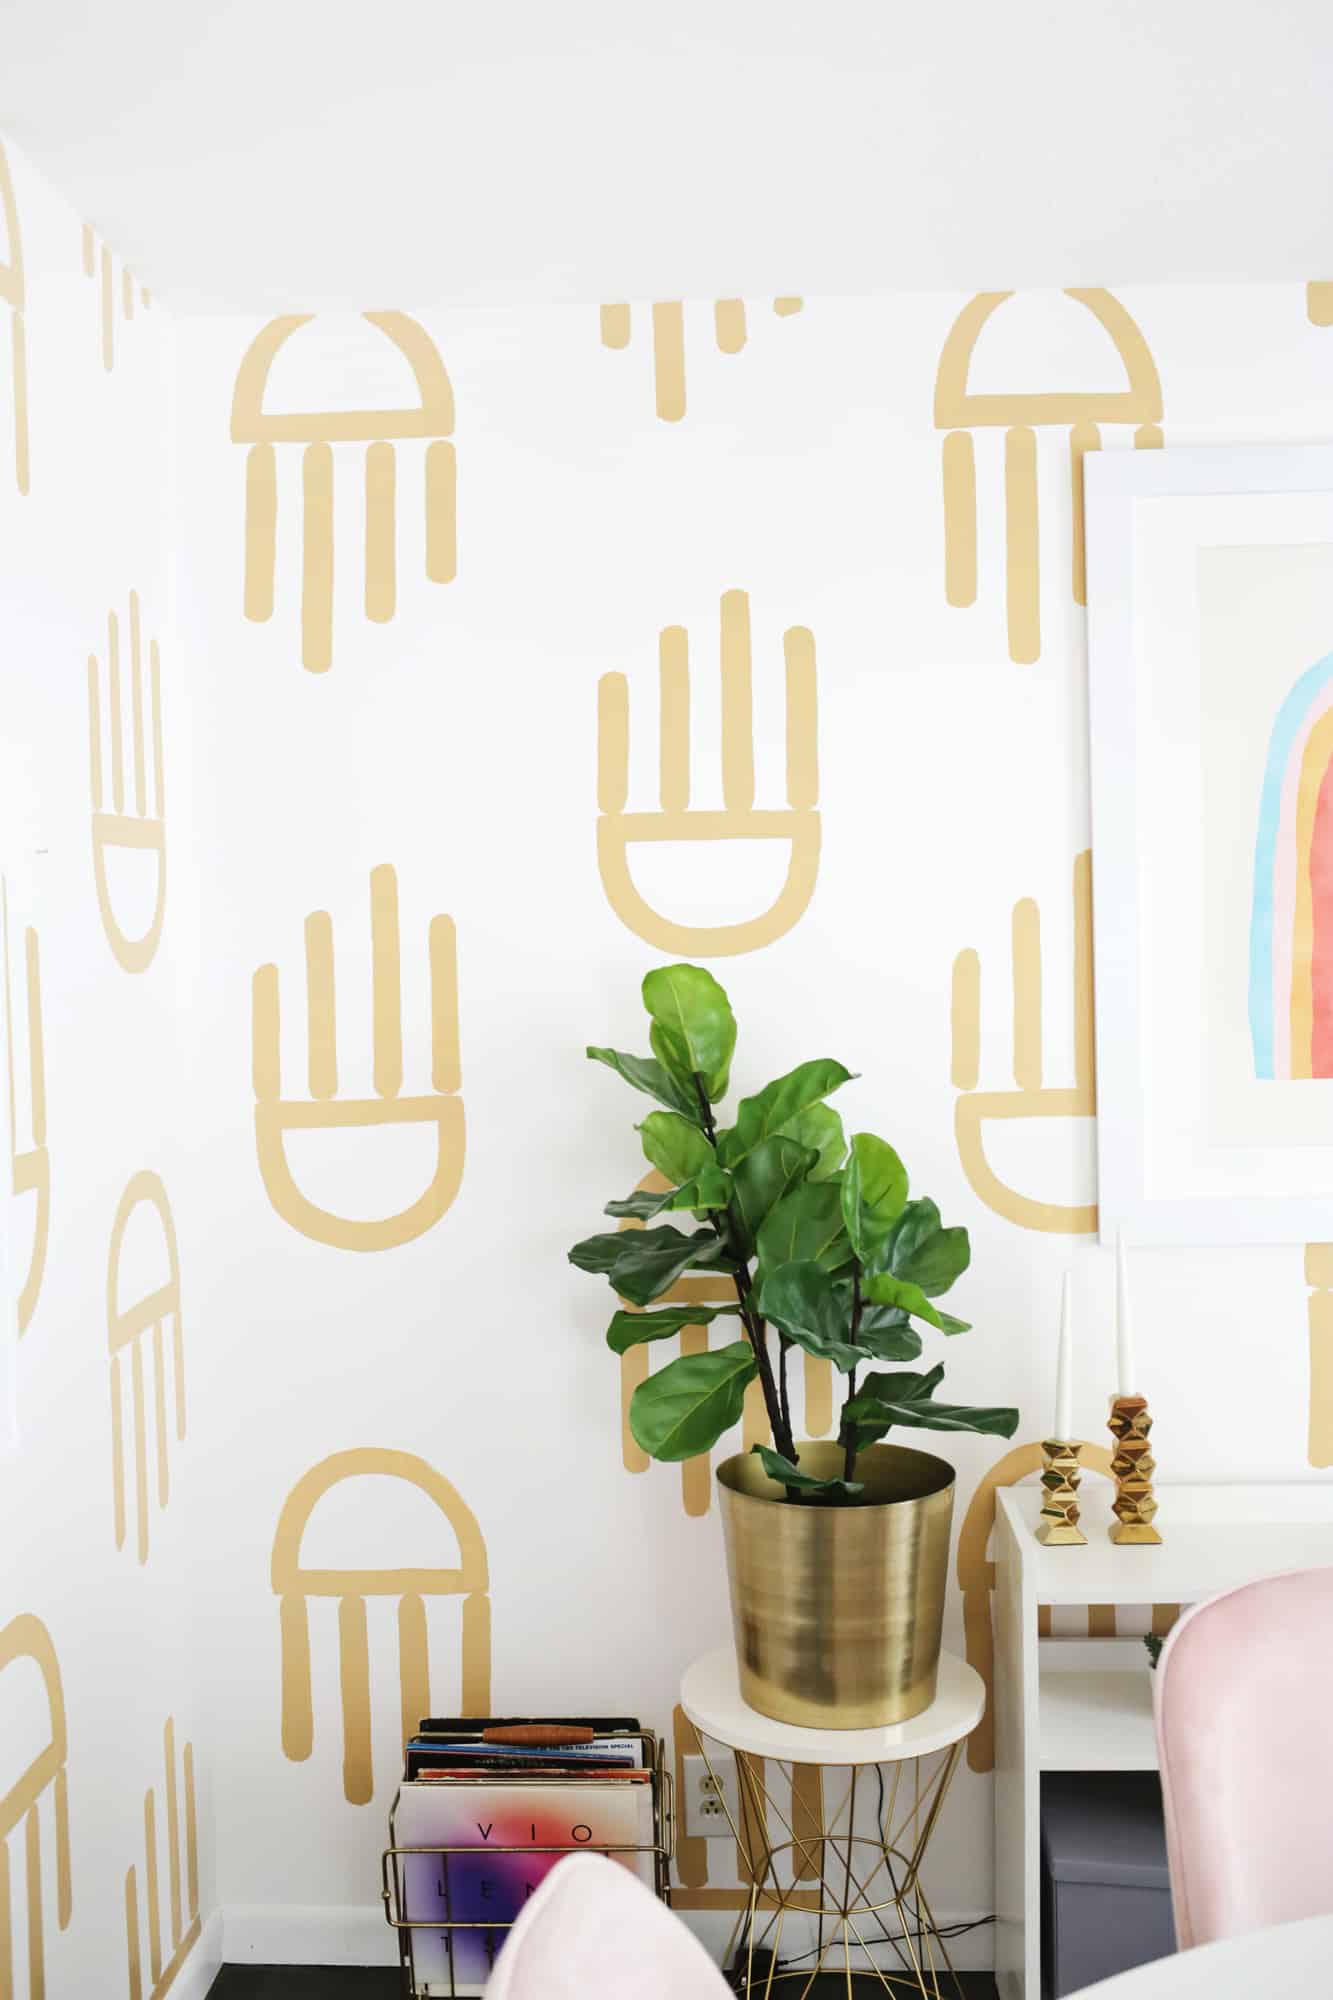
I spent what felt like forever sketching out some patterns and shape options to possibly use for the wallpaper … I really wanted to do a hand pattern of some sort but also liked the idea of a simple geometric shape, so I ended up combining the two to make a shape that looks like a simplified hand (without the thumb). I then printed out my shapes at full size on a printer that does large documents so I could tape a few up on the wall and get the right placement for tracing. You can download the shape that I used for my template to create your own wall and you can resize it as needed for your space (you can print templates out bigger at a Kinko’s-type place if you don’t have a large printer at home).
I also used an X-Acto knife to cut out the middle sections of the shape so I could trace the shape directly onto the wall. 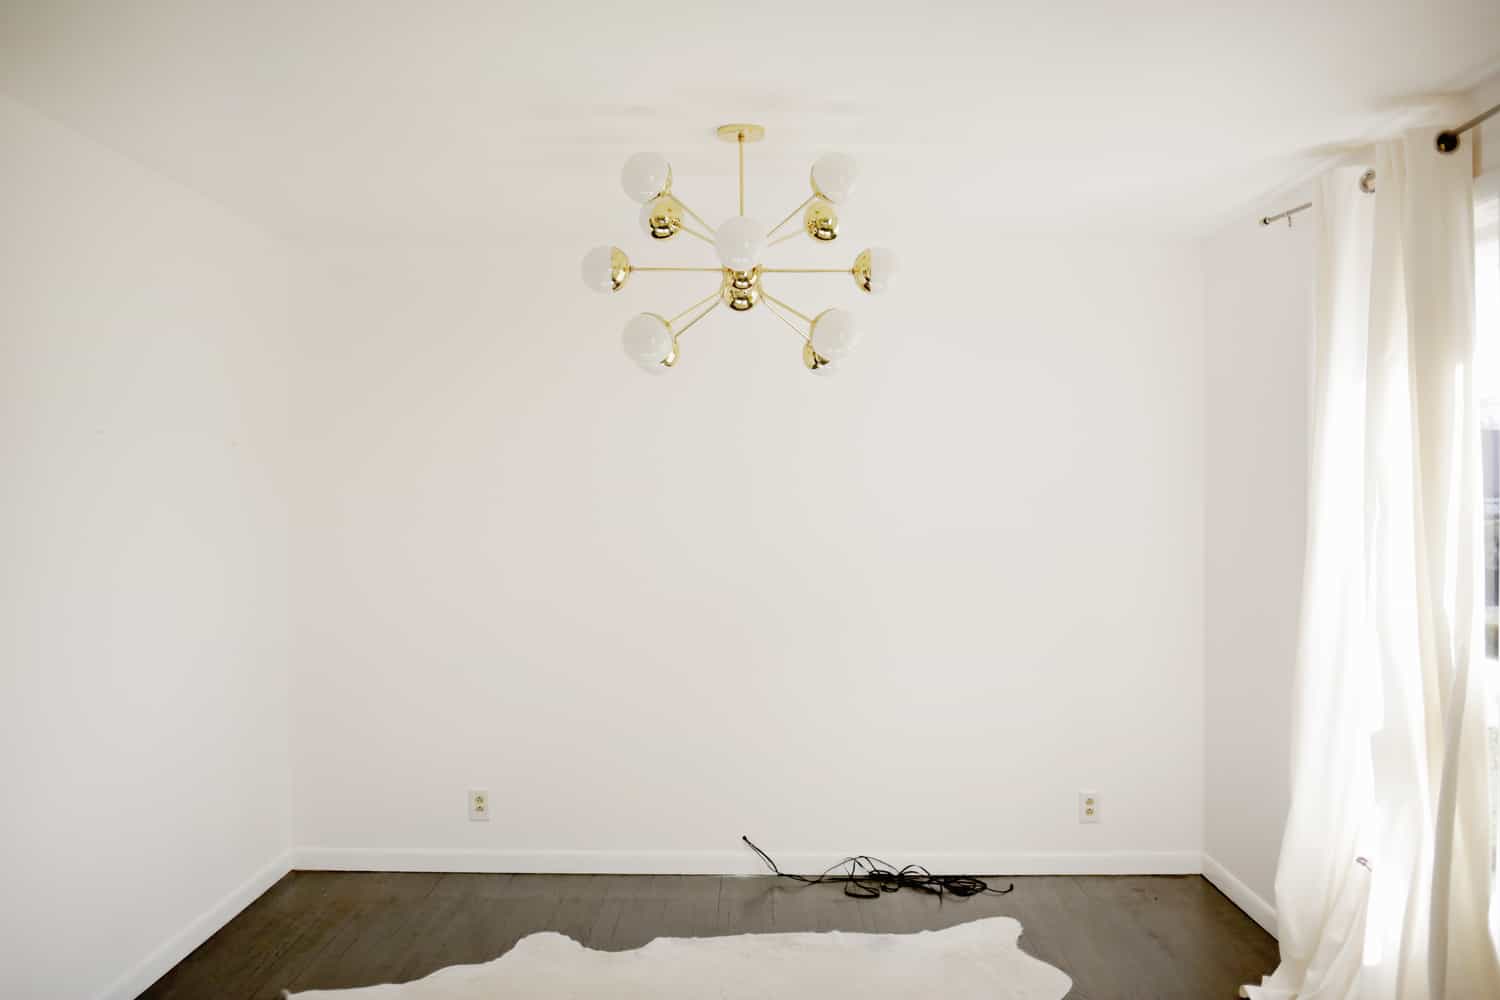
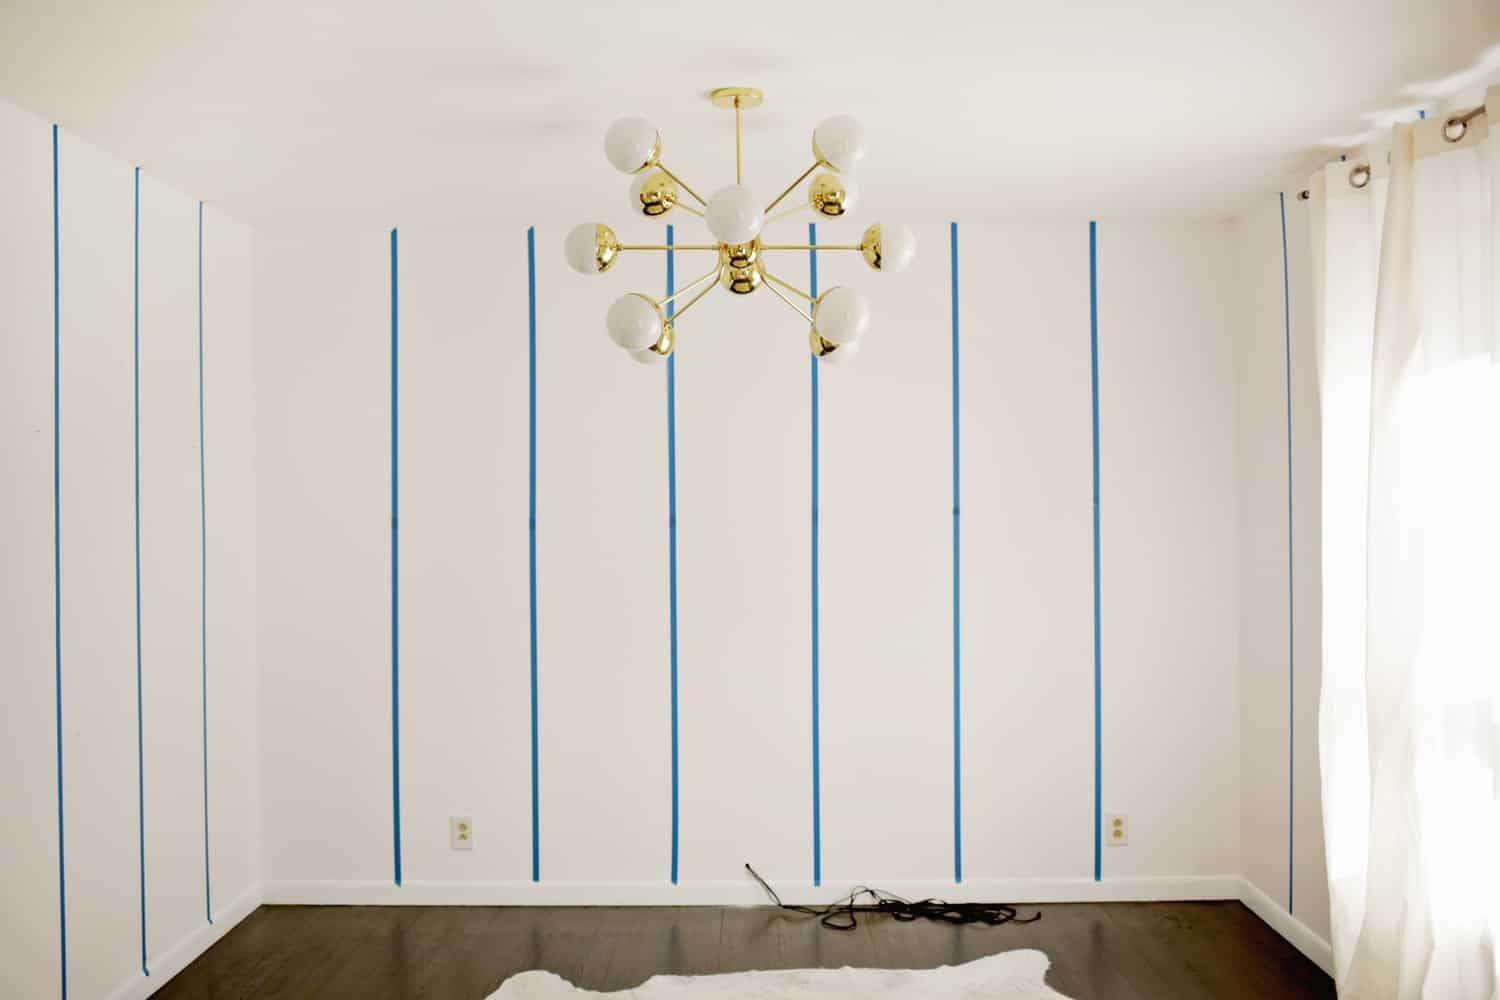
Once we moved everything out of the room, we used painters tape to divide the back wall into seven equal sections a little wider than my shape and then divided the side walls into sections at the same width.
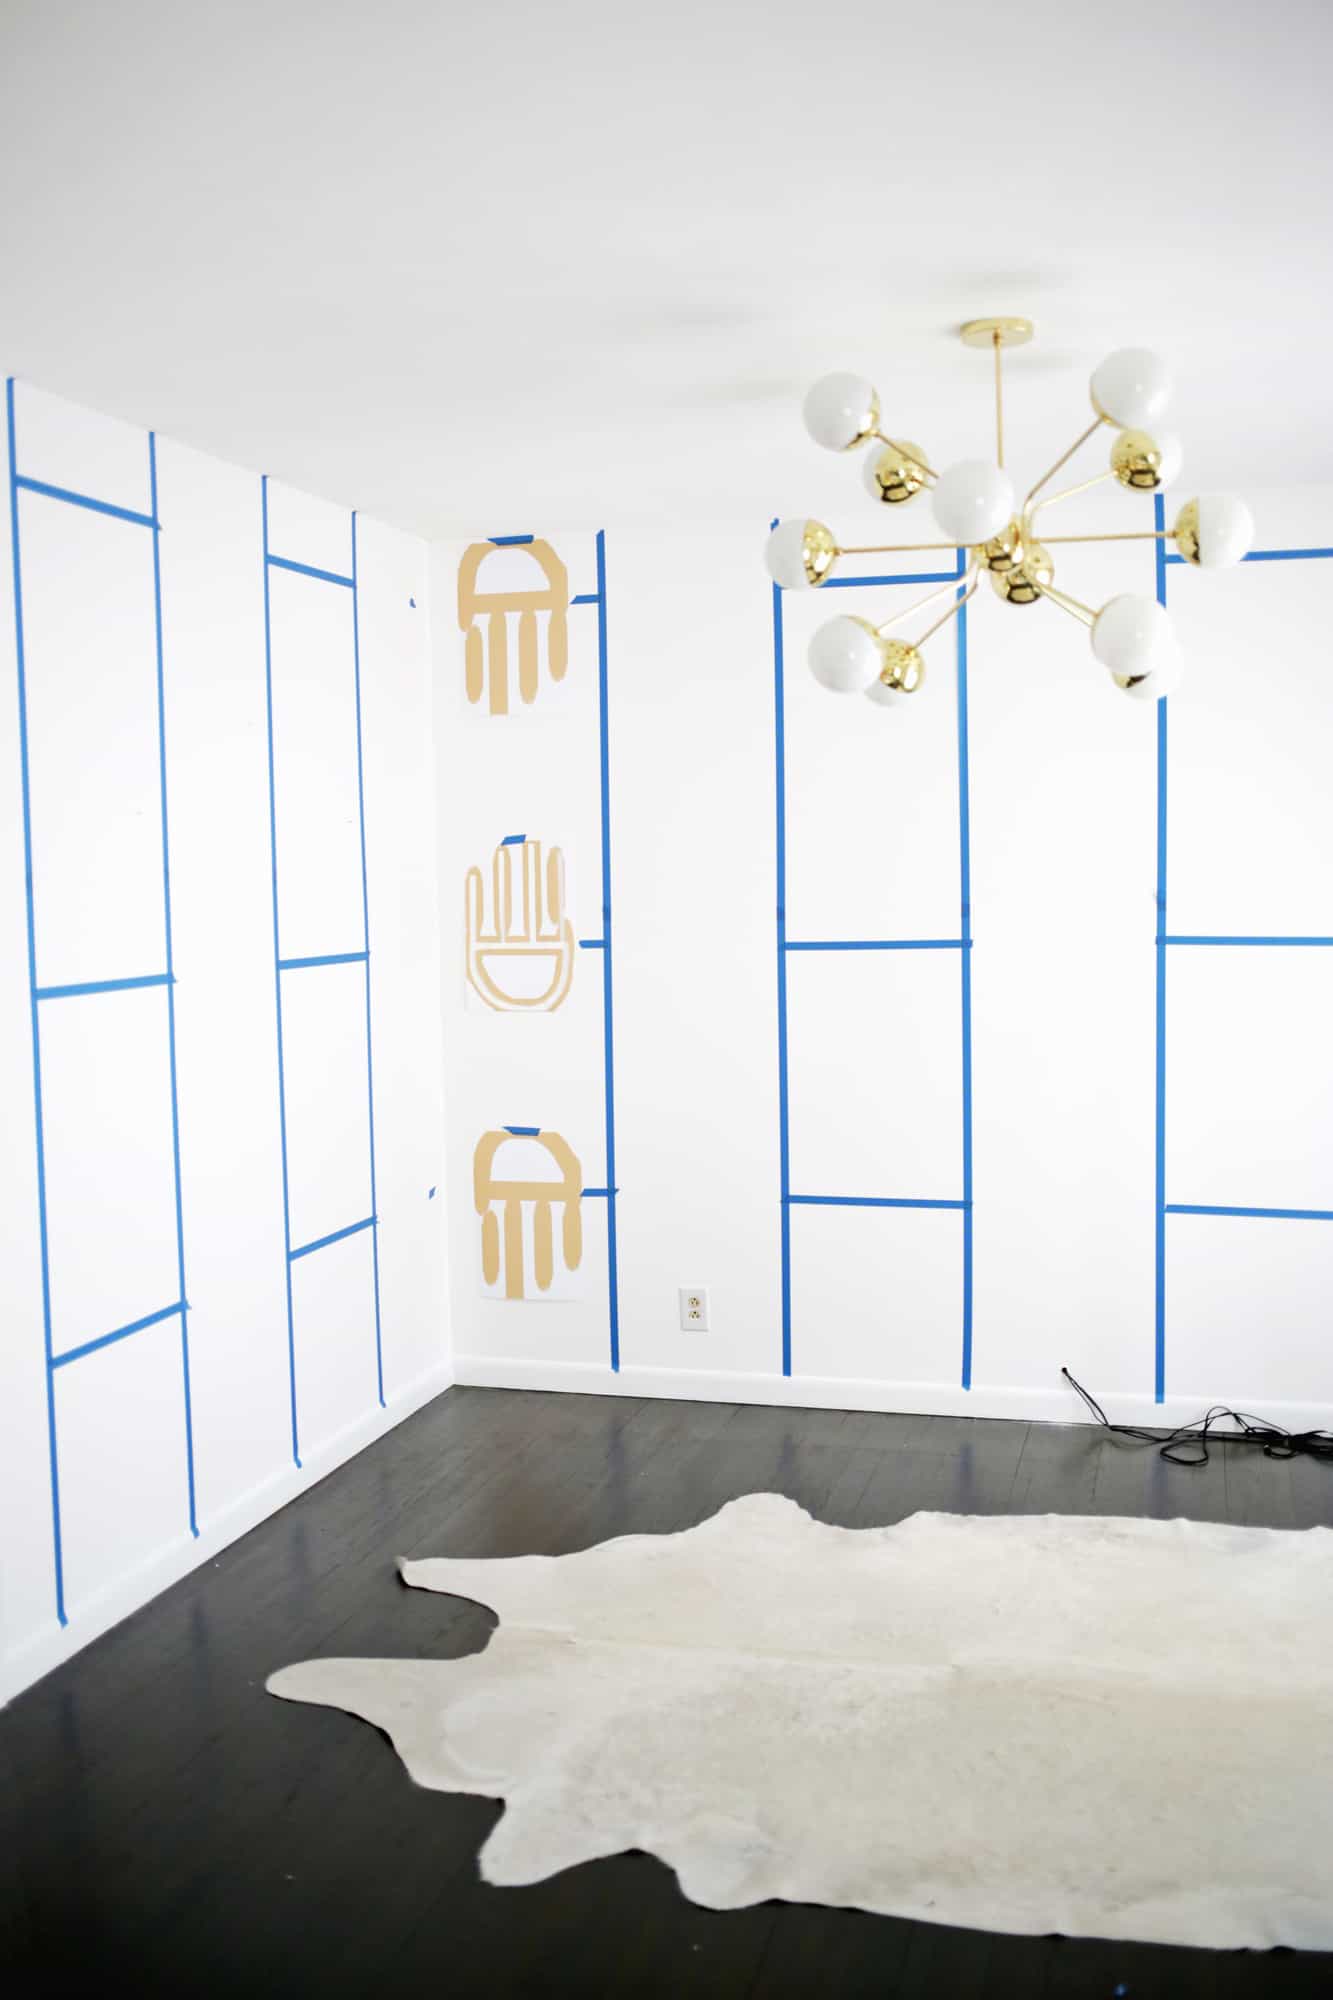
I used three of my printed templates to decide exactly where I wanted the shapes to be traced (based on what looked good with my wall height) and which way I wanted them to face. Then I used painters tape to mark a straight line where the palm should be located on every other column, so I would know where to place the template on those columns so they would all have the same pattern.
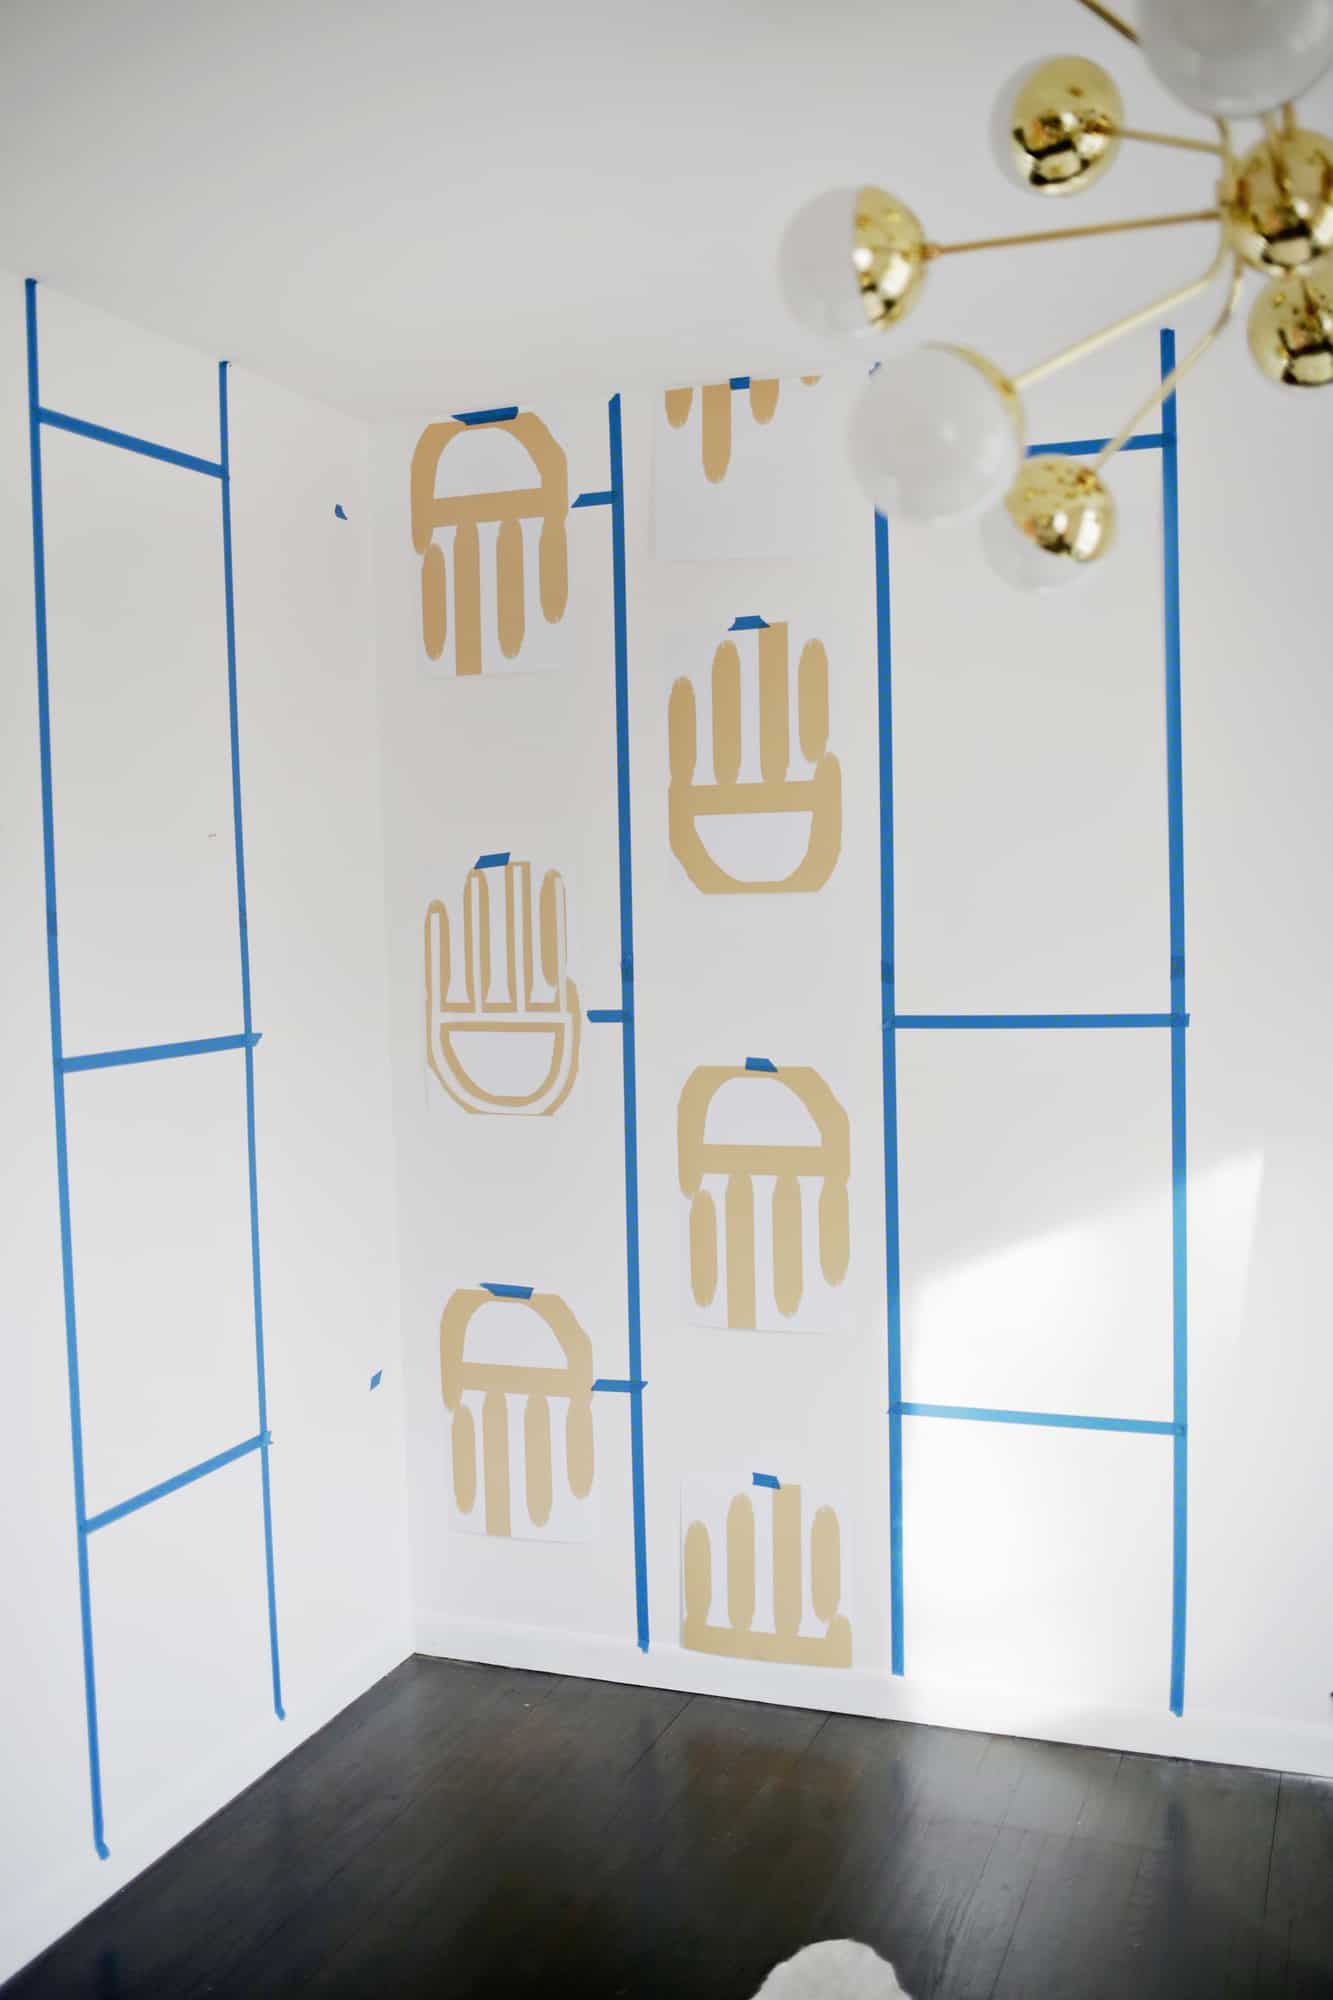
 I then used more templates to decide what I wanted the alternate pattern column to look like and used more tape to mark those palm locations on the rest of the the alternating columns as well (as you can see what I mean about the palm locations in the second photo above).
 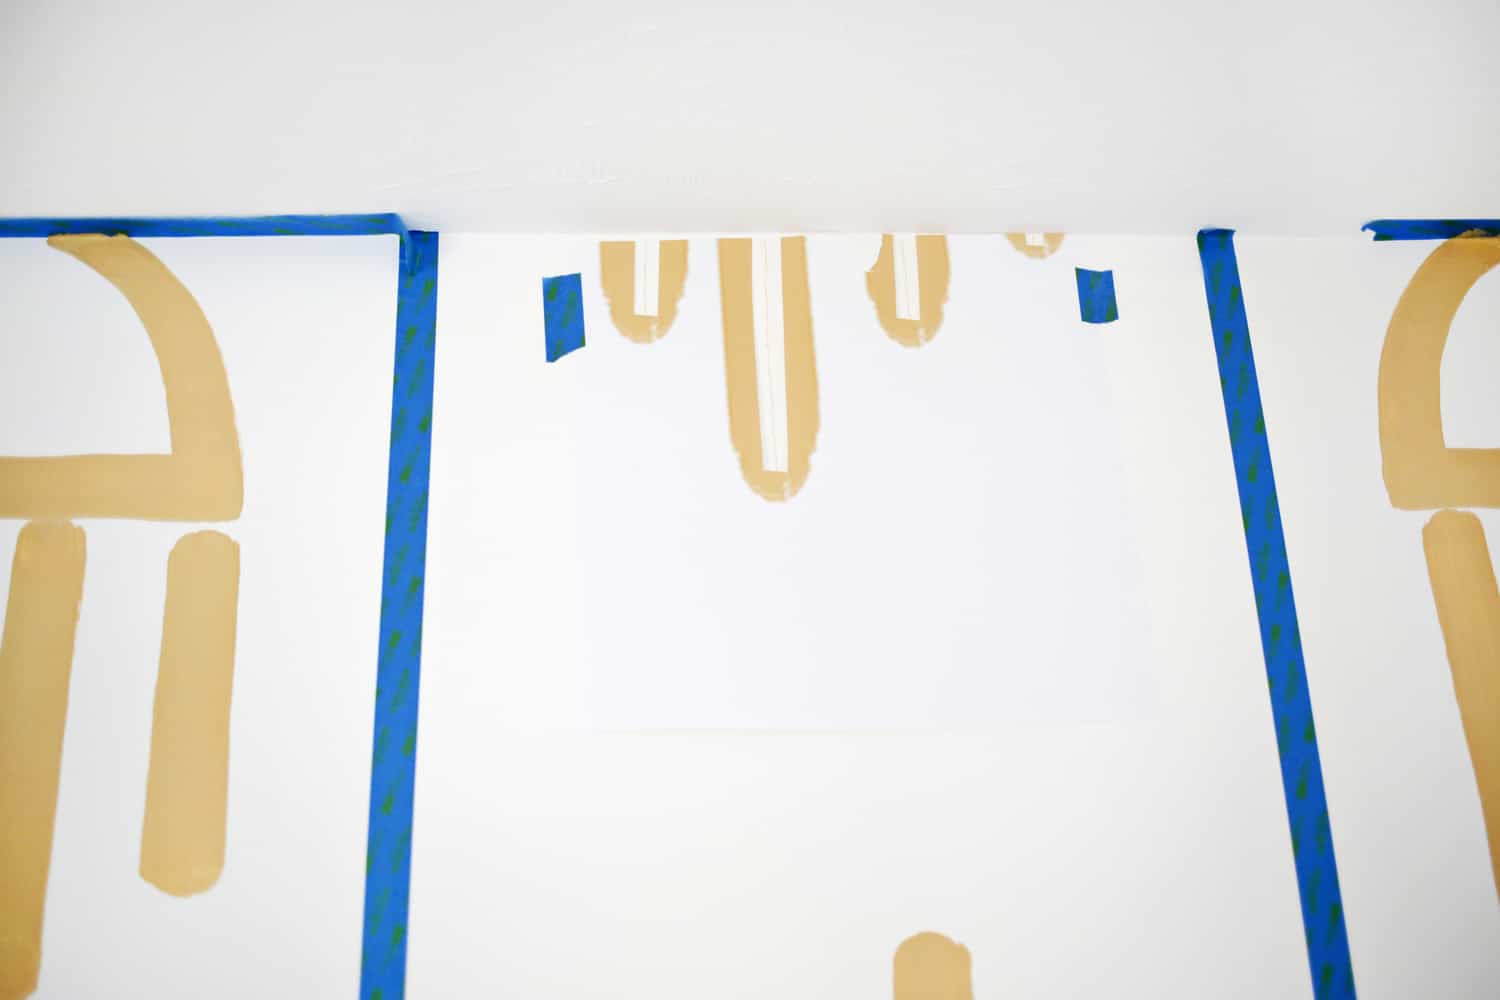 There were a few locations where I had to fold or cut a template in half to fit at the top of the wall or against the baseboard, so I had a specially cropped template just for that.
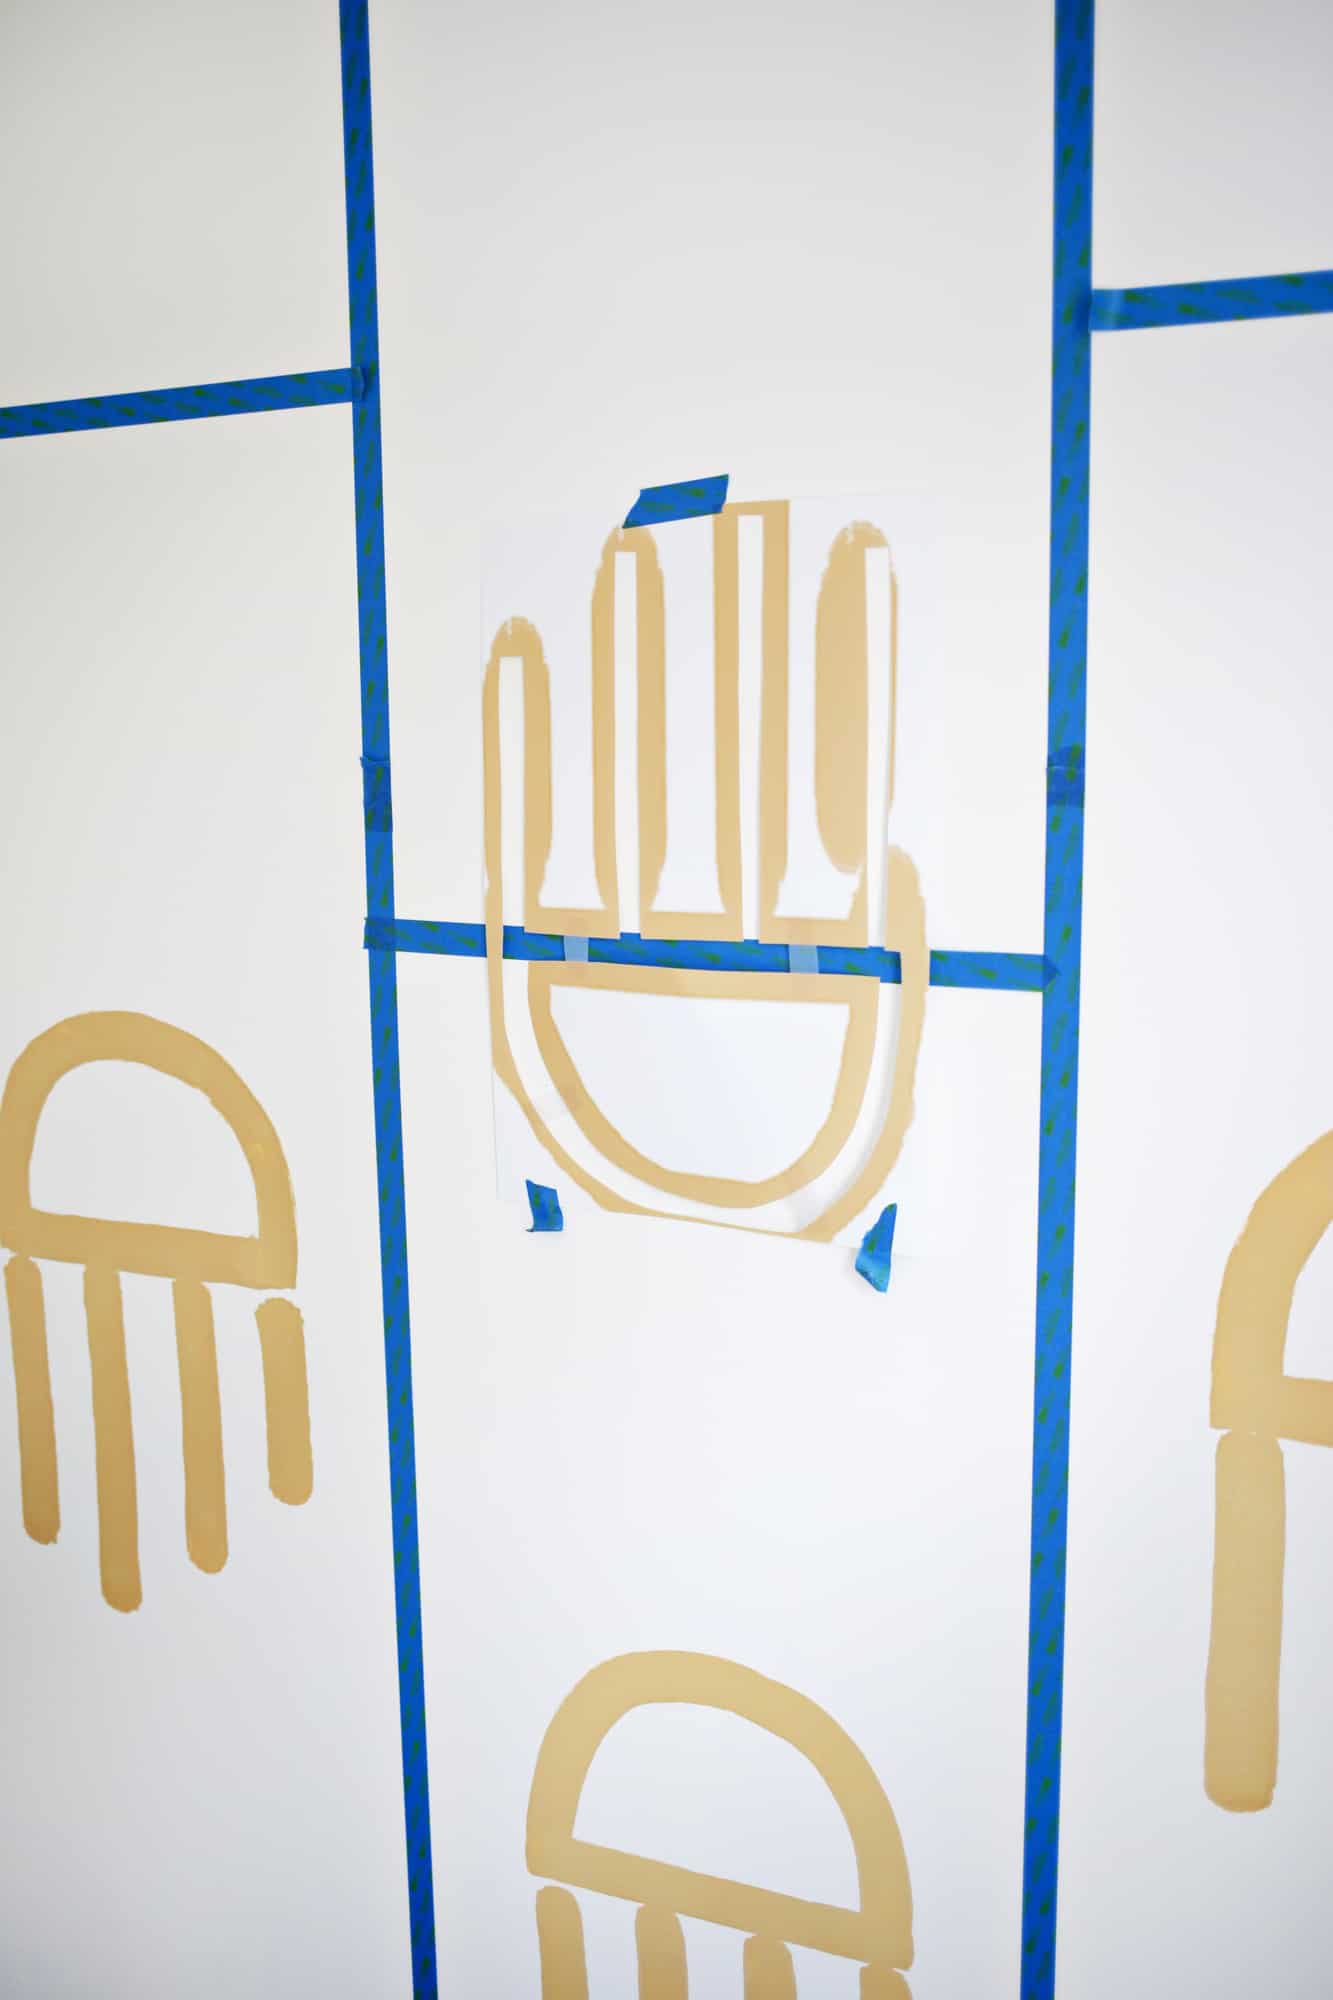
As you can see, I used a colored pencil that was a similar shade of the paint I was going to use so that there wouldn’t be any dark pencil lines showing through the paint. Believe me, I learned my lesson on that doing my daughter’s nursery wallpaper when I had to do extra coats just to cover up the pencil line …

Once each template was moved into the right position and the shape was traced, I used a 1.5″ flat brush to go over each line to make the general shape and then I used a large round tipped brush to go over the start and end points of the straight lines to round out the tips. I used Valspar Young At Heart paint for the golden camel color and I thinned out my paint with a small amount of water to make it flow more easily. There are some parts on each shape that look a little streaky since I really only did one coat of the paint, but I ended up liking that since I thought it looked more like actual brush strokes that way (which they are!).
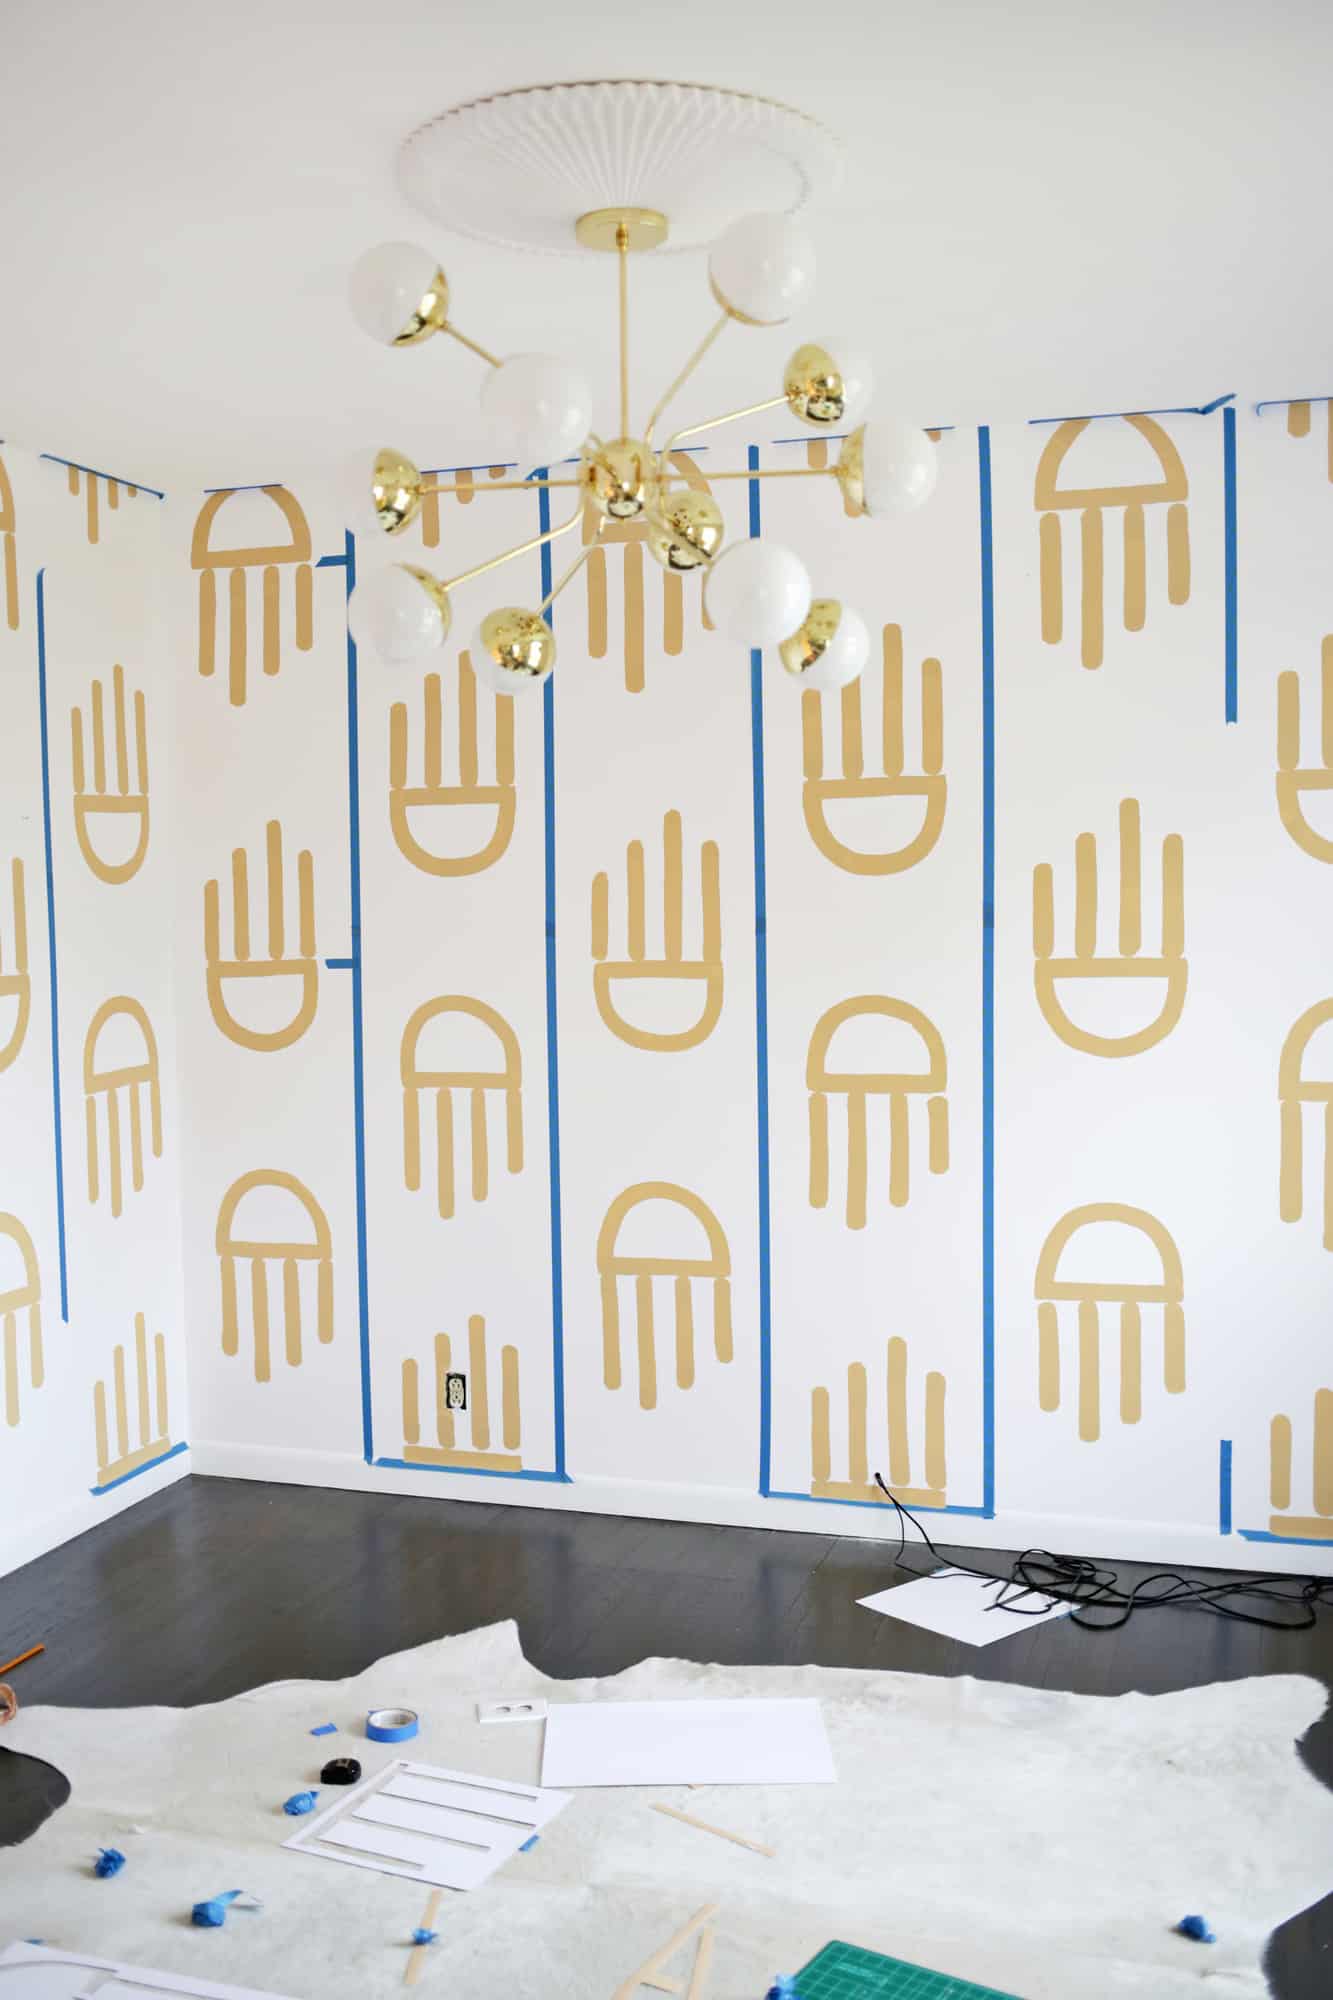
Basically, that’s pretty much the whole method! Making the tape grid, arranging the templates, tracing, and painting!
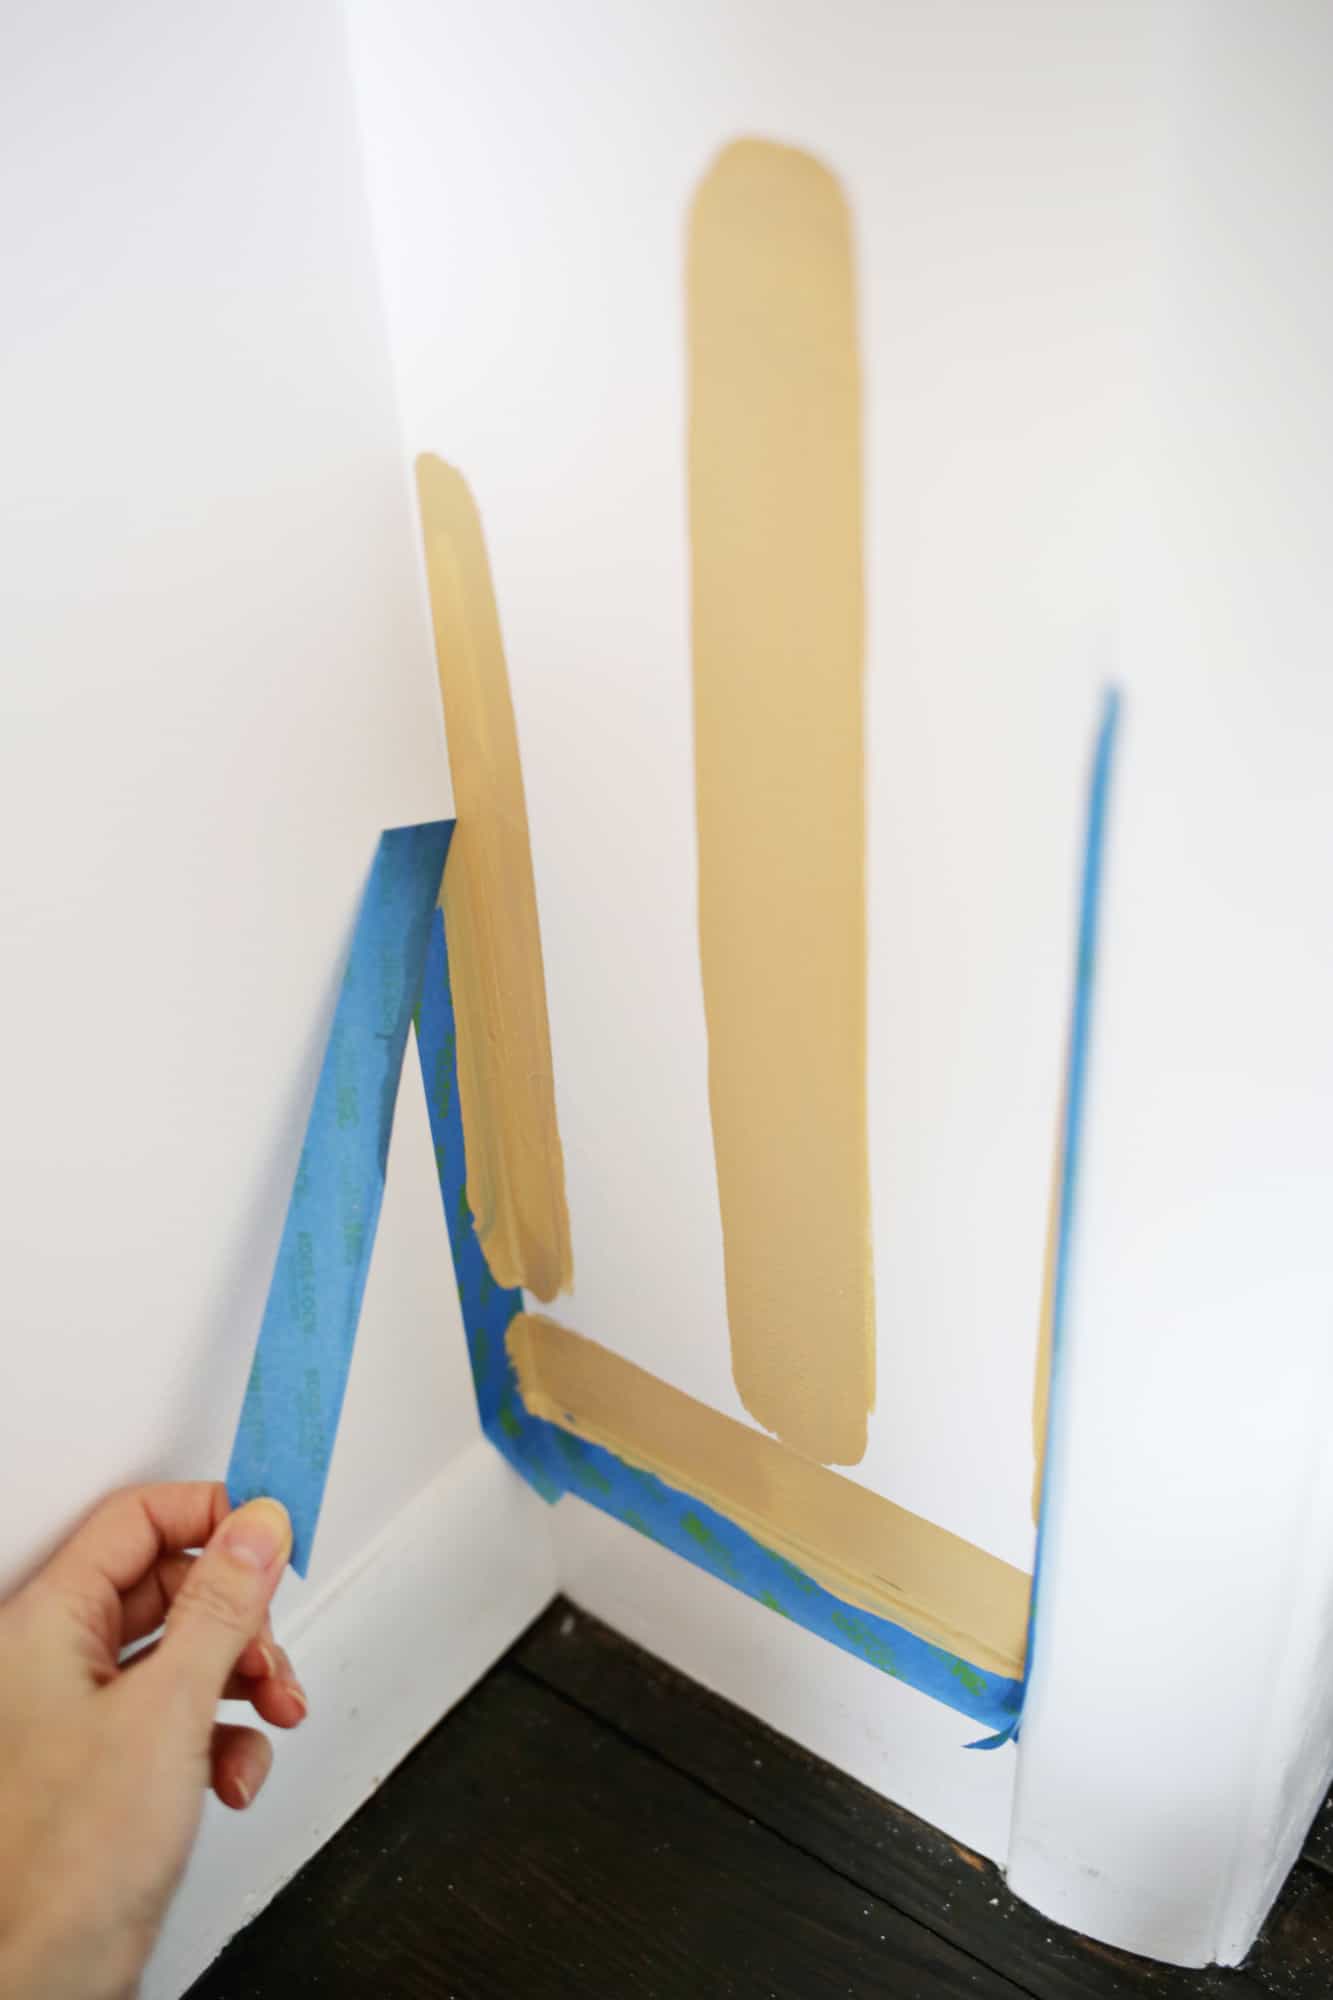
I wanted the pattern to go all the way to the edge, so on the top, bottom, and sides I applied painters tape to the wall so I would have a nice clean edge like wallpaper when I removed the tape.
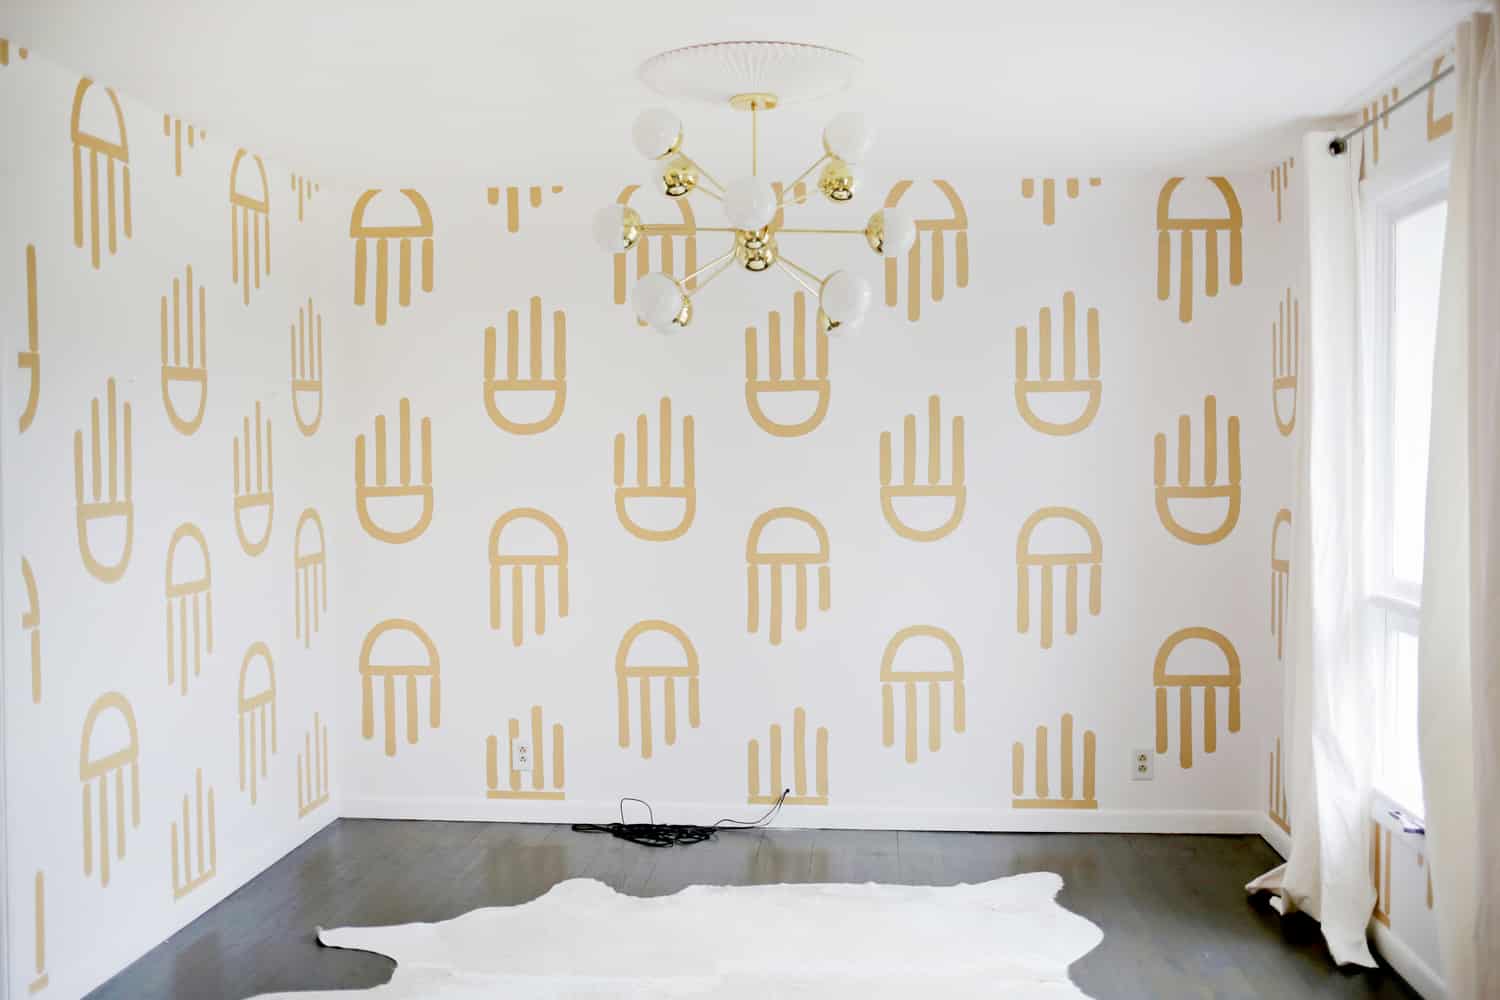
Pretty fun if you ask me! Now it’s time to move everything back in!
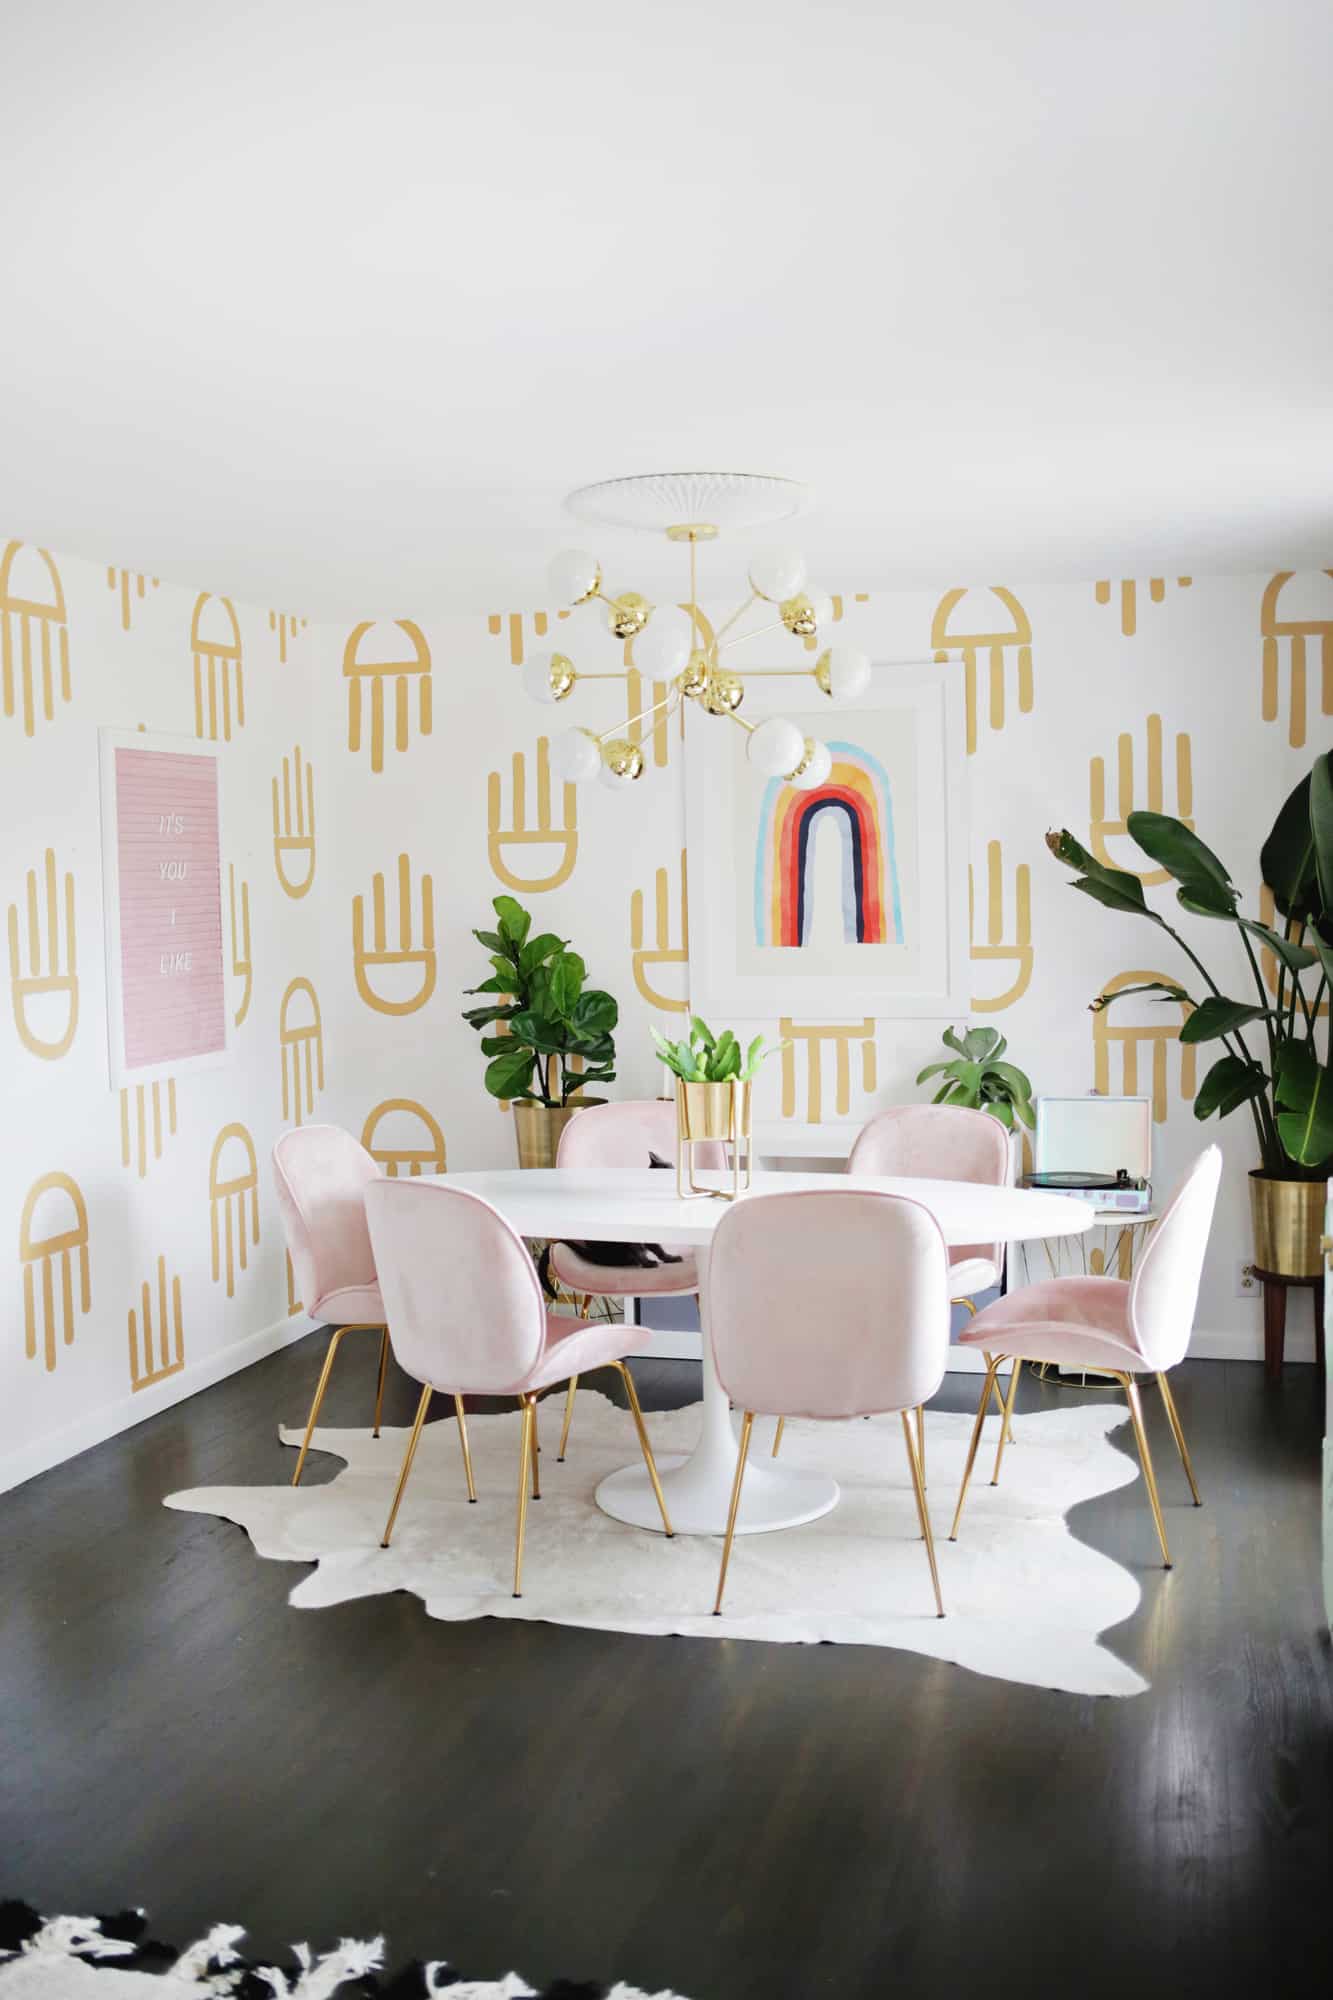
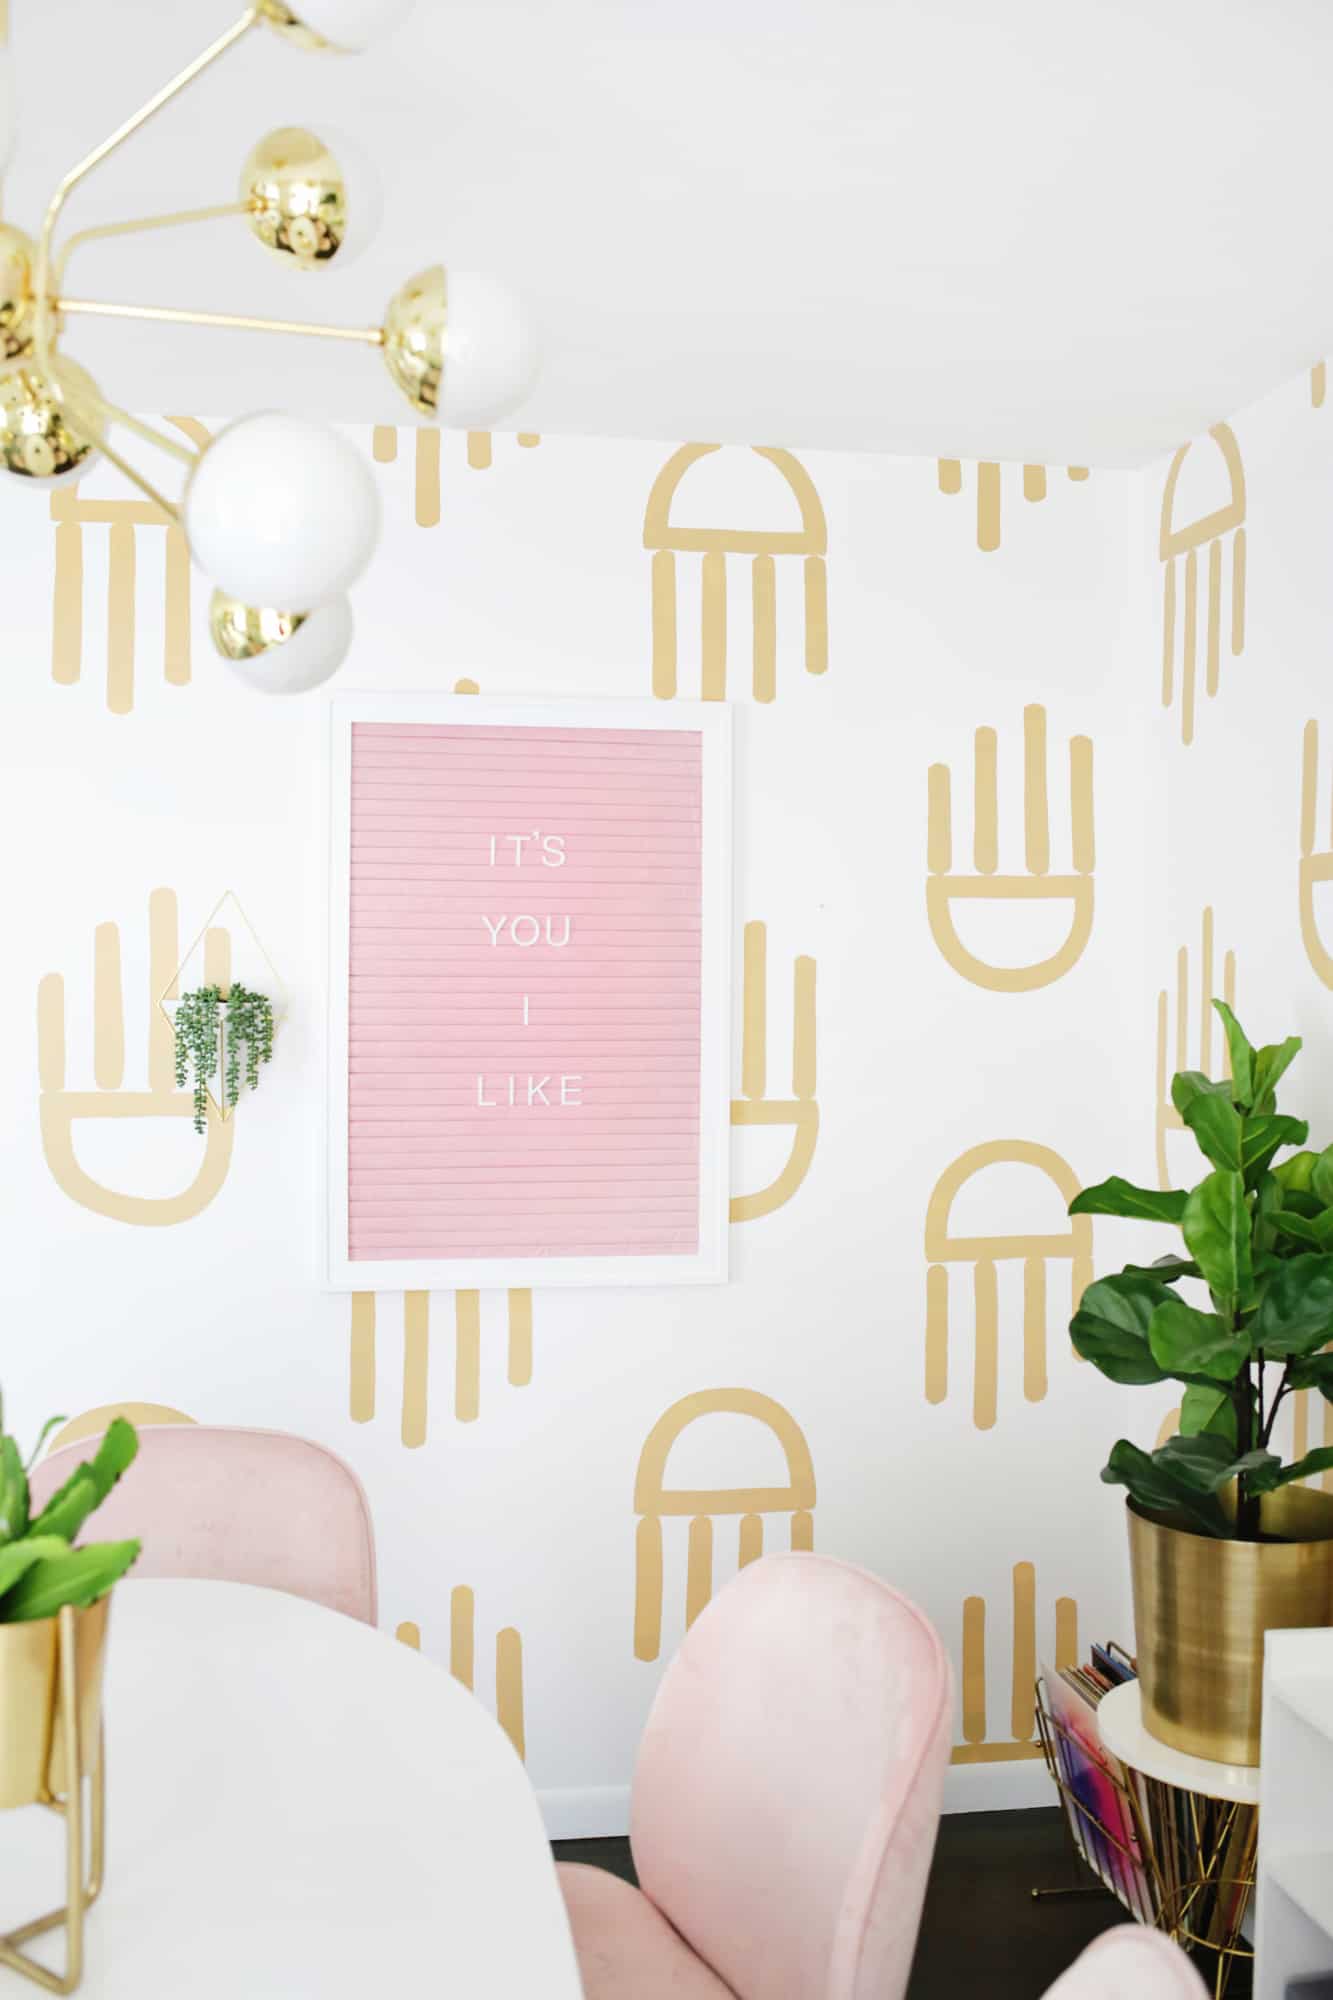
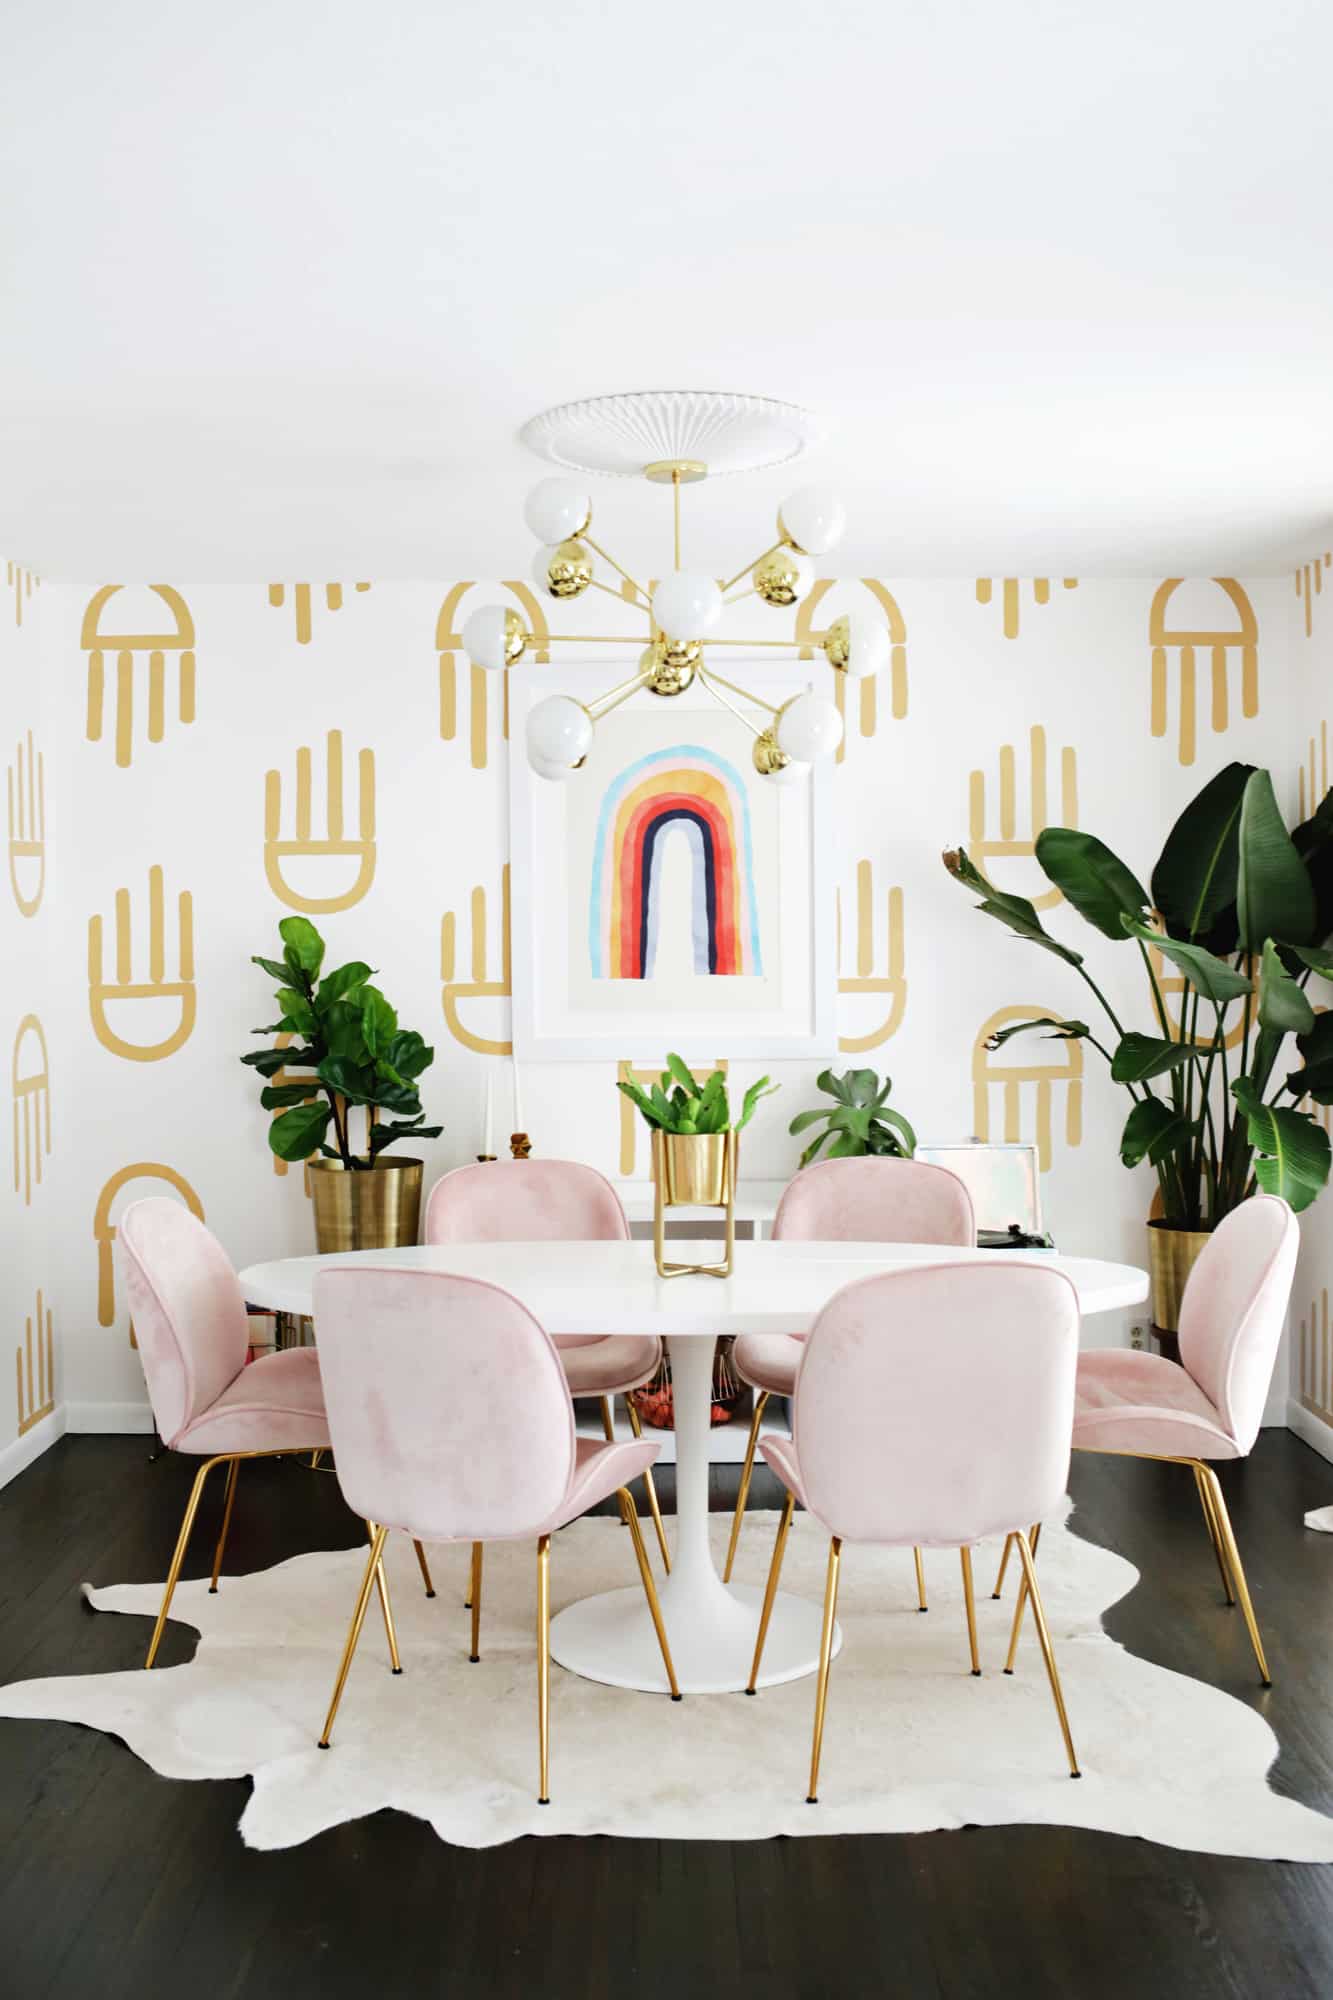
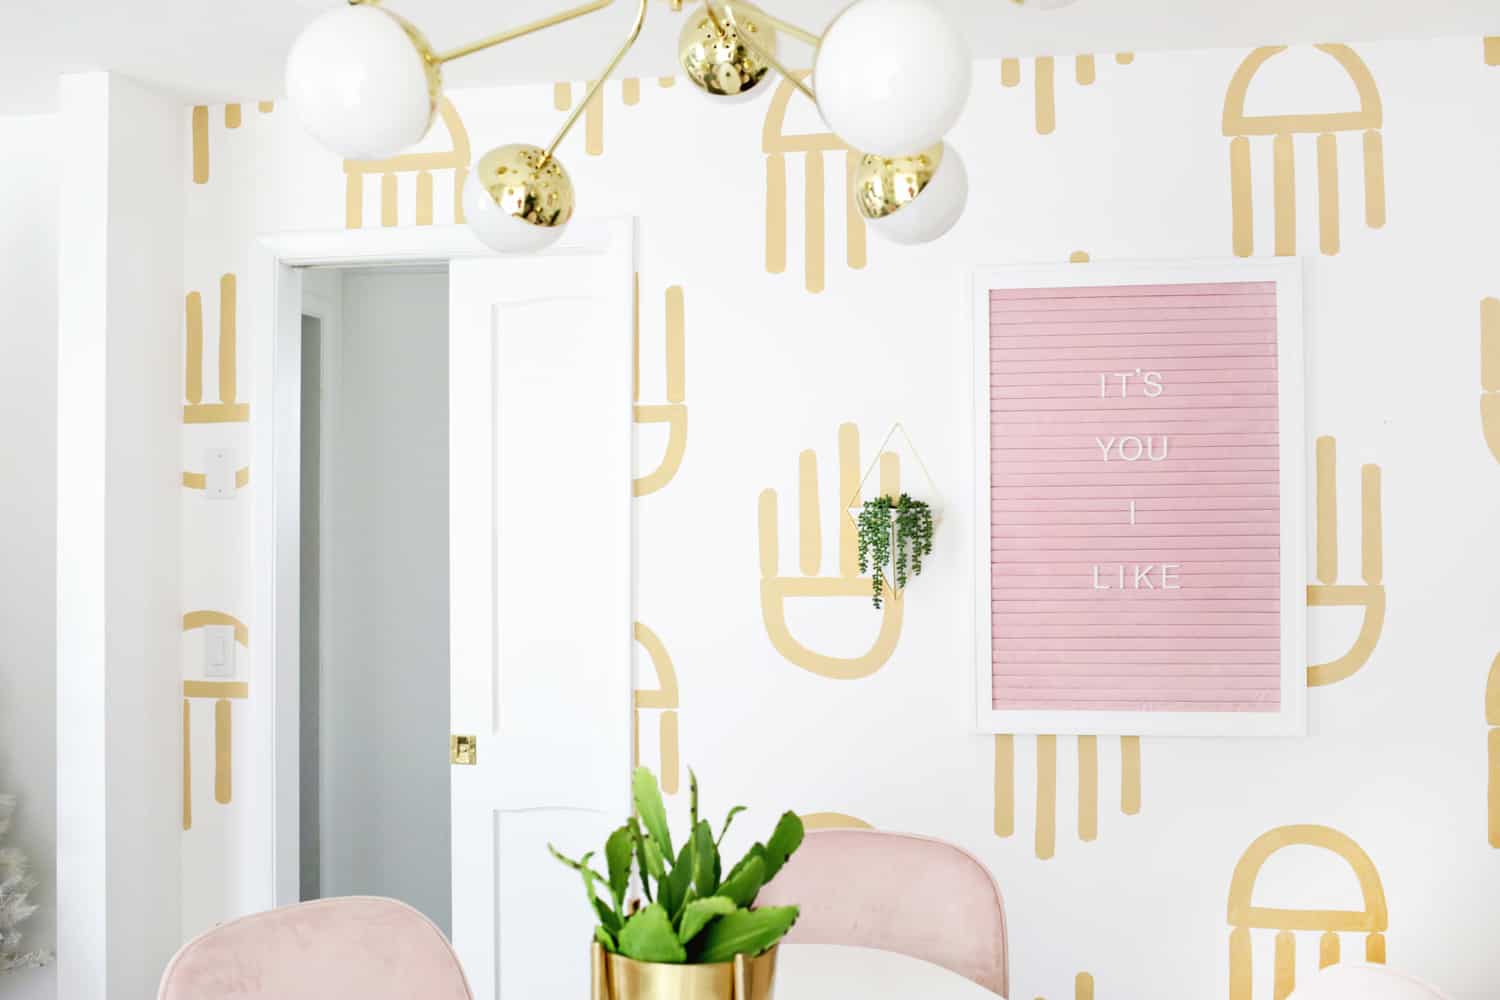

I love how it looks with our new chandelier fixture and ceiling medallion that we got just for this space (Lucent Lightshop is my fave light store of all time!) and I think my oversized pink letter board looks really fun in the space as well (and that rainbow print is juuuuust amazing). Anyway, it was kind of a shock for me to walk into a room of pattern instead of solid color for the first few days, but I’m really glad I took the leap to make something fun. xo. Laura
16 Comments
This is such a quirky pattern! I love the gold colour too. 🙂
Charmaine Ng | Architecture & Lifestyle Blog
http://charmainenyw.com
Vraiment ça me permet d’avoir de nouvelles idées pour la décoration
When I saw the pattern I thought Jellyfish!
Yes, I see that too!
Laura 🙂
I love this so much! So fun! I need to get braver in my home decor choices – I just have plain old paint everywhere but this looks awesome
http://wanderlovefam.com/
Love it!! I don’t know how you accomplish these DIYs with a little one!?
I tried downloading your stencil but it comes out pretty blurry. Any clearer versions you’d be willing to share? It’s such a cool pattern!
Hi Erica! We updated the PDF— thanks for letting us know 🙂
The Mr. Rogers/Daniel Tiger letter board quote makes the room even better.
I love the pattern! It’s quirky and keeps the eye moving. Plus, it reminds me of a jellyfish which for some odd reason is relaxing to me (lol).
Perhaps I’m just being daft, but I really don’t understand getting the template drawn onto the wall part? Not sure why some templates have strips cut out of the ‘fingers’ and others don’t? How are you tracing the design onto the wall while the template is taped on? Carbon paper? Sorry if this is helluva obvious but I think a few steps are missing… Maybe a video of your tracing technique would help?
can you share where you got the frame for the rainbow print? i just received mine and love the frame you chose!
thanks 🙂
What kind of gold paint did you use? Looking to stencil my floor but am not quite sure. TY!
Wish I could post a picture but had to tell you that I just finished doing this to my walls and it came out amazing! I’m blown away and so is my boyfriend. We can’t believe how good it looks! I ended up going with a truer gold metallic paint from an art supply store and it looks so amazing! Thank you for sharing. Totally transformed my living room.
Where did you purchase the frame for the “Shelter” art print? I bought the same one, but the sizing is so strange that I can’t find anything outside of having a custom frame made.
I made my own! Here’s the tutorial
http://abeautifulmess.com/2016/02/make-an-oversized-frame-for-a-fraction-of-the-price.html
Laura