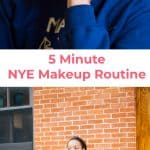
 Click through for tutorial") Do you ever feel like the pressure of New Year’s is just too much? I love getting dressed for a few hours, but I don’t love the go big or go home aspect of it all. It’s sort of like a wedding in my eyes. Why do so much for so little time? And frankly, I’d rather be comfortable and just a tad fancy, then fancy and uncomfortable, only to hide the dress for the rest of the year. Are you with me?
Do you ever feel like the pressure of New Year’s is just too much? I love getting dressed for a few hours, but I don’t love the go big or go home aspect of it all. It’s sort of like a wedding in my eyes. Why do so much for so little time? And frankly, I’d rather be comfortable and just a tad fancy, then fancy and uncomfortable, only to hide the dress for the rest of the year. Are you with me?
What if we just skipped the constricting pieces and had more practical fun? Let the makeup do the talking and the outfits swing us into another fantastic new year? Yes? Perfect.
See that’s the great thing about makeup, it can do it to any look. For New Year’s, I love focusing on my eyes, making them pop with bronze tones and deep settings. Leaving my lips with just a little color. You know, enough to be kissable when the clock strikes 12. Here’s how you can get New Year’s Eve eye-popping ready in just five minutes!
 Click through for tutorial") Makeup:
Makeup:
–Stila eye shadow + blush + mascara pack (This is the most cost effective way to get glammed up. I personally did the research, and two eye shadows roughly equal this pack. The great thing about this: The colors are not too much, leaving them appropriate for any other normal day.
–Gold eye shadow. I’ve used the same gold eye shadow for about six years. Mine is from Mac Cosmetics, and it’s the best for the inner corners of your eye and your brow bone.
–Stila Kitten eye Shadow . This is the only shadow that I specifically suggest for New Year’s. You need the extra sparkle for the festivities. This has the most bang for your buck while leaving you super sparkly!
–Red lip gloss. I chose lip gloss instead of a red lipstick because it gives a bit of shine, but also can be applied lightly without looking undone.
-Liquid eyeliner. Mine just so happens to be blue, but I suggest a black liner.
–Concealer. Concealer is so important for any bumpy shadow application. It hides the bags, leaving all the focus on your eyes.
-Blending brush
-A liquid foundation brush (I use it for blending larger concealer spots)
-A precision shader brush
-Eyeshadow primer
 Click through for tutorial") One. Start out with a basic face. I use a tiny bit of foundation on my problem areas. Normally, I love a more natural face with hints of makeup, so I always suggest applying makeup to your problem areas only, and then blend it with your finger. If you’d rather apply a full face of foundation, then do so. (Do not apply your concealer yet.)
One. Start out with a basic face. I use a tiny bit of foundation on my problem areas. Normally, I love a more natural face with hints of makeup, so I always suggest applying makeup to your problem areas only, and then blend it with your finger. If you’d rather apply a full face of foundation, then do so. (Do not apply your concealer yet.)
Two. Apply your eyeshadow primer. Primer is great for keeping any type of eyeshadow on. But it’s especially important when you plan on sweating and dancing the night away.
 Click through for tutorial")
 Click through for tutorial") Three. The thing to note about applying eye shadow is this: You want to always have about three shades for one eye. It should go from light to dark, the shades should move gradually, but all be of the same family, respectively. So, for the first or “better part” of my eye, I applied a light shade of pink. Then for the second part of my eye, I applied a darker more bronze tone. I do each shade one by one on each eye, making sure the two colors transition easily into each other.
Three. The thing to note about applying eye shadow is this: You want to always have about three shades for one eye. It should go from light to dark, the shades should move gradually, but all be of the same family, respectively. So, for the first or “better part” of my eye, I applied a light shade of pink. Then for the second part of my eye, I applied a darker more bronze tone. I do each shade one by one on each eye, making sure the two colors transition easily into each other.
 Click through for tutorial")
 Click through for tutorial") Four. Now you’re going to take your darkest (third) shade and apply it right under your brow bone with the skinny brush. This shade will help create a focus point for the eyes. Giving them a deeper look. (After I apply shadow, I use my index finger to blend it in a little more every time. I know I can use a brush, but my finger blend works so much better for me.)
Four. Now you’re going to take your darkest (third) shade and apply it right under your brow bone with the skinny brush. This shade will help create a focus point for the eyes. Giving them a deeper look. (After I apply shadow, I use my index finger to blend it in a little more every time. I know I can use a brush, but my finger blend works so much better for me.)
 Click through for tutorial")
 Click through for tutorial") Five. Now it’s time to apply some of your concealer. For this part, I apply it right on my eyebrow bone. Applying the concealer on the brow bone gives my eyebrows a more defined look, and again, makes them stand out a bit more.
Five. Now it’s time to apply some of your concealer. For this part, I apply it right on my eyebrow bone. Applying the concealer on the brow bone gives my eyebrows a more defined look, and again, makes them stand out a bit more.
 Click through for tutorial") Six. Using my gold eyeshadow, I apply it right on the brow bone under my eyebrow. You want to blend this with your finger to give it a more natural look. You also want to apply that same shade of gold in the crease of your eyes just a tad.
Six. Using my gold eyeshadow, I apply it right on the brow bone under my eyebrow. You want to blend this with your finger to give it a more natural look. You also want to apply that same shade of gold in the crease of your eyes just a tad.
 Click through for tutorial") Seven. Now it’s time for the fun stuff! Using your index finger, you want to dig your finger lightly in your kitten eyeshadow (or any super sparkly eyeshadow you have). I recommend using your finger instead of your brush because this stuff is creamy, but also, weirdly flaky. I found that when I applied it with a brush, it didn’t apply evenly, and it also scattered all over my face. I had more control over the application using my finger. I also chose to stick with a rose gold sort of shade because I wanted to bring out the bronze color that was on the second part of my lid. This helps keep the overall natural New Year’s look you desire.
Seven. Now it’s time for the fun stuff! Using your index finger, you want to dig your finger lightly in your kitten eyeshadow (or any super sparkly eyeshadow you have). I recommend using your finger instead of your brush because this stuff is creamy, but also, weirdly flaky. I found that when I applied it with a brush, it didn’t apply evenly, and it also scattered all over my face. I had more control over the application using my finger. I also chose to stick with a rose gold sort of shade because I wanted to bring out the bronze color that was on the second part of my lid. This helps keep the overall natural New Year’s look you desire.
 Click through for tutorial")
 Click through for tutorial") Eight. Now it’s time to apply your eyeliner and concealer! Normally, I am against a cat eye and a bright lip, but since this lip has a more blended effect, it was fitting. Before you apply your black eyeliner on the bottom part of your eyelid, apply your concealer first. I only apply concealer halfway under the eye, then I blend it with what…my finger! Haha When you finally apply your black eyeliner (after you apply your concealer) you want to use a pencil or a paste or very carefully use a dark eyeshadow that won’t flake in your eye. For a smokier effect, you can also use a Q-tip to blend a black eyeshadow below your bottom lashes.
Eight. Now it’s time to apply your eyeliner and concealer! Normally, I am against a cat eye and a bright lip, but since this lip has a more blended effect, it was fitting. Before you apply your black eyeliner on the bottom part of your eyelid, apply your concealer first. I only apply concealer halfway under the eye, then I blend it with what…my finger! Haha When you finally apply your black eyeliner (after you apply your concealer) you want to use a pencil or a paste or very carefully use a dark eyeshadow that won’t flake in your eye. For a smokier effect, you can also use a Q-tip to blend a black eyeshadow below your bottom lashes.
Nine. Now you can apply your blush. I use a pale pink that accents my cheekbones but doesn’t overshadow my eye. I suggest this technique for New Year’s Eve especially.
 Click through for tutorial") Ten. Apply your red lip gloss to the bottom half of your lip. I only choose the bottom because that is more than enough for the top. Just rub your lips together, fill in and let it go. We want the lips to have a punch without completely taking over.
Ten. Apply your red lip gloss to the bottom half of your lip. I only choose the bottom because that is more than enough for the top. Just rub your lips together, fill in and let it go. We want the lips to have a punch without completely taking over.
Eleven. Blend! Blend! Blend! Literally everything. I am a cross your t’s and dot your i’s girl. I have been the victim of a camera flash non-blending makeup mishap a few times. It’s not fun. Take your blending brush or your finger and just blend whatever seems unnatural or just too much (like my concealer above).
 Click through for tutorial") And you are done!! Now it’s time to enjoy the festivities!
And you are done!! Now it’s time to enjoy the festivities!
 Click through for tutorial")
 Click through for tutorial") Are you feeling this overall natural New Year’s Eve look?
Are you feeling this overall natural New Year’s Eve look?
What I loved most about this particular makeup is that I didn’t feel heavy wearing it. There was a definite “umph” in the shine factor, but not a ton that would feel jarring. Because the sparkly shadow is more creamy, it stayed on smoothly and perfectly and wiped off easily with a bit of witch hazel.
Let me know if you plan on giving this look a try. Happy New Year to you all! LaTonya
Credits//Author: LaTonya Staubs. Photography: Nneka Salmon. Photos edited with A Beautiful Mess actions.
32 Comments
very nicely done. I cannot believe you took only 5! i would definitely need more
I love these tips! Your eyes look gorgeous, and I totally agree about being comfy and not spending money on something you’ll only wear once. Happy New Year!
Lovely makeup! Now, I am curious about that blue sweatshirt. What’s the scoop and where can we get it? xox
Such a simple yet stunning look!!!
Kisses,
Sarah
EverydayStarlet
Simply gorgeous! Looks so fresh and light but has such a beautiful polish. I’m going to try that eye look. Thank you for doing the gloss. I’m such a klutz with lipstick but that seems potentially doable. Hmmm….I may have to venture out of my comfort zone. Happy New Year, everyone!
You look lovely. Happy nw year!
Is it just me? Why bother going through all that trouble if you’re not going to change that sweatshirt? Maybe I’m old fashioned but you’re a beautiful girl, it’s New Year’s Eve, ditch that sweatshirt and put on something sparkly!
I love this makeup look! But I must know … where did you get those amazing shoes?!?
I LOVE the outfit!
Xx- Elsie
So pretty!!! Love the outfit!!!
Love the bright blue eyeliner against your skin! So pretty!!!
♥ Heather
This is such a gorgeous look! I love it!
Paige
http://thehappyflammily.com
The outfit is awesome! We all have different tastes.
I need that Stila glitter cream shadow now 🙂 Very pretty face!
Love these tips! Thank you!
I think it’s supposed to be fun – her sweatshirt matches her eyes (gold and blue) and I think we can all agree that her make-up looks really nice but the eyes with the blue and gold definitely take the cake! Seriously, loving the eye make-up!
Hi Teresa!
The sweatshirt is just my personal style. If you don’t like it, you can totally dress up a bit more.
xo
LaTonya
Hi Ashley!
They’re Nine West!
xo
i’m so with you here. and who said post-christmas stretchy pants are a complete no? also, i have always found Stila to be a wonderful go to makeup. and your model is adorable!
This looks so pretty http://www.hannamarielei.com
I love those eyes! Thanks for the timely tips!
Your hair is beautiful, LaTonya!
I love how the eyes glow and how lips and eyes match each other perfectly!
https://www.makeandmess.com/
Gorgeous! Thanks for sharing. Love the photo of your colorful outfit against the brick wall. 🙂
I loooooove gold eyeshadow. It’s my go to! It really spruces up any look, any day.
Julie | http://www.xfallenmoon.com
I love both the outfit and the makeup! Casual meets glam; perfect! 🙂
So pretty, LaTonya! I’m totally feeling your down-to-earth approach to NYE this year. I’ll be following suit!
Love the look, wow 5 mins!
… I’m making my dress this new years eve 🙂
Happy New Year!!
What a great palette by Stila! I love seeing rose gold in the application because thats so my color right now.
I love this look! Awesome makeup and great tips.
I love the colors you chose. I always look forward to your posts LaTonya!
Thank you Sara!