") In keeping with my apparent obsession of trying to make everything as gold as possible in my house, I thought it would be only right to make some 24k decorative pillows to keep the theme alive. Well, not actual 24k obviously… gold leaf on a budget is more like it. I used this technique to make a fun phrase sweatshirt recently, and I thought it would be perfect for a set of pillows for our new teal Joybird sectional. The couch is such a pretty teal (it’s the Notion Thunderbird color). So I thought white and gold pillows would be a good accent to the big pop of color. I have been eyeing this beautiful JuJu wallpaper print, and while I’m not in the market for wallpaper at the moment, I thought it would be a great pattern inspiration for the pillow project. Let’s get started!
In keeping with my apparent obsession of trying to make everything as gold as possible in my house, I thought it would be only right to make some 24k decorative pillows to keep the theme alive. Well, not actual 24k obviously… gold leaf on a budget is more like it. I used this technique to make a fun phrase sweatshirt recently, and I thought it would be perfect for a set of pillows for our new teal Joybird sectional. The couch is such a pretty teal (it’s the Notion Thunderbird color). So I thought white and gold pillows would be a good accent to the big pop of color. I have been eyeing this beautiful JuJu wallpaper print, and while I’m not in the market for wallpaper at the moment, I thought it would be a great pattern inspiration for the pillow project. Let’s get started!
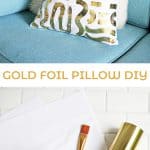
") Supplies:
Supplies:
–gold foil roll
–foil adhesive
-paintbrush
-parchment paper
-plain white cotton fabric
-fabric scissors
-iron
-pillow insert
") I wanted to make 19″ pillows, so I cut out a 20″ wide square since I planned to have a 1/2″ seam allowance when I sewed the pillow together. Turn your iron onto medium/high heat with the steam setting off. To create the pattern, I blocked off about an 8″ square section at a time and used my brush to create random squiggles and strokes with my foil adhesive. The adhesive is more like a thick paste than a thin paint, so you do have to go over it several times to get a real build up on the fabric. You want it to be a concentrated thin layer of adhesive but not gloppy, so brush any big clumps smooth. It’s best to work as quickly as you can for this part since you don’t want the adhesive to dry too much before moving on to the next step. So work in an even smaller area if you need to.
I wanted to make 19″ pillows, so I cut out a 20″ wide square since I planned to have a 1/2″ seam allowance when I sewed the pillow together. Turn your iron onto medium/high heat with the steam setting off. To create the pattern, I blocked off about an 8″ square section at a time and used my brush to create random squiggles and strokes with my foil adhesive. The adhesive is more like a thick paste than a thin paint, so you do have to go over it several times to get a real build up on the fabric. You want it to be a concentrated thin layer of adhesive but not gloppy, so brush any big clumps smooth. It’s best to work as quickly as you can for this part since you don’t want the adhesive to dry too much before moving on to the next step. So work in an even smaller area if you need to.
") Once you have several squiggles painted, cut a piece of gold foil roll just slightly bigger than your painted area, lay the foil (gold side up) on the adhesive and place a piece of parchment paper over the foil. Use the iron to adhere the foil to the adhesive. You’ll want to spend about 20-25 seconds passing over all areas of the foil, making sure it’s sufficiently warming each section. If you see the foil starting to lose it’s “goldness” when you pick up the parchment paper, that means either your iron is too hot or you’re ironing the spot for too long so adjust accordingly.
Once you have several squiggles painted, cut a piece of gold foil roll just slightly bigger than your painted area, lay the foil (gold side up) on the adhesive and place a piece of parchment paper over the foil. Use the iron to adhere the foil to the adhesive. You’ll want to spend about 20-25 seconds passing over all areas of the foil, making sure it’s sufficiently warming each section. If you see the foil starting to lose it’s “goldness” when you pick up the parchment paper, that means either your iron is too hot or you’re ironing the spot for too long so adjust accordingly.
") When the fabric and foil are cool, peel back the foil slowly to reveal the design underneath. Repeat with each section until your pillow design is full! If you like a more brushy look, use less adhesive, or use more for a more solid line. You can practice on a scrap piece of fabric if you want to test out the look first.
When the fabric and foil are cool, peel back the foil slowly to reveal the design underneath. Repeat with each section until your pillow design is full! If you like a more brushy look, use less adhesive, or use more for a more solid line. You can practice on a scrap piece of fabric if you want to test out the look first.
") Finish your pillow by following this envelope pillow tutorial (my favorite way to make a pillow), and your pillows are done! Since the gold foil is a little more delicate than a regular fabric paint, I would hand wash in cold water as needed to keep them looking nice.
Finish your pillow by following this envelope pillow tutorial (my favorite way to make a pillow), and your pillows are done! Since the gold foil is a little more delicate than a regular fabric paint, I would hand wash in cold water as needed to keep them looking nice.
")
")
") These pillows look so good on the teal couch and compliment the rest of the gold items in the room really well. I love that they are also by a big window so the gold foil gets plenty of good reflection from the sunlight that comes in. We spend a lot of time on this sectional, so I’m so happy to have some cute pillows that, just like Lebowski’s rug, “really tie the room together.” If you ask me, this DIY is as good as gold! xo. Laura
These pillows look so good on the teal couch and compliment the rest of the gold items in the room really well. I love that they are also by a big window so the gold foil gets plenty of good reflection from the sunlight that comes in. We spend a lot of time on this sectional, so I’m so happy to have some cute pillows that, just like Lebowski’s rug, “really tie the room together.” If you ask me, this DIY is as good as gold! xo. Laura
Credits//Author and Photography: Laura Gummerman. Photos edited with A Beautiful Mess actions.
19 Comments
So glad you posted this 🙂 Since your sweatshirt DIY I’ve been thinking of doing a sweatshirt with a hashtag #bringbackcosmic for a space-themed music festival this summer but I was kind of worried about ordering all the stuff and messing it up! I feel even more inspired to give it a go now 🙂
http://katyclouds.blogspot.com – I’m a festival blogger 🙂
WOW! IT looks great!
http://soldenochedecocrochet.blogspot.com.ar/
I love this DIY! I love the gold trend and this is such a fun way to add sun fun accents to your living space!
-Helen
http://www.sweethelengrace.com
Not related to the tutorial, but I love the unicorn bookends on your shelf!
They look great eith the fluffy ones!
It’s sooo cool! Love the idea!
These are so pretty I cannot! I have been obsessed with metals in interiors but I never thought to incorporate them in my pillows. Great idea!
http://annescribblesanddoodles.blogspot.com
It looks so easy and visual. It’s a lovely idea that I can’t wait to try!
Xoxo
I’m not the only one trying to make everything as golden as possible! This is wonderful, I definitely have to get my hands on that foil!
https://www.makeandmess.com/
I love it! It looks perfect with that couch!
This is a great idea! I love gold.
How well does the foil withstand everyday use?
Perfect!! We’ve been wanting to find some cushions with a metallic finish but hadn’t had any luck finding ones we like. I was thinking of trying to paint some, but the foil is a fantastic idea, definitely going to give this a try. Thanks for the inspiration!!
Pretty well!! The adhesive and heat turn it into a gold plastic not a flaky material so it don’t come off when sat against 🙂
Laura
I wonder if you could do this on a stretched canvas? And/or on a surface that has been painted (acrylic) or dyed? Love the idea and the look!
Such a great idea!
http://www.petiteandhungry.com
You had me at “gold” and “DIY”. I’m hoping I have time this summer to do something like this! (I dont work summers).
I really love it beautiful
This is such a cool project and so unique http://www.hannamarielei.com
This DIY project looks very pom pom. I like them.