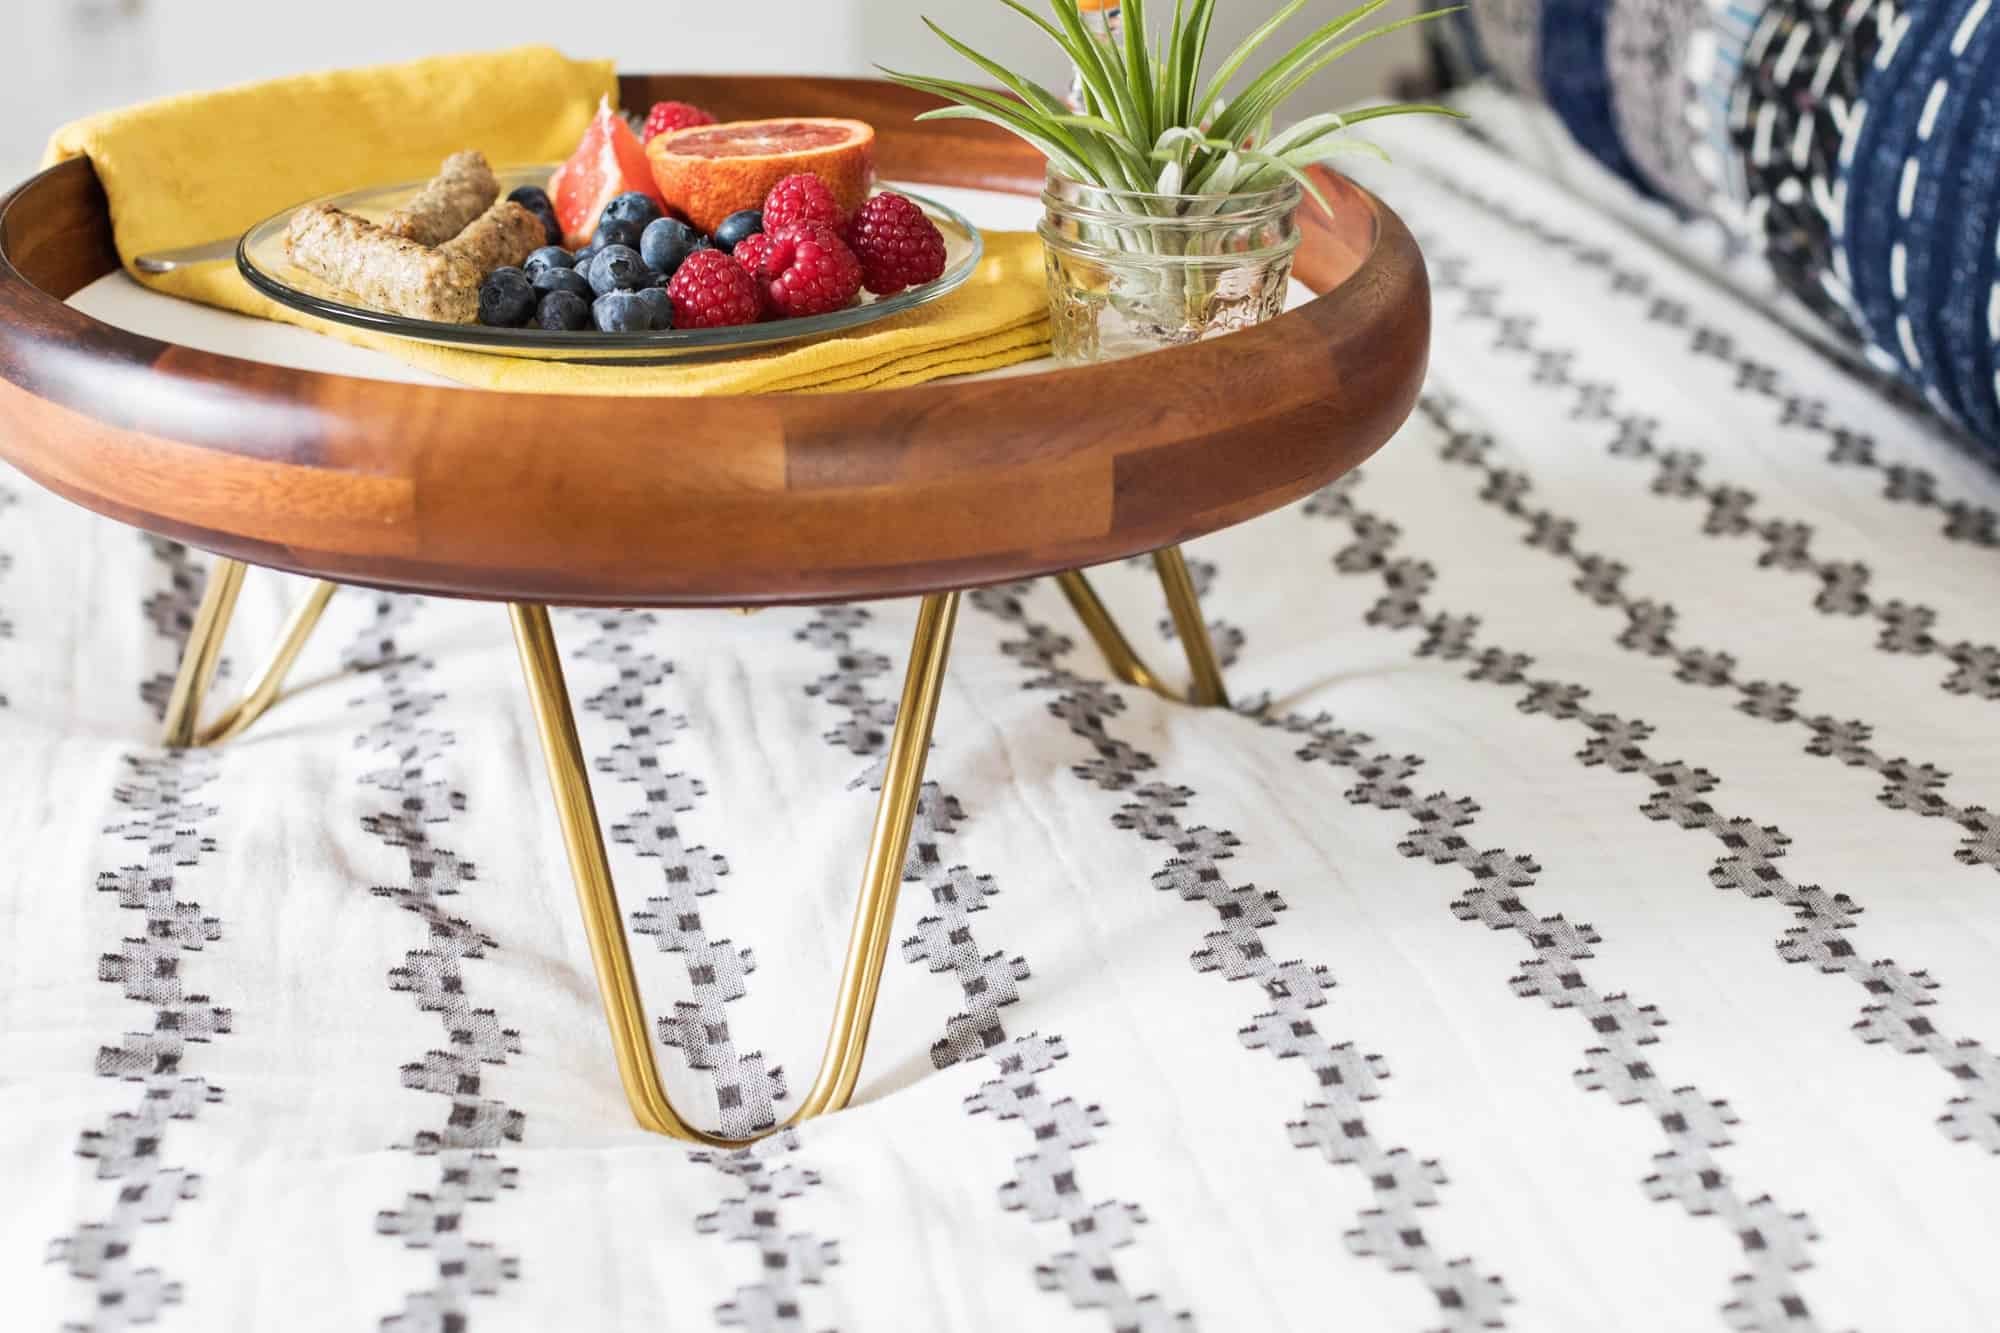
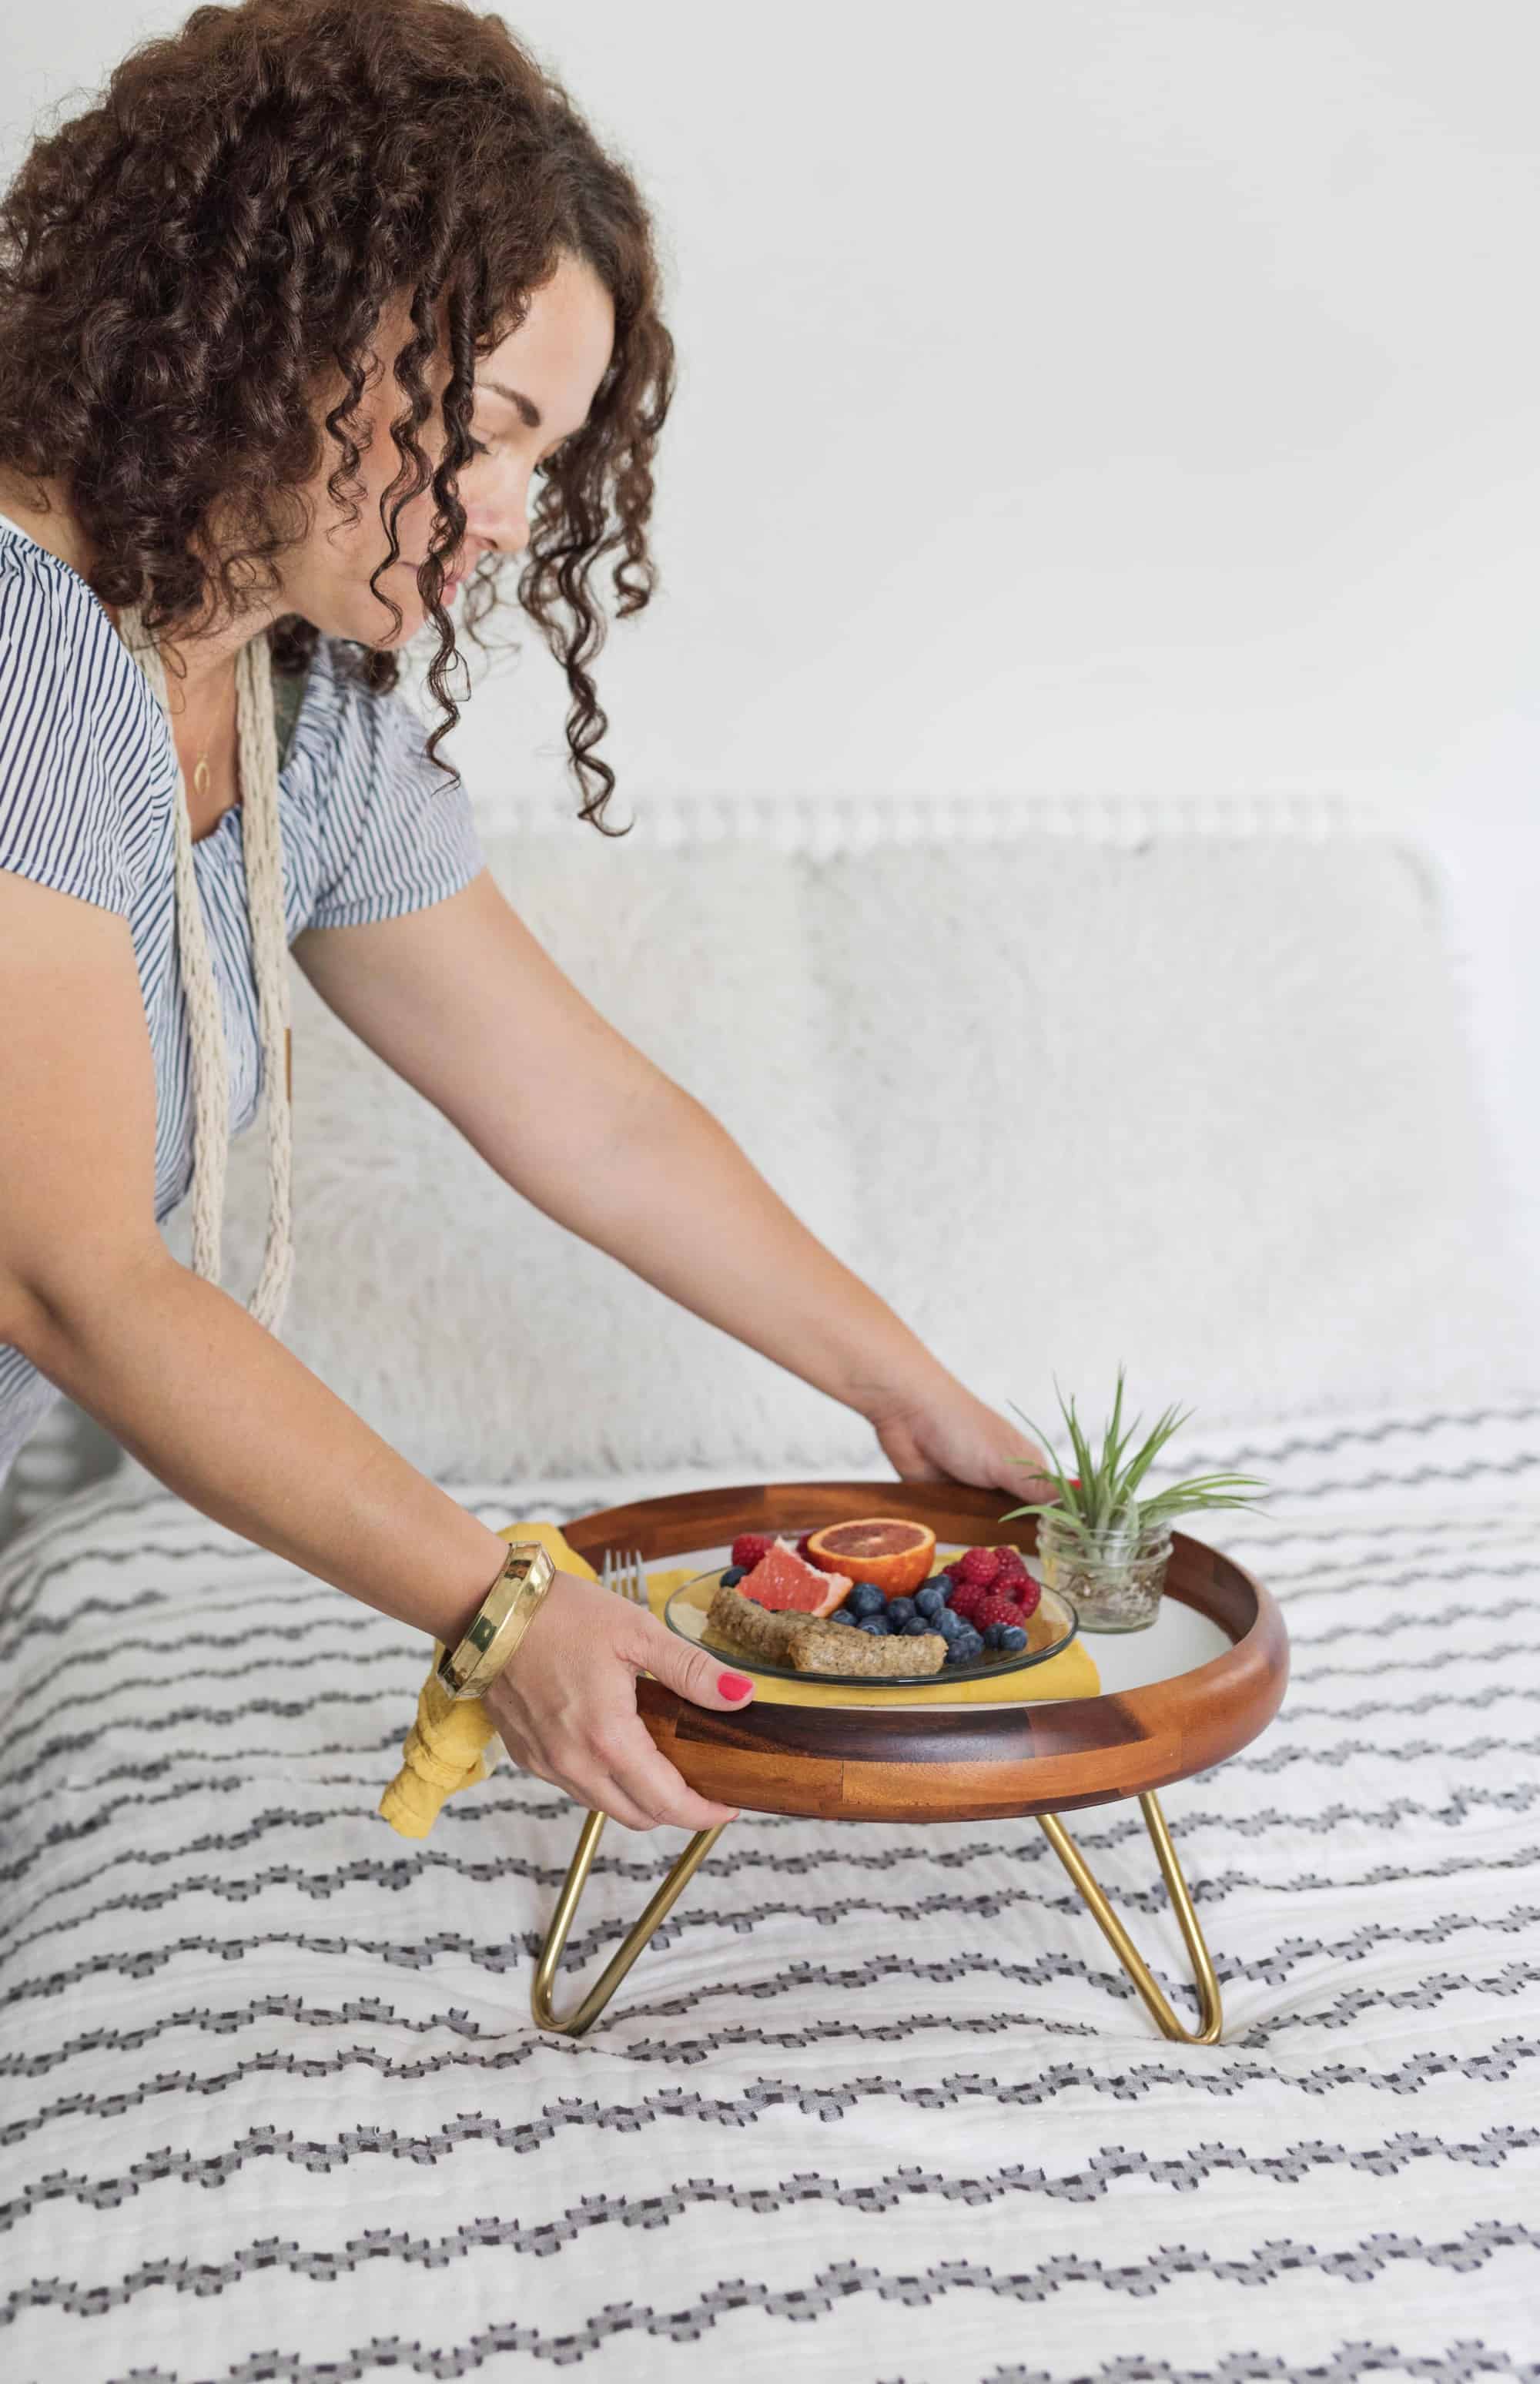
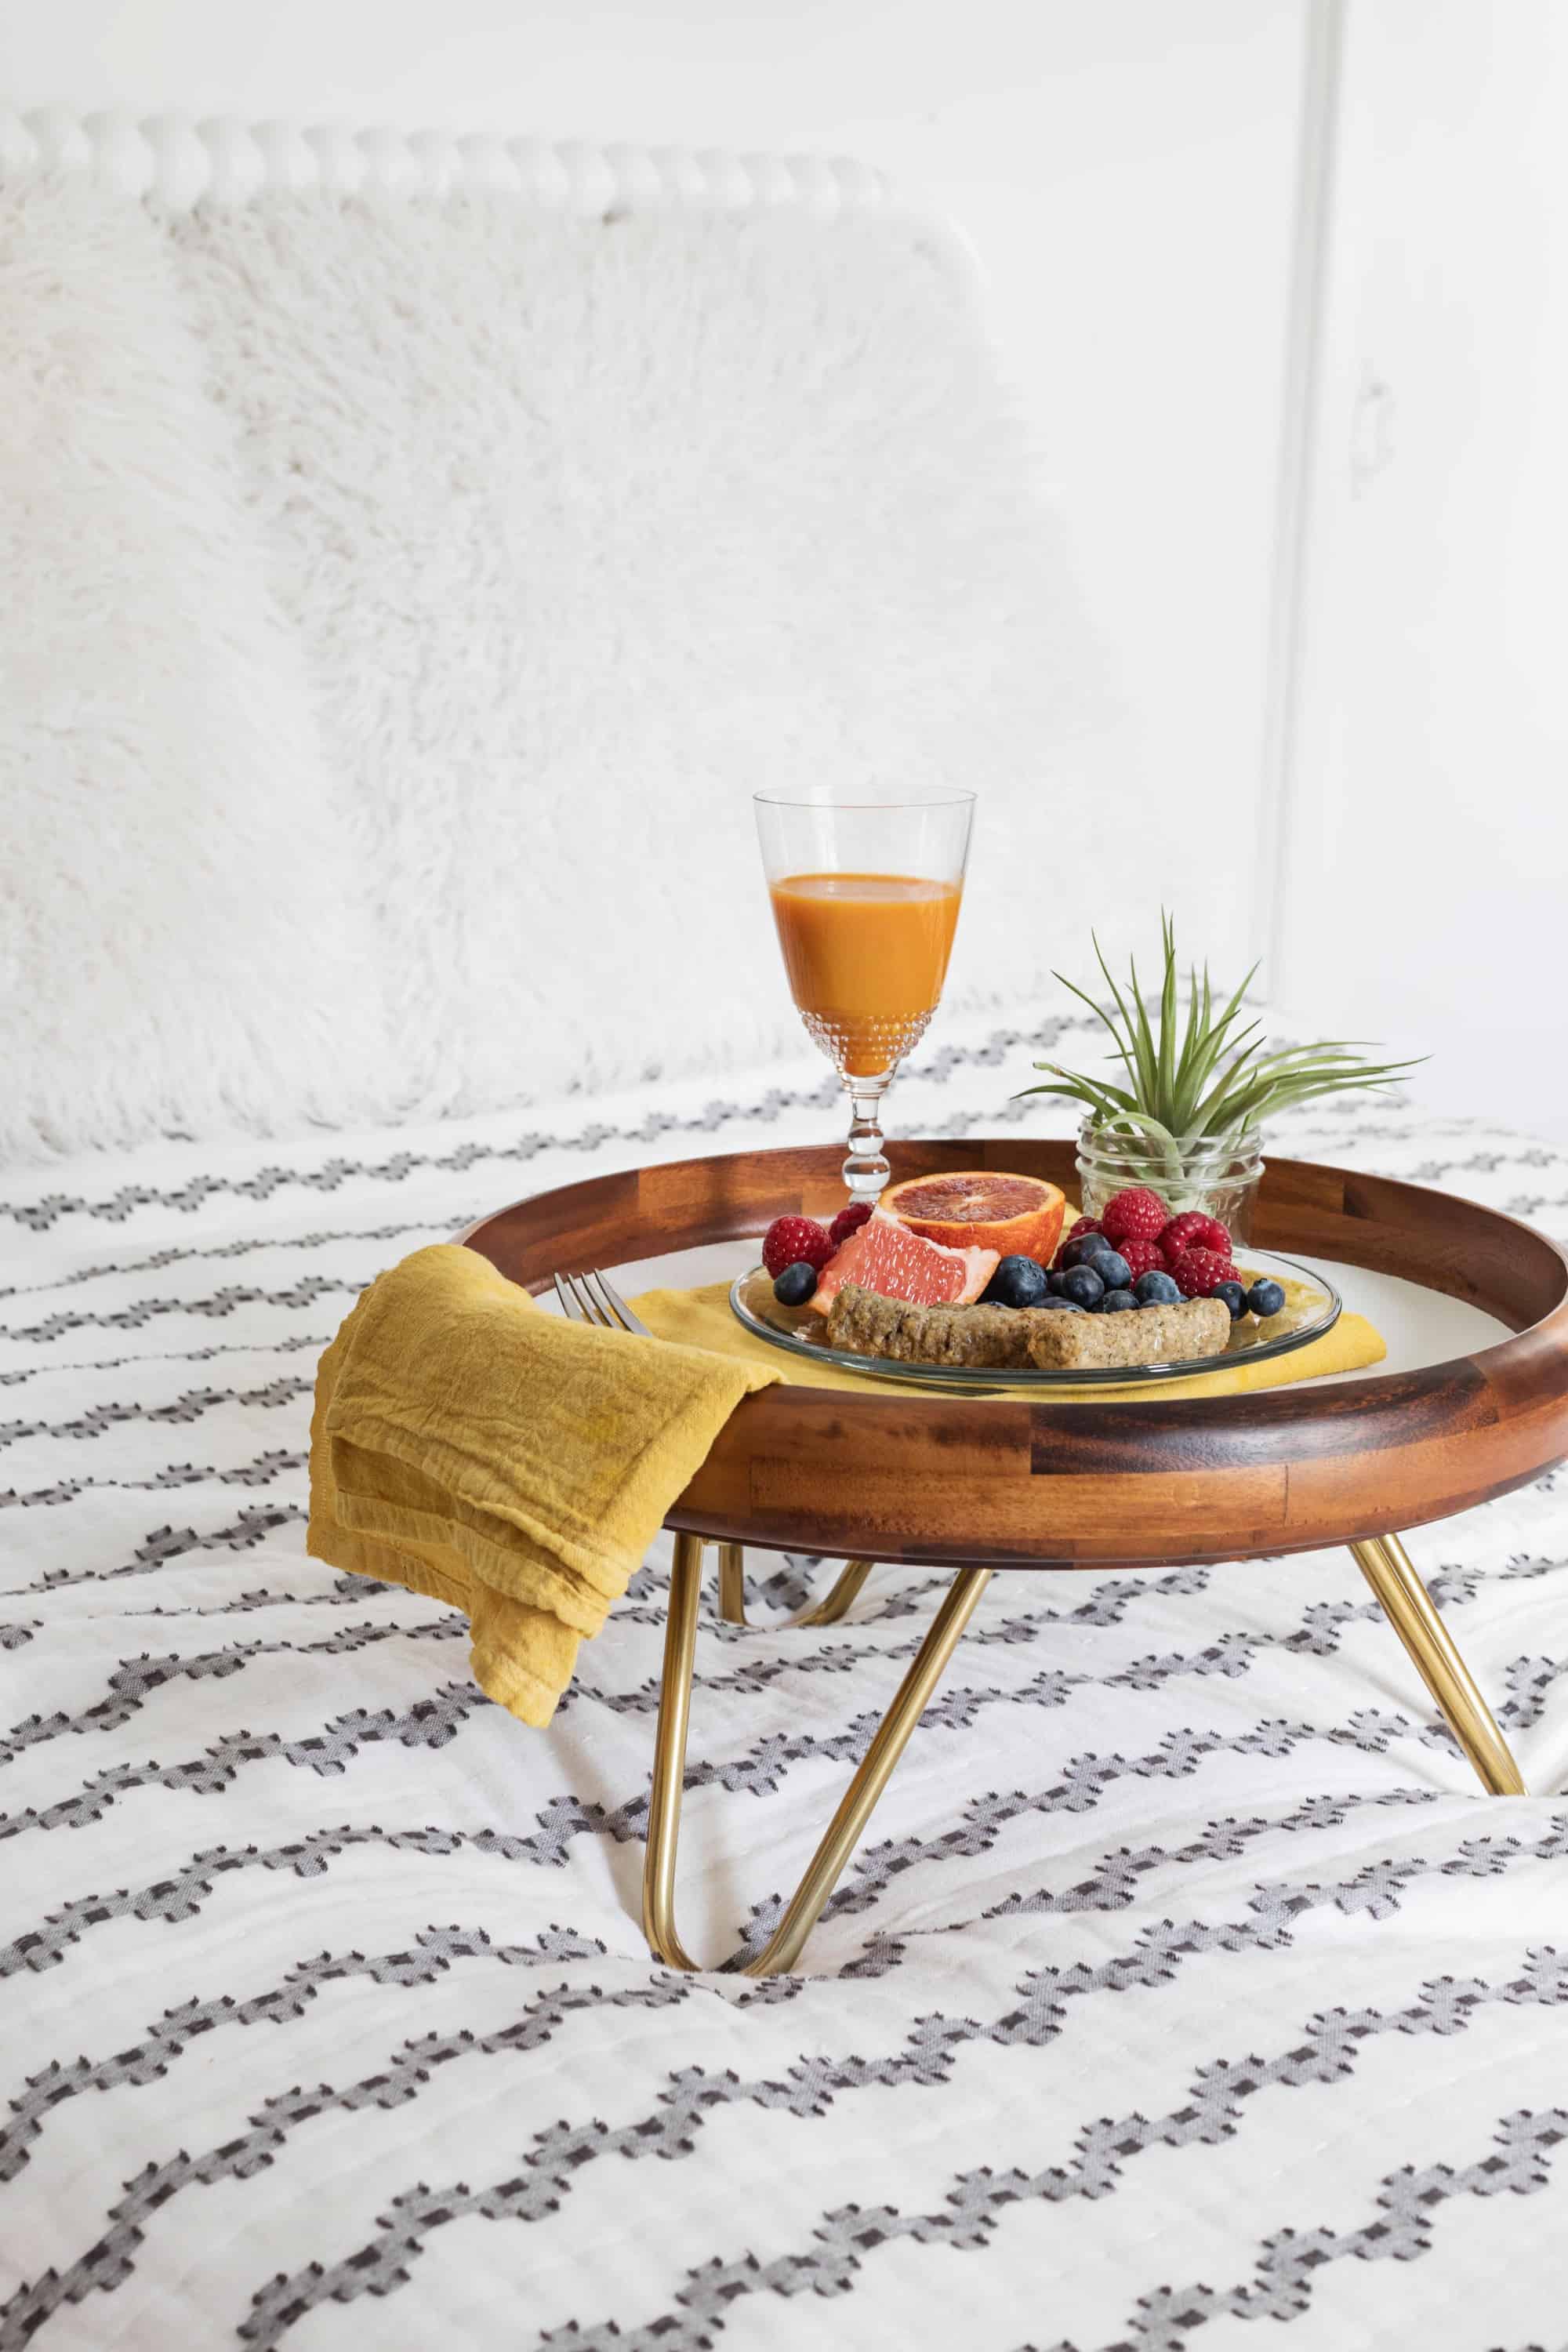
 Let’s talk for just a minute about how luxurious it feels to stay in bed just a bit longer on the weekends! Letting your body wake up when it’s ready and lounging for a bit while you scroll through your phone or snuggle with your favorite people/pets is my favorite way to set the tone for a relaxing day. The only thing that eventually gets me out of bed is a rumbling stomach or a strong need for some caffeine. Even if I end up being the one to have to start the coffee or fix the eggs, I’ve made it much easier to bring it back upstairs and crawl back into bed. Not only is my new breakfast tray sturdy and chic, it’s got a textured insert to help keep my mug and plate from sliding around as I fend off hungry family members. I’m a genius. You’re welcome.
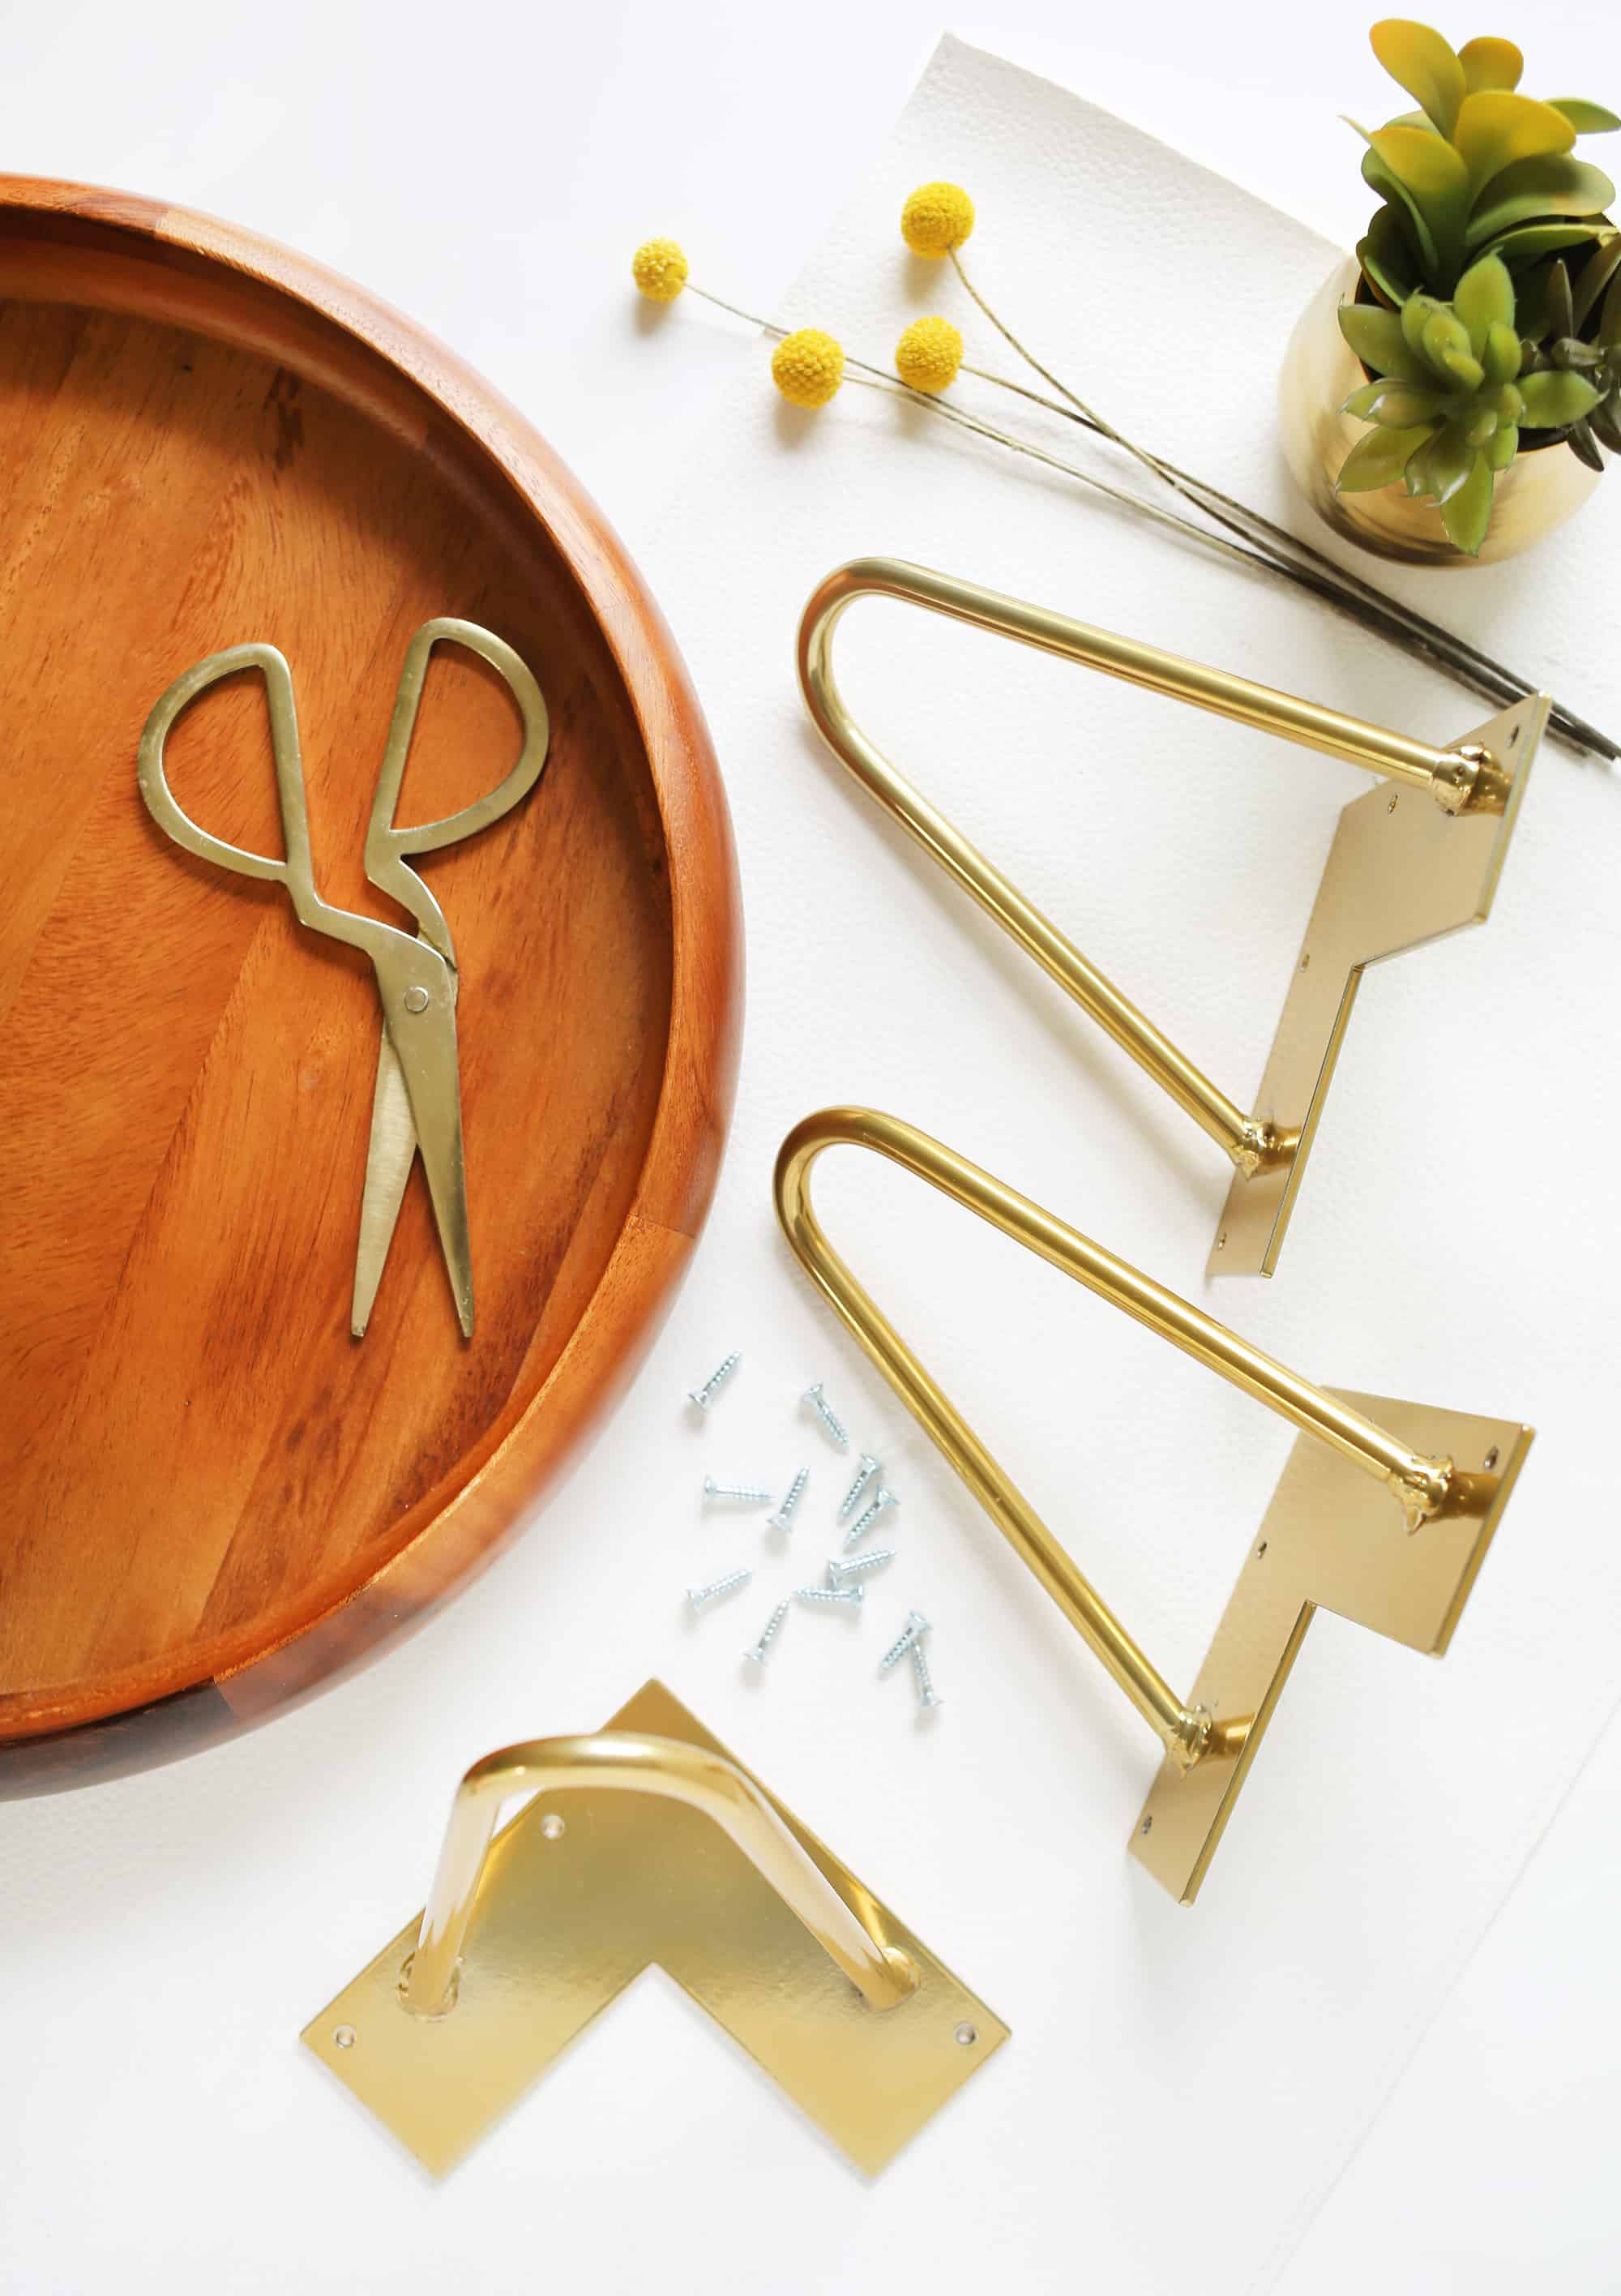 Supplies:
–large wood platter (or any tray with at least 1/2″ thickness on the bottom)
–three 6″ gold powder coated hairpin legs
–twelve #8 x 3/4″ flathead screws
-16″ x 16″ cut of vinyl or leather (check local craft and leather stores)
-scissors
-screw driver
–power drill
-drill bit for #8 screws
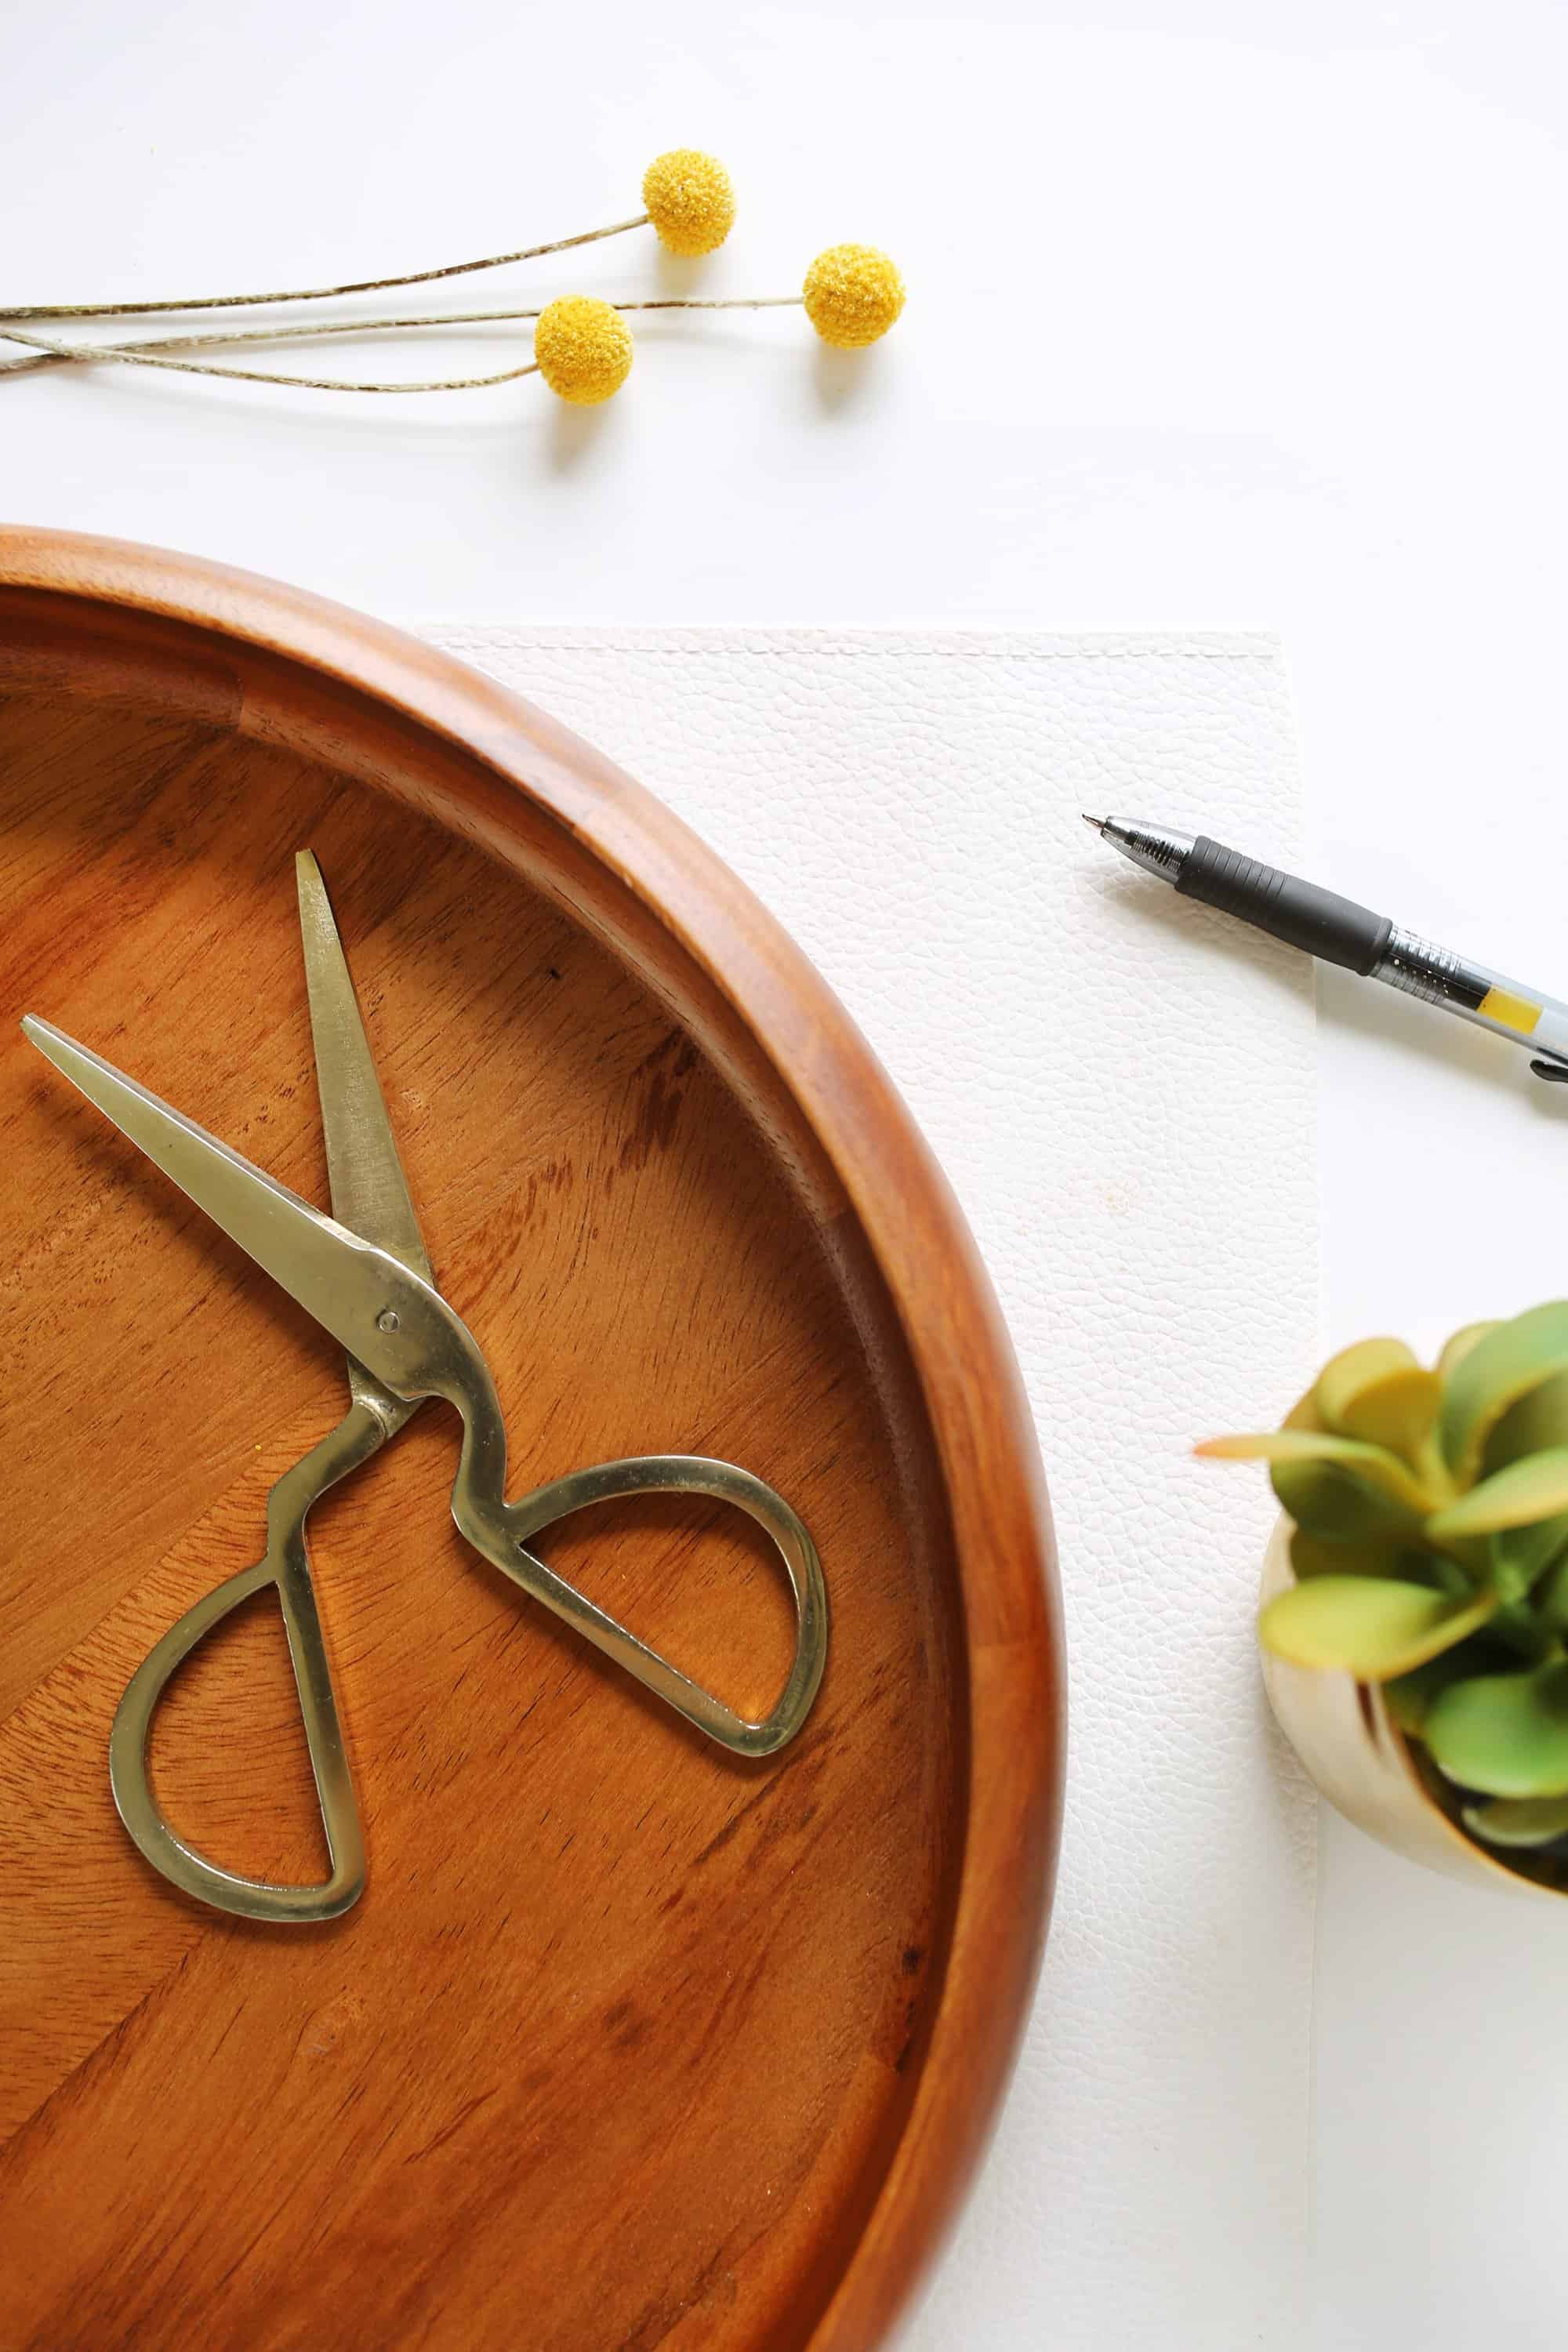 Place your tray on top of your leather, pleather, or vinyl and trace around the bottom edge. It will still be slightly larger than the space inside of your tray, but it’s a good starting point. Using leather, pleather, or vinyl offers some grip to the bottom of your dishes and can easily be wiped down in case of spills.
You can find smaller leather scraps at Tandy leather stores in a variety of colors, but you might also check your local thrift stores or flea markets for larger leather bags or other home good items you may be able to repurpose. The white leather in my project came from a Target magazine rack that I found at our local Goodwill! Otherwise, matte vinyl or even oilcloth can be found at most fabric stores and offer a similar look and texture. 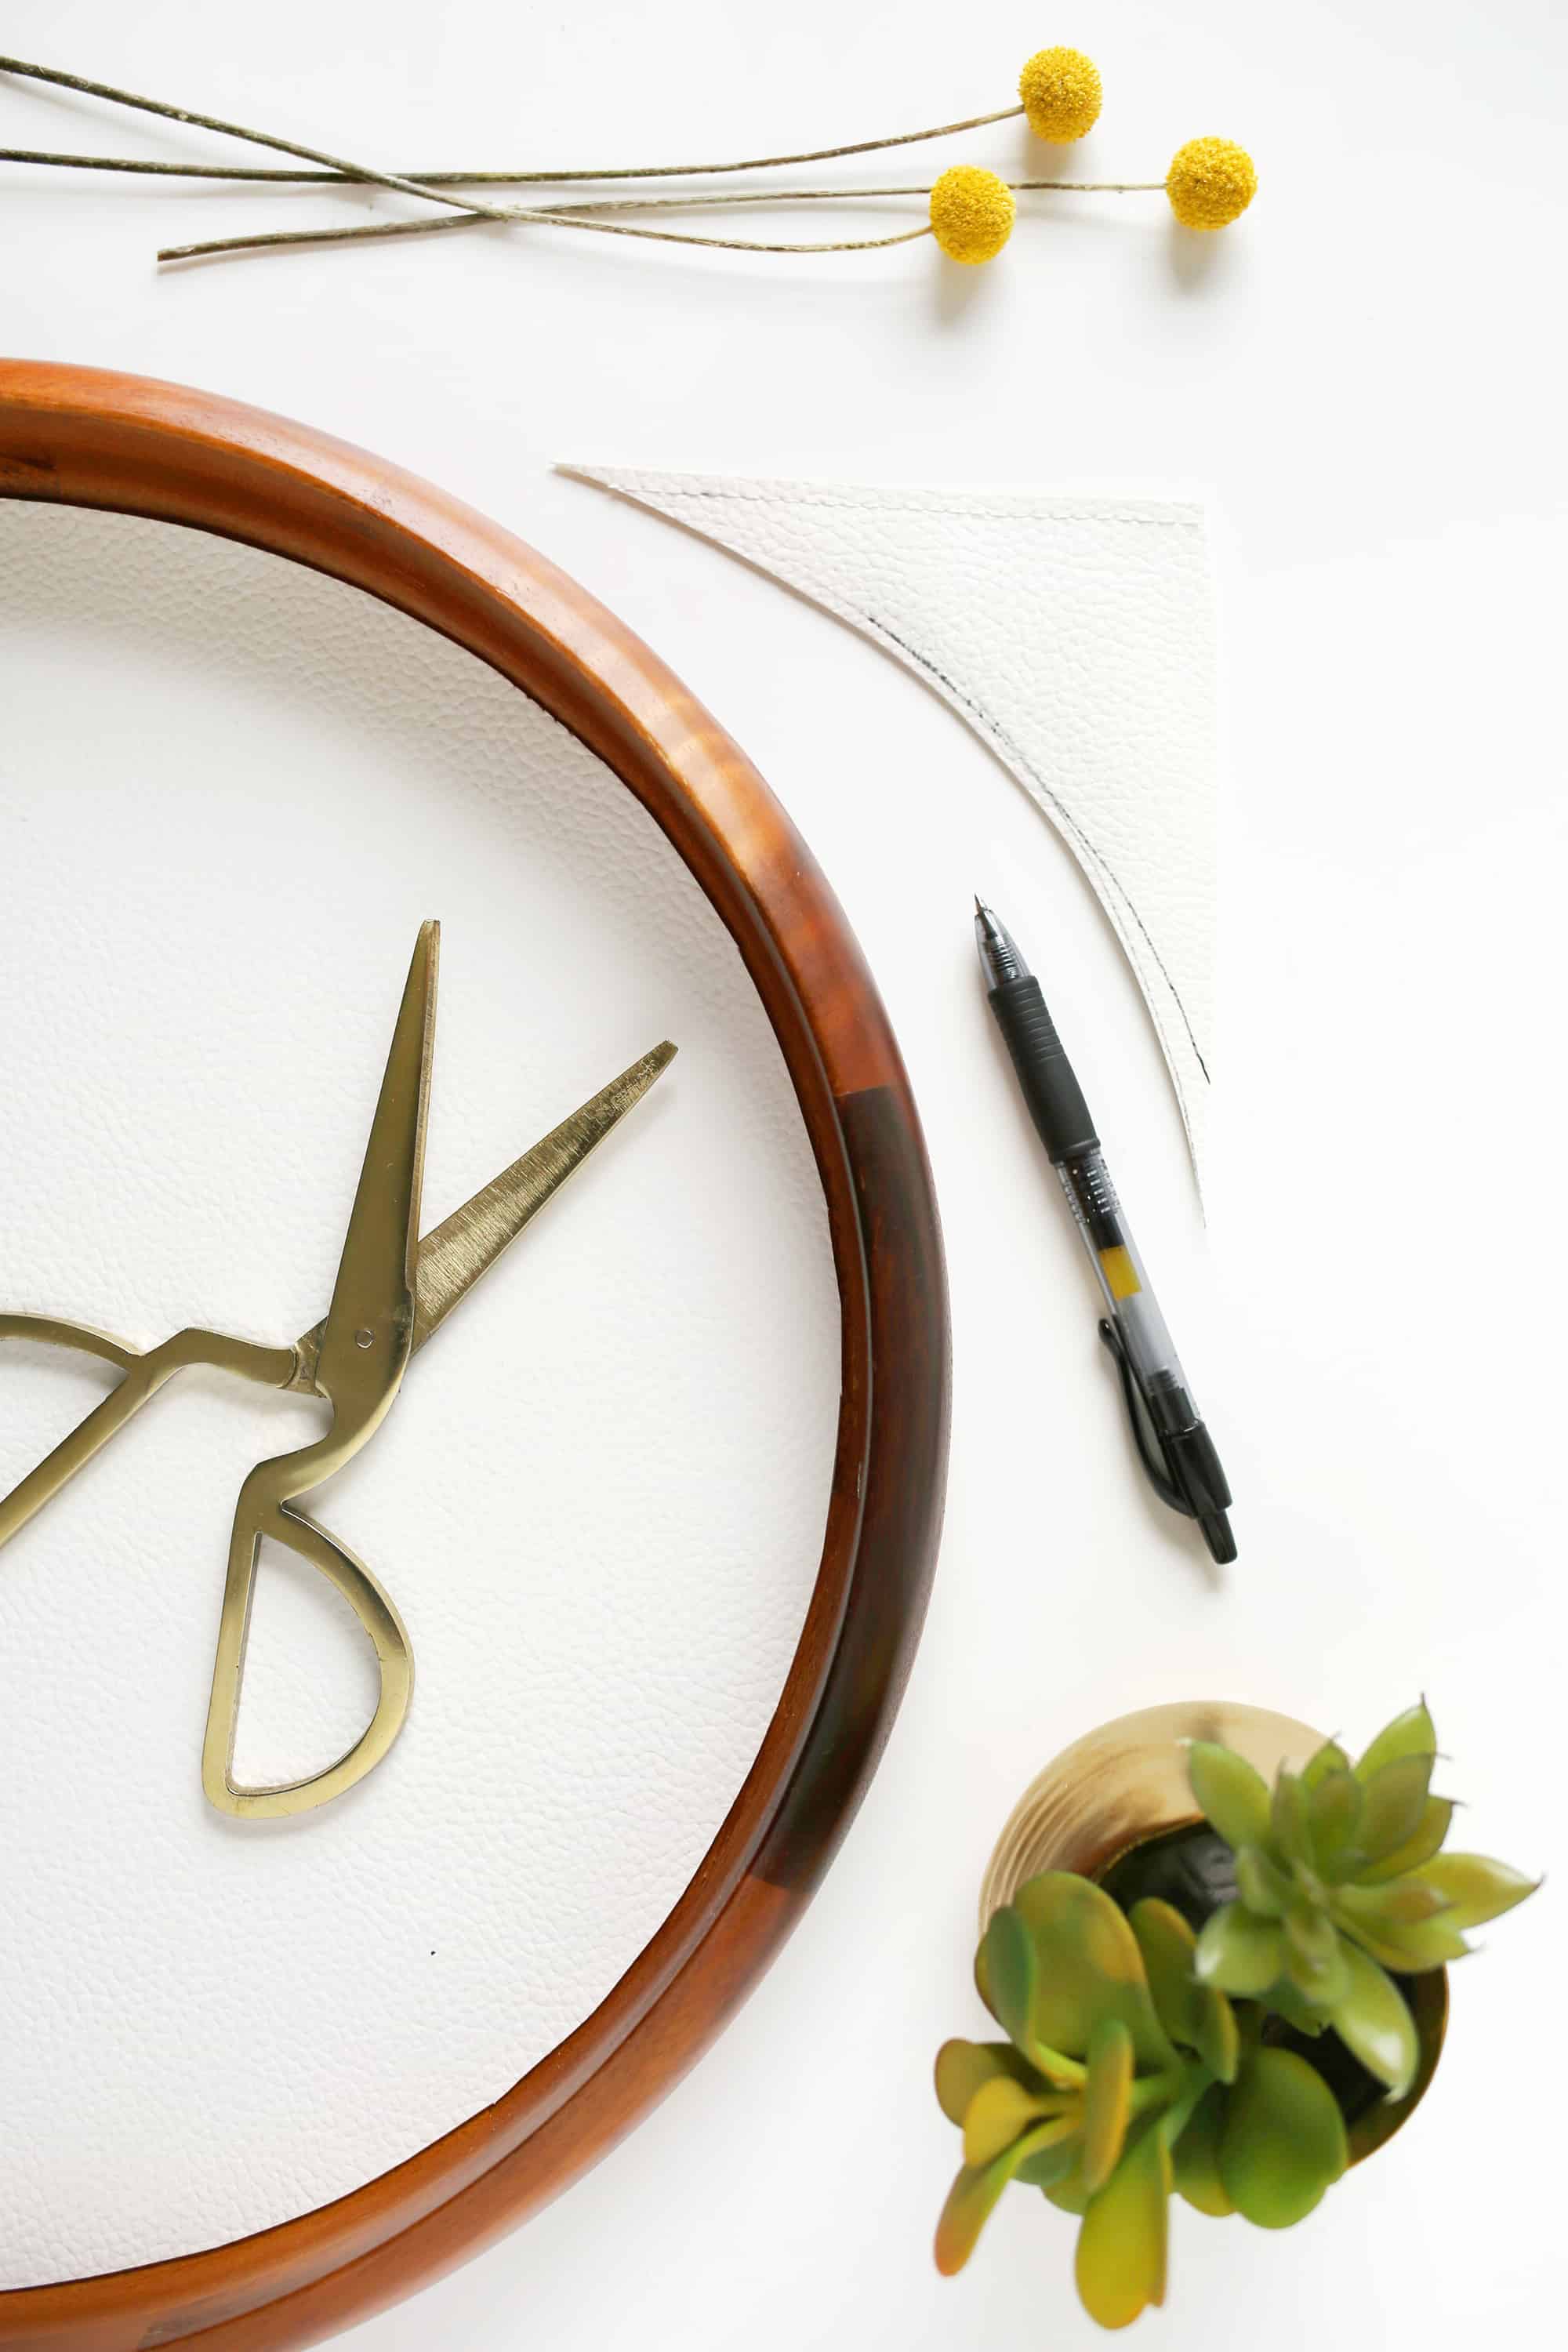 Cut along your traced circle and test it out inside your tray. Cut it down a little at a time to make sure you don’t cut too much or get an awkward oval shape.
 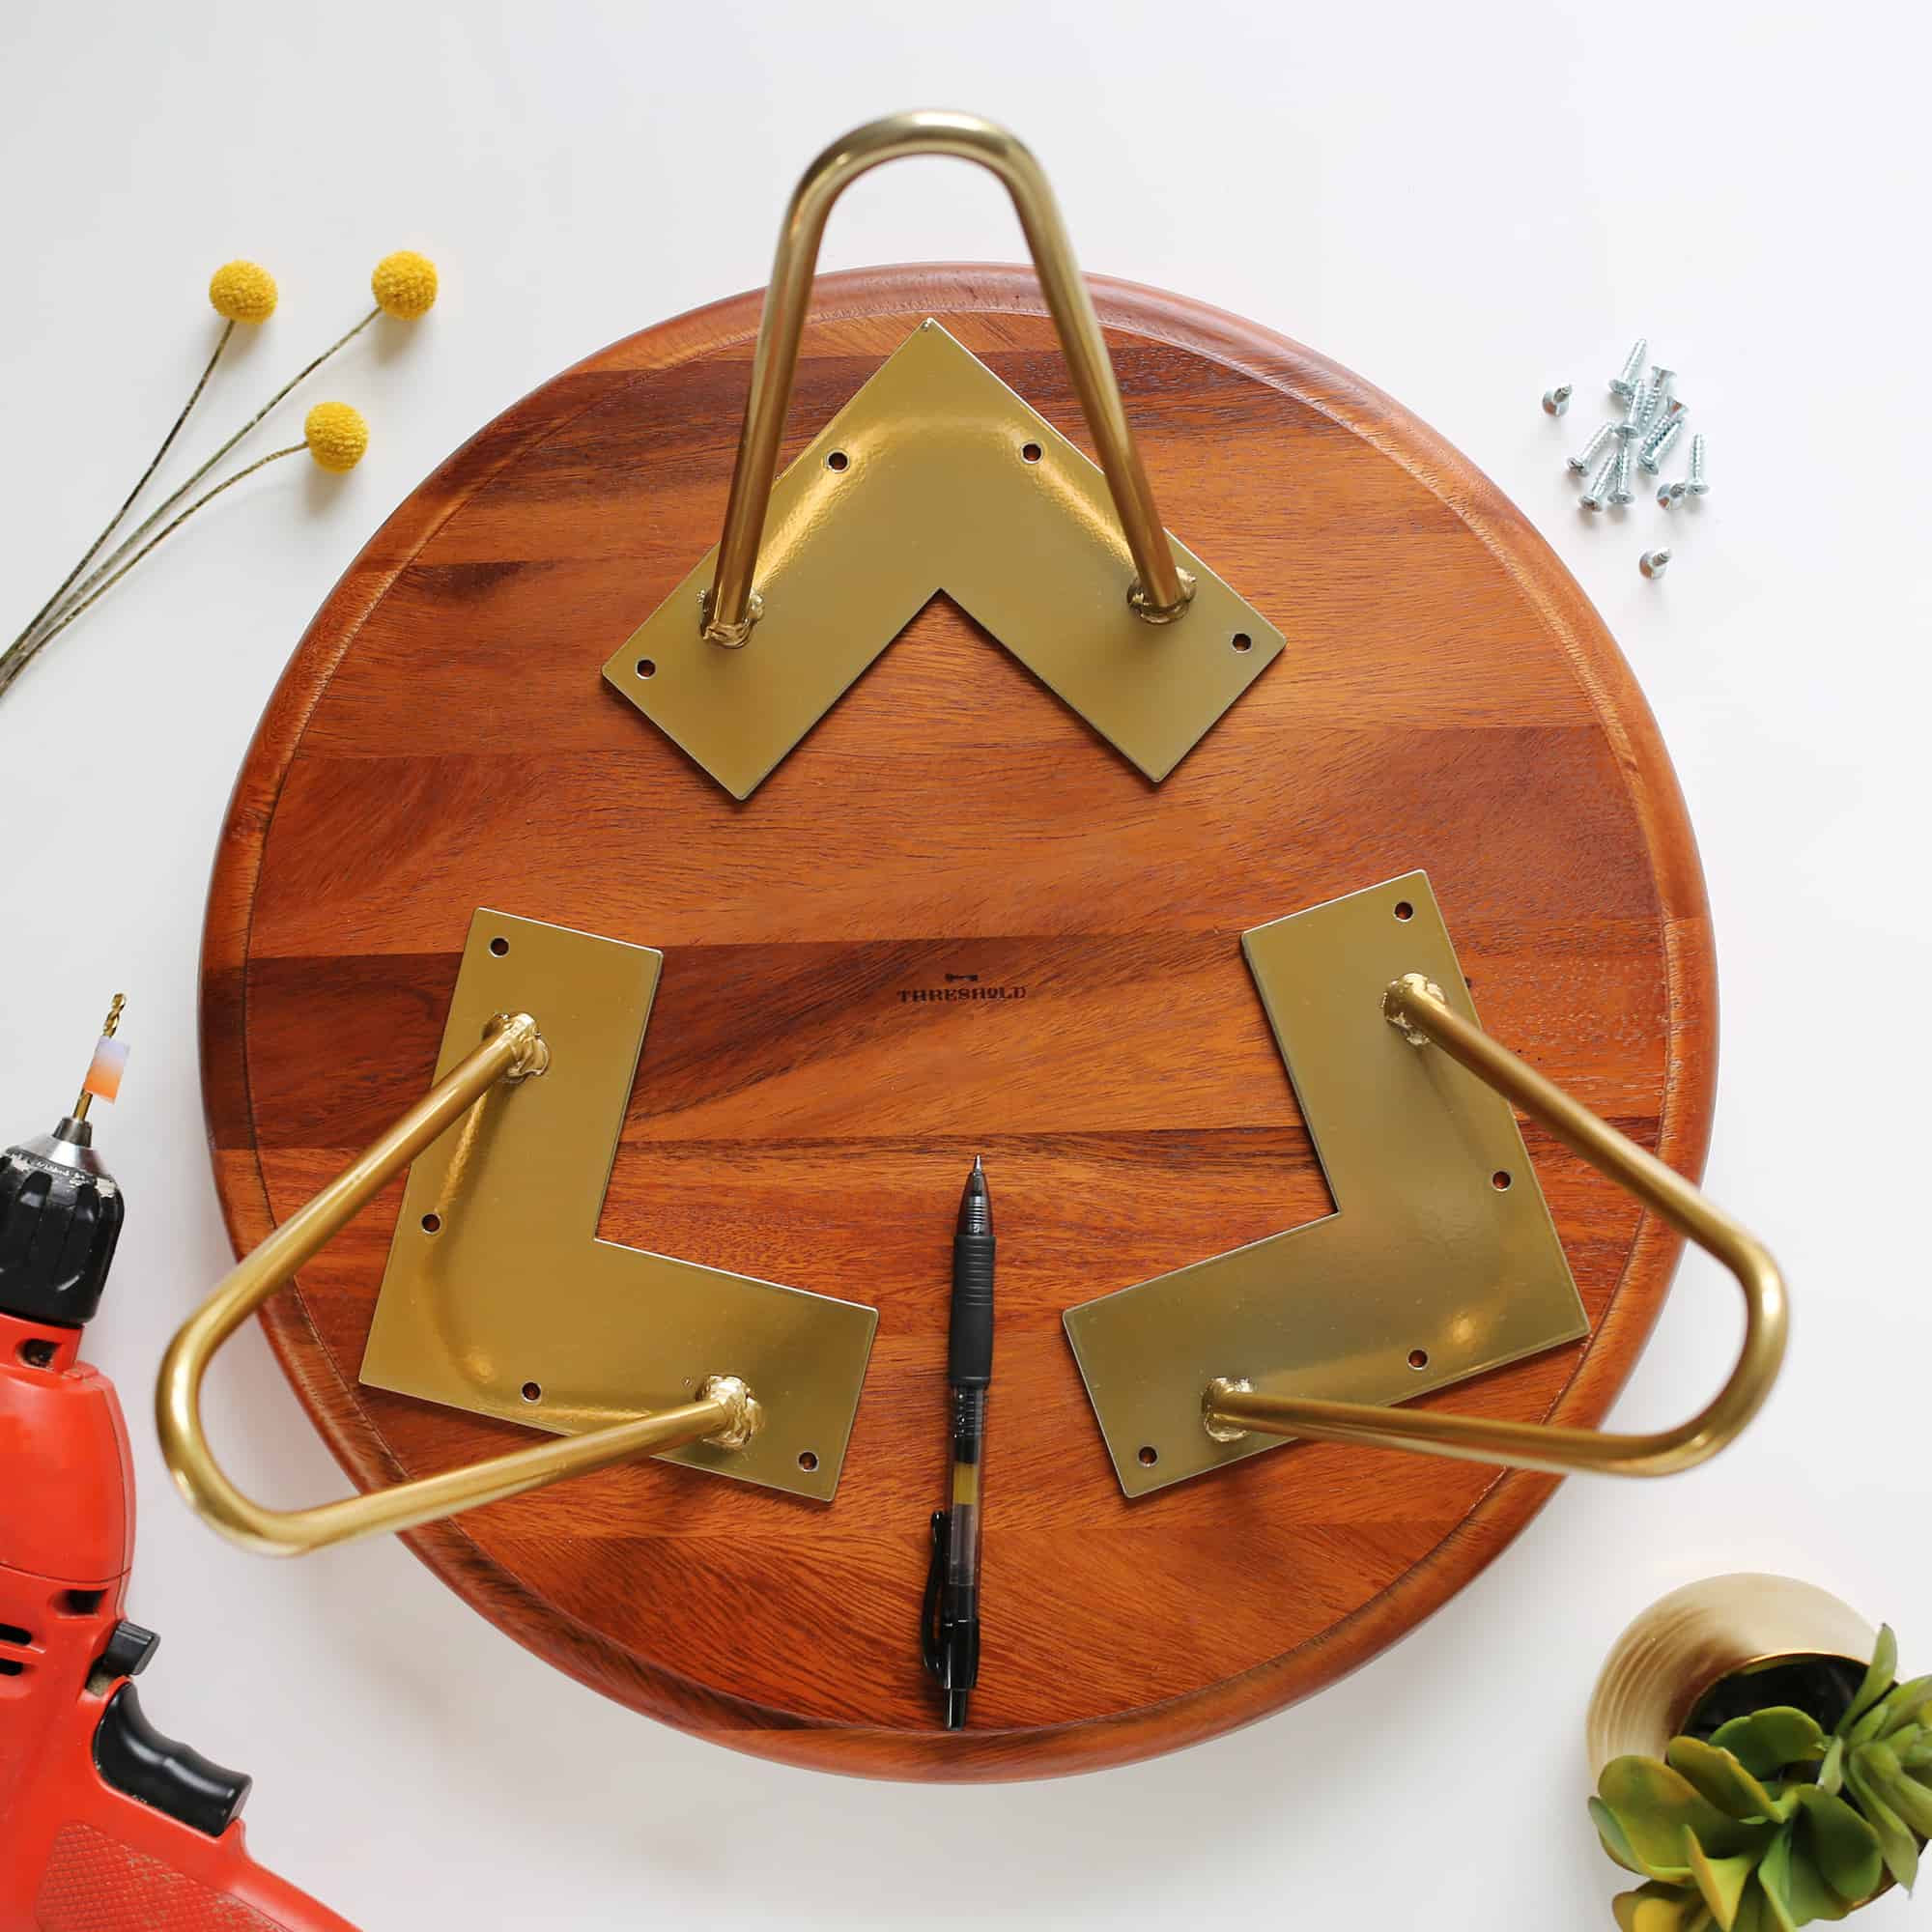 Turn your tray over and place your hairpin legs on the bottom so that they are evenly spaced. I eyeballed this part and just made sure the spaces between the hairpin legs were all about the same width apart from each other. Use a pen to make your marks where you’ll need to drill your holes.
 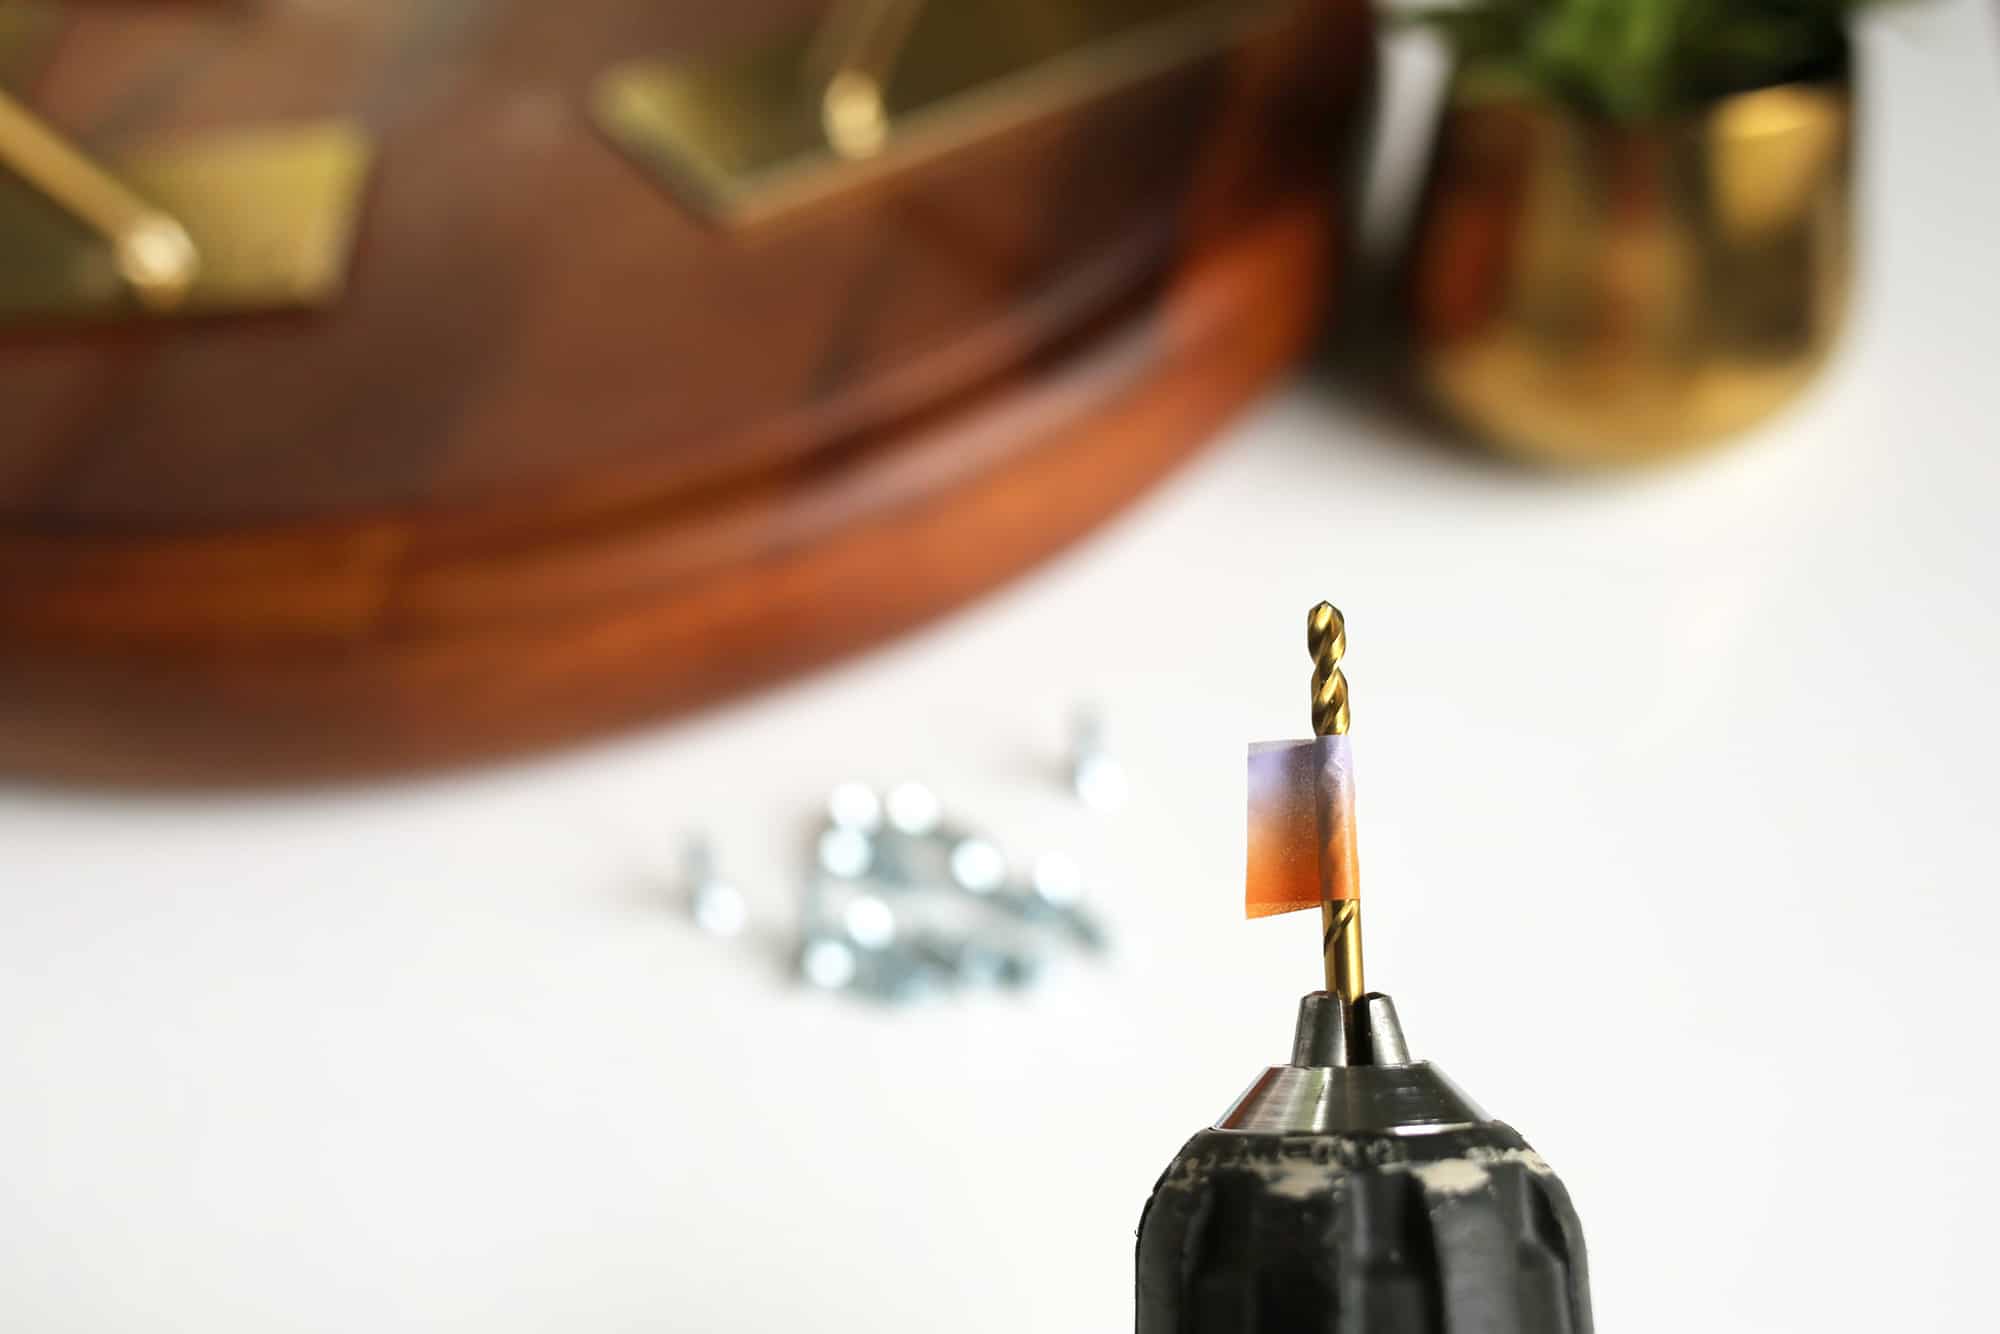 We don’t want to drill all the way through our tray, so I suggest taping washi tape about 1/2″ down from the end of your drill bit. This will give you a safe visual on where to stop drilling and ensure you don’t push all the way through. If you do happen to push through, your leather tray cover will still hide it, so don’t fret too much!
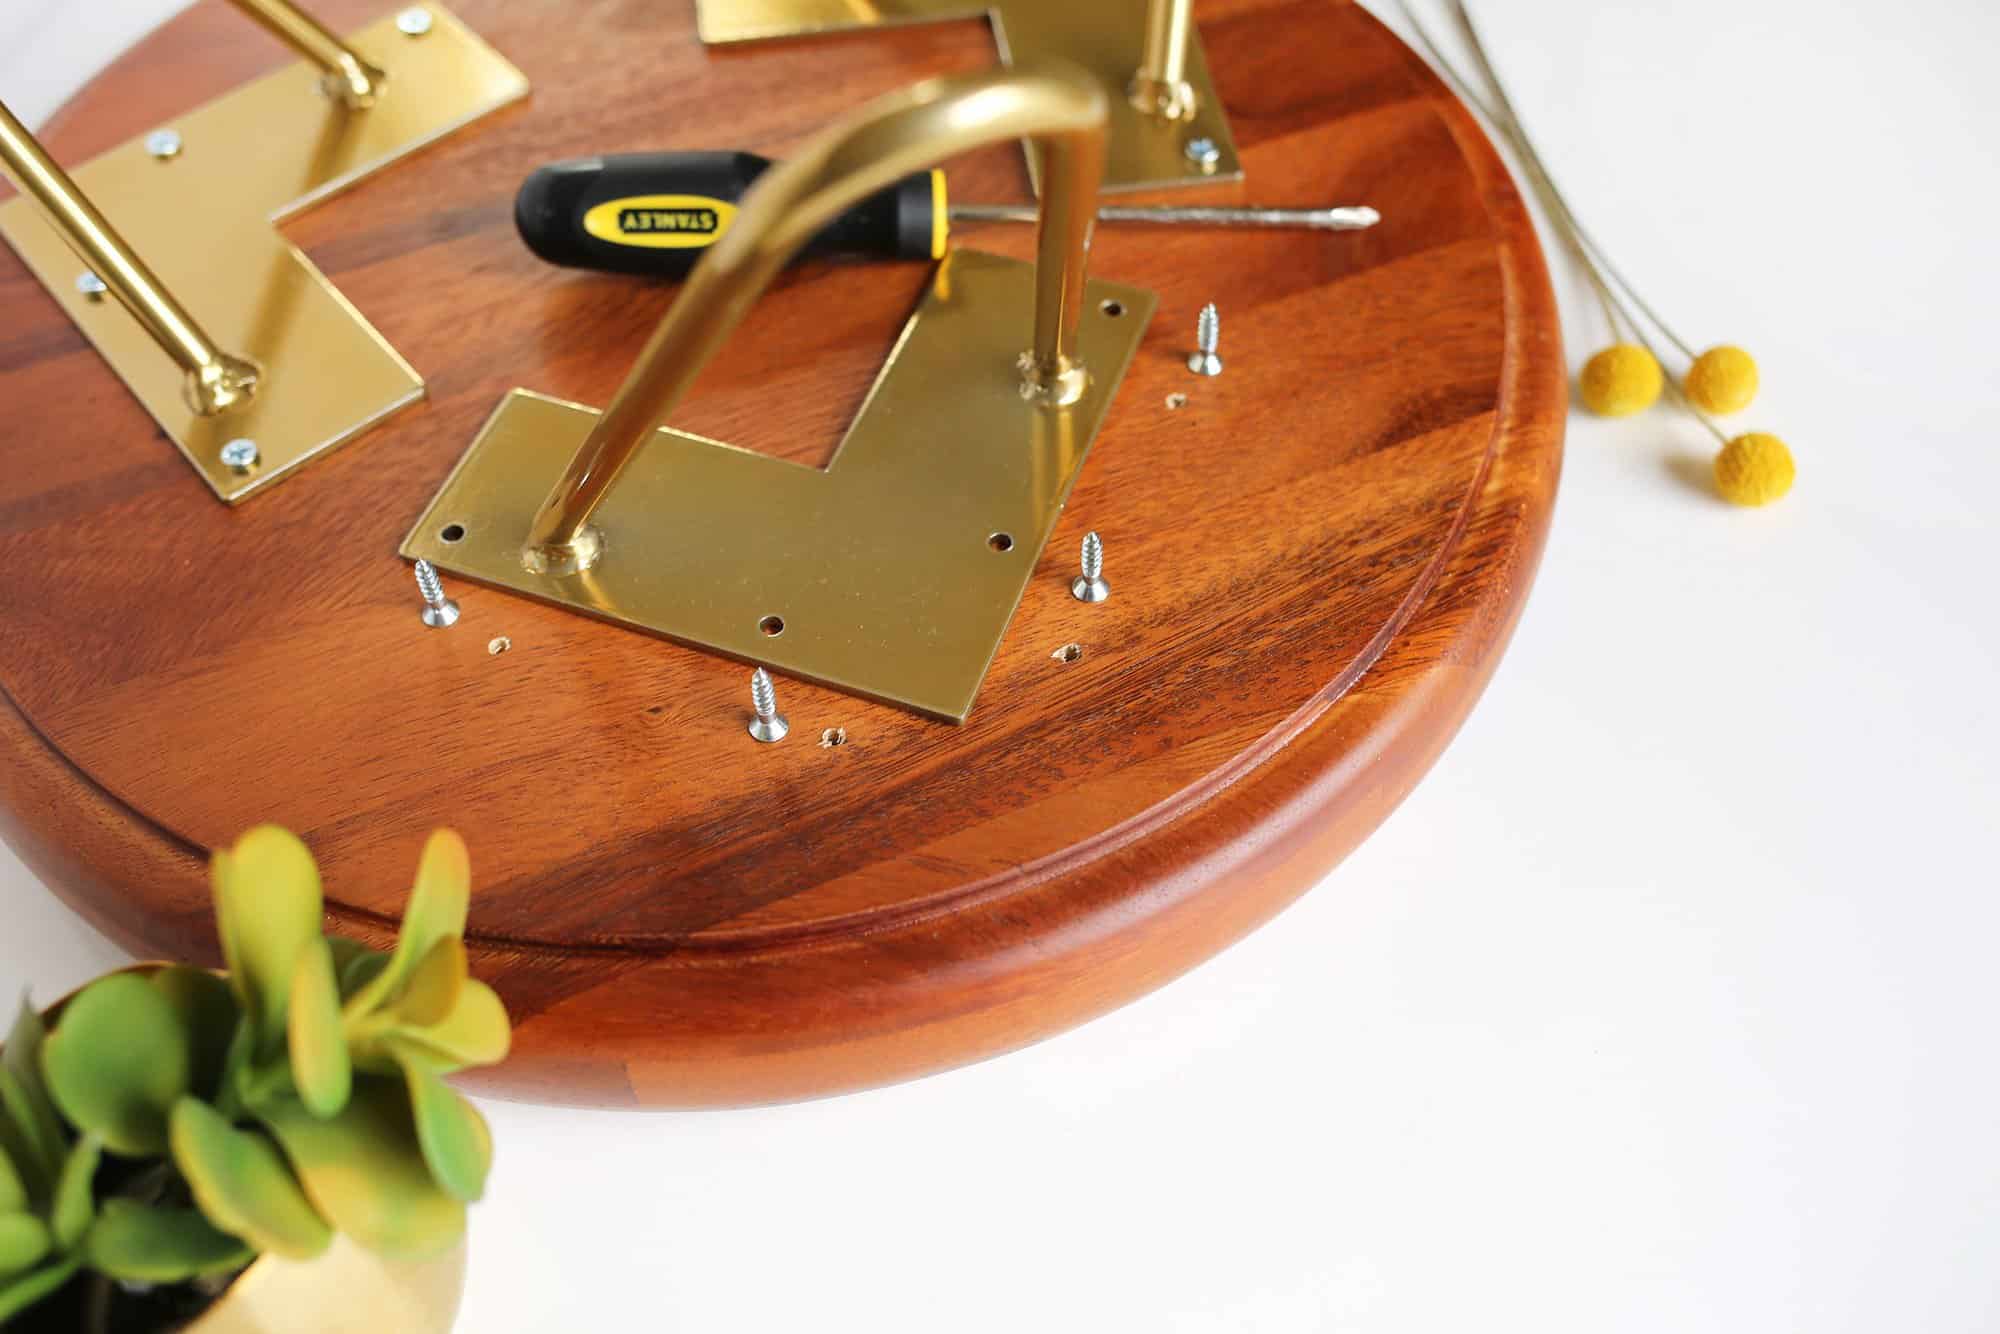 Carefully drill your holes, and then screw your legs on. Add your textured leather or vinyl insert and make sure you get to enjoy using it this weekend!
You know how I’ve mentioned before how multifunctional projects are my favorite projects? Imagine how lovely this same piece would look as a cheese tray at your next gathering or an everyday centerpiece filled with seasonal fruit. Oh! A floor plant stand!
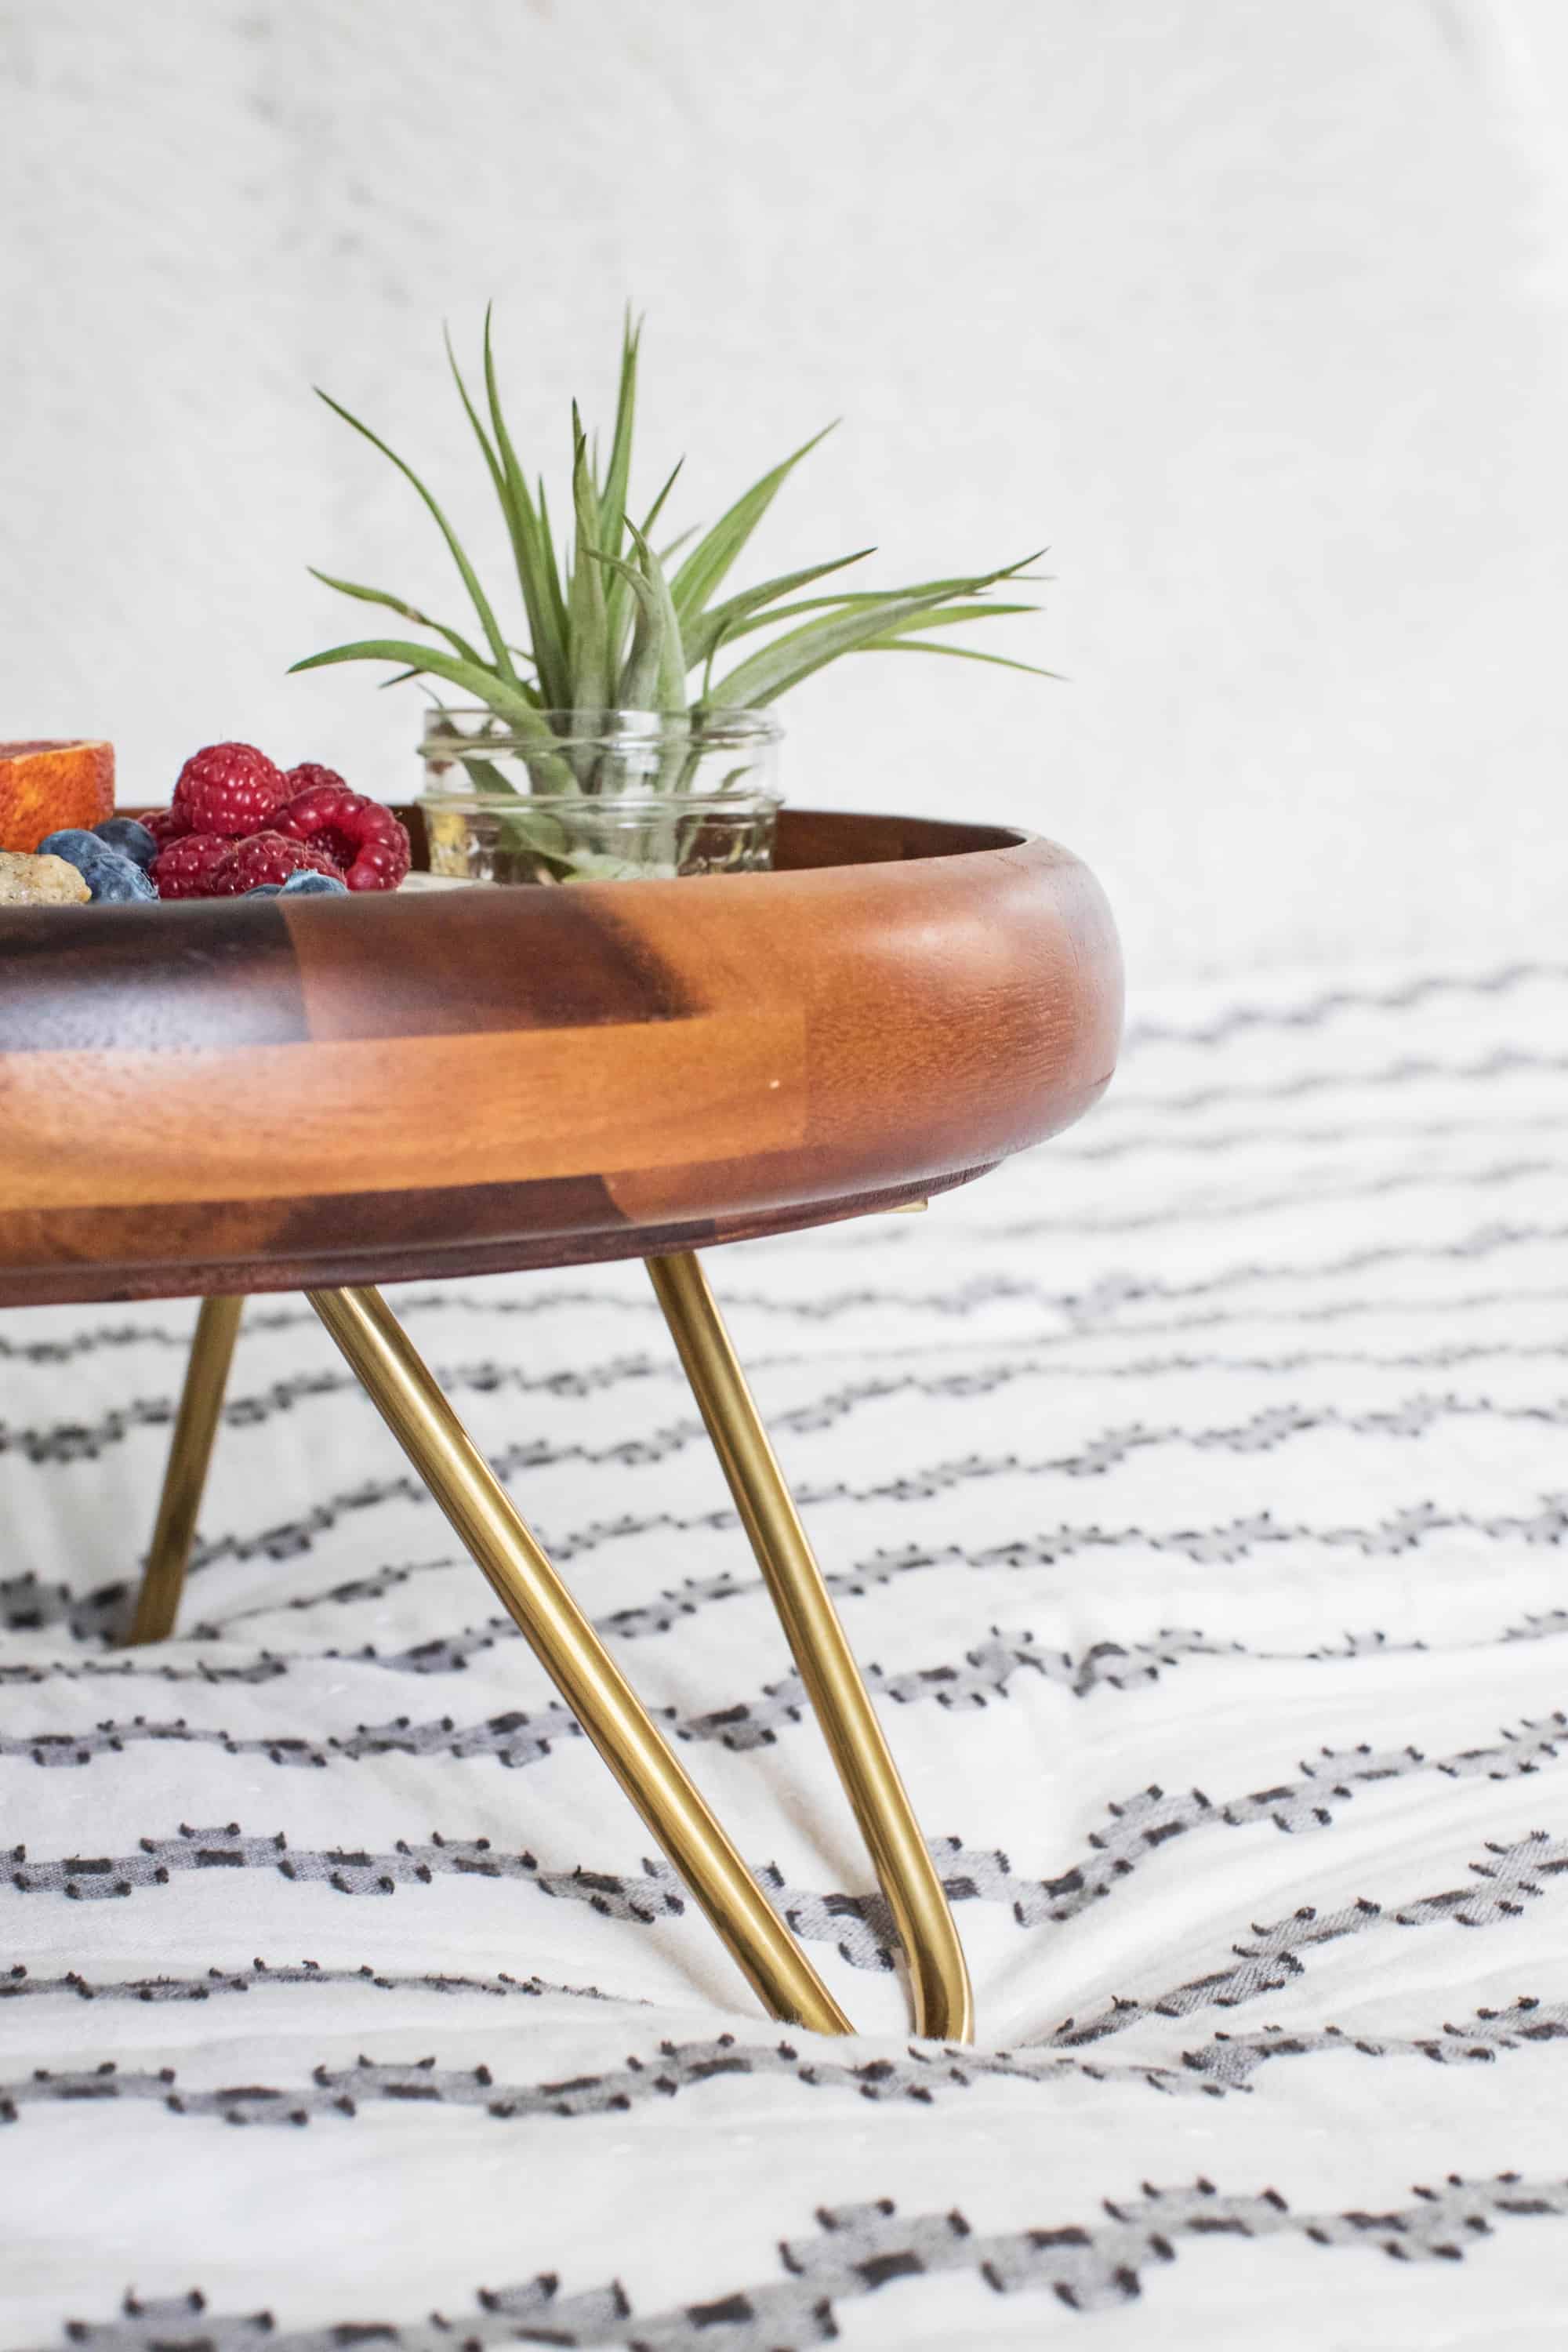 I chose these metallic gold, powder coated hairpin legs because I’ve gone the spray painted legs route before and ended up with drips and sometimes was left with a cheap looking version of what I really wanted. When I heard DIY Hairpin Legs offered theirs in this metallic option, I knew they’d give me the expensive, finished look I was going for and they didn’t disappoint! If gold isn’t your favorite, they do offer a variety of other powder coated colors. You can also get the standard steel legs for a fraction of the powder coated legs if you’d like to make this a more economical DIY.
 No matter which color you choose, get 10% off of your DIY Hairpin Legs purchase with this referral code!
Enjoy lingering under those cozy covers a bit longer, friends! –Rachel
26 Comments
Follow this link #8 Screws for the right screws.
I just love these designs. These pictures are beautiful and classy. Thank you for sharing DIY and decorating ideas and inspiration.
This turned out really great. It’s perfect for lazy weekends in bed. Thank you for sharing this DIY, I’ll definitely bookmark this post for future references!
Great post, fantatsic idea
The Pink Pineapple
New post:
http://thepinkpineappleblog.blogspot.com/
Really fantastic tip about putting tape on the drill bit! I drill all the time and I’ve never thought to do something like that with my hand drill.
The tray is really beautiful and I always think Rachel does an awesome job with tutorials like this, but how are you supposed to use it with three legs and eat at it if it can’t go across your lap?
this is really nice.
My husband and I were only talking about how much we needed on of these the other day.
Thank you for the inspiration! And the discount code!
Jess
wattwherehow.com
this is so perfect for breakfast in bed, now to teach my husband to cook my favourite scrambled eggs….
Love this… I’m going to revise slightly for bedside tables thank you!
Great DIY! I’ve been wanting to use hairpin legs for a while now – summer project inspiration!!
www.shessobright.com
This is the cutest thing! What a great idea.
who doesn’t love breakfast in bed?! this is an amazing idea =o) thanks for sharing!
https://dreamofadventures.com/
Oh my goodness! I ADORE this!! It seems quite easy to make too!
What a great idea! Perfect execution, too! Also, I love your bedding.
We used DIY Hairpin Legs for a bench in our entryway recently and loved the quality!
http://www.tinyhousegiantlife.com/diy/design-plan-takes-detour-mid-century-bench-one-room-challenge-week-4/
But the gold! I really want to make this stat, you think I’ll get breakfast in bed from the hubby then? Here’s to wishing!
I love the gold legs!
You’re right, you are a genius! This is a great diy. The gold legs are perfect. Thanks for sharing!
http://meatsandsweets.net
I need this in my life (plus someone to make breakfasts for me too!).
Totally love this x
www.lovekept.co.uk
Wow, that looks so beautiful! I have to make this!
https://www.makeandmess.com/
This is genius…love the hairpin legs!!
-Greta
www.mintyfrosting.com
This tray also makes a great mid-century plant stand. Love it’s versatility! Check out our DIY here: http://andthenwetried.com/2016/10/diy-mid-century-plant-stands/
Love the idea of putting a layer of leather inside to stop slips! Very cool!
The hairpin looks is the perfect balance of contemporary but classic! I wouldn’t be surprised if all my tables see a makeover soon. so pretty!
Perfect for breakfast in bed!
Charmaine Ng | Architecture & Lifestyle Blog
http://charmainenyw.com