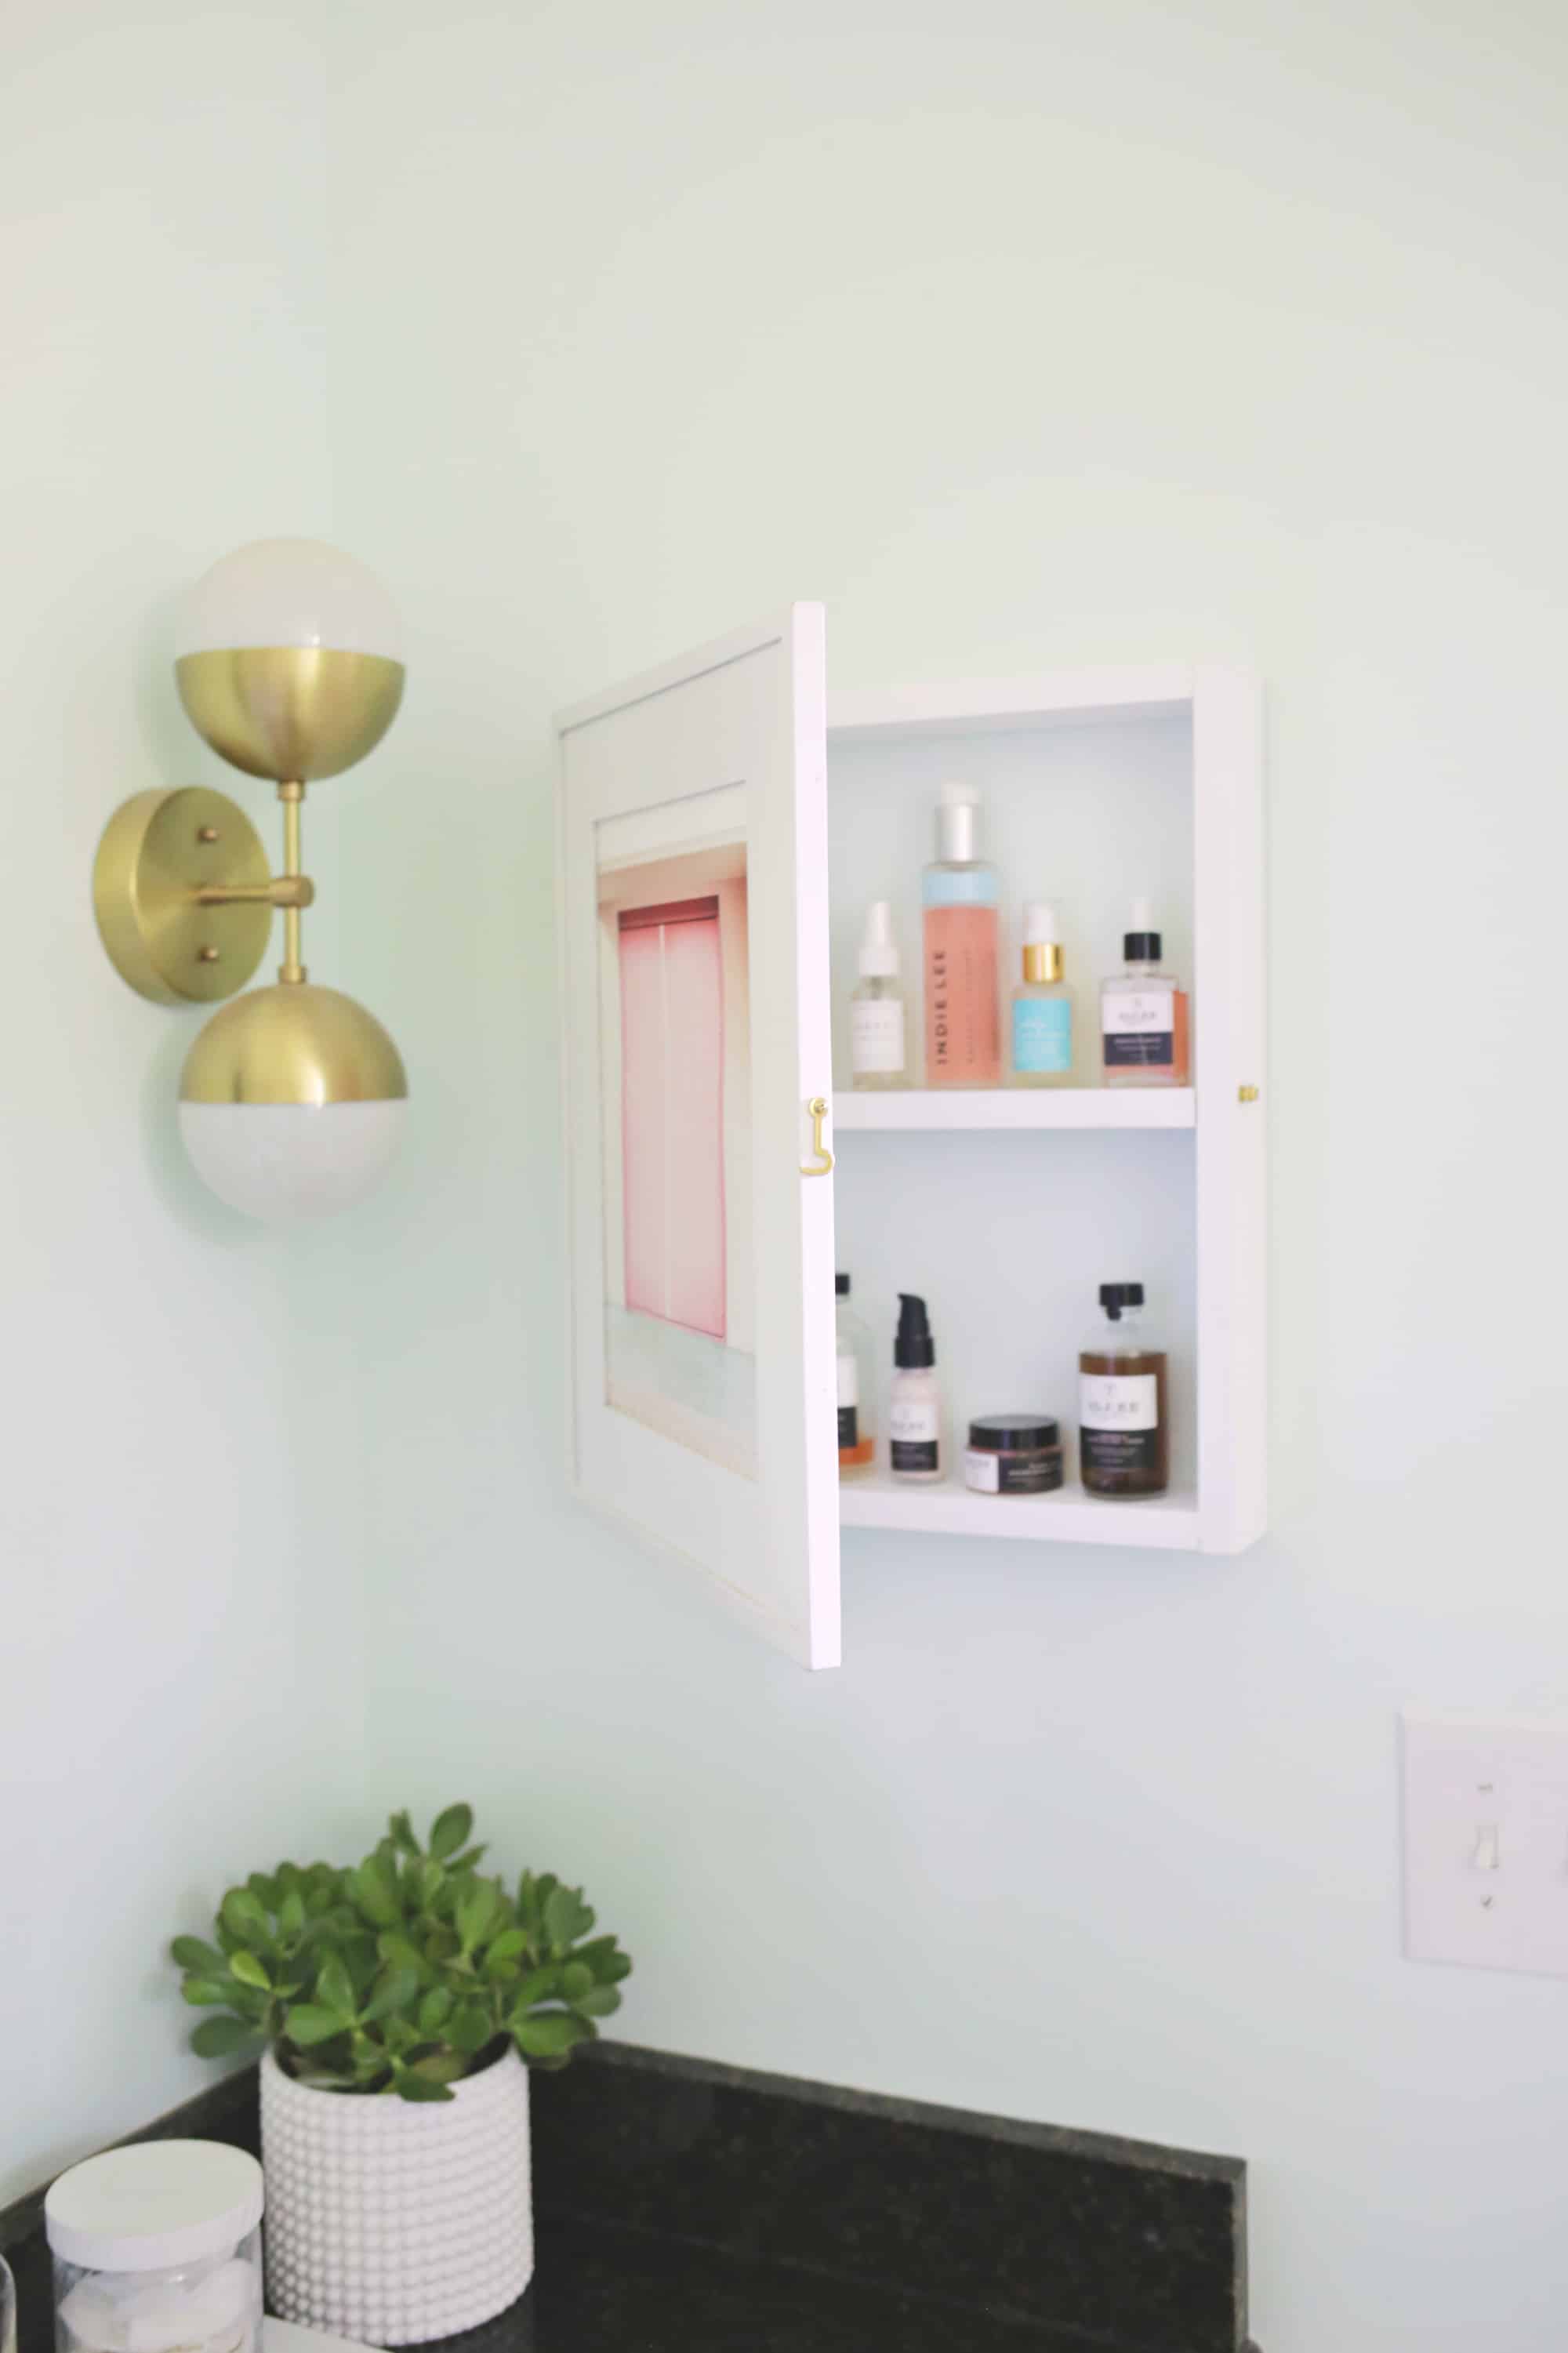
 “I’ve got waaay too much bathroom storage” said no one ever … am I right?! I installed this hanging makeup storage and these DIY marble shelves to give my bathroom counter some more space, and while that definitely helps, I still find that I could use some more room for items that I use everyday (like my skincare products, etc.). We already have a large round mirror in our bathroom that I like, so I didn’t want a traditional medicine cabinet with the mirrored front. So I decided to make a simple cabinet that has a photo frame as the door and get some wall art as well as some bathroom storage, all in one swoop!
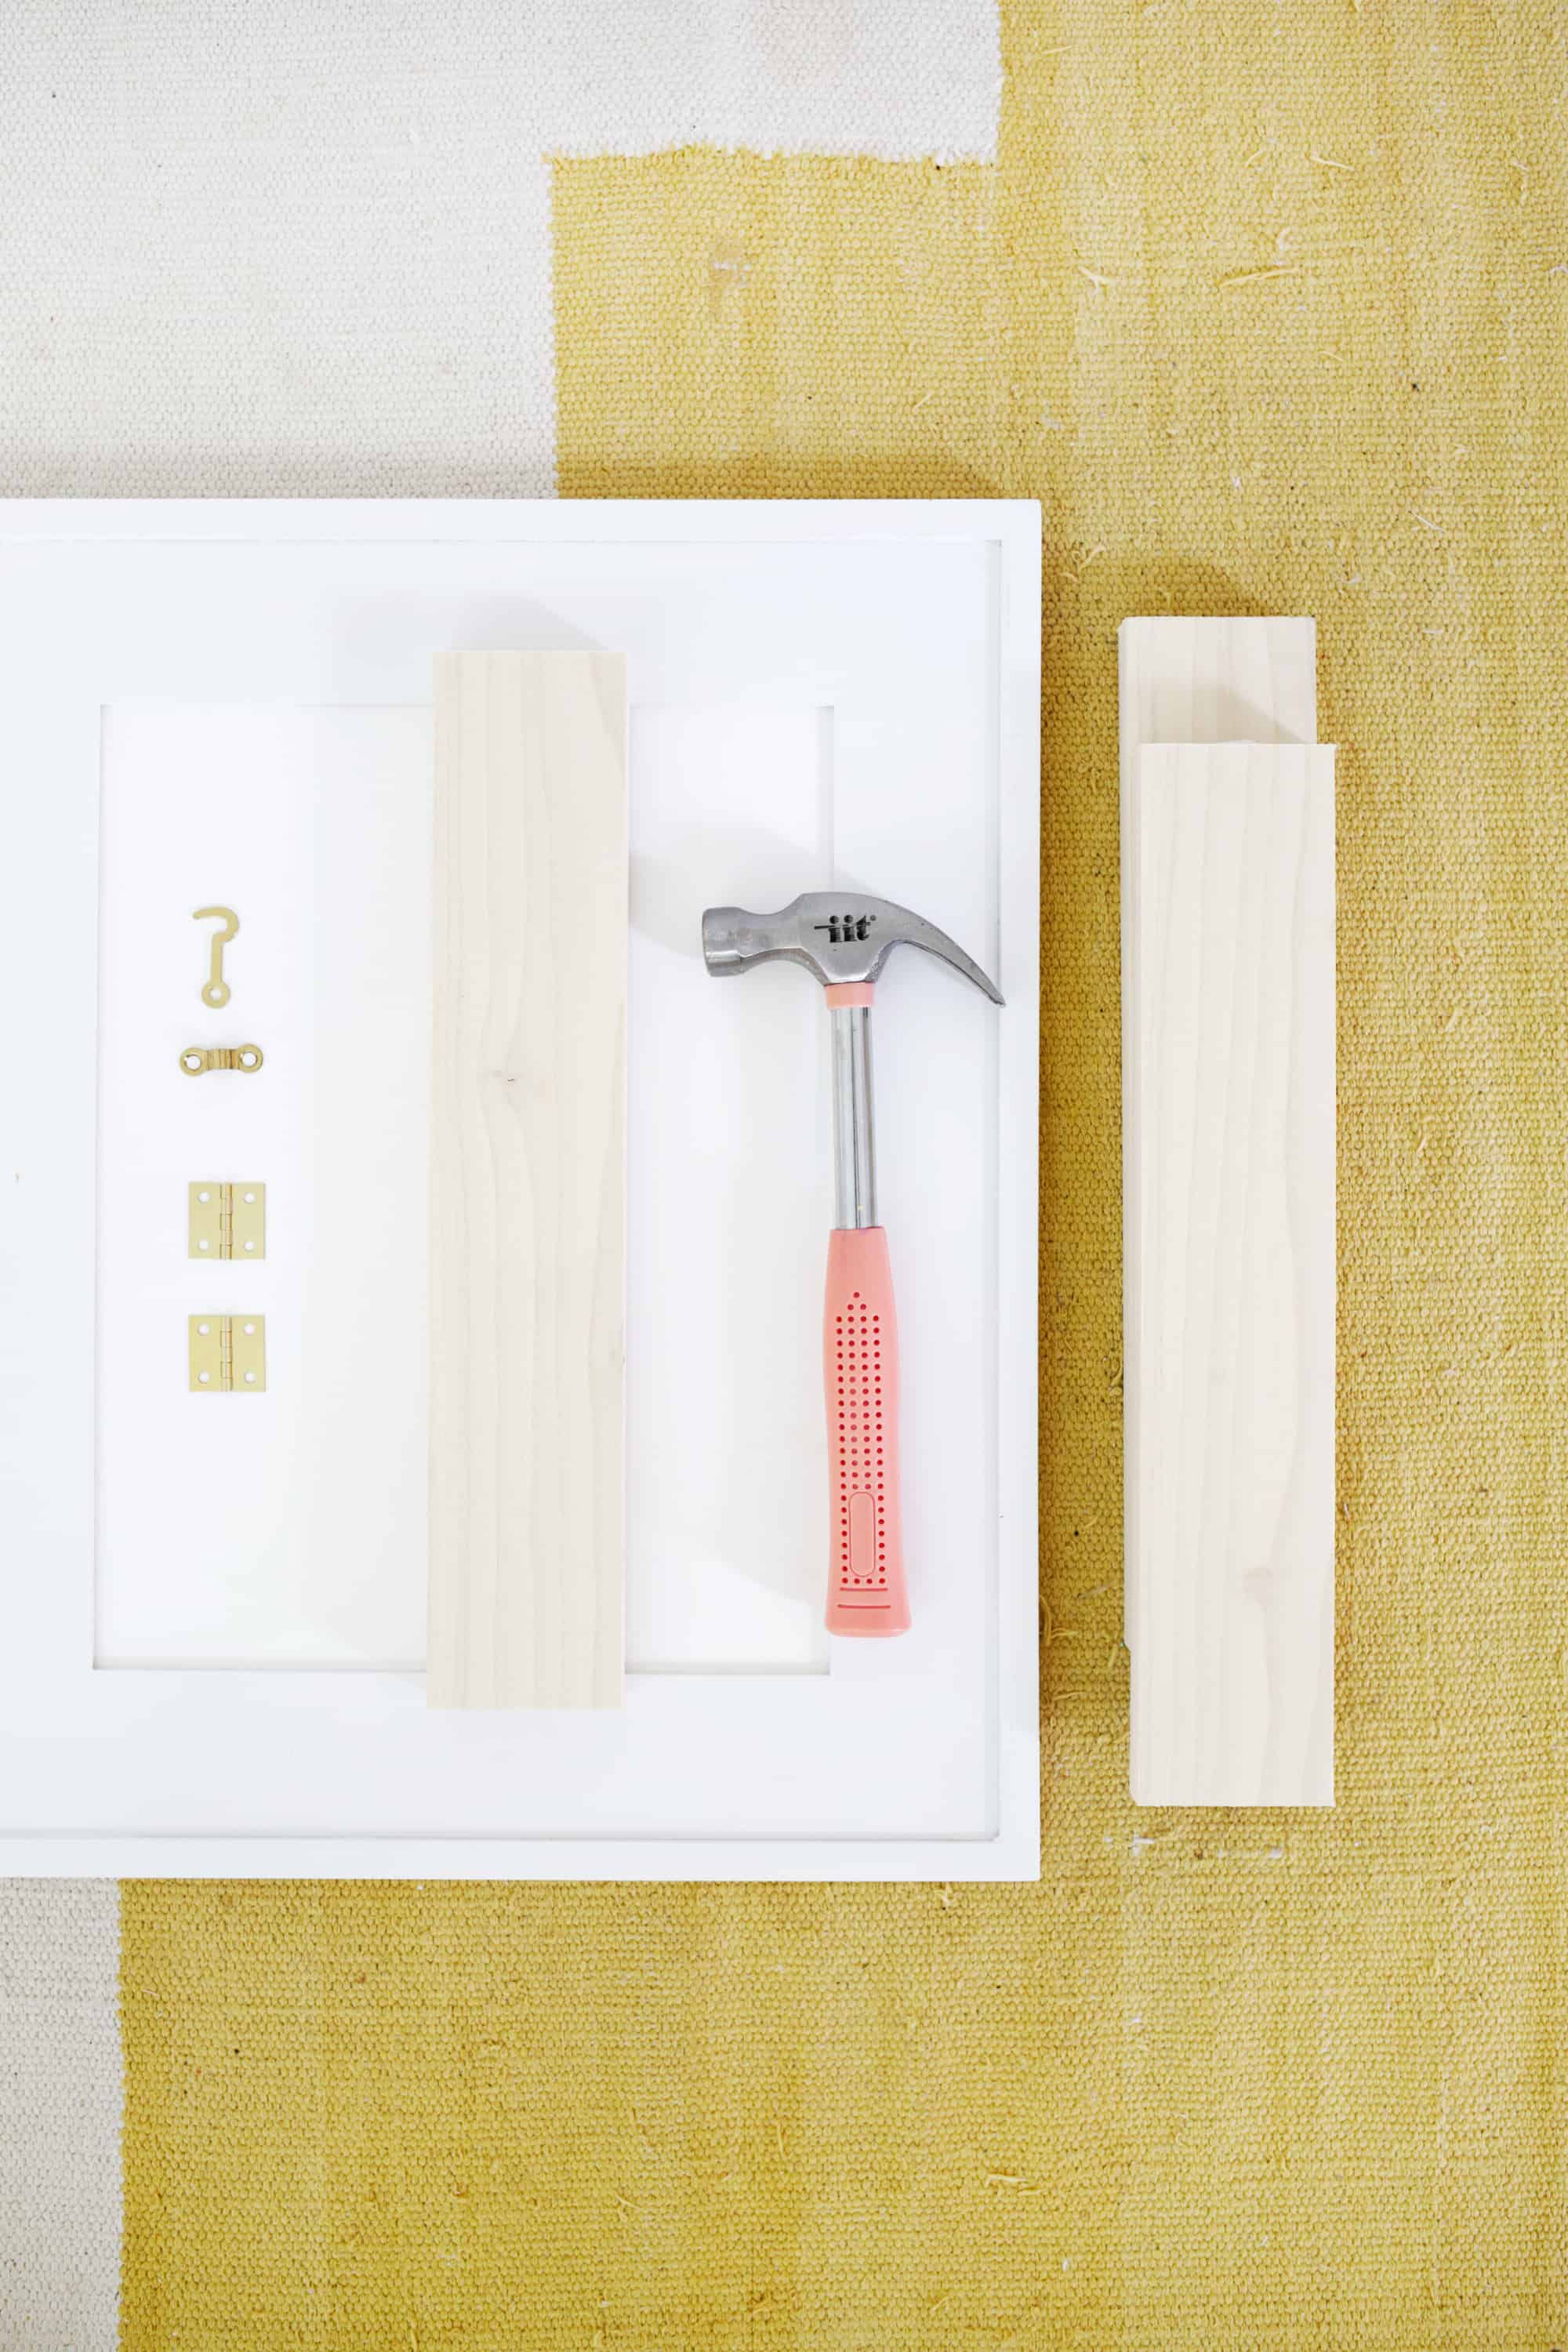 Supplies:
-3/4″ x 2.5″ boards
–D-rings for hanging (x2)
-1 1/2″ nails or screws
-wood glue
-paint that matches your frame
–small hinges
-cabinet closure (there are several kinds of closures like these,these or these)
-wood or MDF frame (a hollow plastic frame probably won’t work well for this)
–jig saw or miter saw (or you can ask if the home improvement store will cut the wood for you when you buy it)
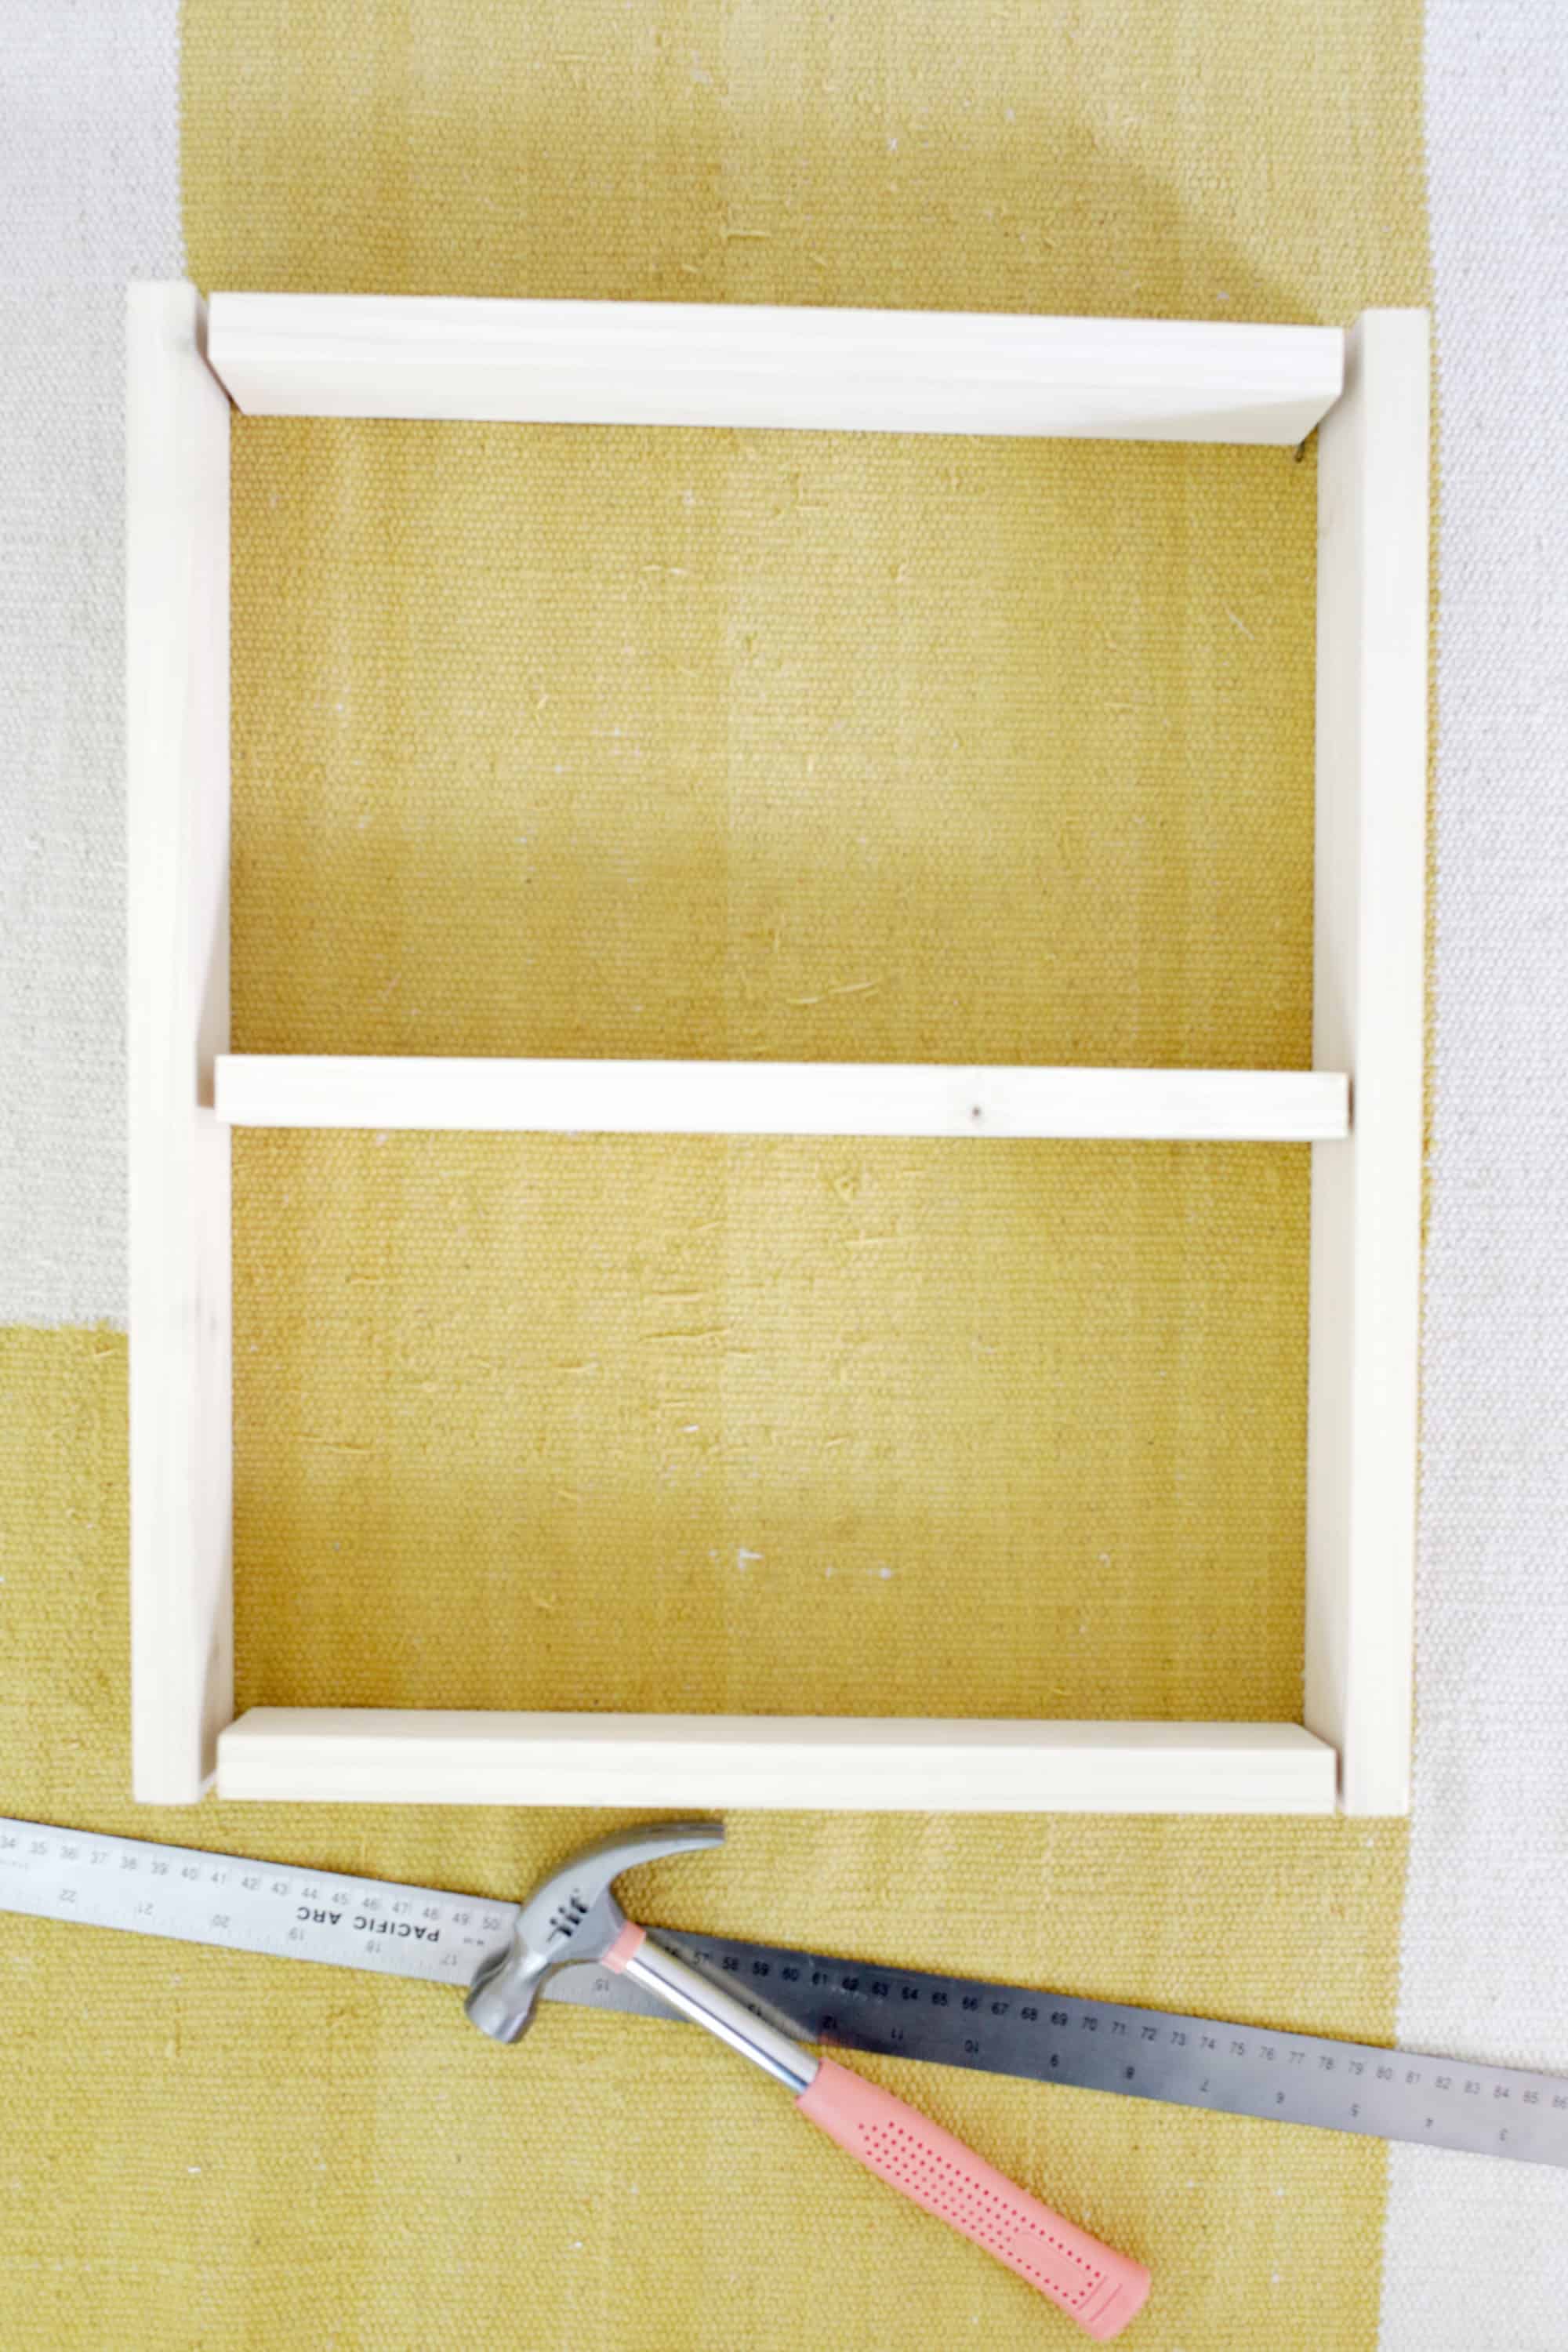 First, you’ll want to cut 2 pieces of wood that are the vertical height of your photo frame. Then, you’ll want at least 3 pieces of wood that equal the horizontal width of your frame when placed between your 2 boards that you just cut in the first step. If you cut 3 boards, you’ll have 2 shelves, so depending on your frame size and the height of what you want to store, you can cut another board to make a 3rd or 4th shelf.
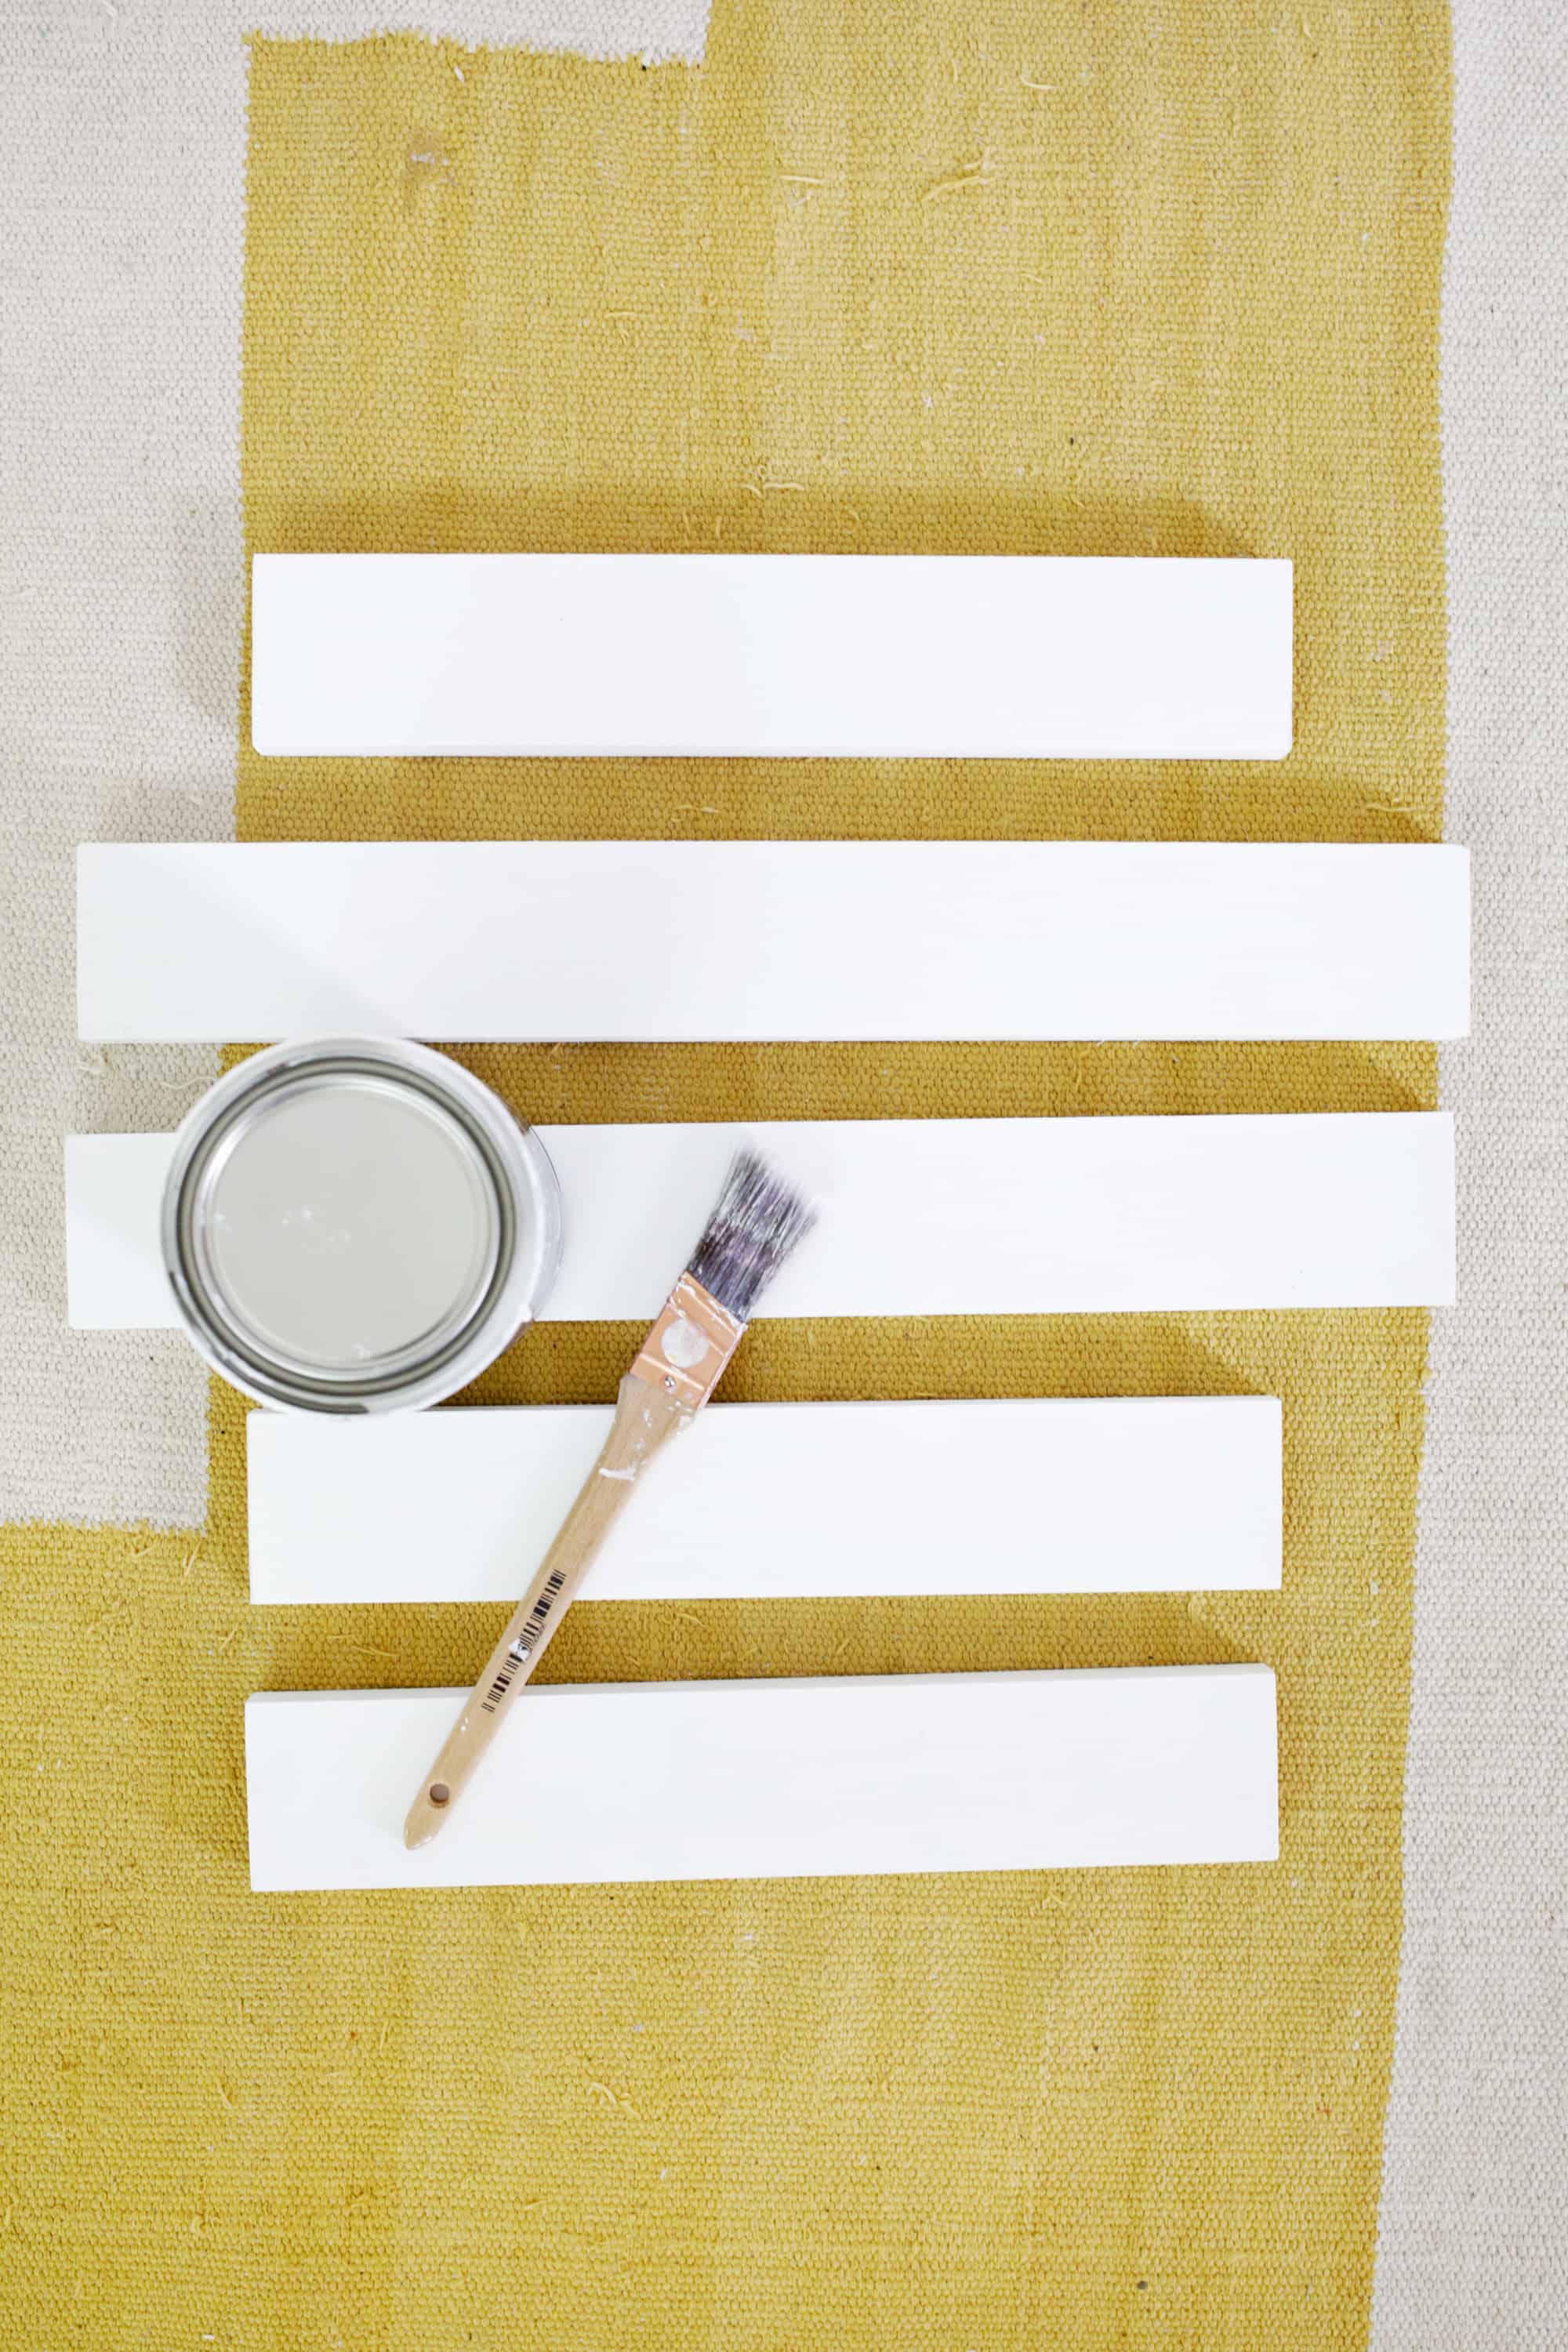 Paint your boards the same color as the photo frame you are using.
 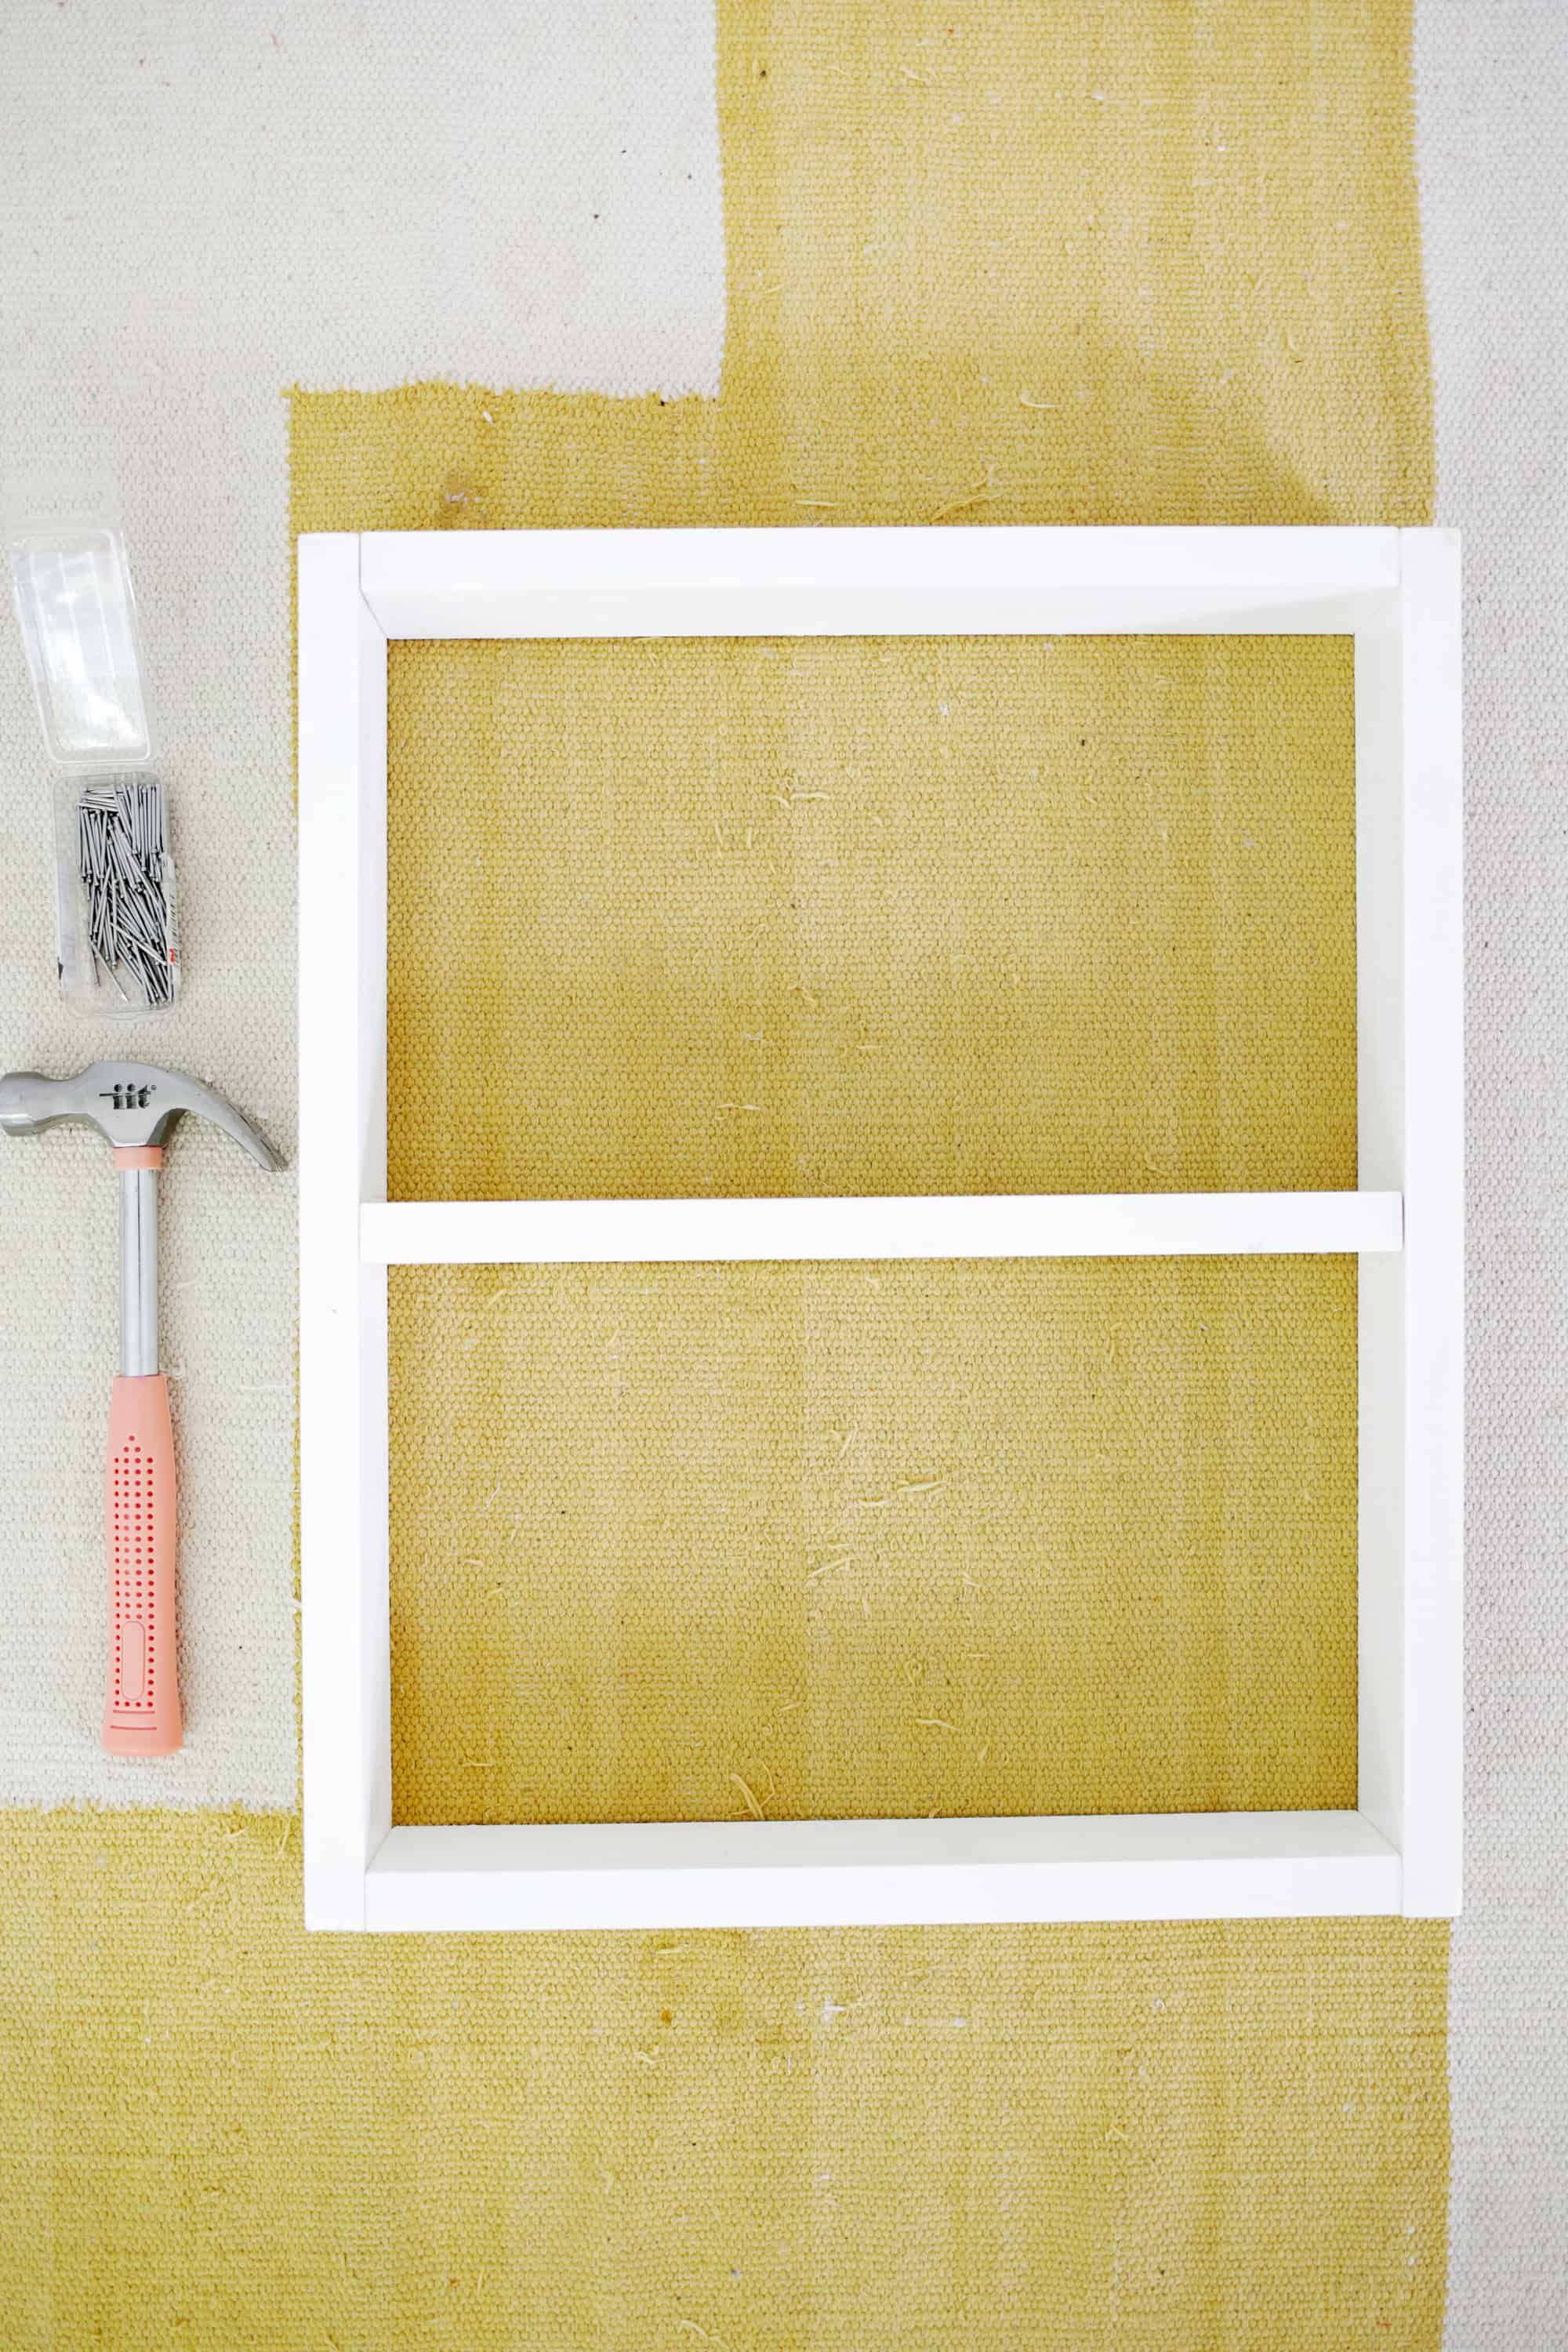 Sandwich your 3 horizontal boards between the vertical ones to create your top, bottom, and shelf. Nail or screw your boards into place using some wood glue as well to attach them. If you don’t want to see the nail or screw heads, you can use a nail setter (after the nail is in place) or a countersink drill bit (pre-drill with that before screwing in the screw) to sink the heads of your nails or screws into the wood. That way, you can use wood filler overtop and sand smooth when dry. Just a bit of touchup paint over the filler and the holes will disappear!
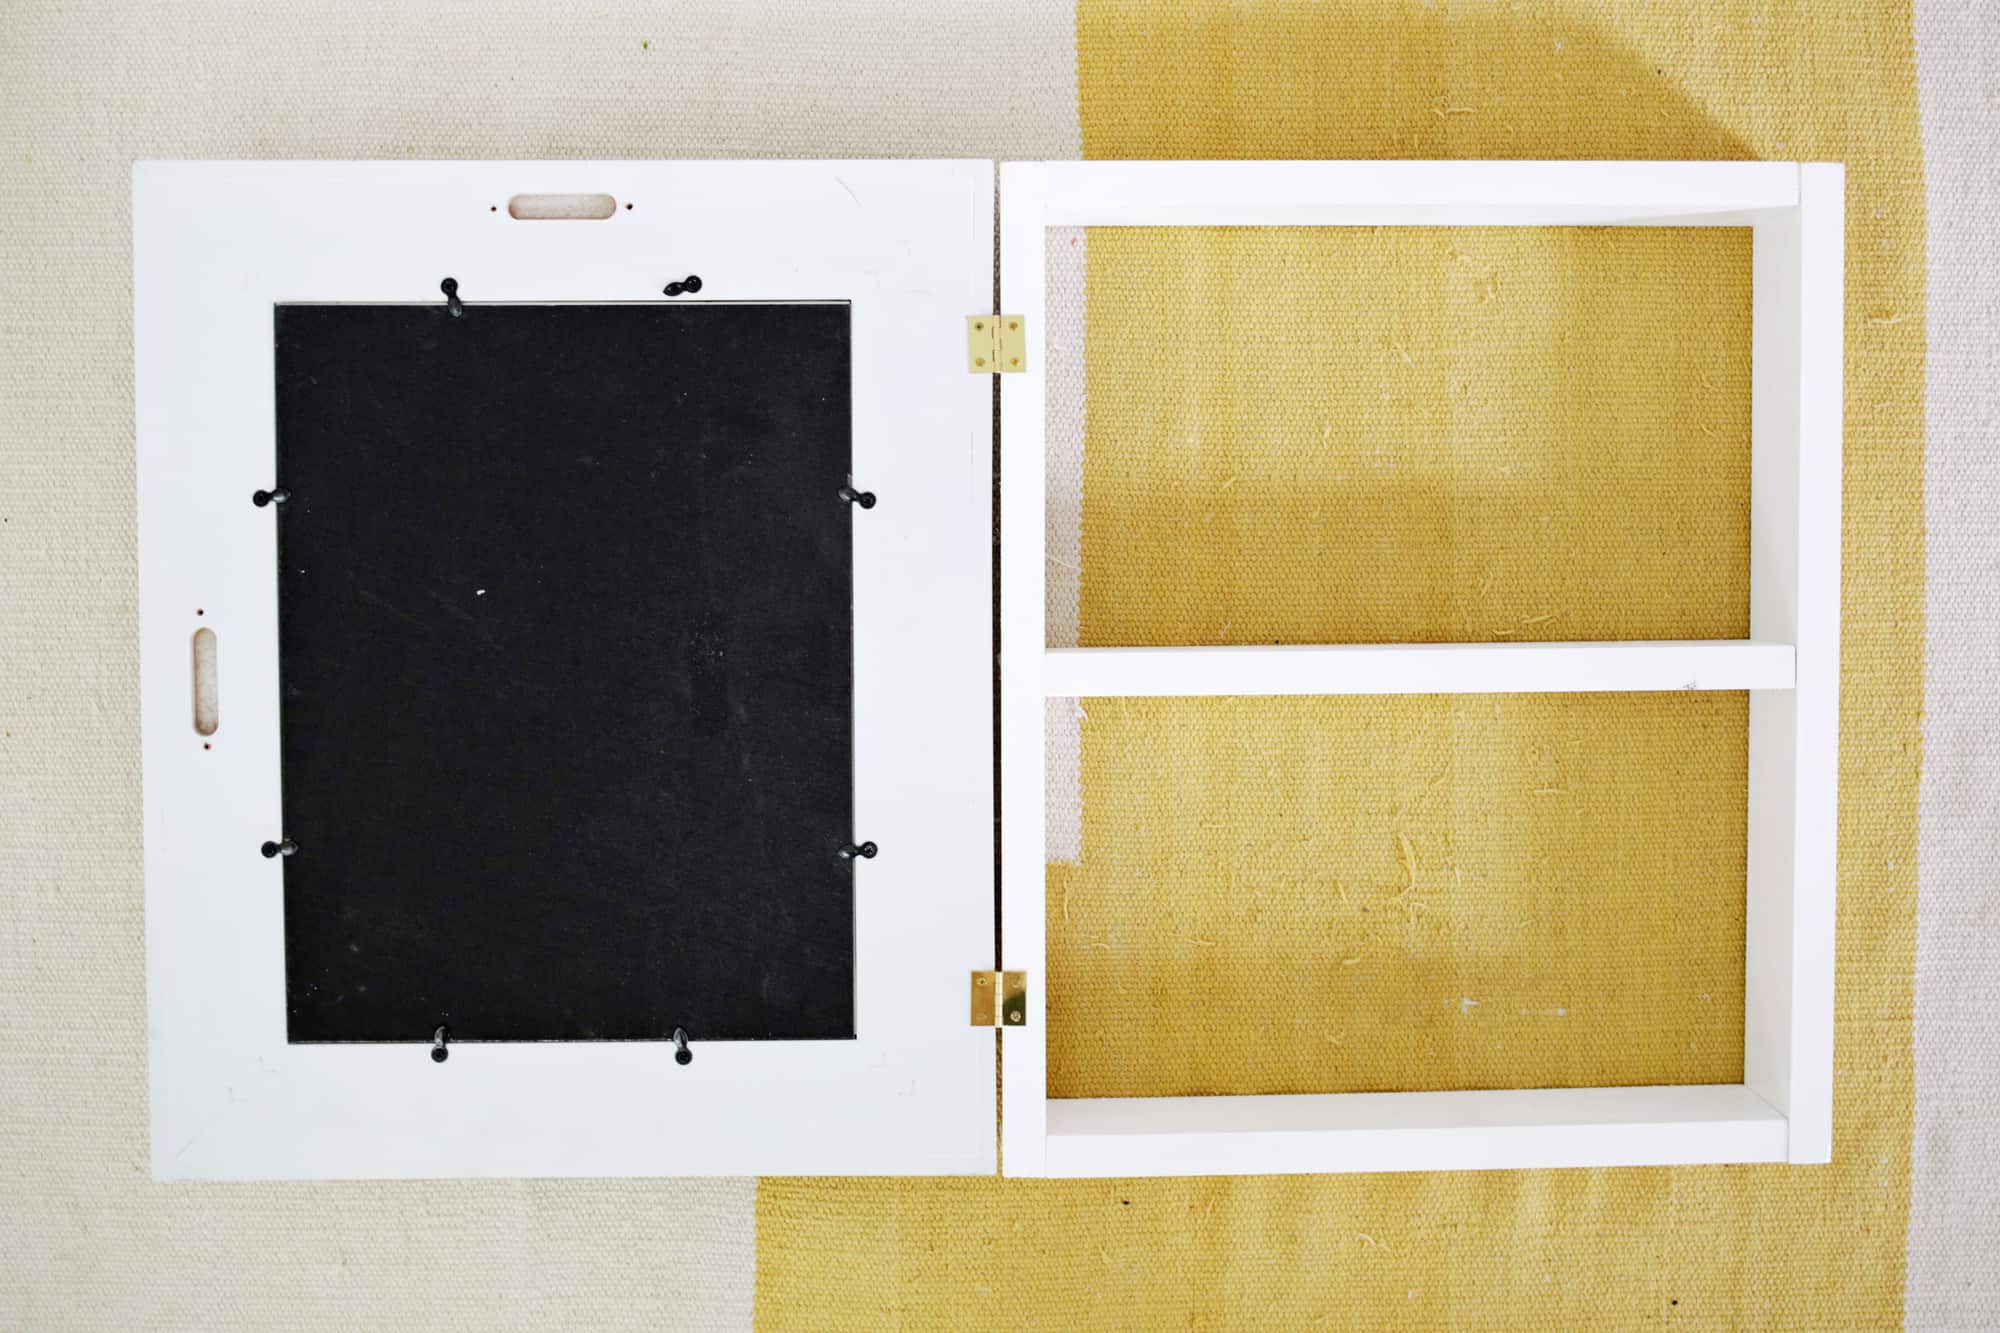 Once your shelf is together, use your hinges to attach your frame to the side of the shelf in the direction you want it to open.
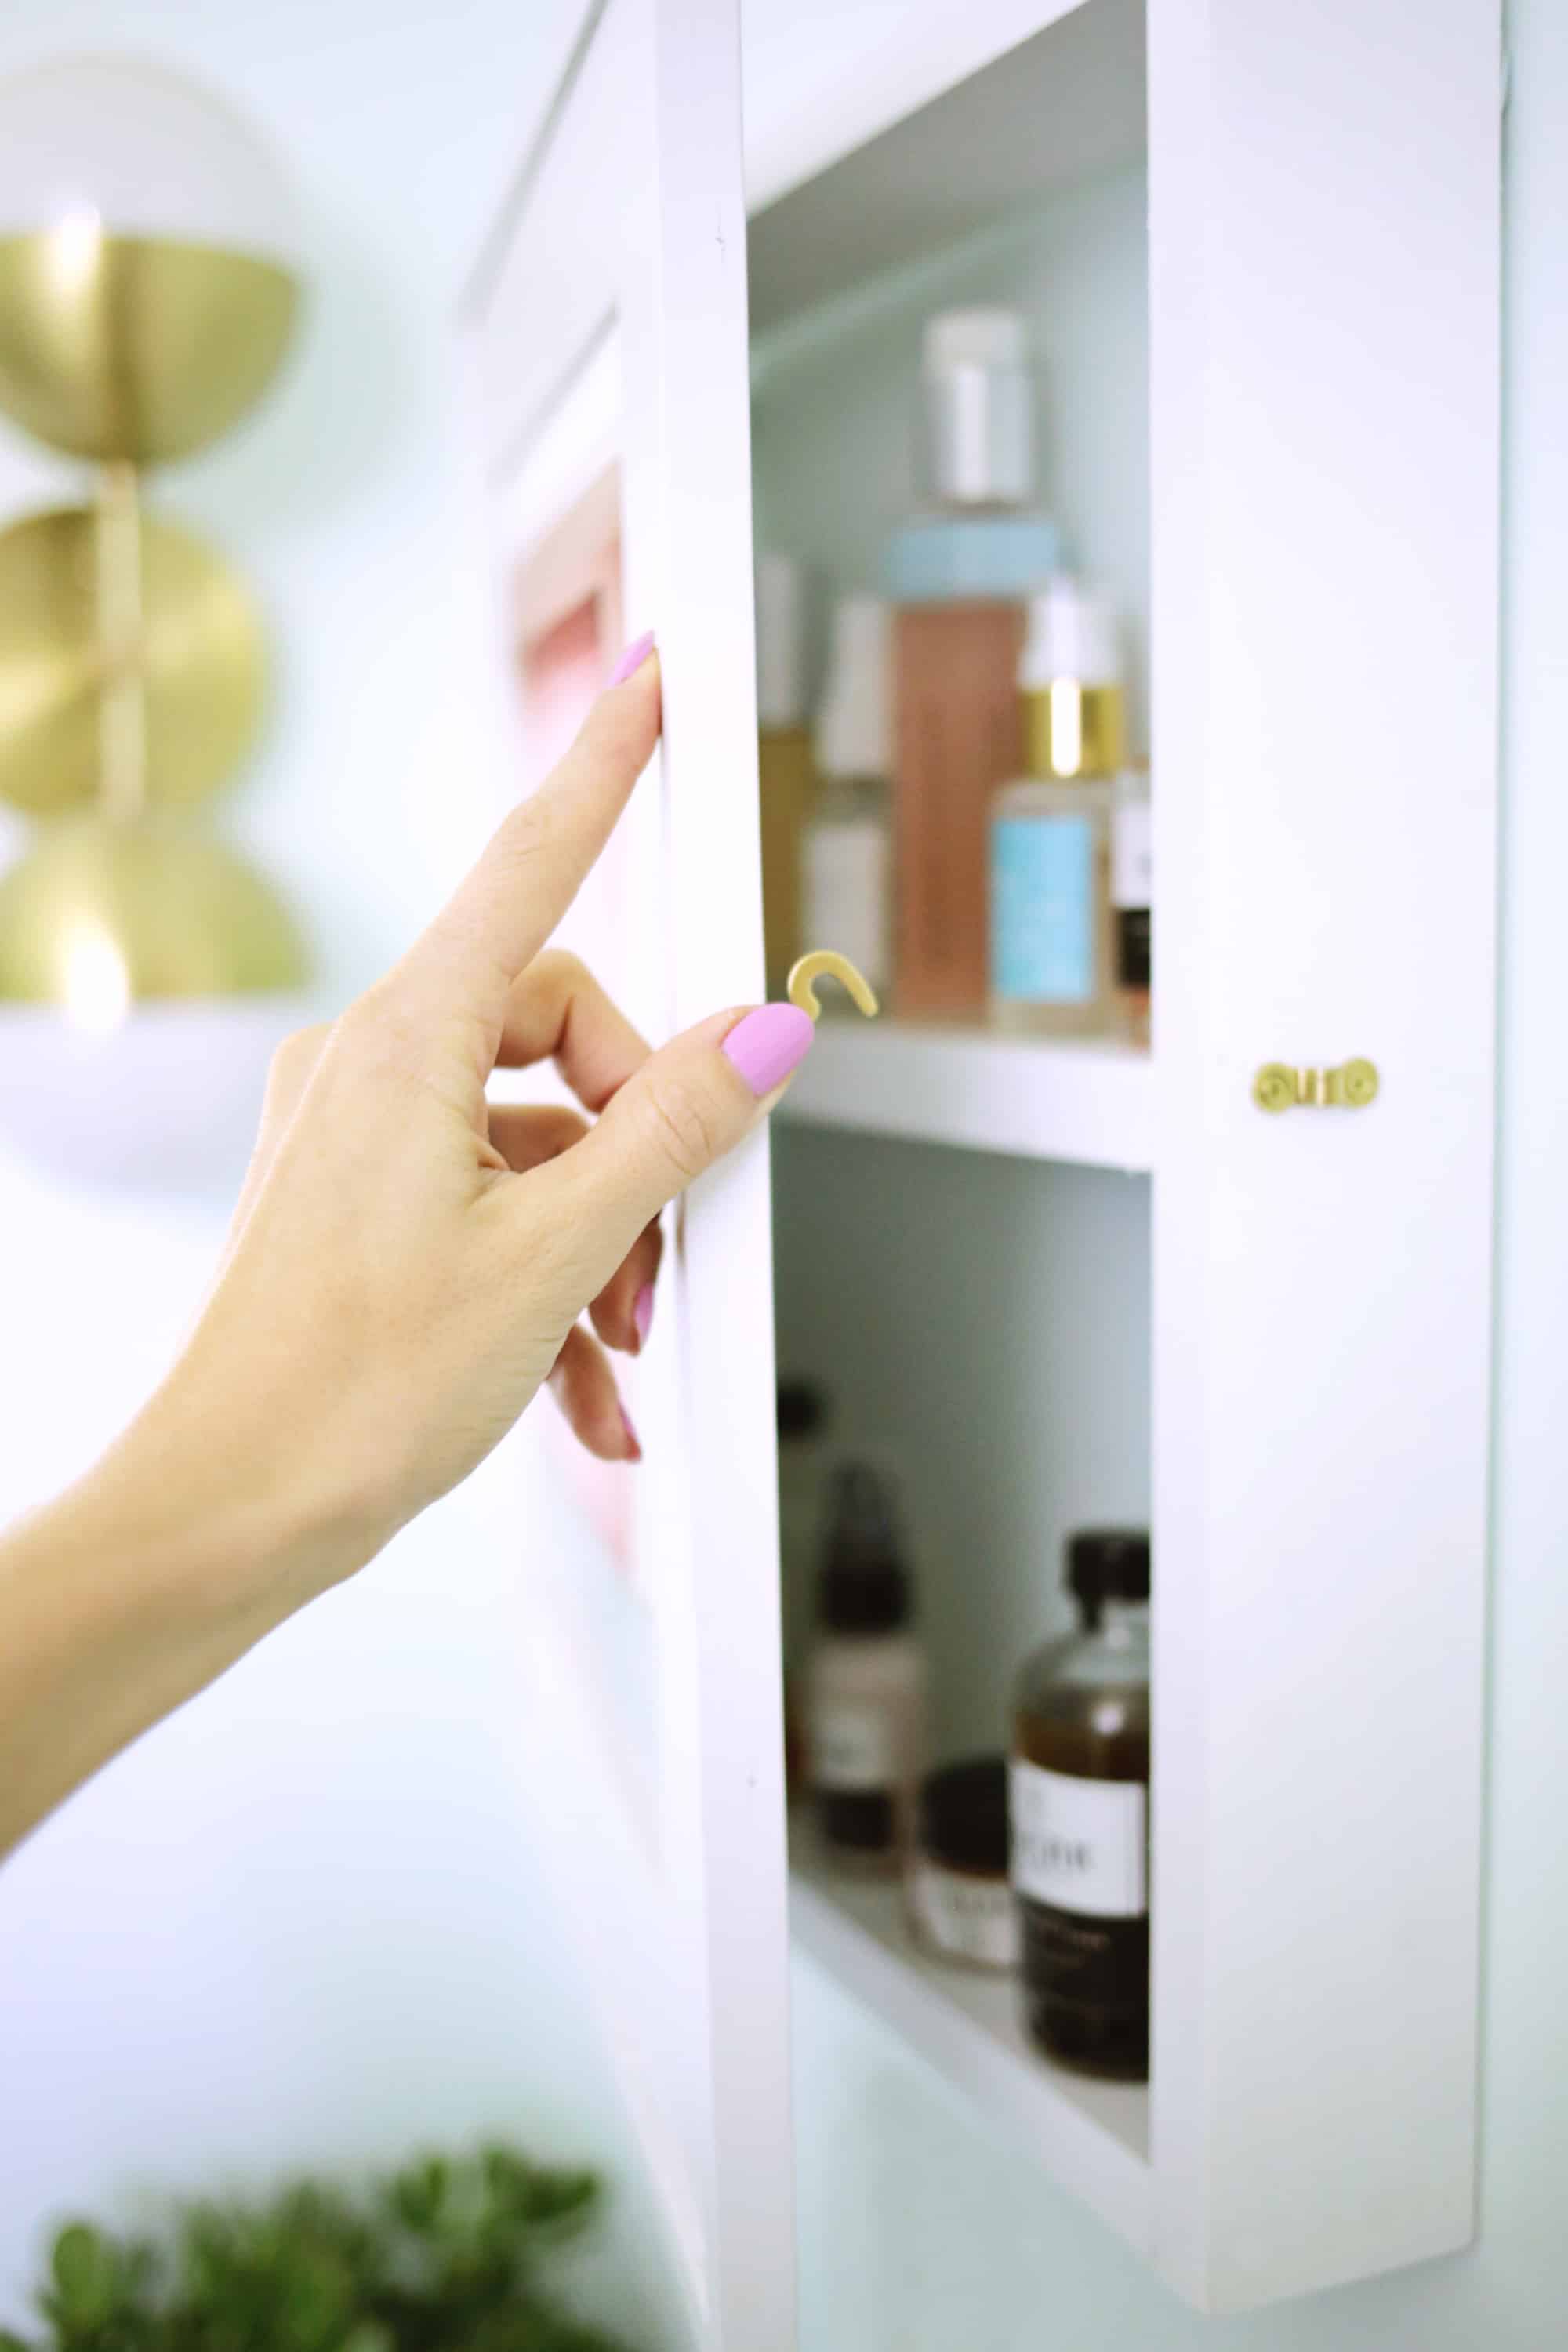
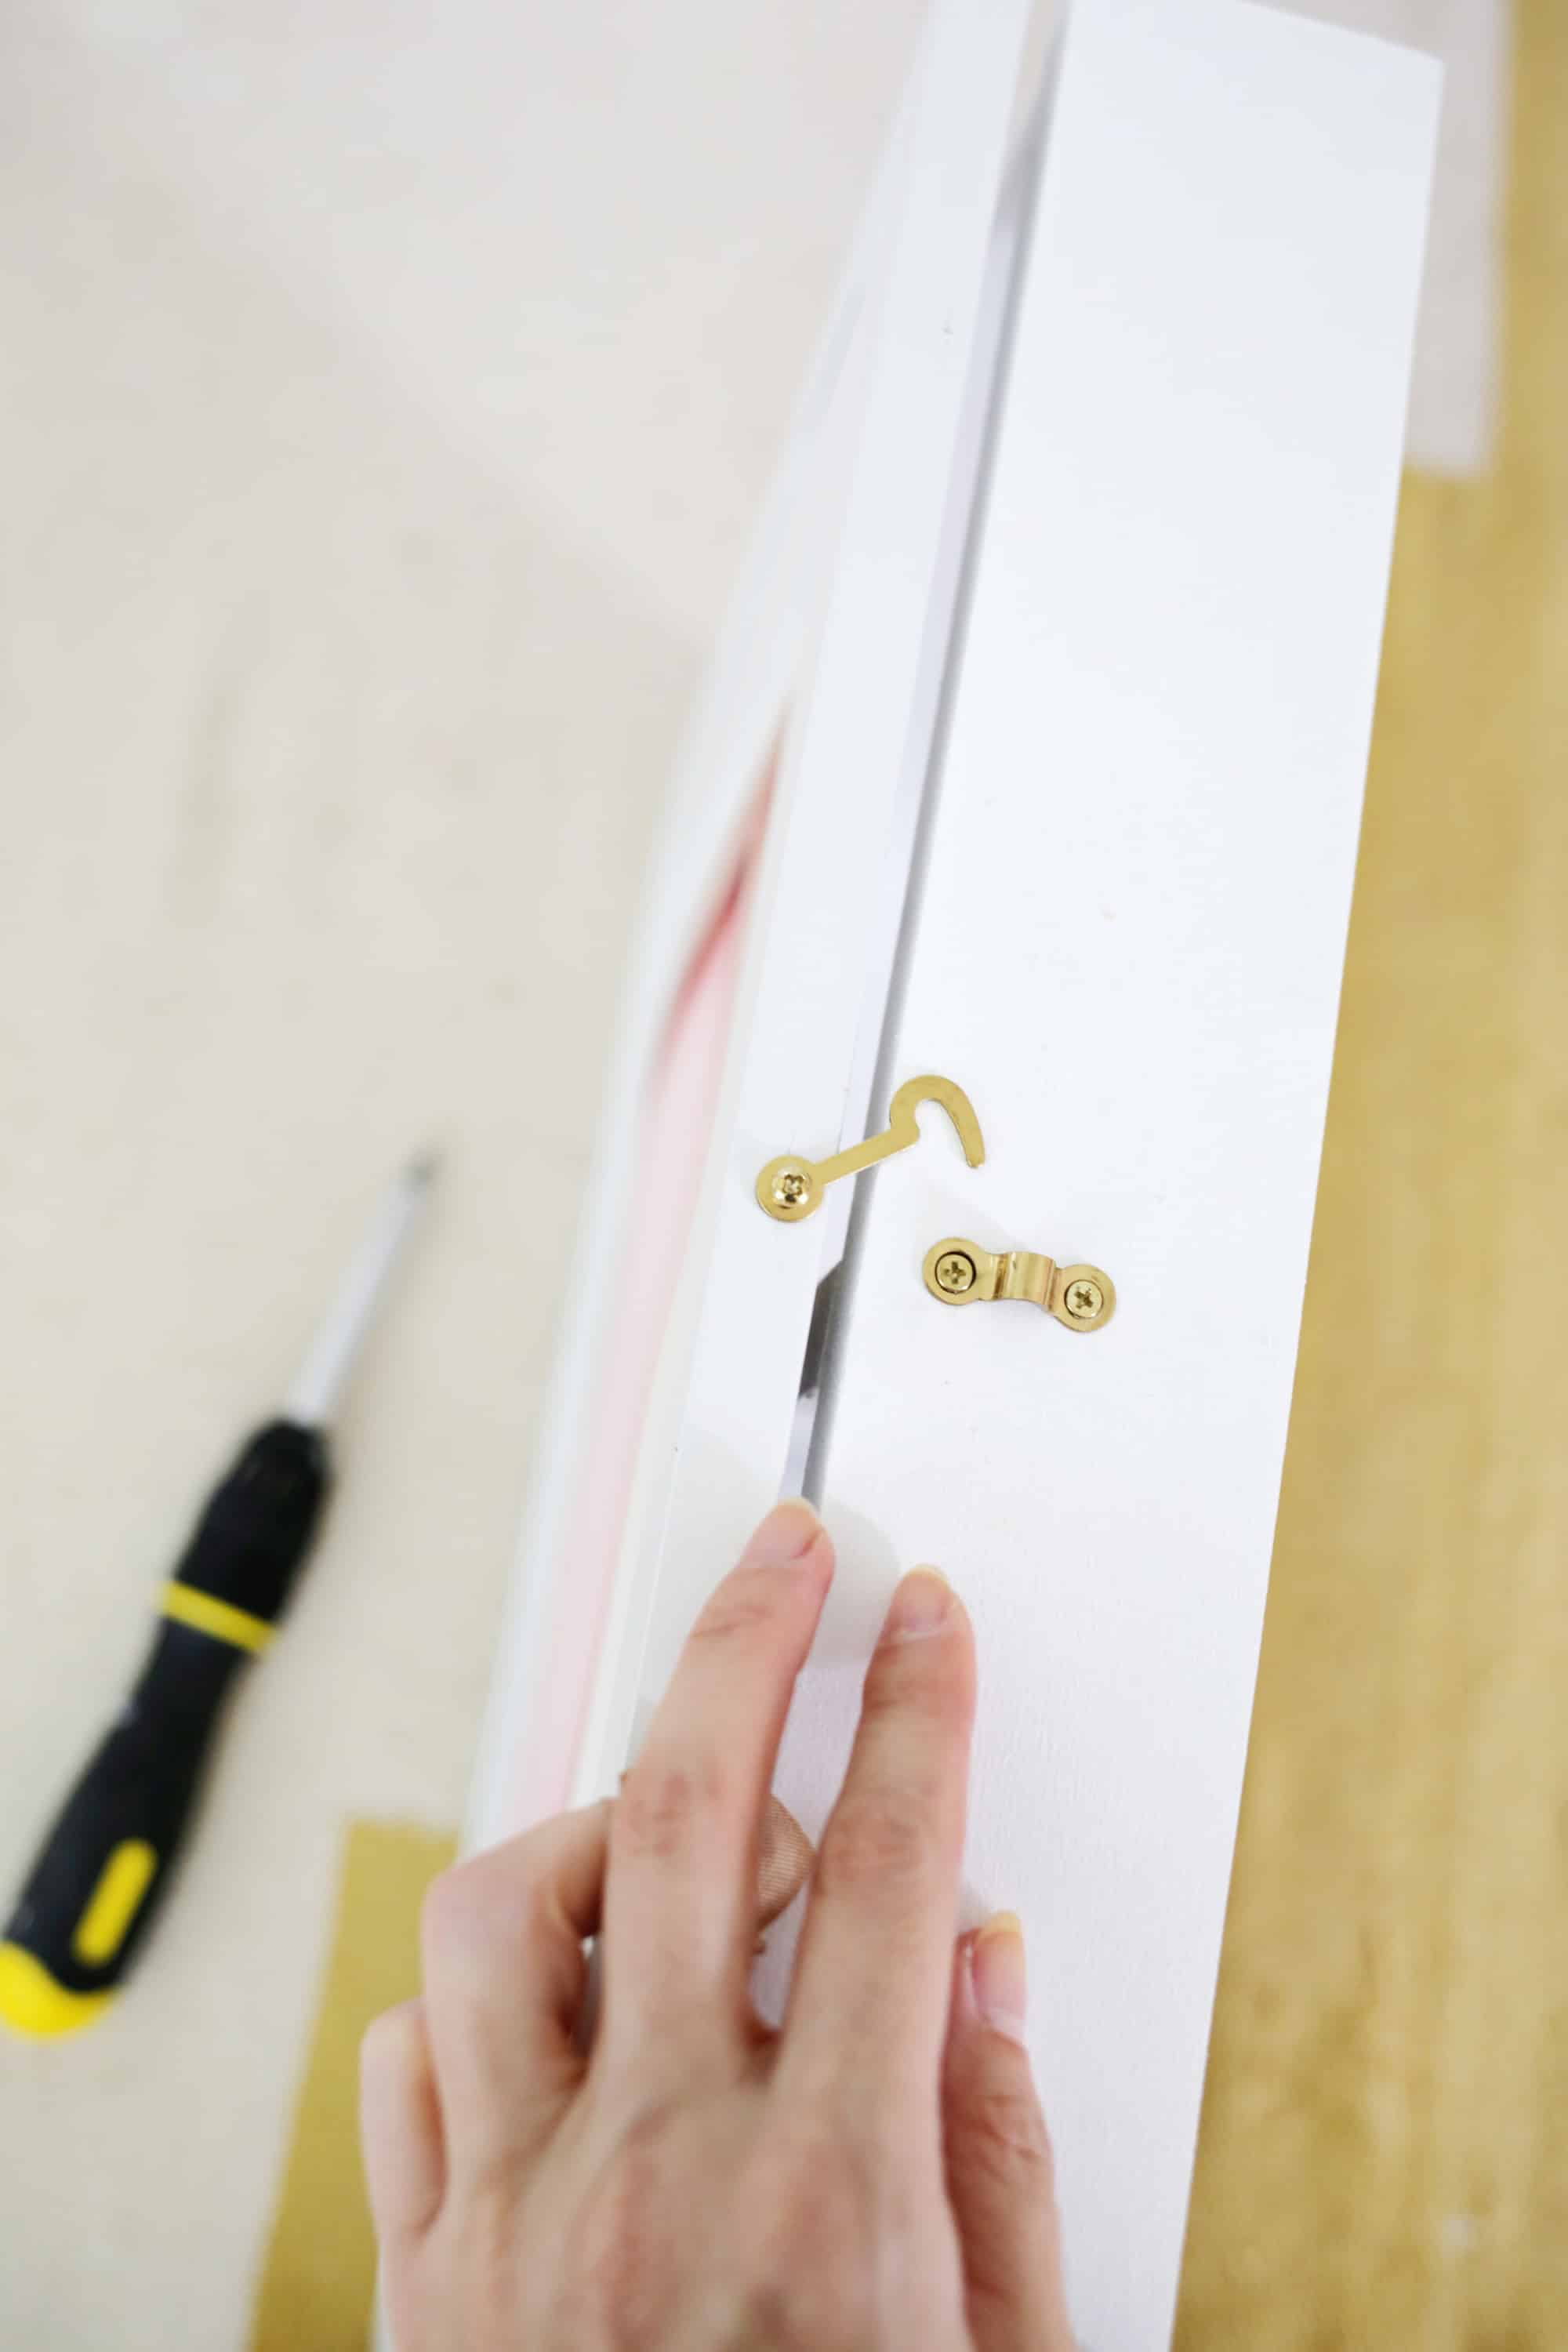 Close the frame door and attach your closure so that the door can be shut when not in use.
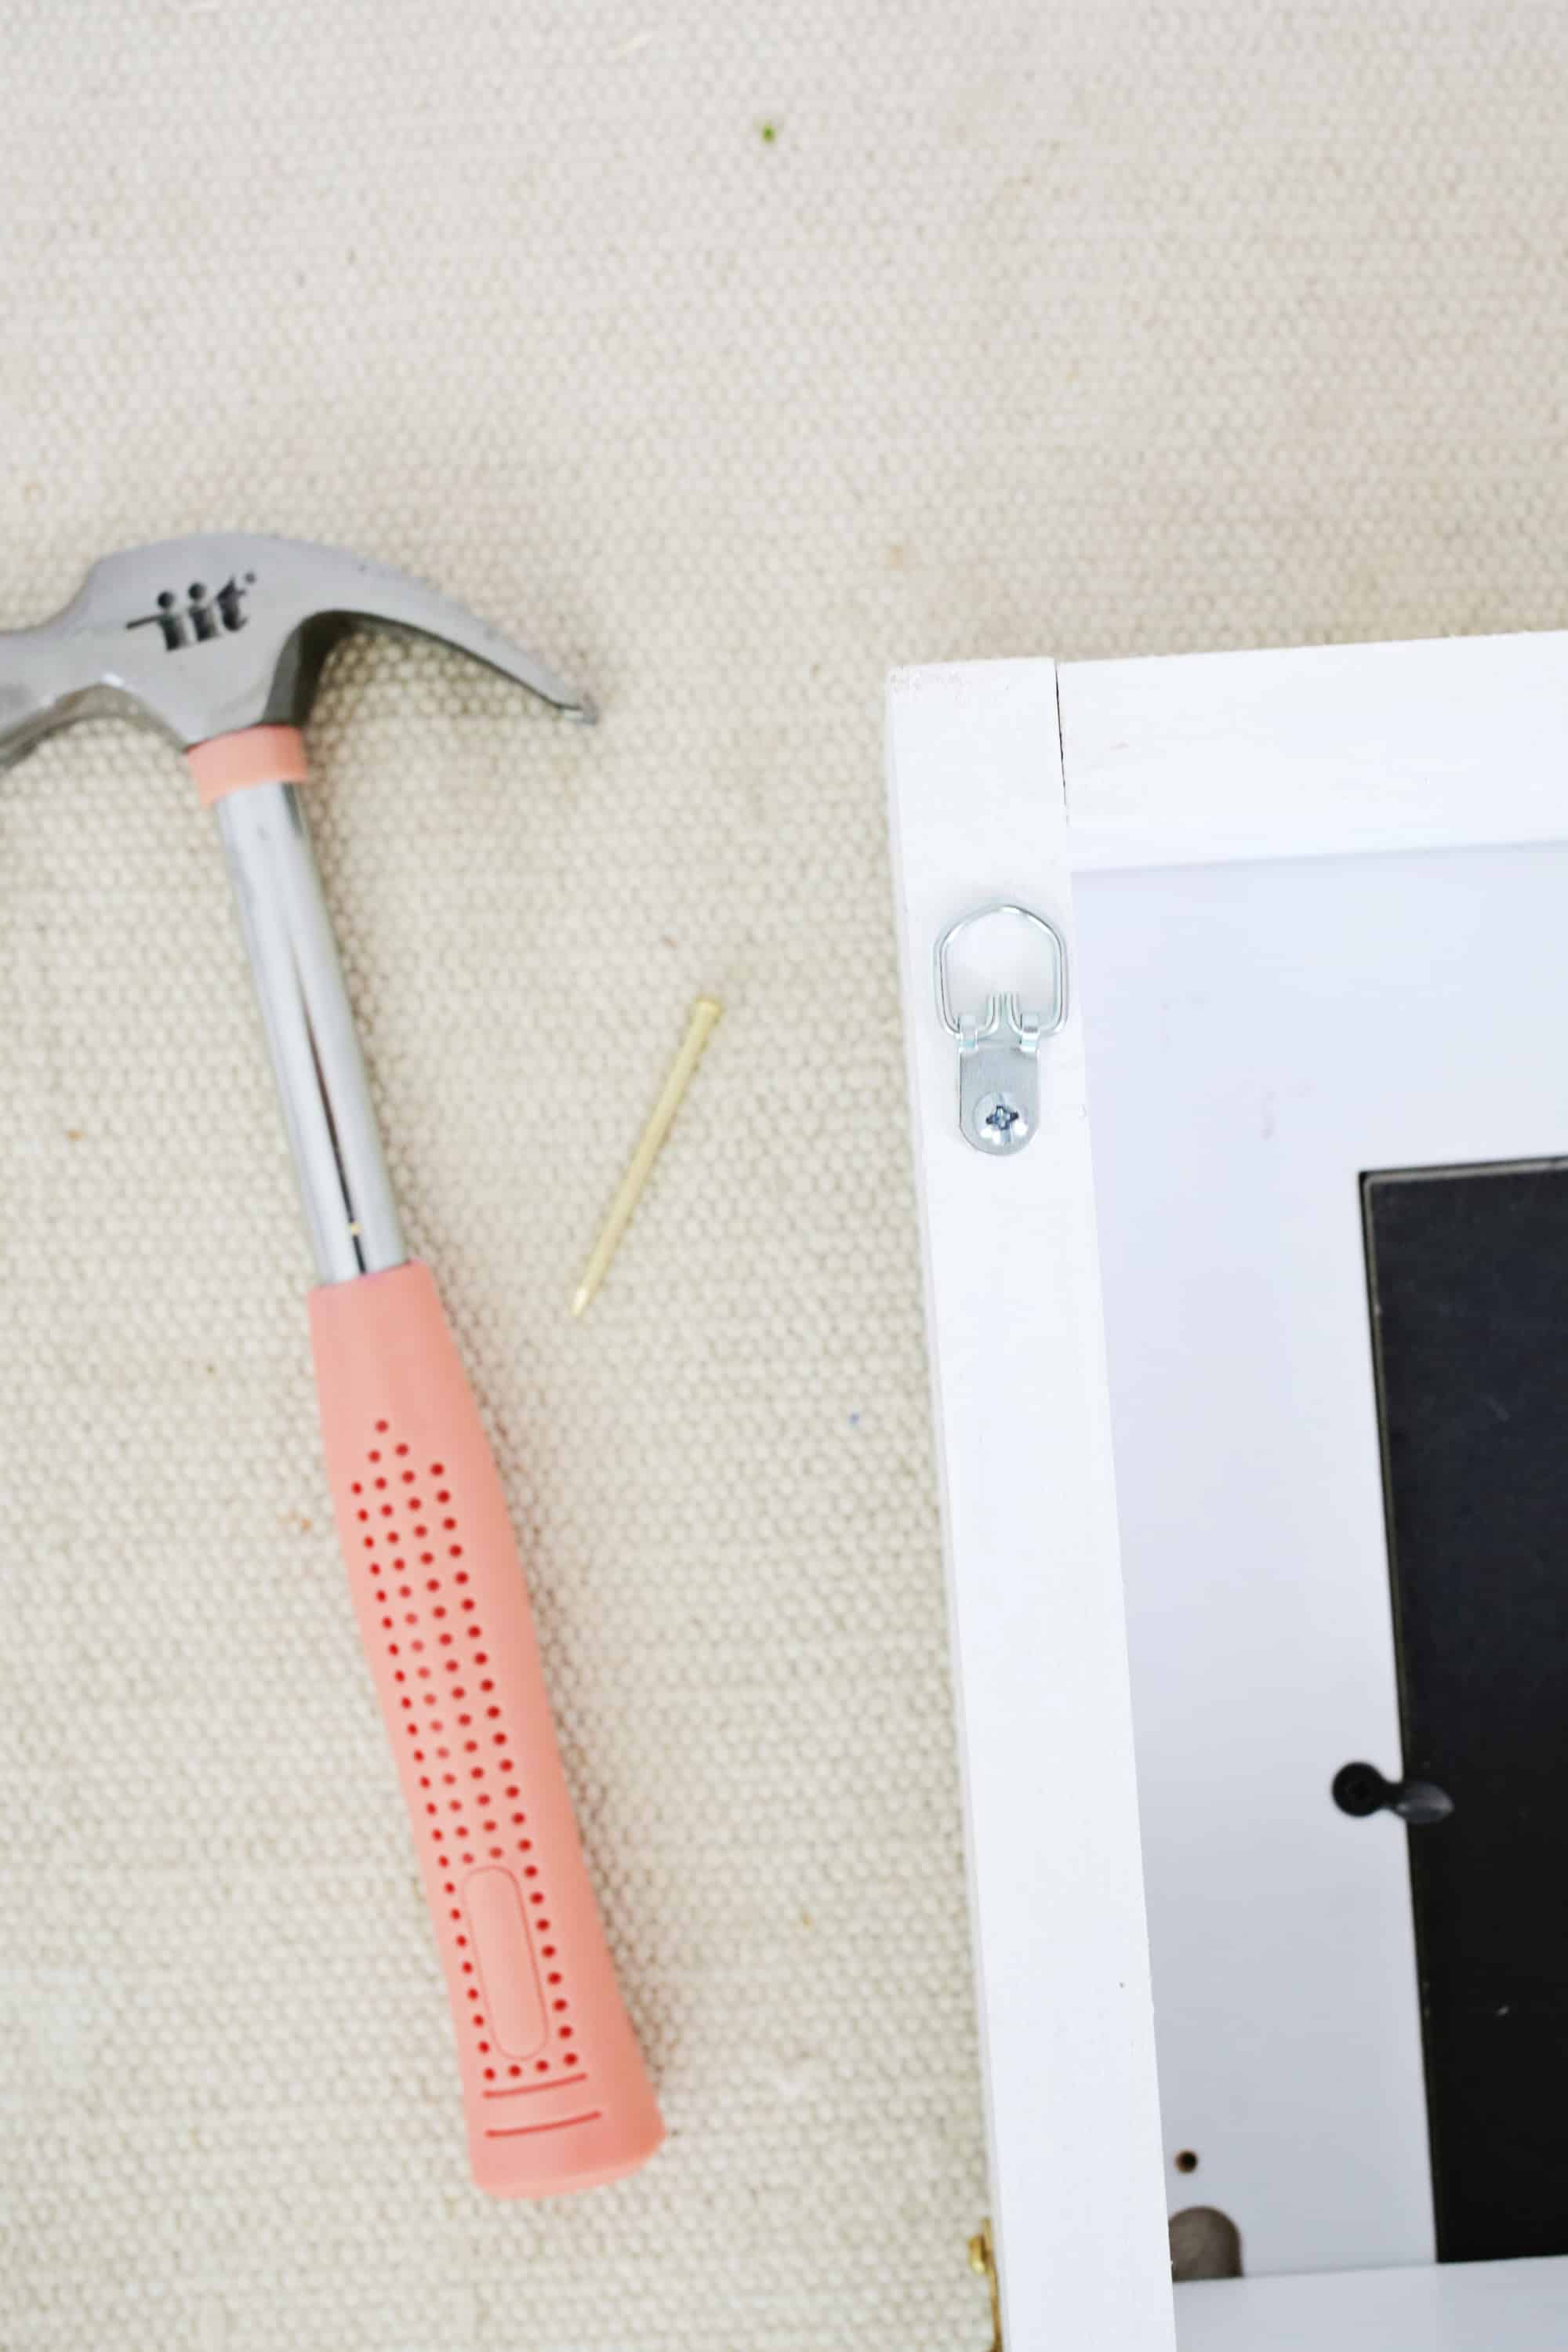 Attach 2 D-rings to the back of the shelf sides 2″ from the top, add your photo or print to the frame, and your hidden medicine cabinet is ready to hang!
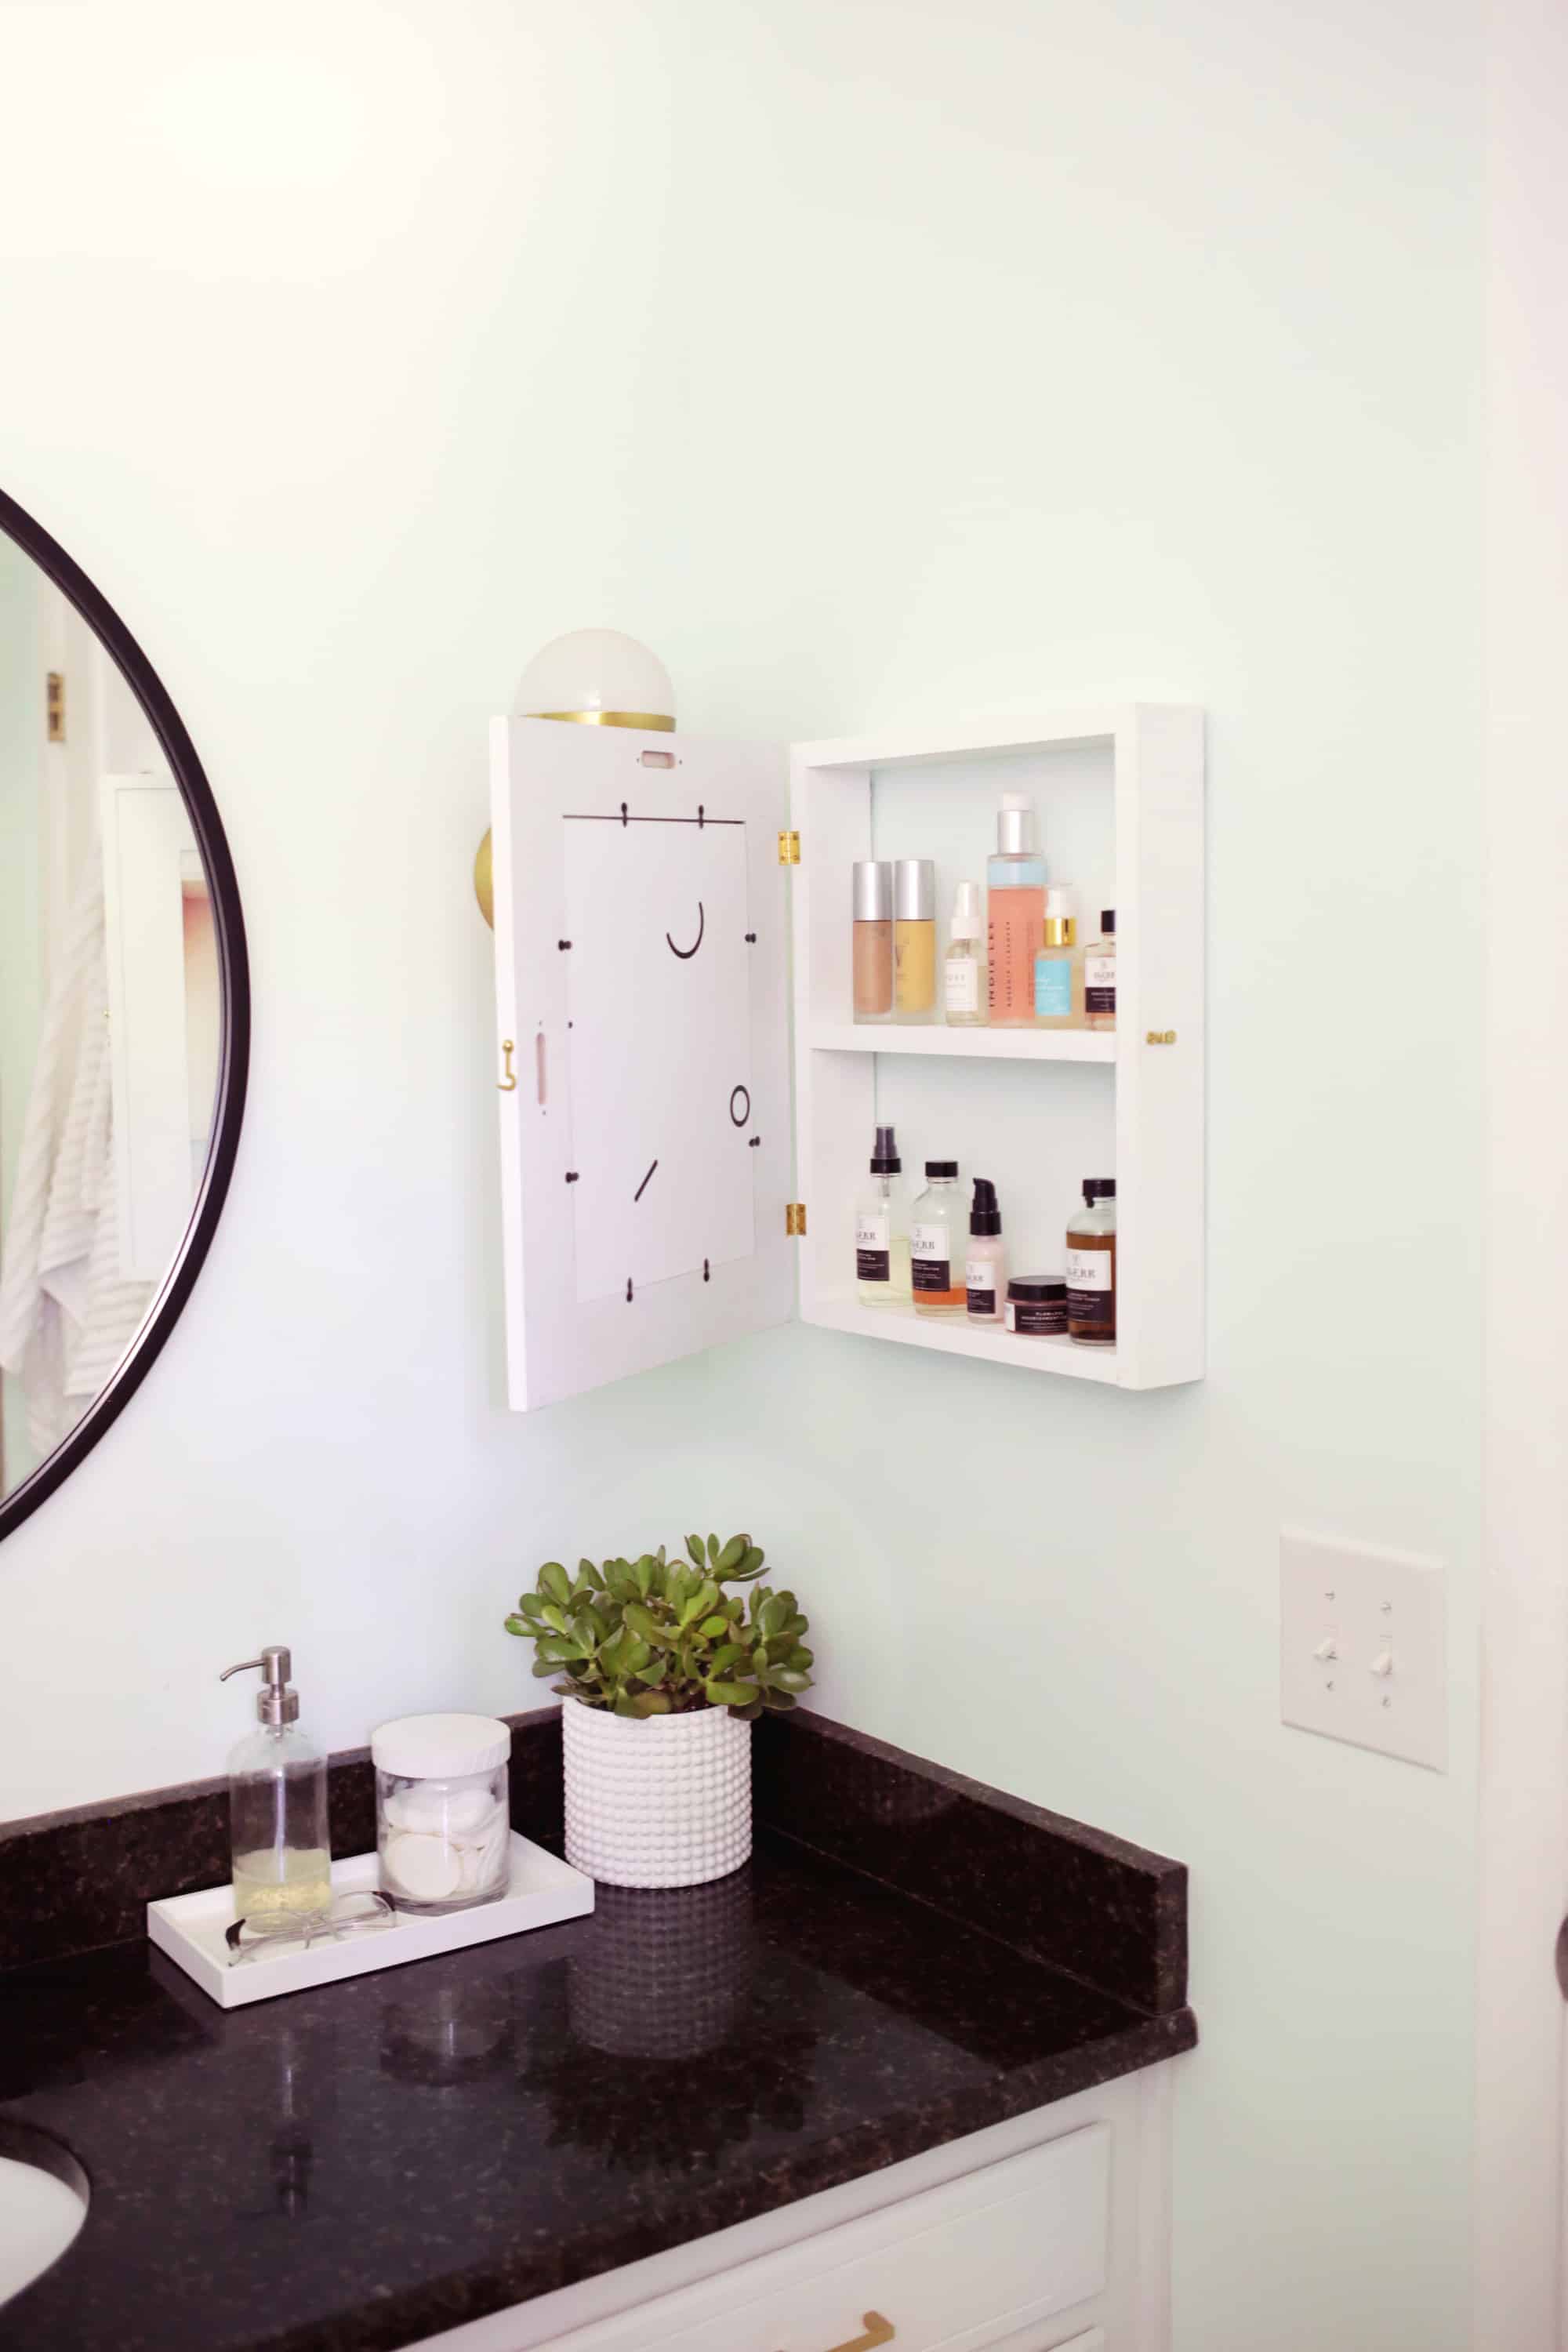
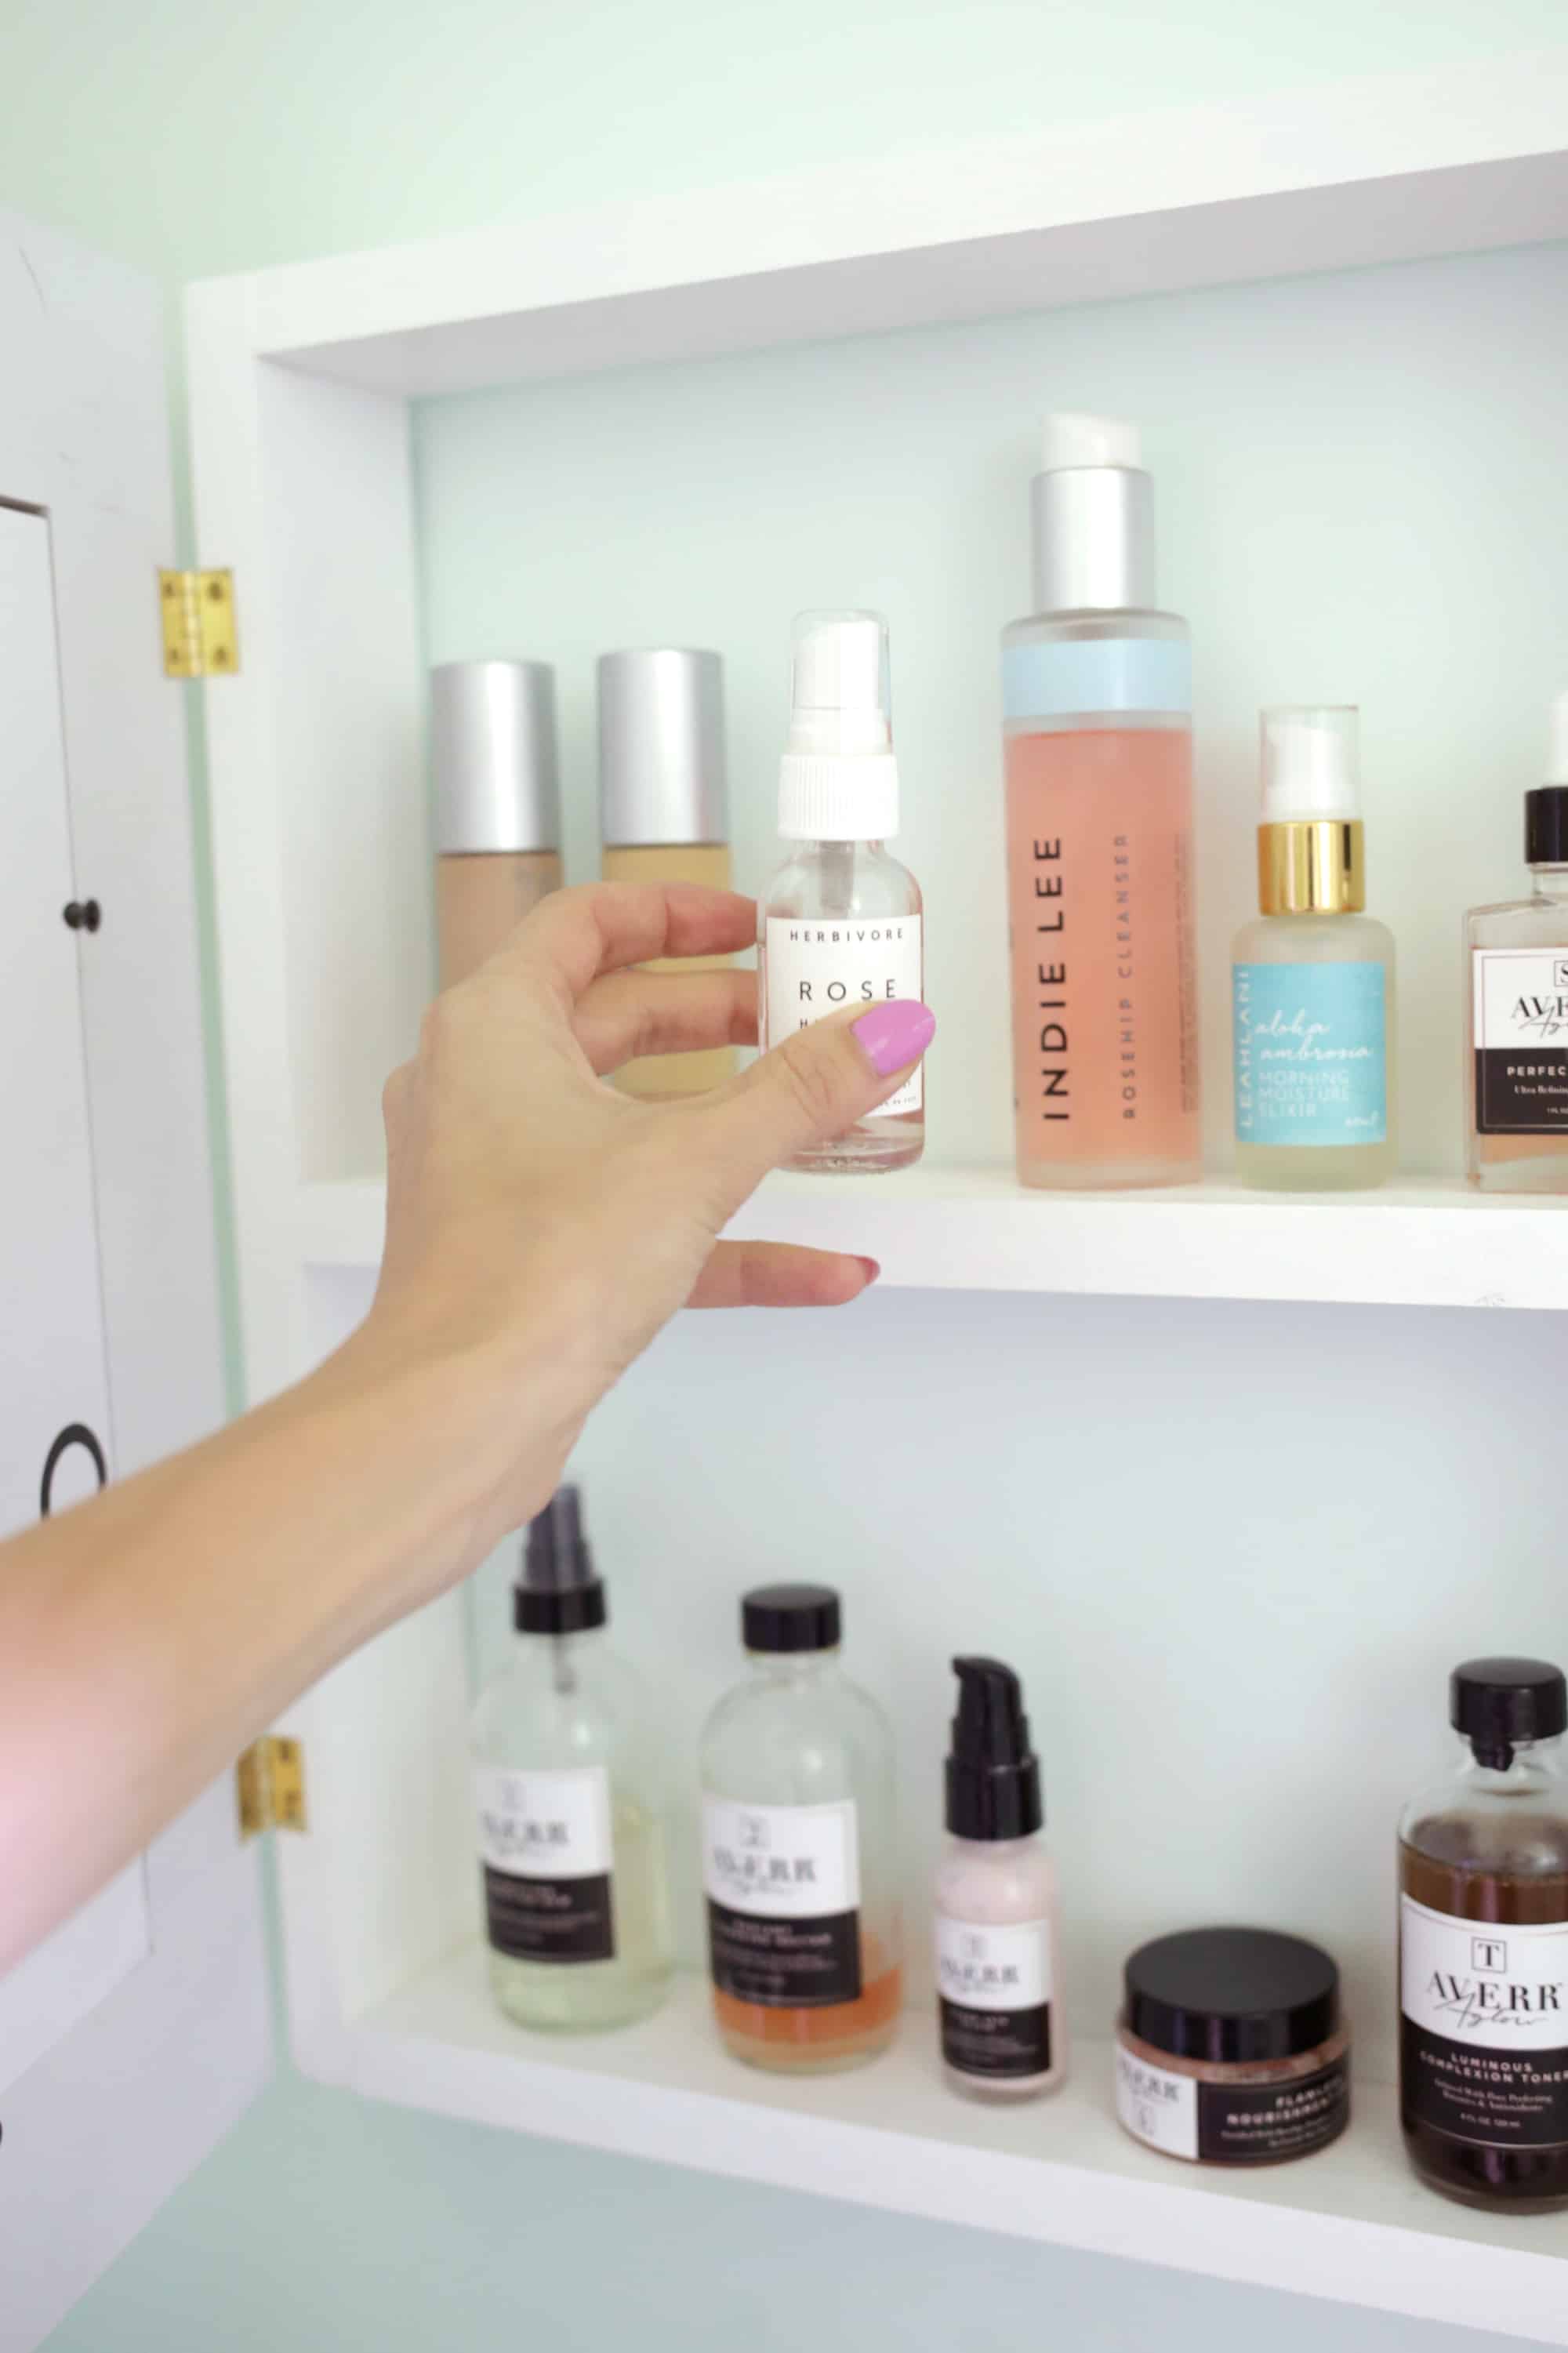
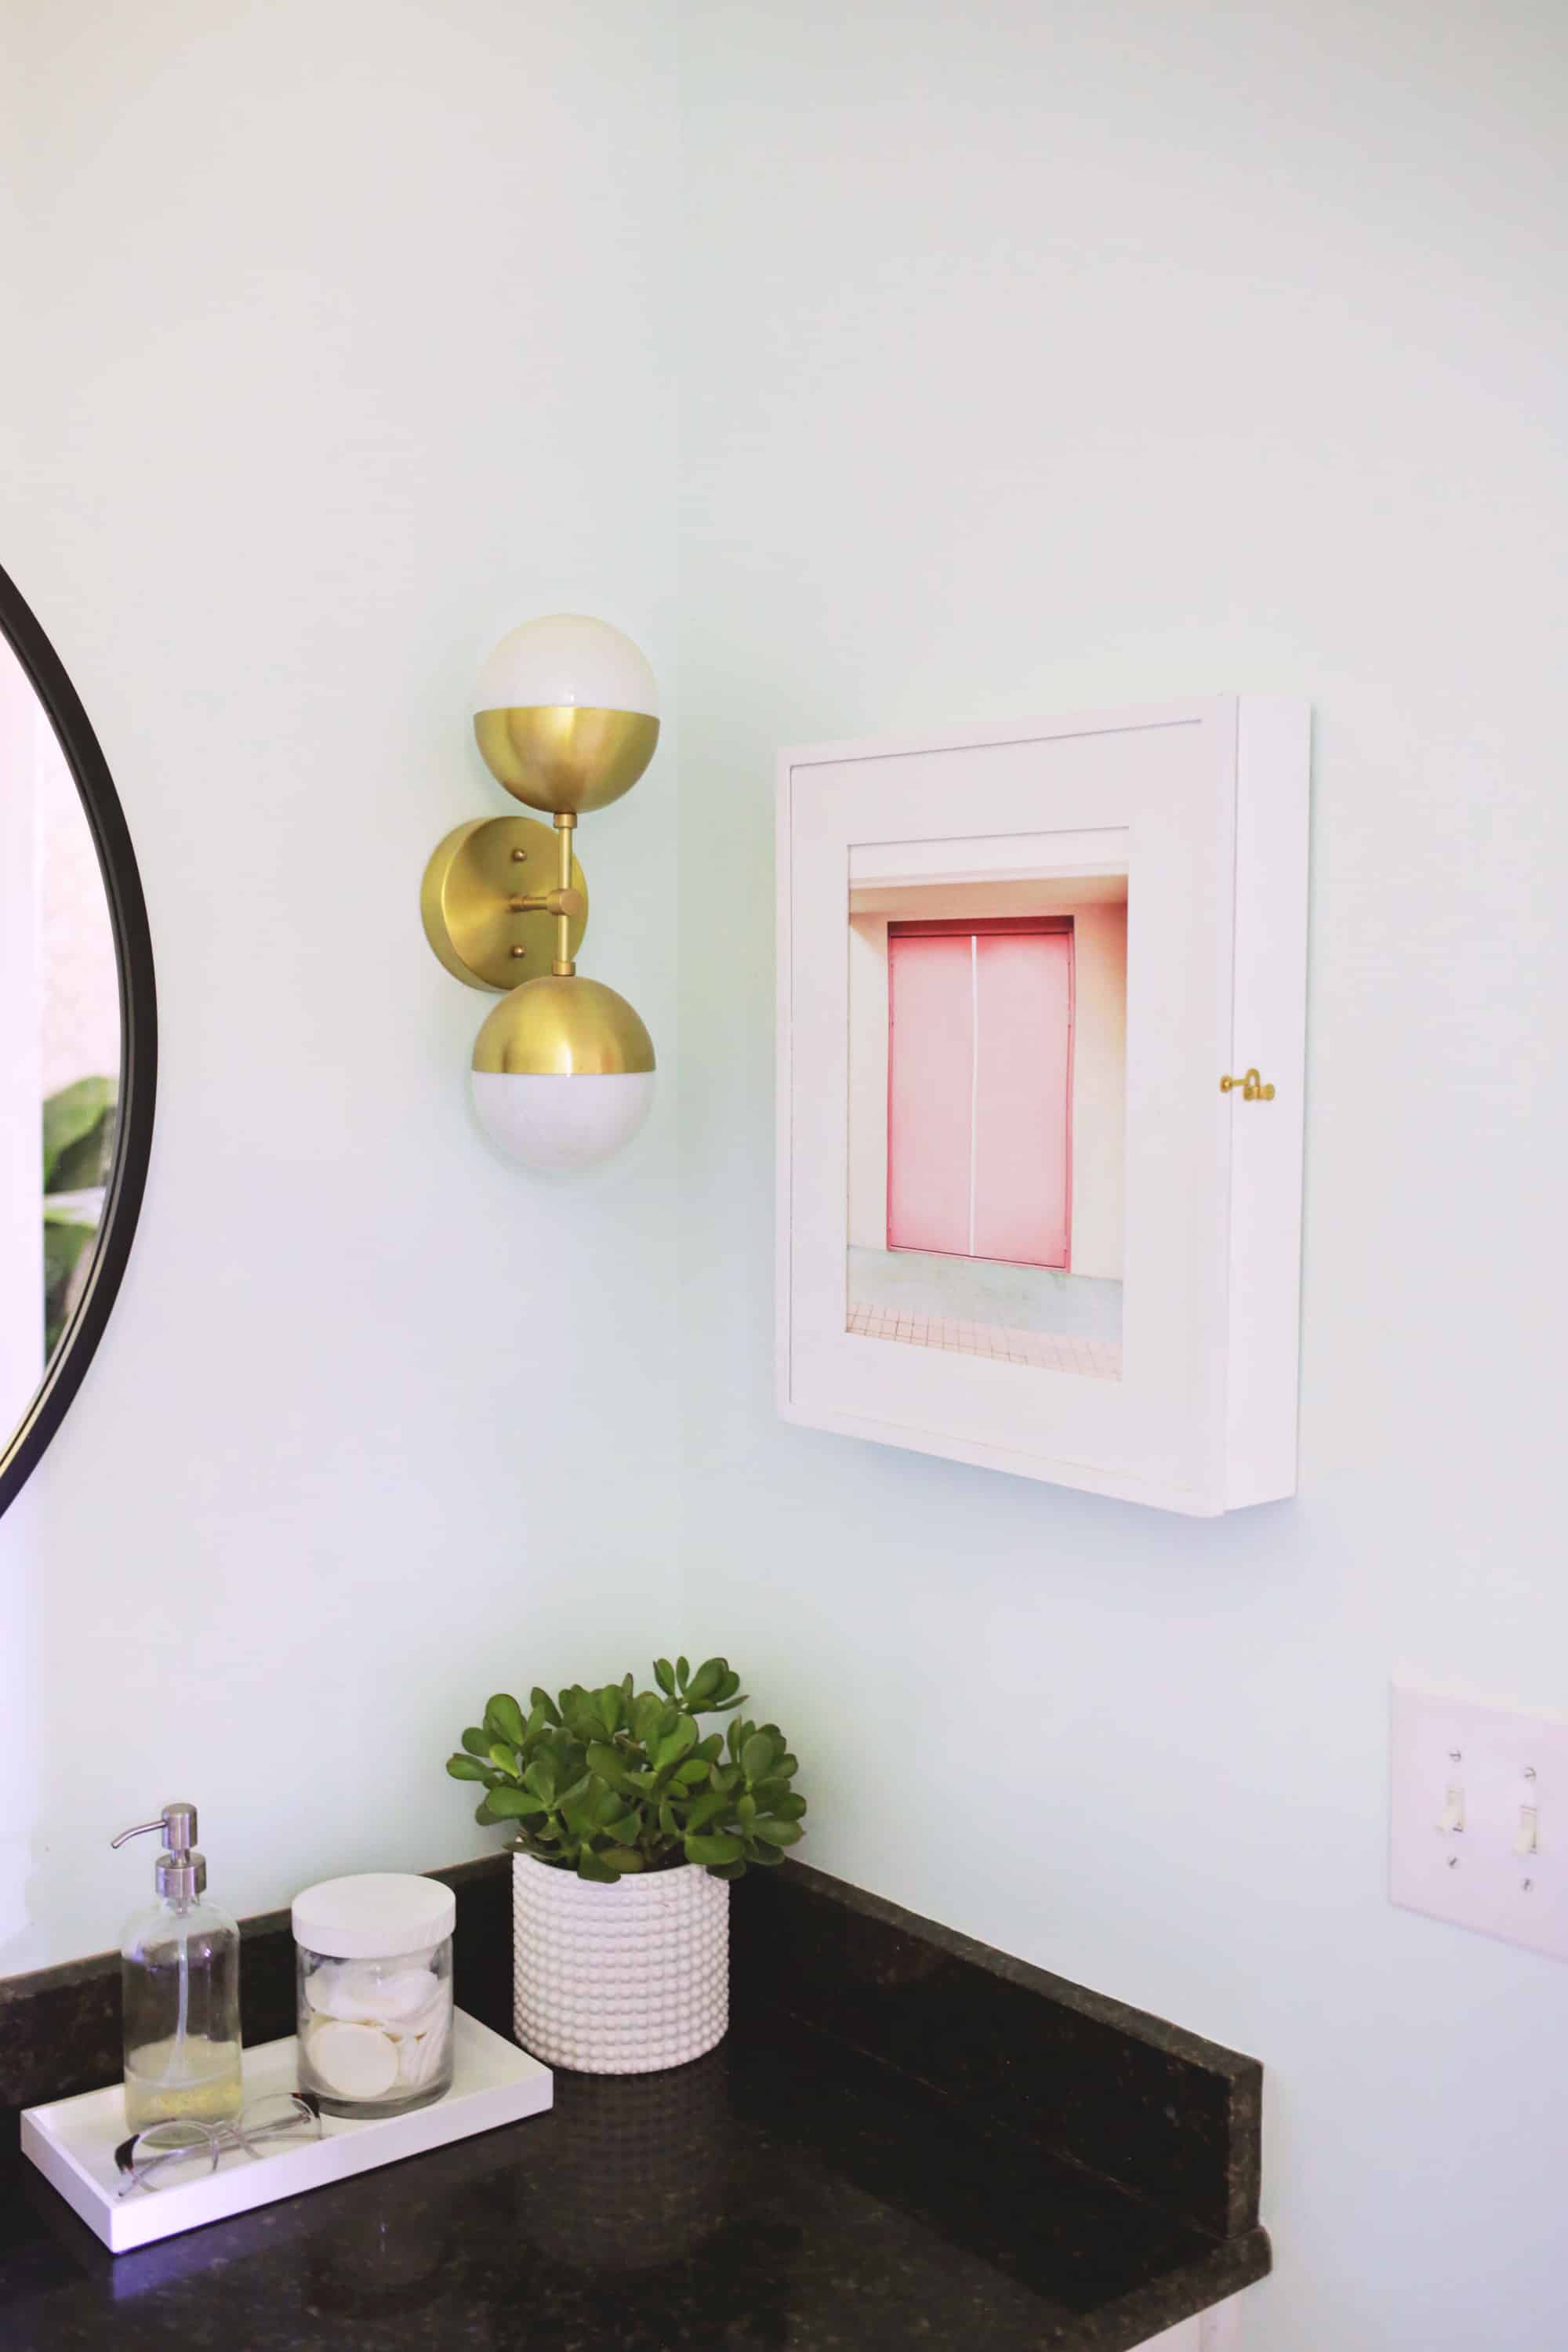 Blends right in, doesn’t it? Since the back panel of my photo frame was black, I covered it with some removable wallpaper to help it match a bit more. But you could also paint that panel or modpodge some paper onto it if the color of your back panel bothers you. It’s great to have most of my skincare items off the counter but within easy reach for my daily routine, and I can easily switch out the print (I cropped this one that’s in there currently) whenever I want! What do you think—could you use a little more space on your counter too? xo. Laura

11 Comments
The cabinet looks super sleek, like it was built in! Flawless DIY! 🙂
Charmaine Ng | Architecture & Lifestyle Blog
http://charmainenyw.com
Honestly, Laura, you are brilliant! I can see creating one of these for my kitchen to store spices or vitamins.
Laura you are SO handy!! I hope your husband is super impressed by your engineering skills! Haha. This is such a cool DIY for any small space where you want to tuck things away. I’m thinking this might be a good idea for me to store small things inside my closet or above my desk. Sometimes you just don’t want to see stuff out. So fun and easy!
Eva | http://www.shessobright.com
Haha, he is! I’m definitely the one that uses the power tools more often but we’re a good team 🙂
Laura
This is genius! You never fail to impress me! 🙂
This is seriously so cute! What a great idea <3
This is so cute! I totally want to make one for our bathroom!
Paige
http://thehappyflammily.com
I never thought that this could look so stylish, maybe I should make one too! Right now I have my medicine in a drawer…
https://www.makeandmess.com/
This is such a brilliant idea! xx
This is amazing and exactly what I need! Did you just use nails in the wall to hang it on the D-rings?
Yes! You can use screws as well if it’s a larger/heavier cabinet, but good sized nails seemed to work just fine for me 🙂
Laura