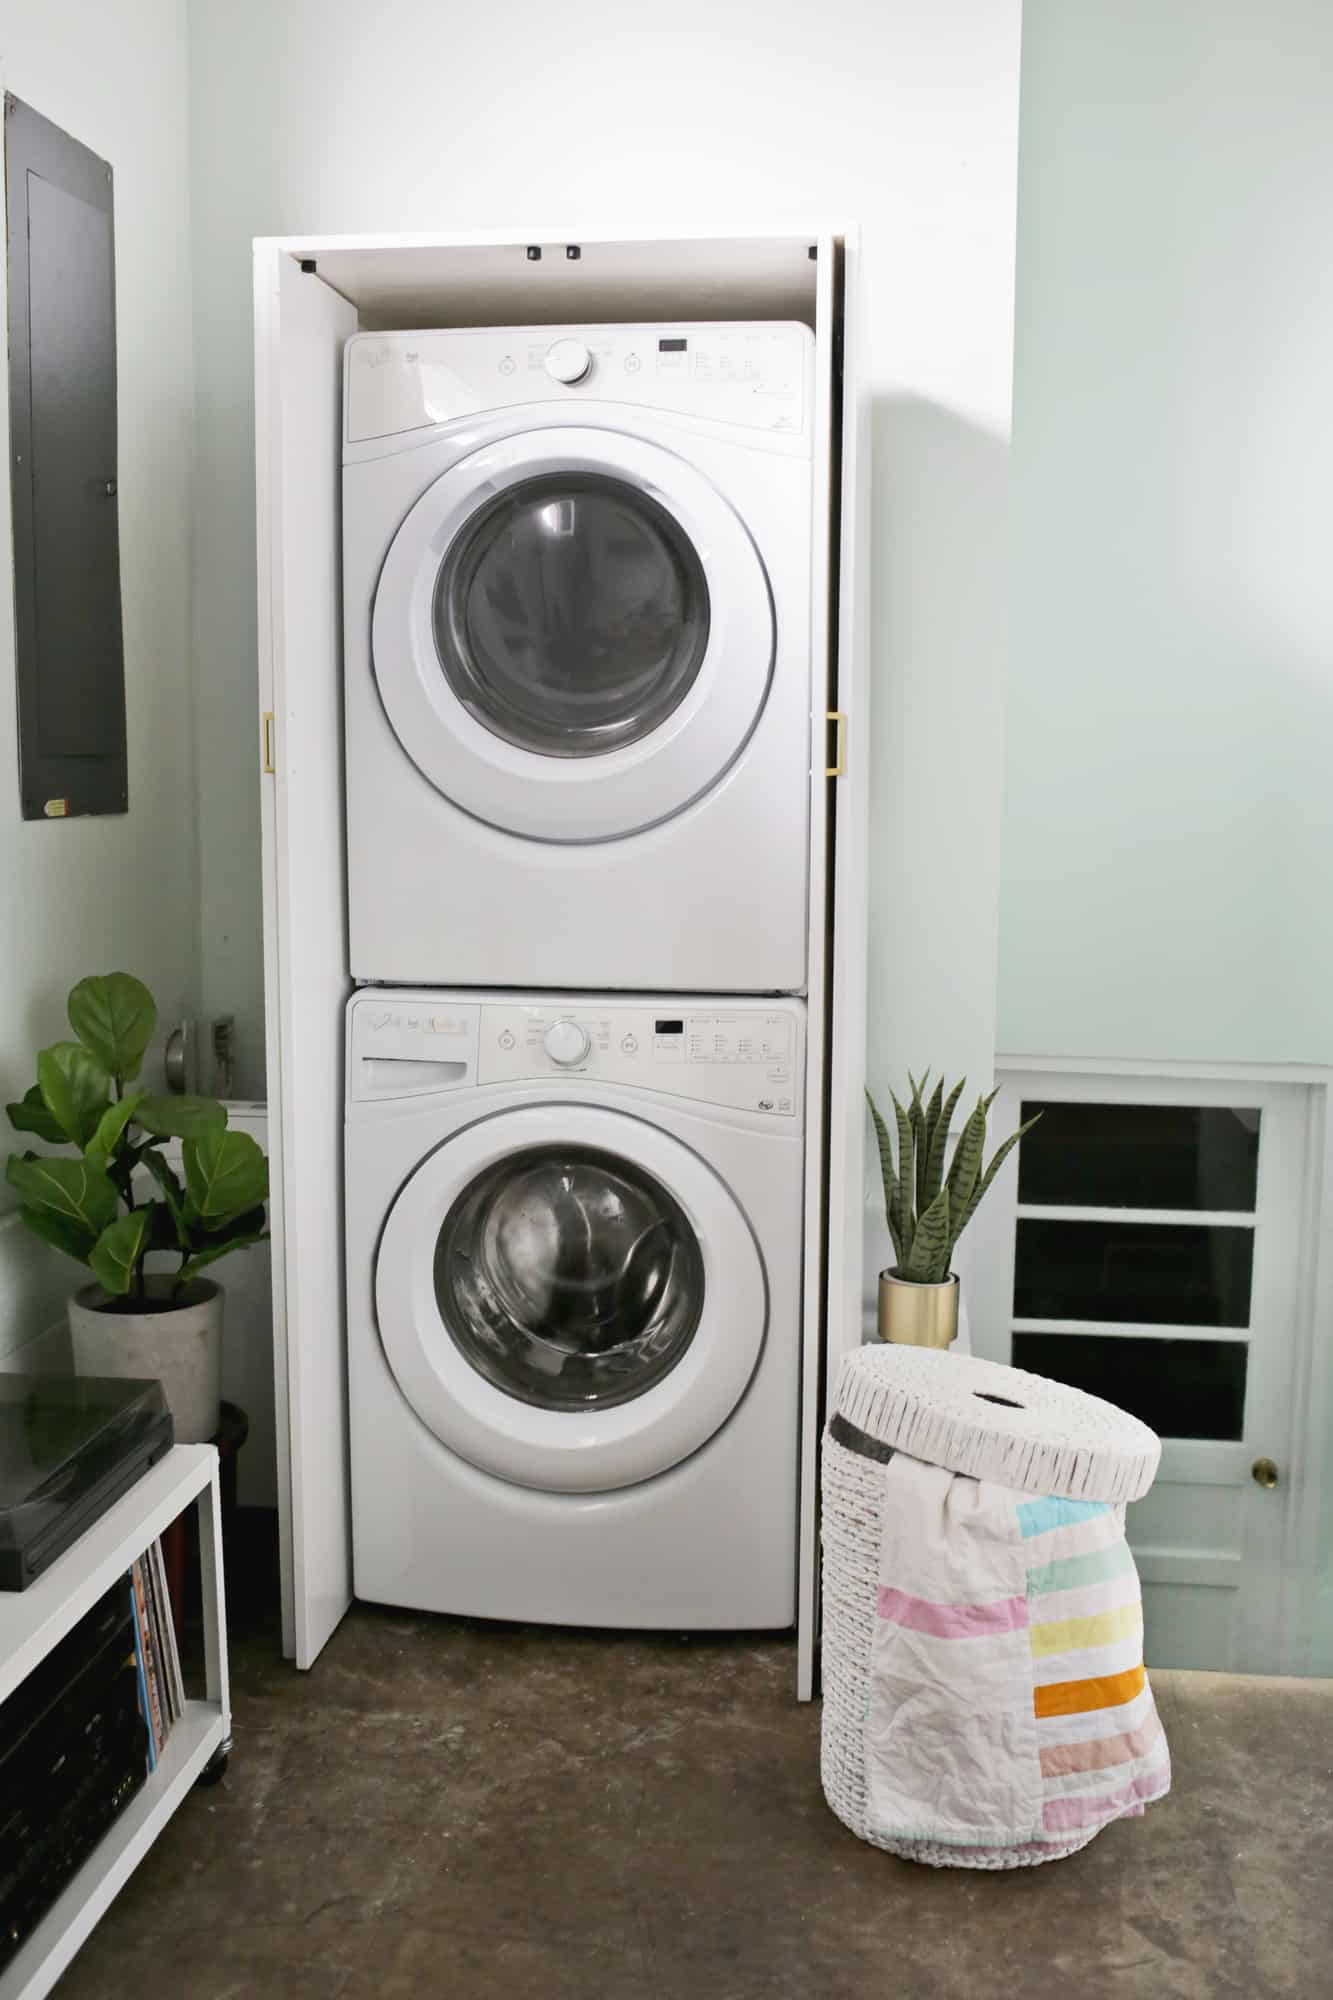
Everyone has a list of house “problems” that they want to get around to solving someday. For us, our “laundry problem” has been at the top of that list for years. We have a cute little 60s ranch house that has a laundry closet which doesn’t fit modern sized washer/dryers so the laundry has apparently been done in the semi-attached garage for the last few decades. It is definitely a bit of a pain to have to go out a door, down stairs, through the carport, and in another locked door with all your laundry supplies every time we wash anything, but I just felt extra bad that the laundry is technically in Todd’s music studio and it was kind of killing the professional vibe in there. I’ve always wanted to build a simple cabinet for the units to hide them when not in use, but it’s such a tight space and when I saw an oven door that opens and then slides into the oven out of the way, I knew that would be the perfect type of door installation for this project. It took me a while to hunt down exactly the right hardware I would need for this size of a project, but I eventually found it and it works perfectly! Here’s what we did and I’ll show you a budget work-around option as well…
 The first step is to measure your stacked washer/dryer so you can see how high/wide/deep your cabinet needs to be. We knew that when the 3/4″ thick cabinet door was slid inside the cabinet, the door and the sliding door hardware would take up 1 3/4″ of space on each side, so we had to add 3 1/2″ (1 3/4″ x 2 = 3 1/2″) to the measured width of my washer/dryer to find the minimum amount of space we needed in the cabinet. It’s up to you how much extra space you want there to be between your washer/dryer and the cabinet doors, so add a few inches on either side as you’d like for the final measurement. We were pretty tight on space with a small air conditioning unit next to the washer, so we had to keep the measurements pretty close.
Make sure your cabinet is deep enough to cover the sides of your unit and give enough space in front for 3/4″ thick doors to be closed inside the cabinet frame as well without hitting the front of the washer units. With the height, I would just go a couple of inches above the top of the dryer unless you are trying to match the height of something else in the room nearby.
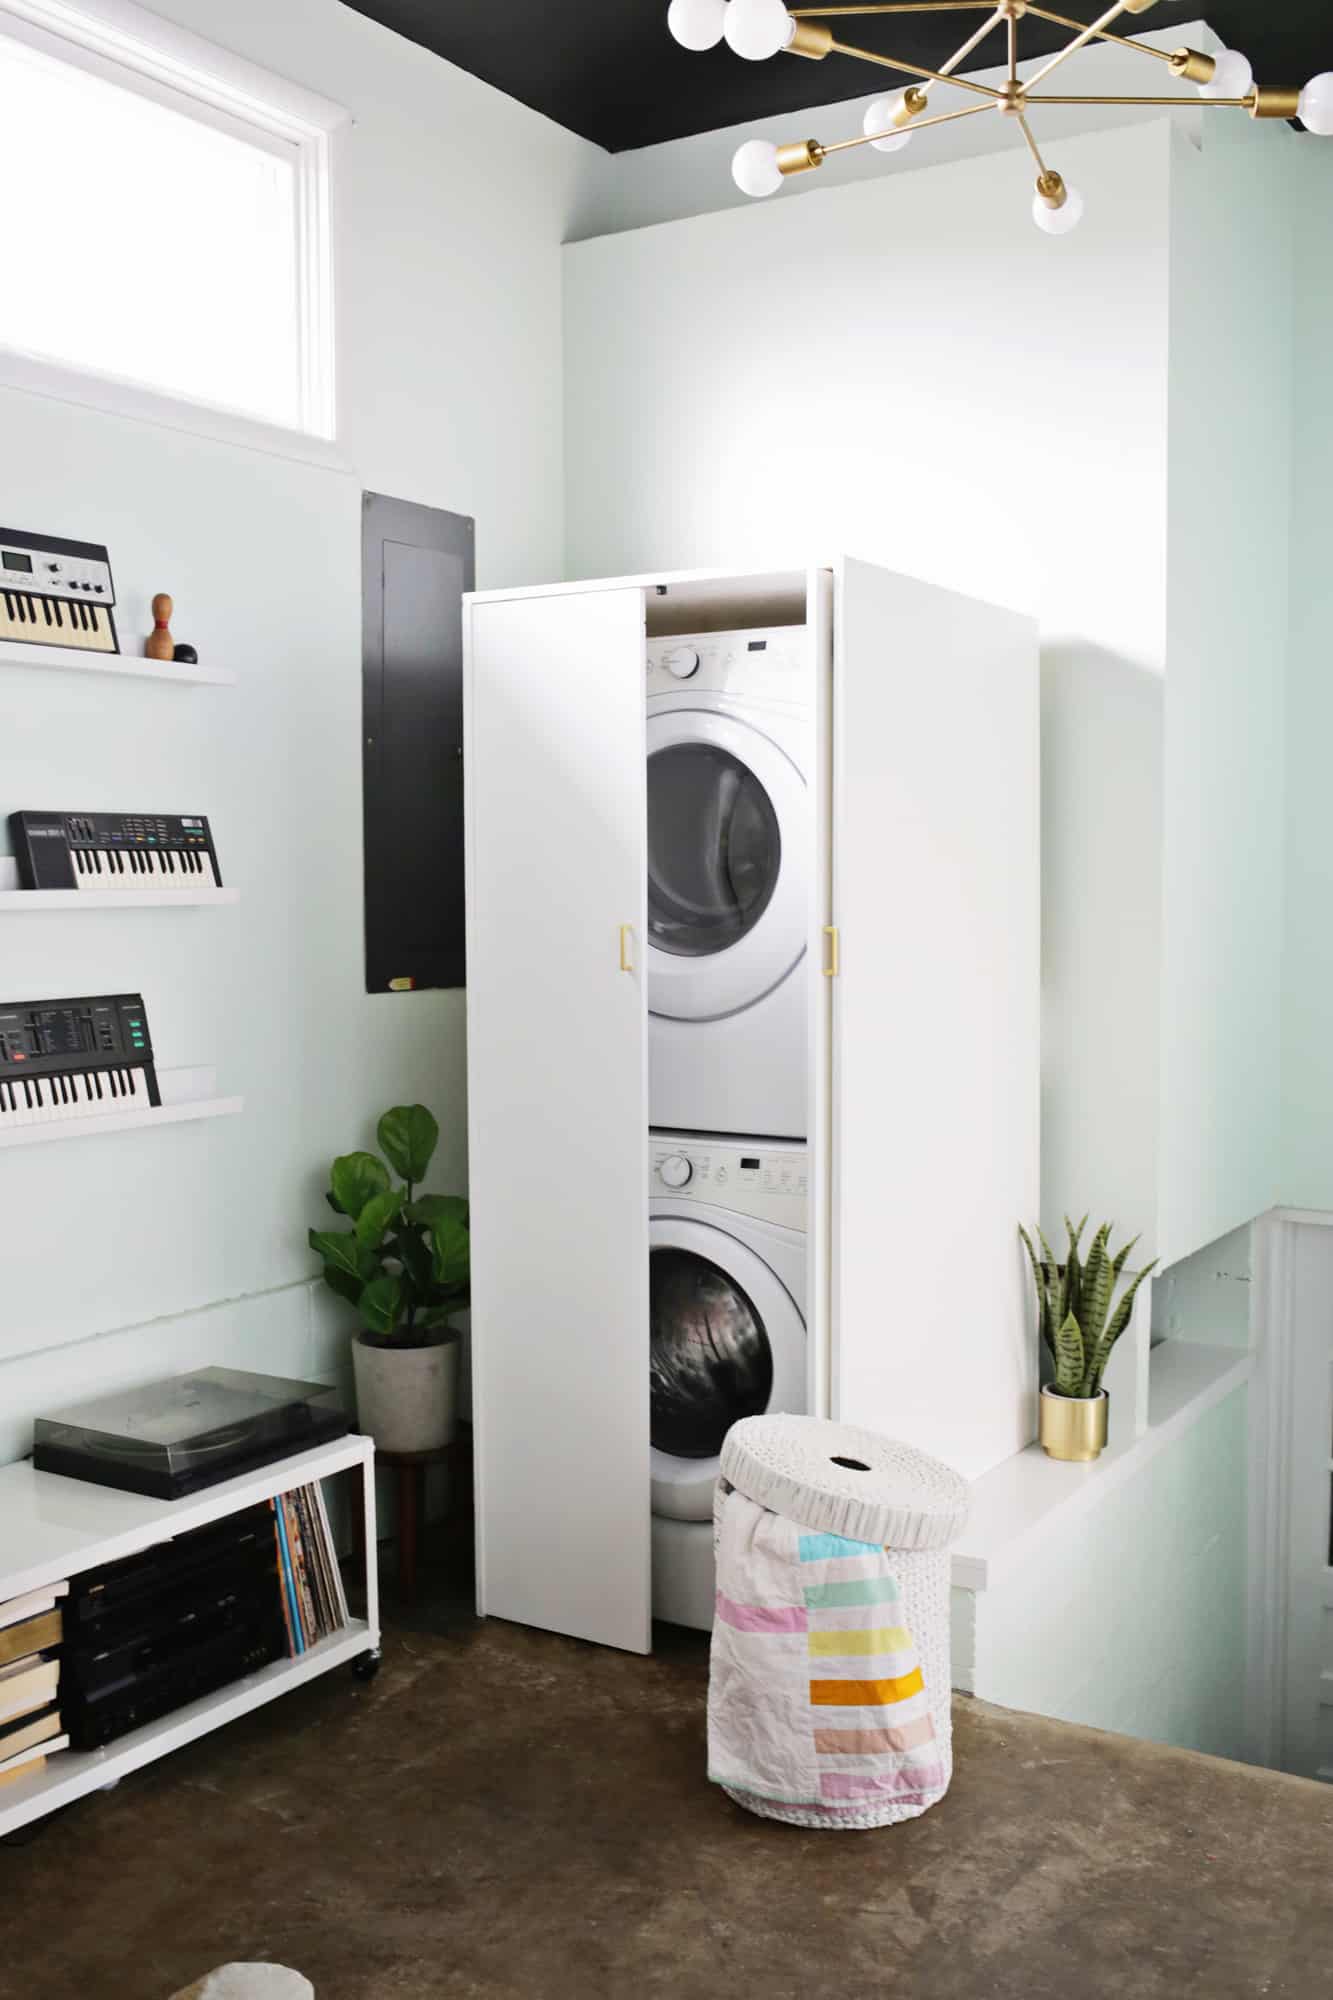
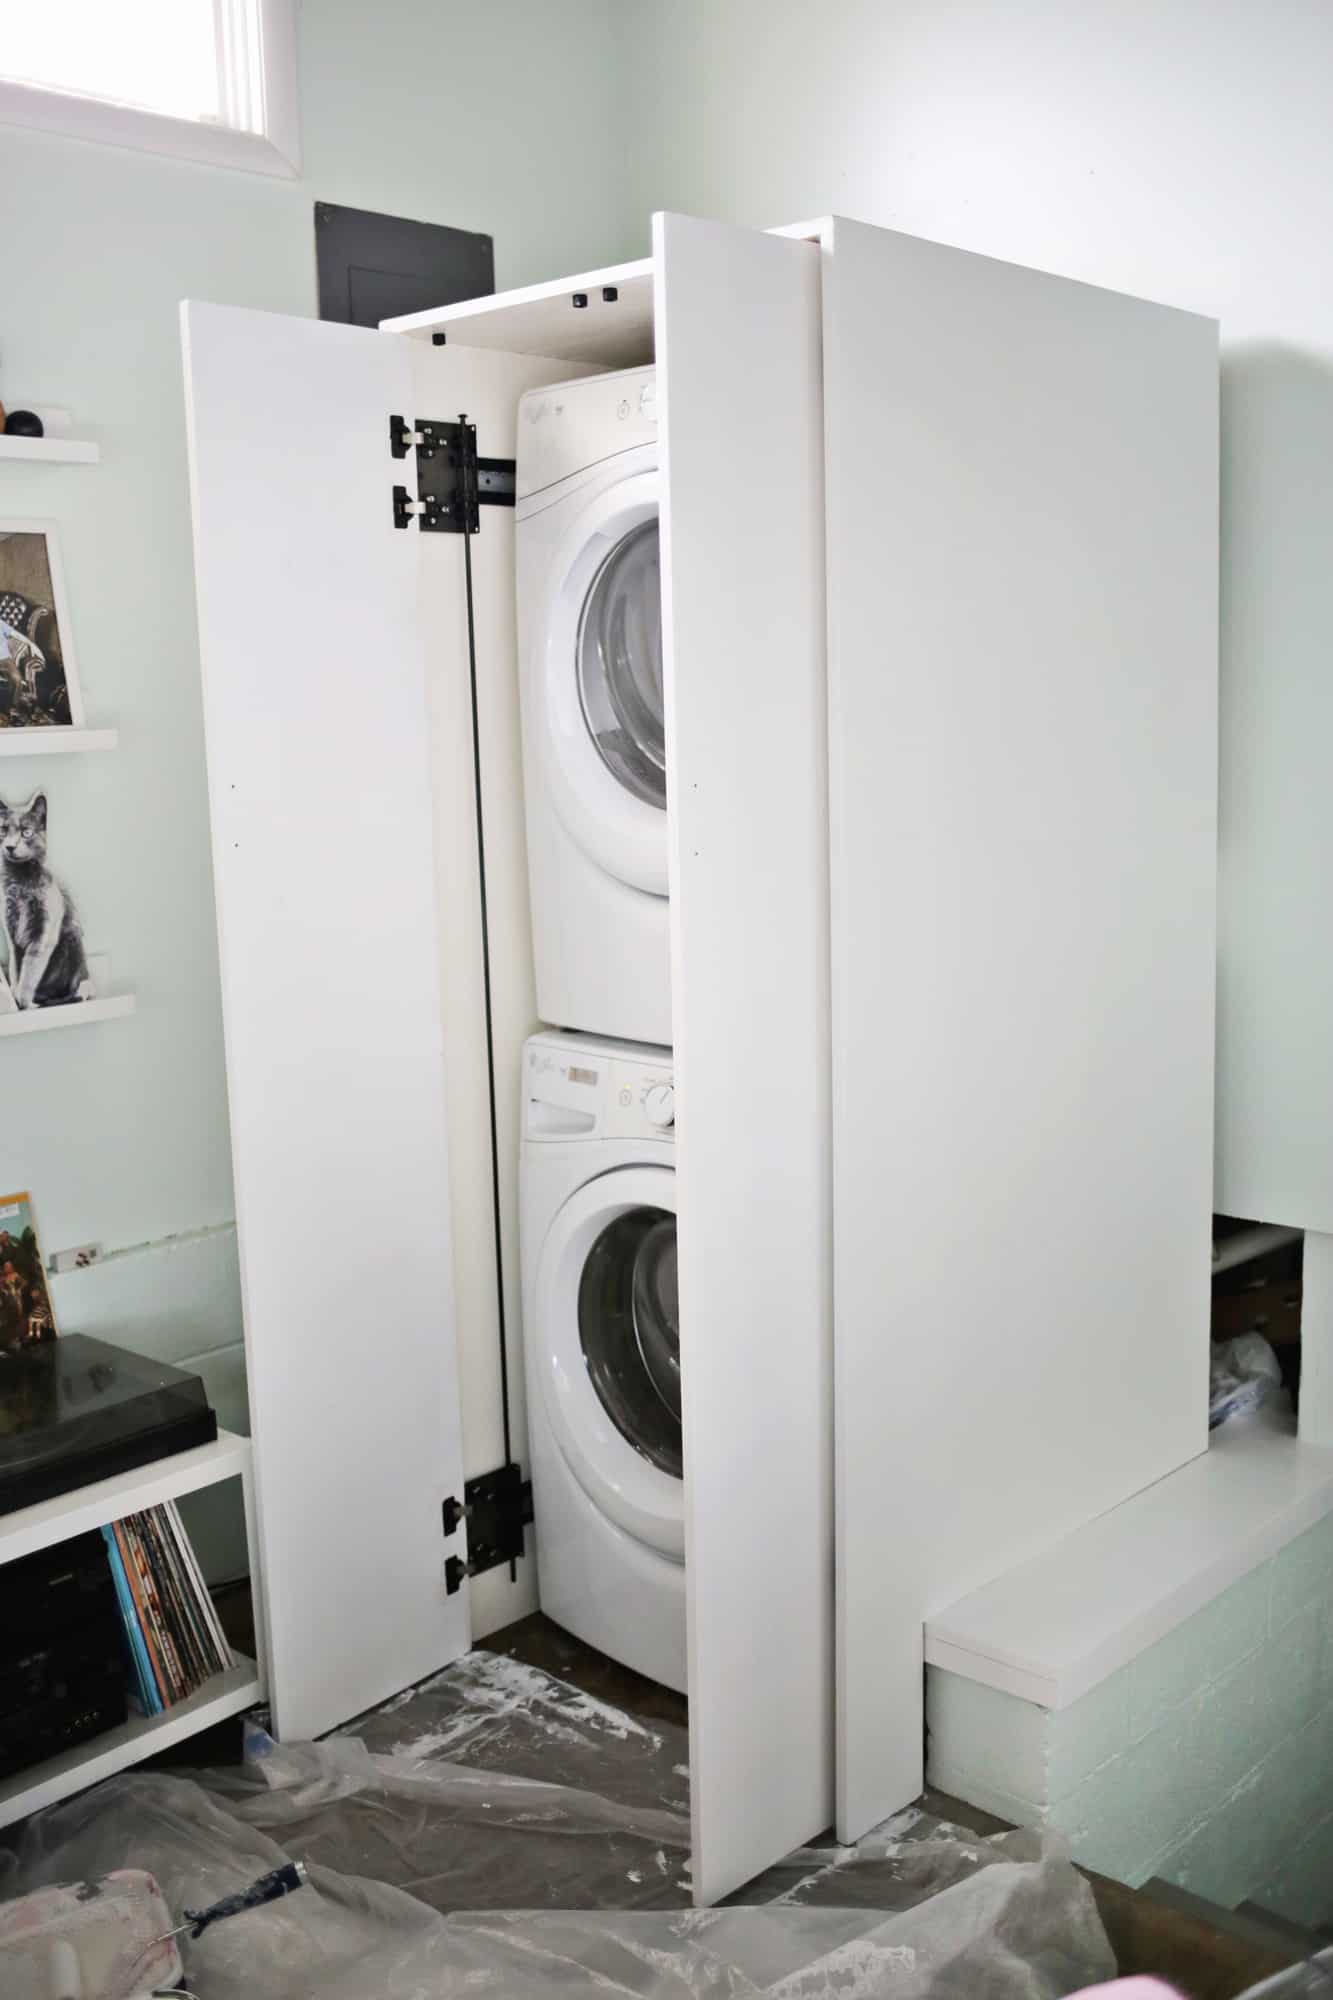
Using 3/4″ thick sheets of plywood in whatever sizes you need, build a 3-sided box as you see in stage one above that fulfills your height/width/depth requirements and place it around your unit to make sure it fits correctly. Don’t nail or screw it into place just yet though! If you want to paint the inside of your cabinet, now is a good time to do those sides at least since it will be difficult to do that once it’s all in place. It’s also a lot easier to mount the hardware before connecting the sides of your 3-sided box to your top piece so I’ll show you how we did that too.
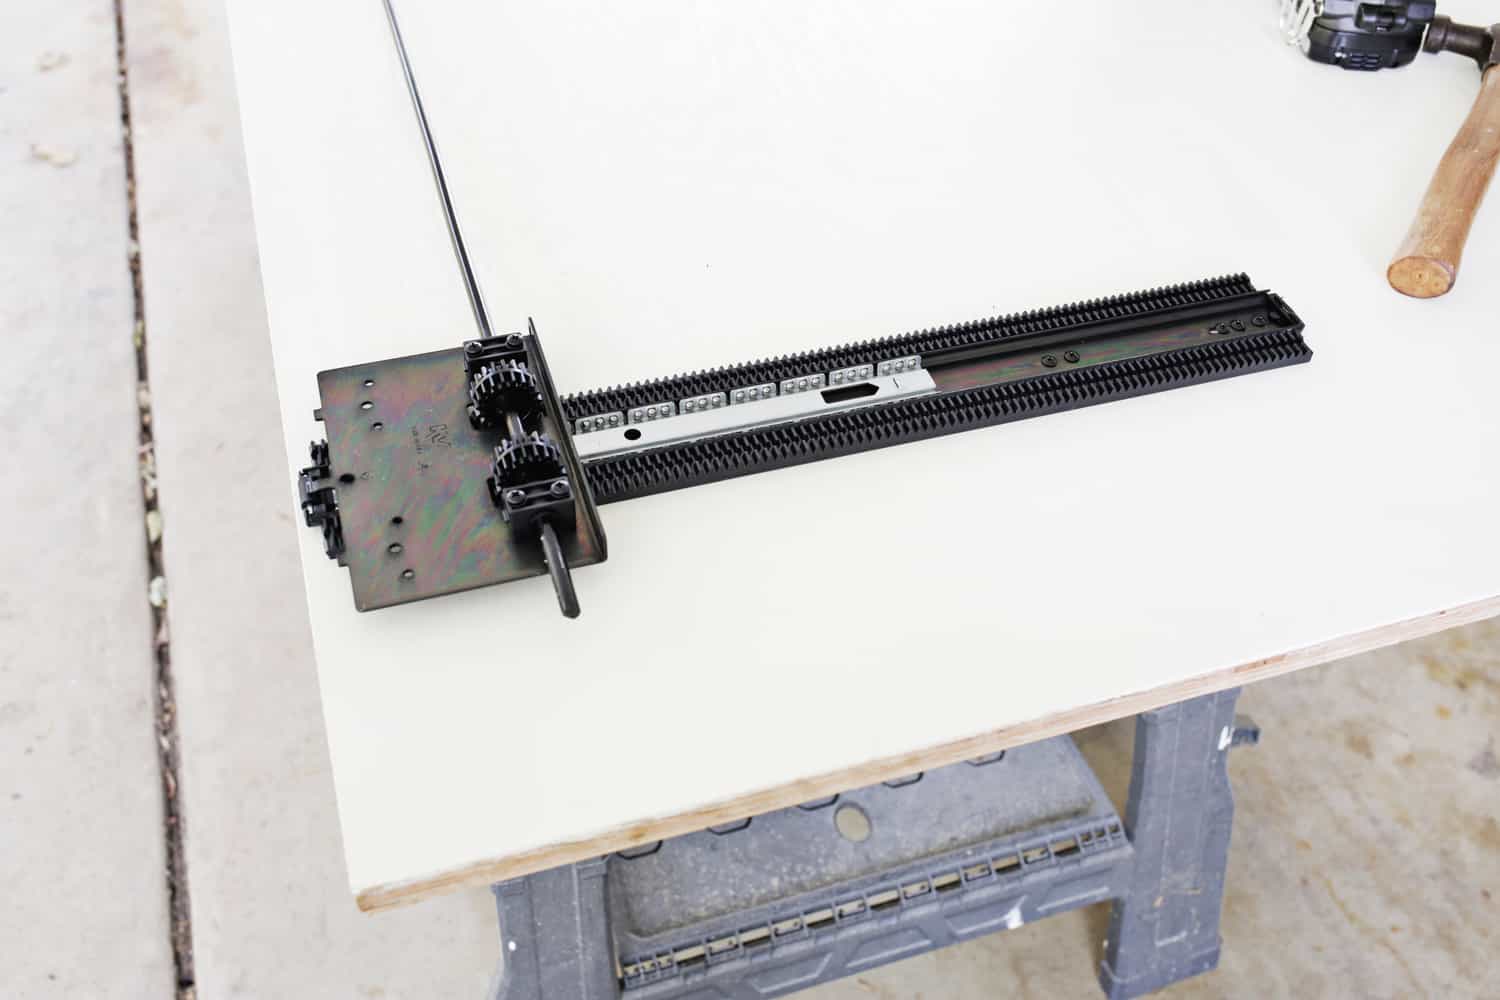 We used two sets of this slide system for the doors (this part gets mounted inside the sides of your cabinet) with two of these rods to connect the top and bottom slide on each side so they slide at the same speed (you can cut the rod shorter if you need it smaller with a simple hacksaw). We mounted the slide hardware starting 1 1/4″ away from the front edge of each side board and 60″ apart and cut the two rods to fit that distance apart and connect the hardware sets. Then we repeated the process on the other side.
 Once the sliding hardware was in place, it was time to cut our doors! Unlike some cabinet doors that go on the outside of an opening to cover the hole completely, you want these doors to fit inside the cabinet frame so you’ll want to measure that space inside the frame between the sides and top to bottom. Cut the width measurement in half to find your door width (since you will have two doors) and I would take off 1/8″ from the width of each door so your doors aren’t jammed into the space too tightly. Also, take off 1/2″ from the height of the doors and mount them so they are flush with the top, but a little off the floor, so they can open freely at the bottom without scraping the floor.
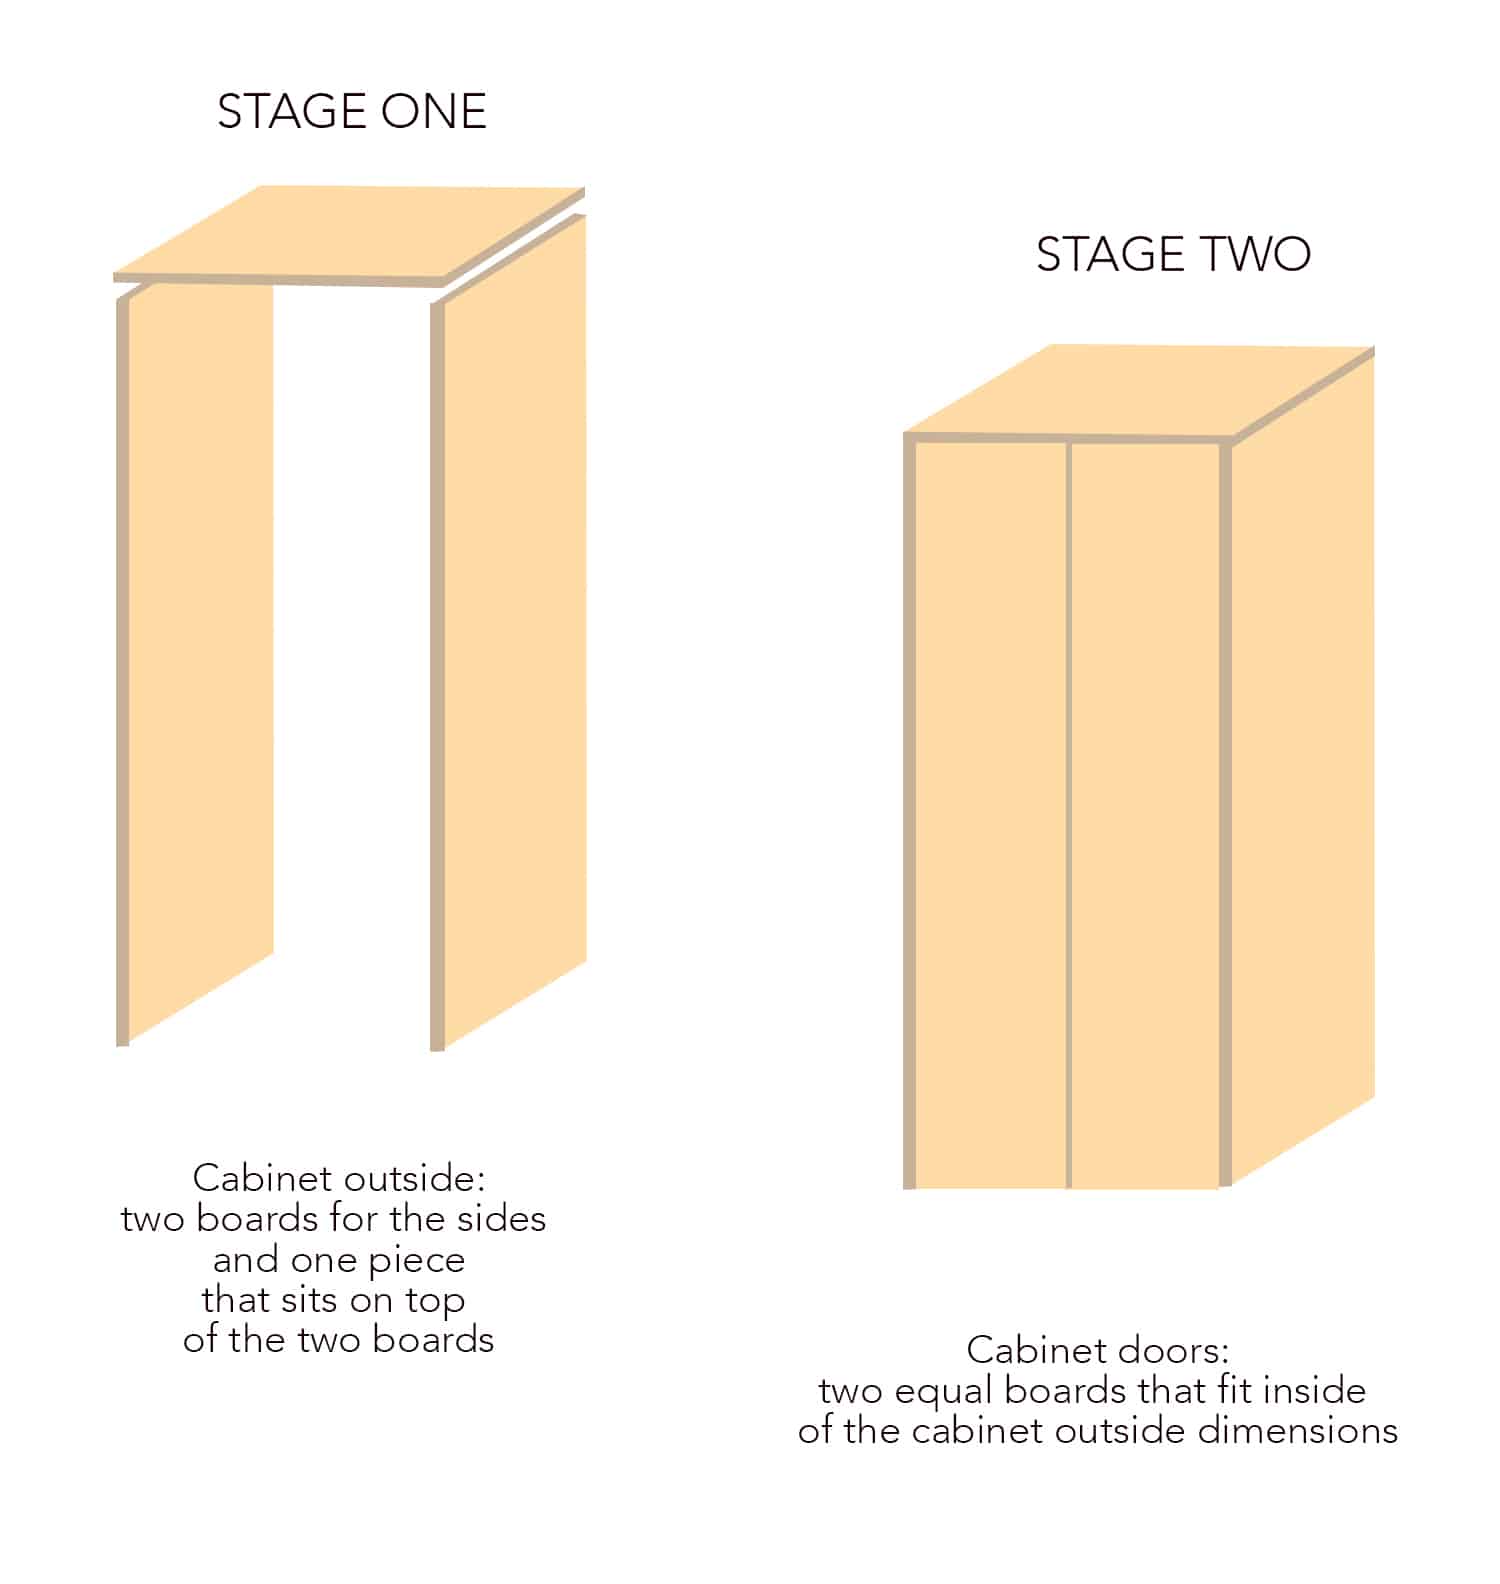
We bought boards that were bigger than we needed and used a circular saw to trim the doors down to size (if you have access to a table saw though, that’s the easiest way to cut a large board). If a table saw or circular saw seems a bit scary to you, I totally get that and you can use less-intimidating jig saw instead—I promise they aren’t that scary at all and super useful!
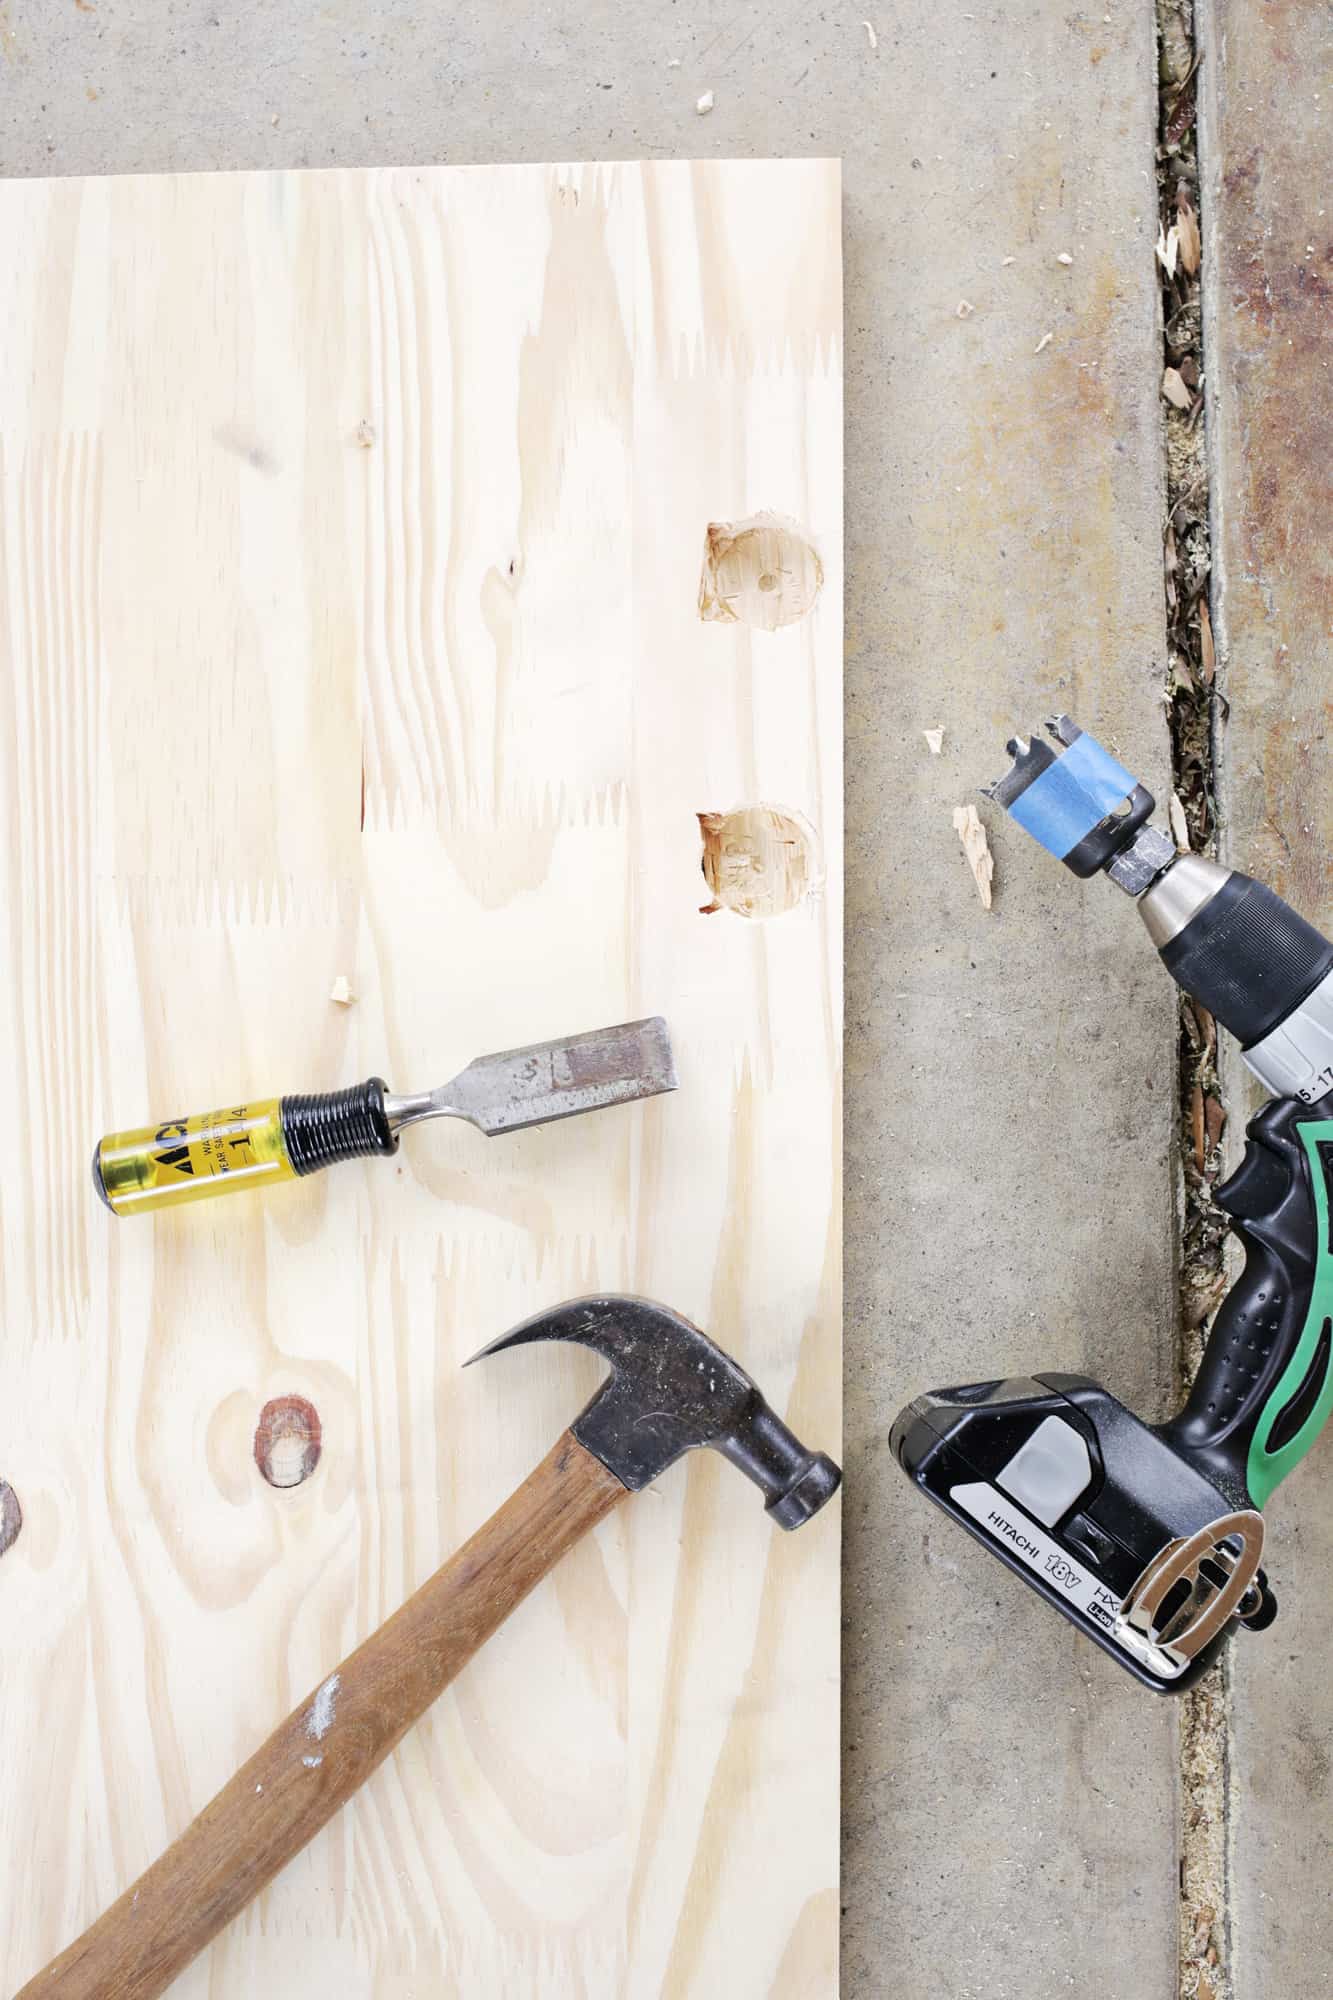
To attach our new doors, we used two of these full overlay hinge kits to attach the cabinet doors to the sliders so they could slide in and out of the cabinet and open properly. You can lay your door next to the corresponding side panel and mark where the hardware should sit on the door in order to line up properly. We used a 1 1/2″ hole saw drill bit to drill 1/2″ deep into the door at each place where a hinge needed to go and then knocked out the excess wood with a chisel and flathead screwdriver to make an indentation for the hinge to sit into (basically what this video shows for similar door hardware prep).
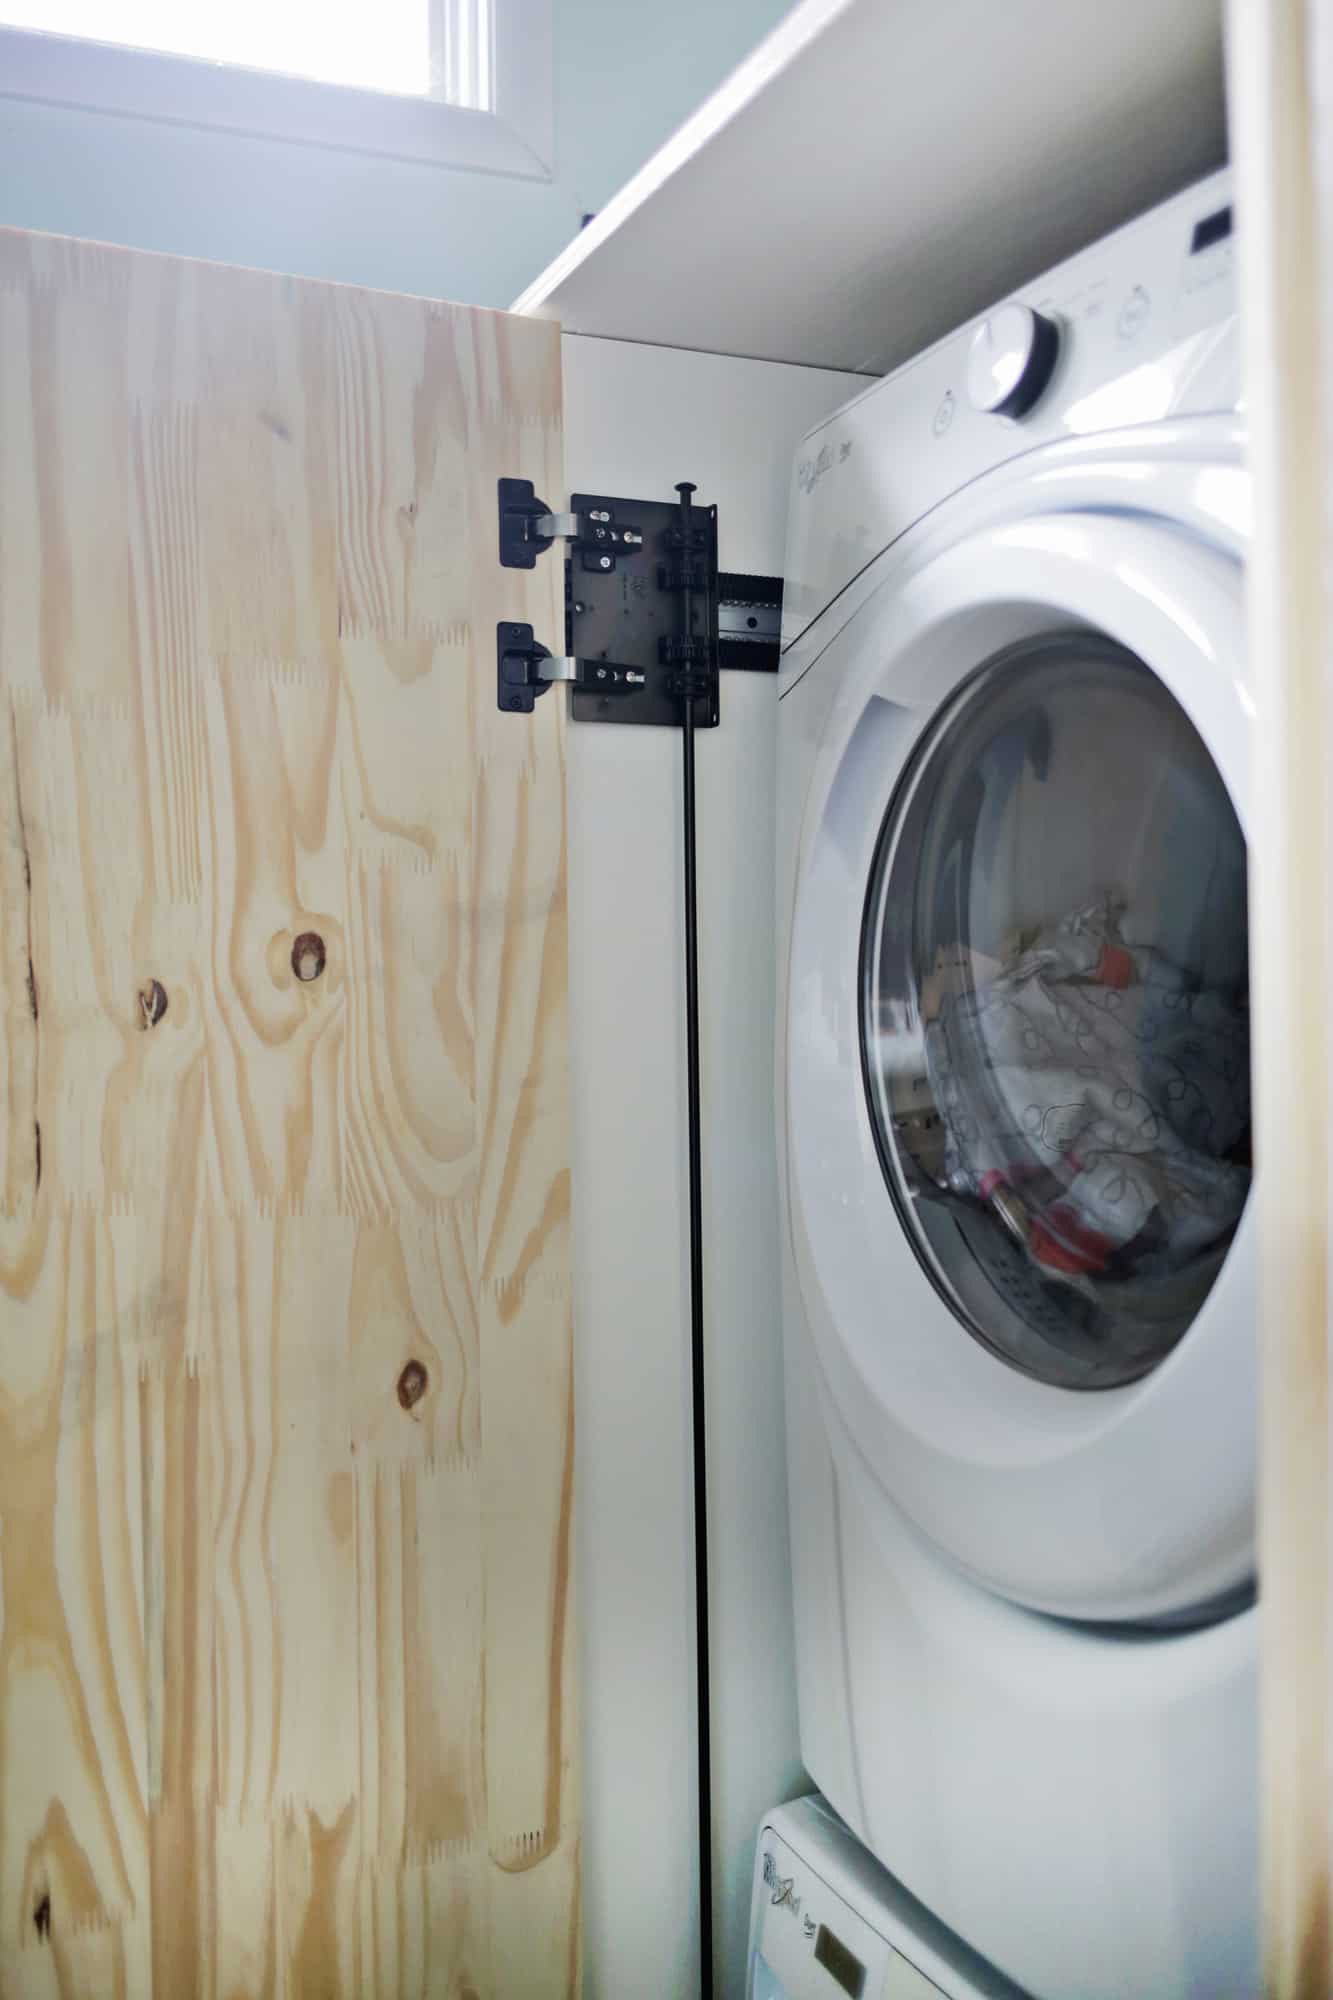
 Then, we could install the hinge kits and attach them onto the slide systems on each side and make sure the doors worked. Most systems like this should have some adjustment options in the hinges themselves so that loosening or tightening certain screws will cause the door to sit up higher/lower or be pulled back/forwards so you should be able to make those adjustments within the hinge pieces themselves if the door isn’t sitting properly when you first attach it.
Once each door is mounted to each side, you can put your 3-sided box back over your washer dryer for another fitting for any final adjustments. If everything looks right and the doors open and close correctly, go ahead and screw your top into the sides of your cabinet, attaching all three main pieces together.
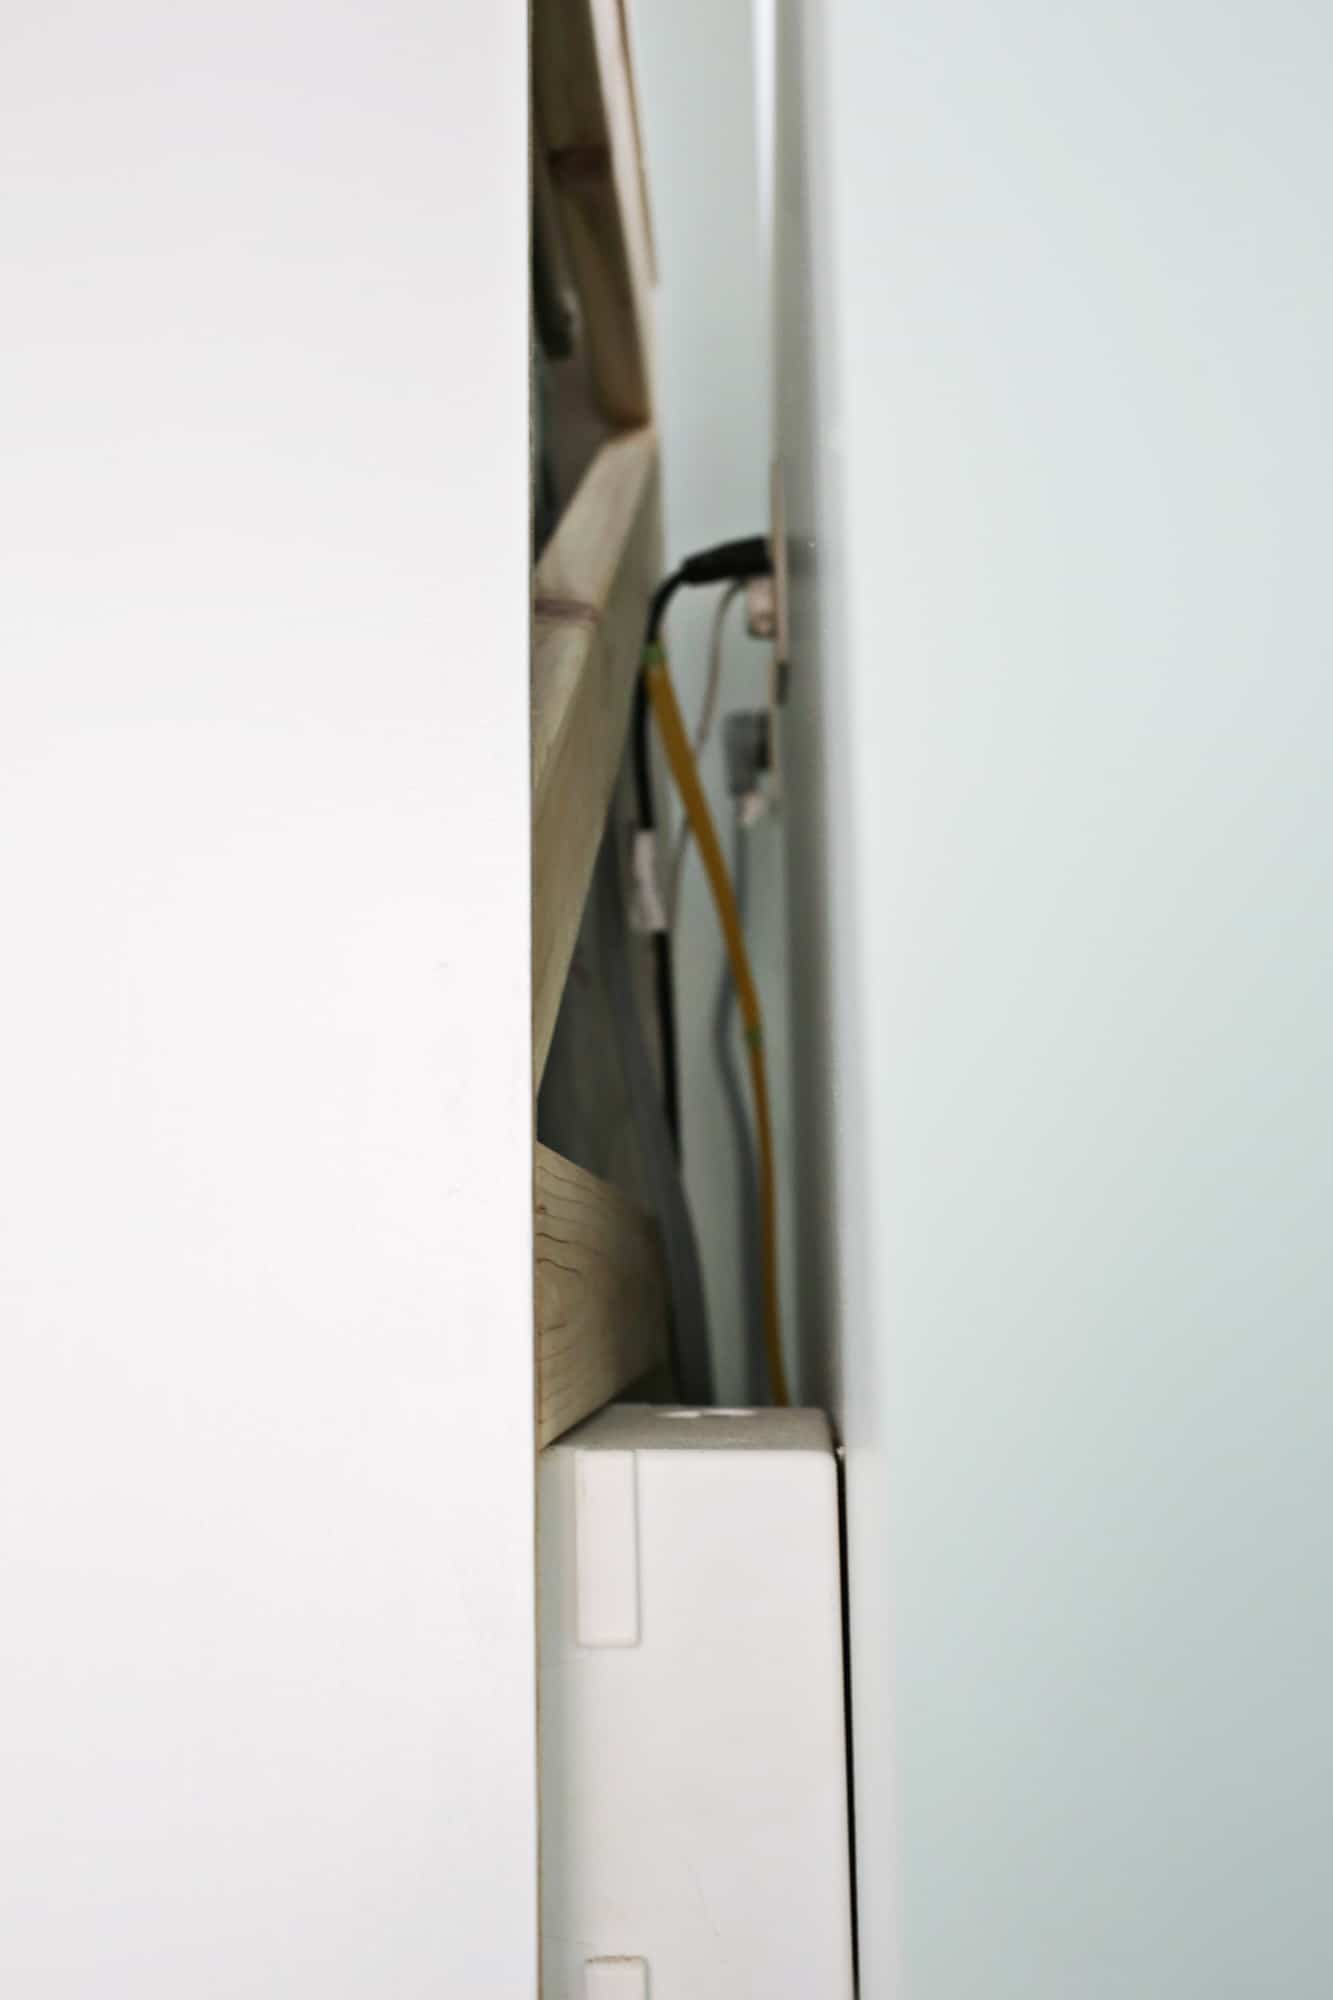 For stability, we cut some back braces to connect the cabinet across the back to make it more sturdy and keep it from wiggling. Since there are lots of wires and hoses that need to come out of the back of the washer/dryer, I didn’t want to make a fully solid back to the cabinet so using some “X” braces and a straight across piece seemed like a better way to go. We only screwed these in rather than also gluing them so that if there was a maintenance issue and someone needed to access the back of the machine, we could remove the braces and slide the cabinet forward off the washer/dryer for easier access to the area. It’s also hard to drill directly into the back of the cabinet at this angle without puling the whole washer/dryer unit forward to stand behind it, so we cut the braces to fit inside of the cabinet so we could drill them in place from the sides rather than screwing them directly onto the back of the cabinet edge.
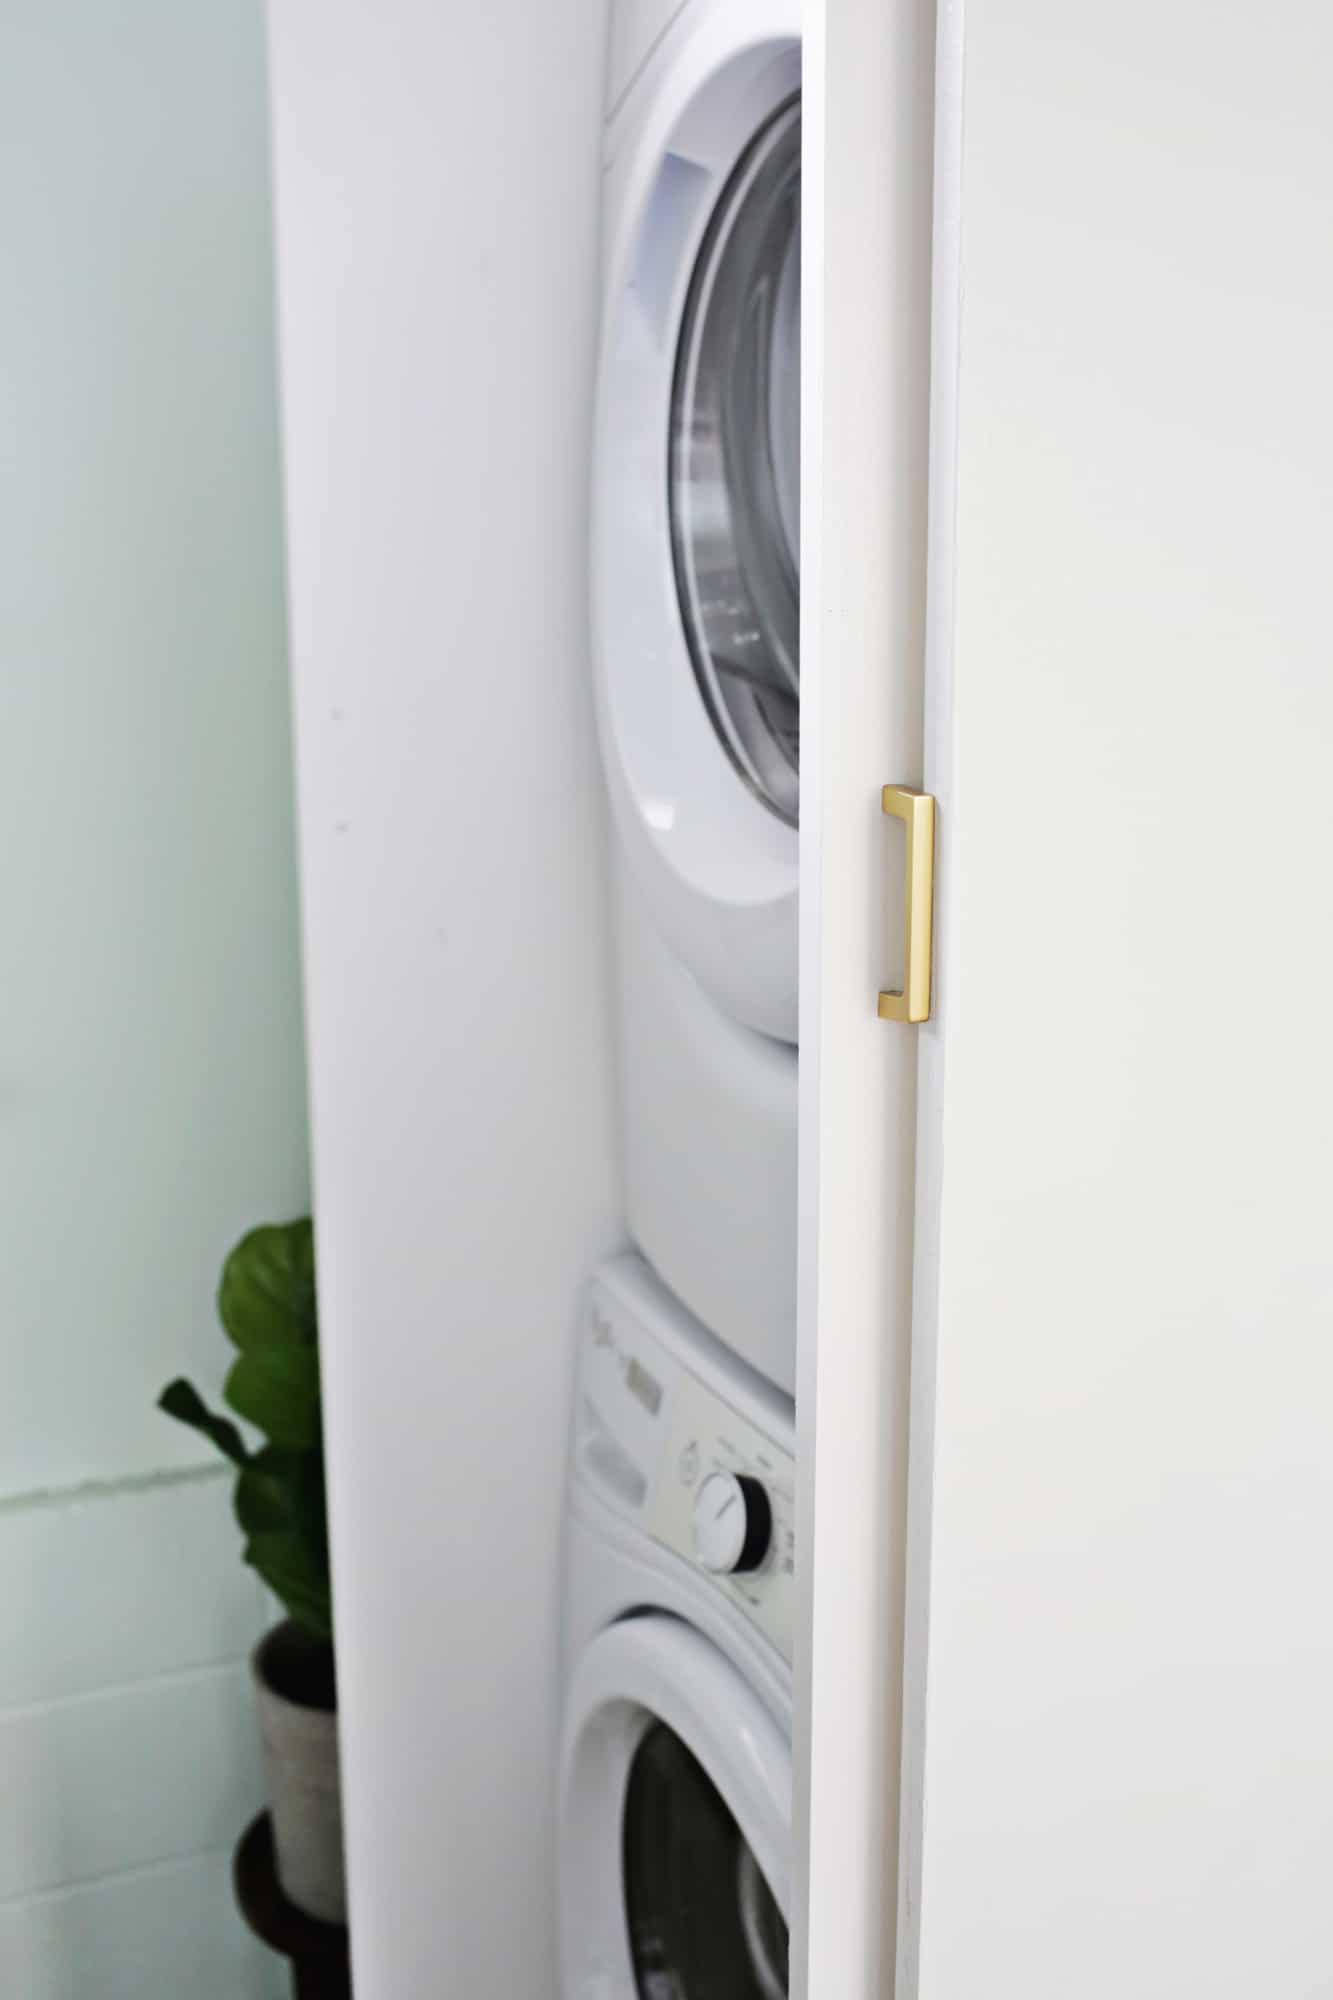
 Once the braces were in place, it was time to add a coat of paint, some handles, and those 4 little black stoppers you see at the front top of the cabinet (they come with the hardware and keep the doors in place as they roll and close). I added some hardware (these are a great option) close on each door so the doors do stick out a little bit when slid into the sides since they have to stop once they hit the hardware, but you want/need them to go all the way in, you can use hardware like this for a totally recessed option.
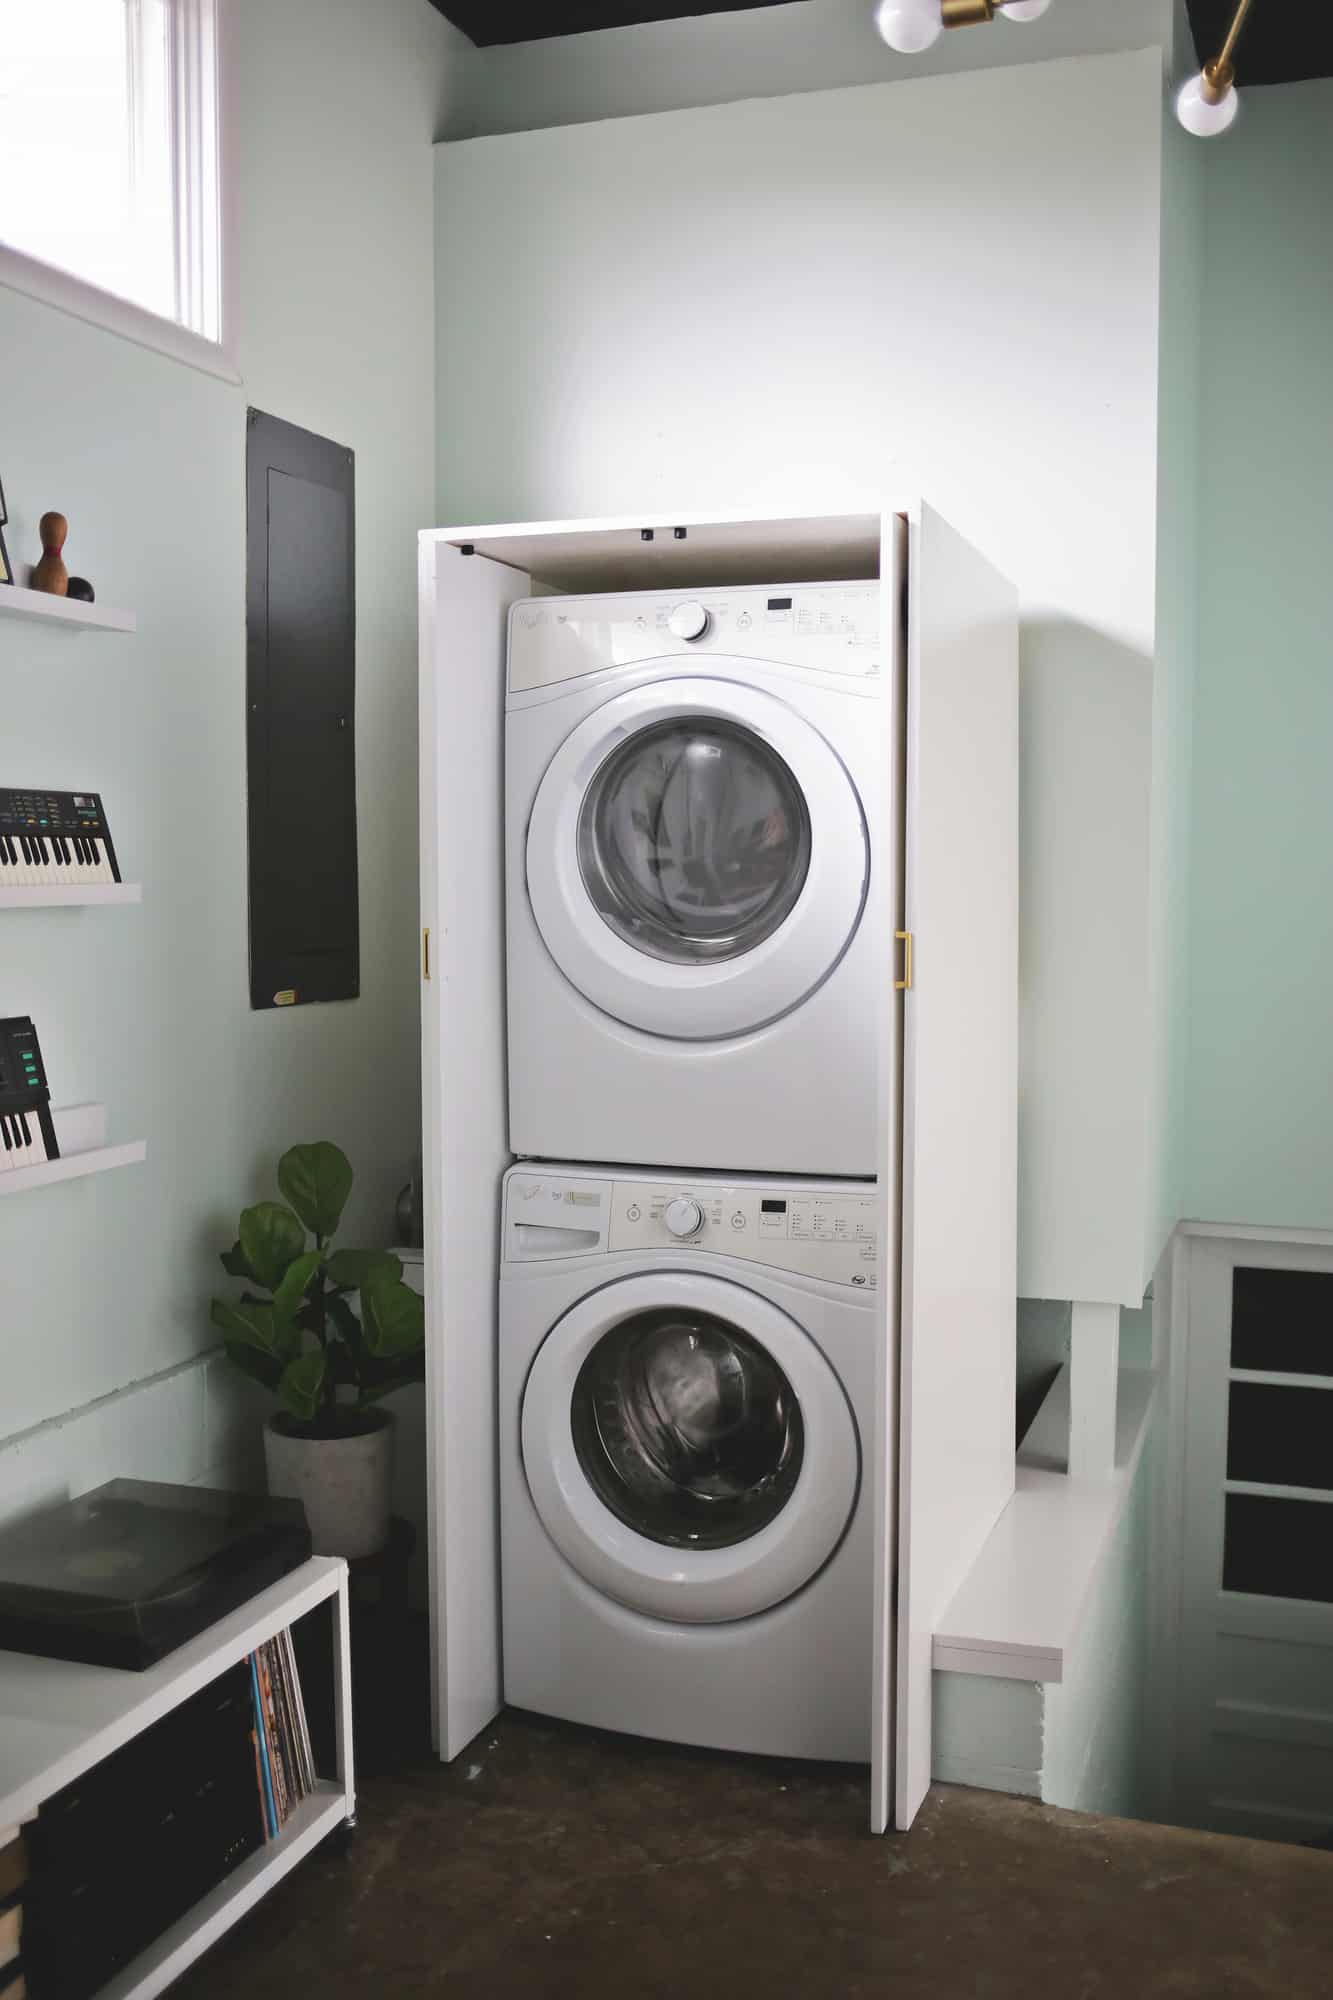
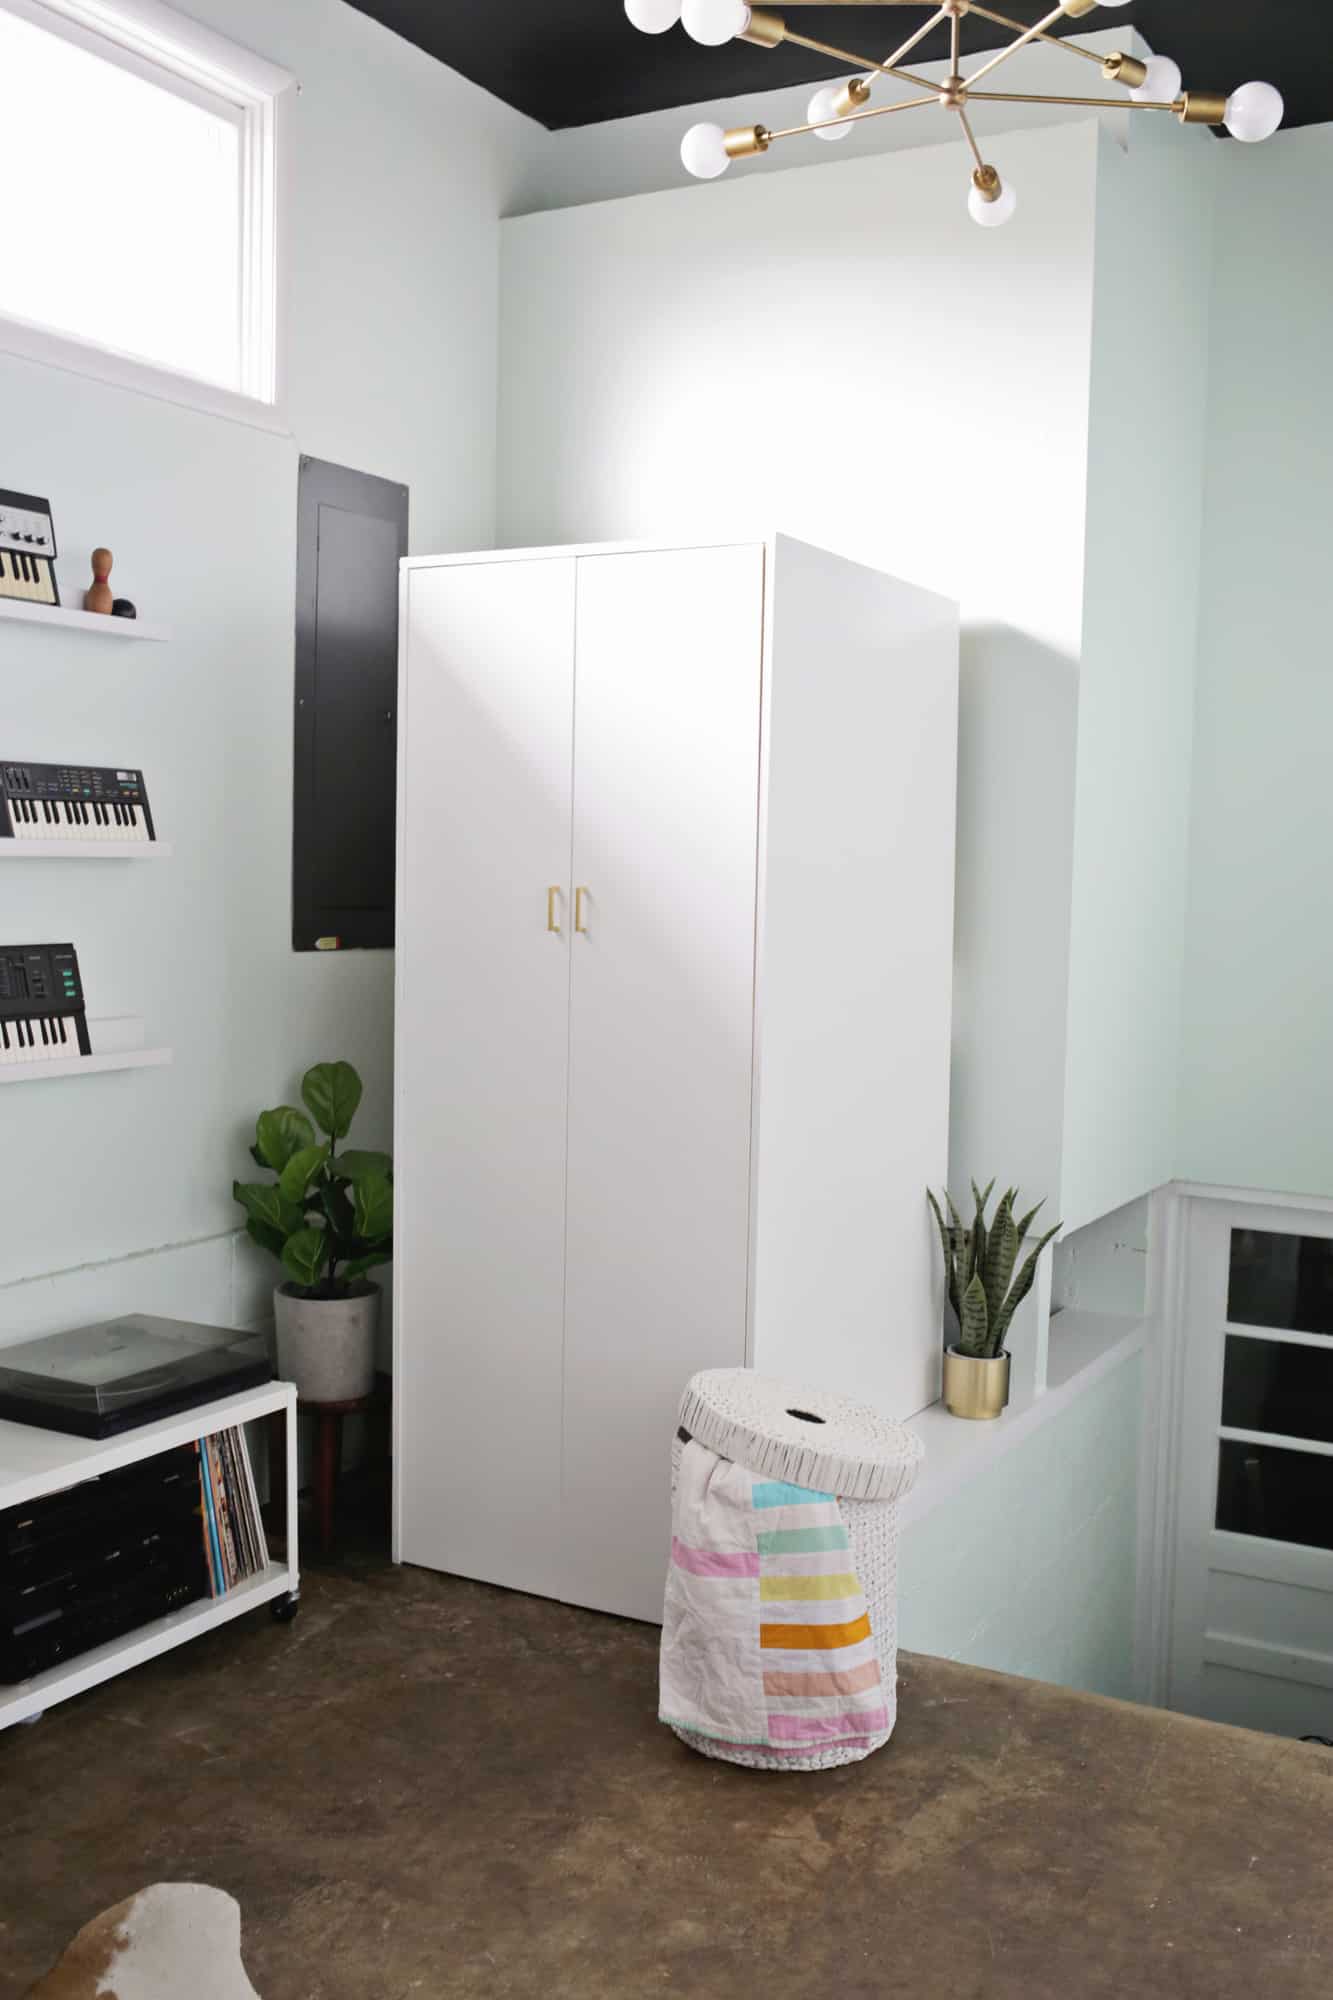
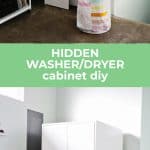
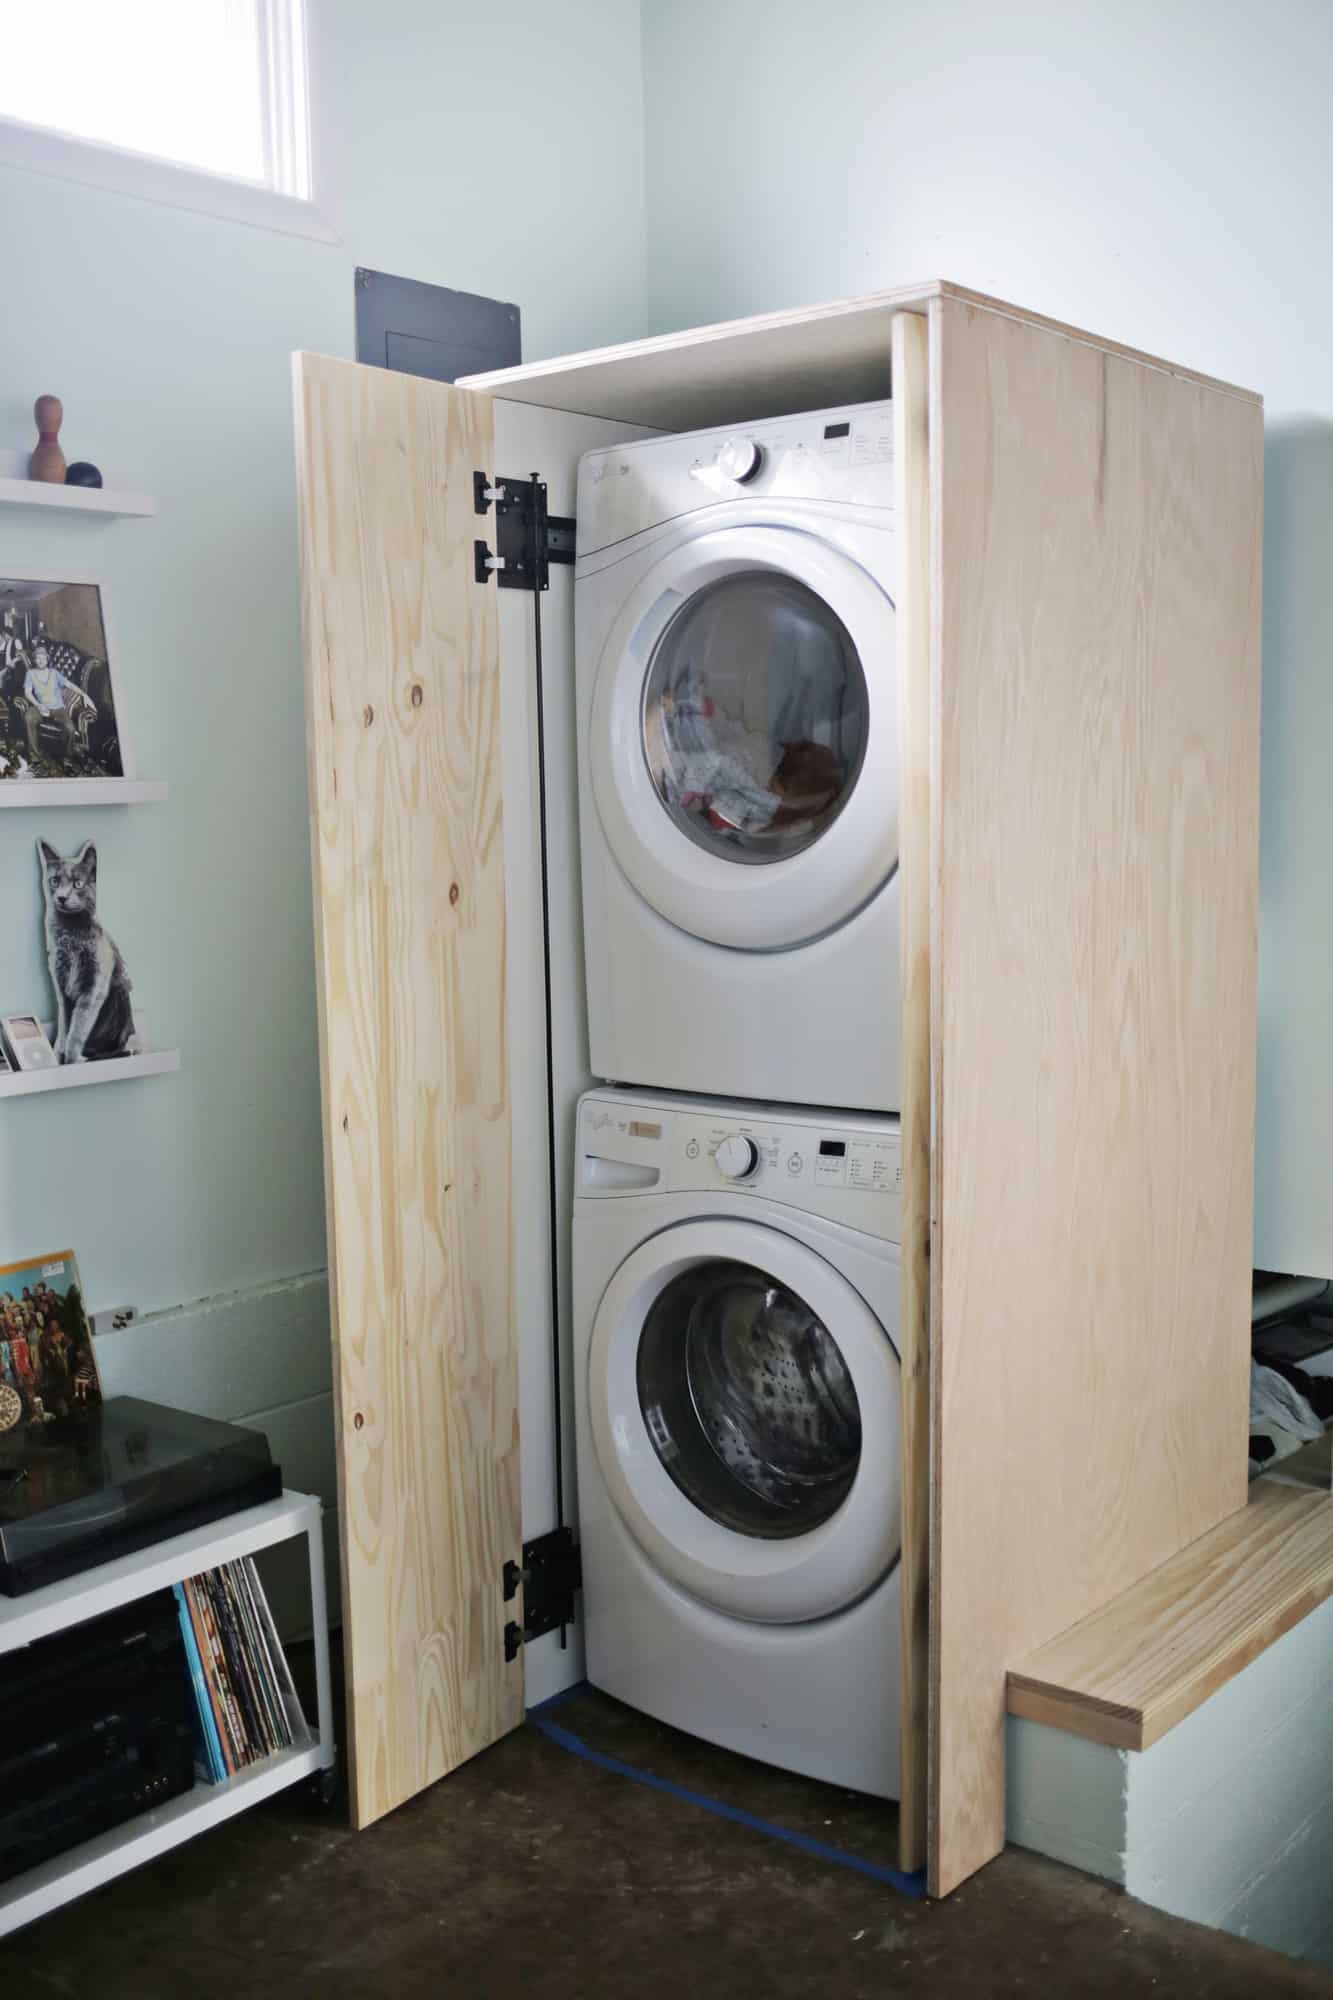
 Pretty cool, huh? You’ll notice that we did a cutout on the bottom of the right side of the cabinet so it could sit on that ledge and kind of blend into the trim, but that’s a bit of a unique need for our space so I would imagine most people would just do full panels on each side. I love that Todd can now go from “laundry area” to “music studio” mode in just a few seconds now without taking up hardly any room in that tiny area.
While I absolutely love the slide function of the doors, it is a bit pricey to add that hardware, so if you can spare the space to have the doors open quite a bit to keep the washer door open (which you should do whenever possible with front loading washers to help keep mold from growing) you can save money by using 3 or 4 of these small hinges on each door instead. You won’t have the slide function that keeps the doors out of the way when open, but it will look the same when the doors are closed so it’s a good budget option. If you have one I hope this helps solve a laundry problem for you as well! xo. Laura
14 Comments
Such a smart way to hide the washer and dryer! The cabinet looks so modern and chic too, haha! 🙂
Charmaine Ng | Architecture & Lifestyle Blog
http://charmainenyw.com
Did you happen to see that oven door while watching The Great British Baking Show? Just started watching that show last week and noticed oven doors that went in and thought that design was just brilliant!
YES I DID!! Haha!
Laura
Laura is brilliant! Love all her posts ????
Looks nice but honestly terrible idea once that machine fails. No room for a tech to work on or the user to do any routine maintenance ????
Not really actually! We have our machines sitting tight under a worktop table and we just had an issue with the washing machine not long ago. Didn’t take much effort to get it sorted. You could just pull them out to reach the wires etc. behind.
That’s why we attached the back braces with screws that can be easily removed and the cabinet can be pulled forward as I stated in the post for just that reason 🙂
Laura
This is so perfect for my laundry situation! I’ve been on the prowl for a DIY like this. Thanks so much for sharing this project with all of us!
This is a BRILLIANT idea! Such a great way to make the aesthetic of your bathroom/laundry room much more cohesive. Definitely bookmarking this for the future!
I have months searching for an idea like this!!! You can make money with this brilliant idea! I would definitely buy it!!! Thanks for posting…now let me tell my husband to get started asap! lol
My goodness this is GENIUS! I also live in a small home and have been thinking of doing something very similar. Glad to know that I wasn’t too far off track. Thank you for sharing!
http://www.jadoreledecor.com
I’ve been thinking about doing this very project but was wondering if you have had an issues with the doors rattling (in the slide back position) when the machines are running. Thanks!
THANK YOU! I too live in an old home and this is SO exactly what I need. I was thinking about something similar but actually seeing it work is brilliant! Great work.
I am looking for a cabinet to hide my washer & dryer – I am surprised that no one is selling 28″-30″ deep cabinets. The max I’ve seen is 24″ deep at IKEA. So I will have to DIY this. Lowes and Home Depot can cut the plywood, right? And do we need an electric drill?