 OK, let me start by saying that of all the spots in my house, this one is tied with my guest bathroom closet for driving me the most insane on a daily basis. However, after finishing this hall closet, having it be done so quickly, and being over the top thrilled with the results, I can’t wait to tackle that guest bathroom one next! I’ll show you what I did and how you can organize your messy closet in one afternoon too. Can you believe the before/after photo below?
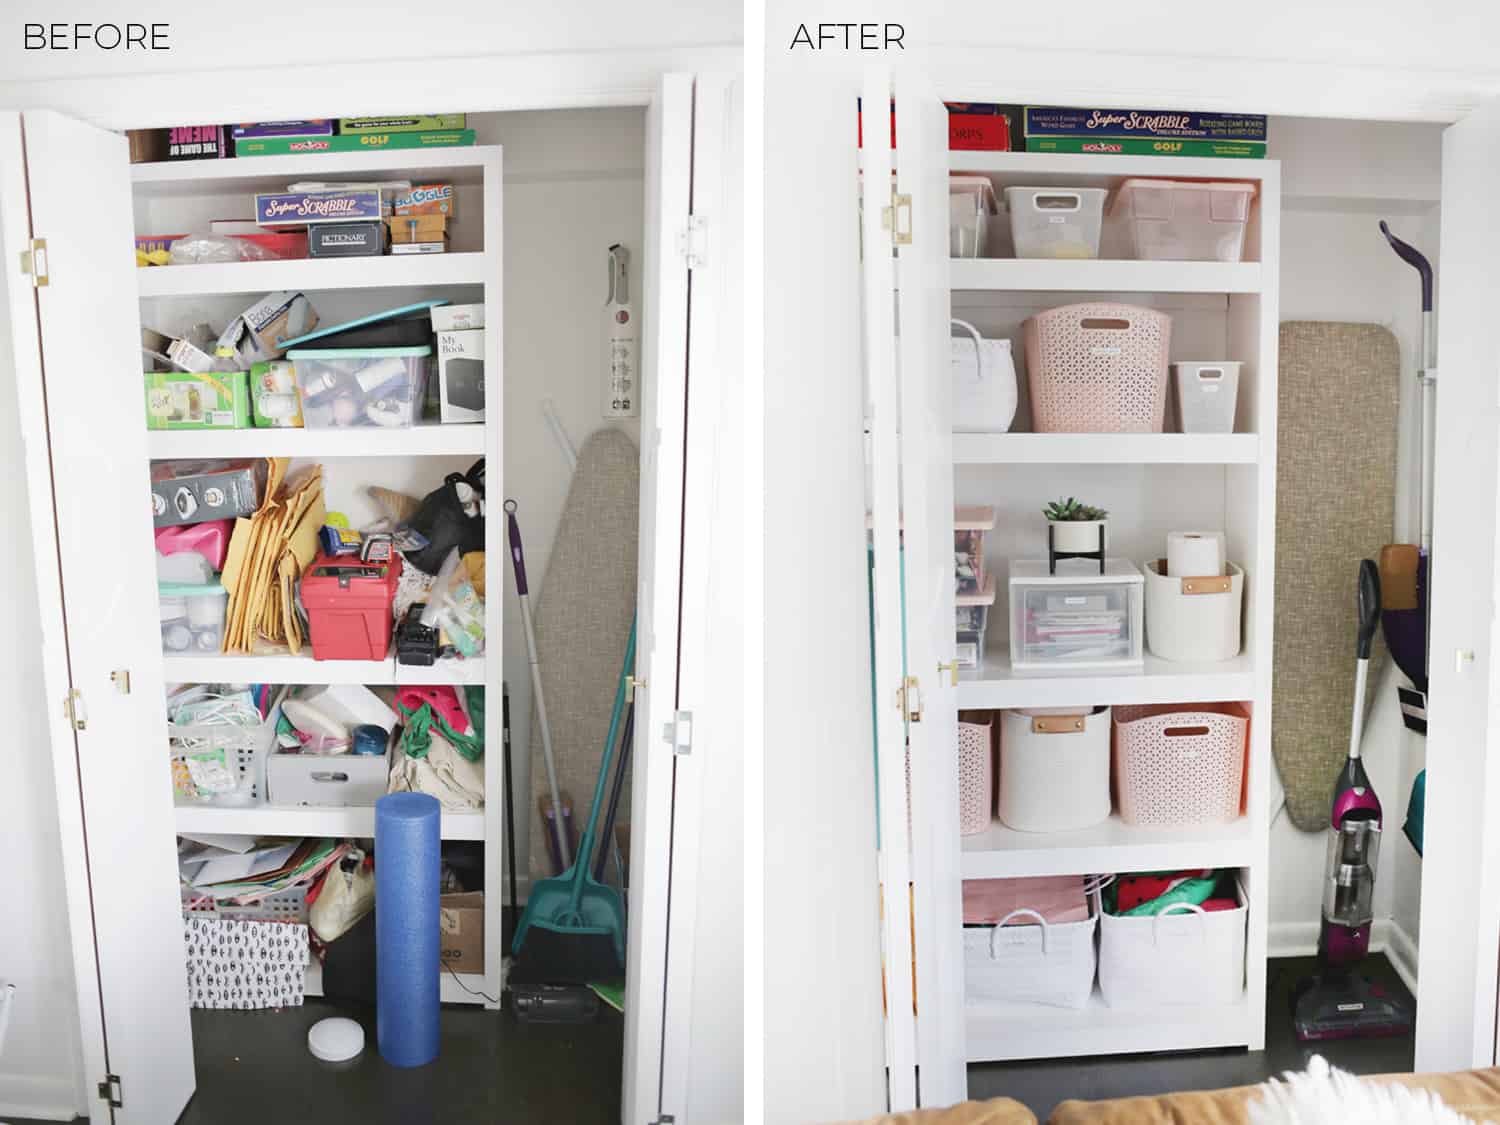 I would say that’s quite a bit better, wouldn’t you?!? I’ll show you what I did …
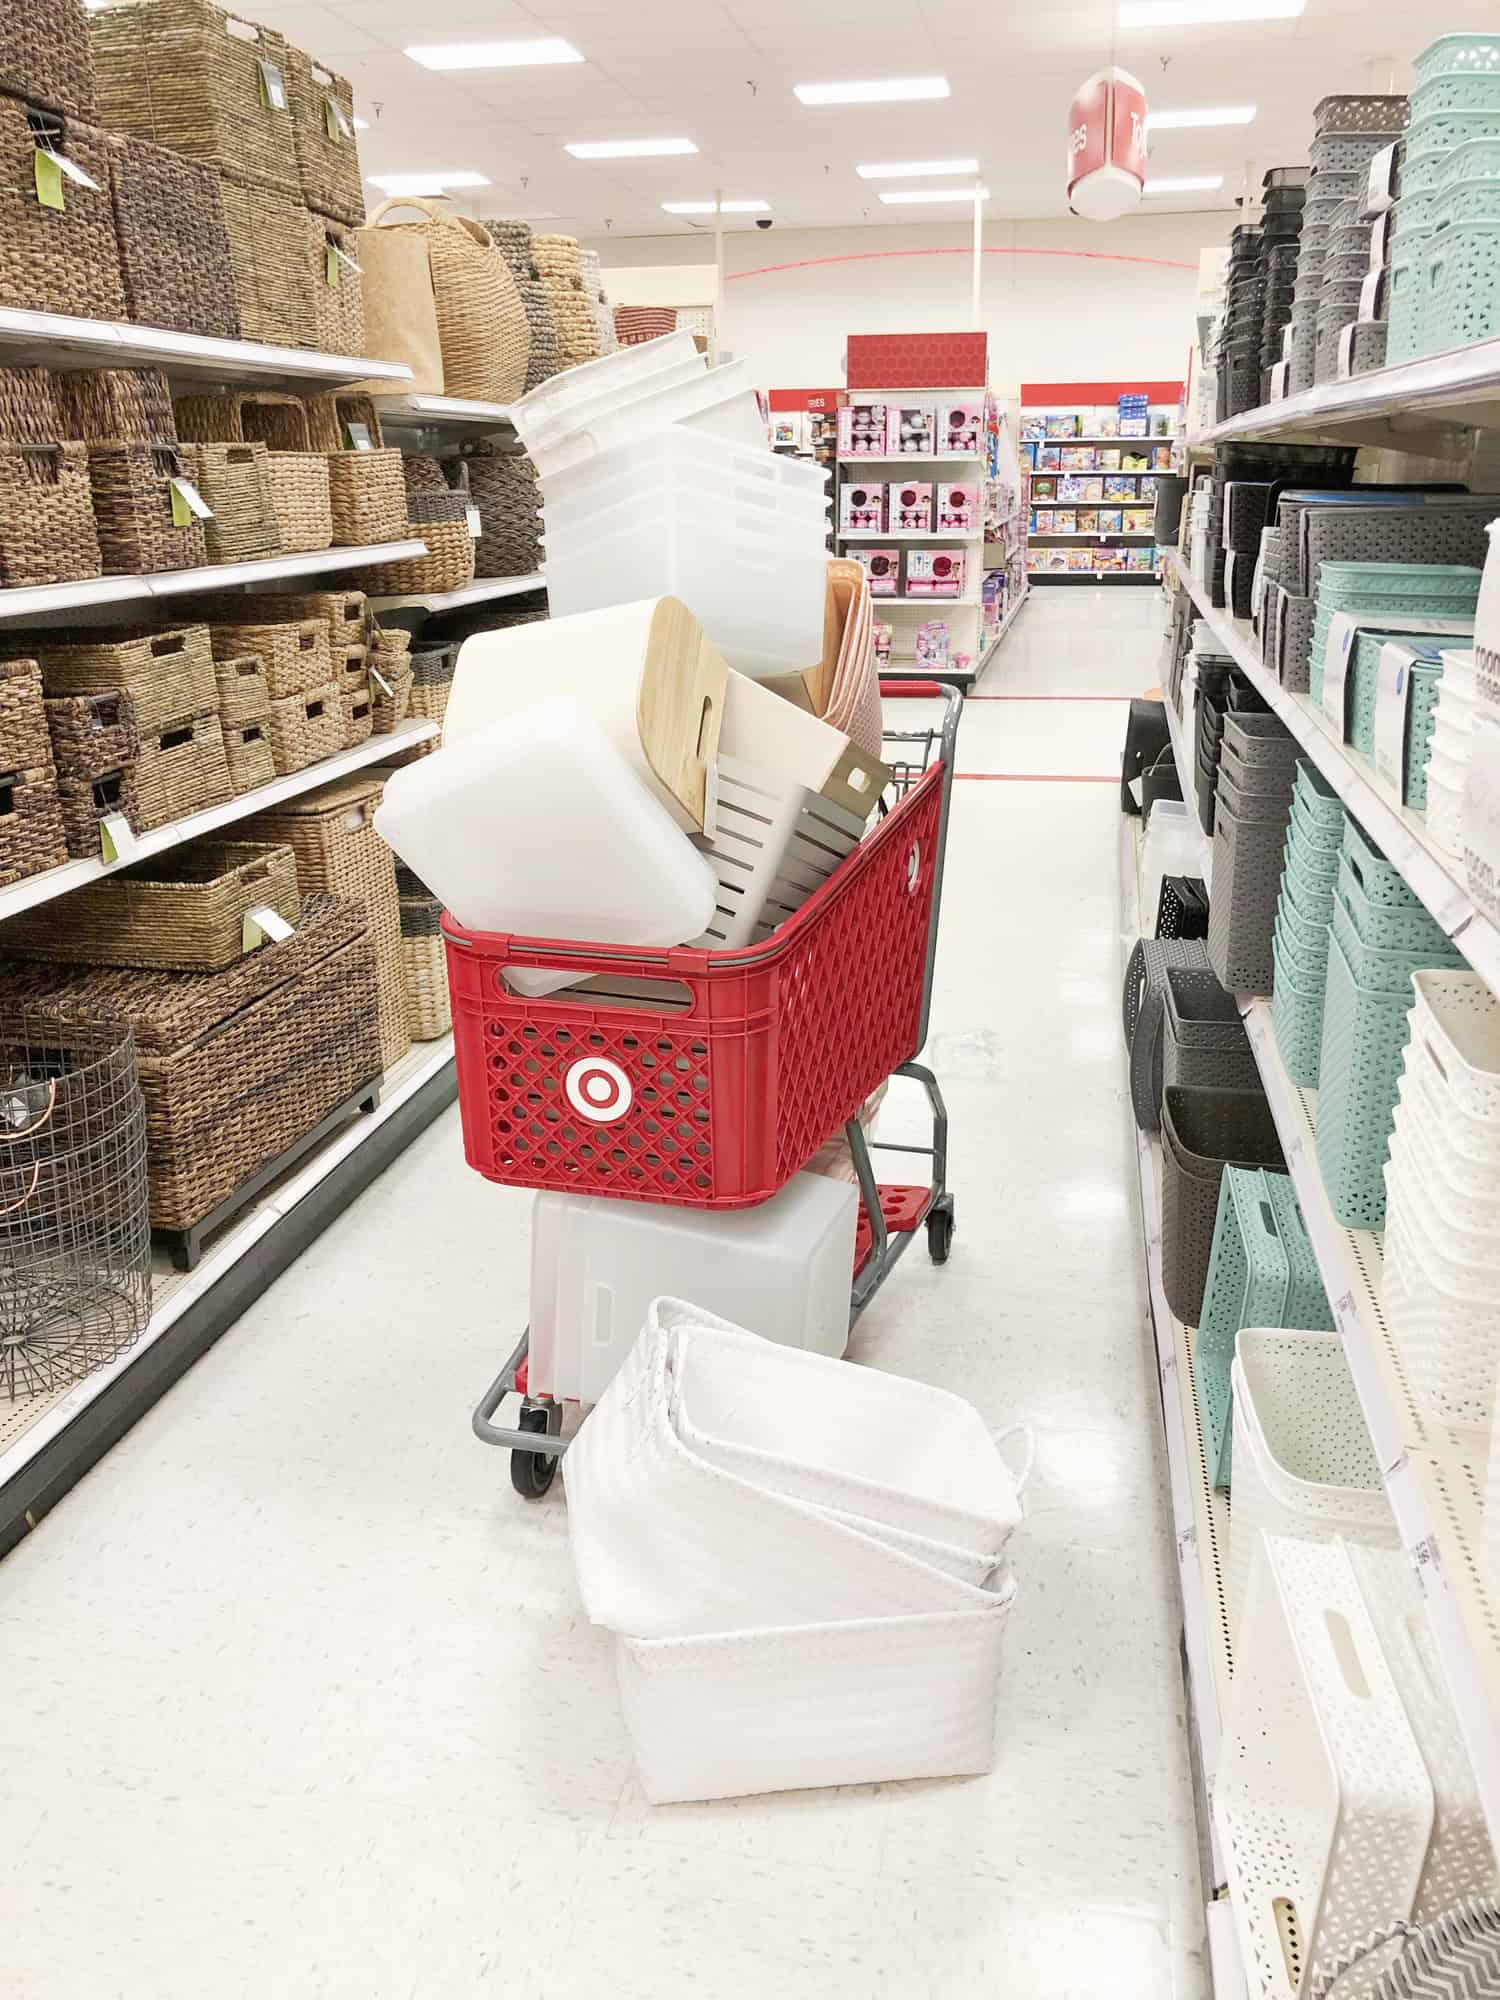 Get all the boxes (seriously): So this is the only part that may have to be separate from your “one afternoon” timespan, depending on where your home stores are located and how many stores you want to go to in order to look for options. I had to go over to Target a day or two before my closet organization time officially started for a few things, so I just got all the boxes then. Basically though, you’re just going to get literally every box you like in multiple sizes, and in multiple styles, to have a ton of options while you are organizing—just make sure to shop at a place where you can you return unneeded boxes back later! I like to have a mix of opaque boxes to hide the contents (it tends to make the overall look feel neater) and some clear boxes so I can quickly scan what’s inside without even opening the box. So I got a lot of different sizes and shapes for both categories. As you can see from the photo above, it got a little insane on the way to the checkout counter (and that’s not even all I brought home!), but it was infinitely worth it to have so many options as I was organizing.
Don’t be afraid to purge: OK, now you’ve got your box options and it’s time to decide what has to go! Since you are transferring all your contents to new boxes, getting rid of things is easy if you can have trash/donate bags next to you and make a decision about every item as you go through the boxes. Go with your gut on what to keep and try to move quickly—this will take forever if you take 20 minutes to decide on each item. The purging stage also means just getting rid of “trash” that has built up in a space like empty boxes from products, expired vitamins, duplicate items, broken items, etc. For example, we had eight decks of playing cards, so I had my husband pick a few favorites and then we donated the rest.
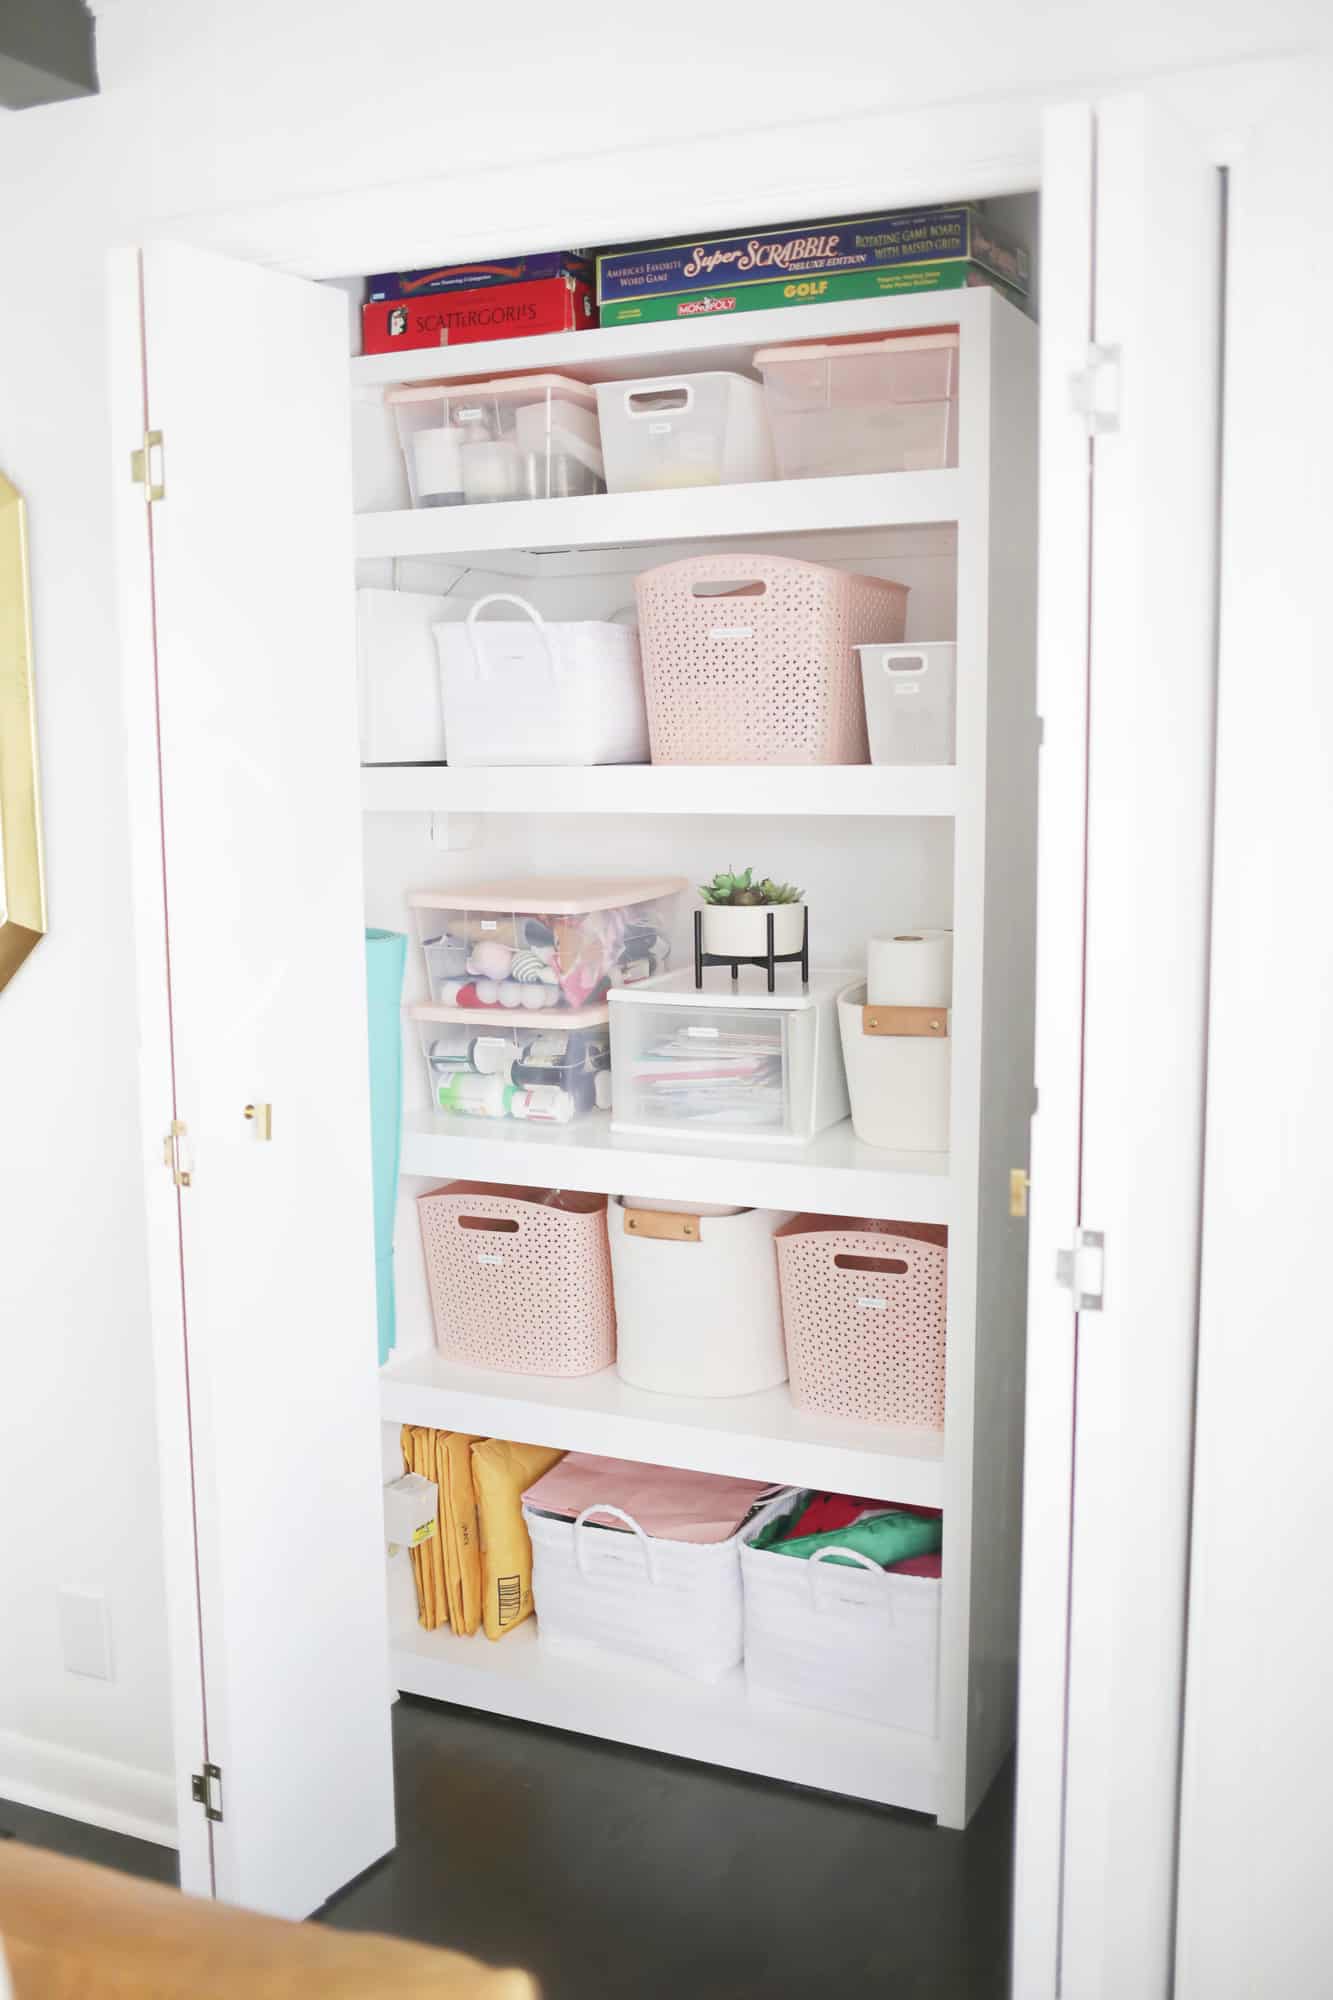
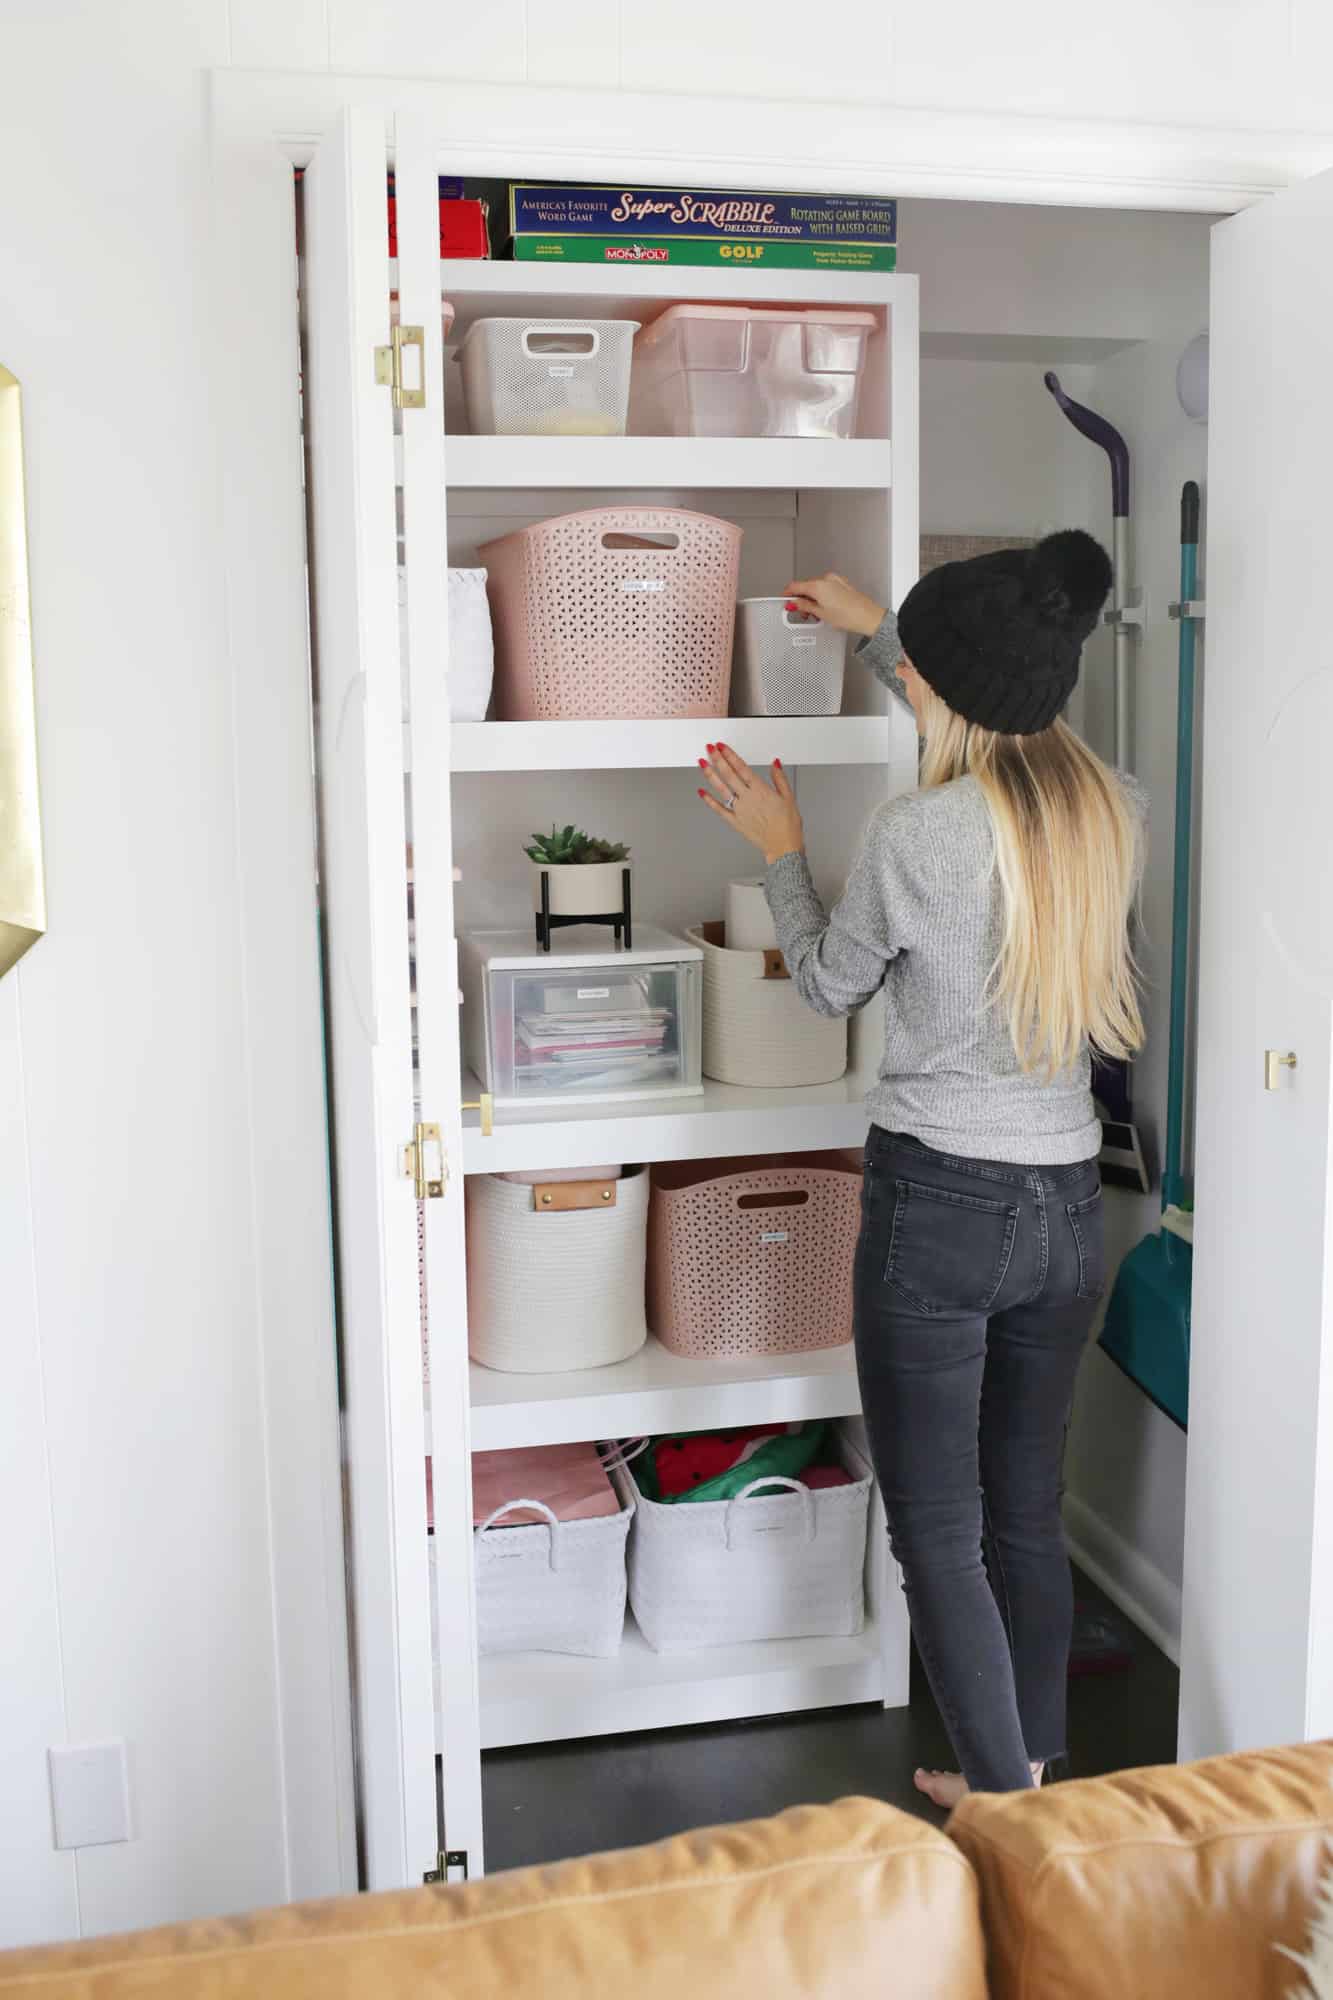
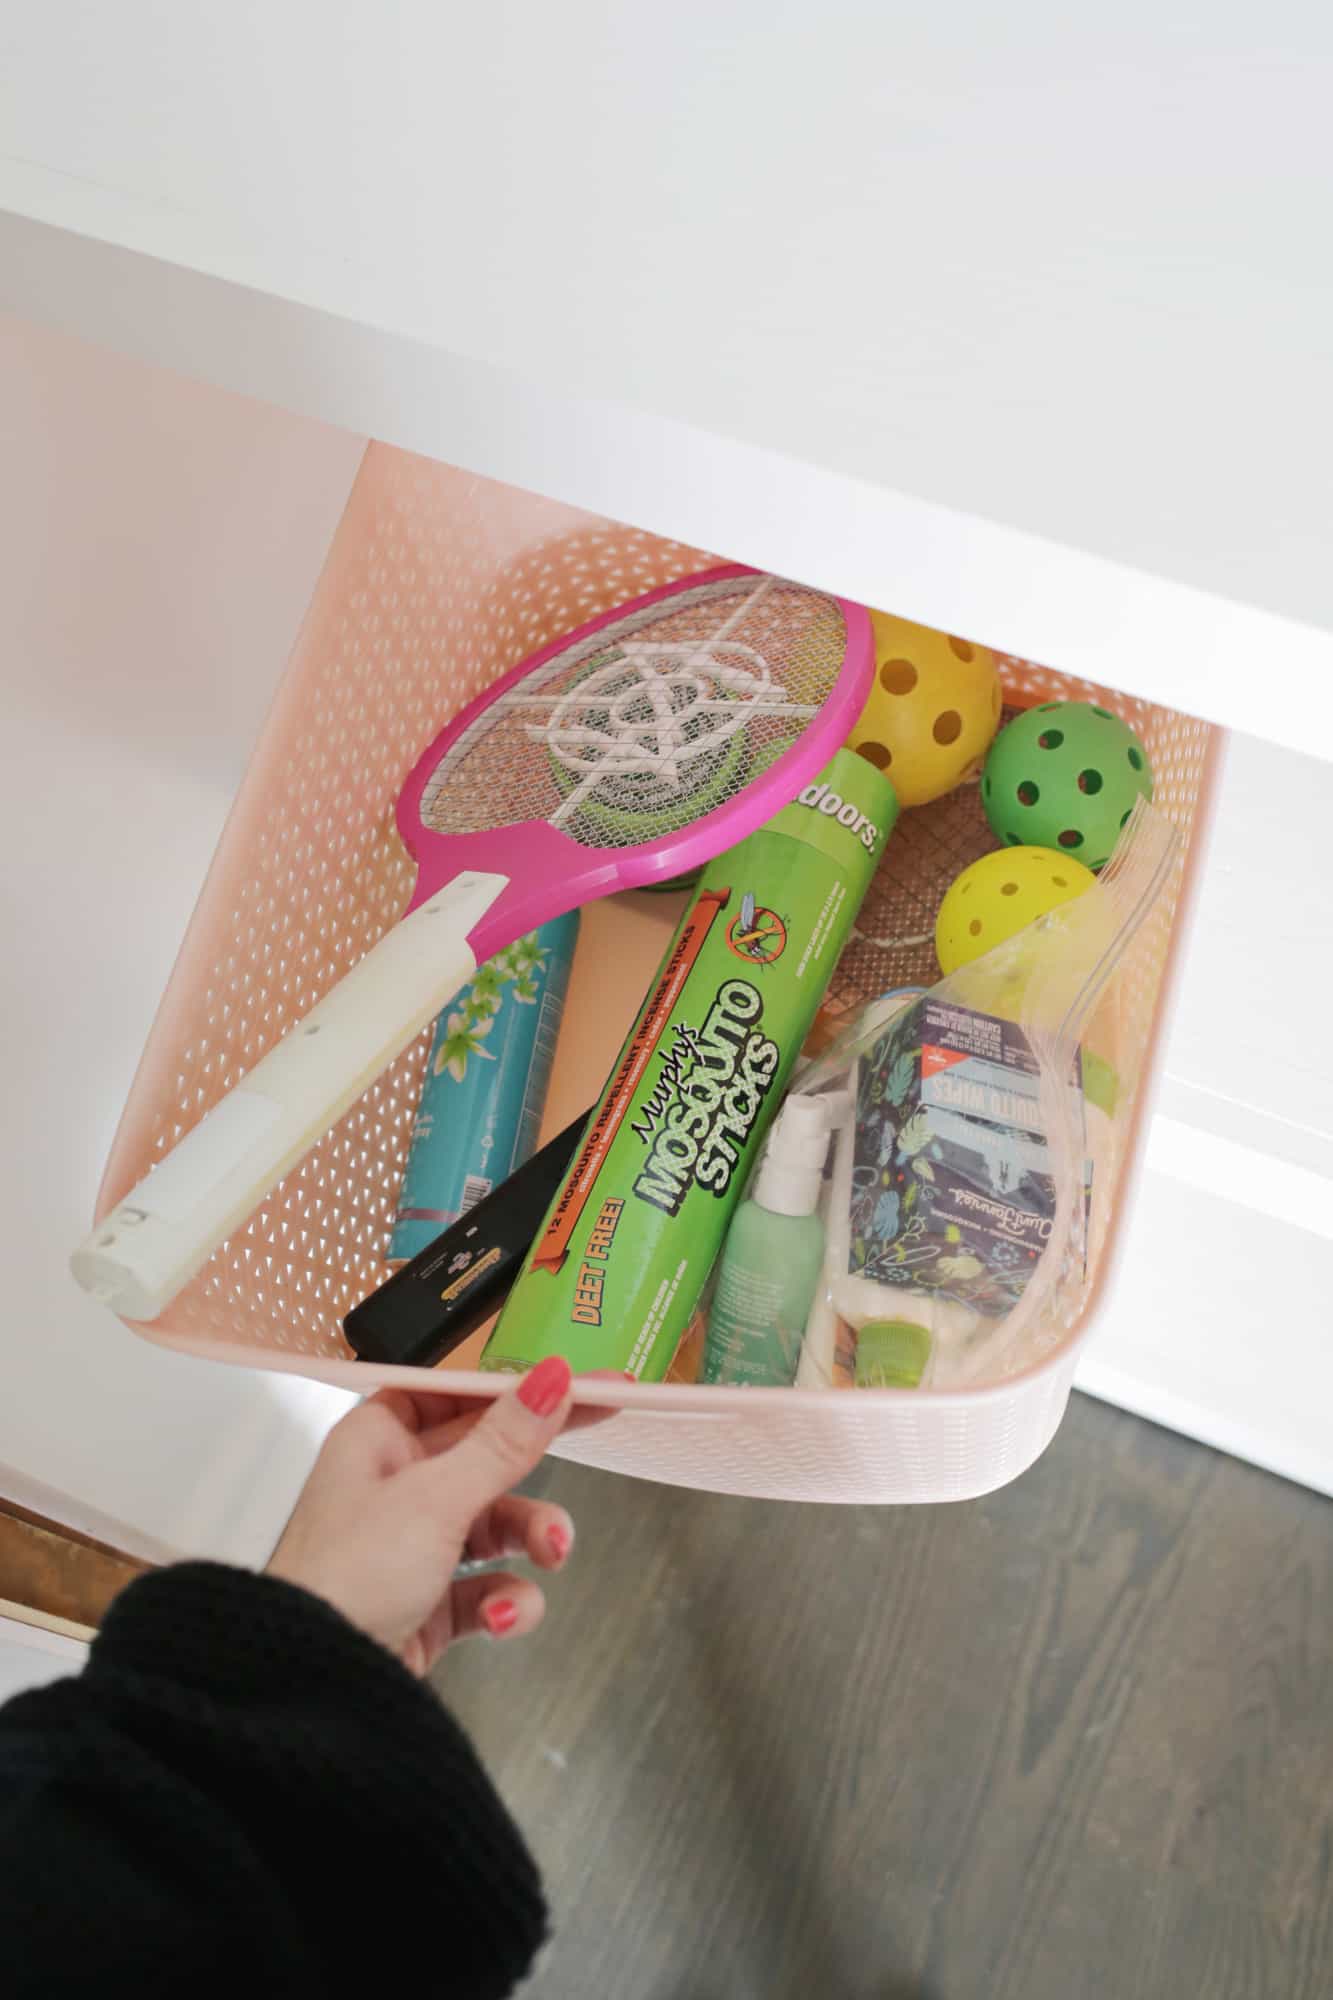 Put like items together in appropriate sized boxes: Every person’s categories will be different depending on their needs and what they store in their hall closet, but group your main categories together and sort through your mountain of storage containers to find the right size bin for that category. If you have a very large category, try equally dividing it into several matching boxes or break down the category into a smaller subset to separate them (like instead of two “winter clothes” bins, maybe do “coats” and “gloves/hats/scarves” instead). Our larger board games didn’t really need a box to go into since they could be stacked, but I used a small bin for the loose game items like small card games to keep them all together.
Decide if items can be stored elsewhere: I had several items that I did want to keep, but decided that this closet wasn’t the right area for them. So I made a pile of things to move down to the basement or outside to the shed to store there.
Decide what goes up high or down low: Heavy boxes or bins that you use a lot should be down low with less used or lighter items up high. That way, if you workout often you don’t have to struggle to get your bin of hand weights down from the top shelf everyday—just put them down lower and make it easier on yourself. Now that we have a toddler we still love board games, but we don’t get to do game nights nearly as much as we used to, so I put those all up on the top shelf where I’d have to go get a chair to get them down as needed.
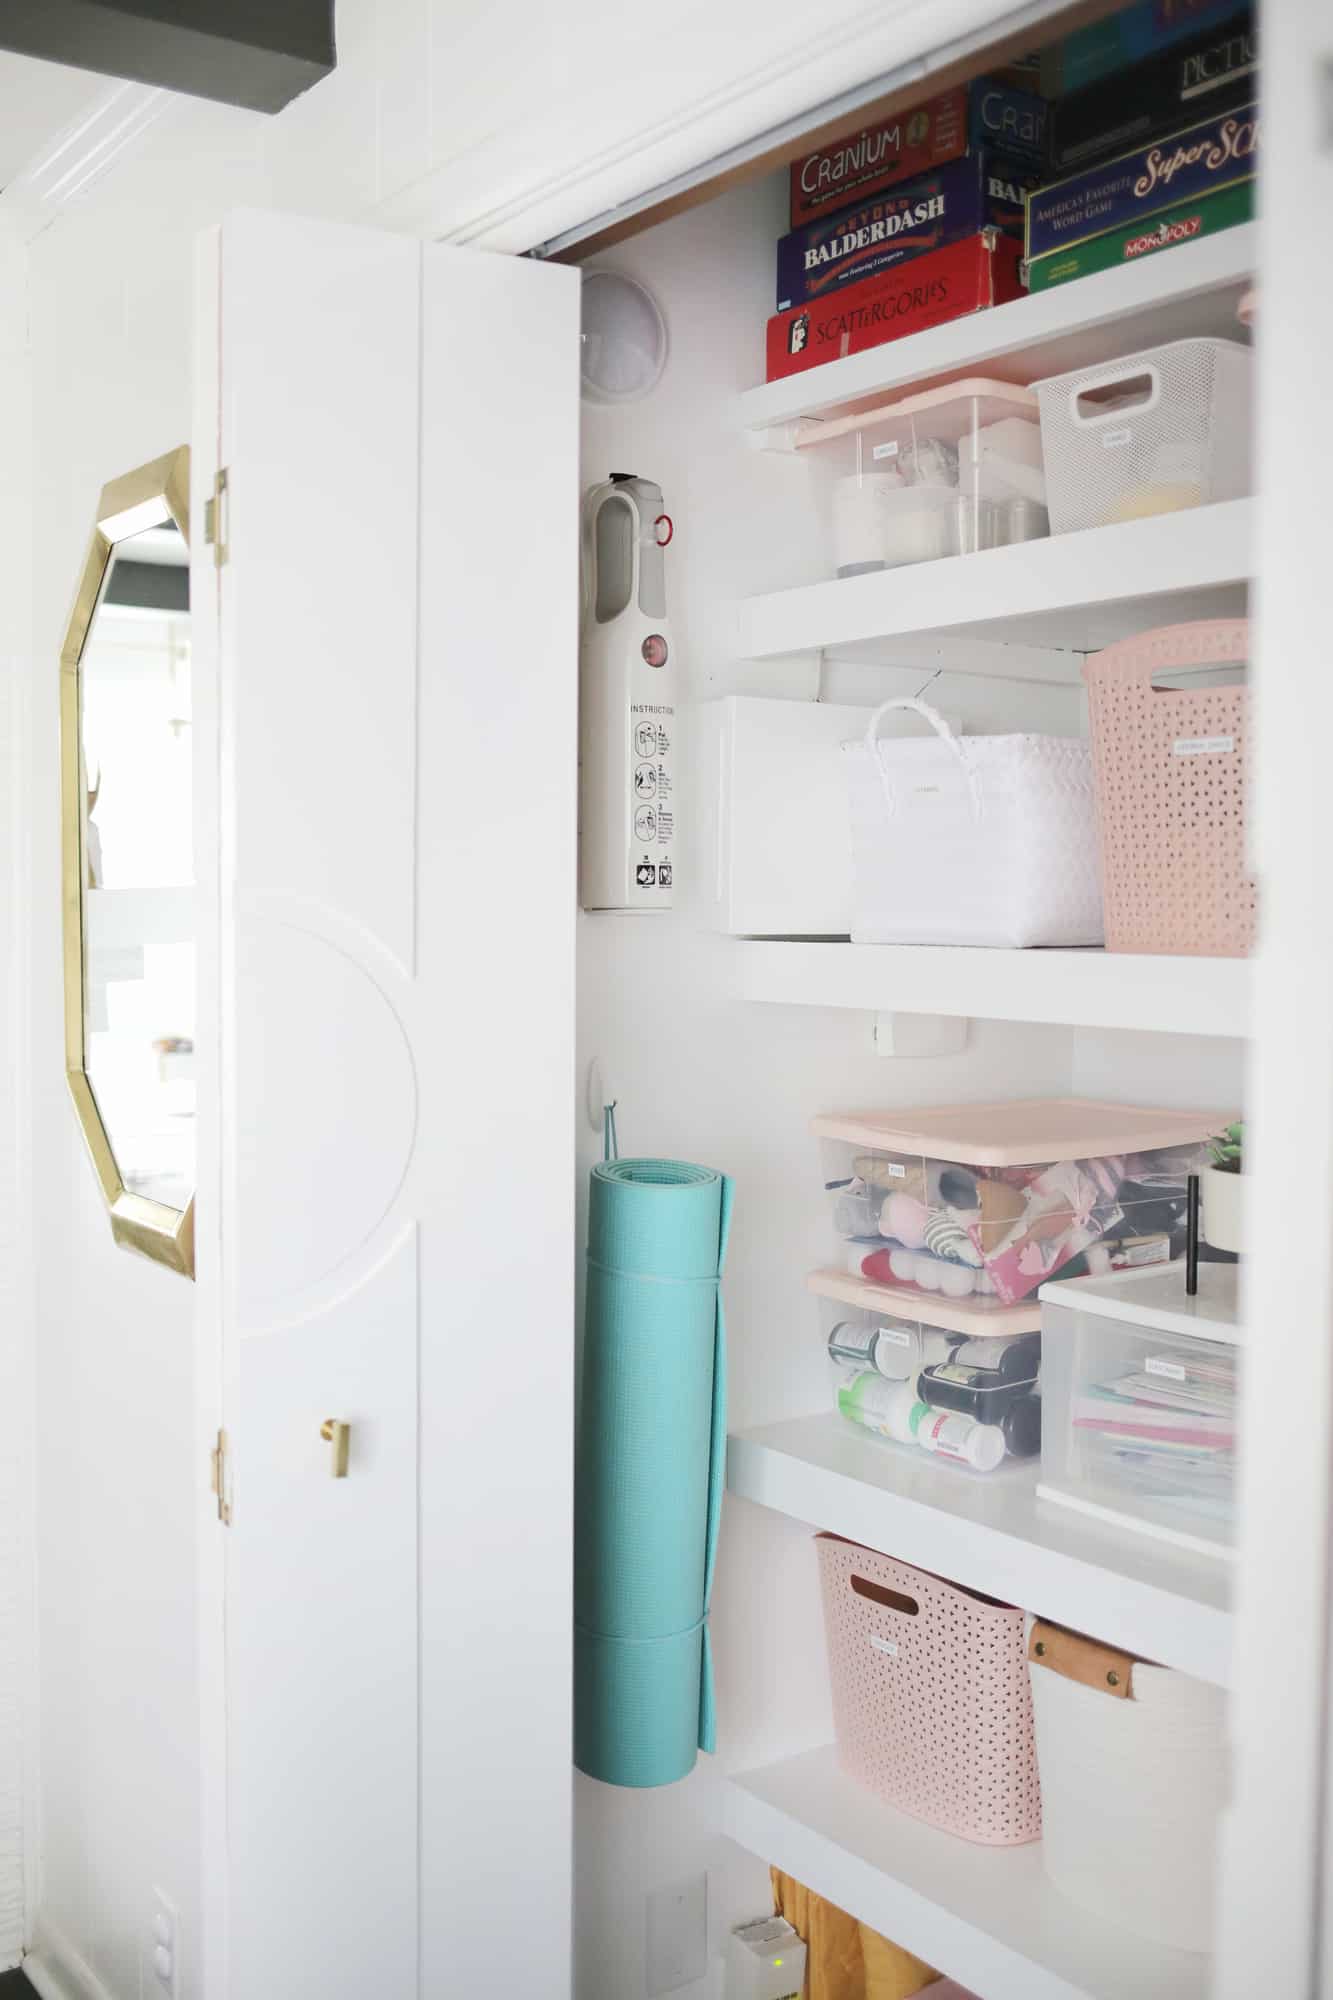
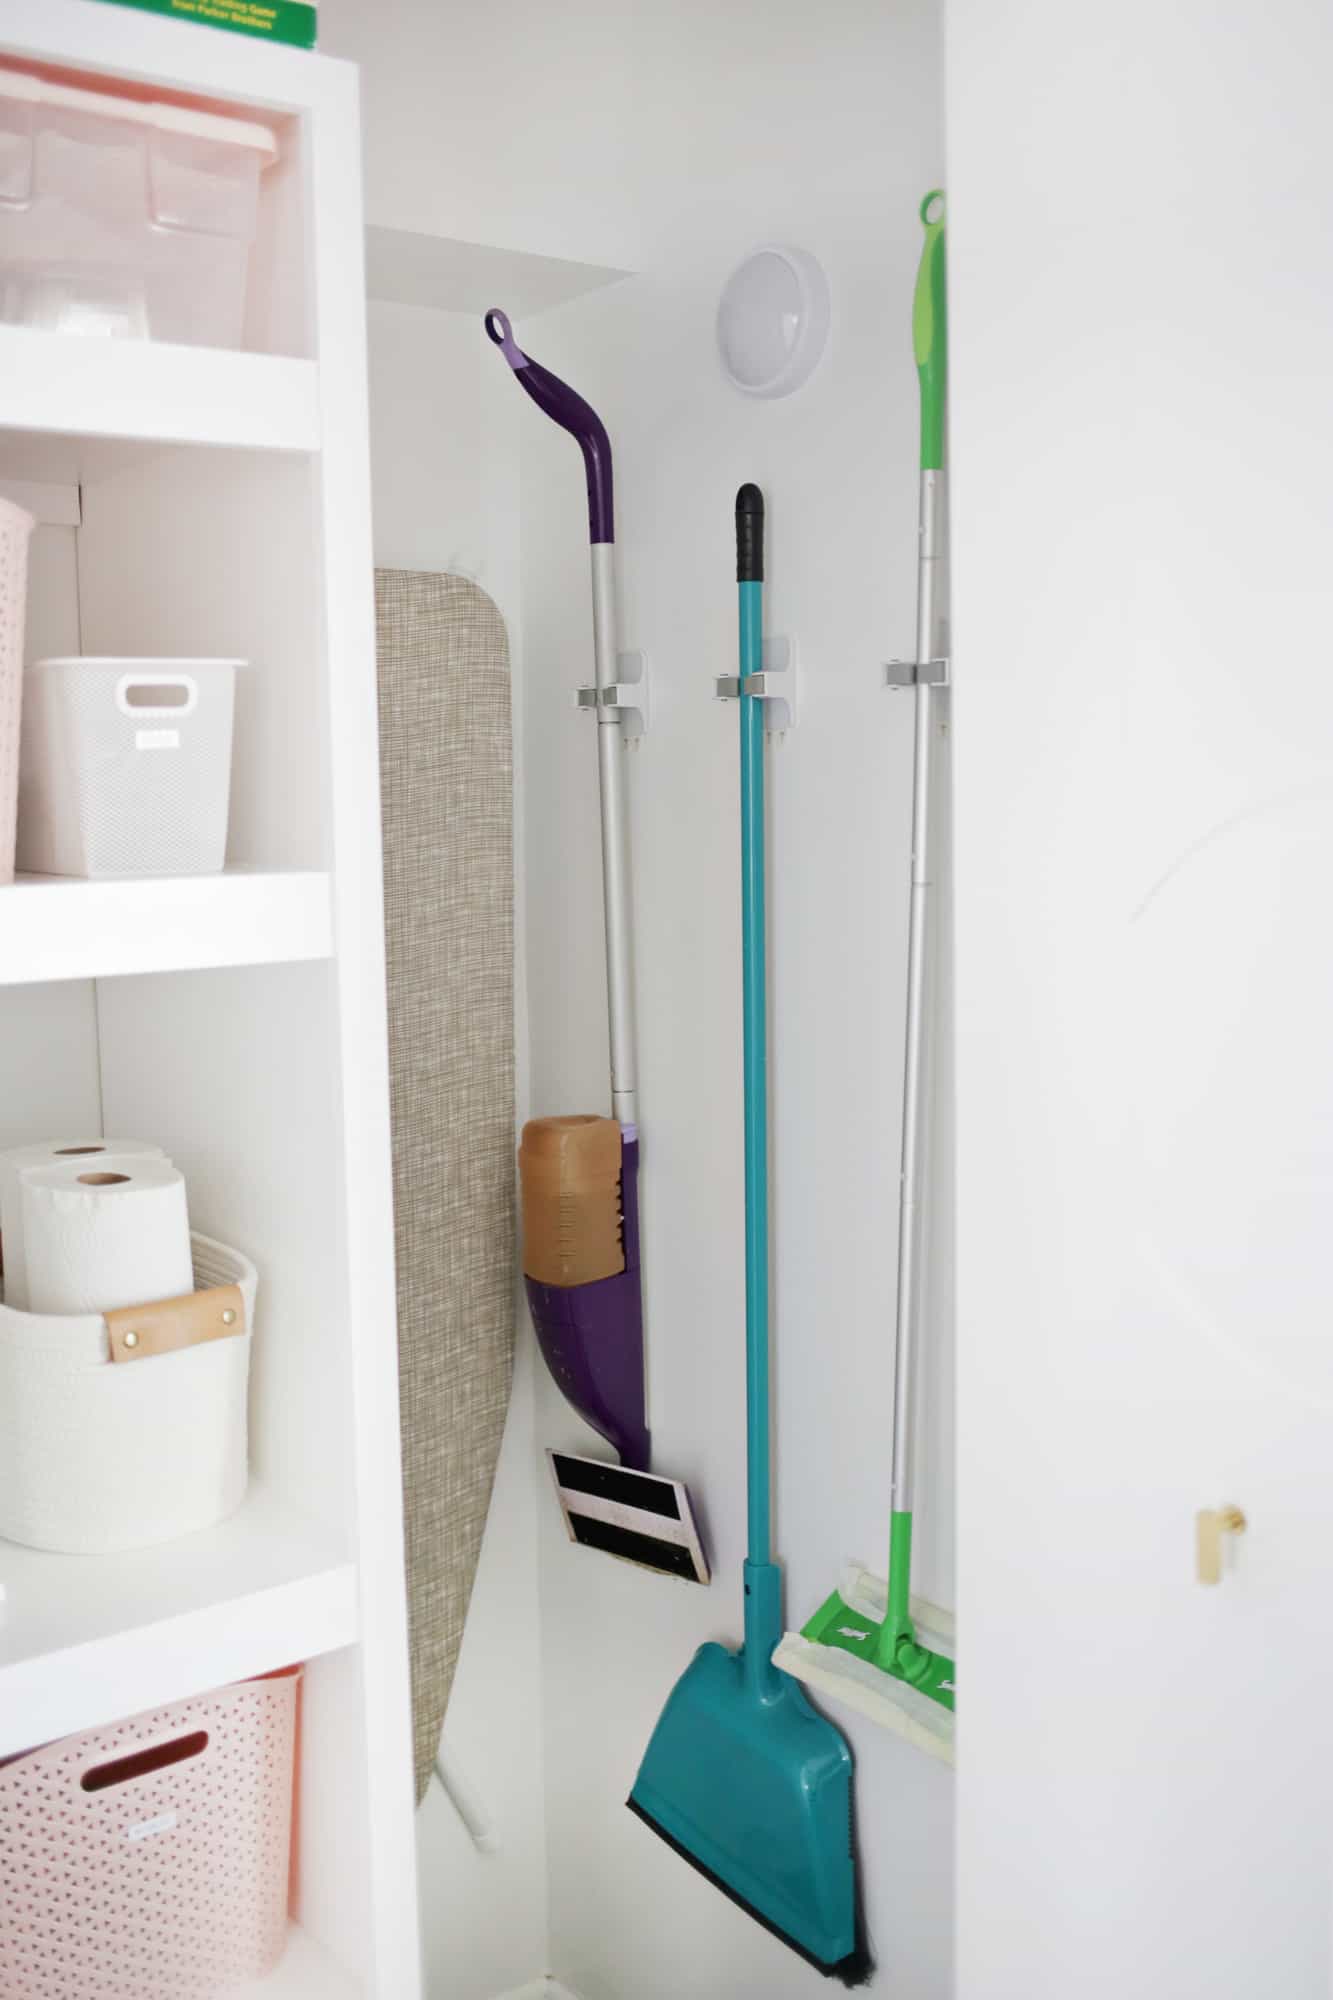 Get items up off the floor: I had a lot of cleaning supplies all tangled together on the floor so I was thrilled to find that these broom hangers and ironing board hanger existed—genius! And anything that uses Command strips (like the hanger I used for my yoga mat) instead of screws make installation go a lot faster as well. Once I hung all the items I kept (I had a few duplicate floor-dusting items), there was the perfect spot for our vacuum charger to sit on the floor for easy access. I also drilled a small hole into the back of our shelves so the cord to the charger could go around the back and down the wall rather than down the front of the shelving—looks so much neater that way!
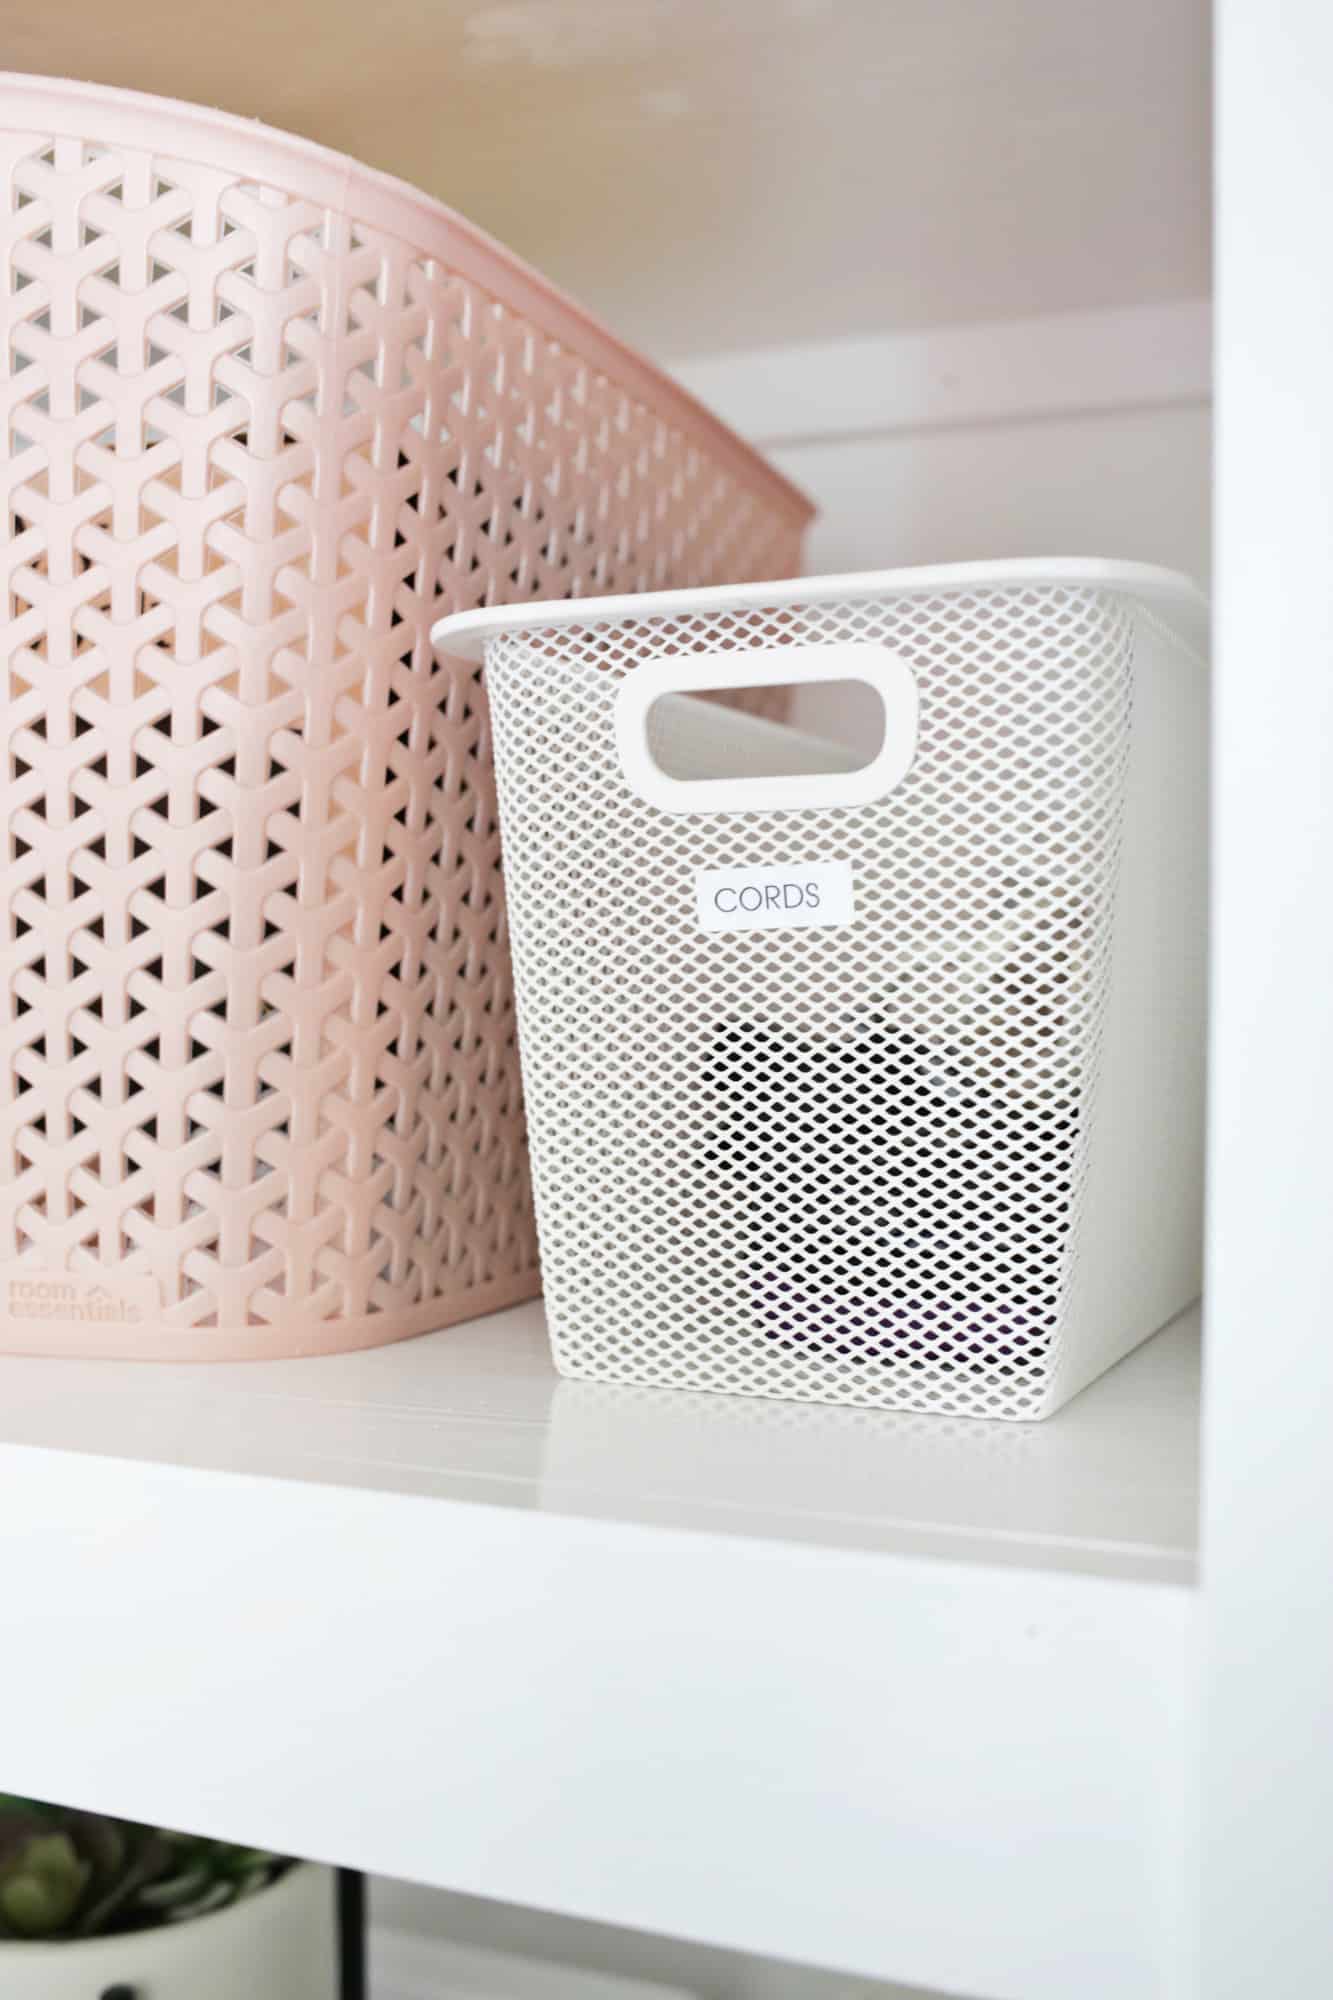
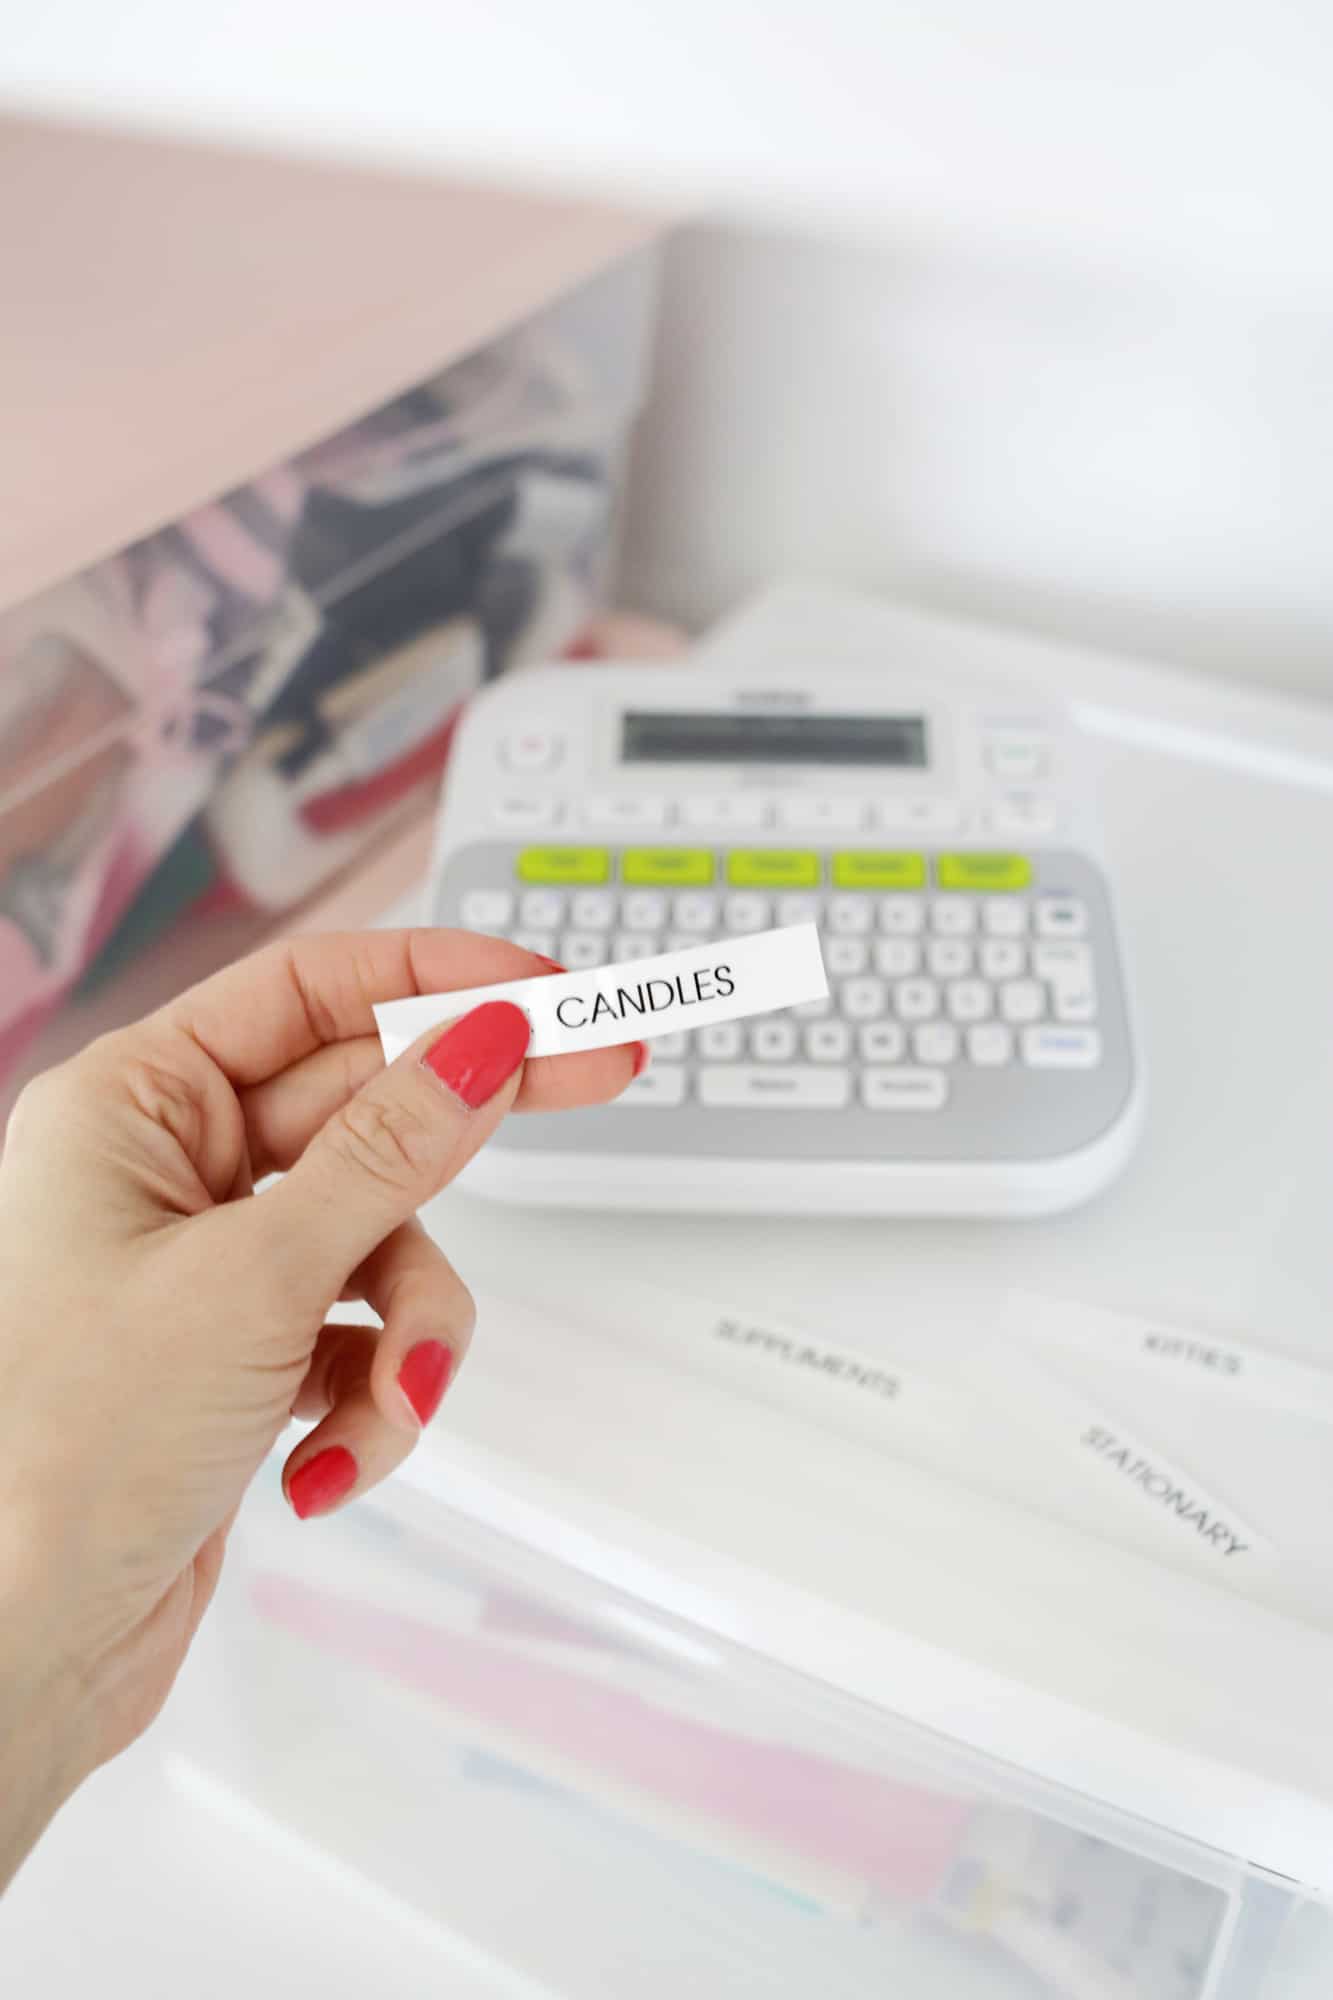 Use labels to find items quickly: I love this electronic labeler for anything that I want to label in my house (it’s great for all the DIY oils and cleaning products I make so I can label my bottles), so I could make all the labels for my boxes in just a few minutes. You don’t have to use labels, but even though you may know what’s in every box, not every person in your house will (especially if you switched up some categories in the organization process), so it’s best to make labels so everyone is on the same page with what goes where.
Leave space to grow and one empty box: Try and reduce and organize down to the point where you have at least one empty box in your closet and several bins/boxes that are not totally full. Being at 100% capacity means that you’ll immediate be overflowing by adding in just a few items, so give yourself some breathing room so you can go much longer periods before needing to re-organize and declutter again. Just seeing that empty box and half filled bins gives me such a sense of breathing room!
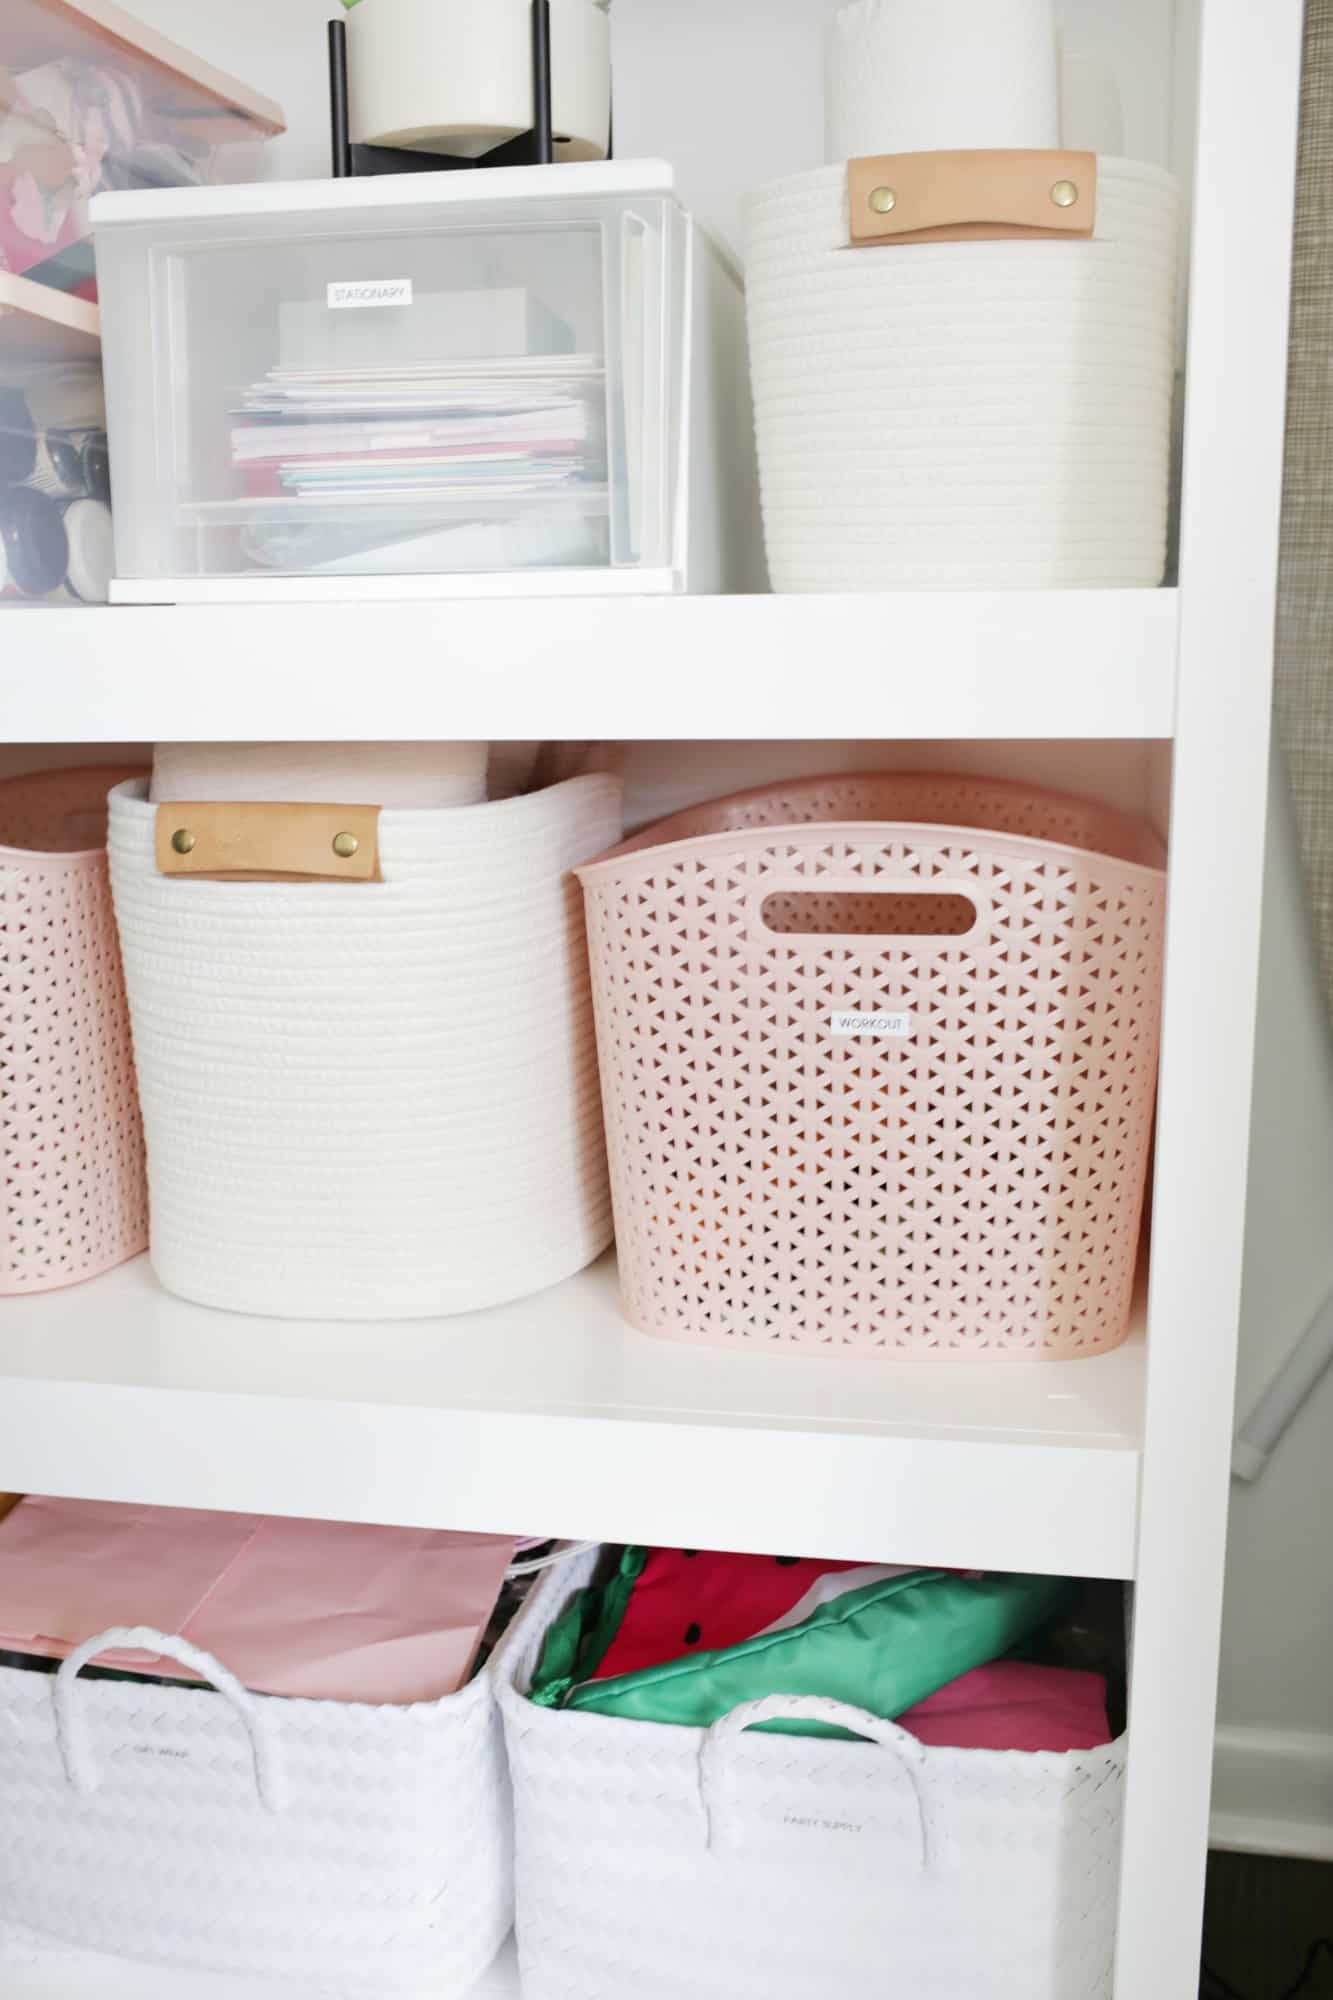

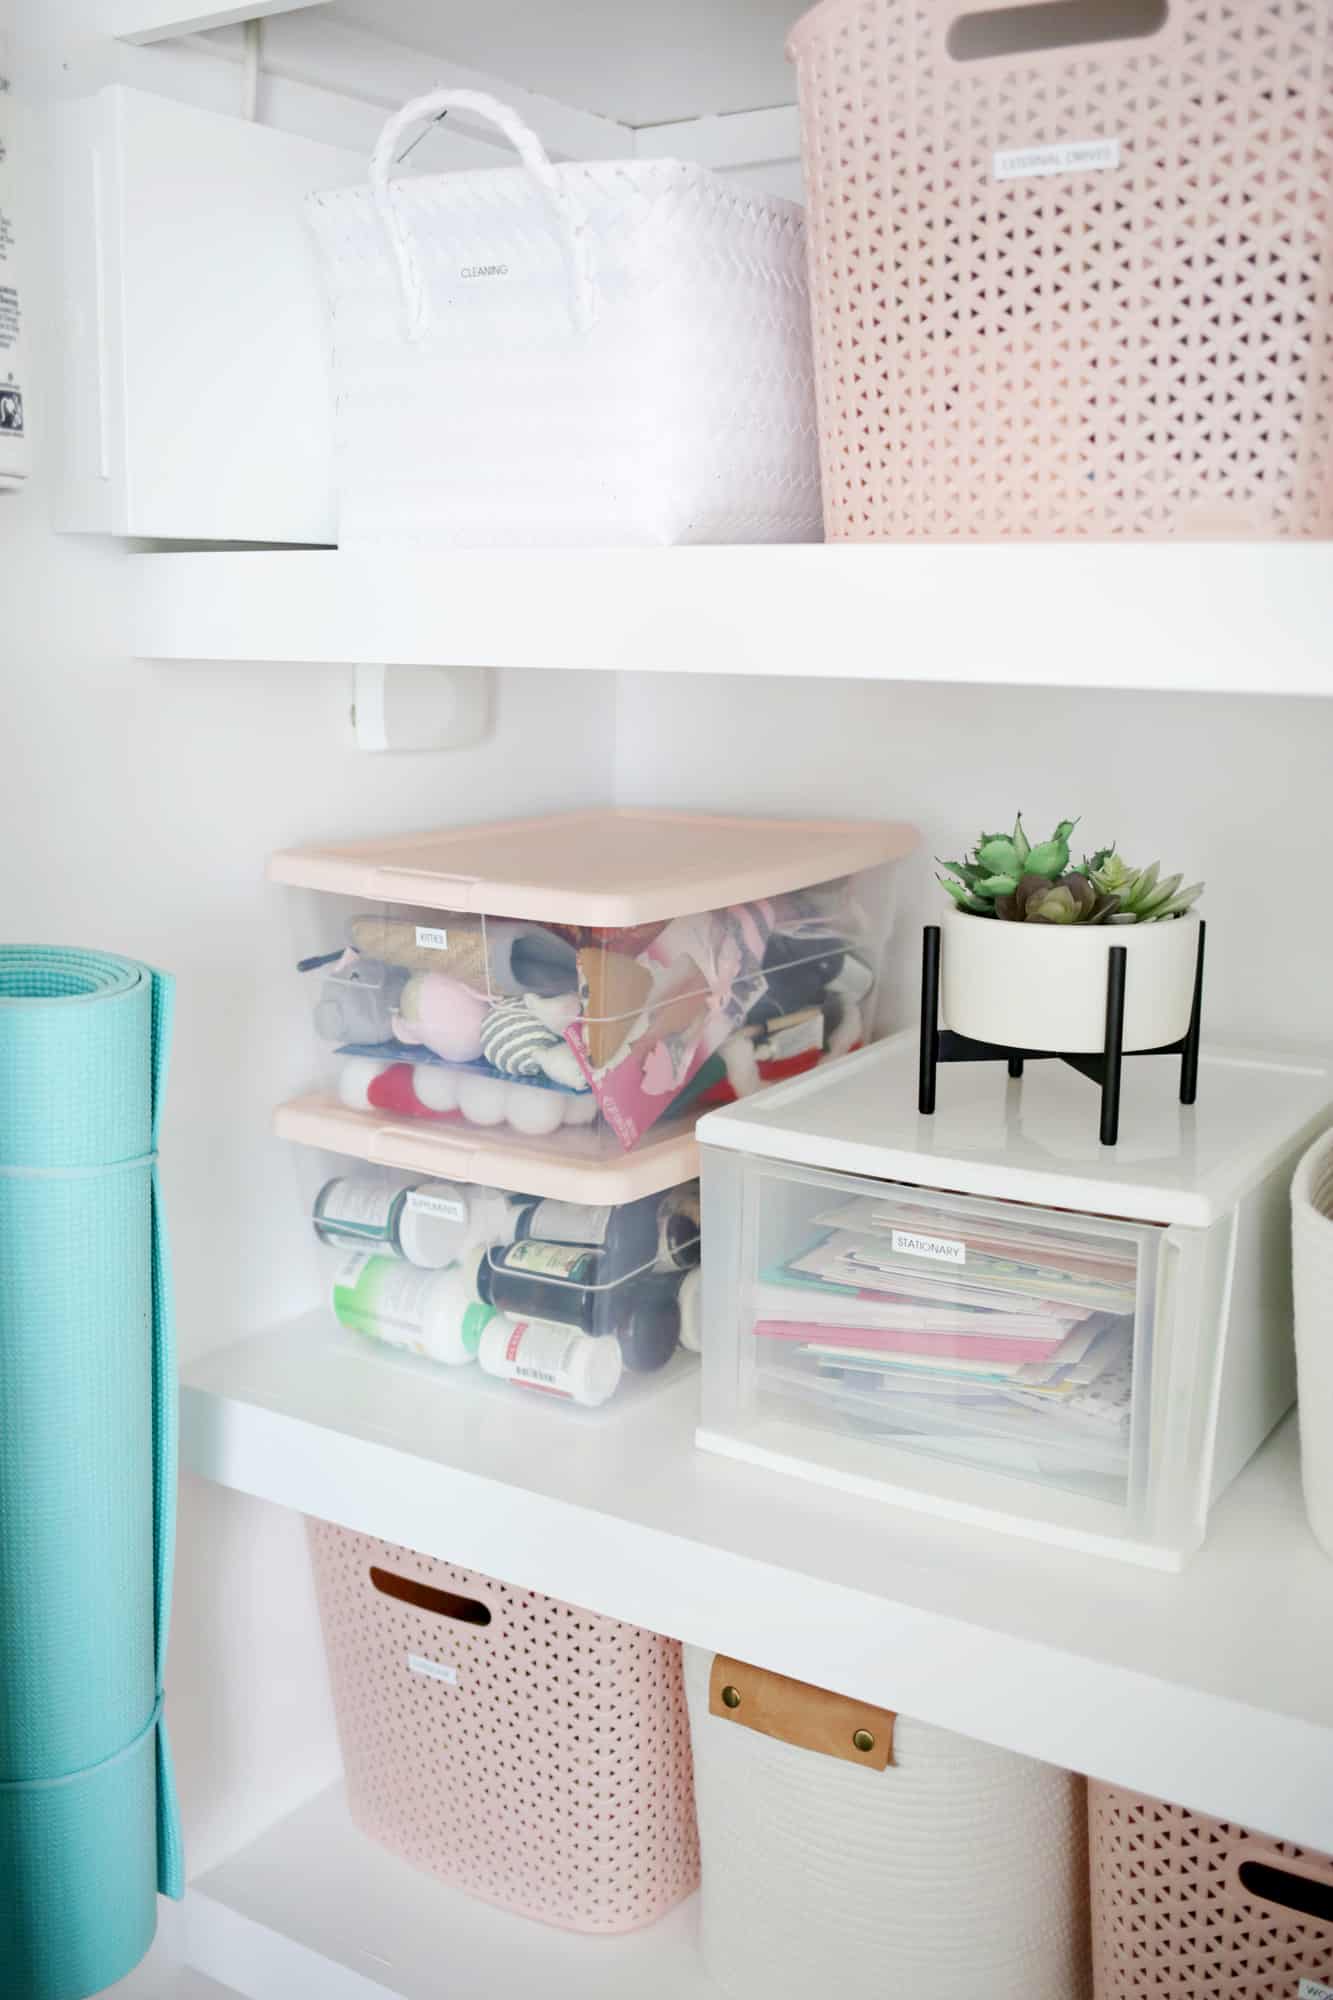
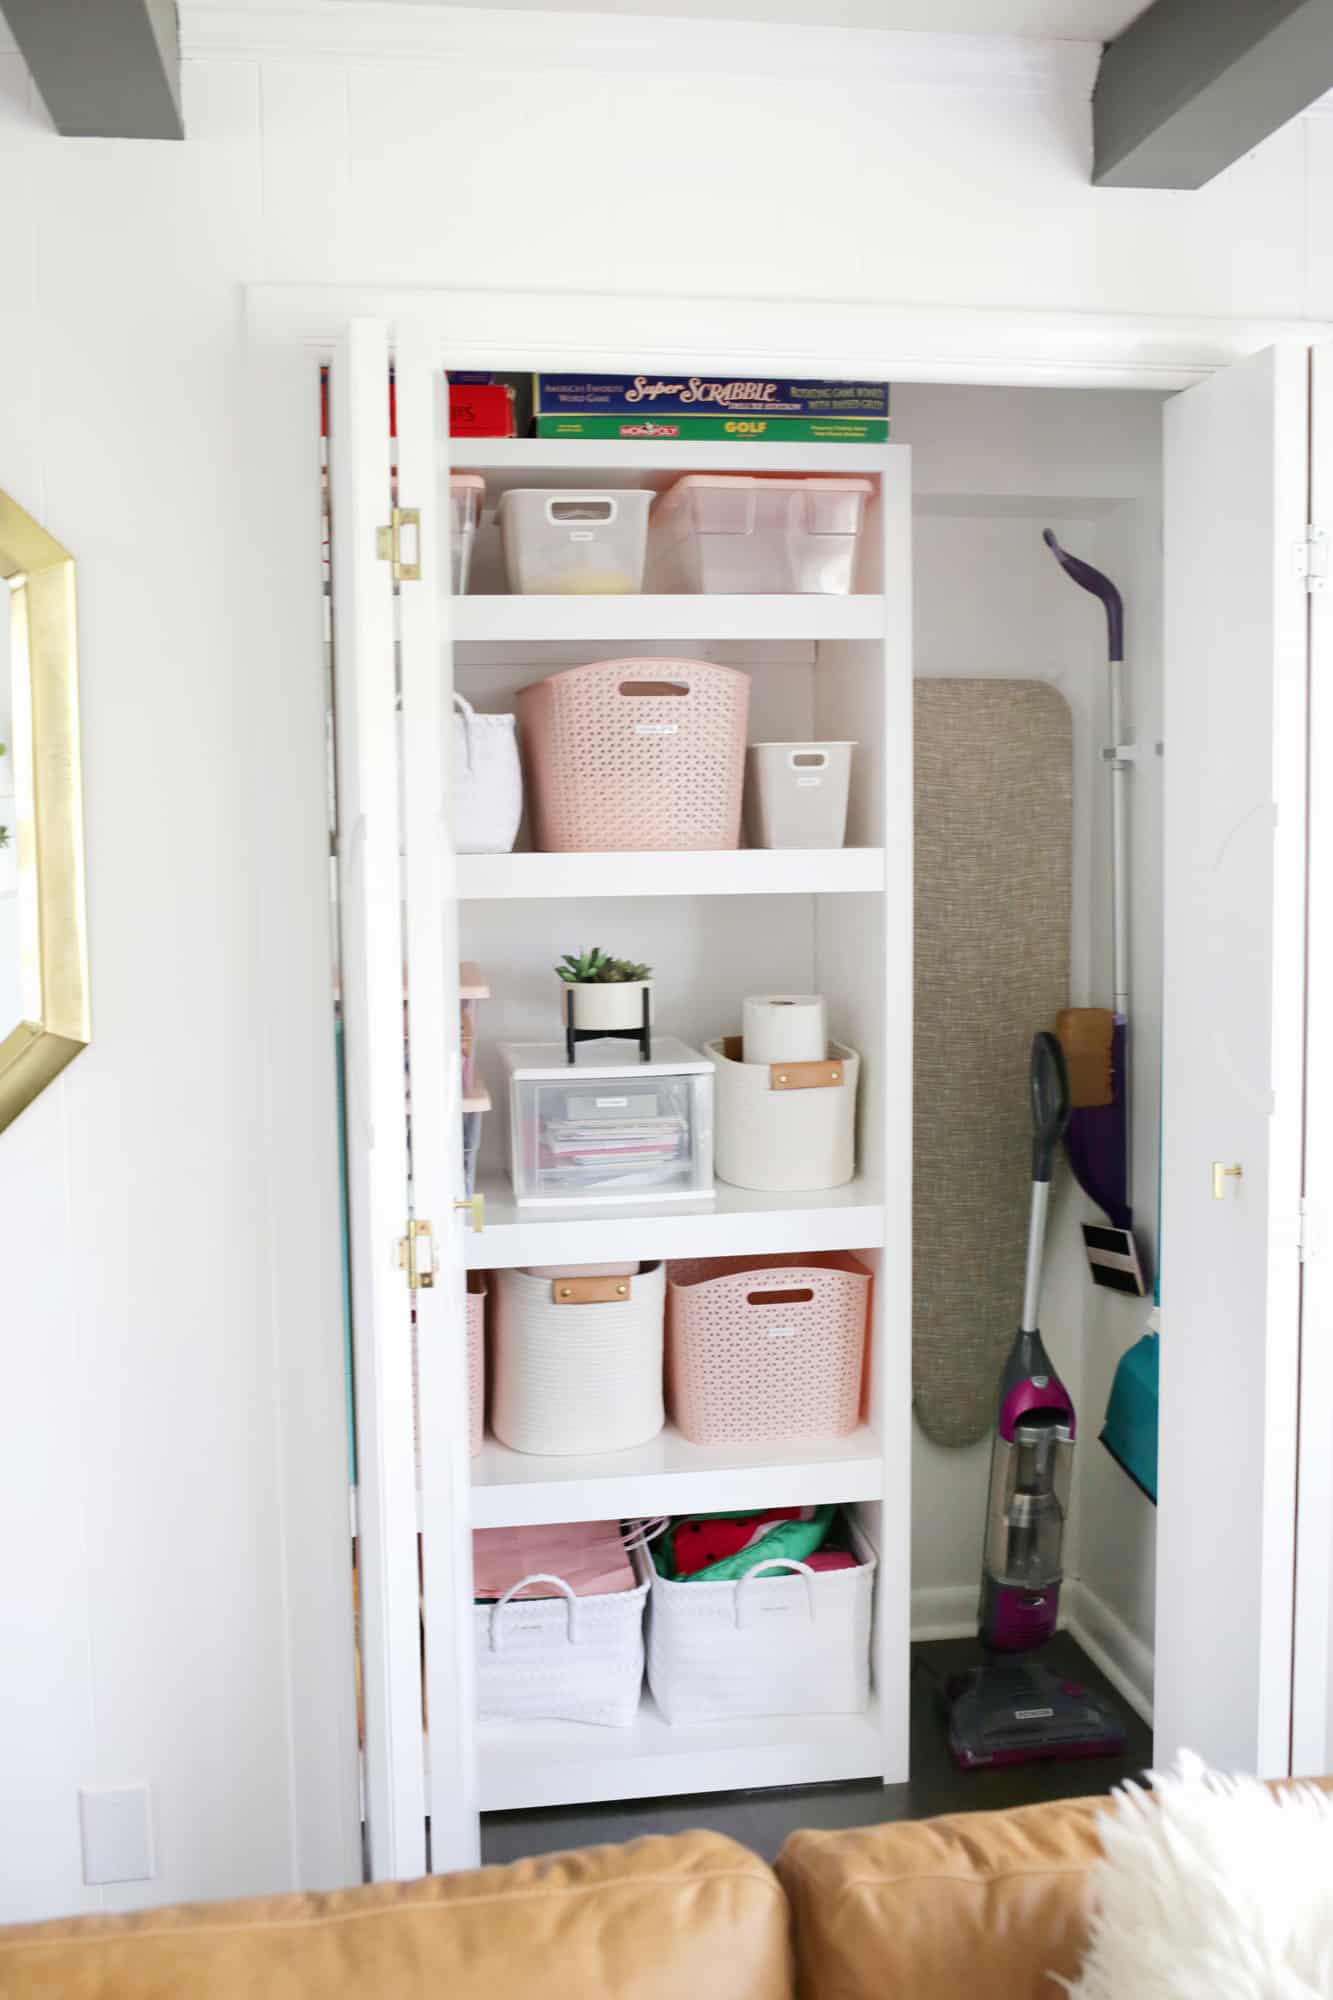 Technically, I broke up my afternoon hours into two different days so they would be when my toddler was out of the house at a play group (hard to do large scale organizing with a toddler trying to “help” you!), but can you believe the difference?! I used different sizes of these woven baskets, these clear storage containers, these pink bins (similar), these skinny baskets, and these rope baskets as well to hold the main elements and I’m thrilled with how it turned out. I keep going over to open the closet just to make sure it’s not a dream and I just stand there and bask in the organization—haha!! I can’t wait to do the same to my guest bathroom closet and get that on the same track as this one—let me know if you have any organizations tips or gadgets that always help you! xo. Laura
13 Comments
Such a big difference! Well done, Laura. I’m inspired to get organising too now. 😀
Charmaine Ng | Architecture & Lifestyle Blog
http://charmainenyw.com
Thanks! 🙂
Laura
It looks so cool, simple and classy. Will use your pictures as a reference for mine.
Hope your organization goes well!
Laura
Great job organizing. Our favorite tip from the ones you listed has to be “Leave room to grow.’ This makes total sense. Without that extra space, stuff soon ends up out of place and turns it all back into a disorganized mess. Thank you for sharing.
Yes! It’s stressful to be almost at the top in any category in life, right?
Laura
Brilliant idea to buy extra container and return unused ones. People are always told not to buy containers before decluttering but how can it hurt? Otherwise you are left with stacks and piles.
I was thinking about incorporating more boxes into my closet and especially in the open shelf storage space, but if you don’t put transparent, you’ll always get lost in your own stuff, and I was never really a fan of transparent. But this idea of discretely labeling each box, the transparent and the non-transparent ones, is brilliant.
It a relief to see the before picture and know that, at one point, a portion of your house was as disorganized and messy as mine.
Oh yeah, this place is a mess constantly! Always going back and forth between really messy and really clean 🙂
Laura
Love this! But I don’t have these great shelves in my closet… should I try to get a bookshelf or wire rack in there?
Yes! Whatever will fit to create some shelving if you can’t build or don’t want to build shelves. We had a big metal shelf that usually goes in basements/garages before the shelves and that does the trick as well!
Laura
I wish I had a hall closet, this is really missing in my apartment. And I always love the feeling of getting something organized 🙂
https://www.makeandmess.com/