
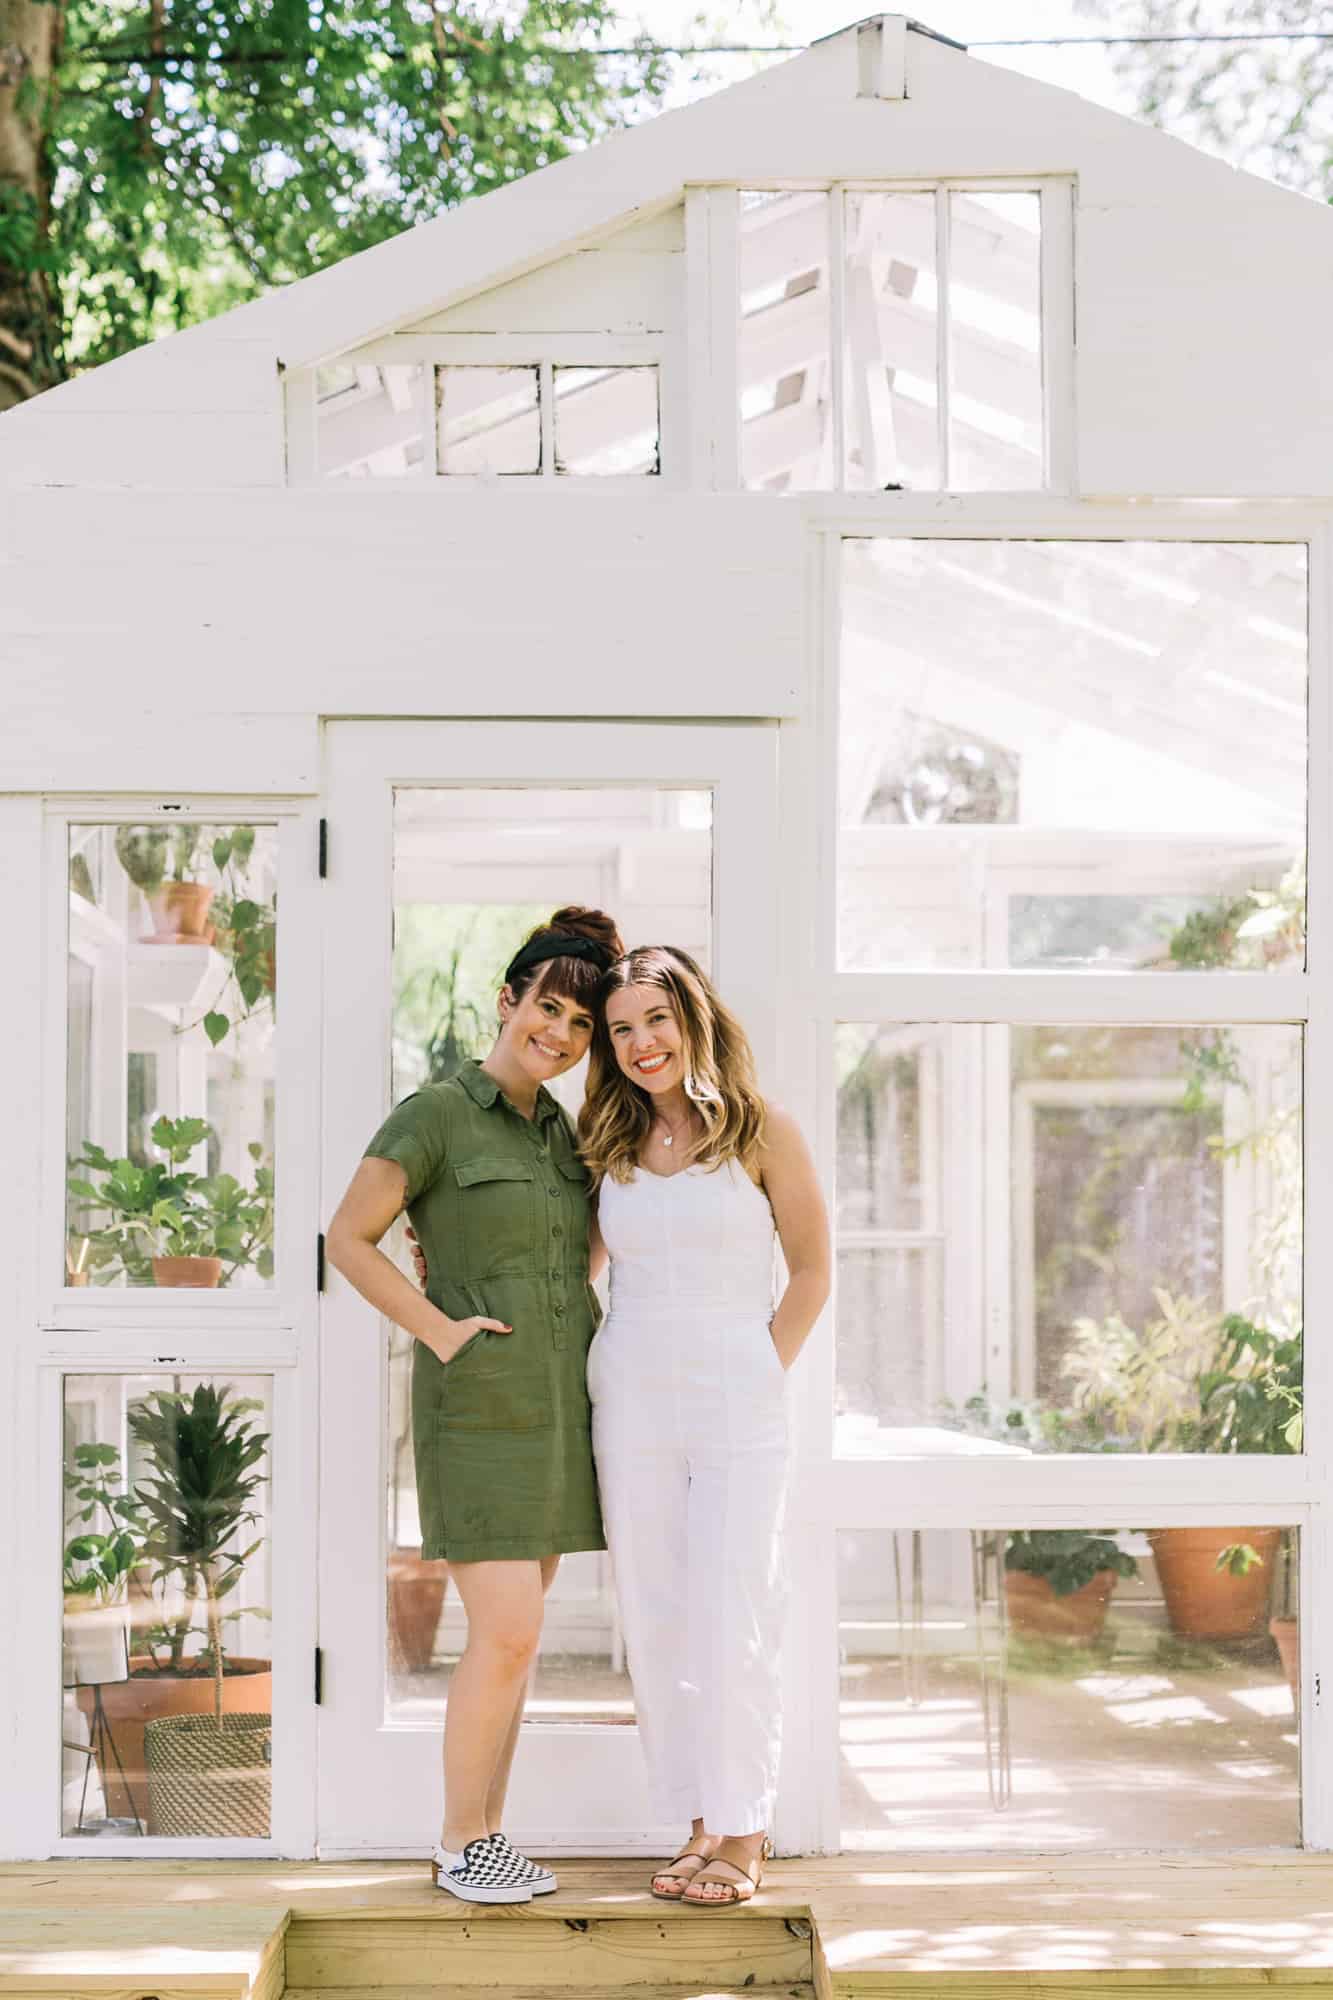
We have a special guest on the blog today! We are so excited for Andi Teggart to share her incredible DIY greenhouse with us. The entire greenhouse is made out of recycled windows and doors from East Nashville, and yes, we had the pleasure of seeing it in person.
“Hi there! I’m Andi and I’m so excited to be on A Beautiful Mess today! This past fall, I moved from San Francisco to Nashville with my husband Eric, daughter Lucy, and our dog Jack. We went from renting a 650-square-foot apartment in San Francisco’s Lower Haight neighborhood (where my daughter slept in our walk-in closet!) to owning a 100-year-old, 2,000-ish-square-foot home in the charming and hip neighborhood of East Nashville.
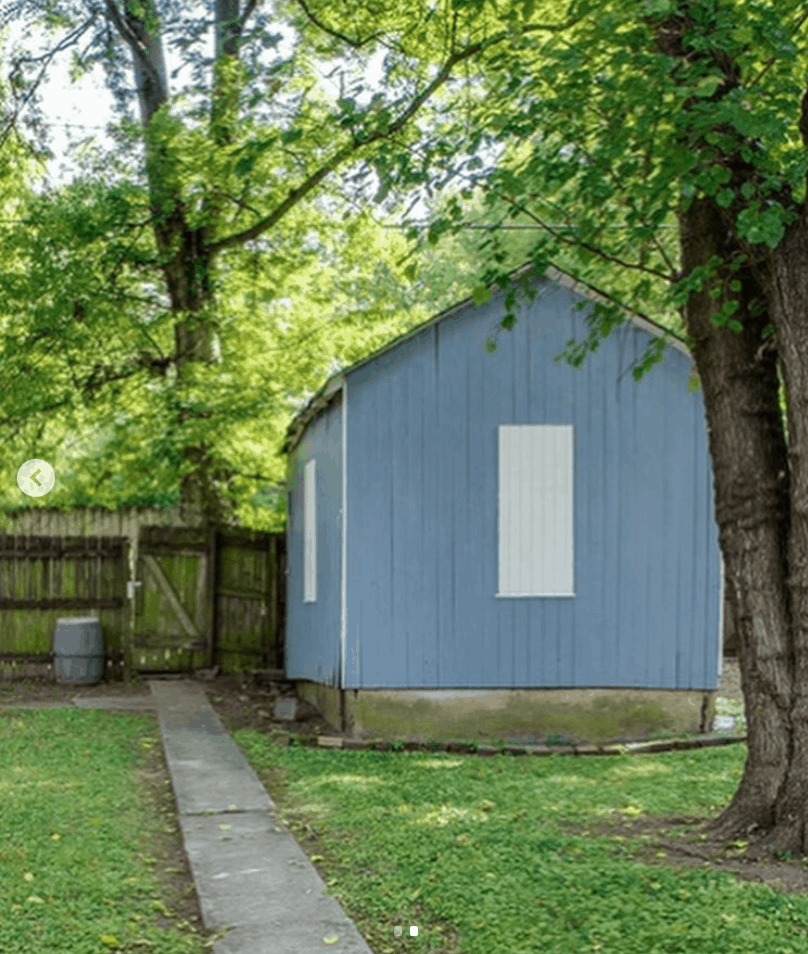
When we moved in, our house (here are more photos of the inside!) had a standalone garage in the backyard, which could be accessed from a back alley. We decided immediately that we would NOT put our car in there because it was falling apart and had termite/rot damage, as evidenced from our home inspection report. A few weeks after we moved in, Eric proposed the idea of turning the garage into a greenhouse.
We’ve both always loved plants and thought this was a challenging and creative way to turn an unsightly, useless structure into a meaningful, functional, beautiful space to house plants and herbs.
The entire project took about seven months from start to finish, and we ran into quite a few bumps along the way—weather, inexperience with this scale of a project, and the biggest being that we had to deal with a lot of city of Nashville + Nashville Historic Society paperwork, codes, complaints, applications, approvals, etc., to make this thing happen.
I’m excited to share how we turned our falling apart garage into a greenhouse! I hope you’re inspired by this project and get some helpful info in case you want to build you own. You can always message me @eastnashgreenhouse with greenhouse-related questions, too!
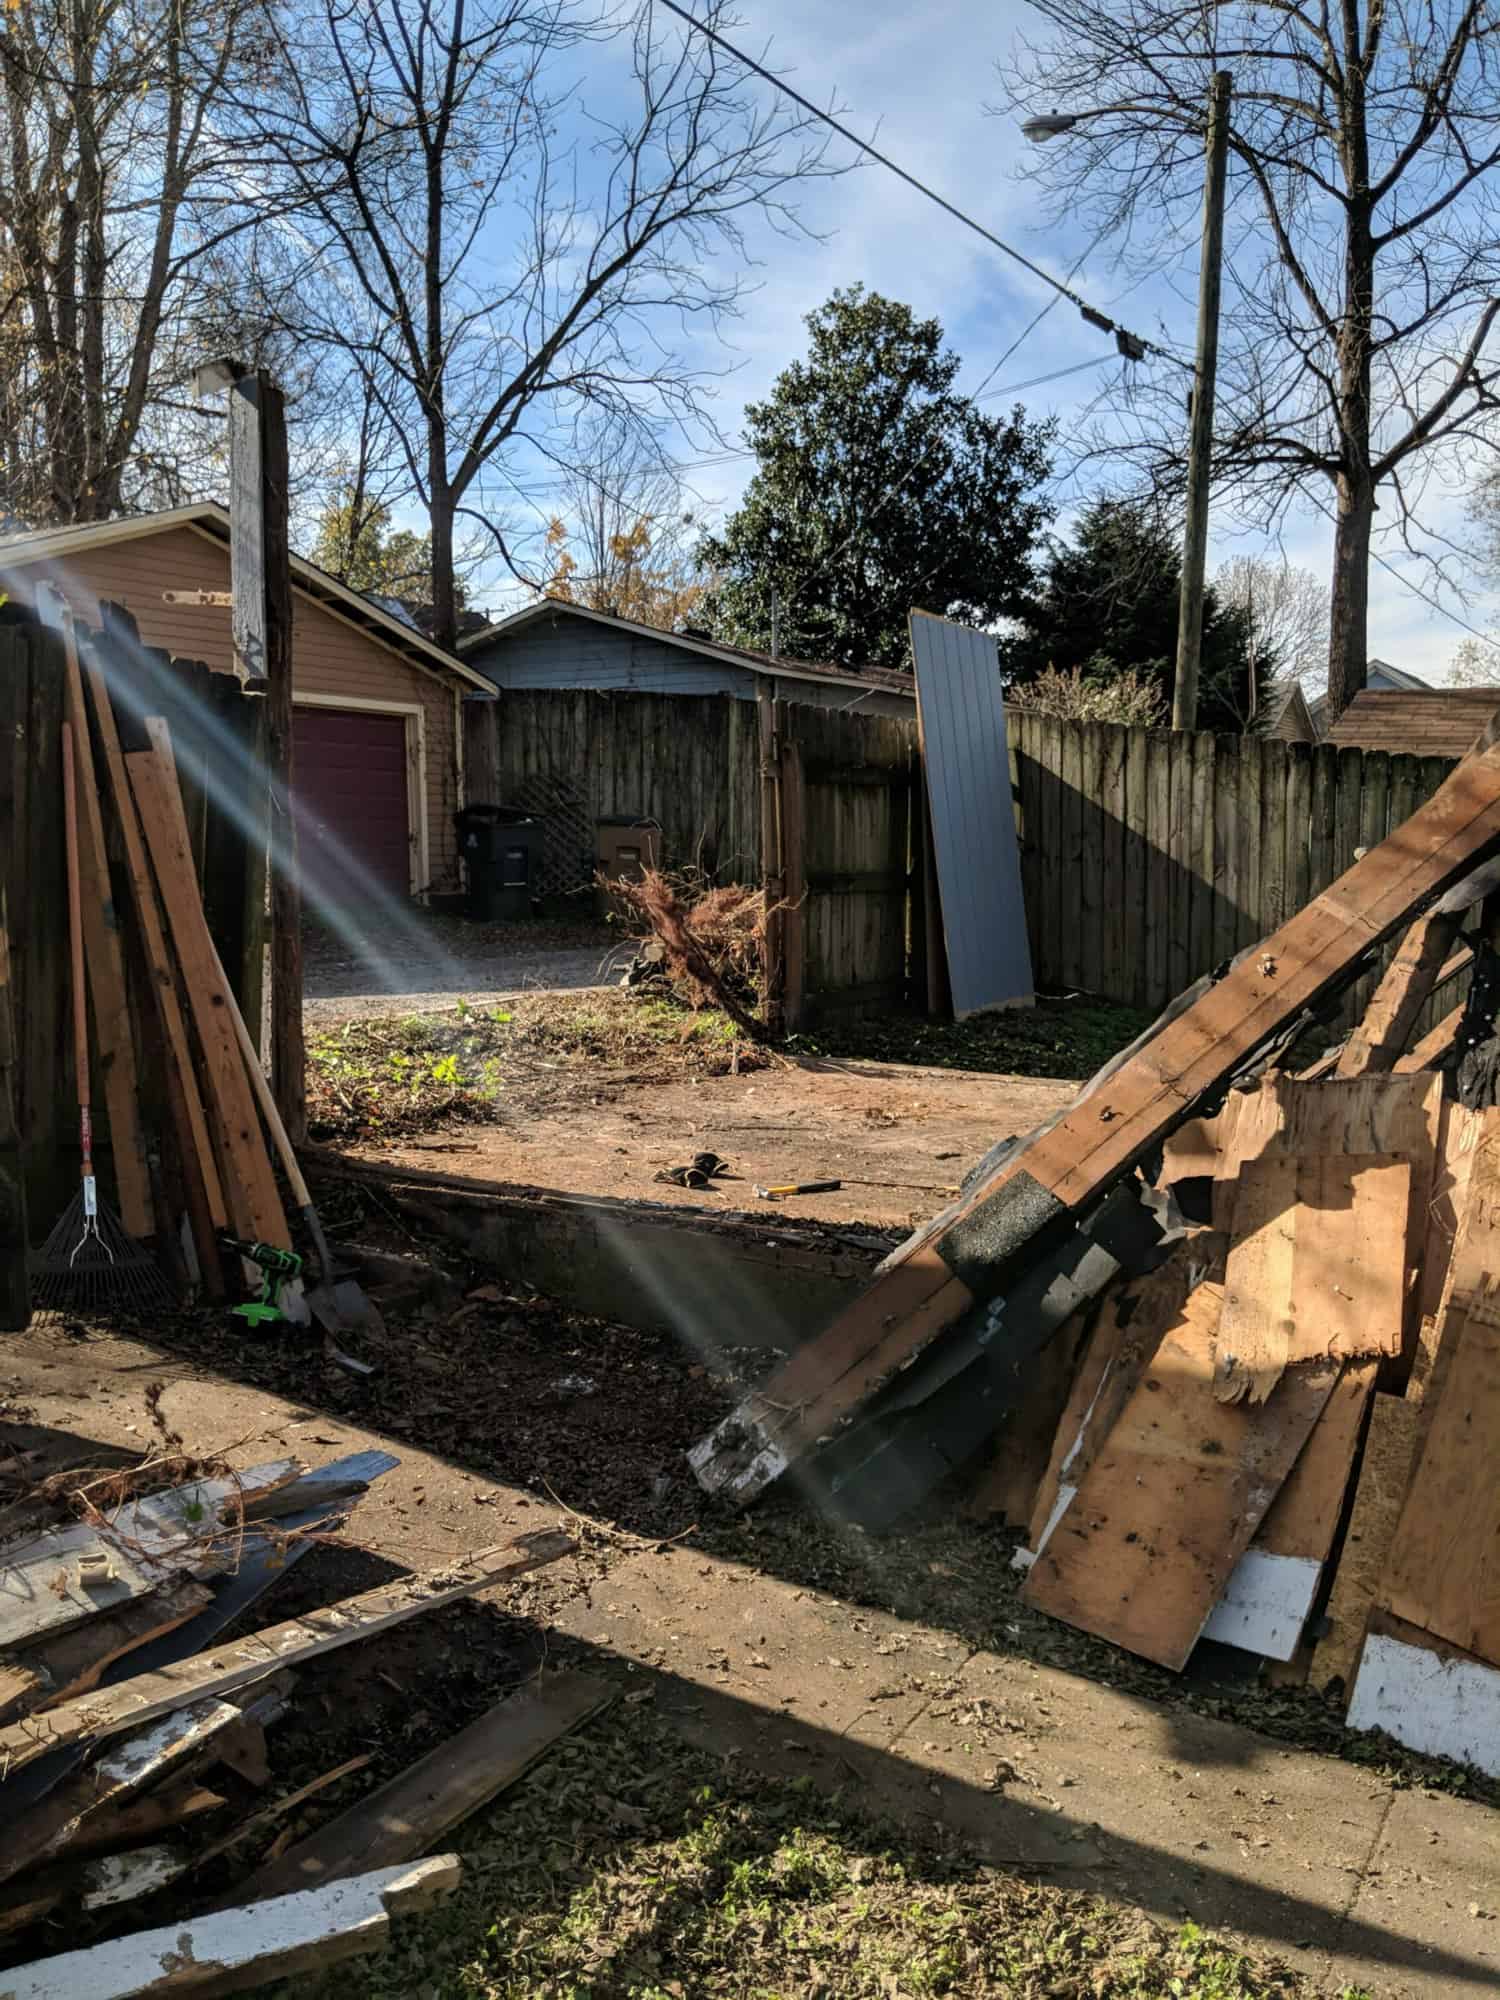
Quick note: Our greenhouse building process started by tearing down our falling apart, termite-infested garage in our backyard. If you already have a spot in mind for your greenhouse and don’t have an existing structure in that place, you can skip Steps 1 and 2 and start at Step 3!
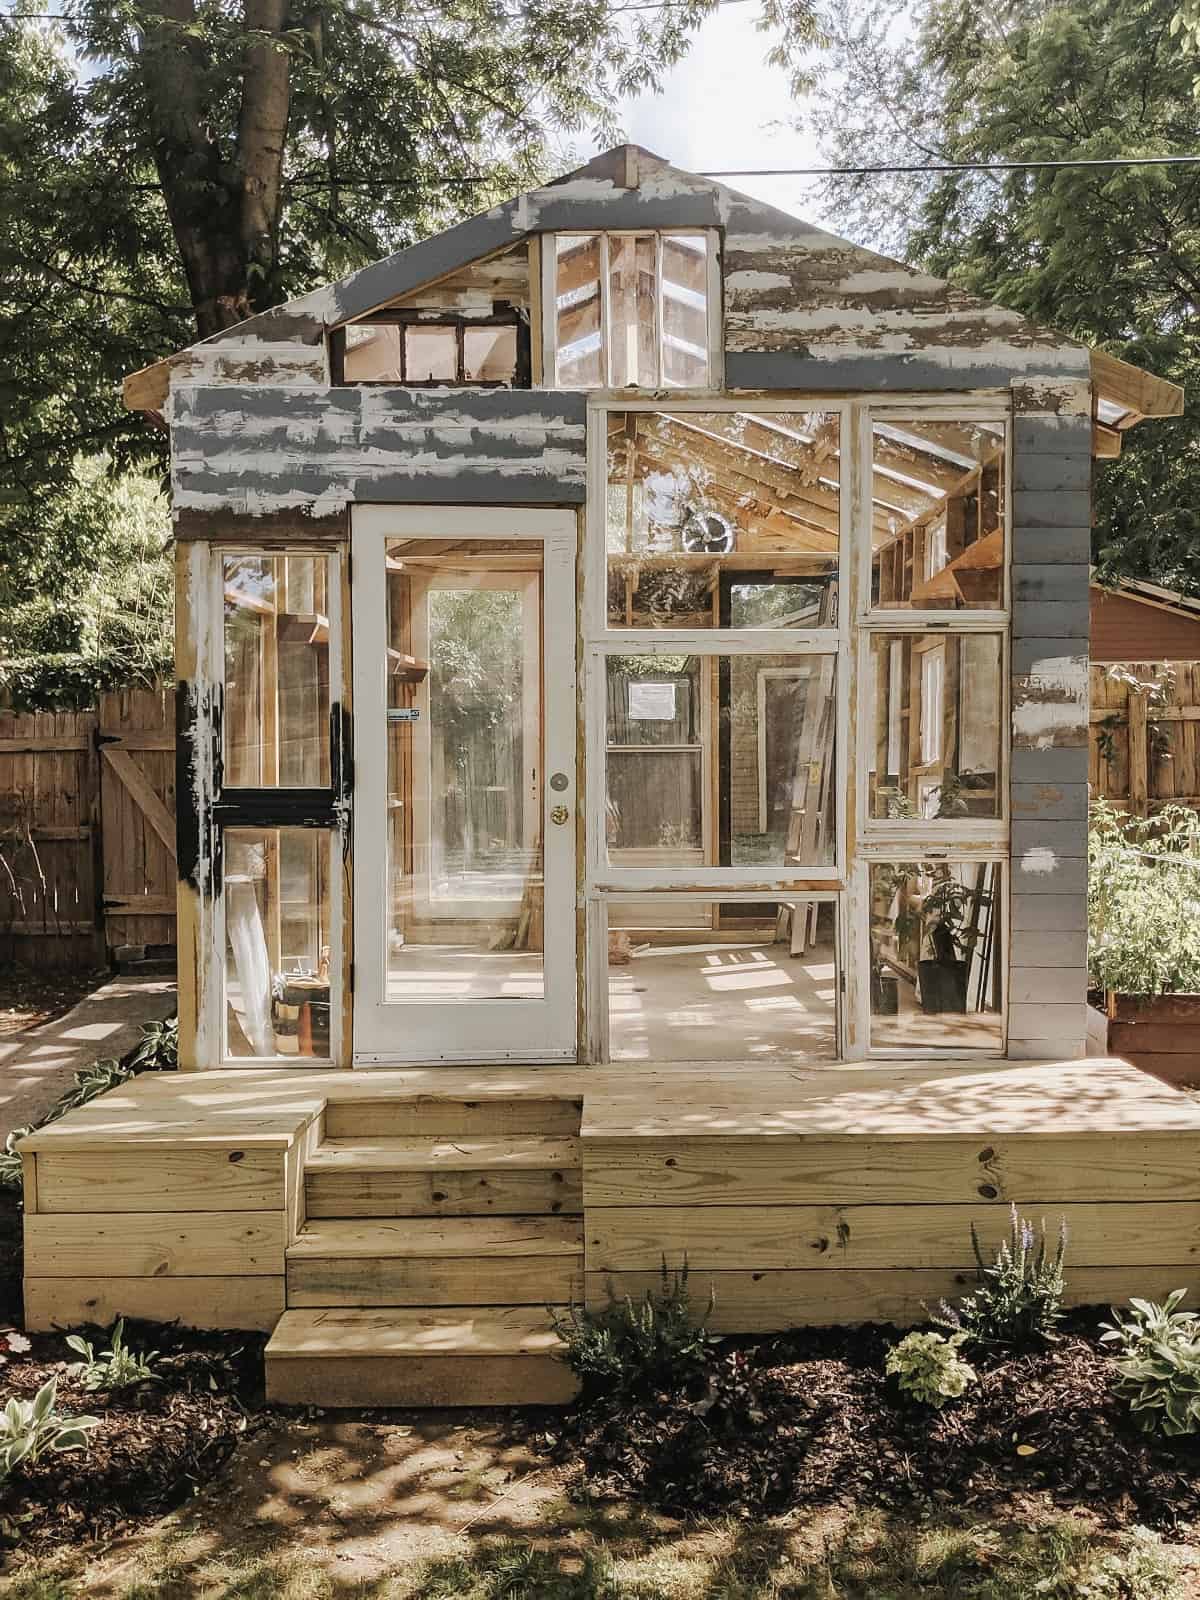
1. OUT WITH THE OLD. Start with any siding, windows, or doors and start swinging your sledgehammer—just making sure to leave the frame intact! Make sure to keep testing the structure along the way so it doesn’t collapse on you! When you get down to the studs, use a jigsaw with a wood and nails blade to cut down the wall and knock it down.
My husband Eric did this all by himself, but recommends finding a helpful friend for this part of the process, as it’s pretty challenging and labor intensive.

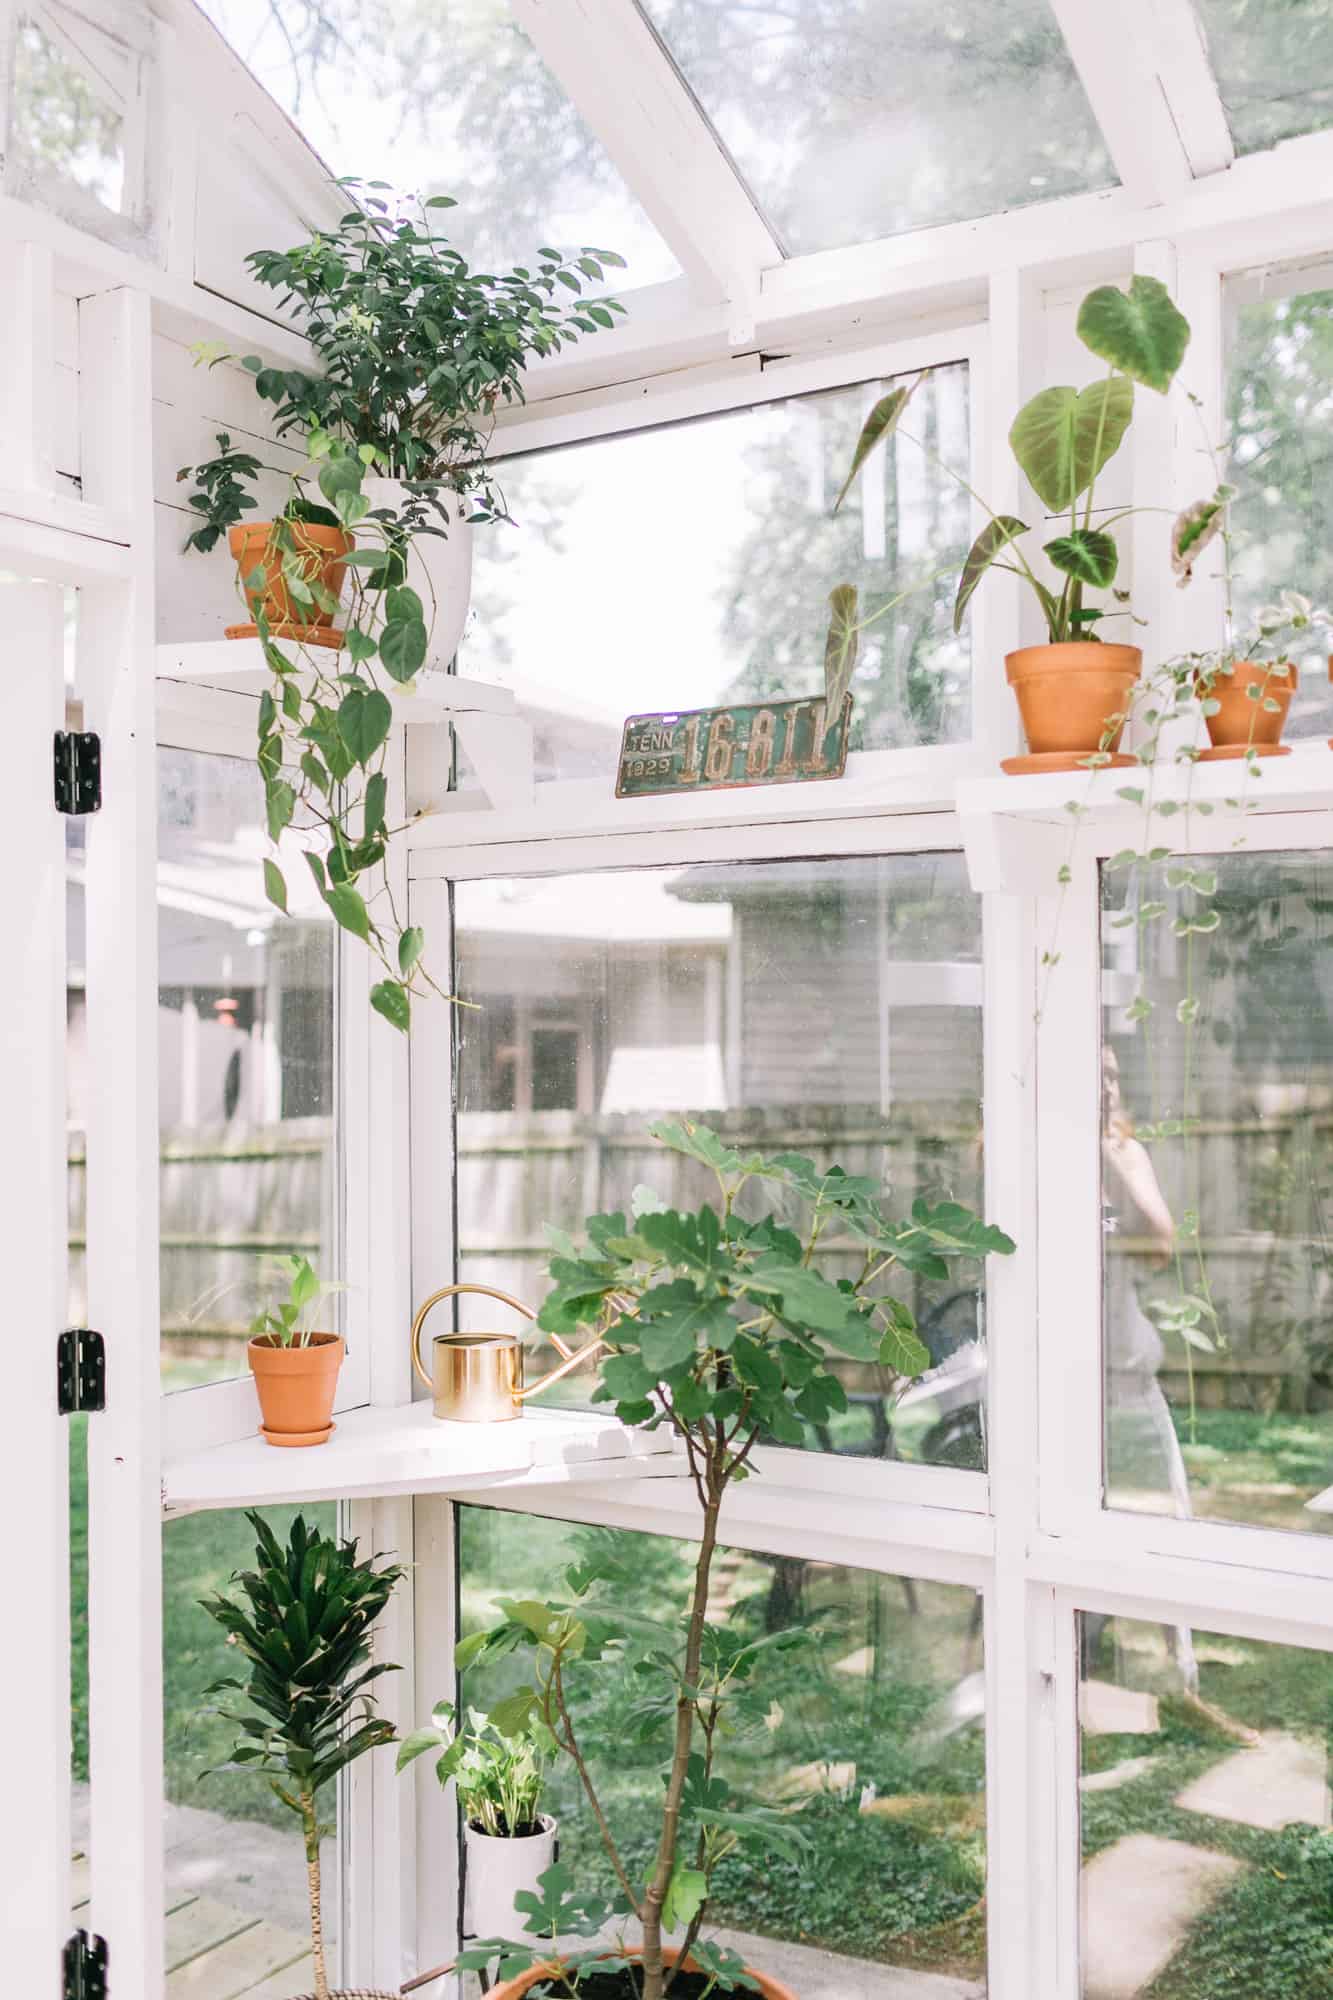
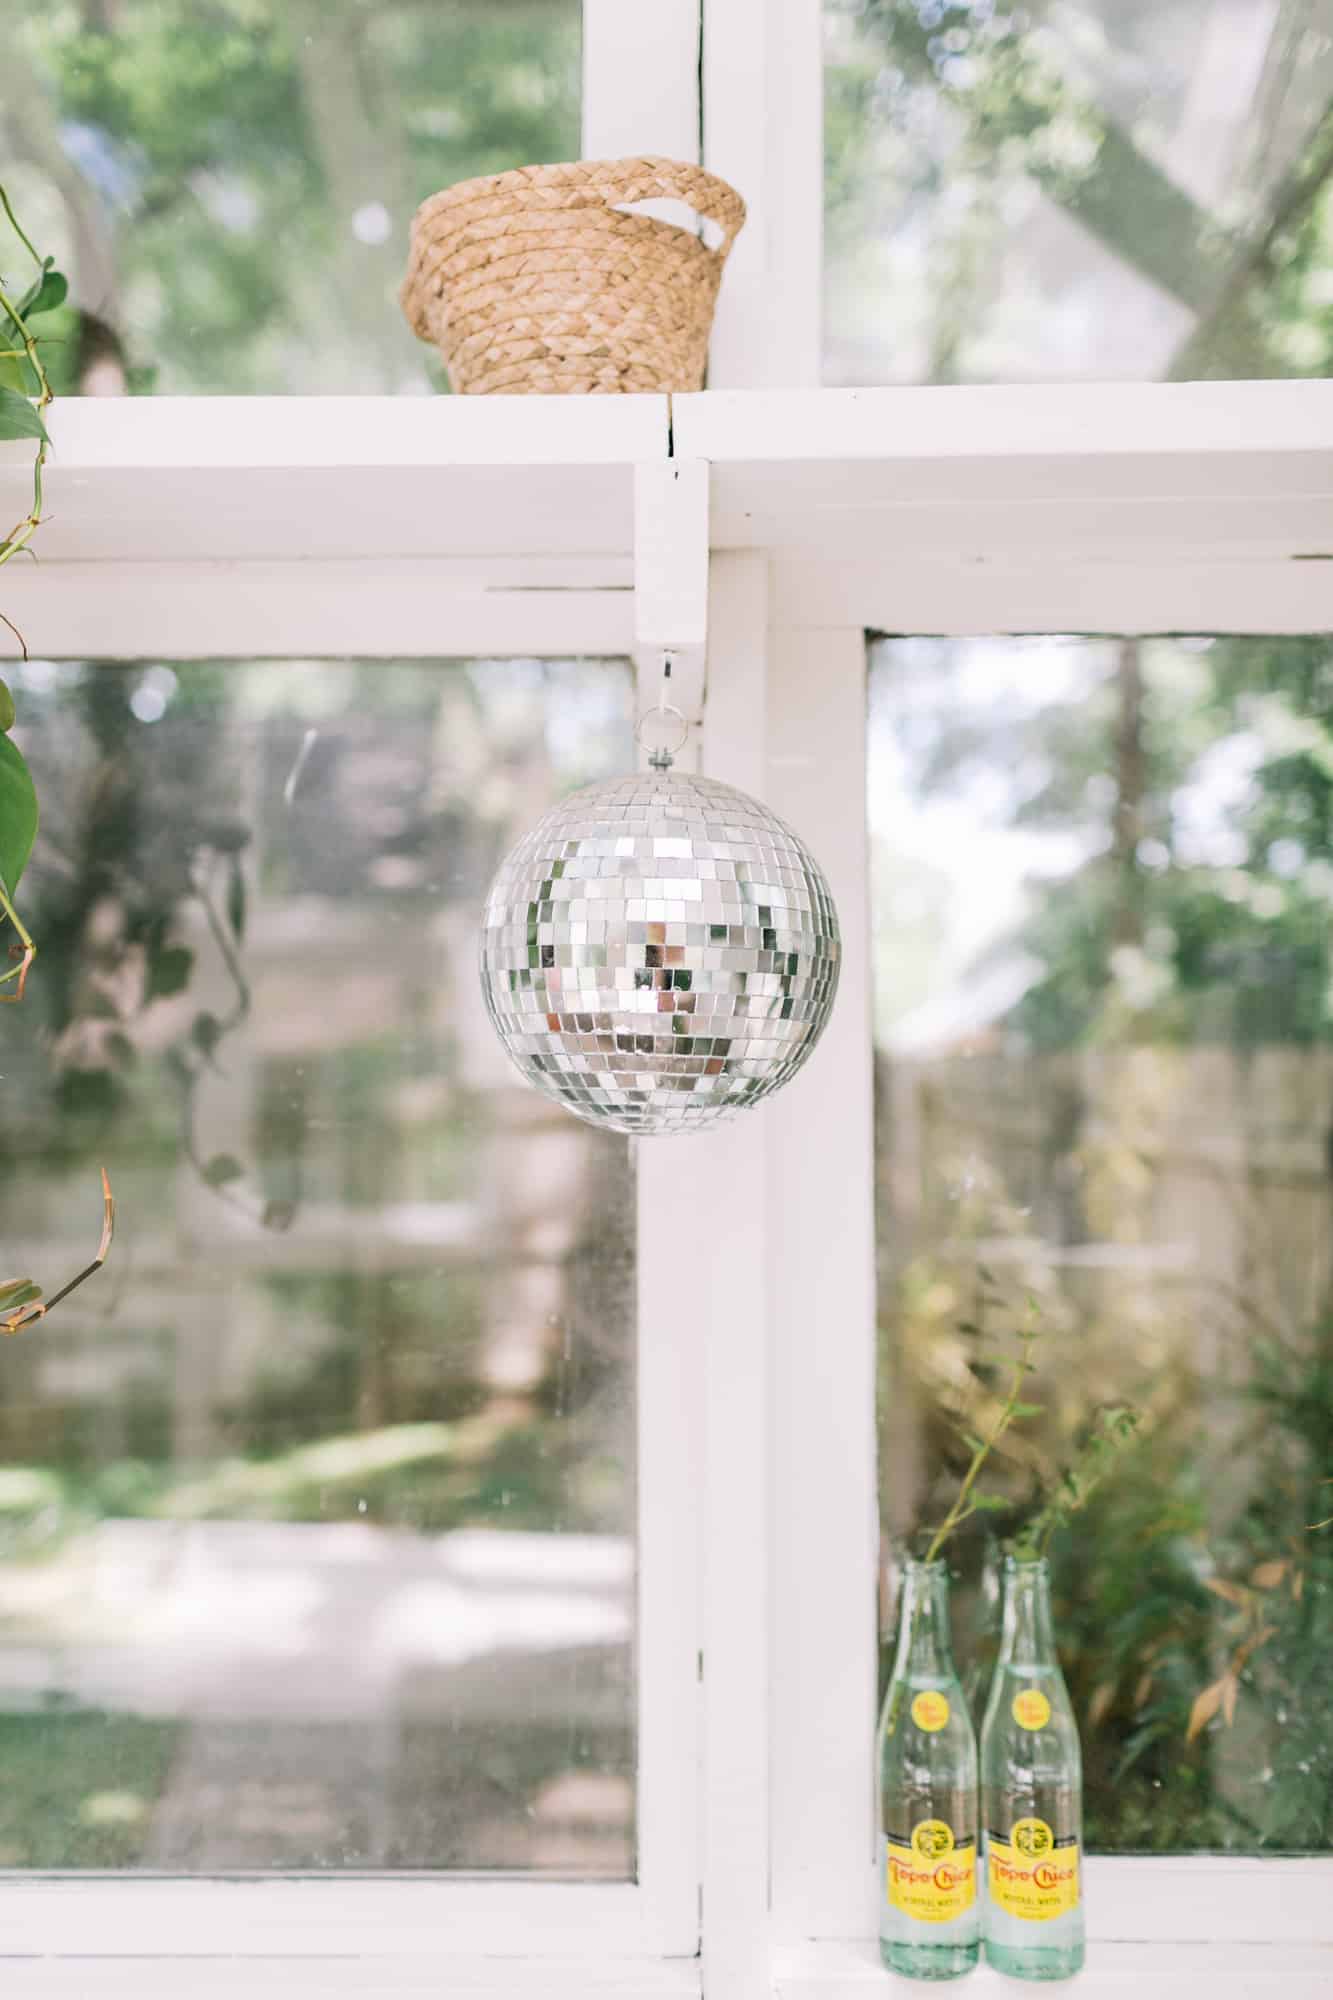
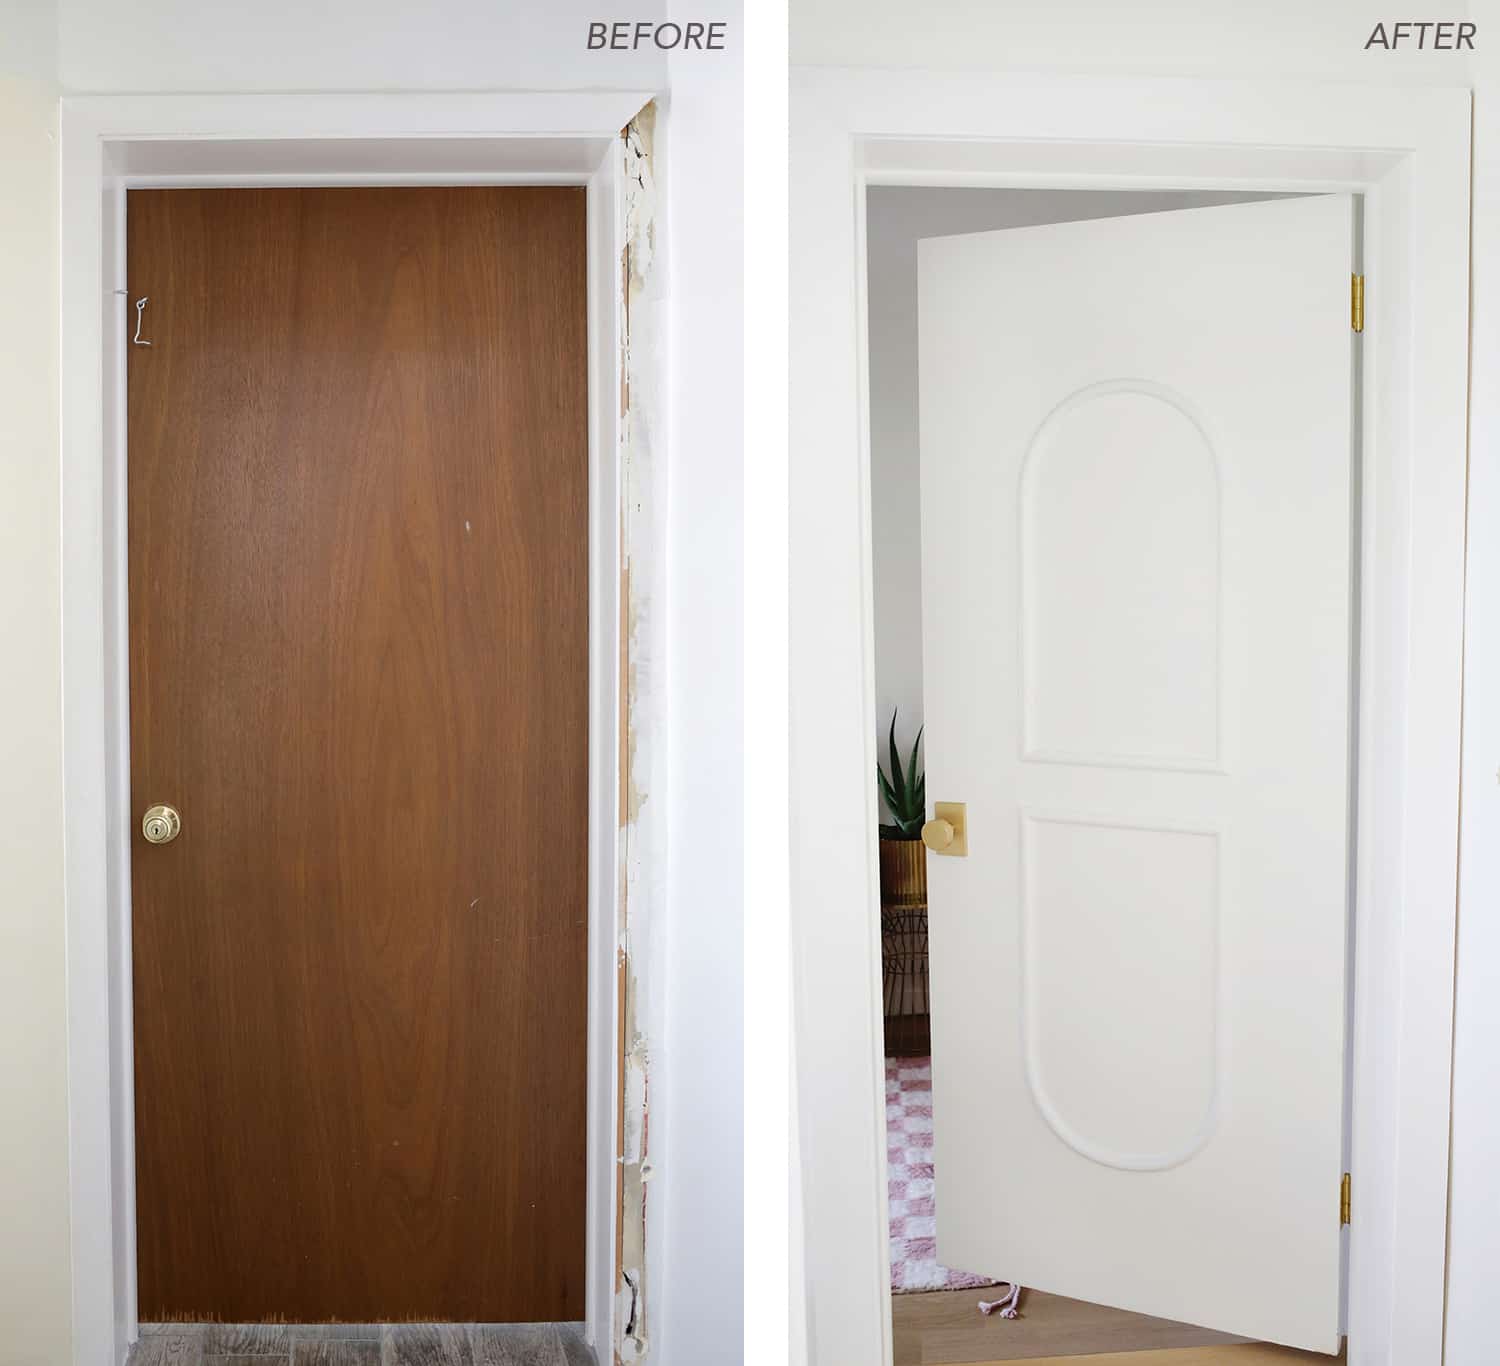
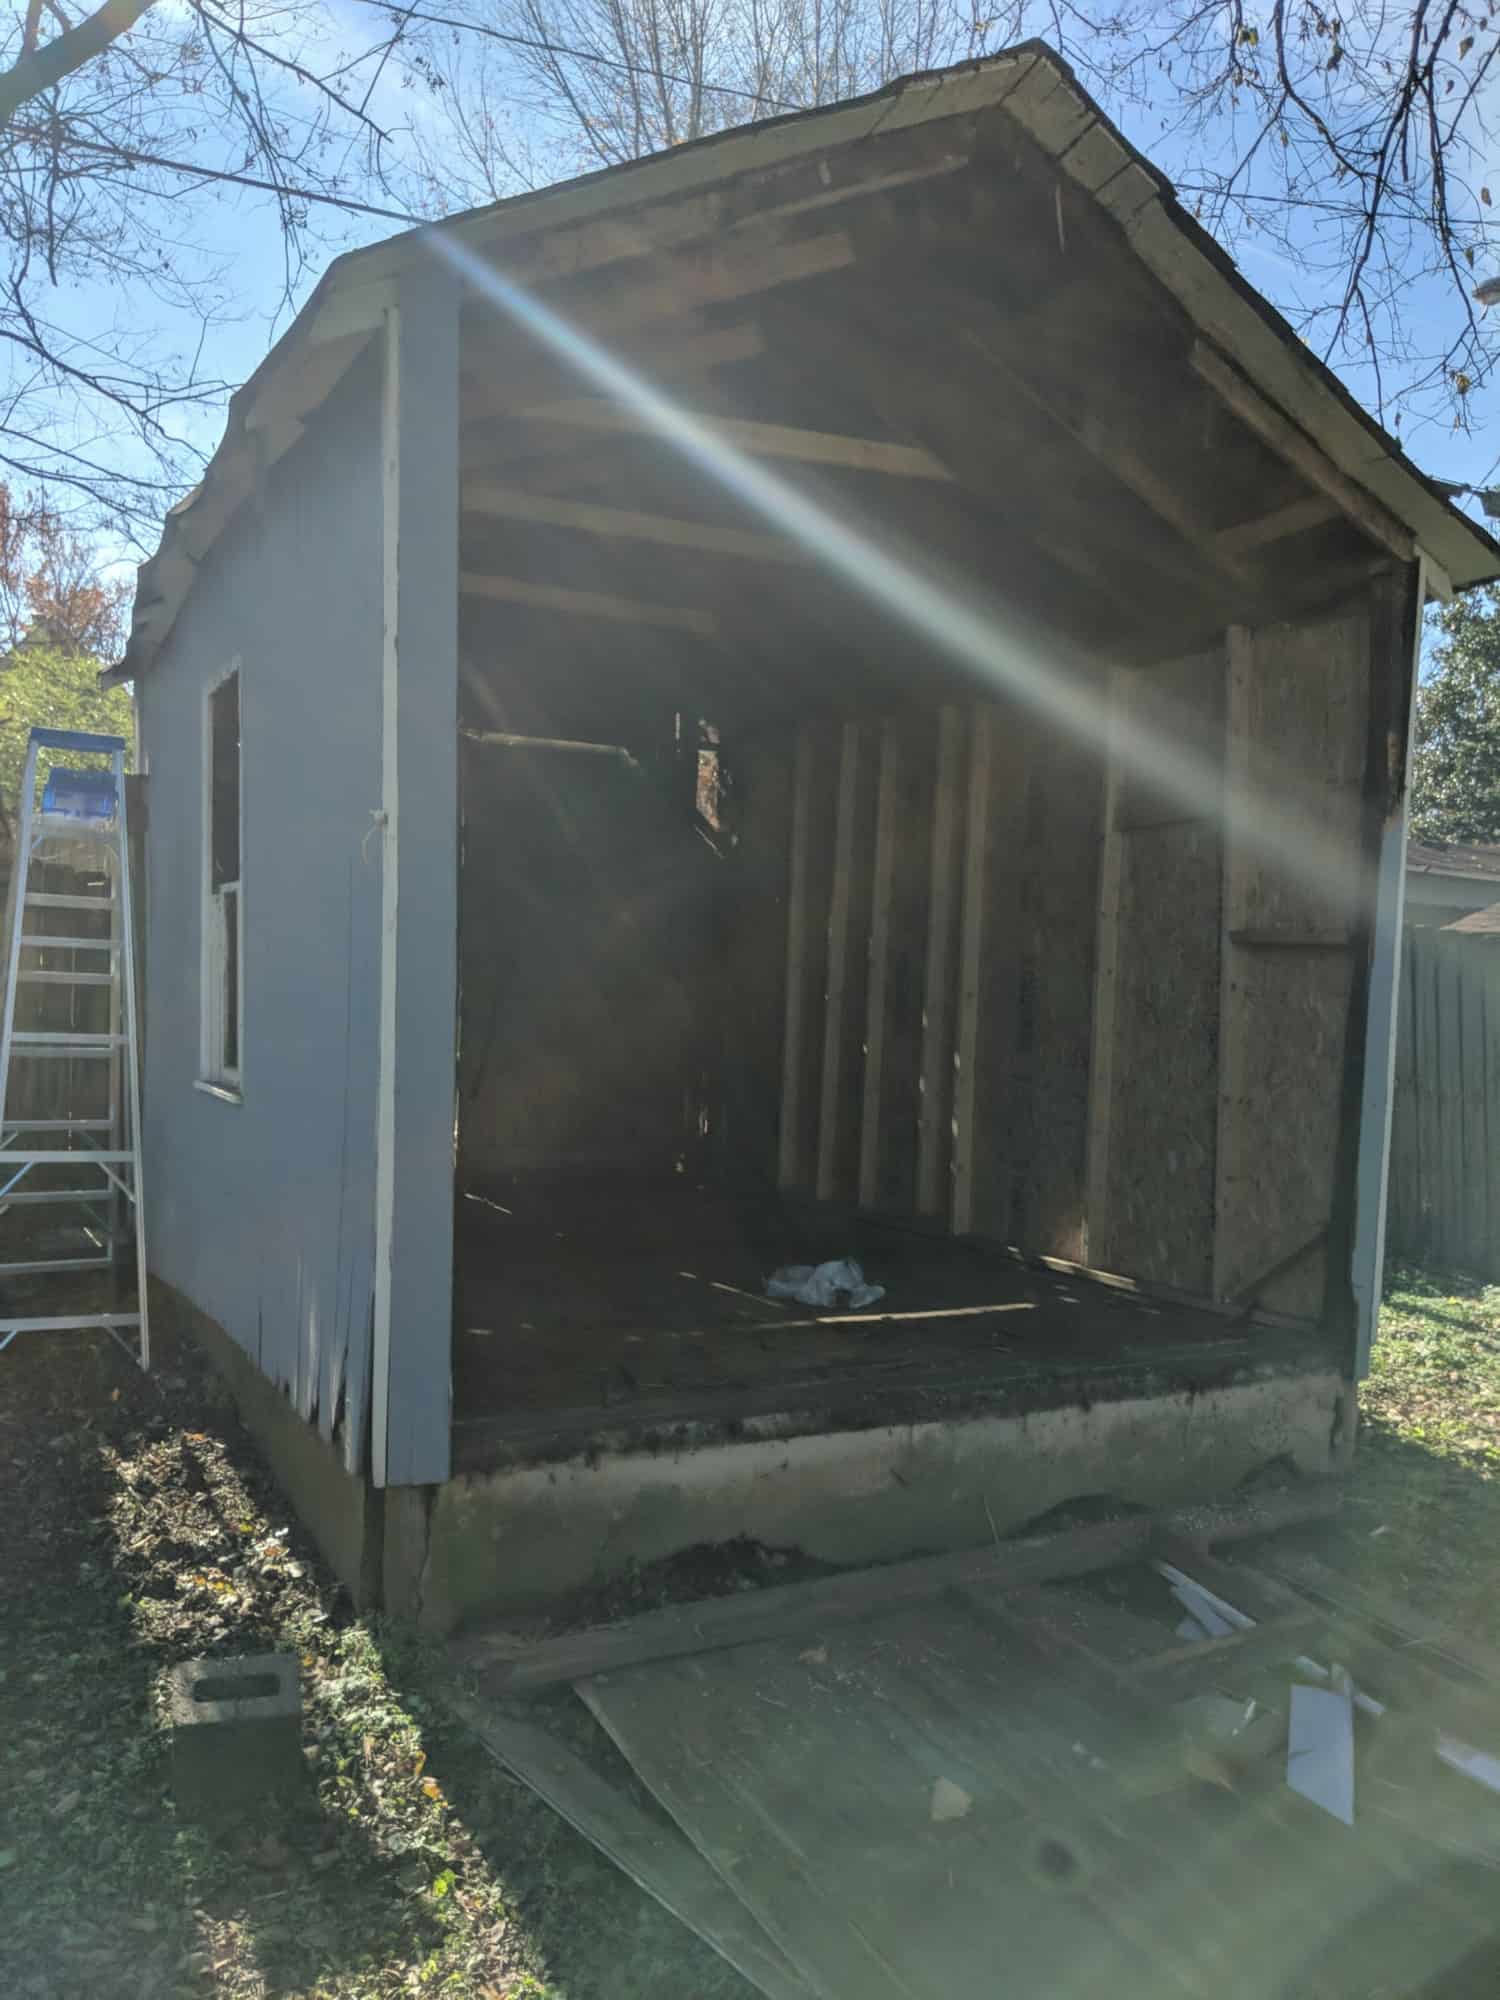 2. CLEAN UP. This part isn’t glamorous or fun, but necessary after Step 1, as you have to get rid of the old stuff before you can build the new! We got rid of A LOT of debris, but ended up saving some of the garage siding, a couple of old doors, and windows that we integrated into the final greenhouse. We also found some really old license plates (from the 1920s!) in our garage and saved those to clean up and display in the greenhouse.
 3. COLLECT OLD WINDOWS. Now to the fun stuff—the hunt for windows! There are a ton of renovations happening in our neighborhood of East Nashville, so it was really easy for us to collect windows. We were able to pick up windows (for free!) from five different houses in our area. We love that they aren’t all the same shape or size—it makes the greenhouse more unique and interesting! Facebook Marketplace, garage sales, estate sales and auctions are other great places to look for old windows.
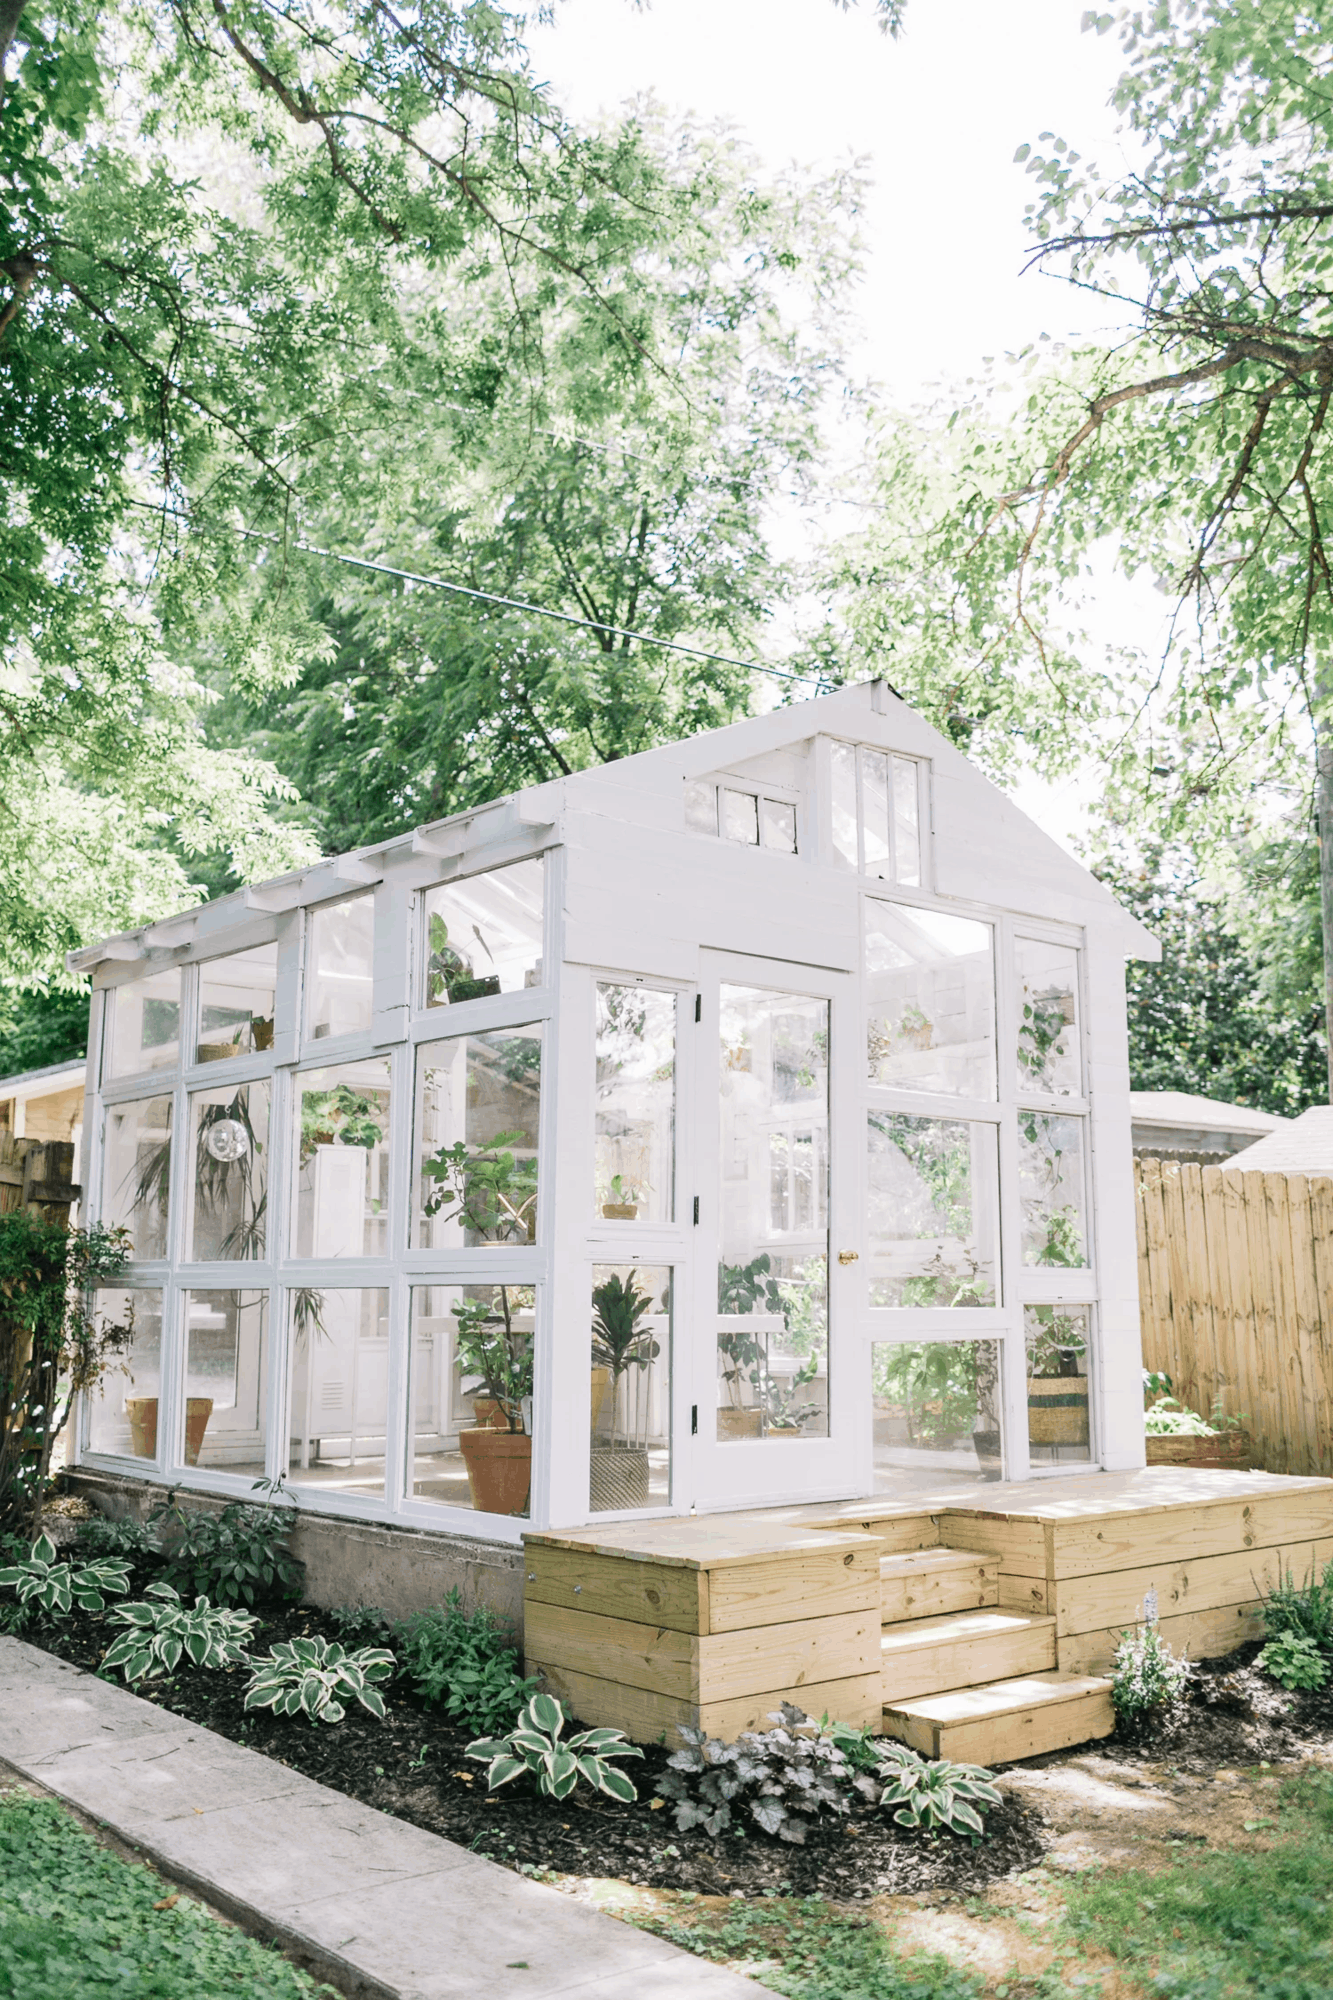
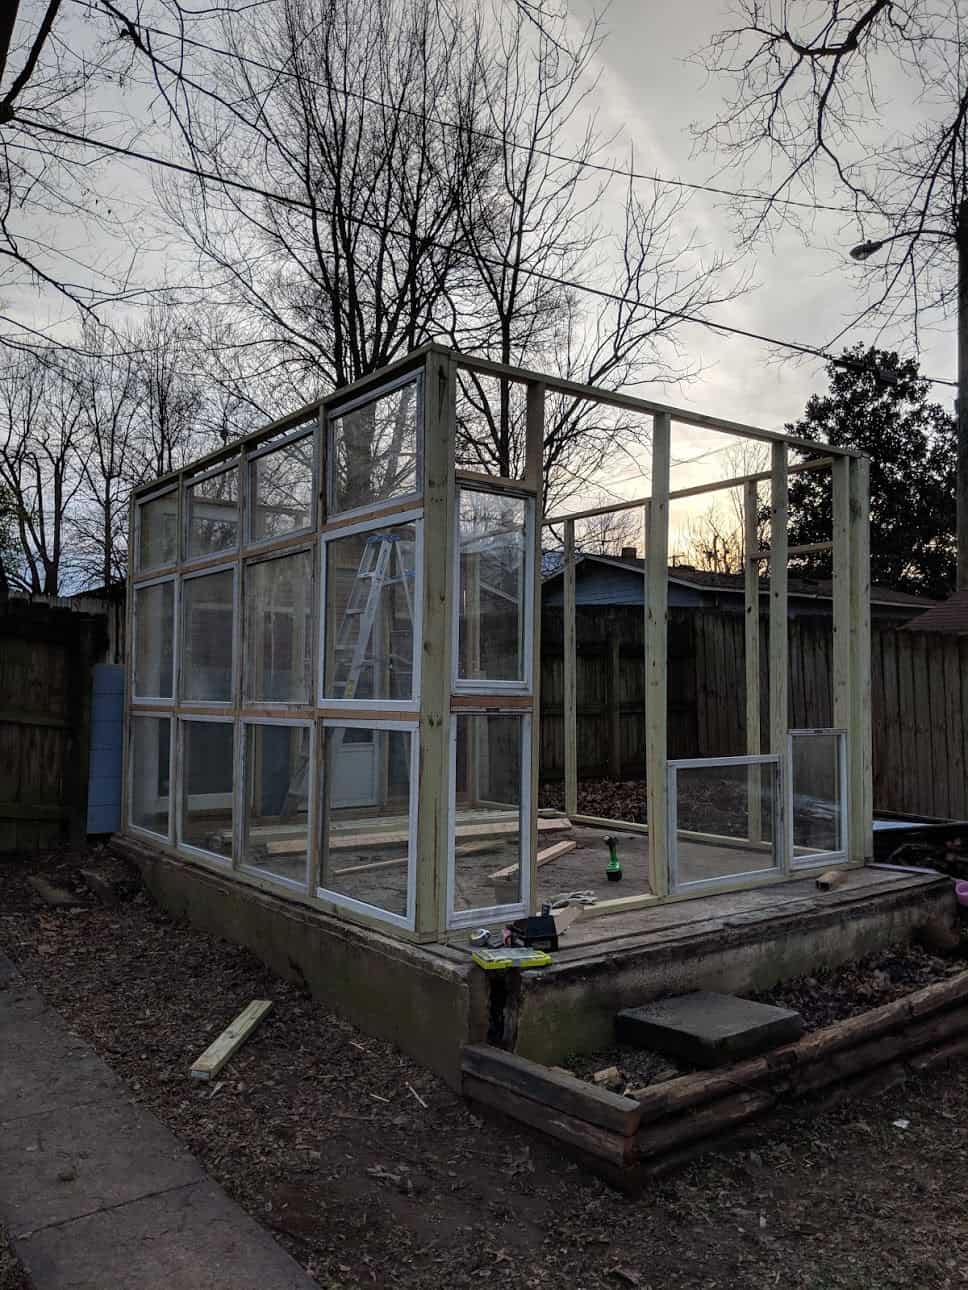
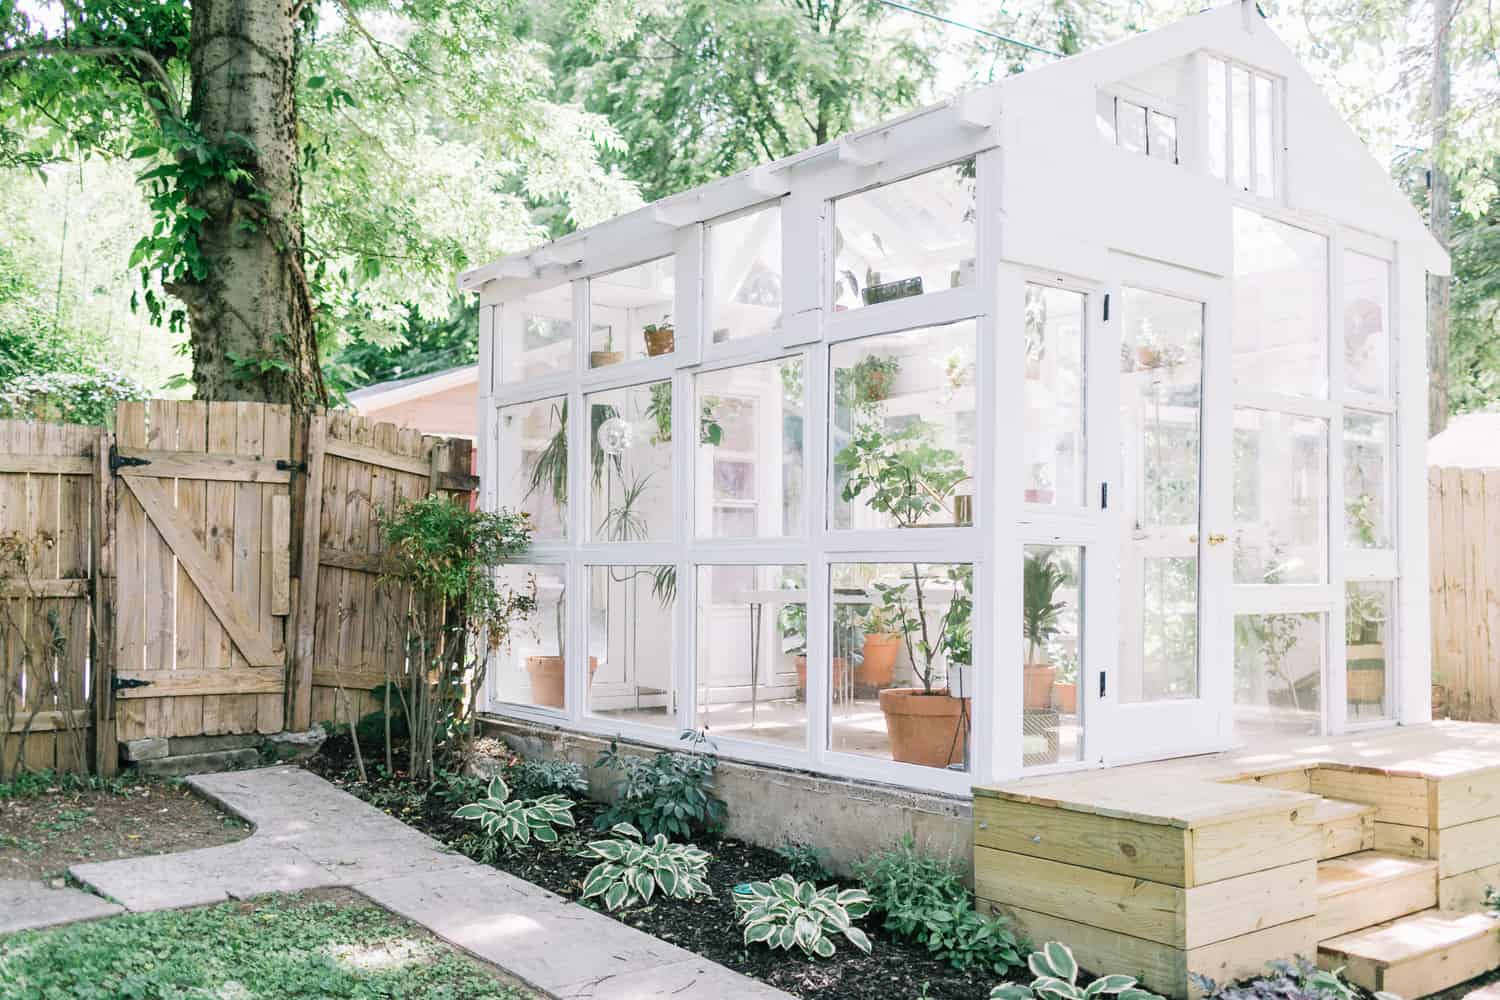
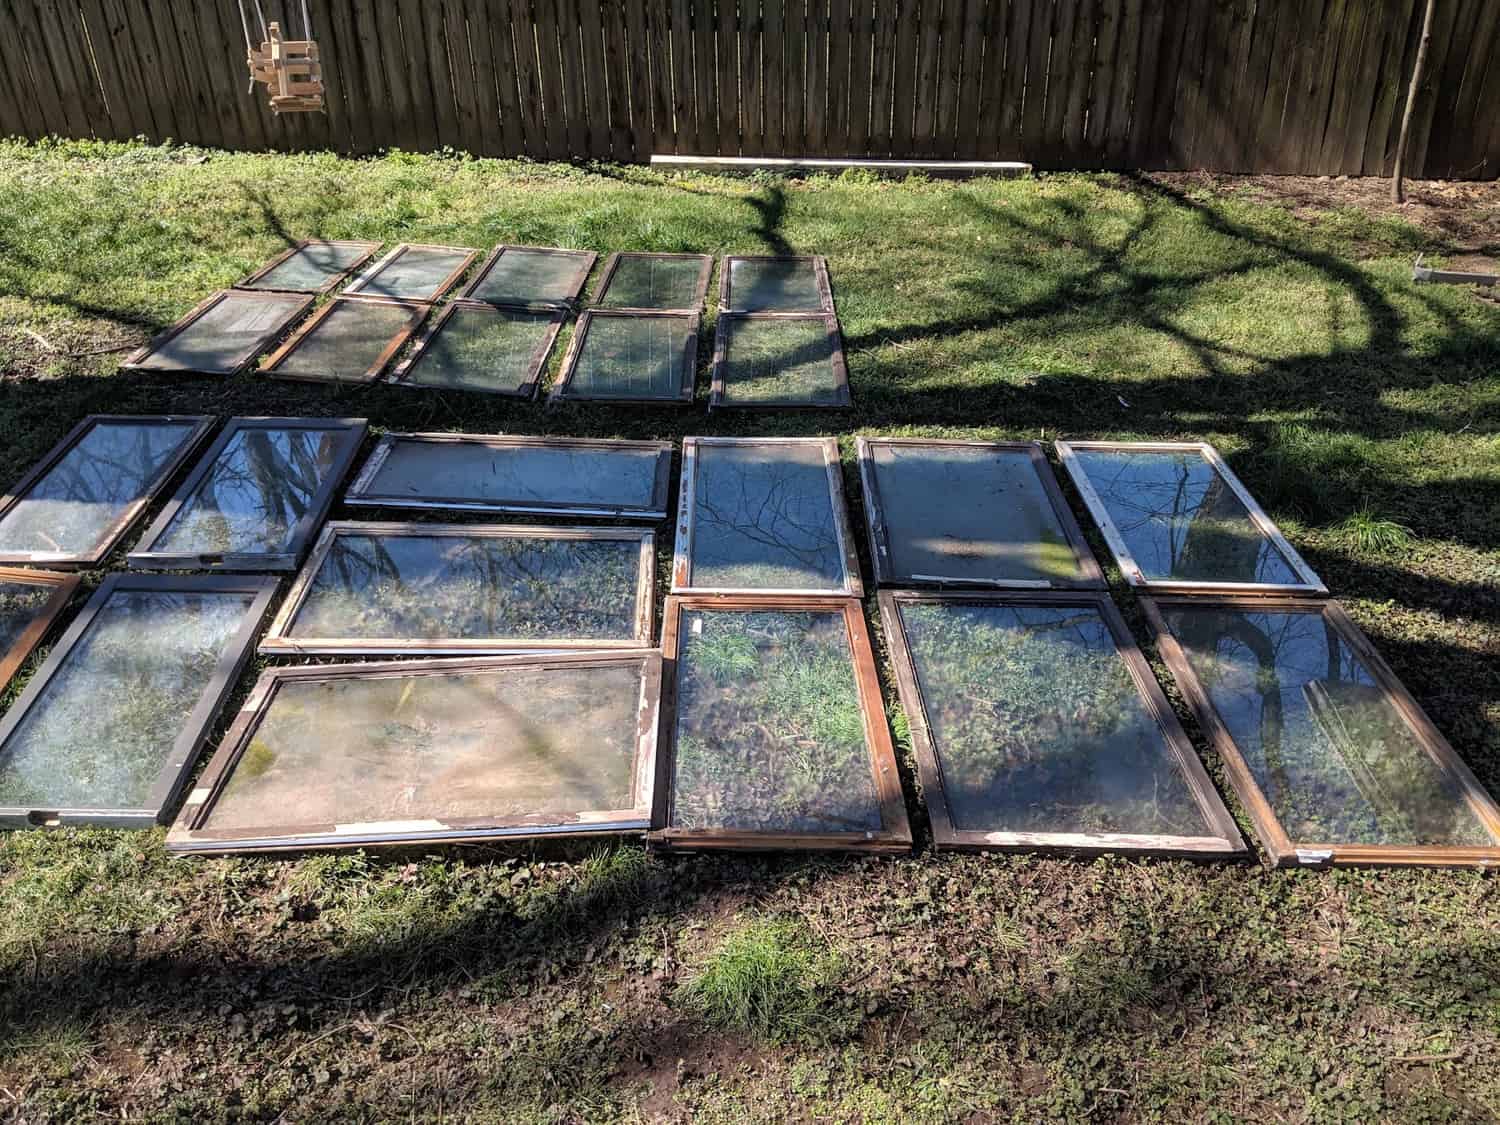 4. FRAME THE STRUCTURE. Using old windows means you will have a super unique framing throughout the greenhouse structure. Our greenhouse is 10×14’ in size, so we laid out the old windows like a puzzle and spaced out 2x4s of different lengths to put together four mostly glass sides of the structure.
I recommend collecting all the windows first, and then taking the time to plan out the full structure with detailed drawings. Make sure to invest in pressure treated lumber when building an outside structure, too. Being new to this, we had a non-pressure treated 2×4 on the ground on one side of the greenhouse and had to remove it and replace the board halfway through the project!
Learn from our mistakes and just use pressure treated lumber. 🙂 An avid gardener friend also told us to make sure we had a fan for air circulation in the greenhouse, so we bought a solar powered attic fan and installed it into the back wall of the greenhouse.
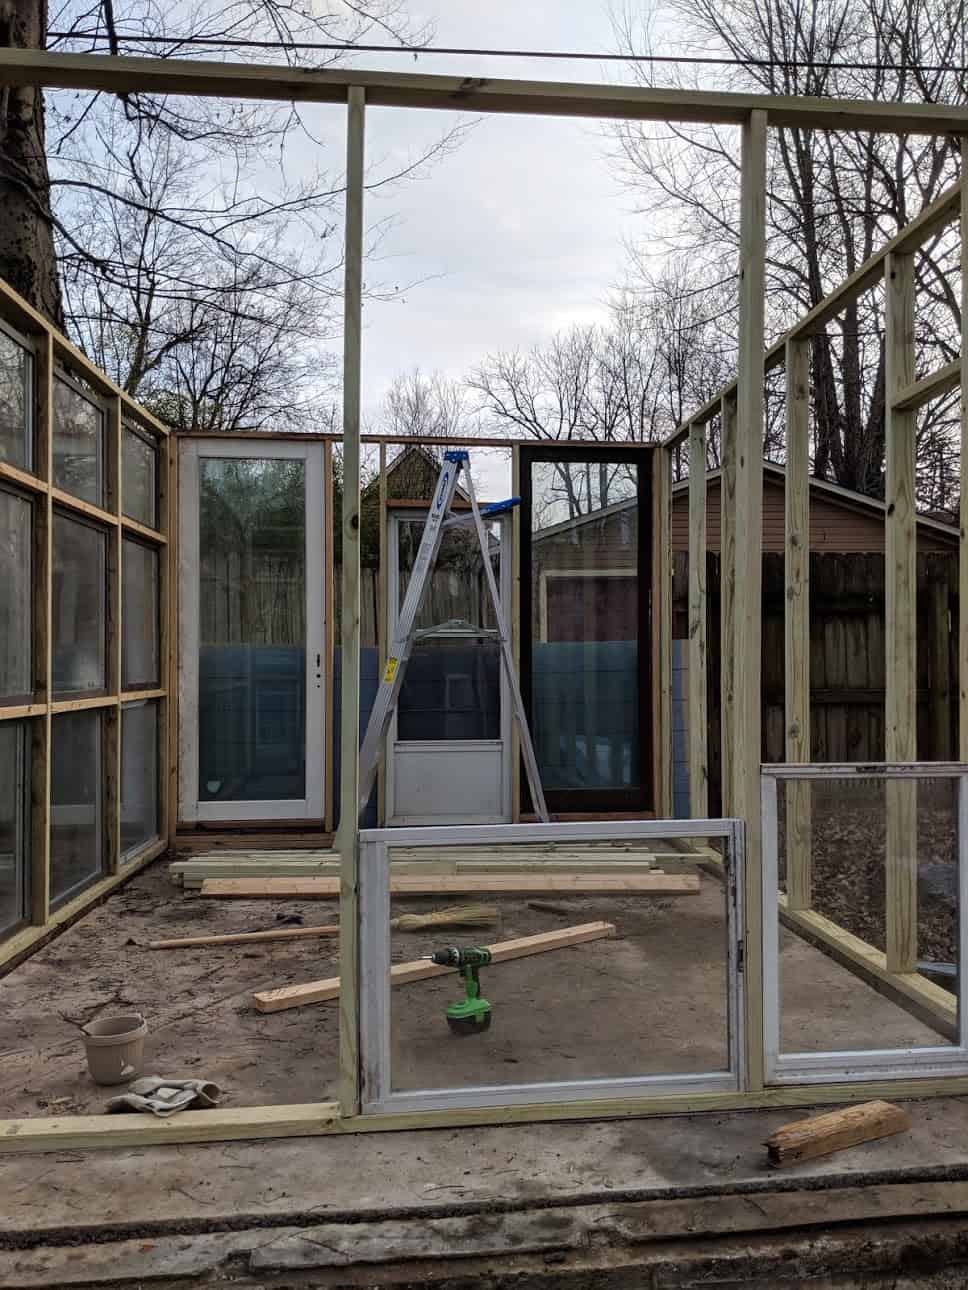
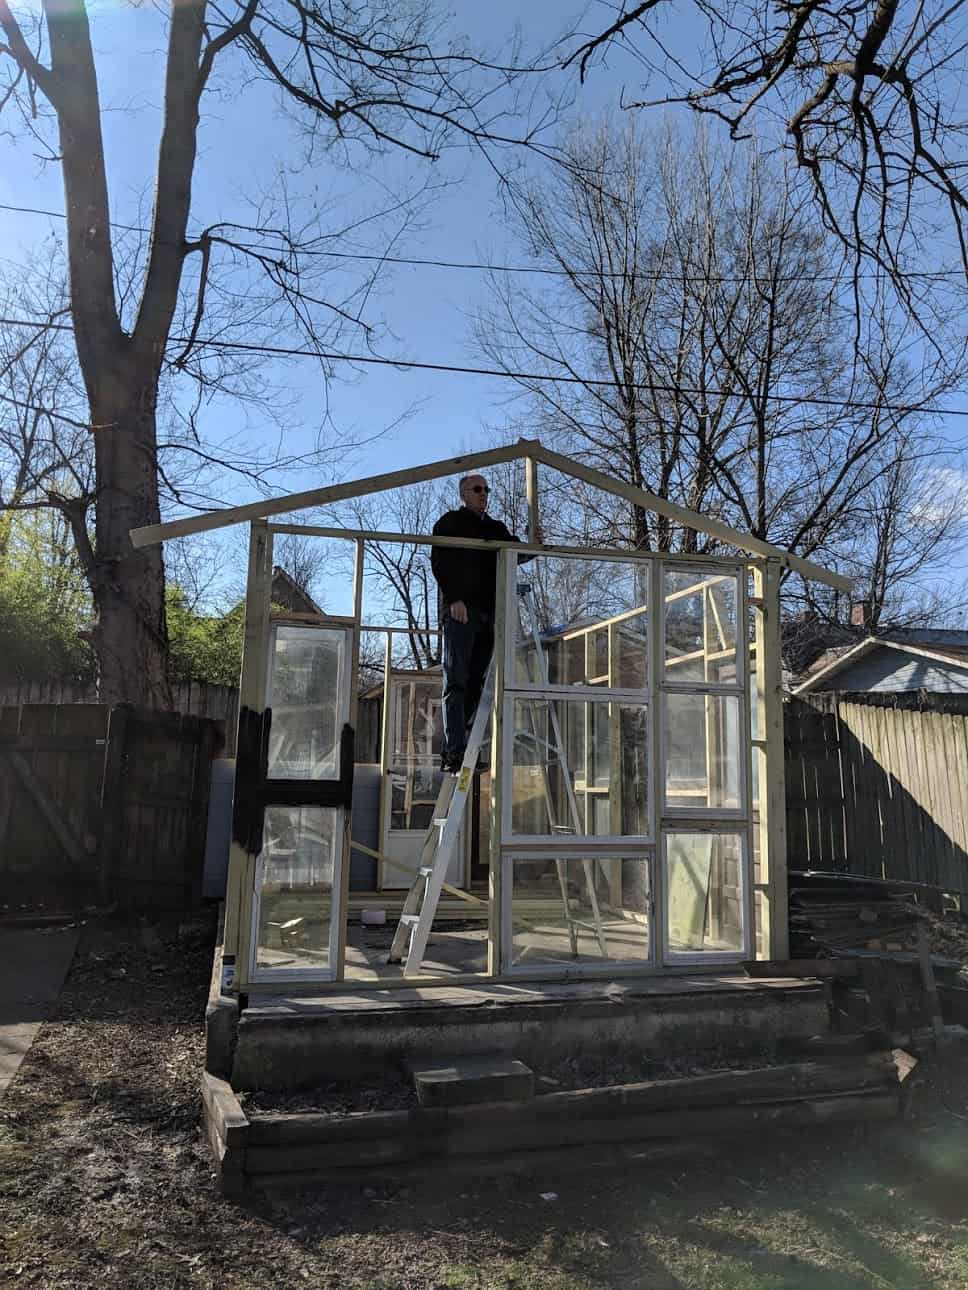
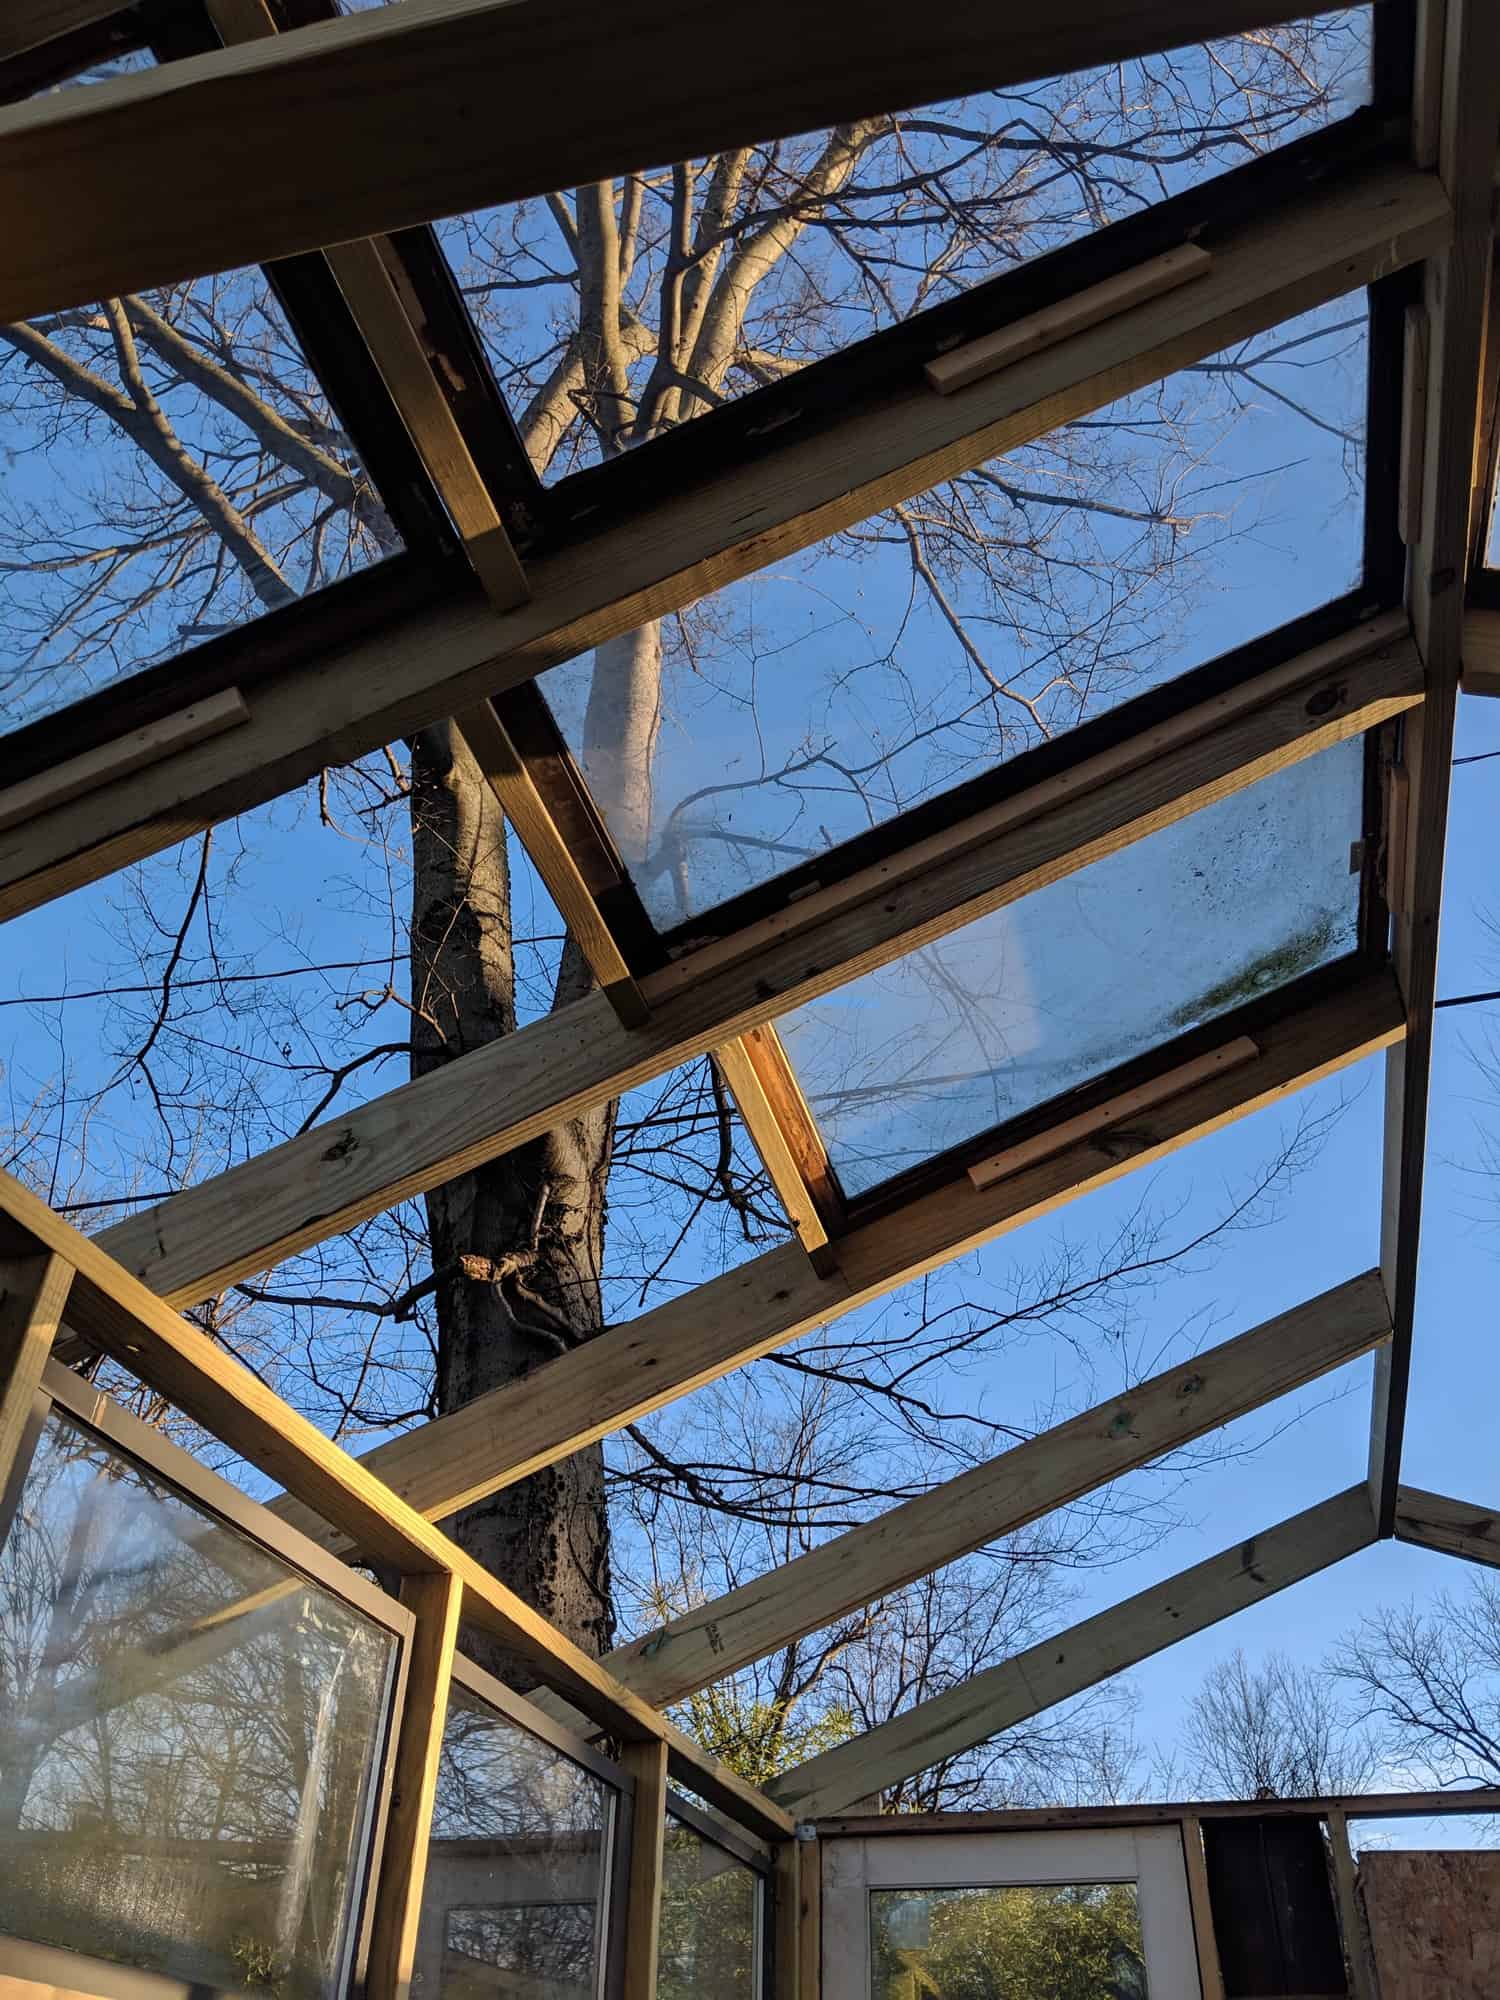
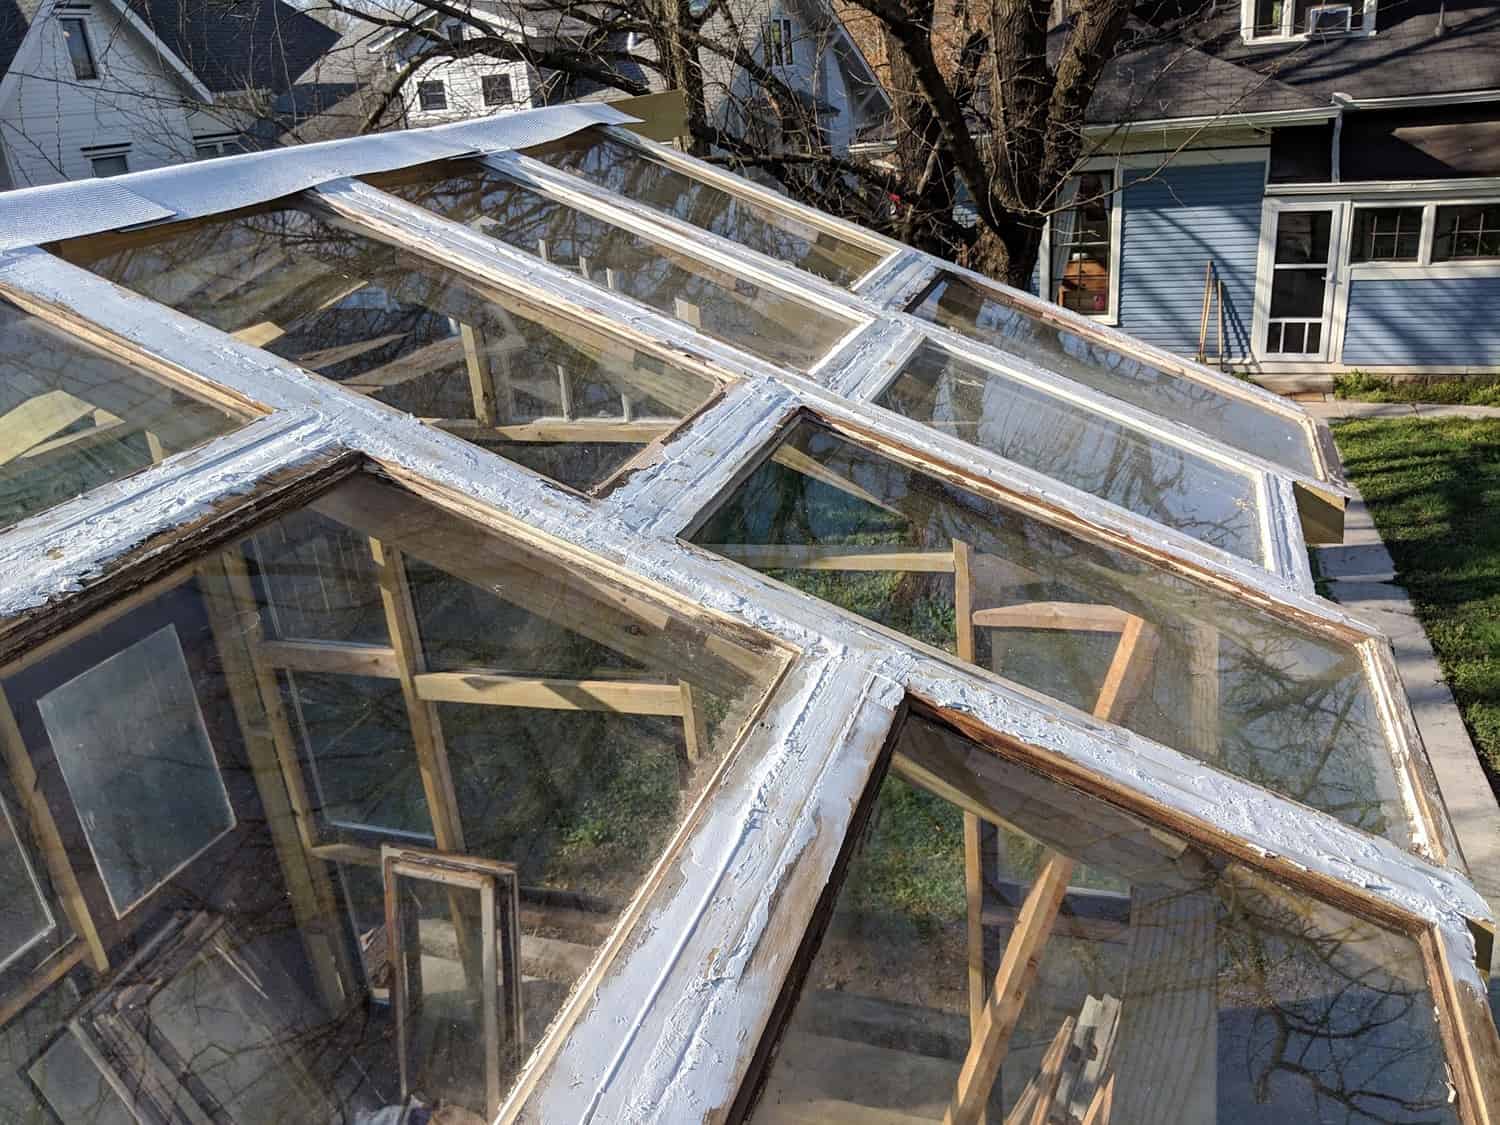
 5. BUILD THE ROOF. The easiest greenhouse roof covering is corrugated plastic that you can attach to the rafters. This will make the roof-building process a whole lot shorter and much more manageable. It will still look beautiful, too! We had collected so many recycled windows that we ended up using the old windows for the roof, too. This posed some unique challenges, but we love the finished product!
If you want to make the roof out of windows, here’s what to do: start with a long ridge board (2×6) and attach your rafters with birdsmouths cut out on either side to support. Similar to building the frame, plan out window placement on the ground to size where your rafters should be making sure that the rafters supported by the top beams on the structure all the way to the ground.
You will then attach the rafters using hurricane ties to the frame and frame in the windows. We filled in the gaps with a silicon sealant and used white asphalt roof panels along the ridge beam.
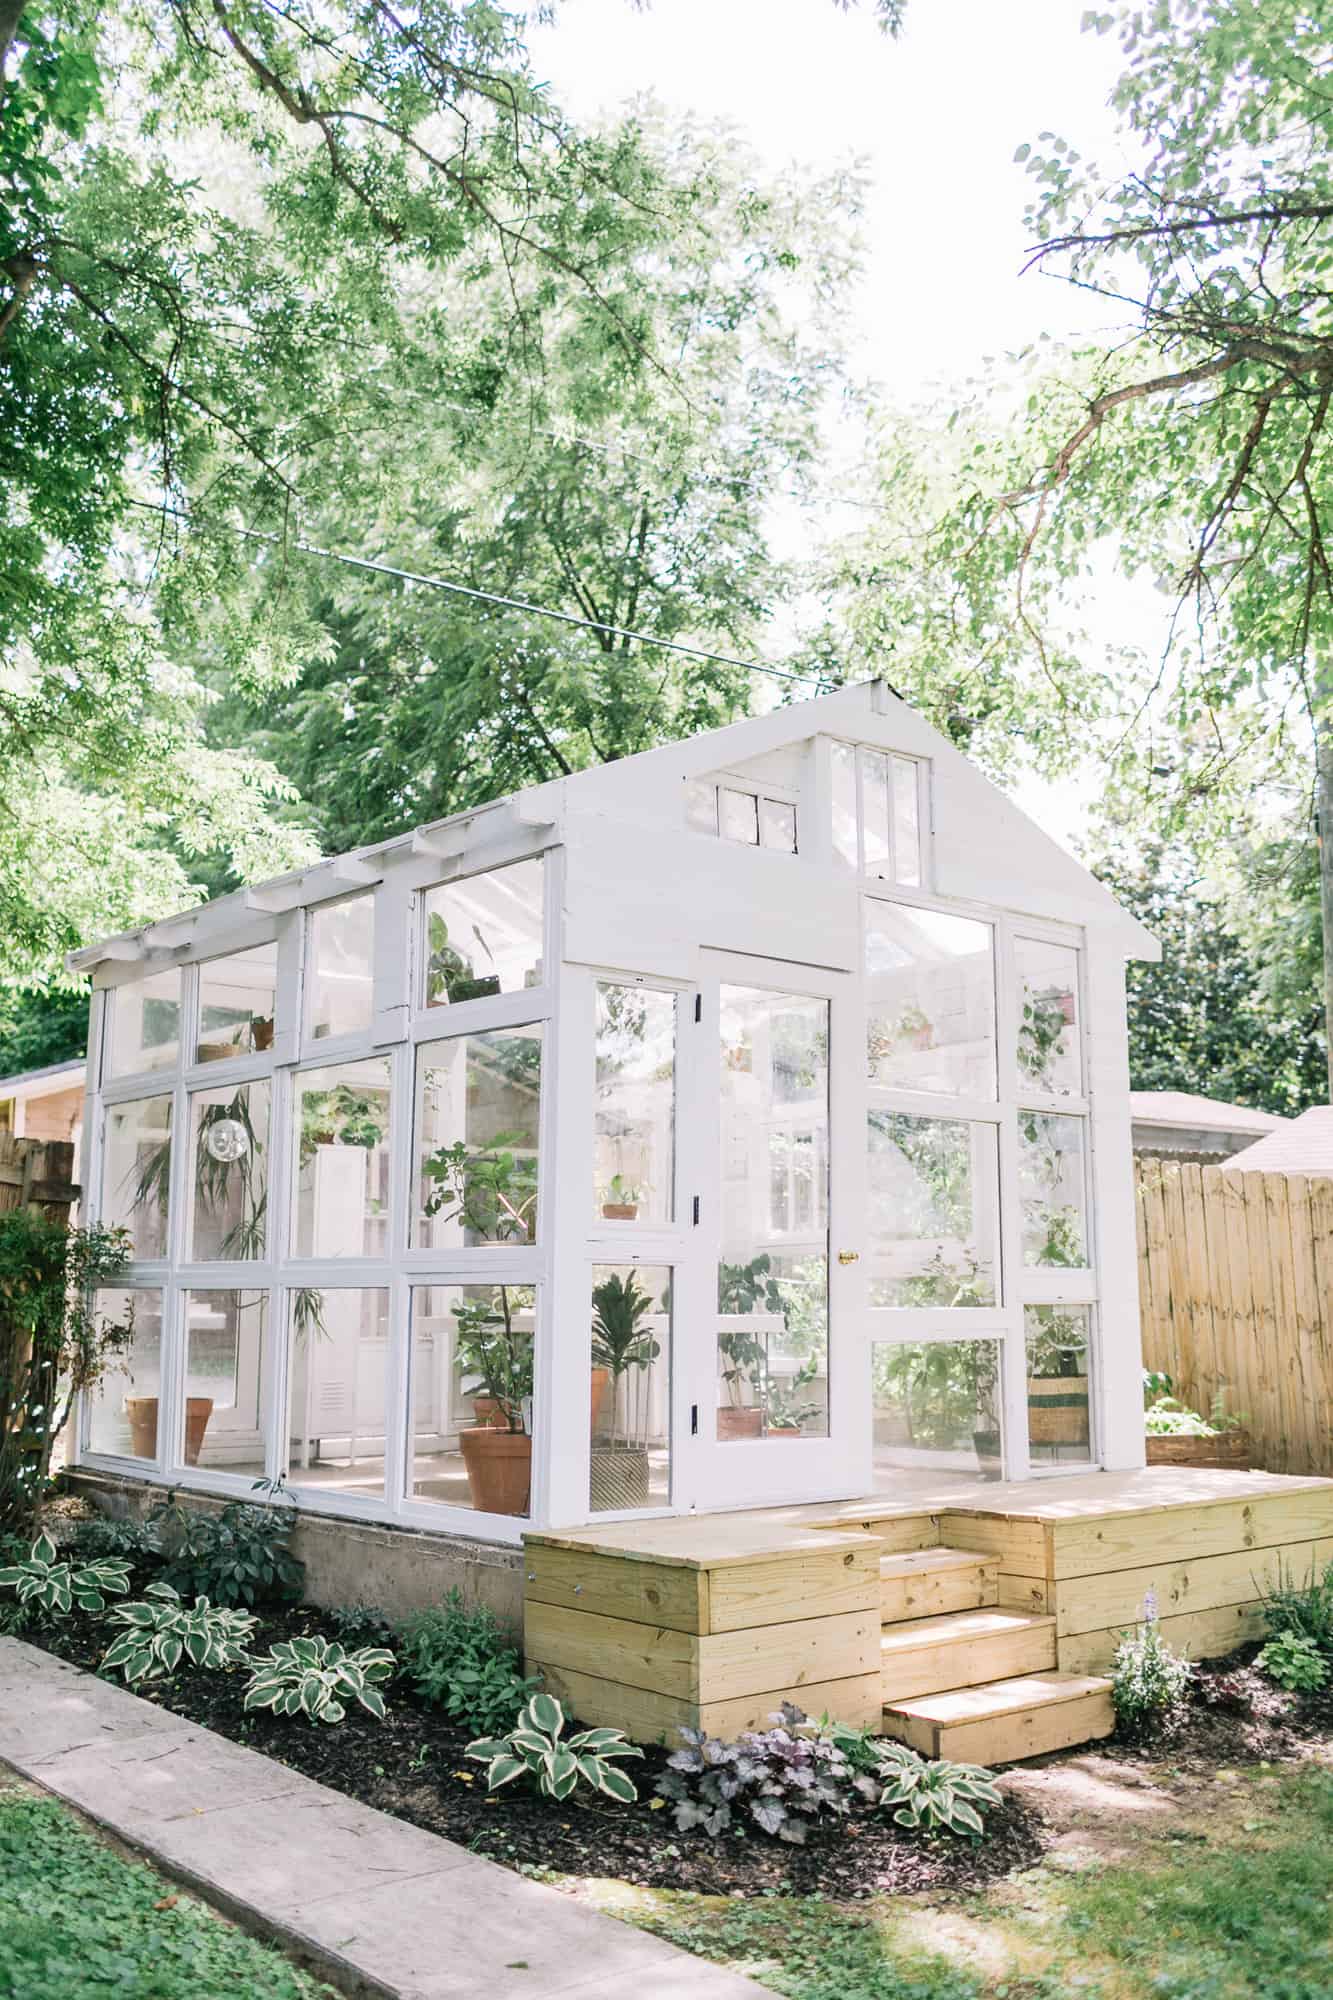
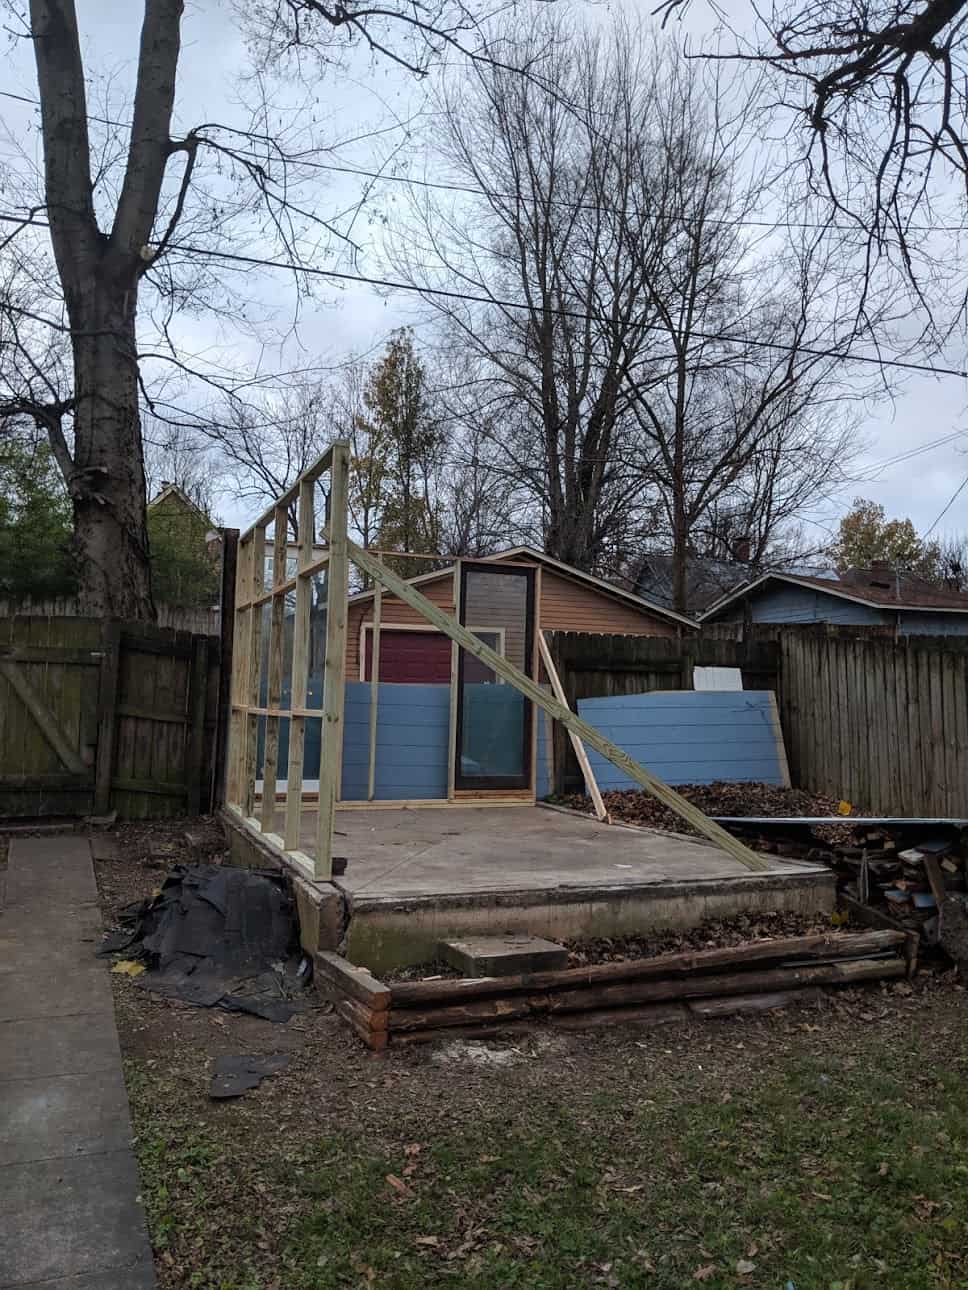
 6. FRESHEN UP THE SPACE. The area around the greenhouse wasn’t so pretty, so we decided to spruce up the space around it. We had built the greenhouse on a concrete slab where the garage used to be, so we planted flowers and plants around the greenhouse, which really freshened up the exterior.
We hired a local contractor to build a deck on the front of the greenhouse to make more of a special entrance to the space. The deck covers the existing concrete slab, and overall, allows the greenhouse to look more finished.

 7. TIME TO PAINT! This is the fun part—you are almost done! After a trusty Instagram poll, I was toying around with the idea of painting the greenhouse a sleek black color. After a recent trip to Tulum, I saw some gorgeous all-white greenhouses and immediately decided that we should paint ours white too.
The white also matches our house and overall backyard vibe better, too. Painting the entire structure one color really helped make the greenhouse look more finished and refined and we LOVE the way it looks!
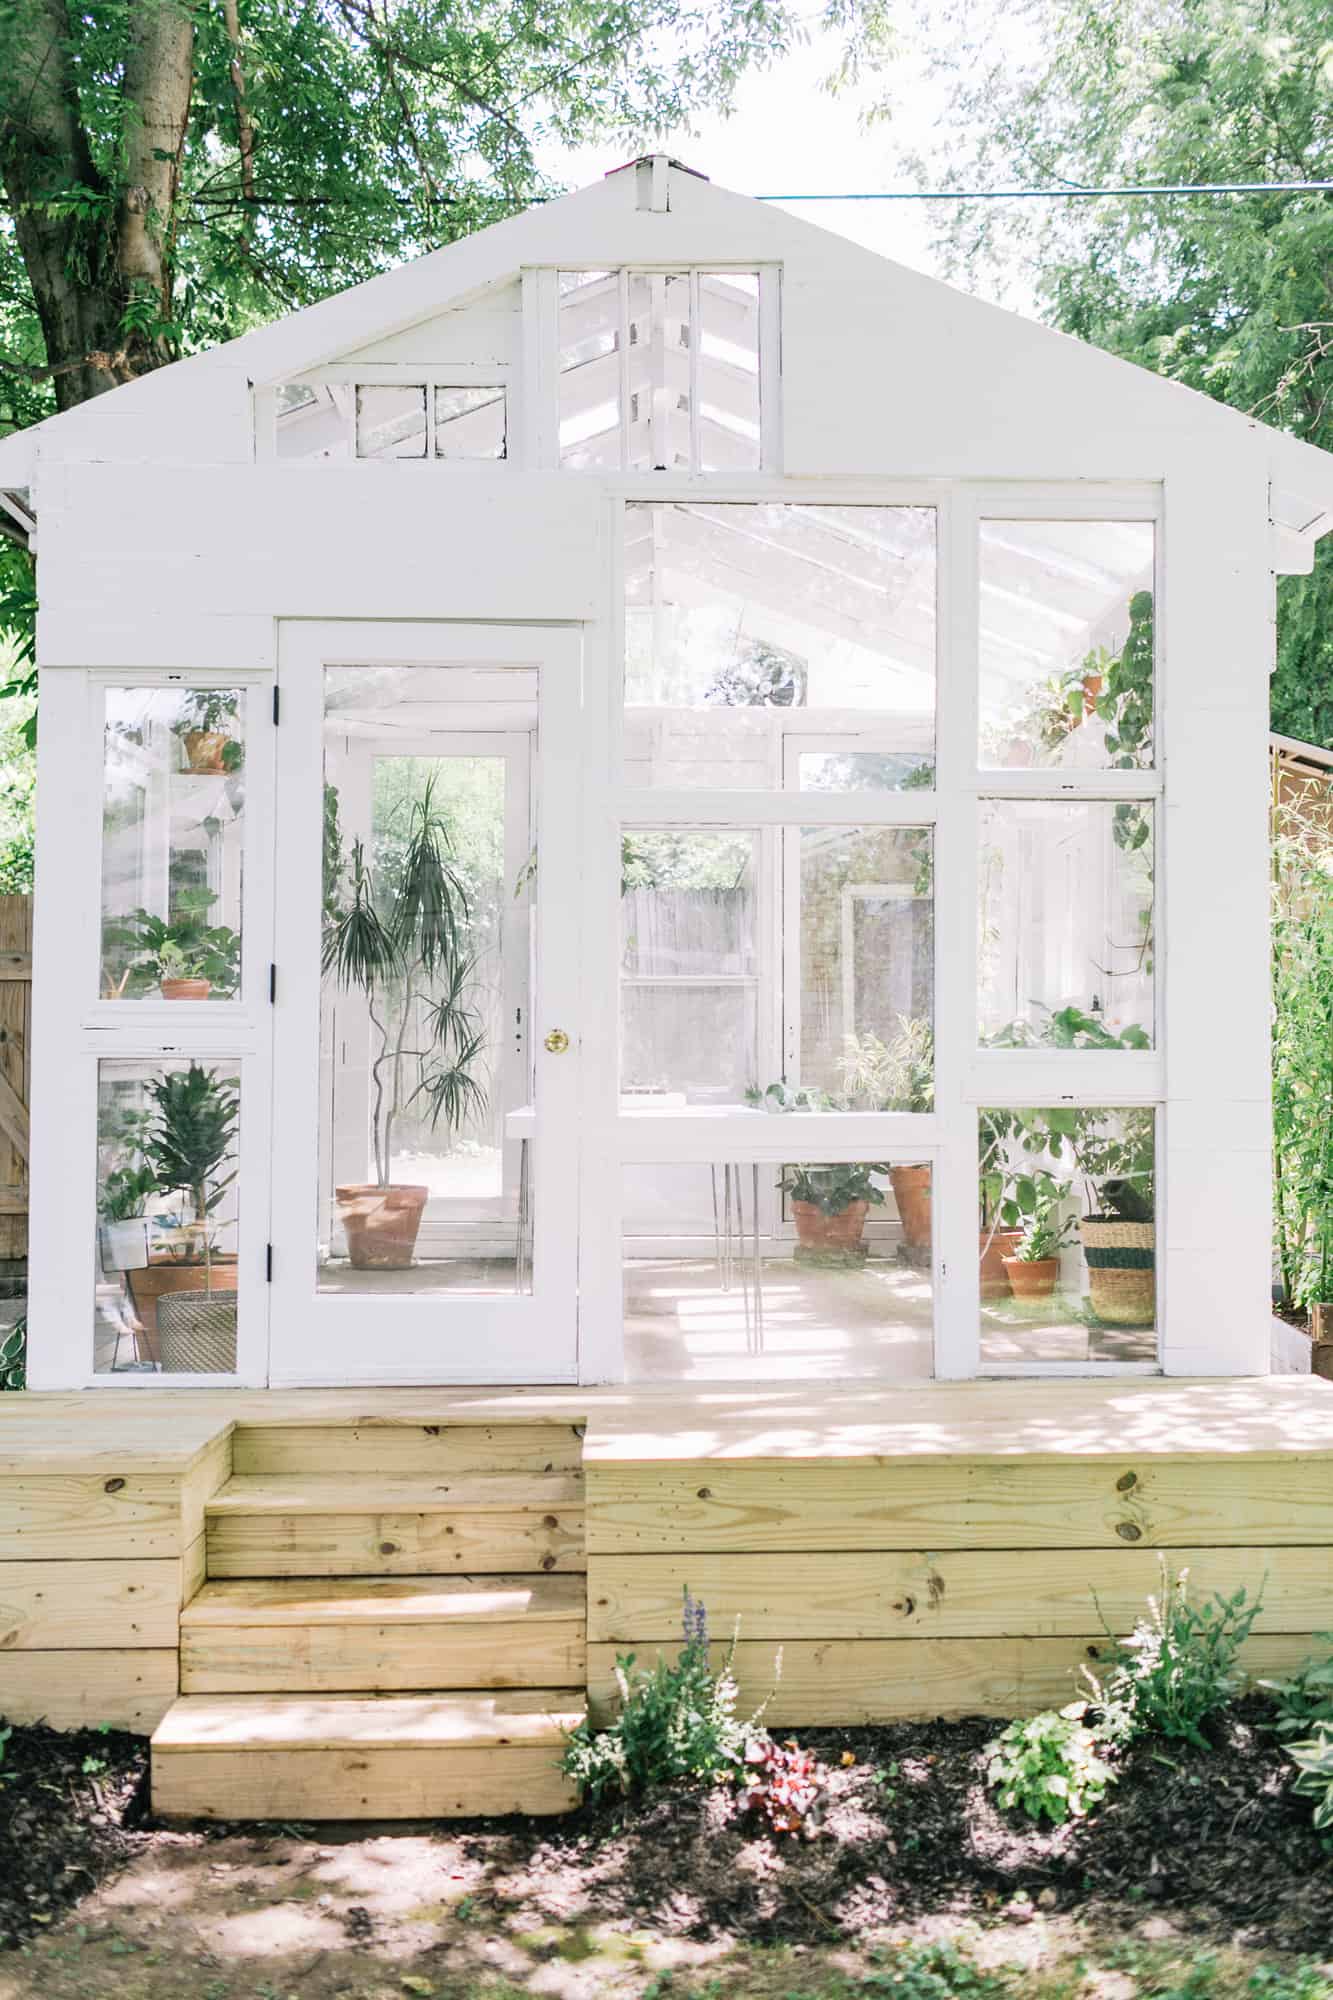
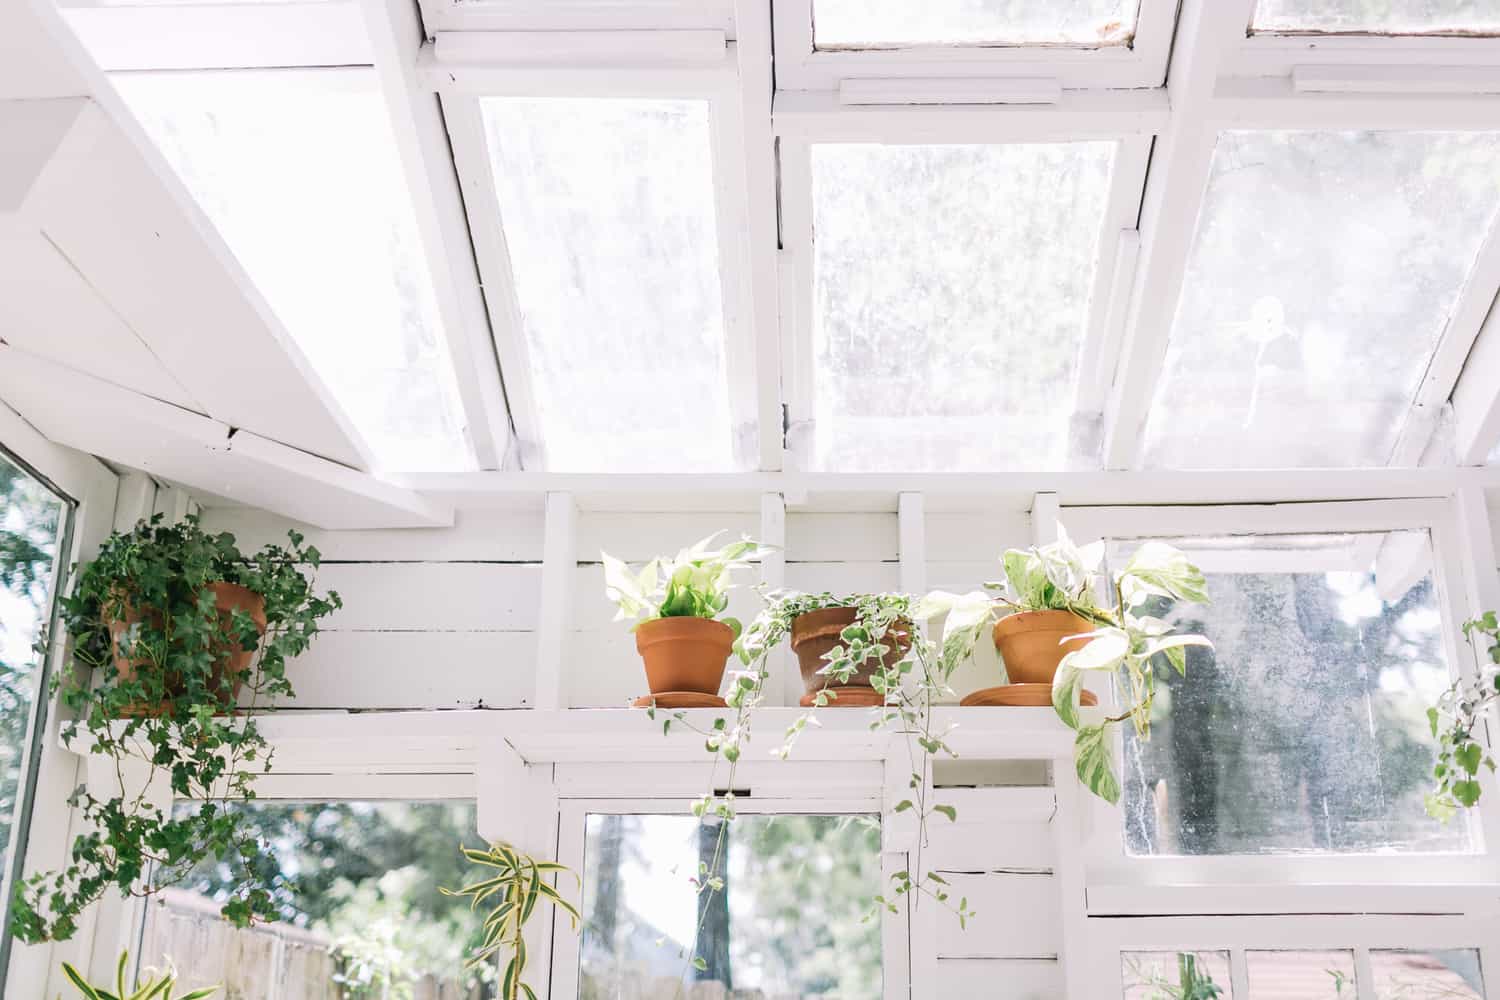
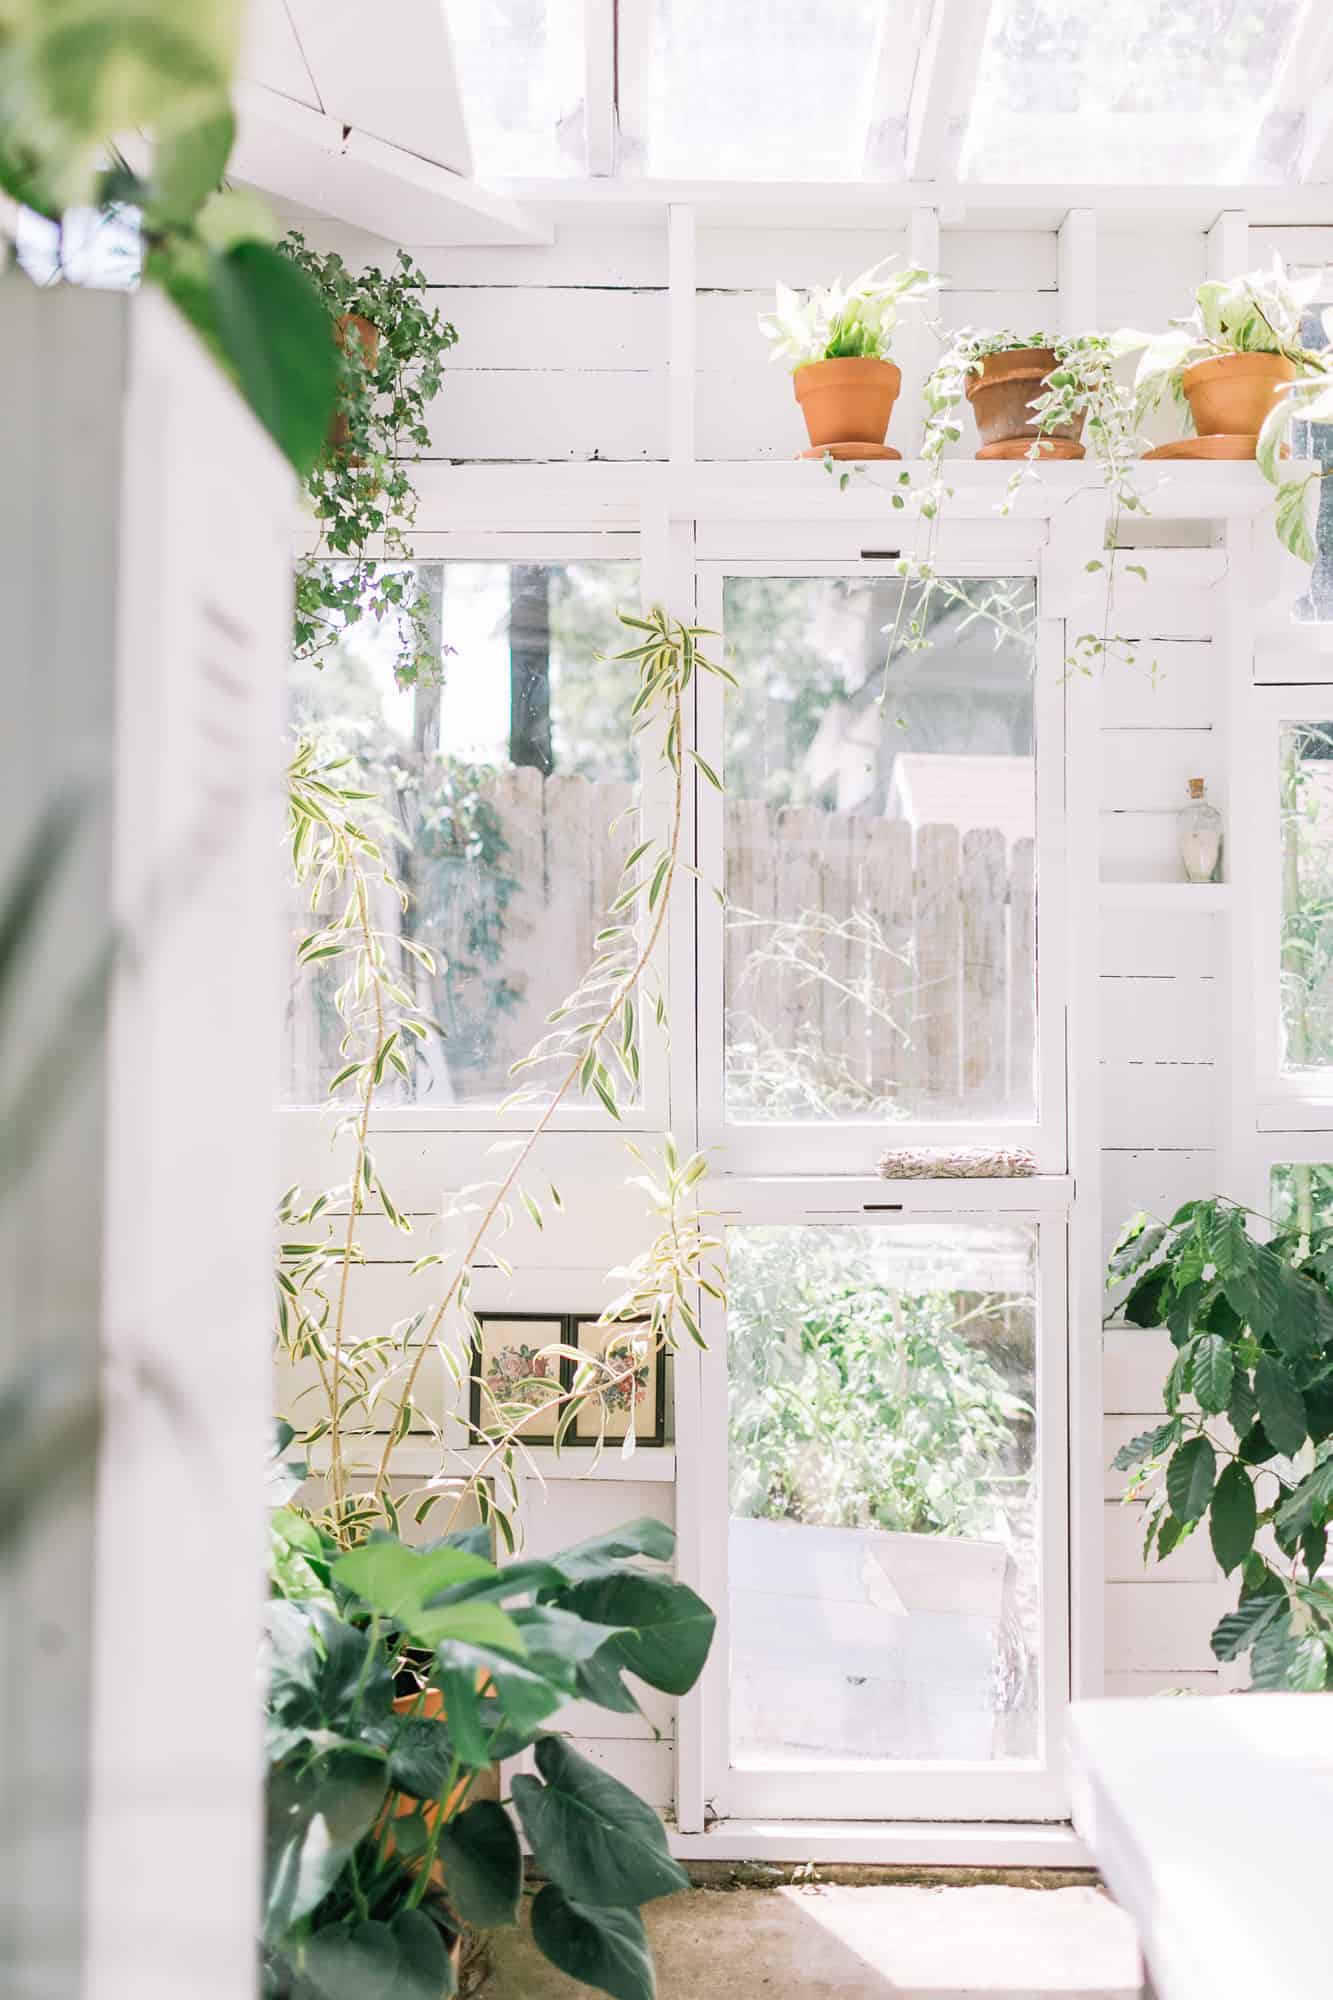
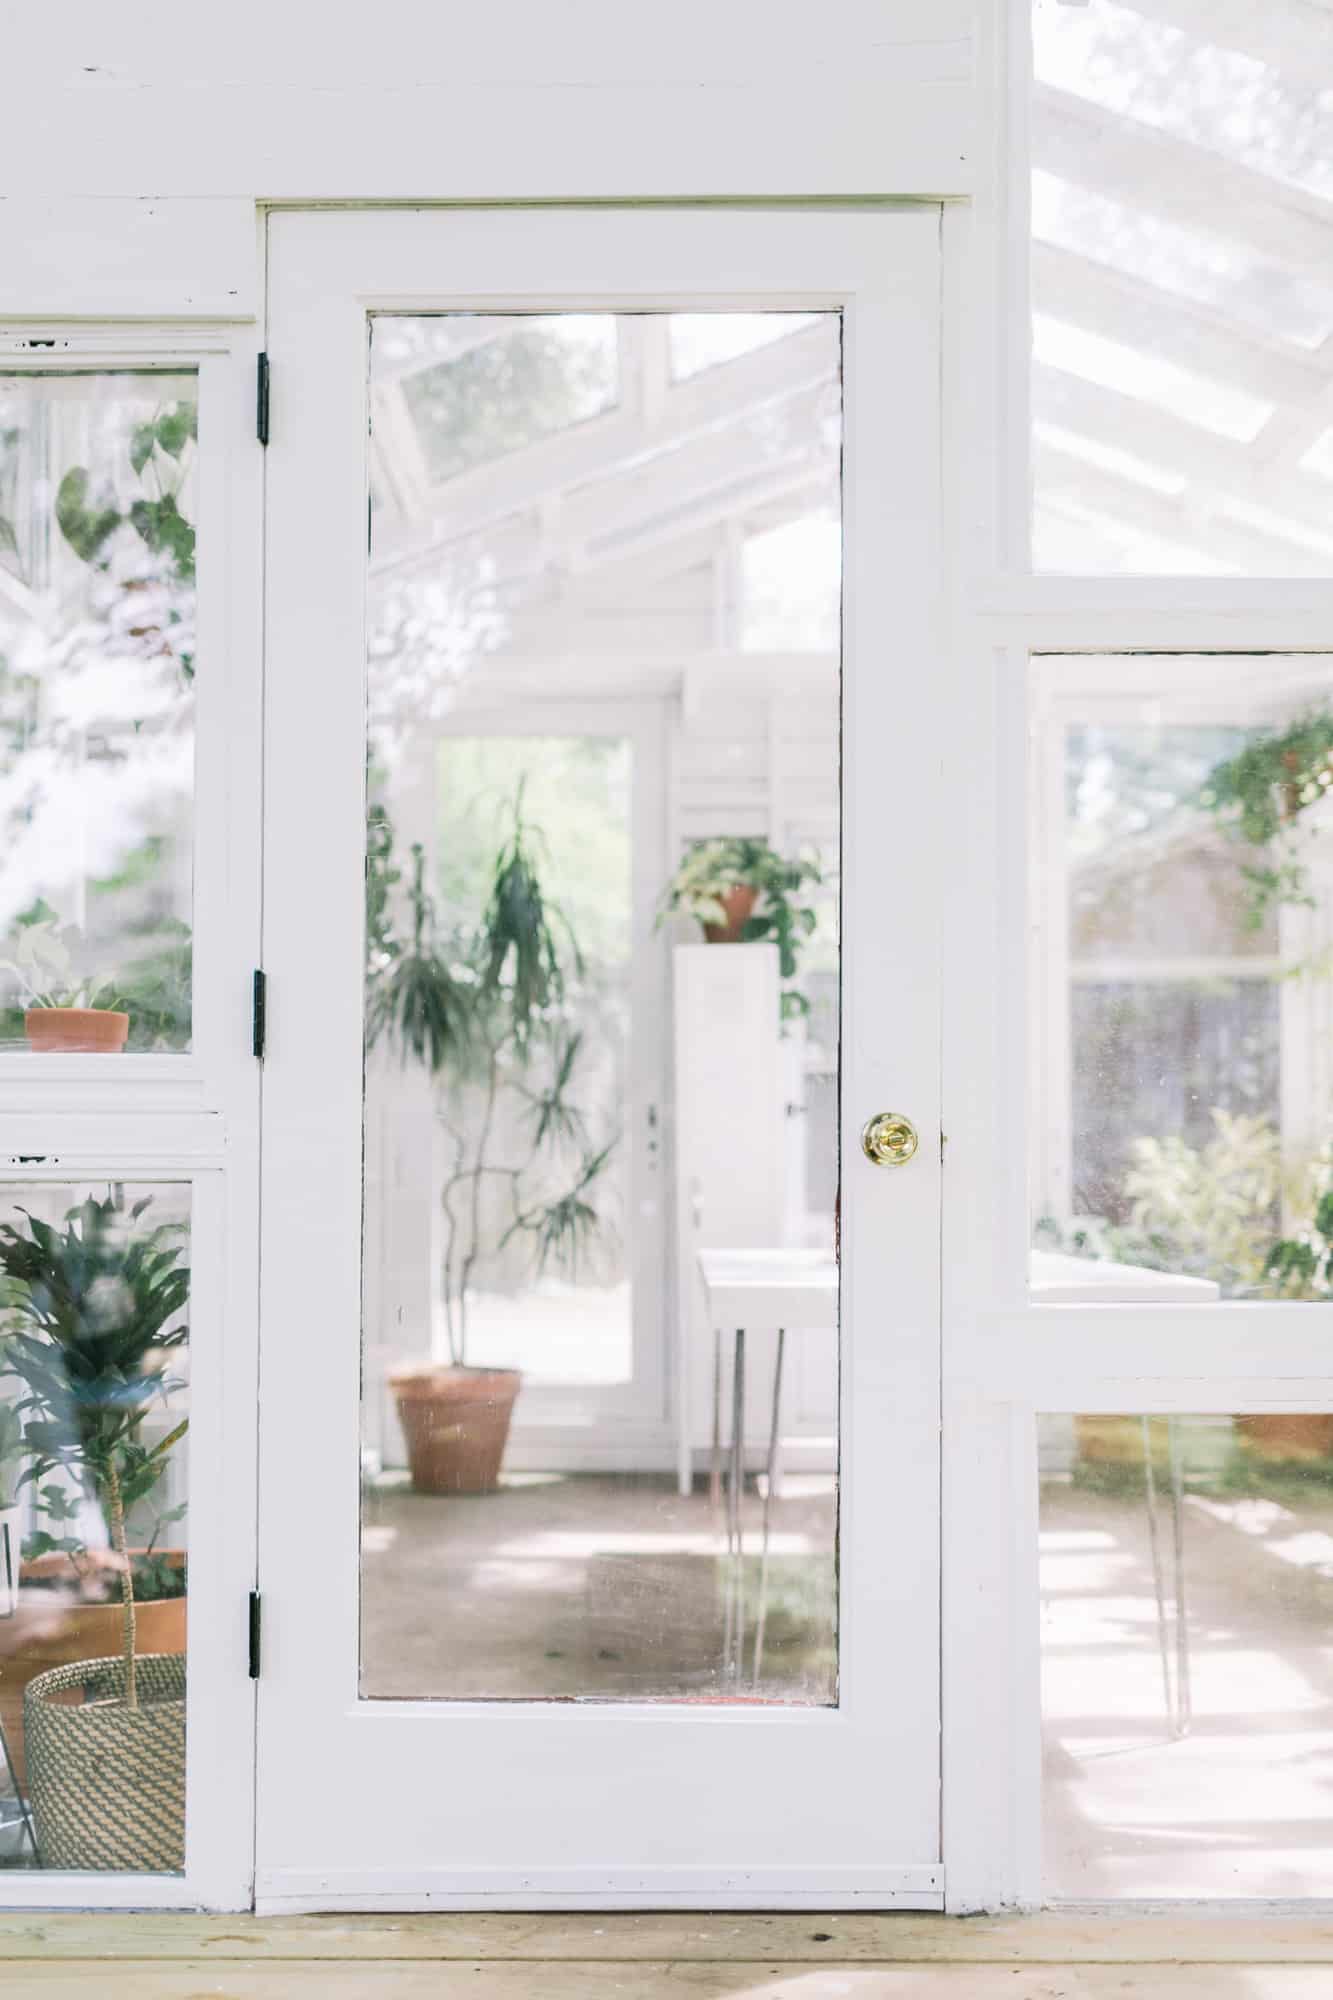 8. ADD THE PLANTS! This is the *most* fun part! Now that the greenhouse is complete, you can work on decorating the interior and, of course, that means all the plants! When Eric built the structure, he built some plant shelves inside.
Most of our plant pots are simple terra cotta pots. Dangly plants look great hanging over a shelf edge and you can’t go wrong with golden pathos or English ivy. We cut trimmings from some of our other plants to create new plants for the greenhouse, bought a few new plants and “adopted” plants that I found on Facebook Marketplace and at garage sales.
 We are SO happy with the final greenhouse result! It truly transformed our backyard. It’s been so special to walk through the greenhouse with our daughter Lucy and show her how we water and care for plants, and sample from the raspberry bush! Right now, we are just thankful it’s done and are working on adding more greenery and plants in the space. Eventually, we want to hang lights in here and add bench seating in here so we can host brunch and dinner parties with friends! I also want to use it as a backyard office or yoga room. Thanks again ABM for having me!”
You can see more photos of Andi’s greenhouse and Nashville home on Instagram, and be sure to check out our plants archive for DIYs and tips!

23 Comments
The wife and I are getting near a move from NYC to North Carolina and we love this. What was the cost (roughly)?
Absolutely Beautiful!!?
NIIIIIIIIIIIIICE
Hi Josh!!
I too built a greenhouse with old windows. And I’m 75 yrs old. Finished it 2 mos ago. It’s not easy but a wonderful feeling of accomplishment when finished. Sorry I can’t ad a pix to show you.
I think this is beautiful, but would never last with our Texas storms since we get too much hail. I bet I could get the old window frames and replace the glass with acrylic, though. Using the clear corrugated roof panels would be the way for me to go, maybe even with a little extra overhang for added protection. Thank you so much for the inspo!
Omigoodness, I am in love!! It looks like a lot of work, but ohhhh has that paid off! A greenhouse is on our list…someday 🙂
This greenhouse, while beautiful, is NOT a DIY!!! It is a structure which in many states will require a permit. This is dangerous. The existing foundation needs to be evaluated. The live and dead loads need to be calculate. The framing isn’t great for shear. Recycled windows for the roof?!?!!! Like I said, live and dead loads – rain is going to add load to the roof, and you have no idea the specifications for the glazing and whether they can support this load. Really, I am concerned for your safety – this structure could collapse with high winds, heavy downpour, or snow.
ABM, I love your site for DIYs and inspiration – but some of these guest DIYs (thinking back to Mandi’s pergola) are simply dangerous, and readers should be encouraged to seek the help of a skilled professional.
Hi Victoria,
While I absolutely encourage any and every reader to voice their opinion in a respectful way (as you have) I have to disagree with you. First, this is a DIY. Andi and her husband built this project and shared the process here as well as on her own site (which we linked, it’s a great post you should go read it). They did it themselves, which is what DIY is. This doesn’t mean every reader who follows ABM could make this, as there are different skill levels no matter if you’re working with wood projects or sewing. And working your way up to an epic level project like this or a pergola is something that you would certainly want to consider if you’ve never worked with any wood or construction projects before.
Andi touches on this fact that the project took awhile to complete because they did have to work with the city to get approvals and paperwork filed. You are correct that permits are important in a project like this, I think you maybe just missed that part of the post. If that’s something you’d like to hear more about I would recommend asking her, we’ve linked her blog and anyone is welcome to reach out.
Notice how Emma didn’t address Victoria’s legitimate safety concerns with this structure. Glass from recycled windows is never a safe roofing material.
It’s so pretty!!! ???? One question… are the old windows tempered glass? I love this idea, but if the old window are not tempered, it seem like they could be dangerous, especially with little ones around. But, seriously so beautiful! Thank you for the inspiration!
O my gosh that transformation is incredible! Ah it is so beautiful, thanks for sharing!!
-Kate
https://daysofkate.com/
Wow! Beautiful! I’ve been dreaming of building my own greenhouse out of recycled windows for years, but I’m not very handy … I migfht give it a try now 😀 Thank you for this post! Greetings from Norway (yes, you have readers over here 🙂 ).
It’s quite a transformation and I like the fact that you didn’t fill it to the brim with plants so that every plant will have enough space to breathe! Well done!
I am curious about whether you took any precautions to deal with possible lead paint on the old windows. We had a scare with our daughter and lead paint back when she was around 9 months old. It turned out that there were lead paint chips in our soil, likely due to careless previous renovators who didn’t contain contaminated debris. There were other lead paint issues with our 90+ year old home too,. The whole thing just made me super sensitive to old paint when kids are in the mix!
Love this! Can someone please advise on where Elsie got this adorable green dress from? Thanks!
Hi Kelly! It’s from J. Crew 🙂
SO BEAUTIFUL!!! I’m curious to see how the plants hold up in the greenhouse through the winter. I worked at FLWR Shop in East Nashville for a few years and the winter time was always rough for our greenhouse!
Do you have to have a heater in it for the winters? When I lived in Bowling Green, (just north of you) I had to move all my plants inside my house during the winters. Even ones I put in my garage would die.
This is AMAZING ????????????
That looks like a lot of work but the result is well worth it. 🙂
This is the most Instagrammable greenhouse I’ve ever seen! It’s so beautiful – I think I’m in love!
Charmaine Ng | Architecture & Lifestyle Blog
http://charmainenyw.com
I love your greenhouse it looks.so elegant wish I had one