
 When we began our patio makeover, I knew I wanted to make a slat wood privacy fence, but I was a little stuck about how to provide some shade. We love dining al fresco, but the sun shone so strongly onto our dining area, dinner often was served with a side of sunburn. No, literally—I would get sunburned on just one side of my body while eating out there. I considered stretching a shade sail, mounting a retractable awning, or just using umbrellas. But in the end, I knew only a pergola would give us the intimate outdoor dining experience I wanted.
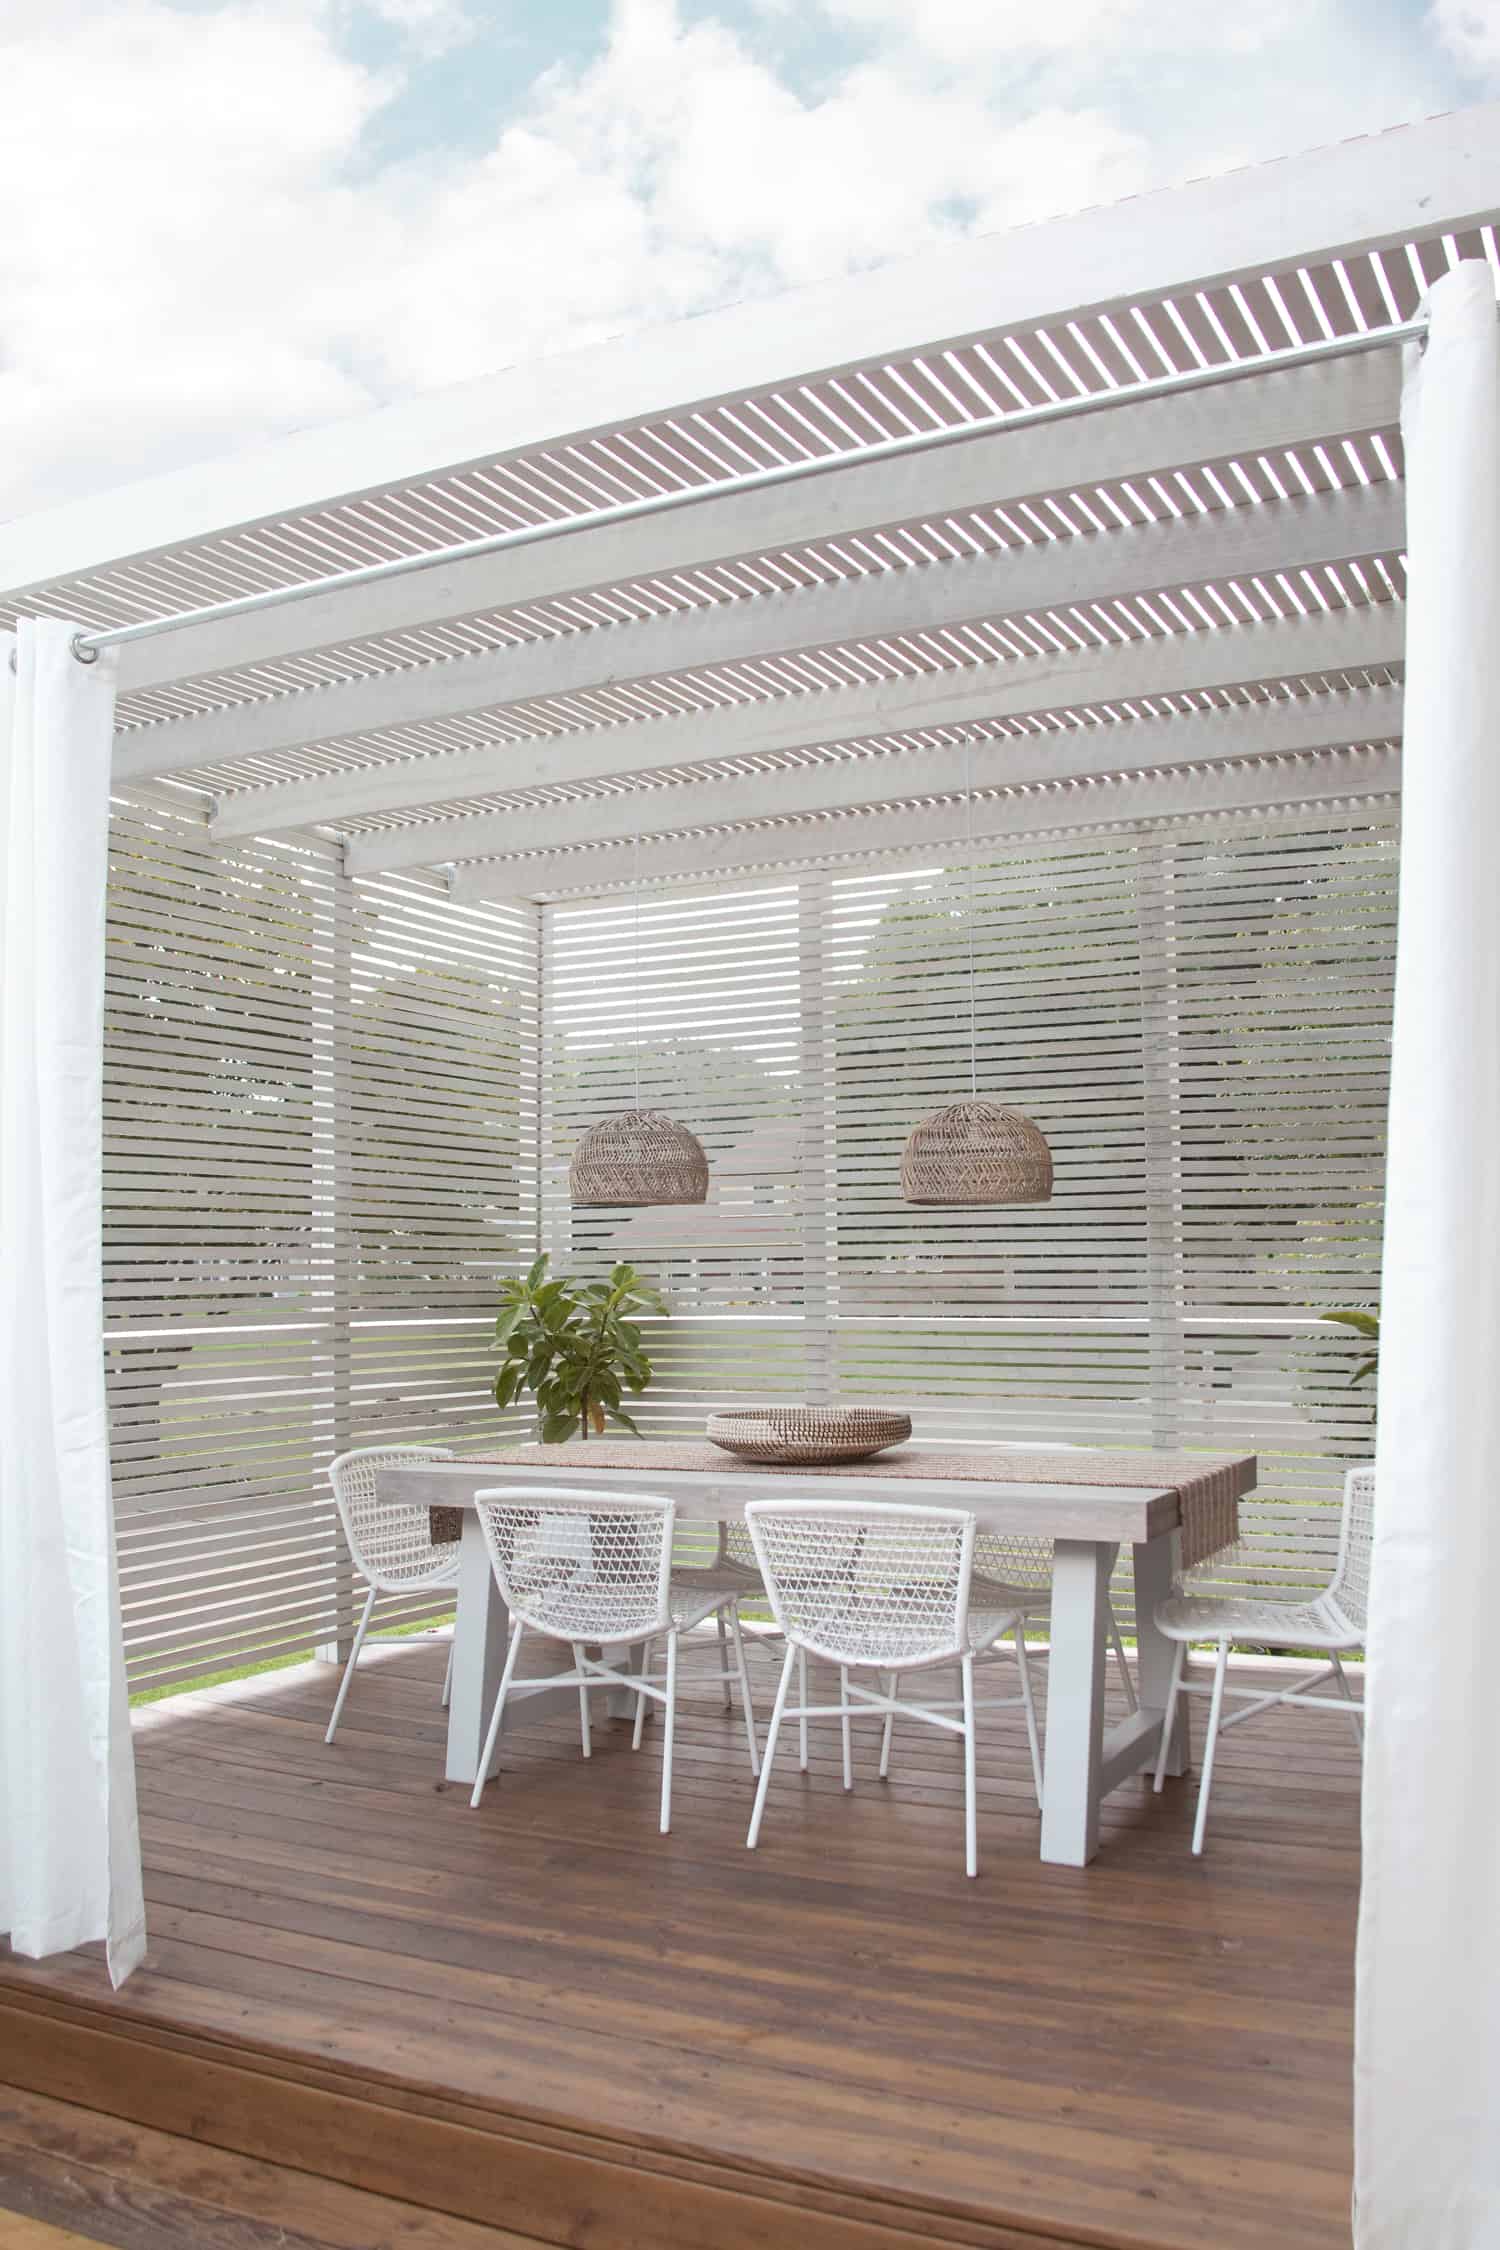
As far as wood slats are concerned, I’m definitely team The More the Merrier! So, of course this pergola idea evolved into making not just any old pergola, but making a slat wood pergola to go with our slat wood privacy fence. I had considered adding a retractable fabric shade for the pergola, but the slats ended up being fairly simple and inexpensive additions that make this space feel so cozy and nice. I’m so glad we took the time to add the slats to the pergola. The shade the slats offer is so nice, but we still have the sense of being completely outside with plenty of bright light and breezes!
 Before & After
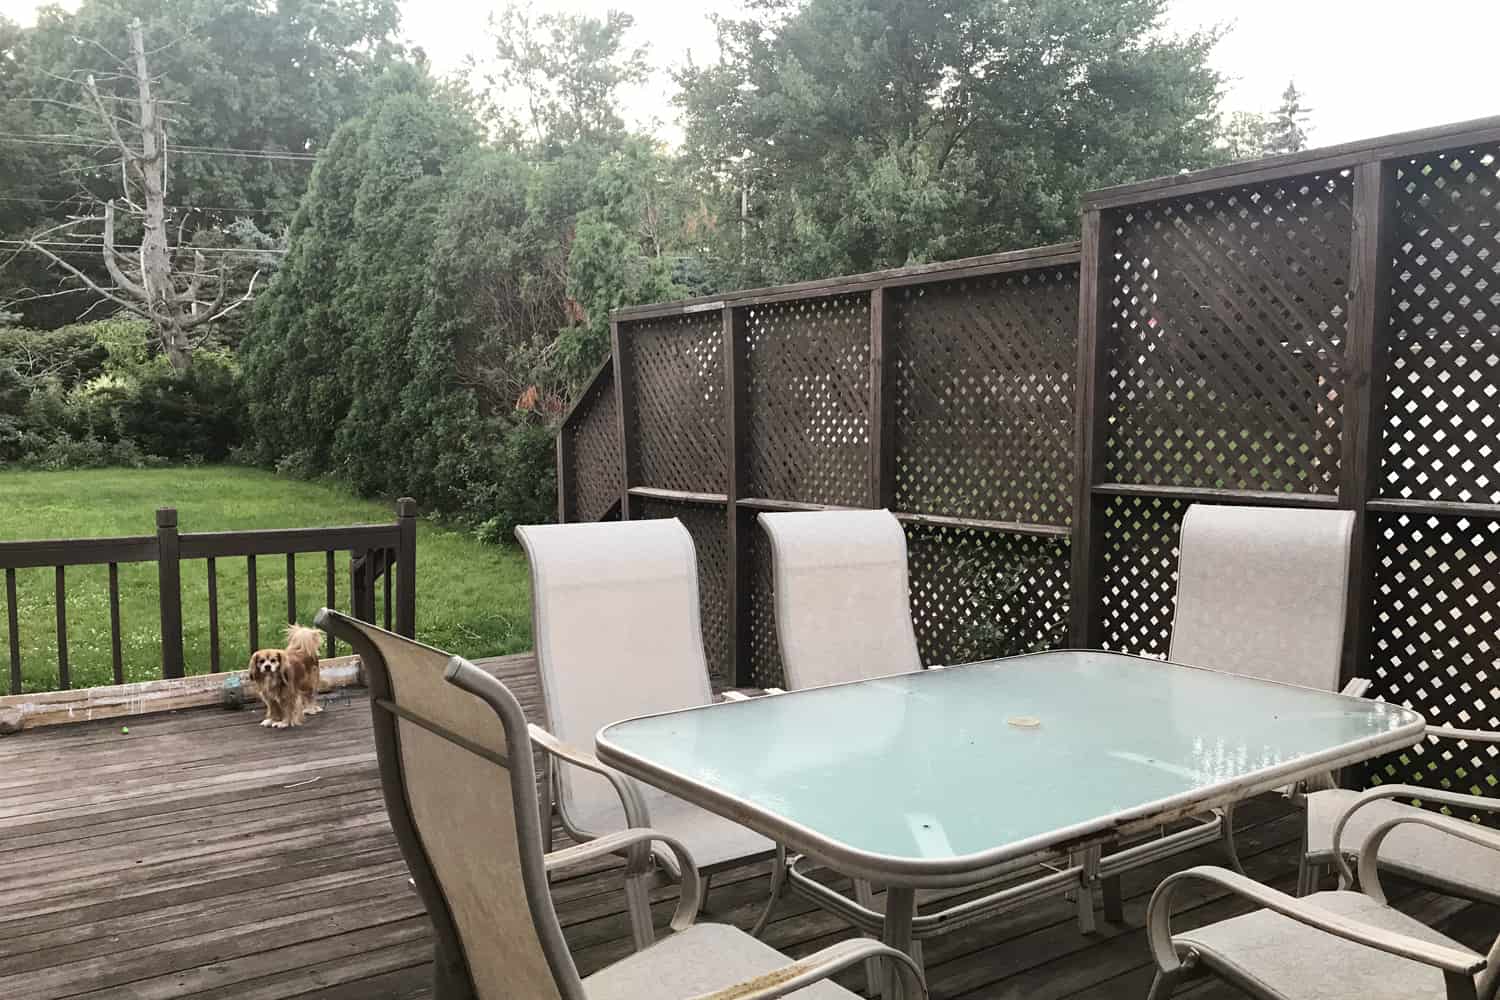
The before and after of this space feels so insane to me! I had never really viewed our patio as any kind of extension of our home. It was just this big looming project, and never anywhere we wanted to hang out. We had a hand-me-down dining set that served us well during the first year of living here, but obviously, the Article Tavola table and Sala chairs are absolutely stunning. They have the style factor of an interior dining set, but with the durability for outdoors. (We will put covers over all of our outdoor furniture when our Ohio weather turns too chilly to enjoy the space.) Article provided all of the outdoor furniture for this patio makeover, definitely making the space complete!
 Before putting up a pergola, you need to have a tall fence or support posts with a top beam in order to mount the pergola beams. You can check out my post about building a slat wood privacy fence where I talk about mounting posts and creating the base which we used to support one side of the pergola.
Supplies:
- Metal hangers like this
- Coated deck screws
- 2×6 treated lumber (You’ll need enough of these to be spaced 2′ apart)
- Lattice strips*
- Tape measure
- Power drill
- Chop saw
- Nail gun or hammer and nails
*Sourcing Lattice Strips
I recommend you check out the section of my slat wood fence blog post where I talk about sourcing lattice strips. You can buy pre-cut treated lattice strips at places like The Home Depot and Lowe’s, but I had a bad quality experience with the slats I received. We ended up making our own treated slats for above the pergola, and it was really nice to just use really long strips instead of having seams where shorter strips would meet up. I wrote everything you need to know about sourcing strips as well as making your own. Check it out here!
 Building the Pergola
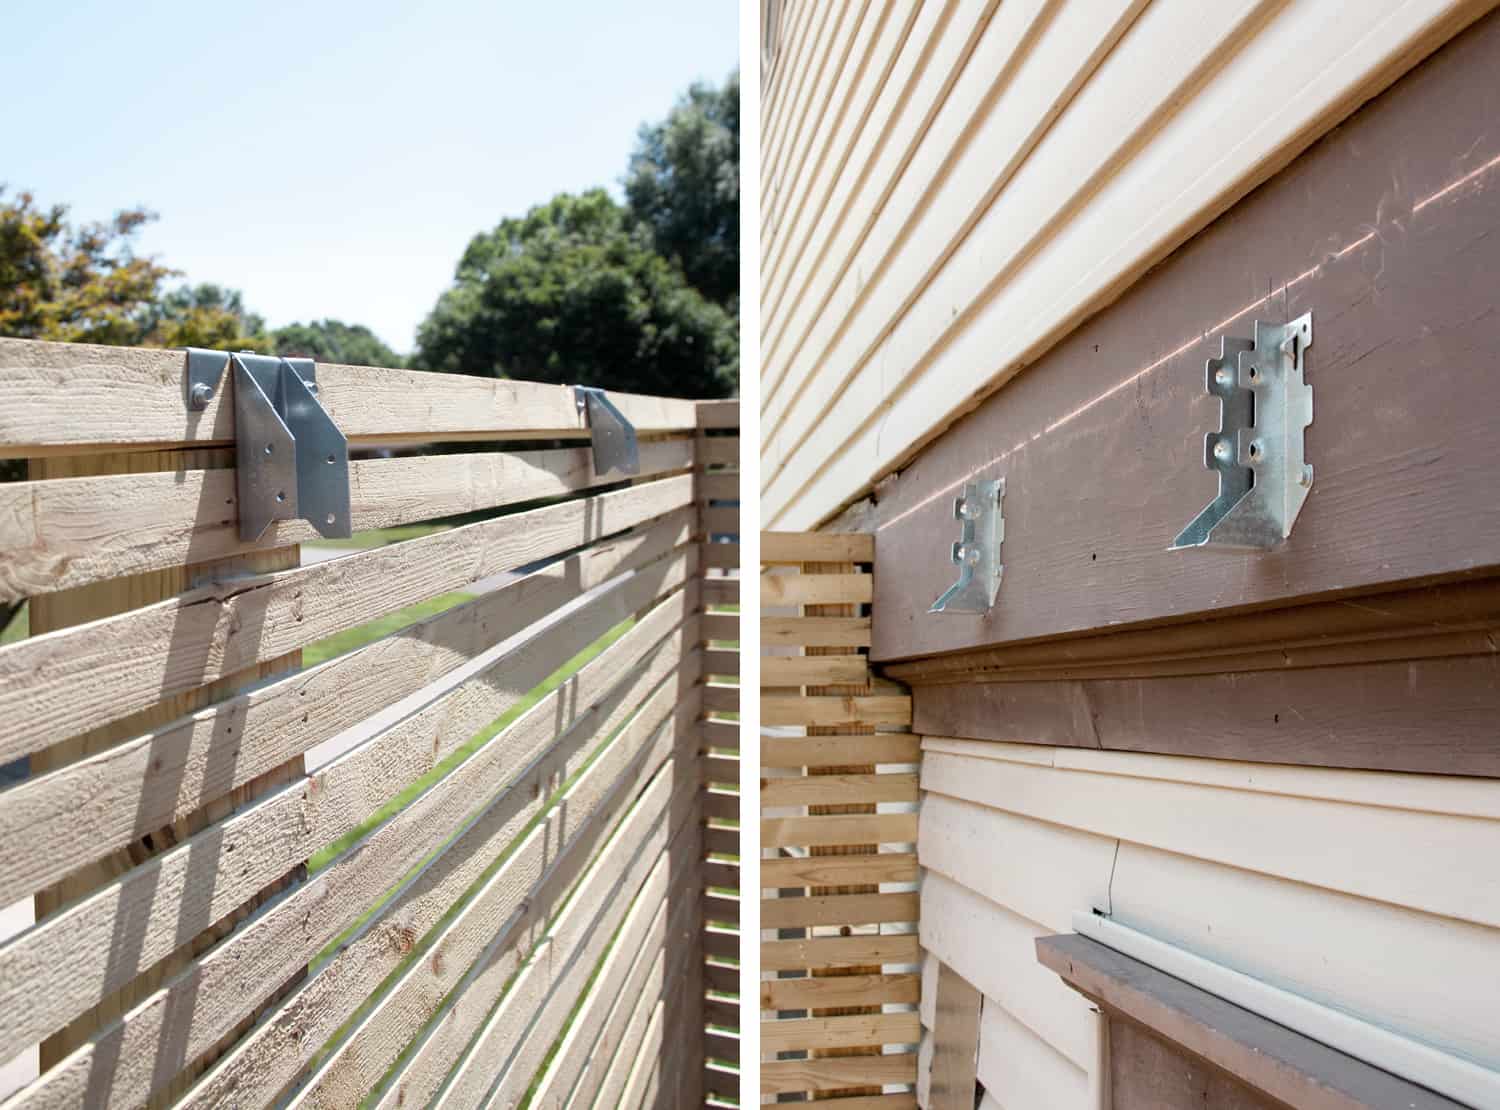
Step One: Mount steel hangers in a level line on your house and on the fence/support posts. You can usually find these hangers near the treated lumber or outdoor building supplies at any hardware store. I recommend using 2×6 treated lumber for the beams of your pergola, so make sure the hangers go with 2x6s. The specific style of fasteners/hangers you will use to hold the beams into place varies depending on what you’re mounting them on. You can see that on the fence I was able to use a style of hanger that rests on top of the top board of my fence. I used that style there because there wasn’t a post at every point I wanted to hang a beam, but there was a top board. On the house side of the beams, I used hangers that screw into the house.
Our house had a convenient wood trim board for mounting the hangers. I used long enough screws that also went into the structural beams of our house, so the hangers would be secure. If you have siding, I would consider removing a length and adding a strip of redwood for mounting the hangers. (Redwood won’t rot.) When we built a pergola at our old house, we mounted the hangers onto brick. You’ll just need to use a hammer drill with a masonry bit and Tapcon screws for drilling into brick/mortar.
 Step Two: Measure the distance between each hanger. You’ll want to take the time to measure each individual distance. If your fence or supports aren’t spaced exactly the same from your house, you may end up with boards that are too short or too long. I took notes for each distance and drew numbers beside each hanger and on each board. This ensured the boards we cut went into the right spot.
Step Three: If you don’t want the natural wood look, paint or stain all of your beams and lattice strips before mounting them. This was the most time consuming aspect of the project by far! Each lattice strip needed painted before it went up, or the unpainted top would look bad from my bedroom window. Little details like that matter to me!
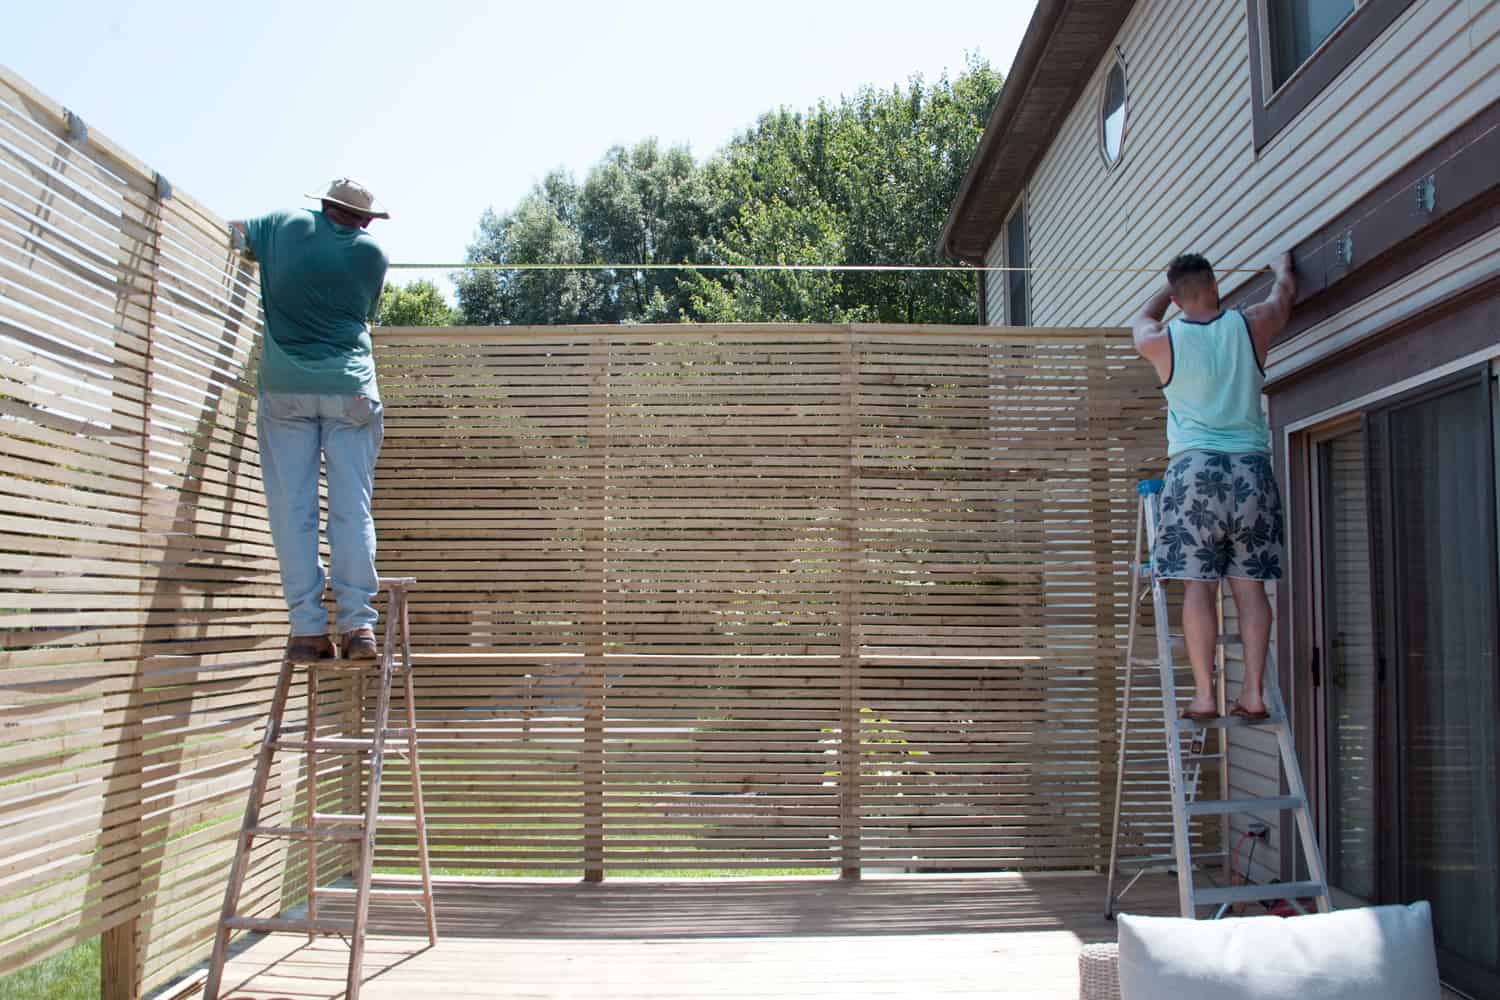
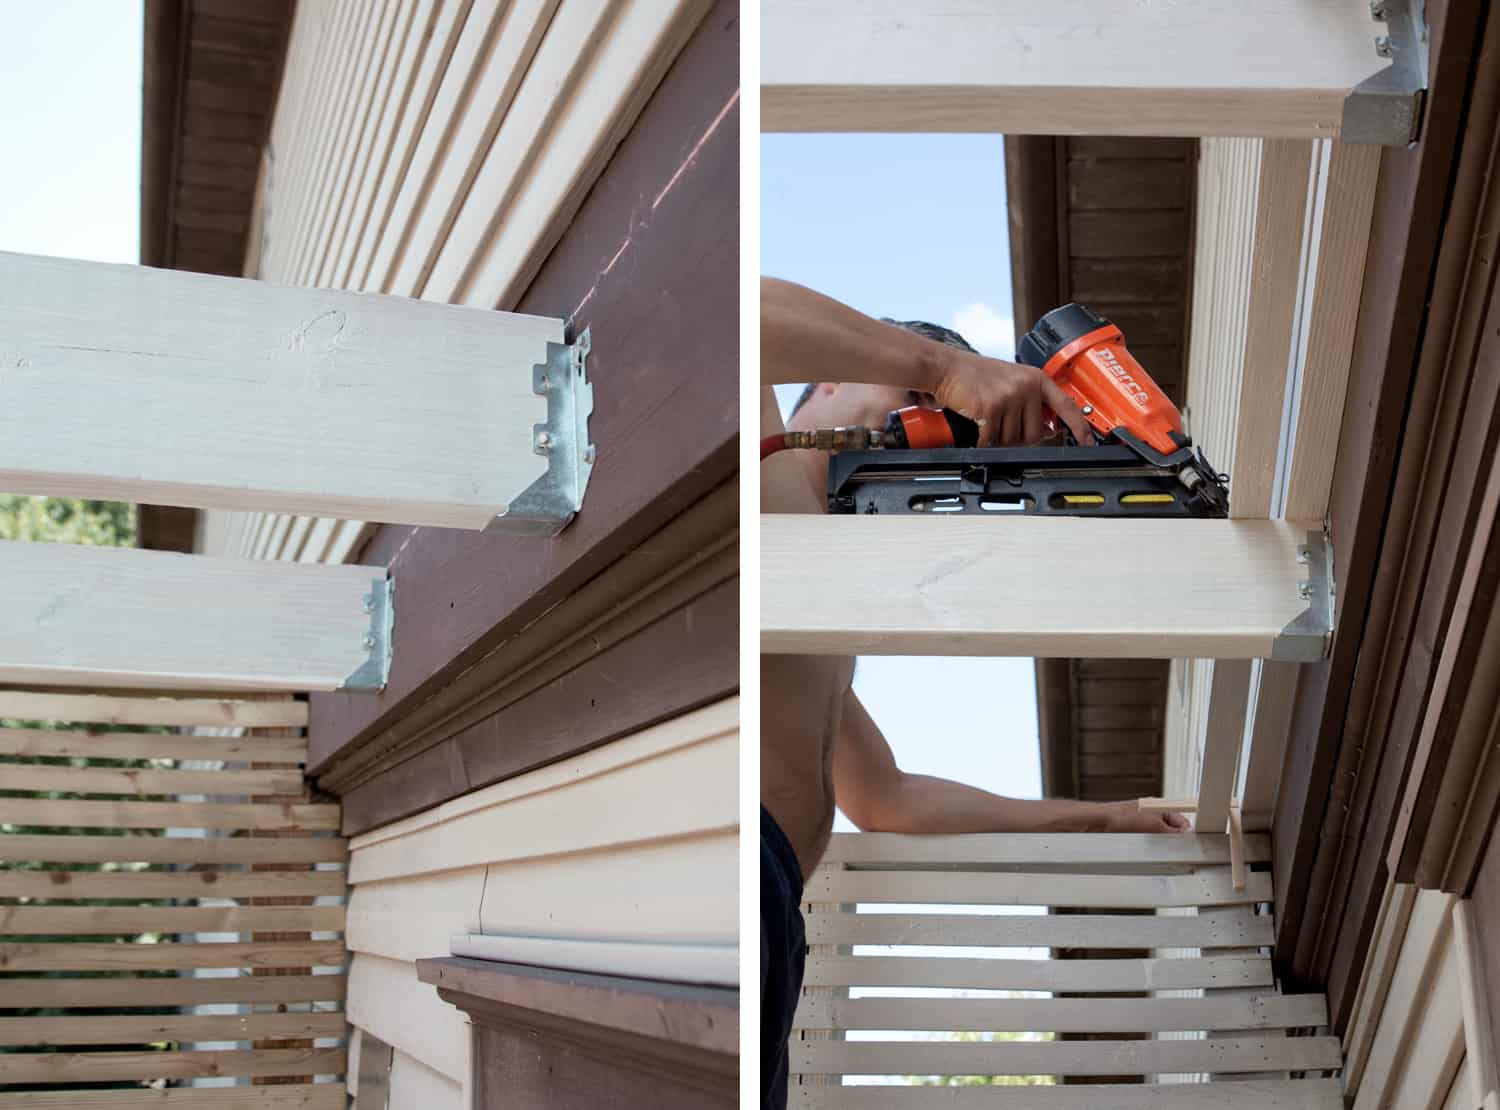 Step Four: With the help of a second person, slip the 2×6 beams into the hangers and use screws in the designated holes to secure the beam to the hanger. If your boards are warped even a little, a clamp is helpful to twist the beam into position before screwing it into place.
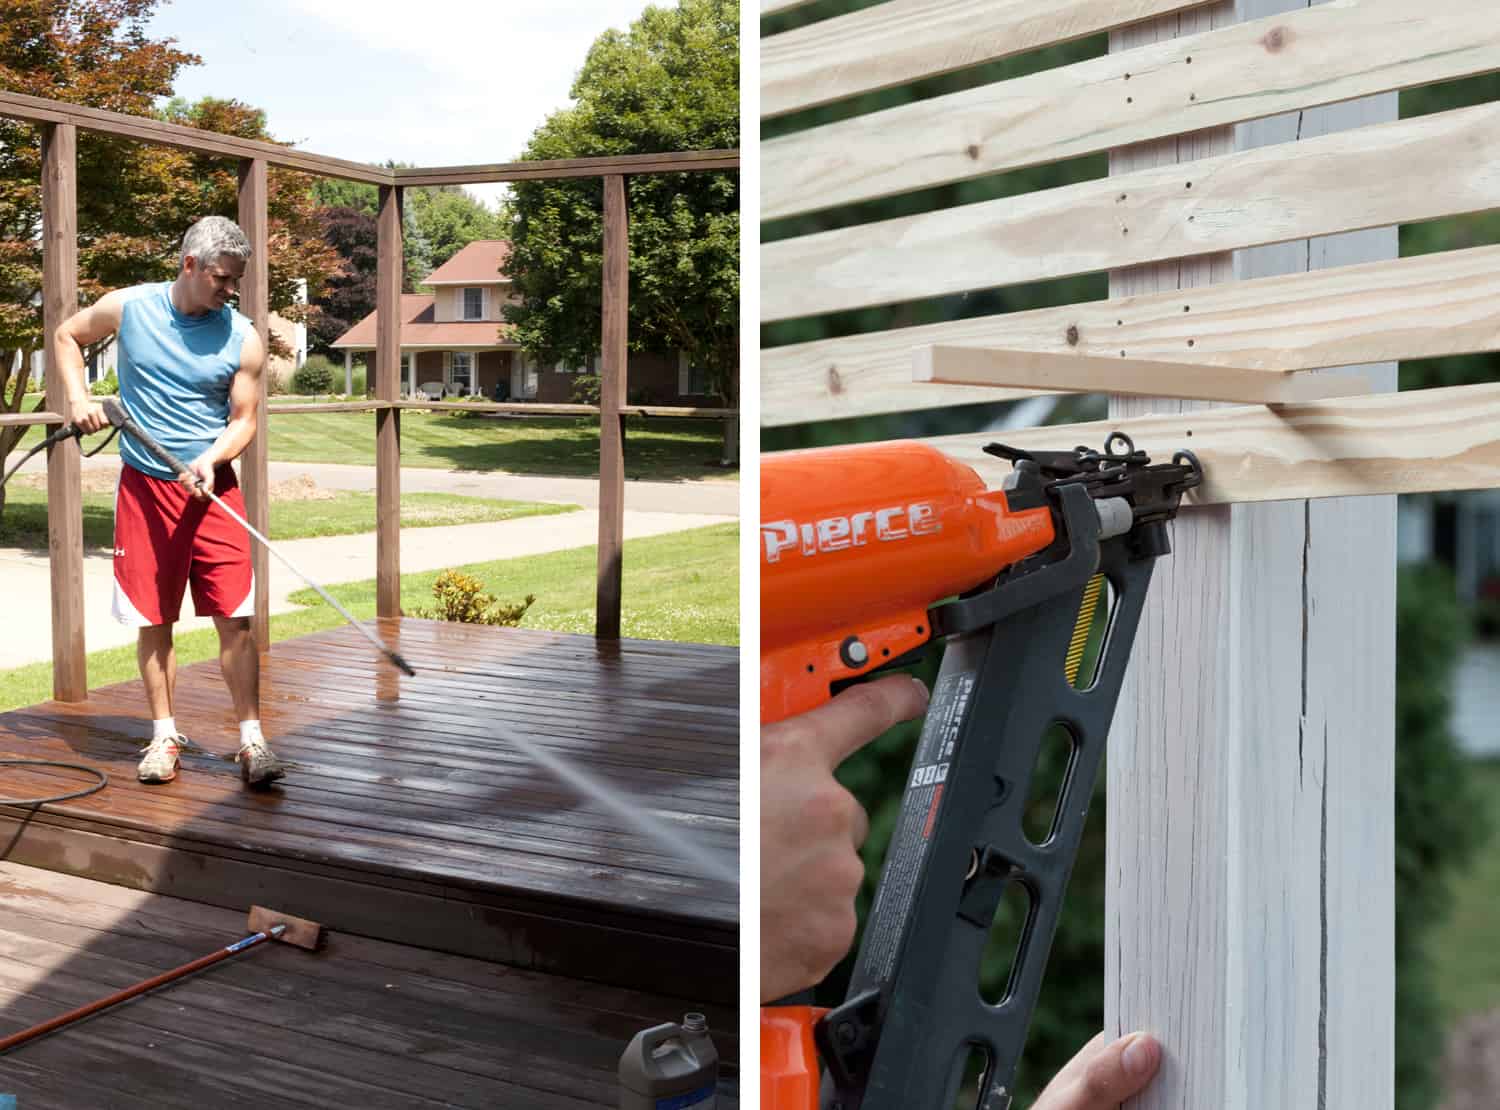
Step Five: Climb up a ladder and nail the strips into place above the pergola beams. We used a 1/5″ square dowel as a spacer to make sure each strip was evenly spaced. We used a nail gun for this, but if you don’t want to rent or use one, you can use a hammer and nails. Just be ready for a workout if you go that route!
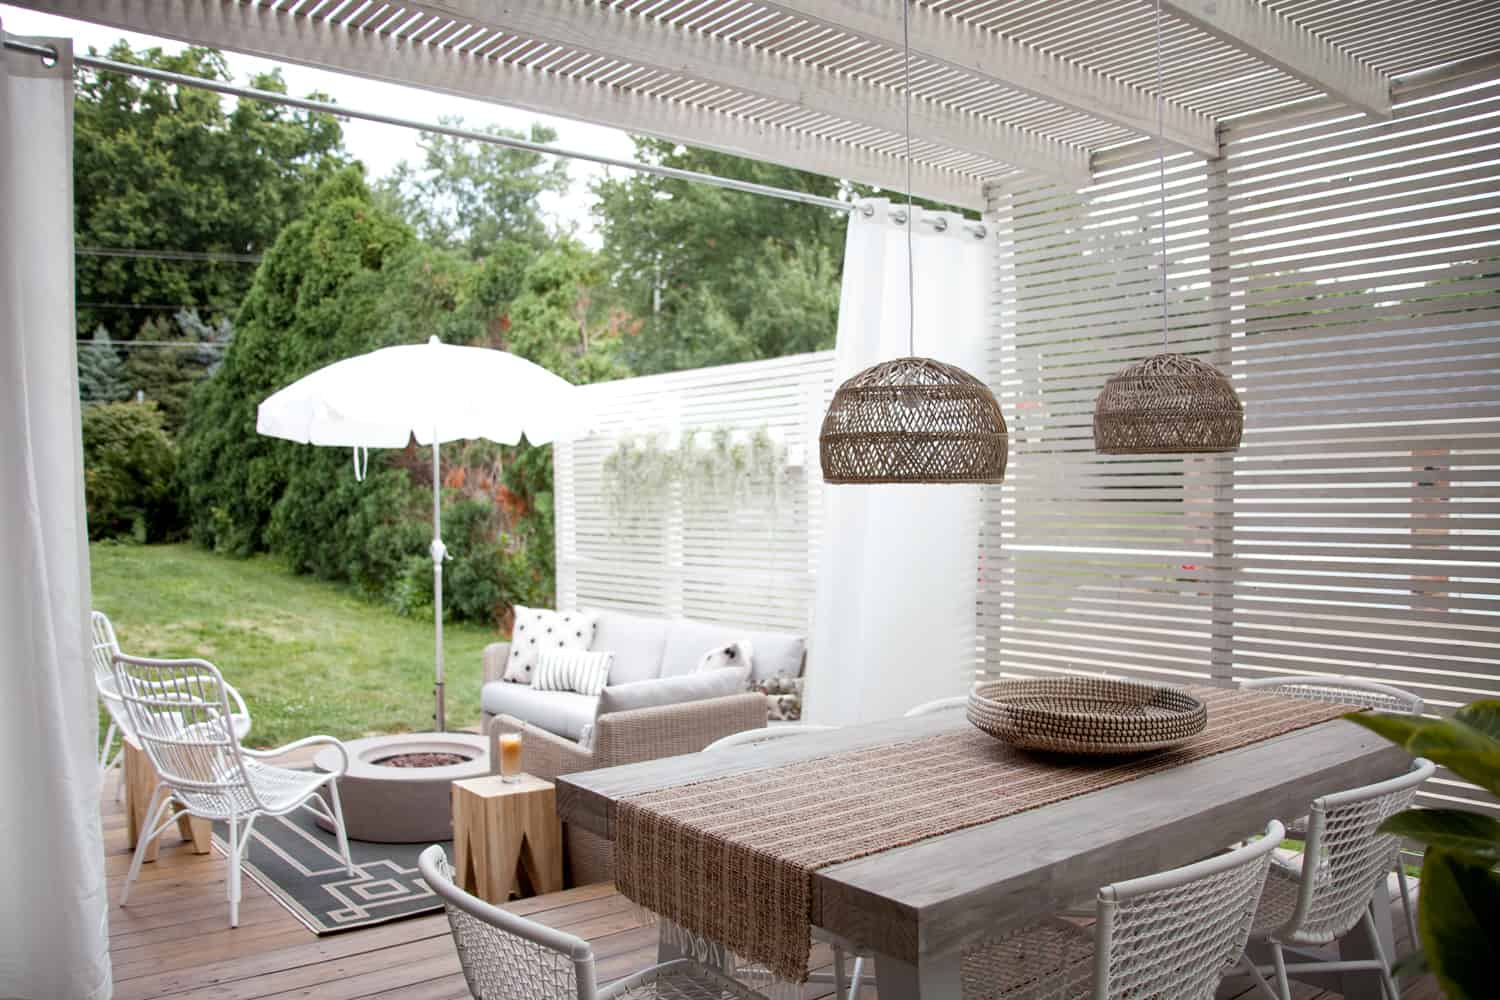
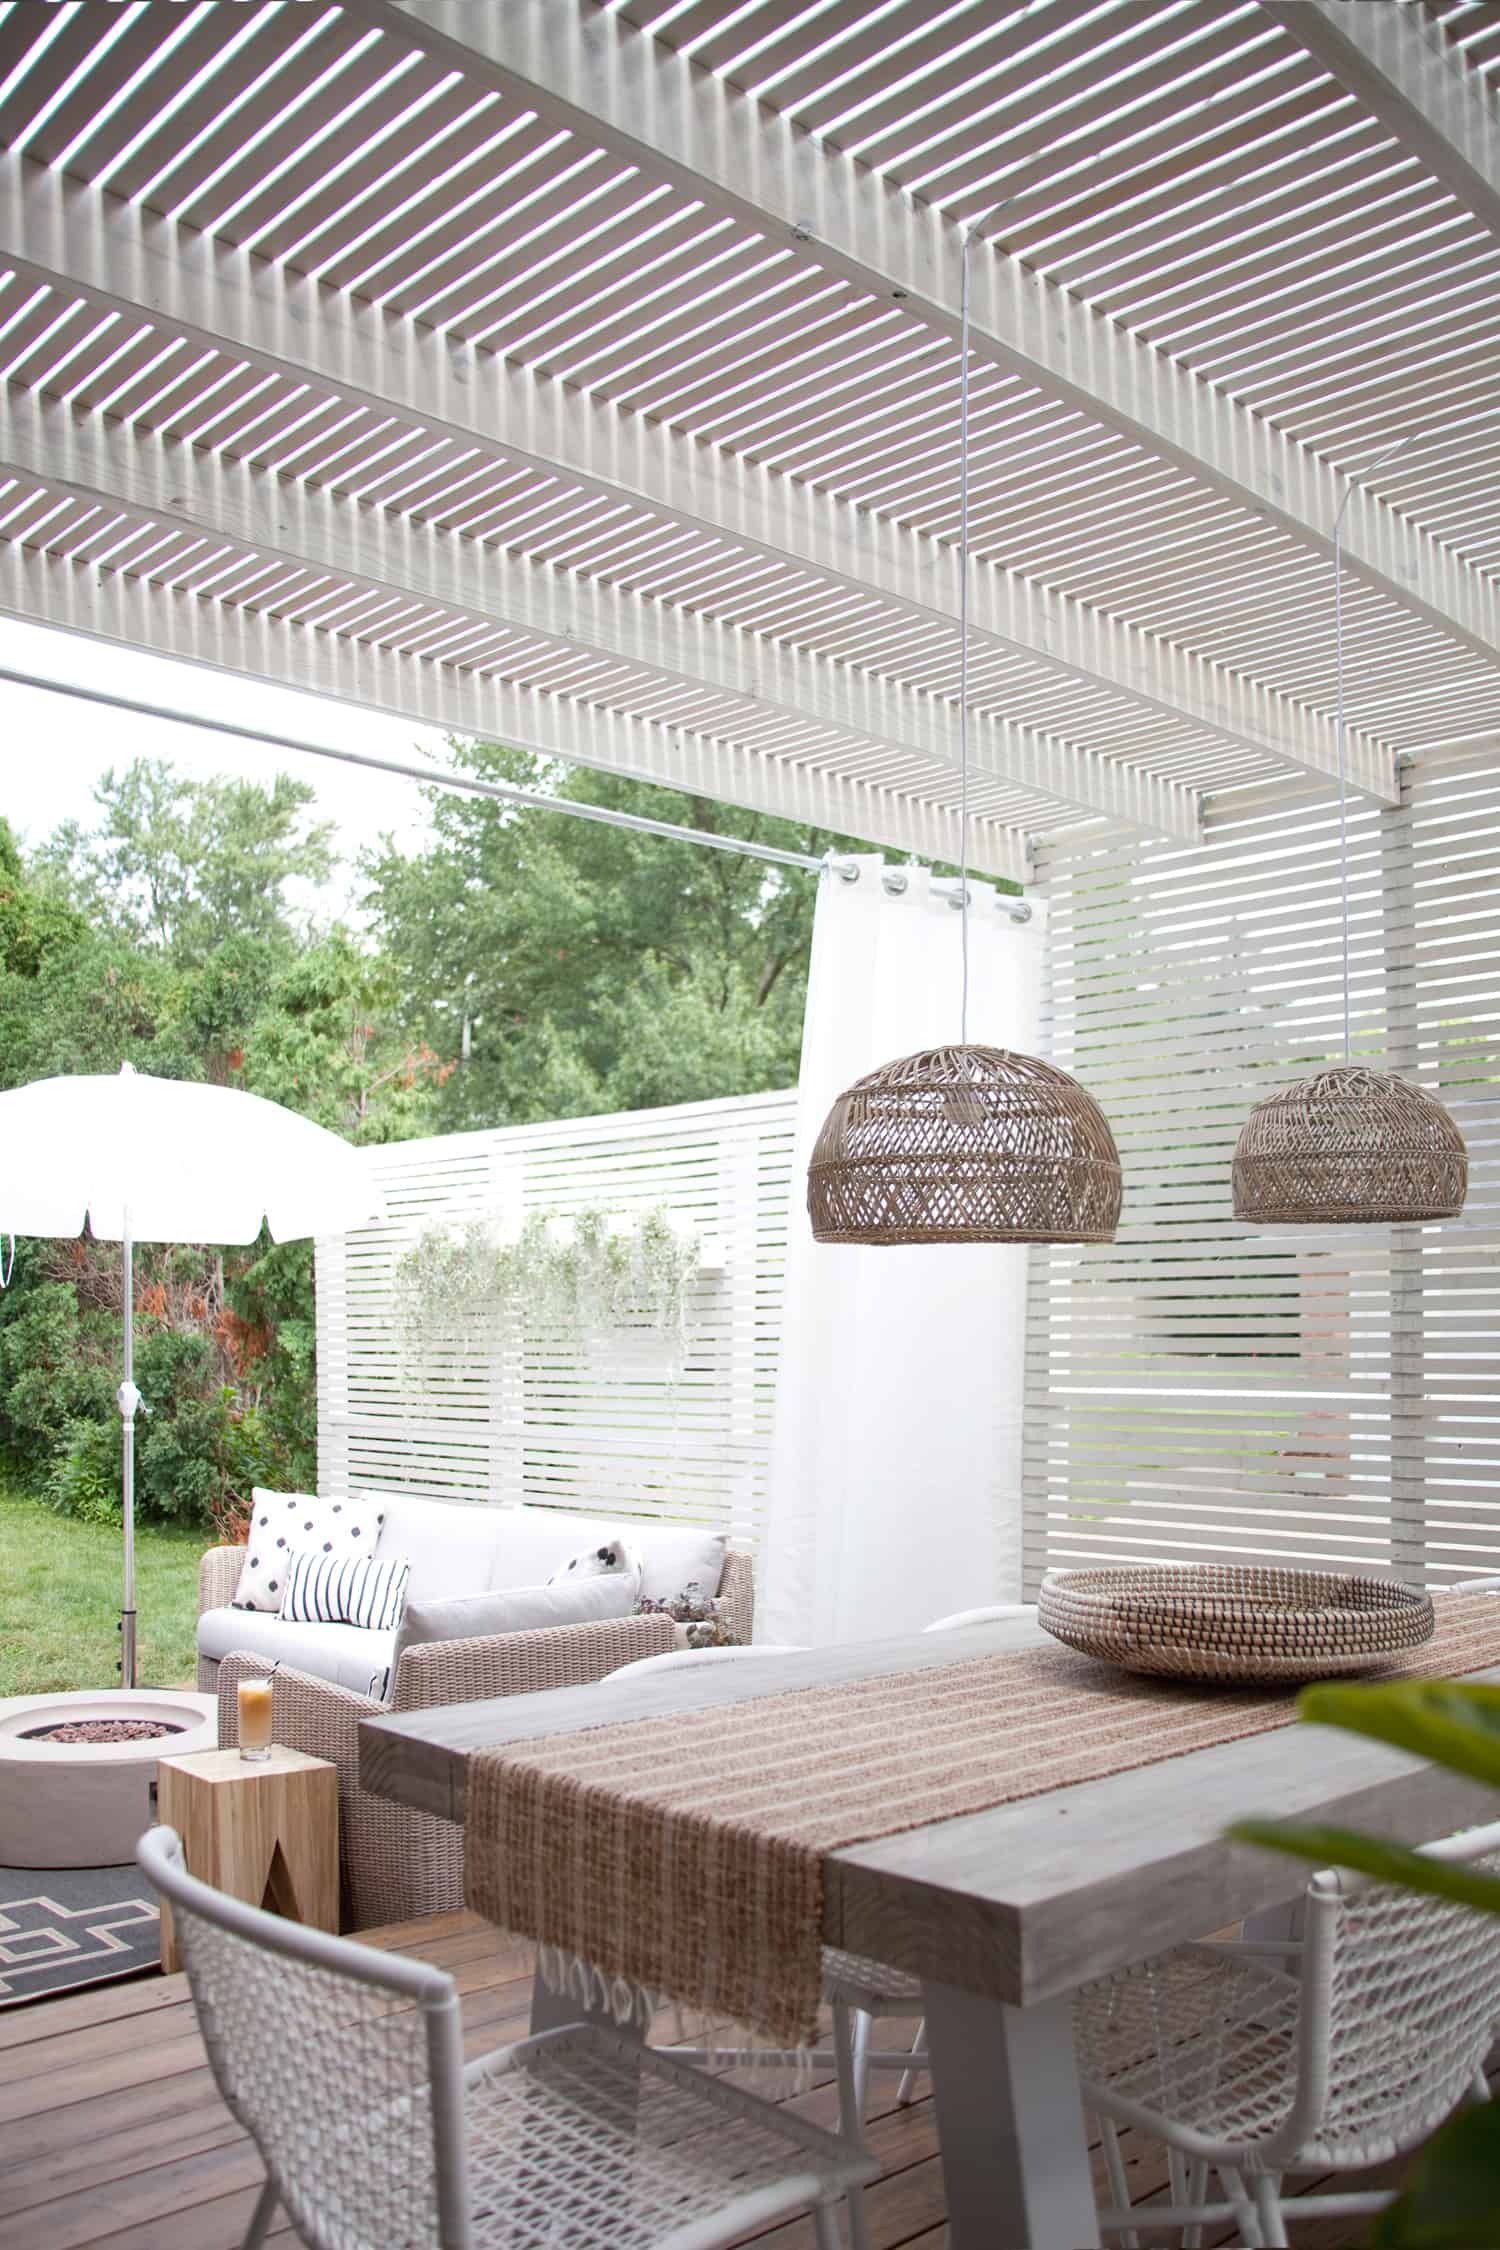 Check it out! The slat wood roof provides such a nice textural element and gives us the perfect amount of shade from the hot summer sun. Covering a portion of the patio also helped make the dining space feel more intimate and set apart from the lower portion of the deck.
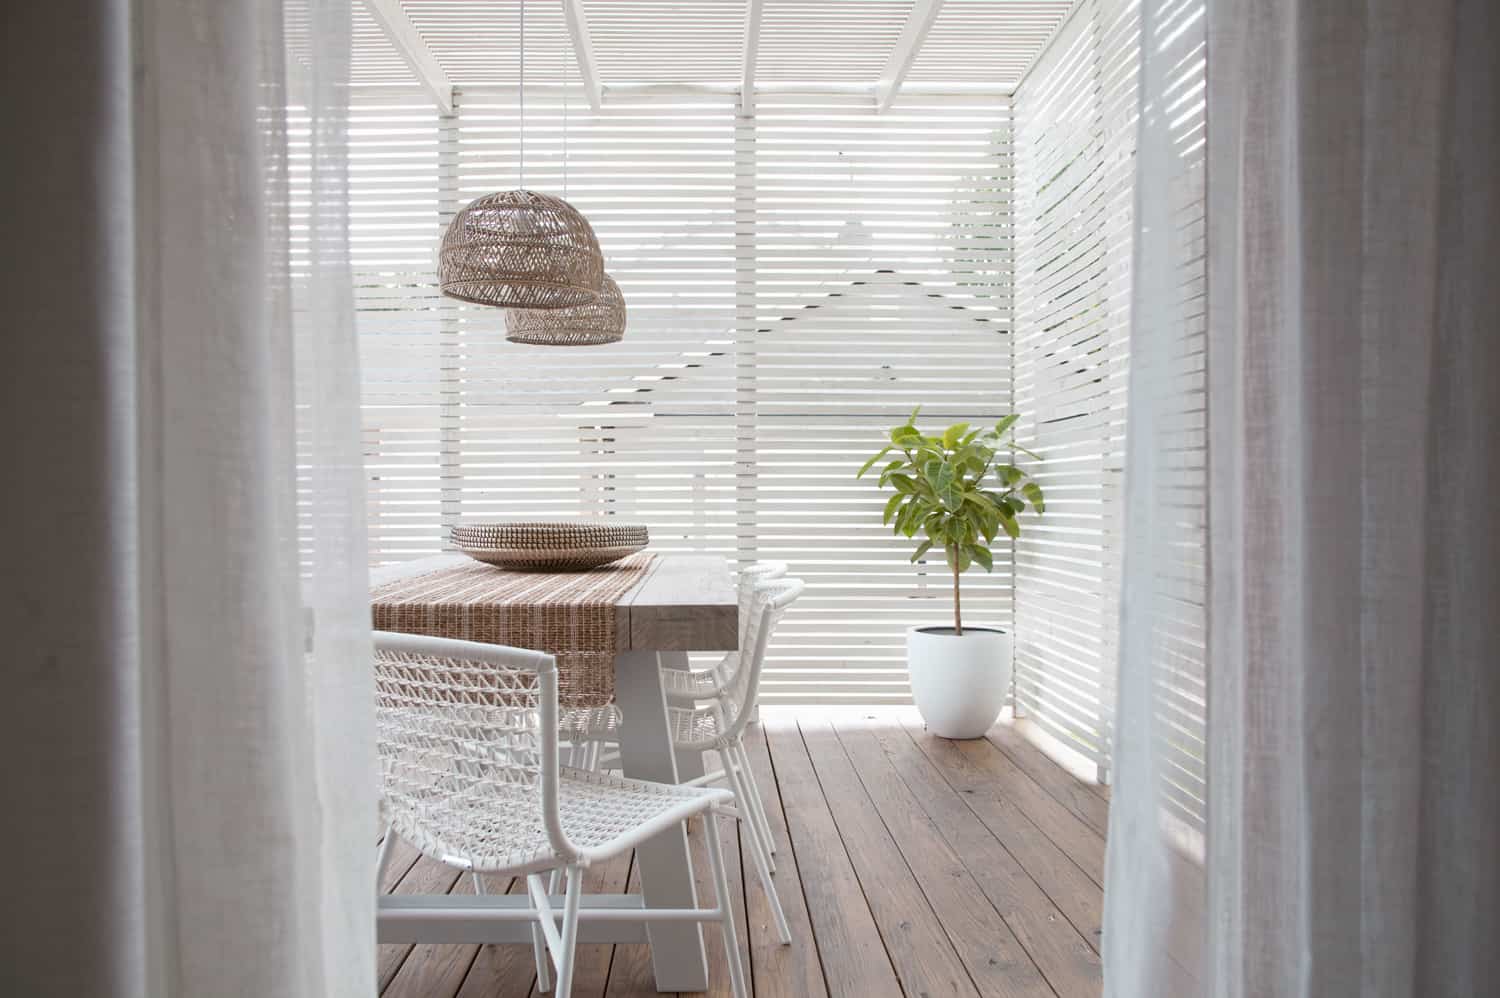 Adding this slat wood pergola made all the difference in our patio makeover. We’re so glad we decided to add this extra element! Let me know if you have any questions about the process—I’m happy to answer them in the comments below! – Mandi
21 Comments
I always enjoy Mandi’s home projects! This turned out beautifully.
Thank you so much!
Instagram goals! It looks beautiful! 🙂
Charmaine Ng | Architecture & Lifestyle Blog
http://charmainenyw.com
This pergola looks amazing! We need something like this in our yard!
Paige
http://thehappyflammily.com
Very transformative! I love it!
Wow, that looks so amazing! I really would love a backyard just to do this!
https://www.makeandmess.com/
I hate to be the downer here, but I think that this post requires a huge disclaimer that 1) depending on where you live, you may need to obtain a building permit (out in California pretty much anything overhead needs a permit) and 2) this should really be engineered. Having “tall fence supports” isn’t necessarily enough. You need to know how deep the footing is so that you can calculate whether or not it can support the additional loads – you’re adding a dead load of the lattice strips, as well as live loads of the wind and precipitation.
It’s lovely, yes, but I would advise people to seek assistance from a contractor, engineer, or architect.
As someone with an interior design degree from an accredited university, I agree about obtaining a building permit. In my township we’re required to get permits when building a new fence, because of utility lines. I don’t discuss building permits for every blog post I write, but I have mentioned it before and also advise people to look into that when determining the budget of their project.
I want this for my future deck on the back side of my pool.
Stunning! Thank you for sharing your home. Do you mind linking to the pendant lights? I’m looking for something just like that.
Cheers!
Hi Alexis! Mandi is sharing a DIY for those on the blog soon 🙂
Awesome! *of course they are DIY 😉
They’re store bought, but I had to make adjustments to make them safe for outdoor use. 🙂
Sure thing! Here you go: http://bit.ly/2LwagQy
This is BEAUTIFUL! love the texture the slats give. So dreamy!
Thanks for sharing!
YouTube: Megan Beltran (Makeup, DIY, Travel, & More)
Looks very cute. Love the curtains too!
Hey Mandi, this looks so freaking great and beautiful. Can you update us on how this holds up over the winter? I’m curious to see how the thin slats up top will deal with a heavy mixture of snow and ice. Perhaps folks in a very snowy clime will need to install a few extra 2x6s for additional support? (I’m in Houston – this SO isn’t my problem. But I’m from the Northeast and I’d love to do something like this for my parents!).
Wow this is amazing!! I am mega impressed and it looks beautiful. Congrats to you! It looks like pro DIY work! Though I have already installed an adjustable shade pergola with the help of pros at Signature Decks. But for sure I will share this idea with my friends and family members. So that they can give it a try. Great work!! Thanks for sharing. Cheers!!
Amazing share, thank you! DIY projecs for me is always exiting. But this also requires quite a lot of work 🙂
I recently found some modern pergolas models: https://pergola.lt/
They look really comfortable but I am not sure about price :O
Do the slats, which looks lovely by the way, provide adequate shading?
So beautiful and well done . Thanks for the information. Just wondering about rain. You have to move the furniture every time it rains?