 Creating abstracts by manipulating your shutter speed means that you need to see movement happening and think about how you want to capture it. Whenever I see a real Claude Monet painting, I am amazed by his ability to transform a scene and make it seem like it is dancing in front of my eyes. I feel like you can actually see the water lilies floating on top of the water or see the clouds moving across his landscapes. There seems to be a light jitter in these paintings that gives the feel and effect of movement.
In a somewhat similar way, we are going to try to make abstracts, but we’ll be using a different medium—our cameras. Through keeping our shutter open longer and by letting things move in our pictures, we will create abstracts.
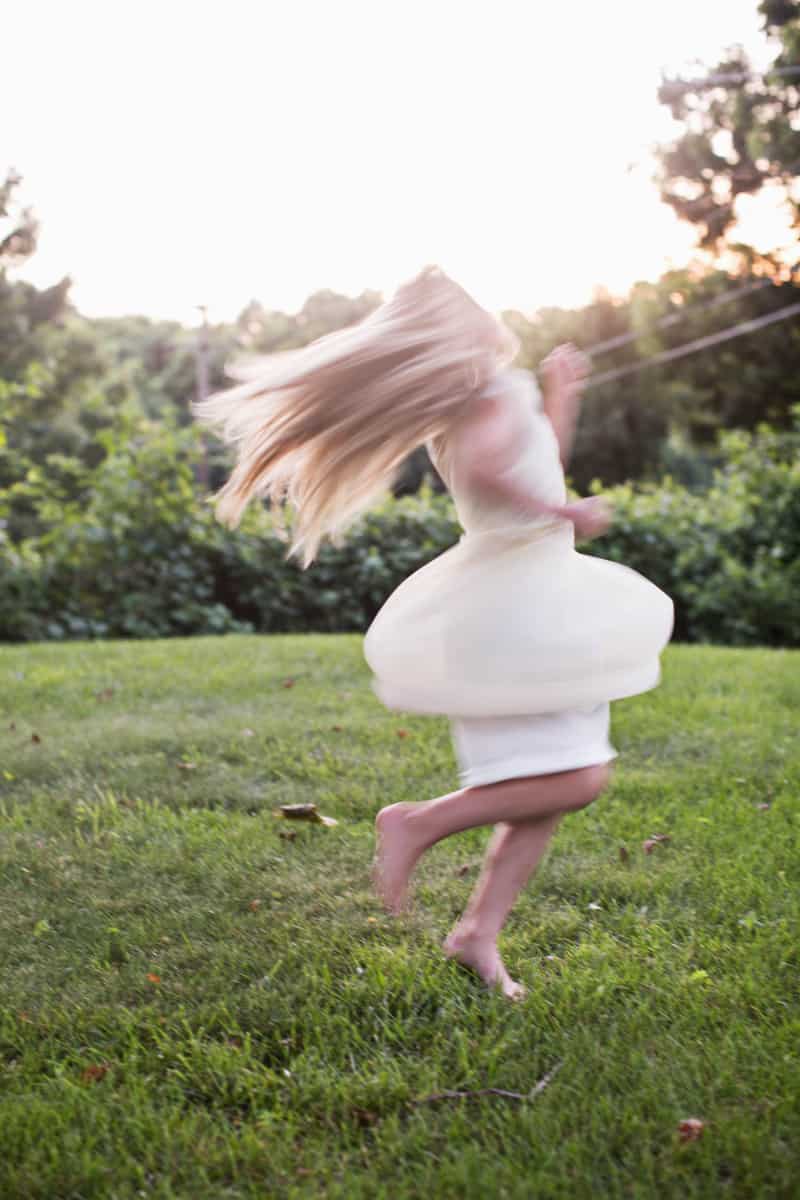 With a longer shutter speed, a simple reflection on the water turns into a glassy wave of colors. Or a child running in a bright outfit results in swirls of color darting through your frame. The options are endless when it comes to the outcome of images you can create.
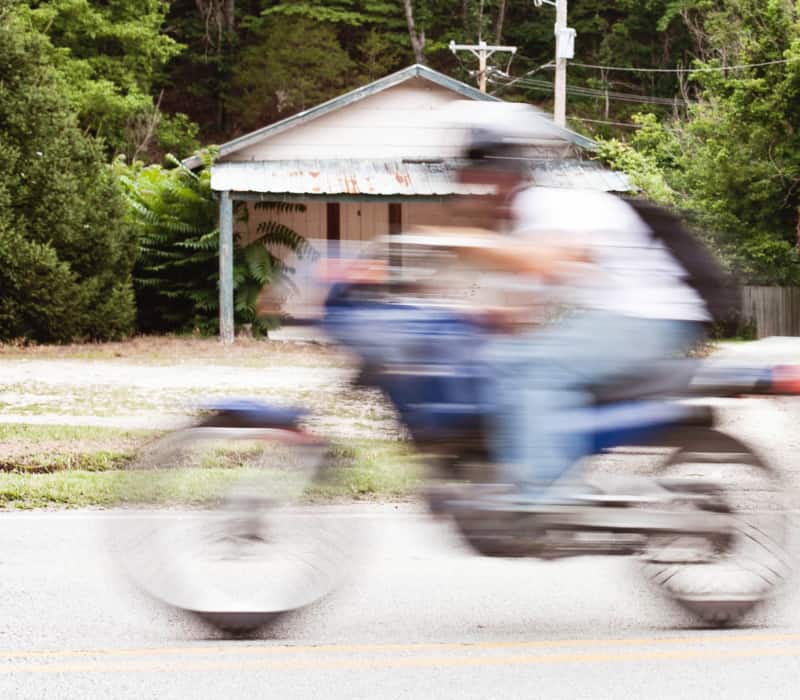
Seeing the movement: As with many aspects of photography, you need to be able to notice things in your scene. Noticing all the details takes practice because you have to actually stop, look and study. I think seeing the movement can be even trickier because your brain really has to focus on what is happening. You have to see the movement before it happens. In the photo below, I heard the man on the motorcycle coming. I knew I wanted him to be blurred, so I fixed my camera settings so that my shutter was on for a longer period of time. We will go over shutter speed in a bit, but by knowing he was driving by, I could foresee blurring him.
Capturing the movement: To capture movement, a lot has to happen in camera, but don’t let that intimidate you. It’s actually quite simple. Yes, this is very much about shutter speed, but some other elements from your camera come into play as well. First, to ensure that you get a clean image with low grain, set your camera to the lowest ISO possible. This shouldn’t be a problem at all if you are using your tripod. In fact, whenever you are using your tripod, always use a lower ISO. It is a free gift that the tripod gives, so always take advantage of it! If you are outdoors (it depends on how bright it is), but start with using ISO 100 and work your way up. I try to not shoot over ISO 400 if I am outdoors.
 Once your ISO is set, you’ll need to set your aperture. Think about your depth of field (DOF) and how much you want in focus. Do you want a deep focus that extends through the picture, just the object or just a small area in focus? A quick tip: Start your aperture at 2.0 or 2.8 for shallow focus. If you want more DOF, start somewhere around 5.6 and work your way up to a higher number. Once your ISO and aperture are set, the fun part begins!
Let’s just take a picture with a correctly exposed image. Your camera will tell you when it is correctly exposed when you turn the dial of the shutter speed moving it up or down and take a picture. Do you see movement? If not, turn your shutter speed to a lower number (this will overexpose your image) and snap another picture. You’ll see that you have a brighter picture than the last. Do you have movement? If not, move your shutter speed and slow it down a bit more. It can take a little while to find the amount of movement you want to show. When you move your shutter speed up and your image is overexposed, you will need to compensate the exposure by lowering your ISO (making it less sensitive to the light) or taking your aperture to a higher number. Doing both of these things will help compensate for a longer shutter speed.
To freeze or not to freeze: When do you know whether a picture will look good blurred or sharp? It all comes down to trial and error. There have been SO many times when I have taken a picture, but when I explored a little more and tested my limits, the end result was so much stronger than the original! So my advice is to take a still picture (with a fast shutter speed) and then a blurred picture (with a slow shutter speed). Now review both pictures on your camera screen and see which one you like best. If you aren’t crazy about what you’re getting, move on to a different subject or change your camera settings. It all comes down to what pleases YOUR eye!
Can’t wait to see what you create! – Janae
P.S. If this tutorial felt a little over your head, you might check out our DSLR Basics course which can help you really get acquainted with your DSLR camera.
3 Comments
Thanks for this! I have a specific shot in my mind that involves a blurred subject and focused background, but I was not at all sure how to achieve it. This is super helpful.
This is great! I don’t even have a DSLR but I’ve been loving the posts on photography… they’re really convincing me to invest in a good quality camera this year! 😀
Charmaine Ng | Architecture & Lifestyle Blog
http://charmainenyw.com
It’s a great guide for me. I will post it https://homework-writer.com/blog/mla-style on this page as well. Okay?