 When considering what kind of cake to have at a birthday party, every good mermaid knows that only the finest sandcastle cake will do! A sandcastle cake? I had never made one before, but figured I could give it a shot. I wouldn’t recommend waiting until right before the party to decorate the cake, like I did, but I would definitely advise flexing your baking muscles and giving this sandcastle cake a try! It was truly a lot of fun to make.
If you plan to make a sandcastle cake like this one, I recommend planning for three days of cake making/decorating sessions. (Not three full days, silly! Just three sessions.) One day to bake and crumb-coat the cake layers, one day to prep the fondant shapes and assemble the main pieces of the cake, then the day of the party to add cookie crumbs (the “sand”) and fondant decorations. Read on to find out about how I made each element and assembled the cake!
 Making the “Sand” for the Cake
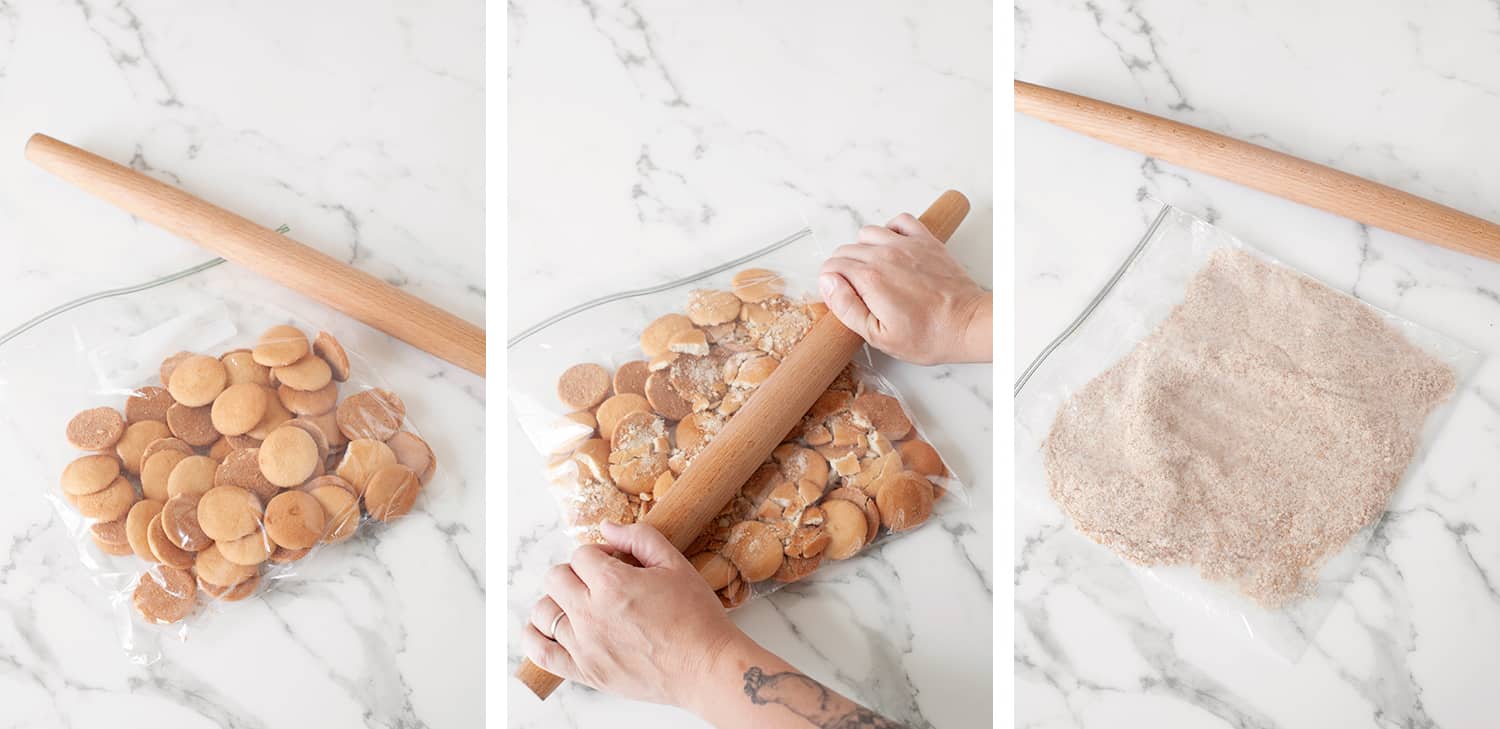
The first step of making this cake is crushing a box of vanilla wafers to create the sand for the sand castle. Use a food processor or a rolling pin for this process. Set the cookie crumbs aside until ready to make your fondant.
 How to Make Marshmallow Fondant
I had never considered making fondant before, because, frankly, I never really thought fondant tasted very good compared to buttercream. But then I realized I could combine fondant elements with a buttercream cake and get the best of both worlds! The Great British Baking Show convinced me that making marshmallow fondant was fun and easy, so I decided to give it a try. Turns out they were right!
I made a batch of marshmallow fondant to make some of the decorative elements of my cake, such as the cones at the tops of the towers, the crenelations of the castle, the shell adornments, and the castle door. You should make the fondant at least one day before making the fondant shapes and pieces, and I recommend making the shapes and pieces the day before decorating the cake. (It just makes decorating go a lot faster when you’re not fussing with fondant!)
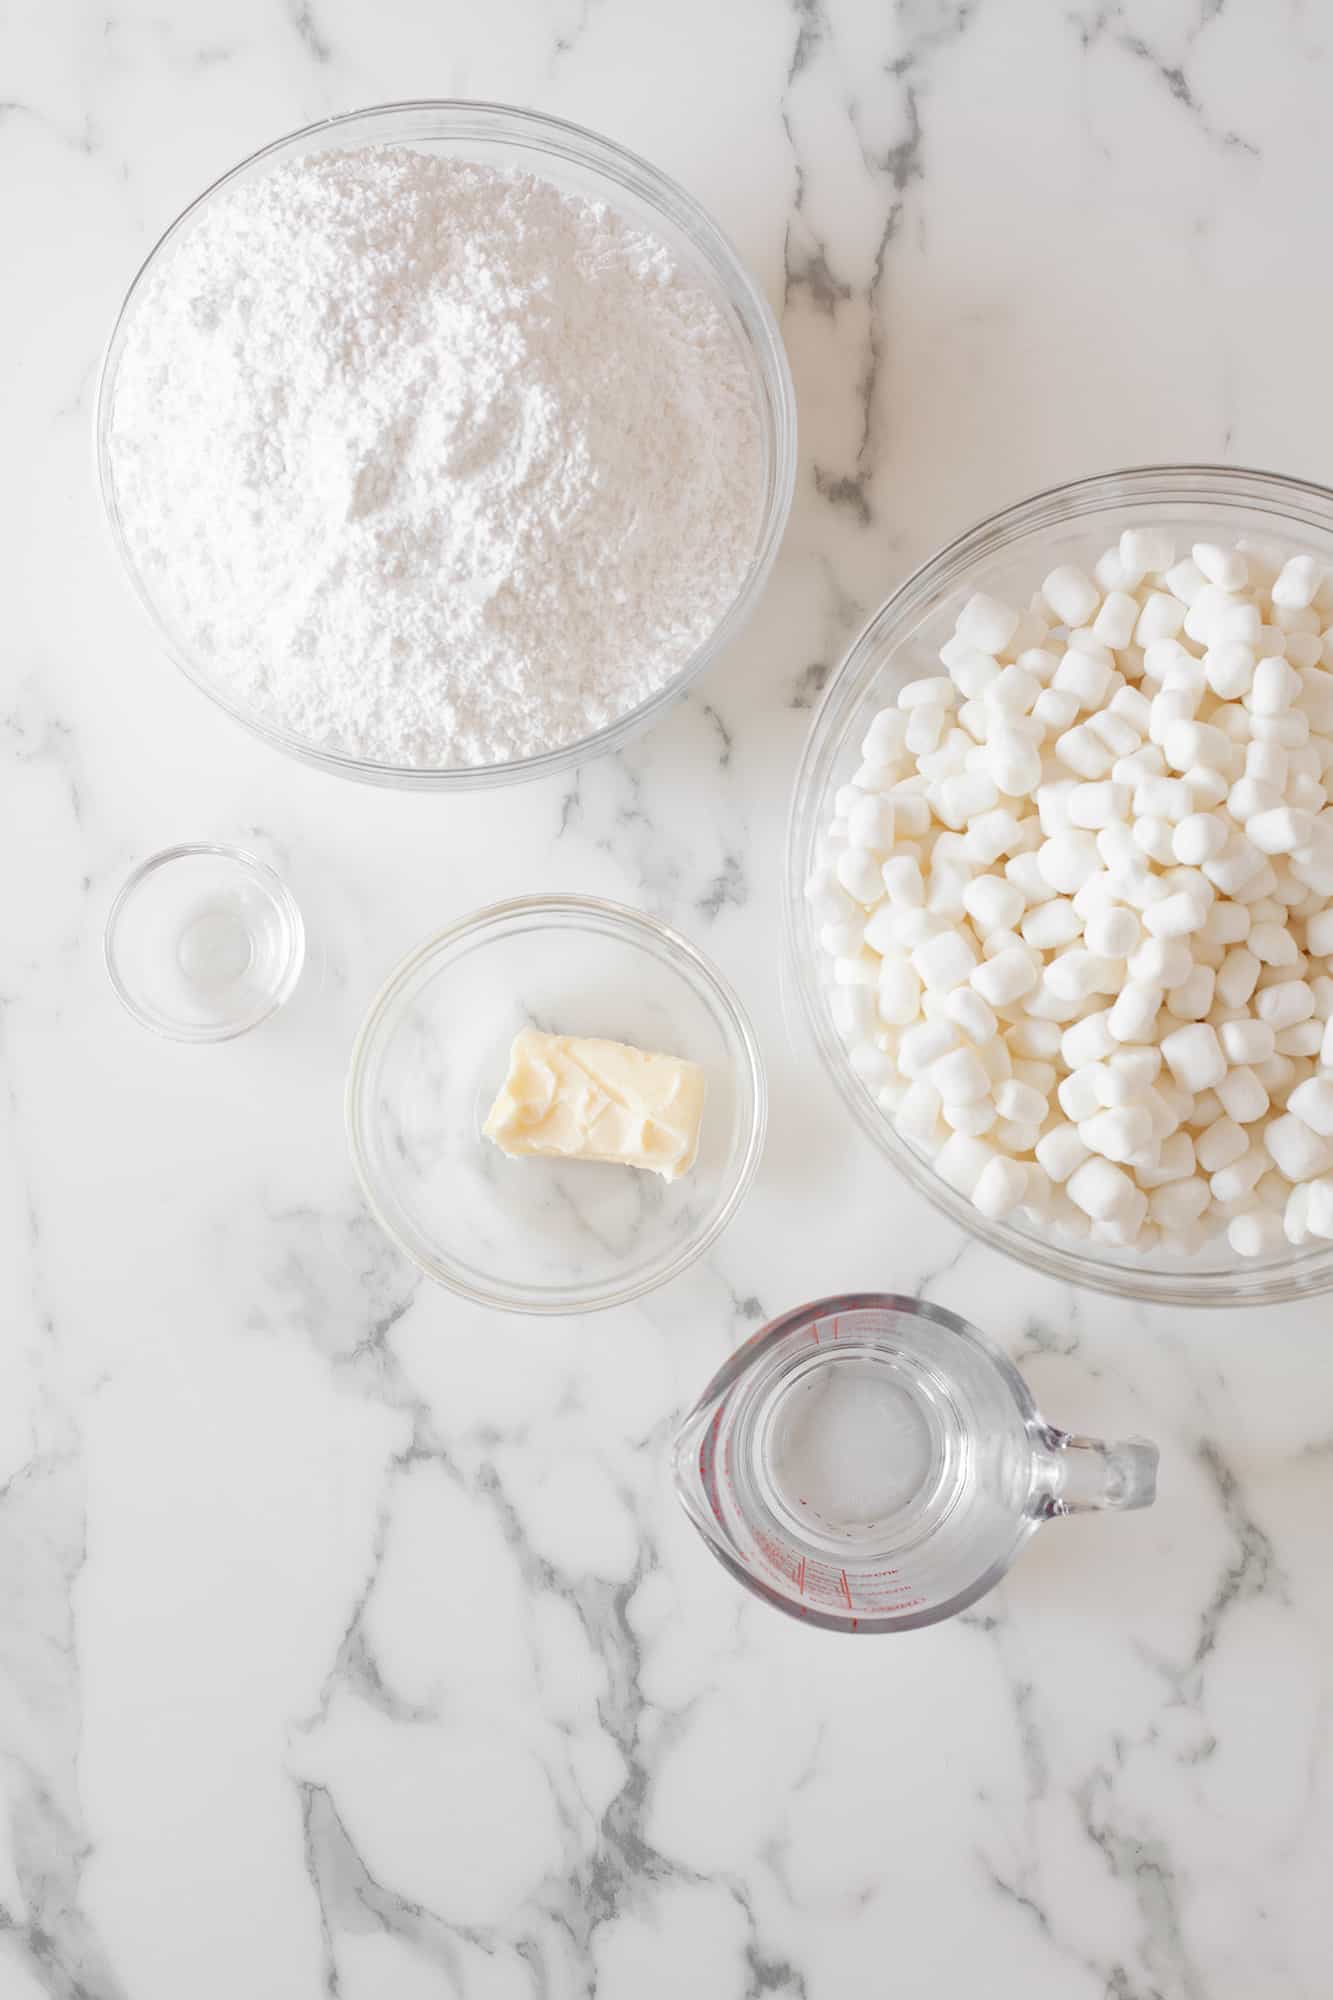
Ingredients
- 16 ounces of marshmallows
- 4 tablespoons water
- 1 teaspoon vanilla extract
- 2 pounds powdered sugar
- 2 tablespoons (or more) of butter or shortening
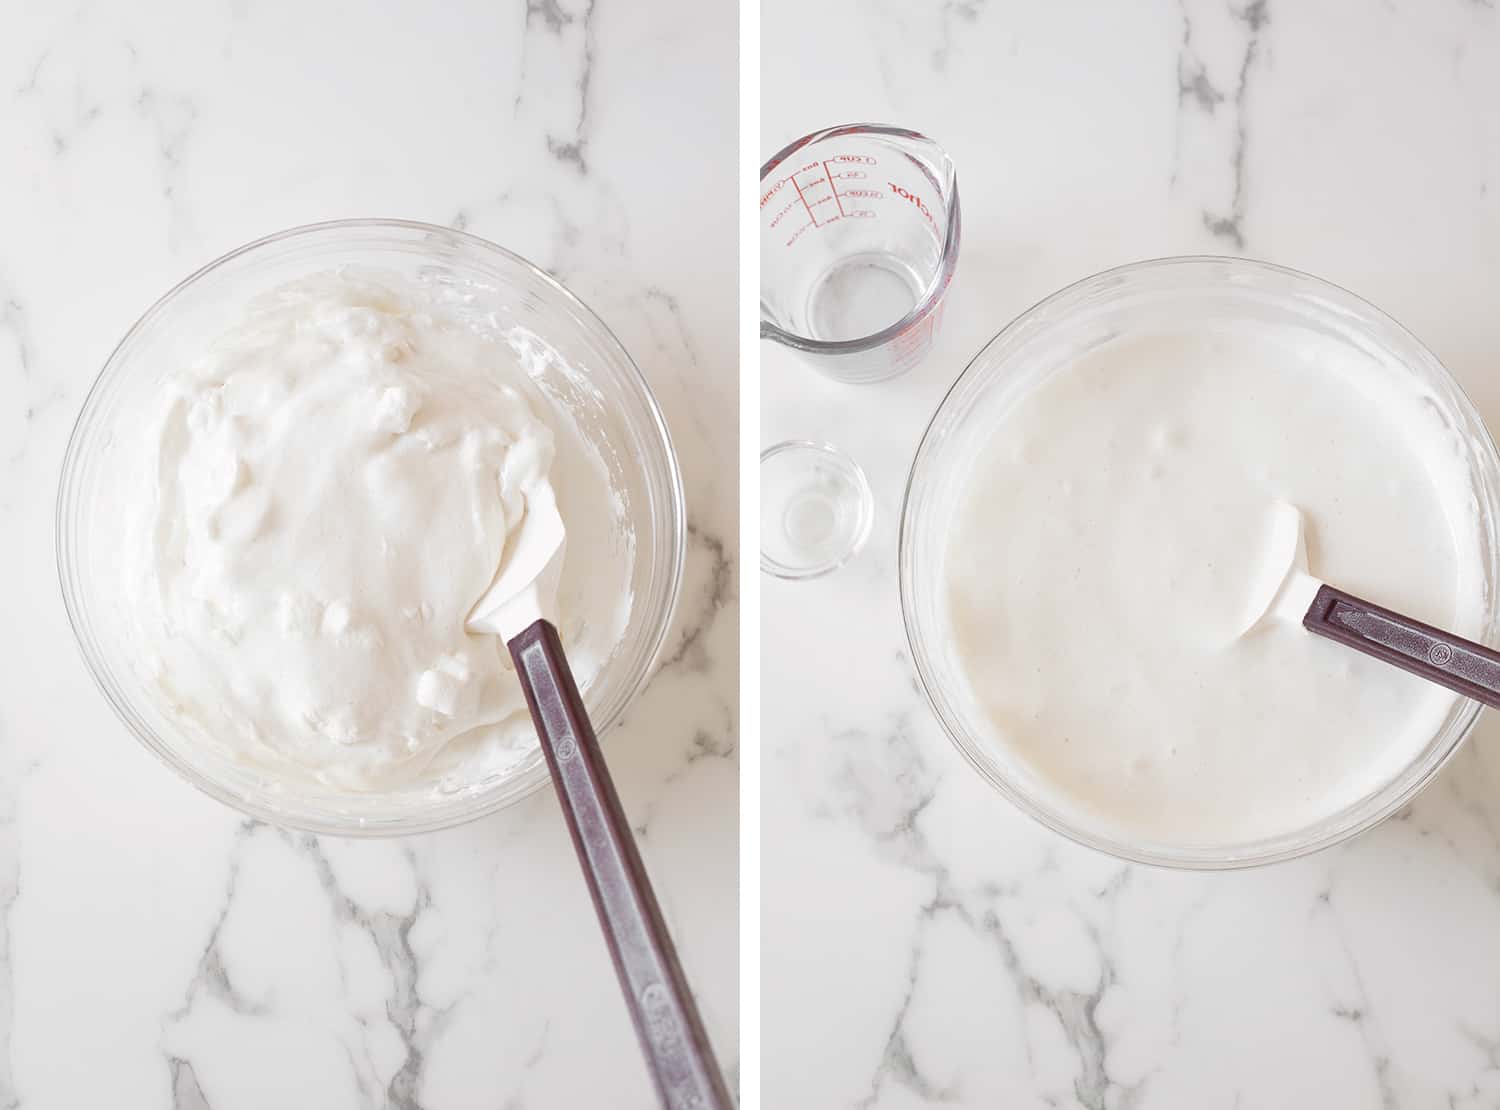 Step One: Microwave marshmallows for 1 minute to begin melting them.
Step Two: Stir in the water and vanilla extract while marshmallows are hot.
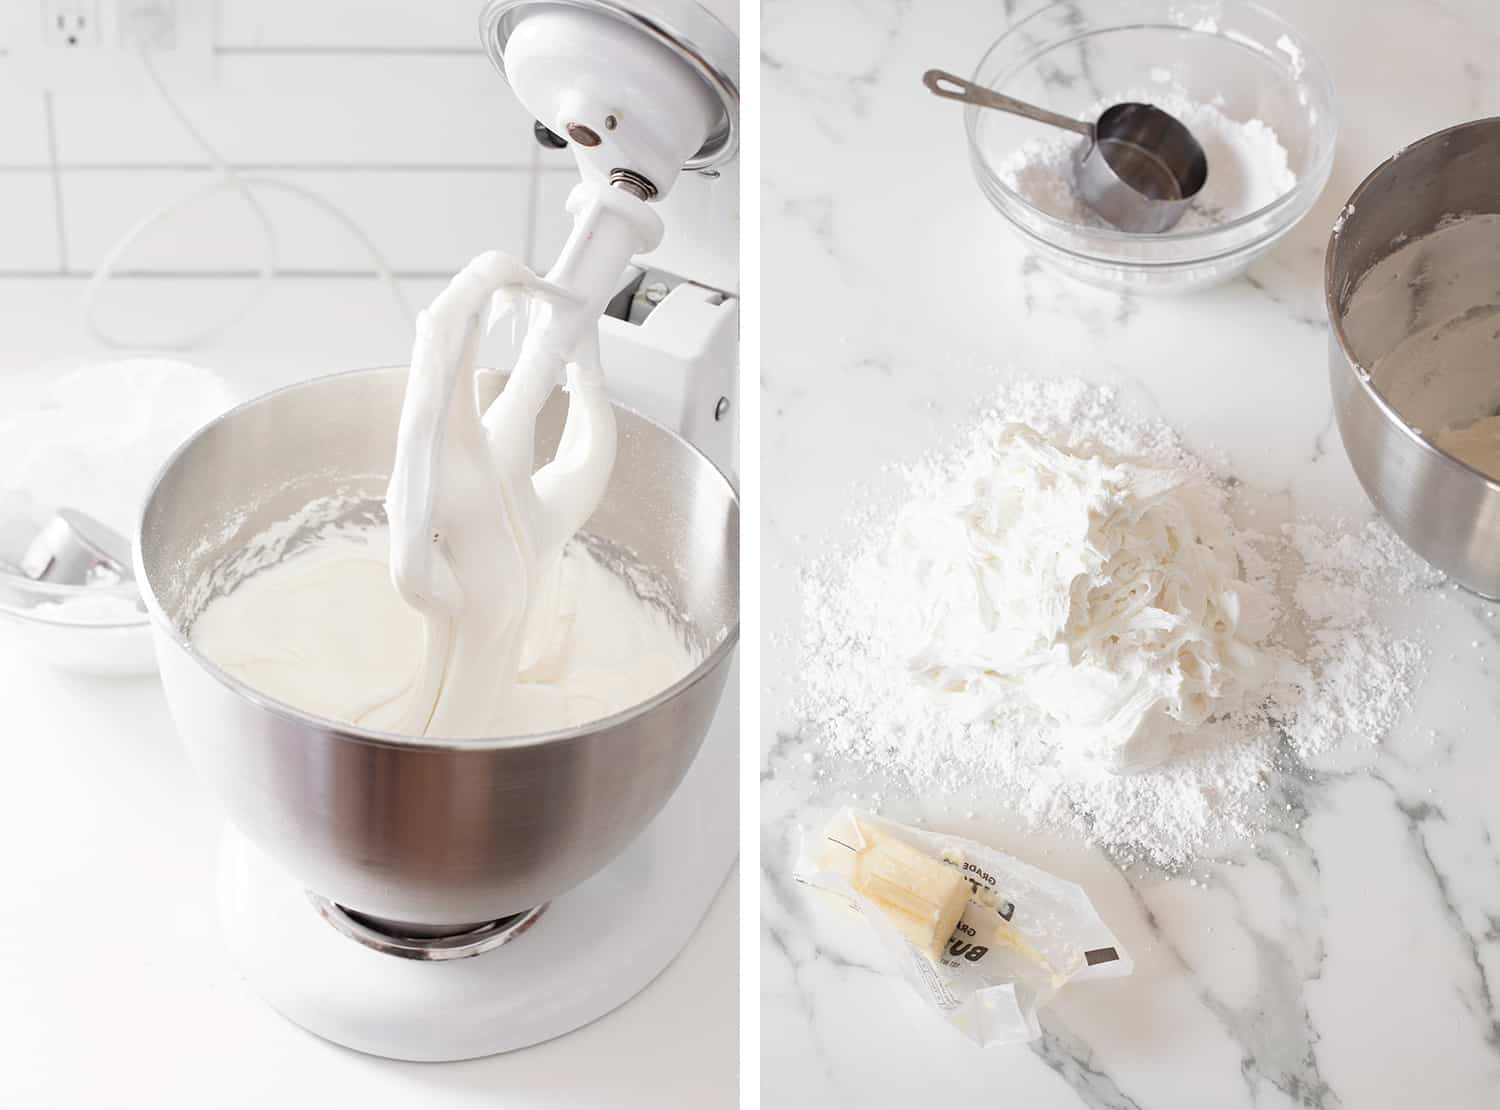 Step Three: Transfer the hot mixture to a stand mixer and gradually mix in 2 pounds of powdered sugar. Save some of the sugar for kneading in the next step.
Step Four: Place sticky fondant “dough” onto a surface dusted with powdered sugar.
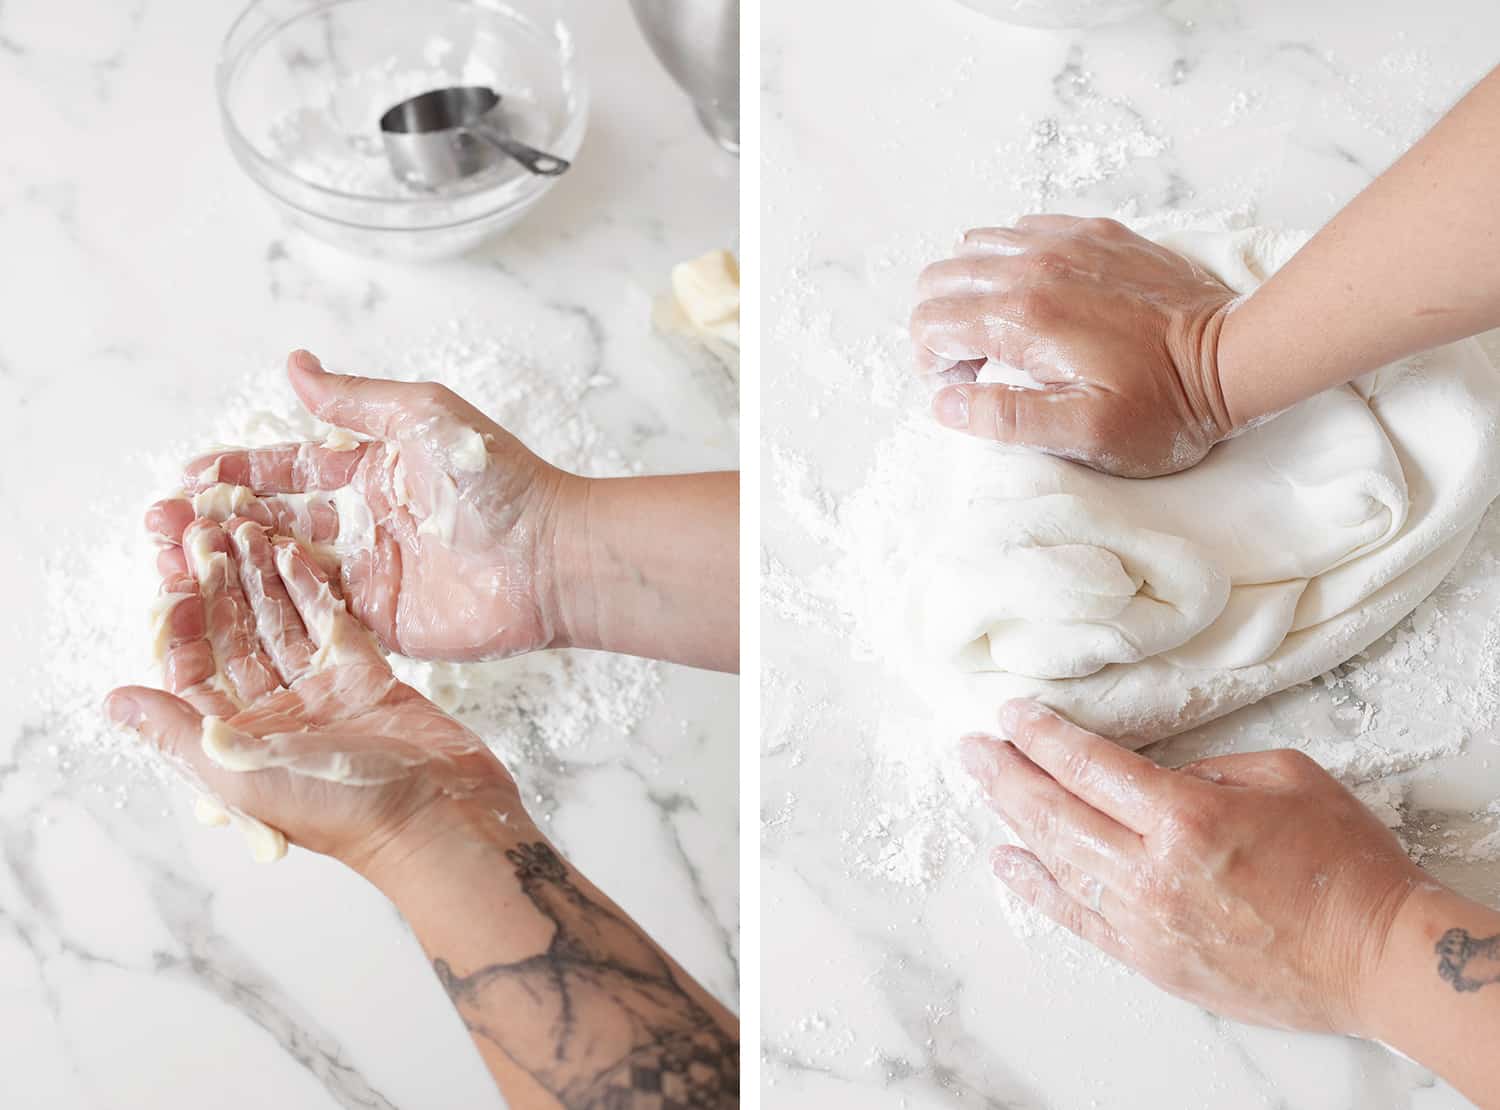 Step Five: Coat your hands with butter or shortening. This will keep your hands from sticking to the dough.
Step Six: Knead the fondant “dough” until it is barely sticky, adding powdered sugar as necessary.
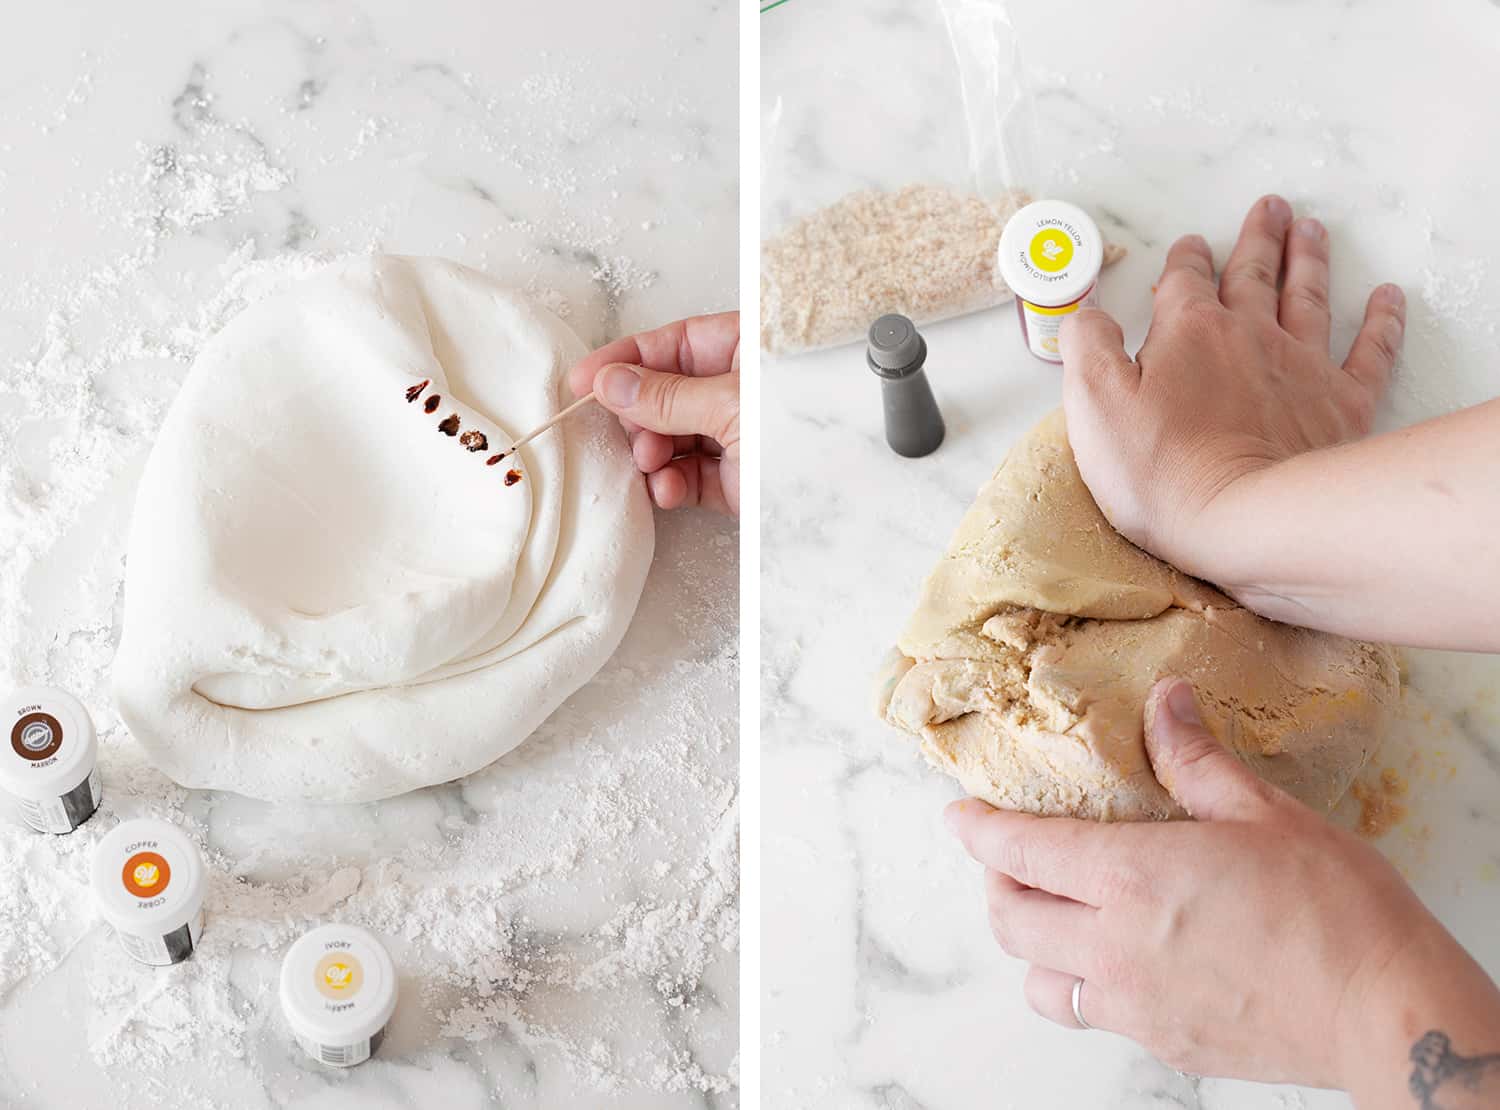 Step Seven: Add food color and knead it into the dough to fully incorporate the coloring. I had to do a bit of experimenting to get the correct color of fondant that looked like sand. It’s helpful to keep a bag of the cookie crumb “sand” nearby to compare my color.
I combined brown, copper, yellow, and teal colors to create the sand color. The teal and yellow added a yellowish green hue which muddied and toned down the reddish hues in the brown and copper coloring. Just add a little bit at a time to keep the color going in the right direction without making any irreversible mistakes.
Step Eight: Place your finished fondant in an airtight container and store in the refrigerator for at least one day. Before rolling out the fondant to make your decorations, allow it to completely come to room temperature.
 Making Fondant Shell Decorations
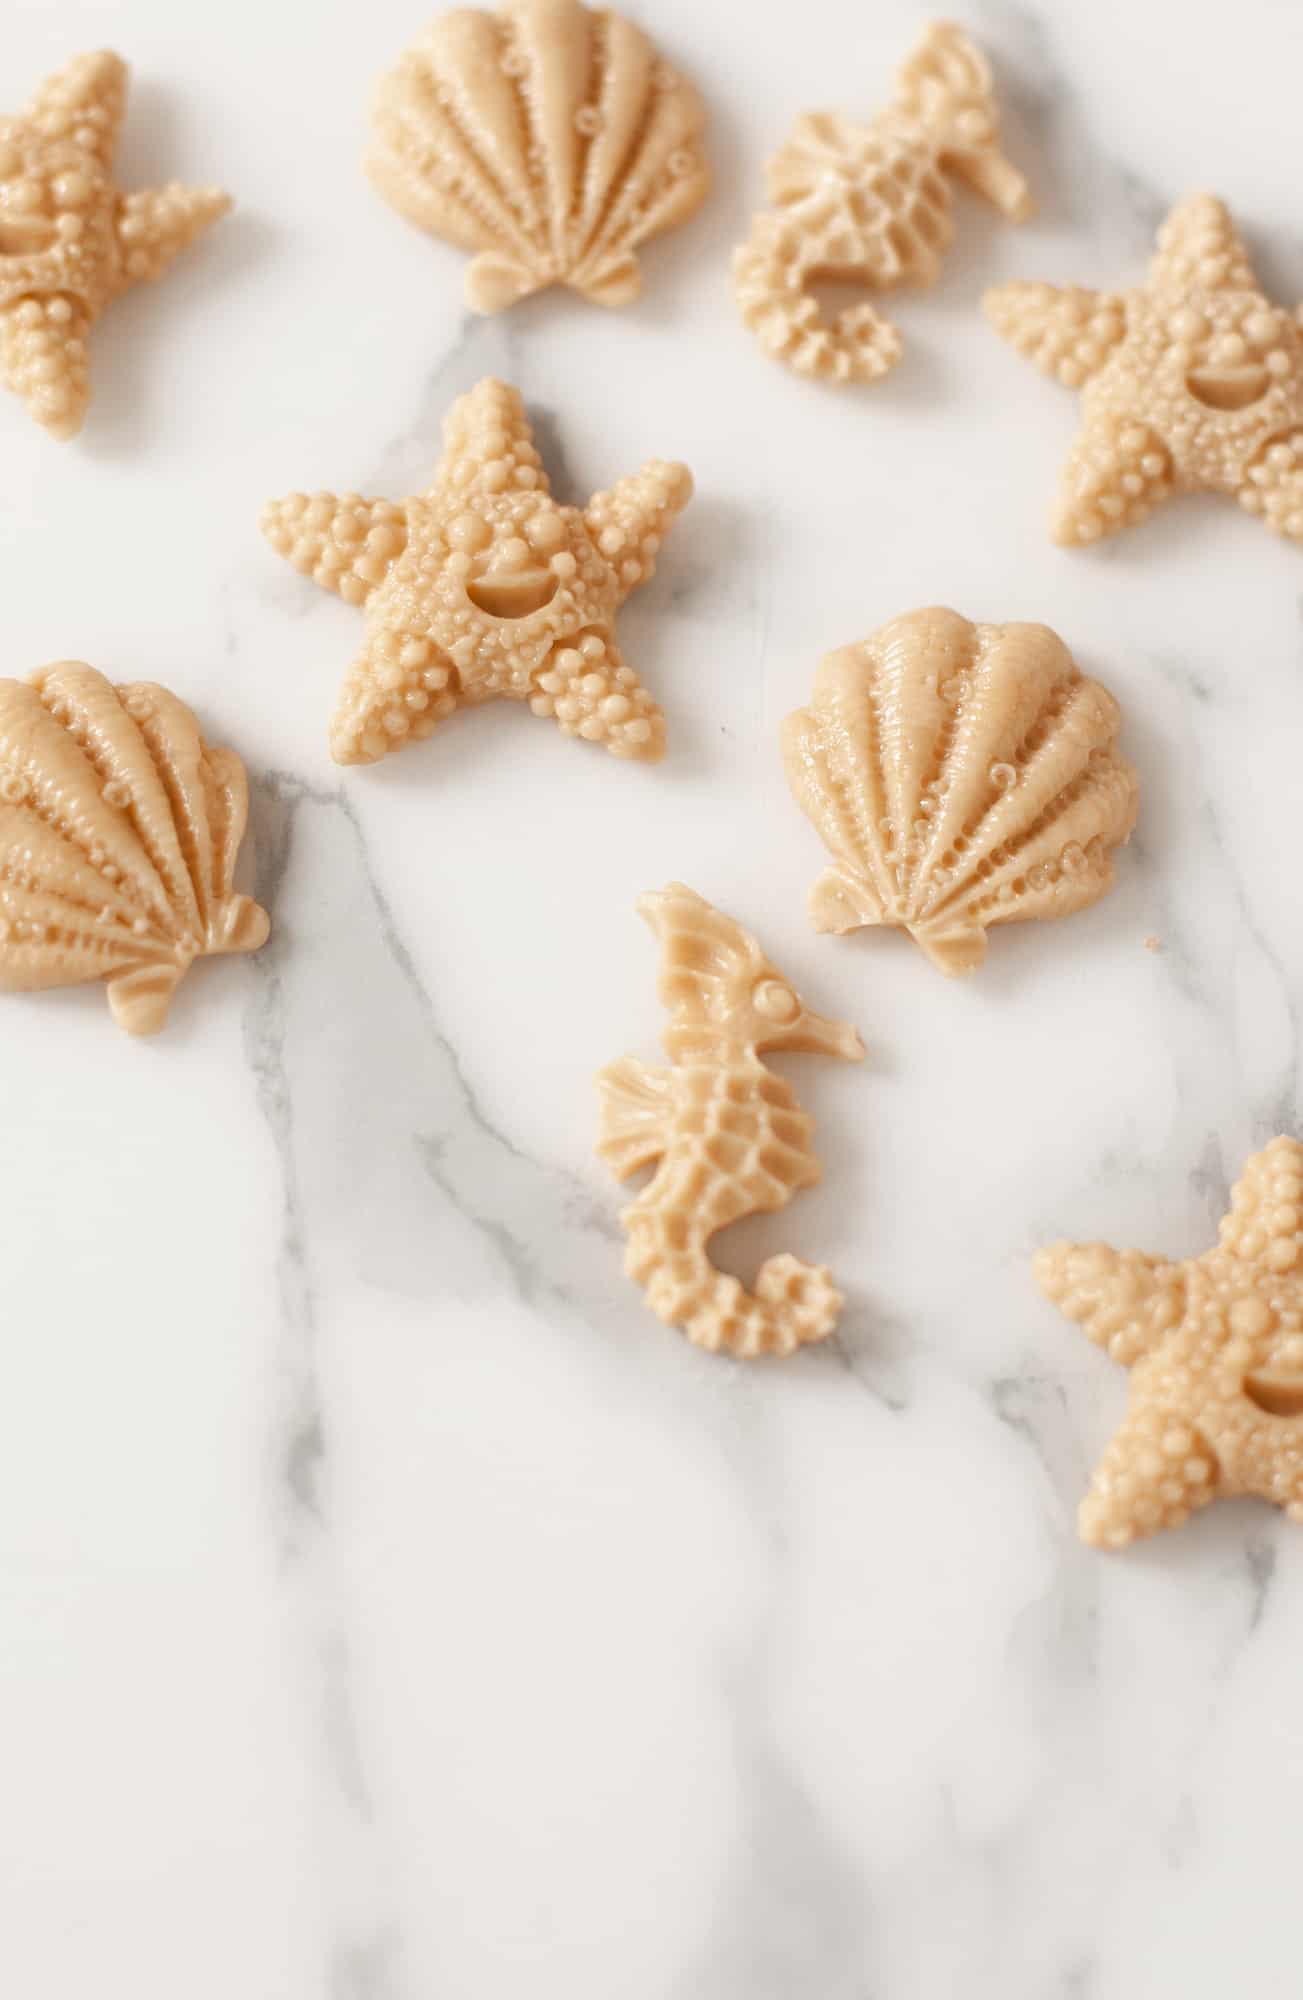
I used a silicone fondant mold to make fun shell shapes to decorate my cake. This is the mold set I bought, which is currently unavailable. I think this fondant shell mold set looks even better, though!
Step One: Allow your one (or more) day old fondant to come to room temperature and press pieces of it into the crevices of the silicone mold.
Step Two: Use a sharp knife to cut away the excess fondant from the surface of the mold.
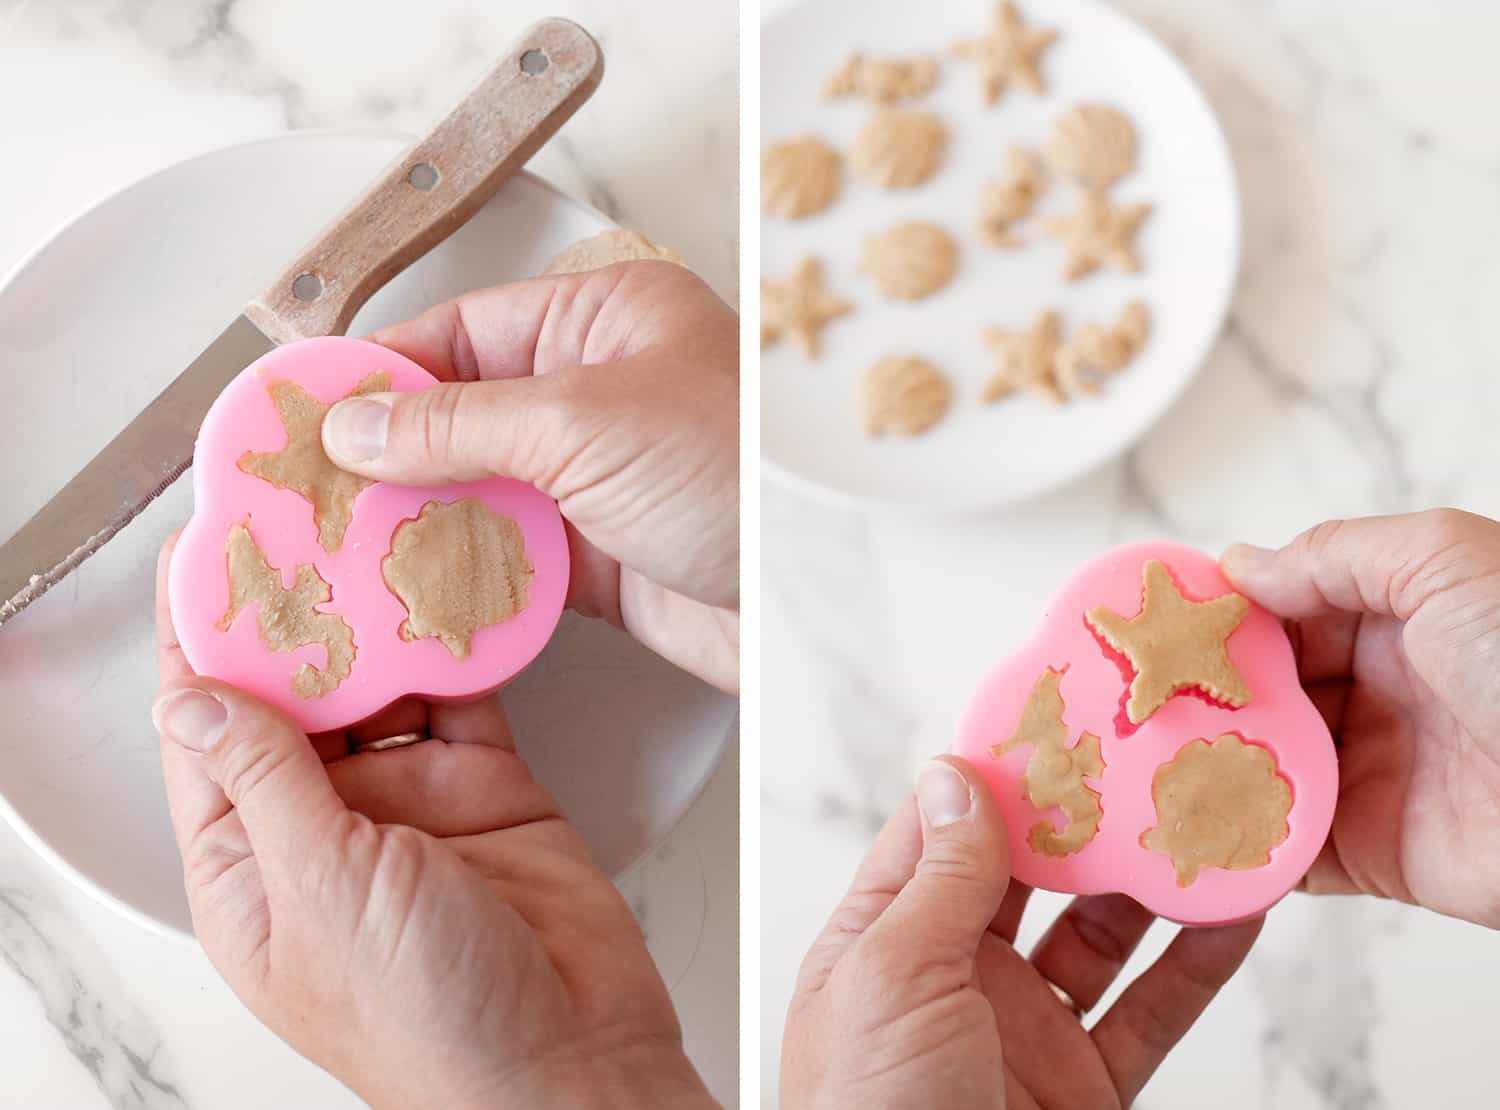 Step Three: After trimming away the excess, press the remaining fondant into the mold again. This is in case any of the fondant lifted out of the mold while trimming.
Step Four: Place the mold into the freezer for at least five minutes to set the shape. Then pop the shaped fondant out of the molds and store between parchment paper in an airtight container until you’re ready to decorate the cake.
 Prepping the Layer Cakes
Now, on to the cake! I made my cakes a week before the birthday party and popped them in the freezer until the day before the party. Gotta be honest—to save time, I opted to use a Pillsbury funfetti cake mix. I chuckled when everyone raved about how delicious the cake was, considering it was from a mix! I did swap melted butter for oil, so maybe that was the trick? The entire sandcastle cake used three boxes of cake mix, each one giving me one 8″ round cake and one 6″ round cake. I used these cake pans which I greased and dusted with flour before filling with batter.
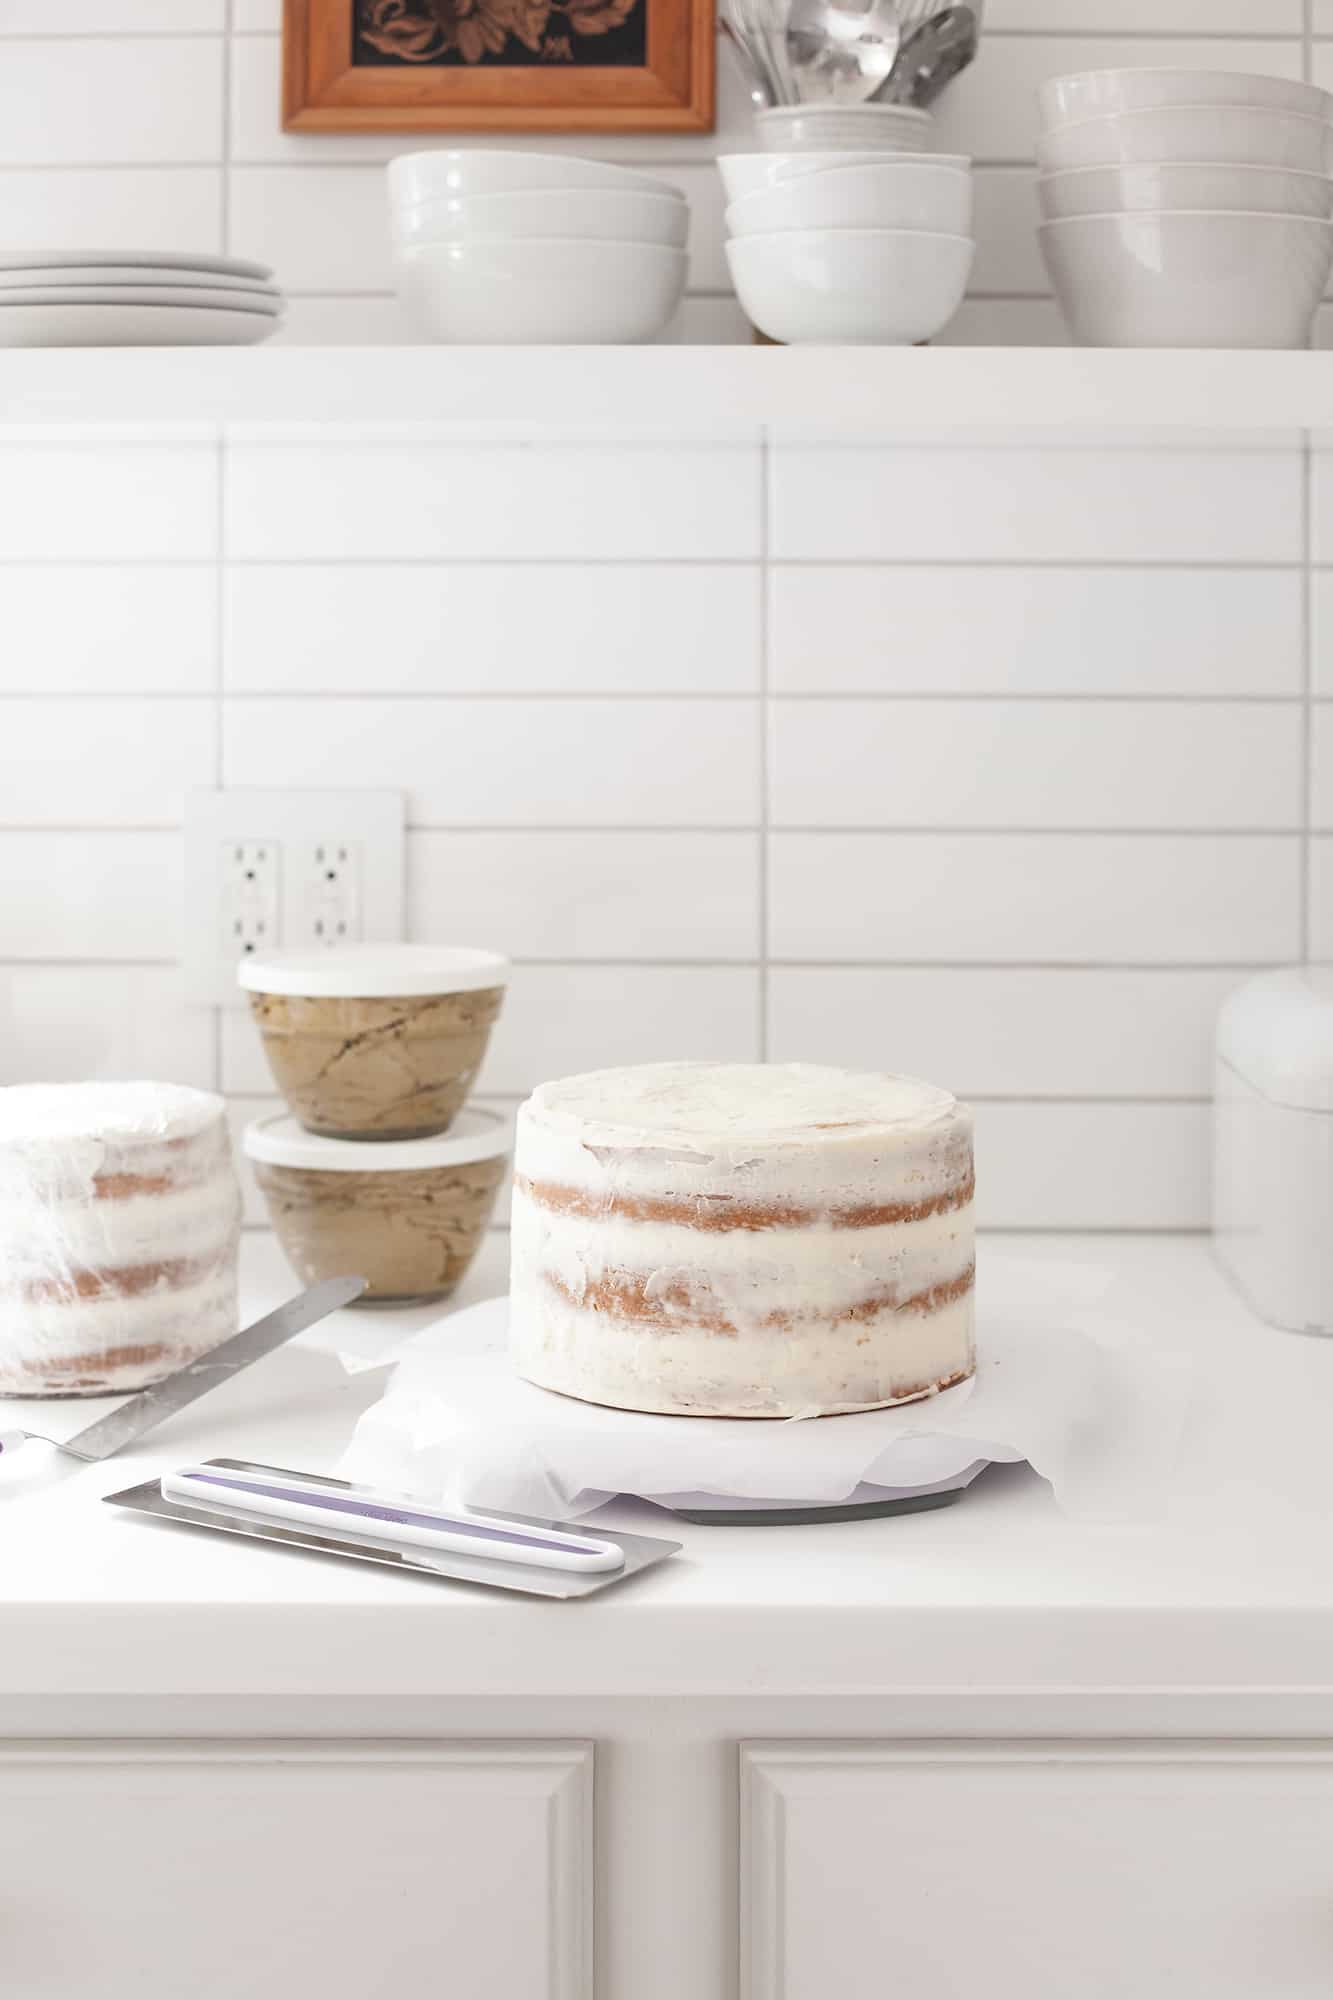
While the cakes were cooling, I made a double batch of buttercream frosting which I ended up coloring the same way I had colored the fondant. Then I cut off the rounded tops of the cakes and stacked them with buttercream between each layer. After stacking, I covered the cakes in a thin layer of frosting to act as a crumb coat. Crumb coats are intended to seal in the crumbs so that they don’t ruin the look of the final coat of frosting, though honestly for this sandy cake, crumbs wouldn’t even matter. Old habits die hard though! So crumb coats it is.
I placed the cakes in the refrigerator for a couple of hours, then covered them with wrapping and foil, then placed them in the freezer until I was ready to decorate the cake the following week. The cakes were removed from the freezer 24 hours before the decorating took place.
Buttercream Frosting Recipe
- 1 cup butter at room temperature
- 3 cups powdered sugar
- 1 teaspoon vanilla extract
- 3 tablespoons cream
 Assembling the Sandcastle Cake
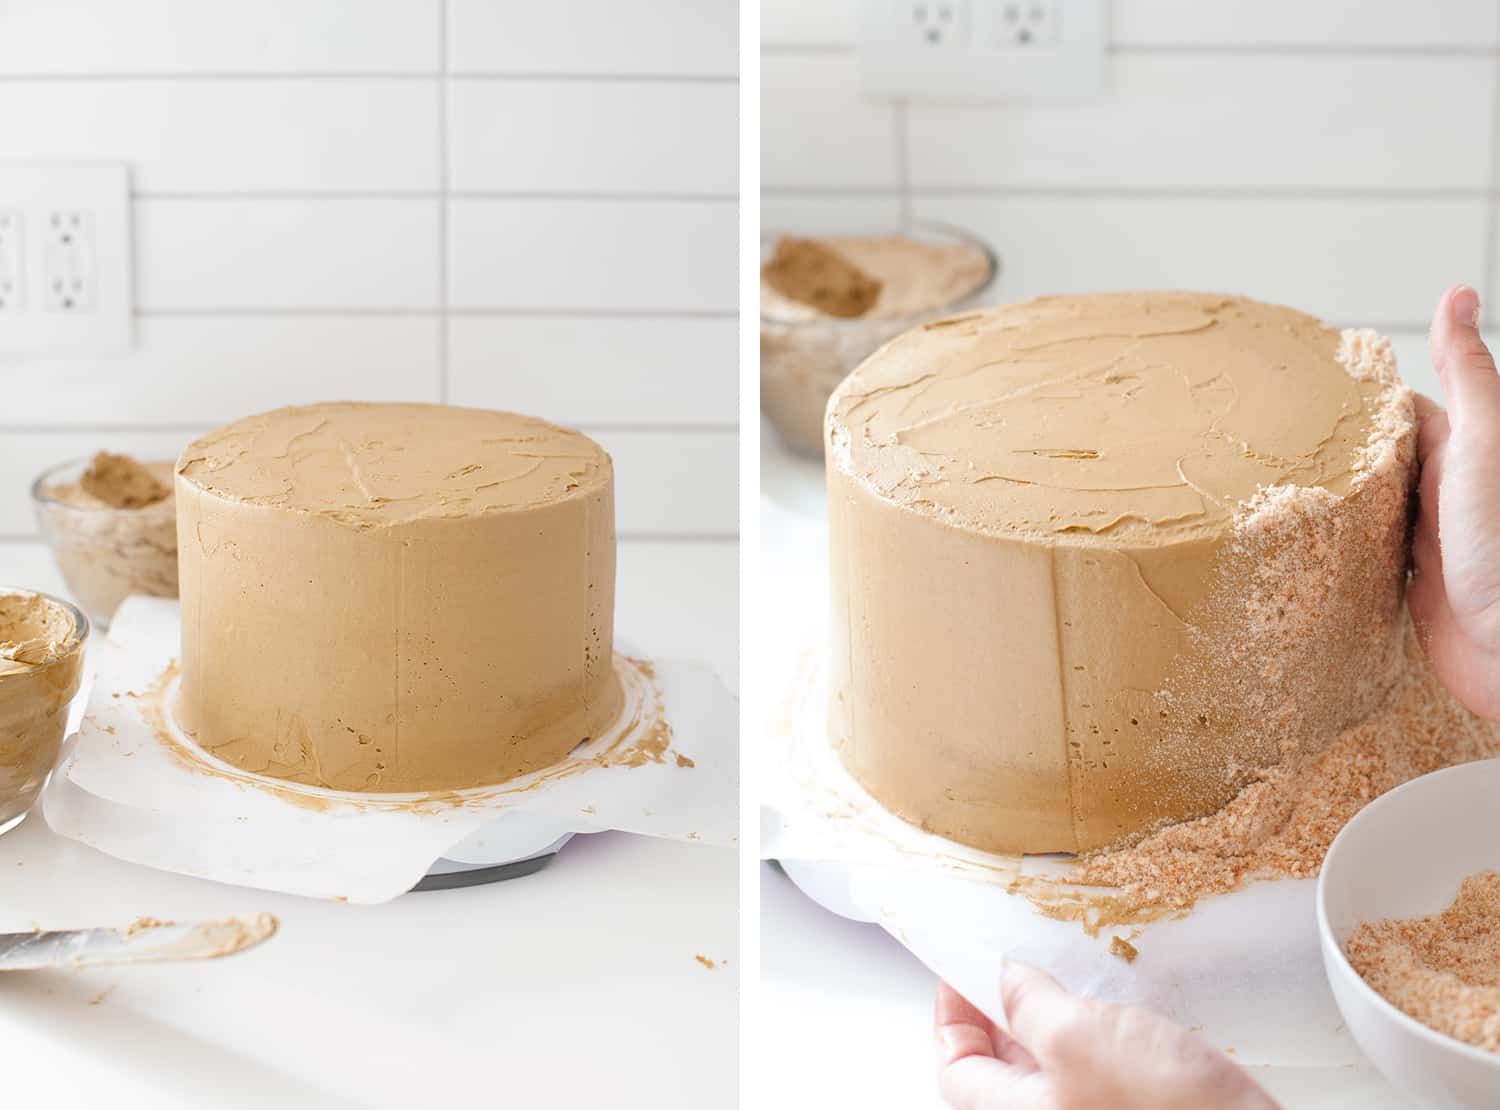
Step One: Cover the crumb-coated cakes with an even layer of sand-colored buttercream frosting. I made an effort to make my frosting nice and smooth, but it doesn’t need to be perfect. It will be covered with crumbs, after all!
Step Two: Use your hands to gently press the crumbs into the freshly frosted sides and tops of the cake. Try to get as many crumbs to stick as possible. They will become saturated with the butter of the frosting and darken the crumbs a bit, so keep this in mind!
Place the frosted and crumb-coated cakes in the refrigerator to stay cool and firm until you are ready to stack them.
The top layer of your cake should be placed on a 6″ round piece of cardboard to support the cake while stacking it in step four. Be sure to add the cardboard to the bottom of the cake before frosting it.

Step Three: Make four 8″ tall towers for each corner of the cake. You can use cardboard from paper towel rolls covered in fondant or even wrapped PVC pipes as I did! I covered my pipes with buttercream and rolled them into crumbs to make non-edible castle towers. Originally, I had planned on making these entirely out of thickly rolled fondant, but decided it wasn’t worth the fondant as they would not be eaten anyway.
 Step Four: Place four dowels into the 8″ layer cake as Emma demonstrates in her wedding cake tutorial. Use spatulas to carefully lift the cooled 6″ cake to rest on top of the dowels of the 8″ cake. The cardboard at the bottom of the 6″ cake will protect it from being pierced by the dowels, whereas the dowels keep the 6″ cake from smashing the 8″ cake.
Adding Fondant Decorations
Now it’s time to add your fondant decorations! I recommend that you prepare all of your fondant decorations at least a day before you plan to decorate the cake, only because it goes much faster without worrying about creating the fondant elements. But if you have plenty of time, you may opt to do it all in one day as I did. (For the record, I did not have plenty of time, but it all worked out in the end!)
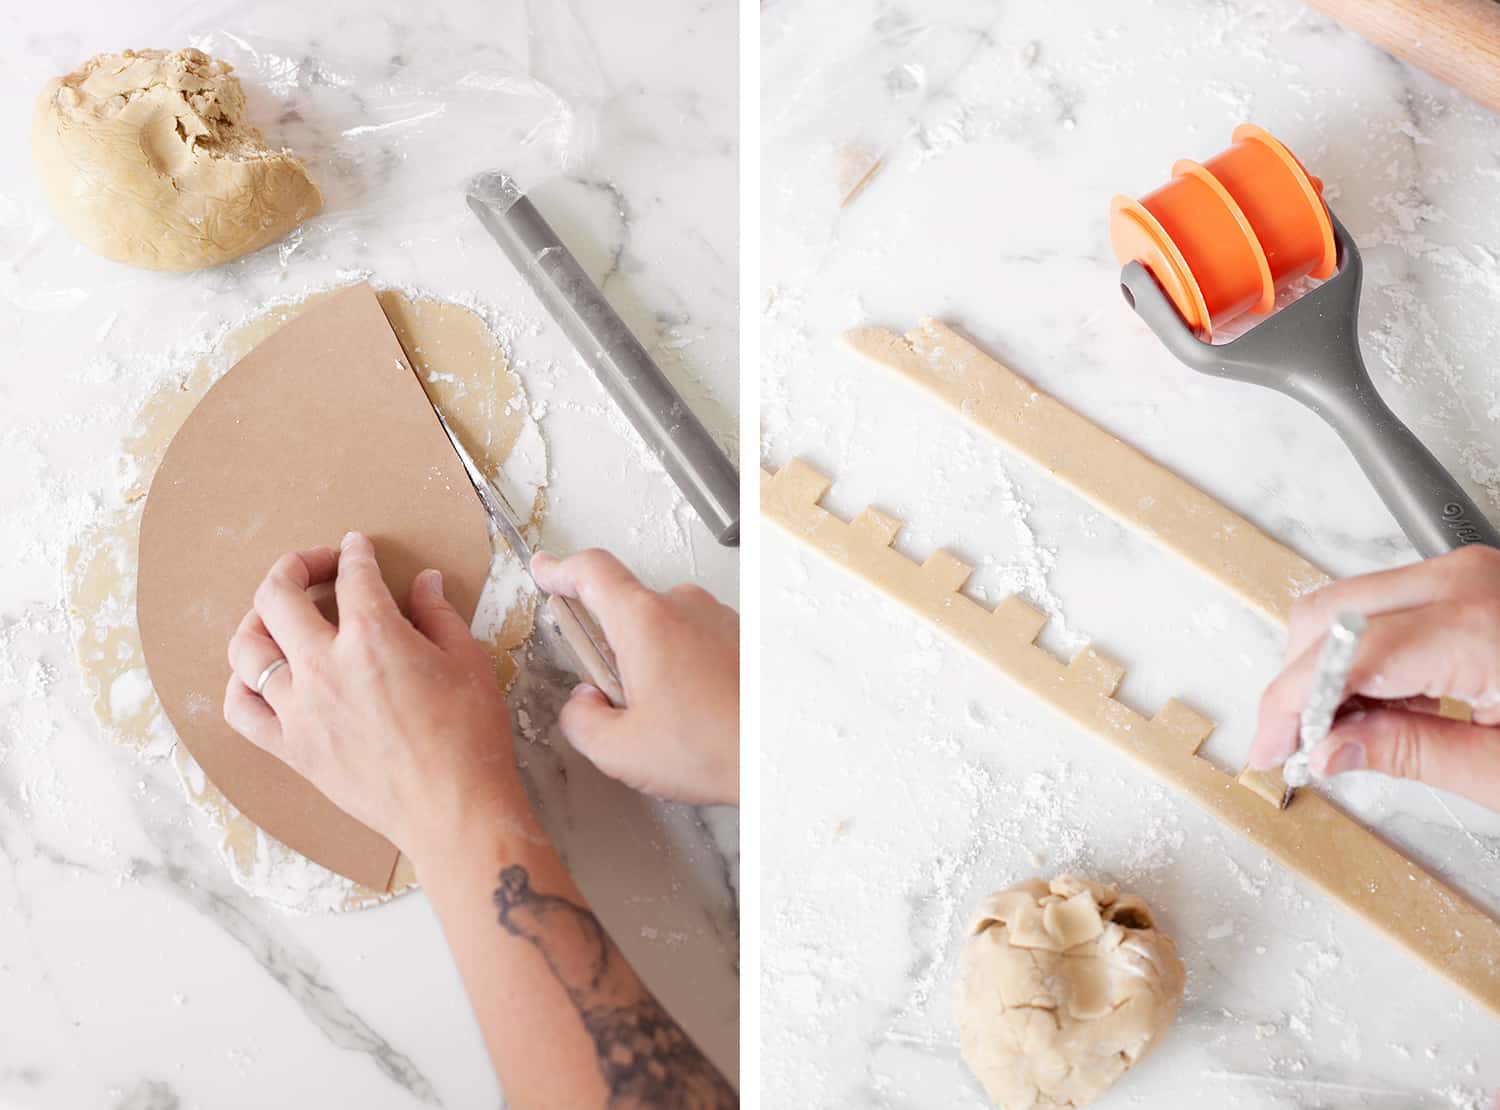 Step One: Print two of these small cone templates and one of each half of this large cone template (half and half) onto card stock. Roll out the fondant into 1/8″ thick sheets and cut out the five pieces for the cone shapes. Keep these stored in an airtight container until step three. Place parchment paper between the pieces so they don’t stick together.
Step Two: Roll out more fondant into 1/8″ thick strips and cut into 1″ strips using a fondant ribbon cutter or a clean ruler and a blade. I used a square-tip X-acto blade to hand cut crenelations into the strips. You could use any clean, sharp blade for this step. Store these strips in an airtight container or tightly covered pan until you’re ready to add them to the cake.
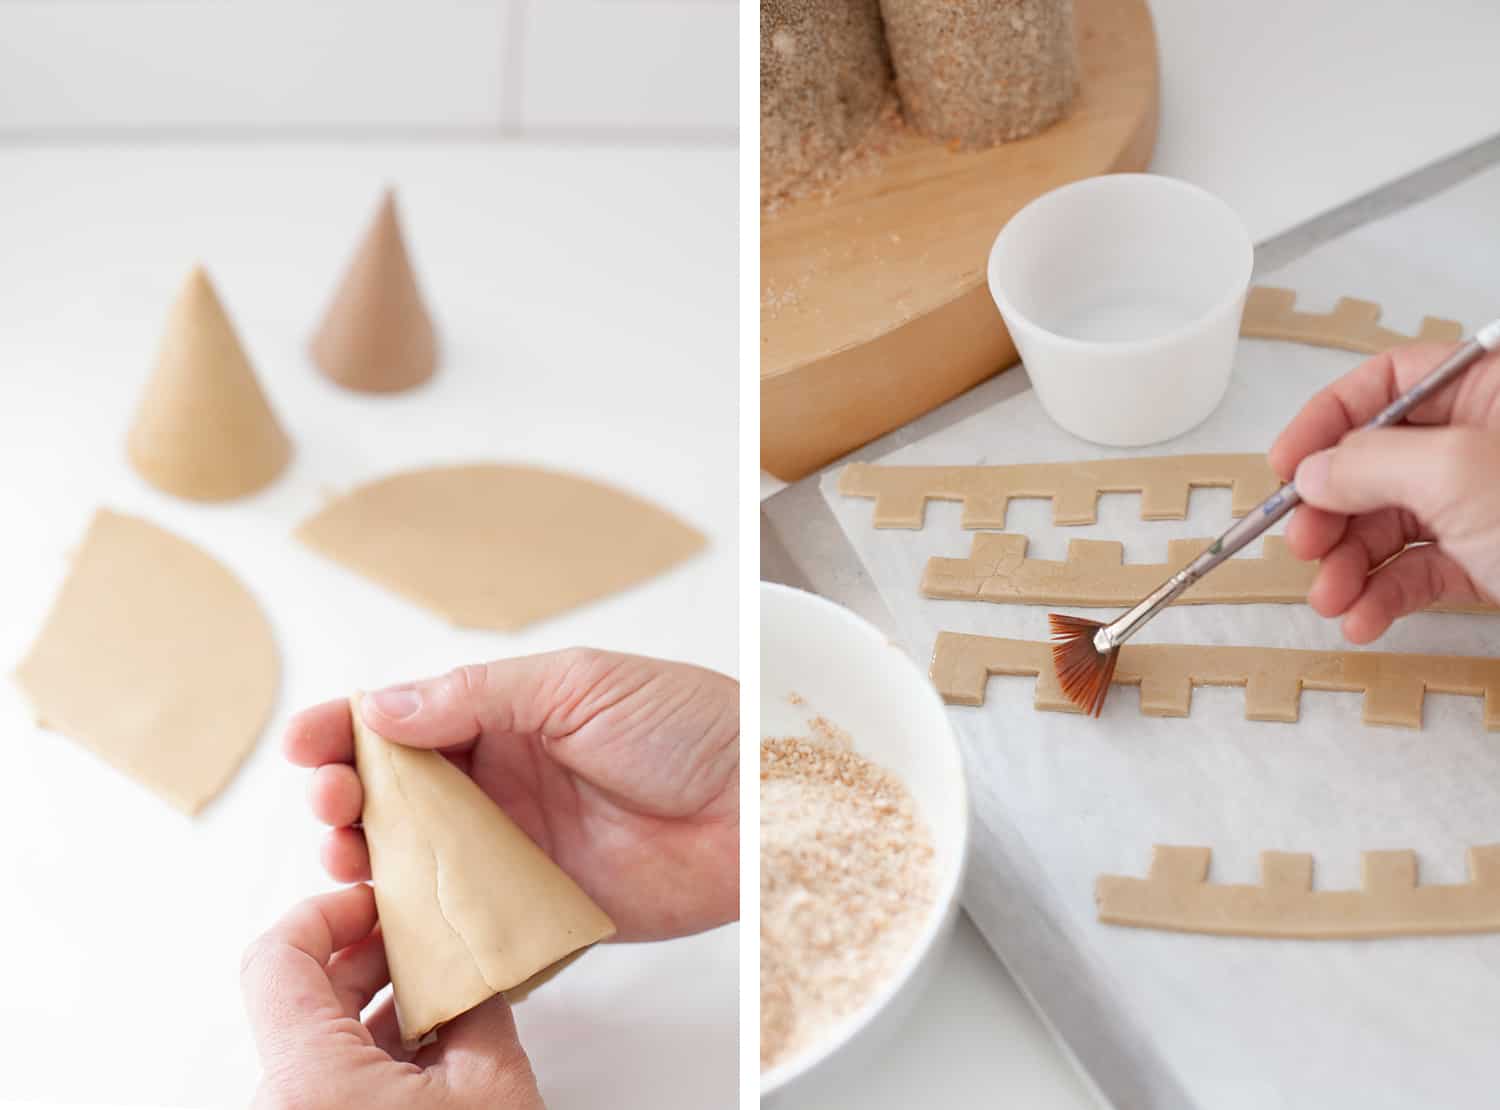 Step Three: Tape together the card stock cone templates to act as a platform for the fondant cones. Use your fingers to blend the seams. The seams do not need to be perfect as they will be covered in crumbs, but you will be able to tell if the seams are very poorly blended.
Step Four: Brush all of your fondant elements with alcohol (such as vodka) to moisten it for crumb application. Alcohol evaporates much faster than water, preventing the fondant from getting too mushy. If you don’t want to buy alcohol for this project, you could probably just use minimal water, though it would not be ideal. Or you can just buy a tiny bottle at any liquor store.
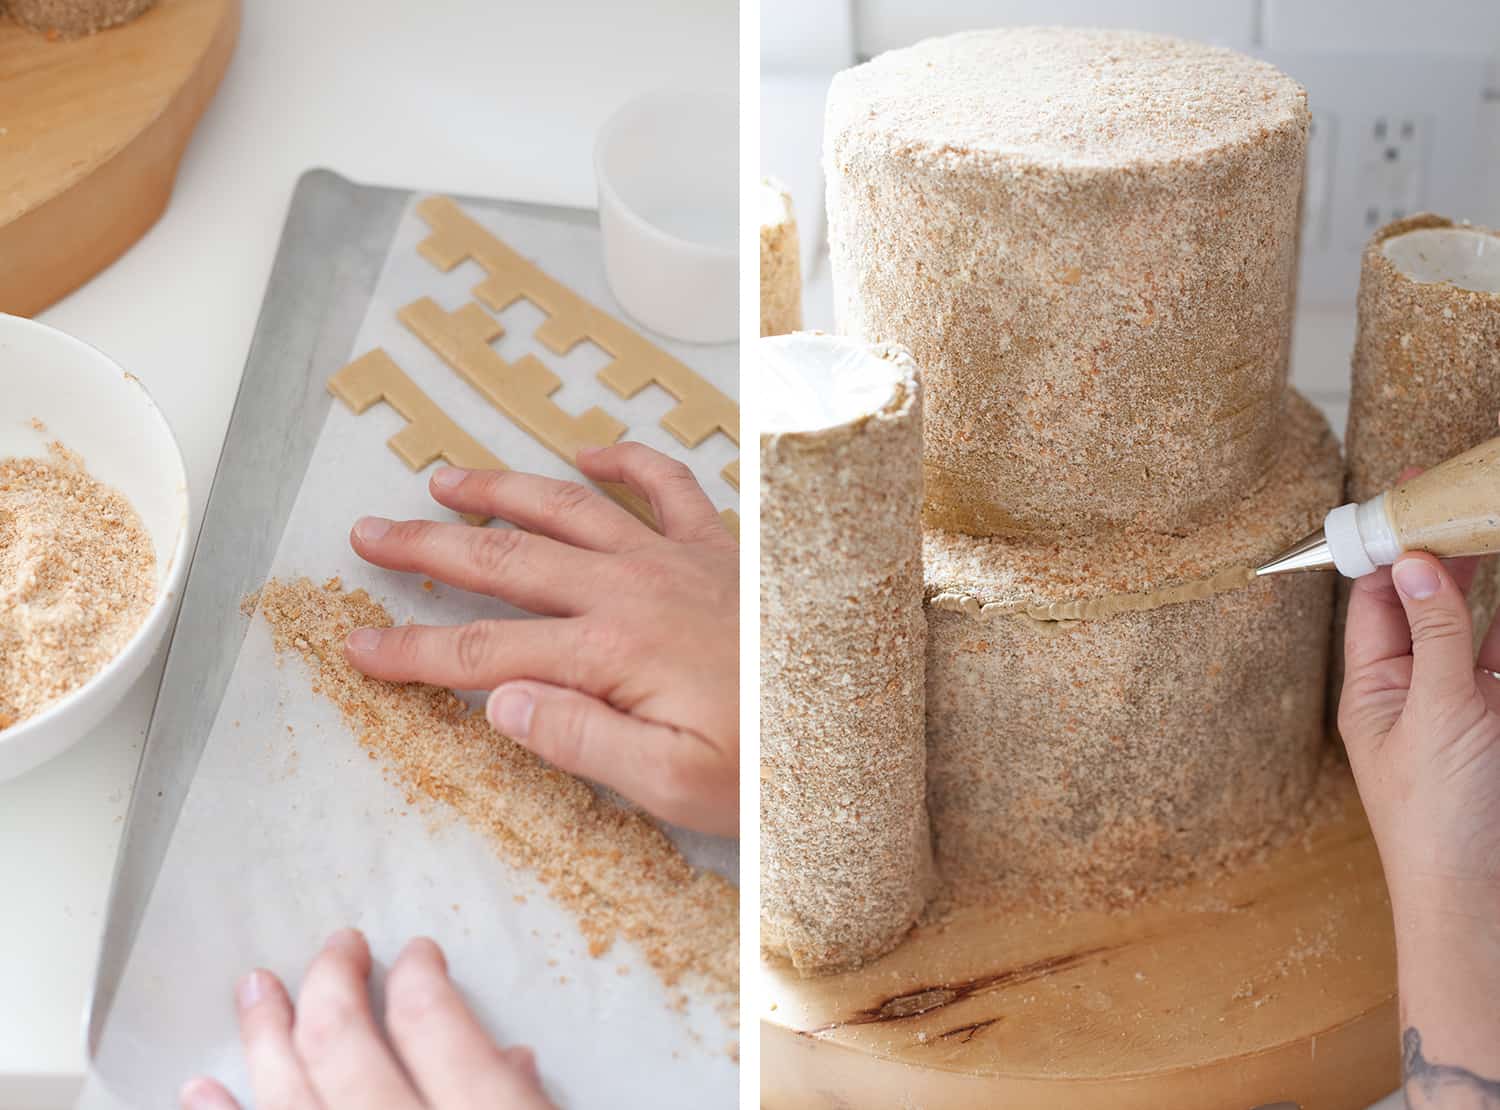 Step Five: Working with one moistened strip at a time, gently press cookie crumbs onto the surface of the fondant.
Step Six: Pipe leftover buttercream frosting onto the areas where you need to apply the fondant decorations.
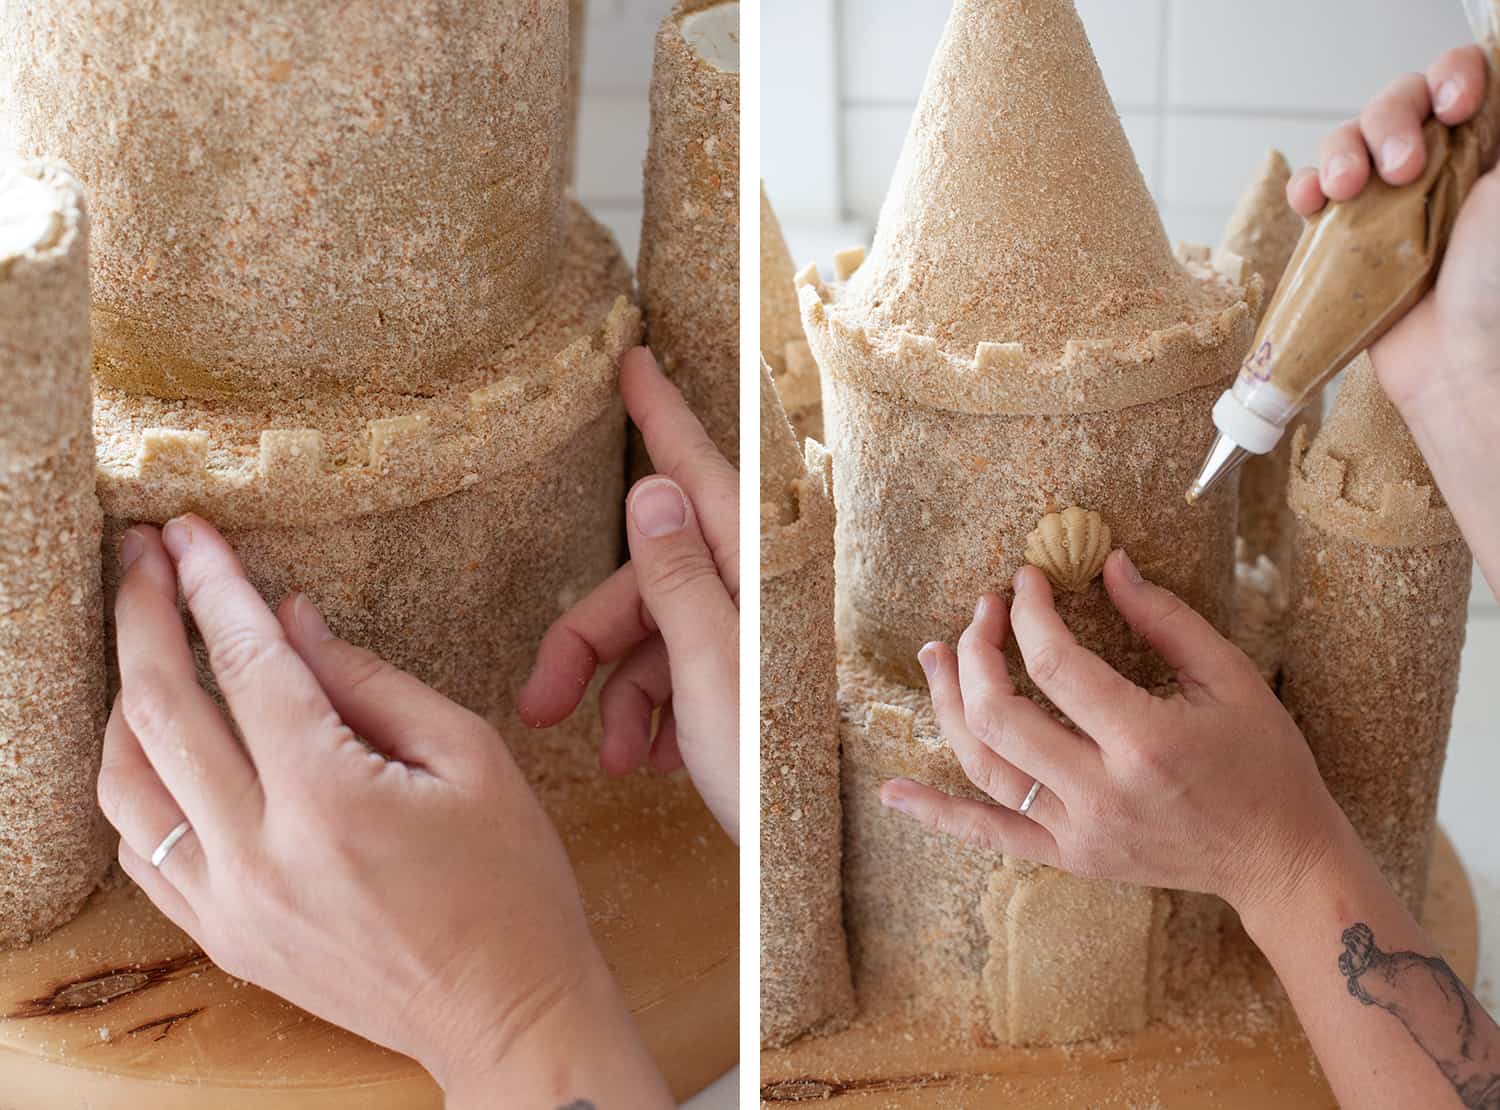 Step Seven: Trim the crenelation strips to fit the areas where they will be applied and press them onto the buttercream. Be sure to use enough buttercream or the weight of the fondant will cause the pieces to fall off the cake.
Step Eight: Add the fondant shells and a front door to the castle for the final decorative touches.
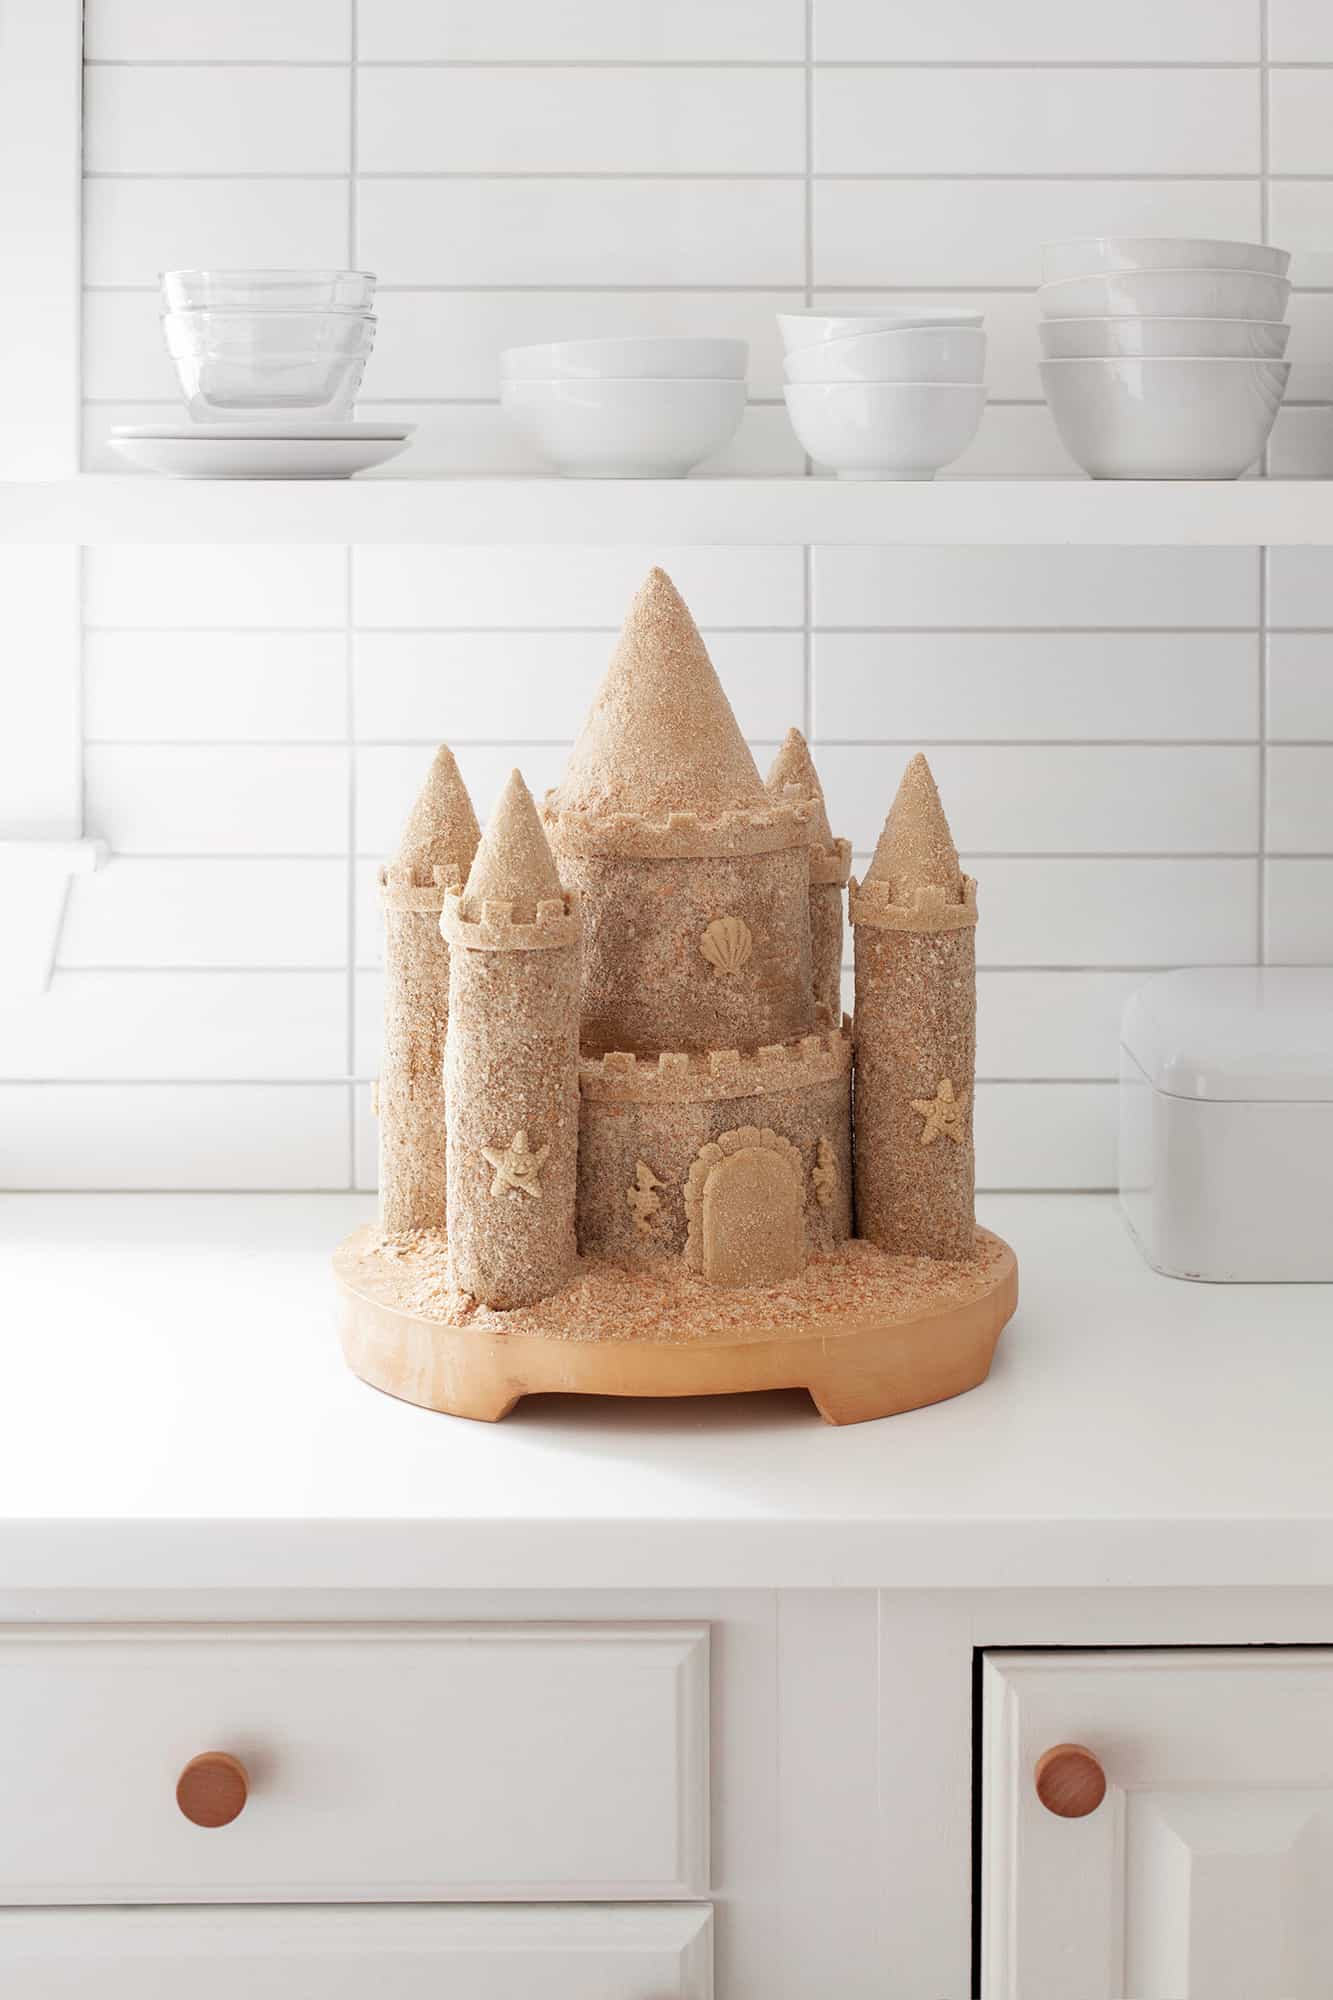 I used a wood cheese board as a cake plate, because none of my cake plates were big enough! I have seen people use upside-down pans covered with cloth and even hat boxes used as cake stands. The gaps at the sides of my wood platform bothered me (I’m such a diva sometimes), so we decided to add card stock waves to the edges to complete the whimsical look of the cake.
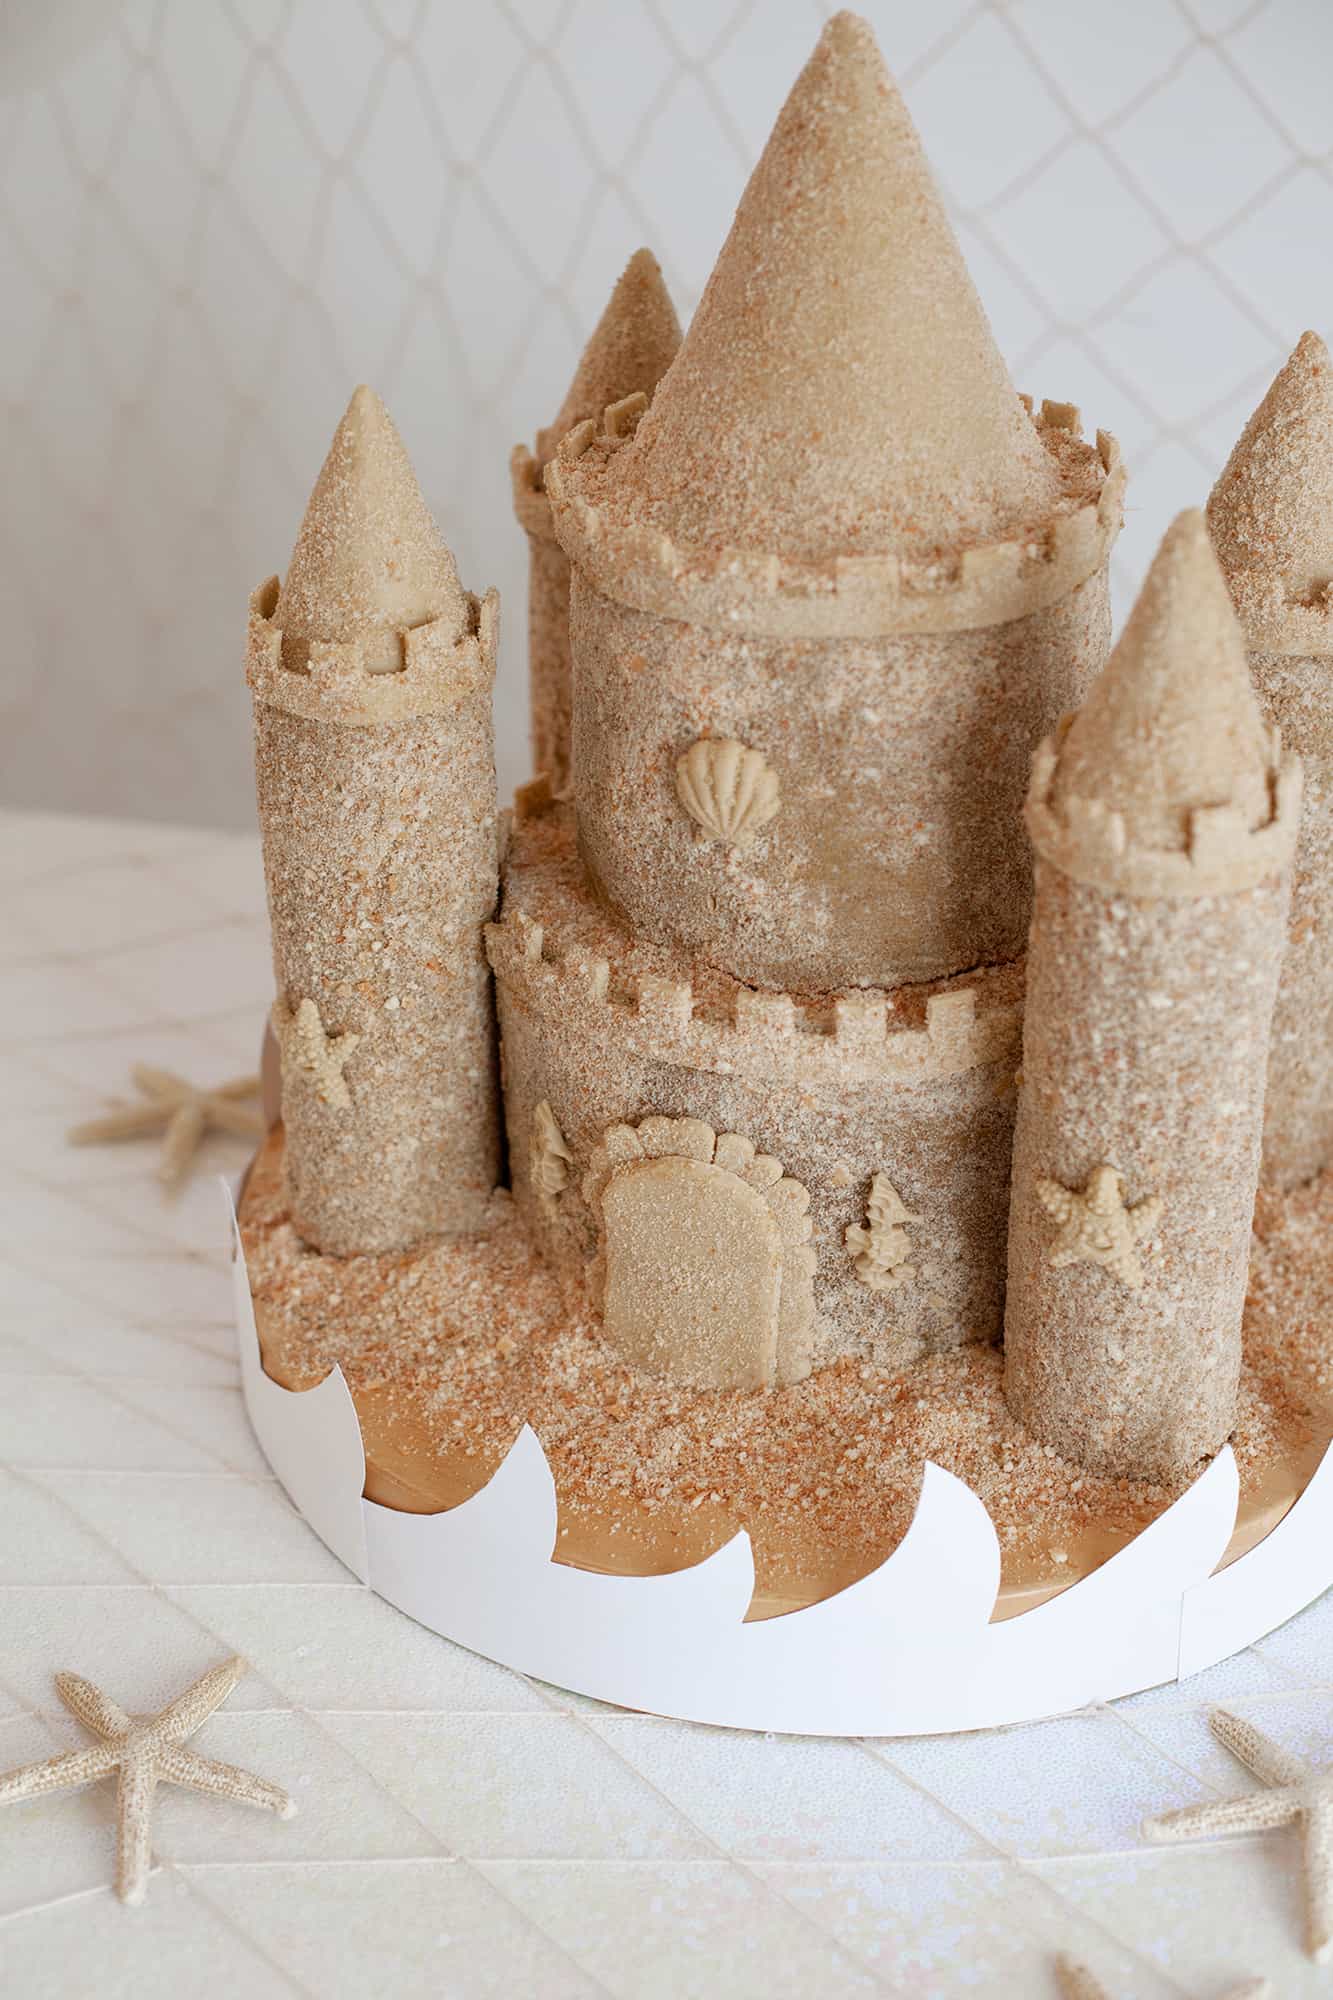 As you can tell in the image above, the vanilla wafer crumbs did absorb some of the moisture of the buttercream, but it didn’t get any worse than you can see in the above image. We had the entire bottom half of the cake leftover from the birthday party and served it at a family event the next day. I’m happy to report the crumbs held up nicely, didn’t absorb any additional moisture, and the cake still looked great without the towers and the fondant crenelations!
This sandcastle cake was such a fun project and really was the (buttercream) icing on top of my daughter’s mermaid birthday party! I’m so excited to try my hand at another showstopper cake sometime soon. – Mandi
21 Comments
This is crazy – I actually thought it was made of sand at first glance! ❤️✨
Charmaine Ng | Architecture & Lifestyle Blog
http://charmainenyw.com
I seriously can’t get over how amazing this is. I bet your kids will love looking back on photos like this , Mandi. What a special cake and even more special being made by you!
Colleen Wisniewski
http://www.sincerelycolleen.com
This is amazing creativity. I will never, ever make this cake, but I am so glad that you did. And I think the damp cookie crumbs make it look more realistic.
Mandi, this cake really is a dream! Well done! Thanks for the tutorial!
This is so fun! My kids would be obsessed with this!
Paige
http://thehappyflammily.com
This is so incredible. You have raised the bar again!
Do you ever use cake strips (those things you soak in water and wrap around the pan) to get your layers even? Or am I overthinking this?
Always so impressed with you!
Thank you! I have used cake strips in the past and they are amazing! The thing that really bothers me about the way cakes bake is how the top of the cake pulls away from the pan, whereas the bottom doesn’t. The rounded tops aren’t as bothersome. Anyway, the cake strips help with both of those problems! I just couldn’t figure out where I put mine after the move. Gah!
I am absolutely in AWE and in LOVE with this cake omg! So clever and so beautiful! <3
A cute cake! I never would have thought of this ideal.love the way you made it with the marshmallows. So creative. Will check back with you again.
oh my goodness, what a labour of love! this is absolutely amazing! so special <3
This cake is truly amazing and it is clear how much time and love you put into it!!
I have some question… When you froze the cakes, did you do the crumb code first? Were the cakes stacked or separate? How do you wrap them to keep them fresh in the freezer? Do you put them in boxes or something like that to keep them from getting squished in the freezer? I’ve never frozen cakes before, but am interested for the future.
This was my first time freezing cakes, so I was a bit nervous about how it would go! I did a crumb coat on the stacked cakes, then put them in the fridge to harden the frosting a bit. After an hour in the fridge, I took them out and wrapped them in plastic wrap and foil. Then I popped them in an extra freezer I have in my garage, where I knew nothing would be sitting on top of them or crowding/crushing them. I took them out of the freezer 24 hours before I planned to decorate the cake. They were only in the freezer for a week.
This is the most impressive cake I have seen in a long time. Amazing! The only problem is that the bar is set so high, it will be hard to top in your lifetime!
Haha! Thank you, and agreed! Thankfully my kids are truly happy with simple cakes as well, this fancy stuff is just to flex my creative muscles and have fun. 🙂 They were in awe of the cake, but I know they’d be happy to have any kind of sugar/butter combination. Heh!
Amazing!!! This is going to go viral for sure!!!
This is so inspiring. Thanks for the breakdown. I am going to have to try it for a kids party (or even an adult party…cause let’s be honest this is awesome).
Mandi, you seriously nailed it with this cake! It’s so beautiful and I will never have the patience to make it!
Oh my goodness that turned out absolutely amazing! Plus, I had no idea that there was an alternative to not yucky tasting fondant. I am excited to give the fondant recipe a try!
I was pretty pleased with the taste of it! I wouldn’t want to eat much of it, but just for extra decorations, it was tasty!
I cannot get over this cake! So amazing.
Would rice crispy work instead to PVC pipe?
Also would gramb crackers give the sand more shine like sand has?