 About a year ago, my good friend Shai asked me if I would make her wedding cake. Many years ago, I used to do some cupcake catering on the side, so I’ve made cupcakes for a few weddings. But I’ve never made a tiered cake before. And I was terrified to do so as I really don’t consider myself much of a cake decorator. I love to bake and feel pretty good about that overall, but decorating a tiered cake for a good friend’s wedding sounded like a lot of pressure. But I was thrilled that she asked me to be a part of her big day and I was excited for the challenge. I just needed to figure out how to make a wedding cake. I mean, how hard could it be?
This is the part where I laugh until it trails off and turns into a nervous gulp.
 I decided to recruit my talented friend, Amber McGuire, to help me with the decorating and set up of the cake since she previously had worked for a bakery. I learned a lot from Amber, and the cake turned out so good! Shai’s only request was for this peanut butter frosting that I make, so I did that along with vanilla and chocolate cake layers. Really, it was a very simple cake and now that I know a few tricks I learned from Amber, I really think anyone who likes to bake could totally make a wedding cake. So I just thought I’d share in case anyone out there gets asked by their friend to make their wedding cake—it’s not that hard. You can totally do this even if you don’t have a cake decorating pro friend like I did. 🙂
First, think through the flavors of the cake and the recipes you plan to use. If they are recipes you aren’t familiar with, test them out first. You’ll also want to think about how much cake will be needed, depending on how big the guest list is. I thought this article was helpful. Based on that article, the wedding cake I made should have served around 100-120 guests (she was expecting more like 150 guests). I was aiming a little low just because in my experience not everyone eats cake at a wedding, especially if dinner and drinks are being served (which they were at this one). I saw there was some extra cake slices left over, but it was probably around 10 or maybe a few more, so that worked out. But you will also want to think about if a groom’s cake is being served, if any other desserts are being offered, and if the couple would like to save the top tier for their first anniversary (does anyone still do this?).
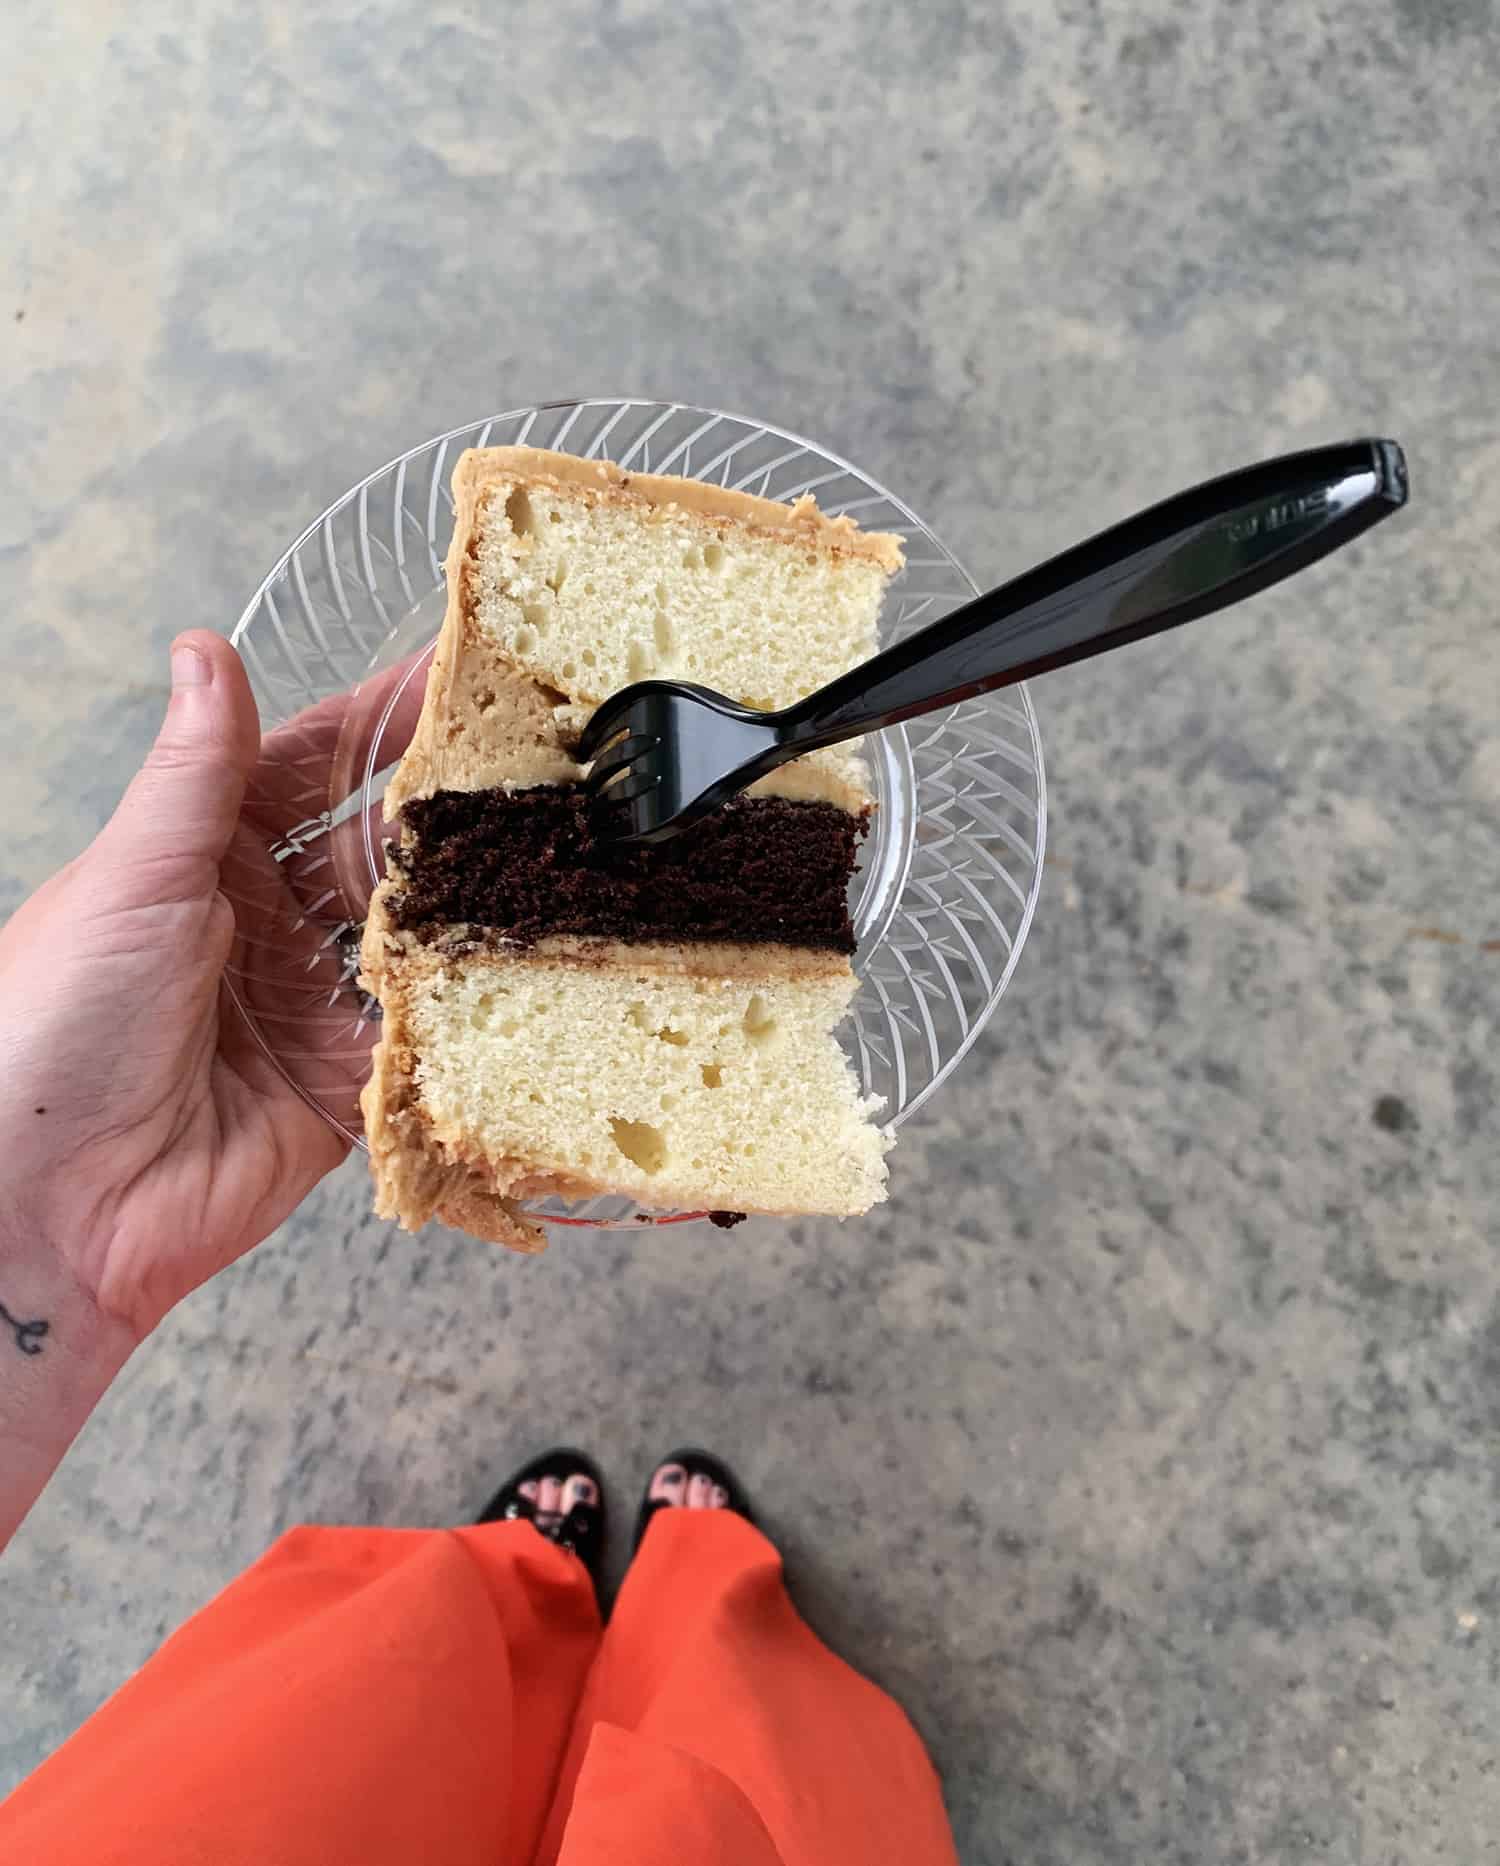
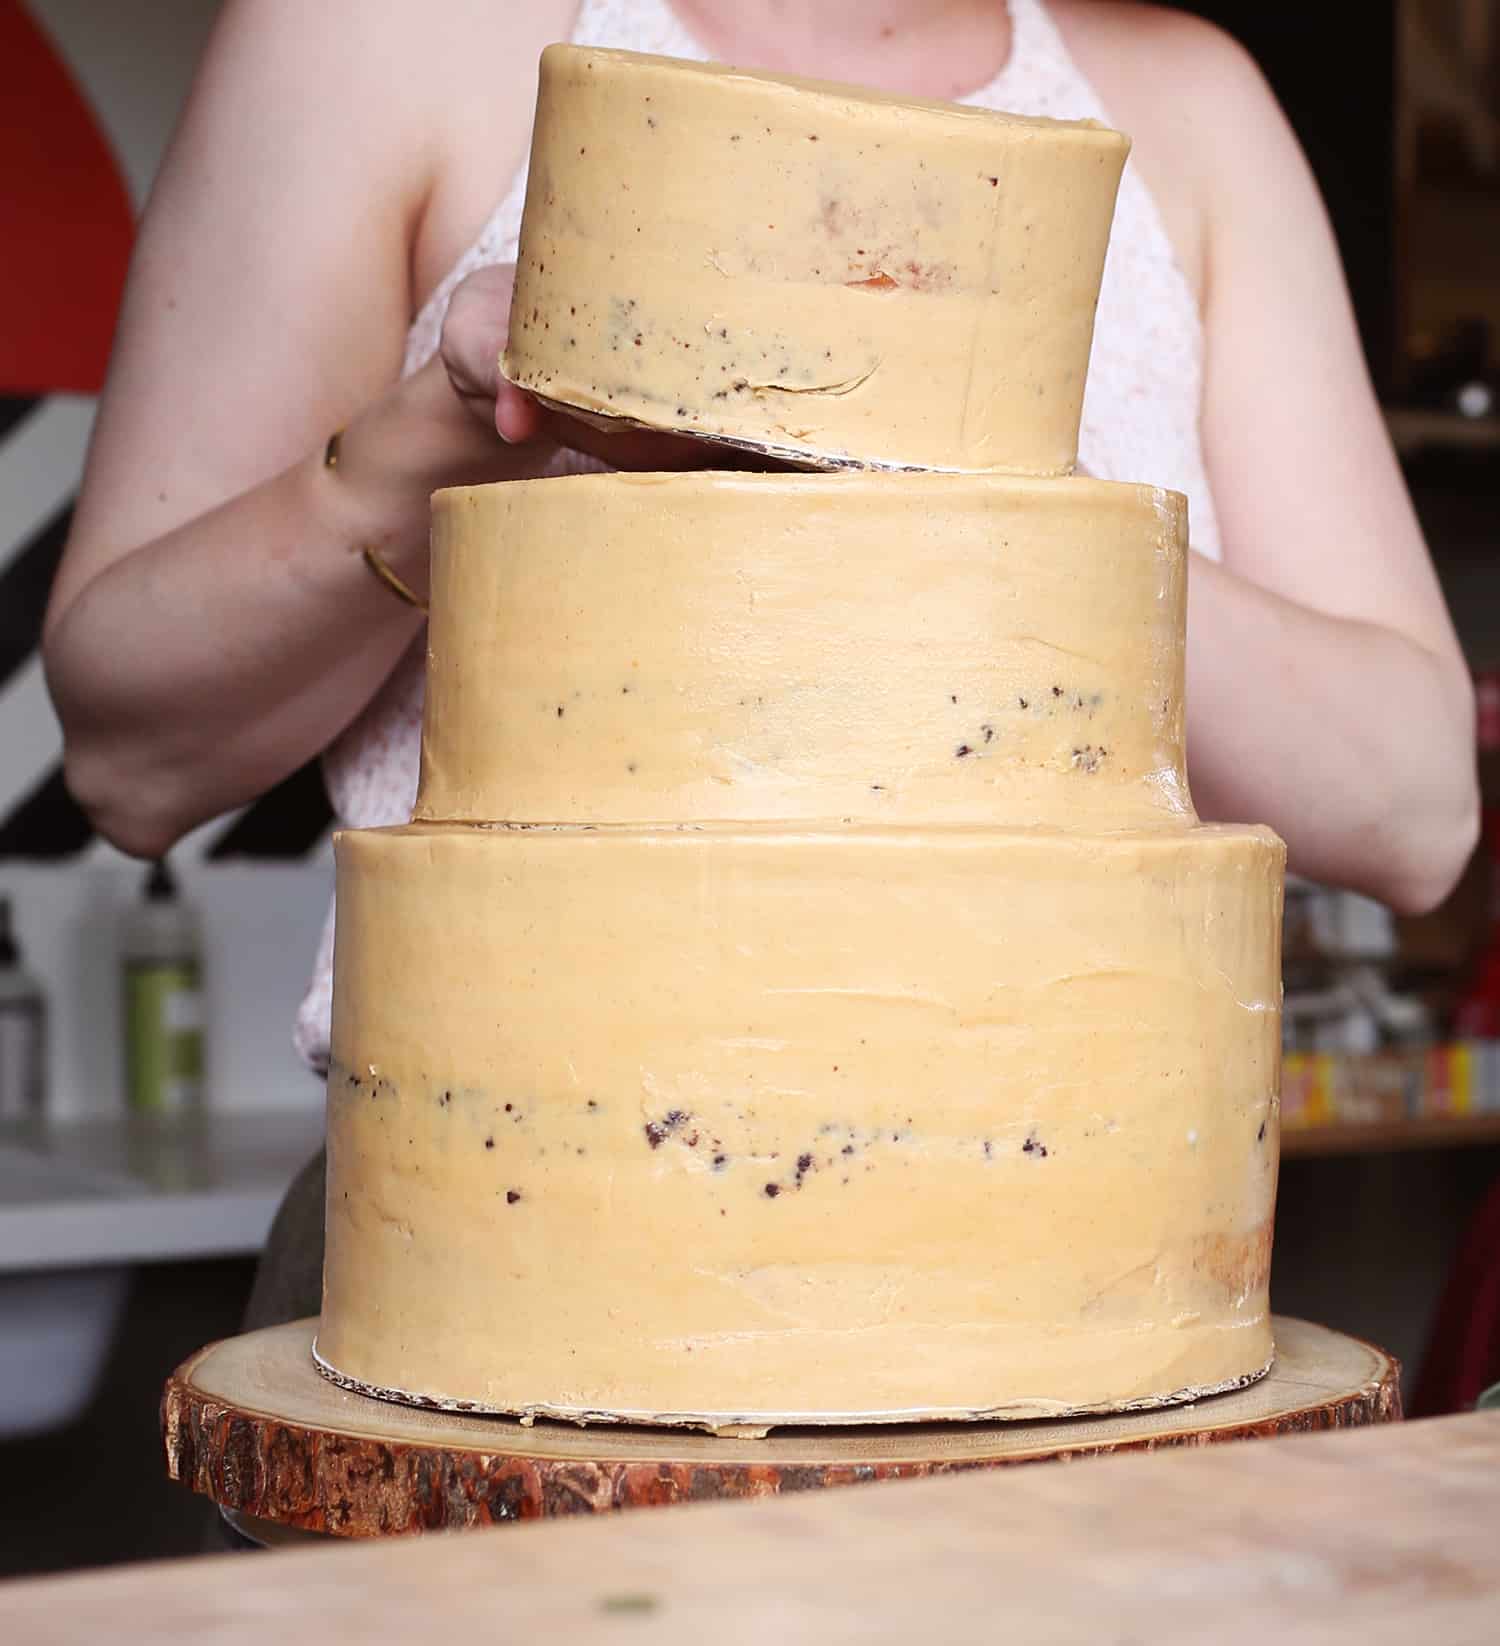
My bottom tier was three 10-inch layers, the middle tier was two 8-inch layers, and the top tier was two 6-inch layers. I simply alternated the layers between vanilla and chocolate and used all peanut butter frosting throughout.
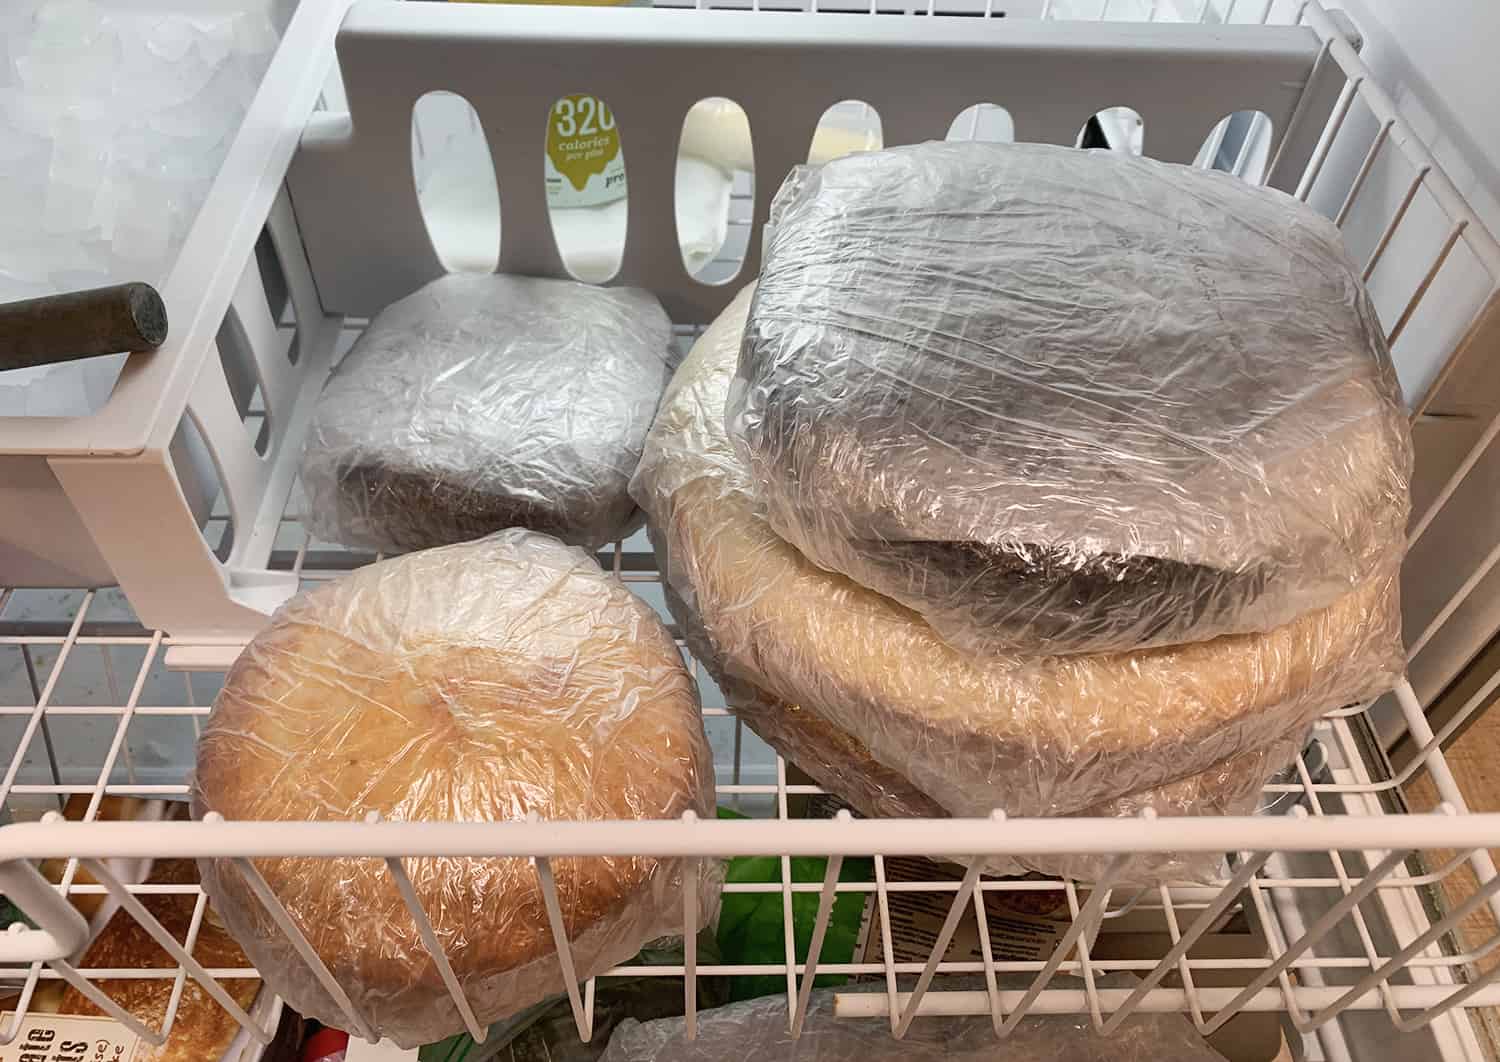 You’ll want to bake the wedding cake layers 1-2 weeks before (or even more) and freeze them. This is the secret to really good wedding cake!
For the vanilla cake, I used this recipe from Sally’s Baking Addiction. For the chocolate cake, I used this recipe from Smitten Kitchen. I had made these cake recipes before and loved them, so I doubled the recipes it needed and that’s what I used. How did they hold up in a tiered wedding cake? The vanilla cake recipe is cake flour based and uses a mix of baking powder and soda as the main leavening agents. That makes this cake pretty sturdy, so it held up really well and I would totally recommend this as the recipe you use for an entire tiered cake if needed. The chocolate cake recipe is all-purpose flour based and uses baking soda and vinegar as the main leavening agents. This makes for a softer cake (think fluffy and moist—really great cake!), so it worked well in this tiered cake alongside the sturdier vanilla cake layers. But if I had been making the entire wedding cake chocolate, I think this recipe might be a little too soft to hold up well. The freezing helps, but if you are going that route I would test a few other chocolate cake recipes and find what you think will work for the size of your cake.
 Once the cakes are baked, allow them to completely cool. Then wrap tightly in plastic wrap before freezing. Be careful when freezing them to stack or layer so that they don’t freeze with dents or bumps from other things that may be in your freezer. Also, you can tell this from the photo, but just to be super clear, you won’t level off the cakes until you frost them. So freeze them without leveling the layers.
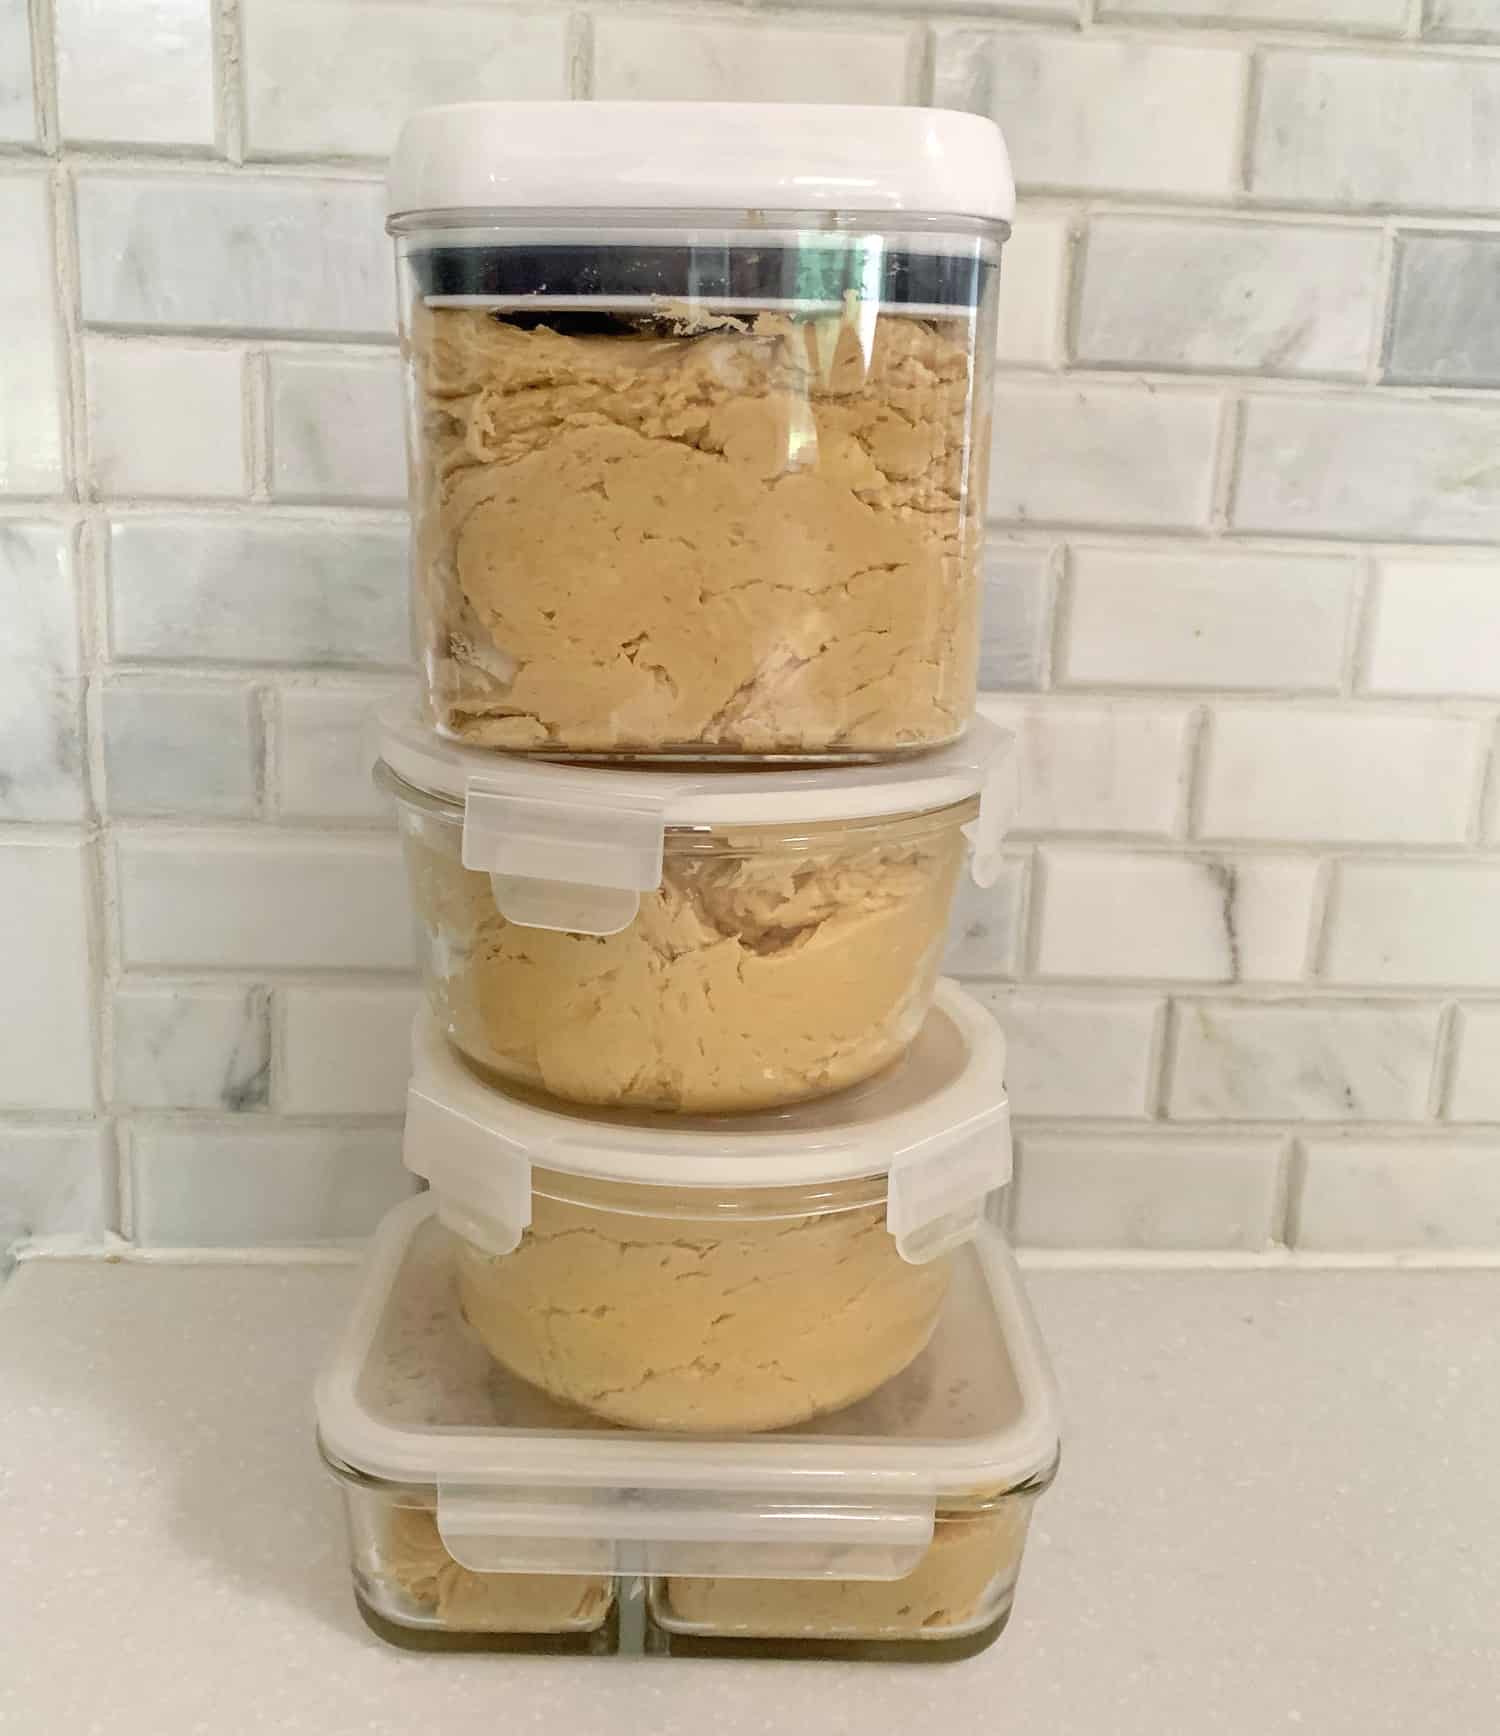
I made the frosting the day before the wedding, but it could probably be made up to a week before (depending on the recipe you use) and refrigerated. Make sure you have enough containers to hold the amount of frosting you make. I had actually brought a friend (who just had a baby) dinner the week before this wedding and didn’t think how many of my reusable containers would still be at her house by the time I needed them to make this frosting. So, I ended up cleaning out a container I don’t usually use for this purpose (although it can be) since I was short.
I used my peanut butter frosting recipe and tripled it. That ended up being pretty much perfect for this sized cake, with just a little bit left over. But if you are unsure, I would err on the side of making too much frosting over not enough.
You may also want to buy or borrow a cooler to transport the frozen cake layers and frosting in. This really depends on weather, if the wedding is outdoors, and what the venue’s facilities are like. This wedding cake was for an outdoor wedding in southern Missouri in mid-June—so it was hot and humid! I was VERY afraid of the cake melting. I was once a bridesmaid for a friend whose wedding cake partially melted and it leaned so much it fell off the table before her wedding began. Her wedding was still such a beautiful event, but it was sad to see all that delicious cake on the ground. The tragedy!
 The night before the wedding, we leveled the frozen cake layers, placed them on cake boards, and frosted each tier. These were wrapped and refrigerated and then transported the day of the wedding. The venue had a refrigerator we could use to store the tiers in as we did the final assembly just before the reception. We wanted to assemble the cake at the last possible moment, hoping this would prevent any melting from the Midwest weather. The cake did get a little sweaty, but other than that, it held up and tasted great, so I think this was the best call for our situation.
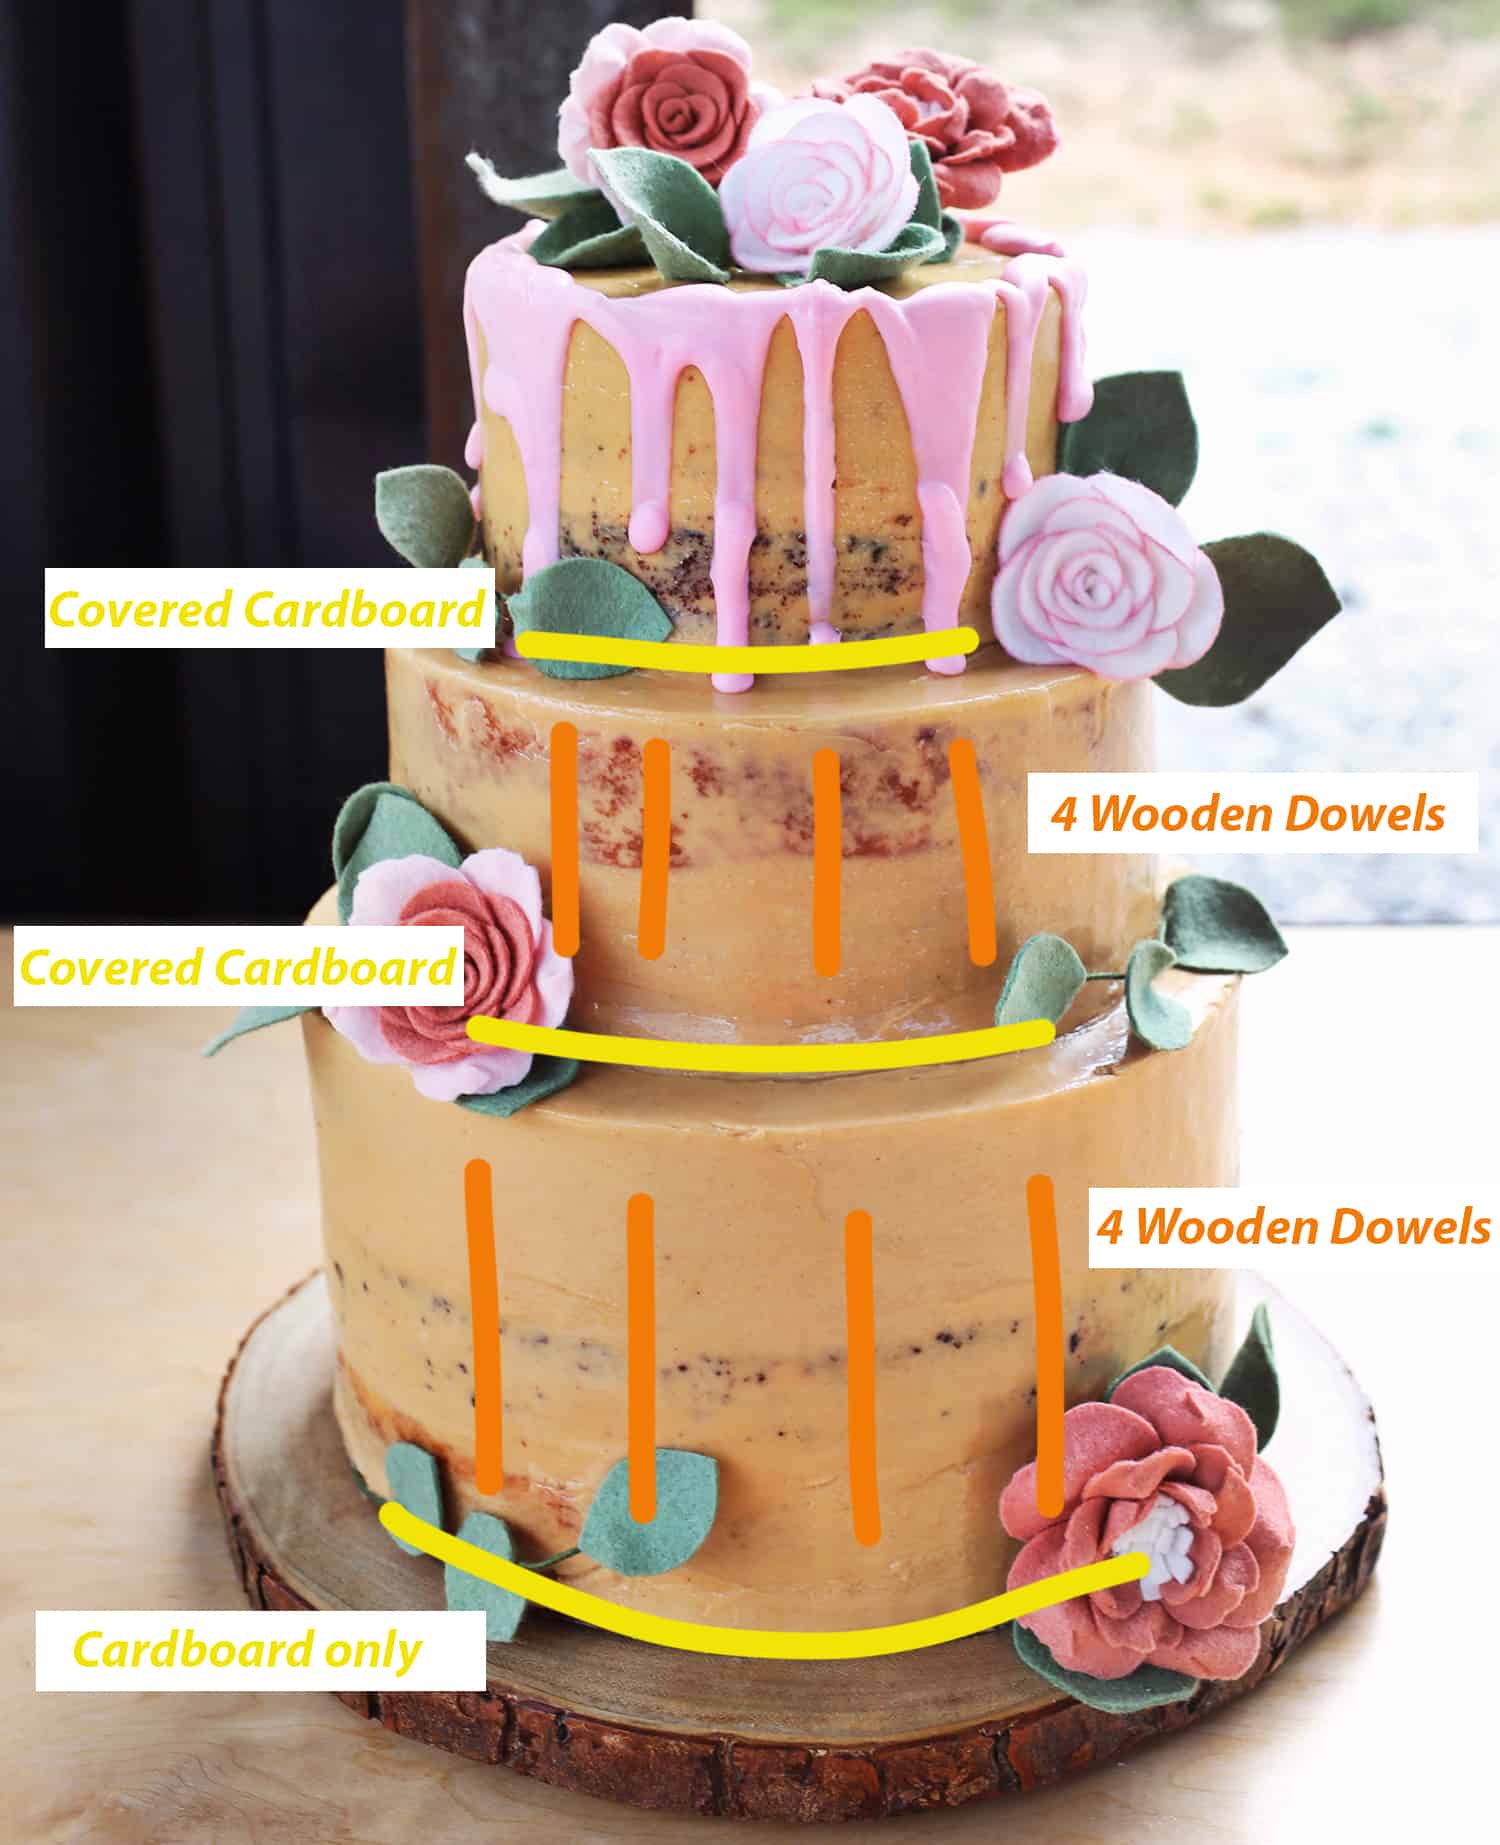
A few tips on this step of the process. So, each tier of the cake will be on its own cake board. Since this wedding cake had three tiers, it also had three cake boards throughout. This allows you to move the tiers to assemble, as well as remove as you slice it to serve. The bottom tier can go directly on a coated cardboard cake board (as the cake will only be touching the coated part). The other two cake boards will need to be covered in plastic wrap or parchment or something so that the bottom of the cardboard cake board doesn’t touch the underneath tier once assembled.
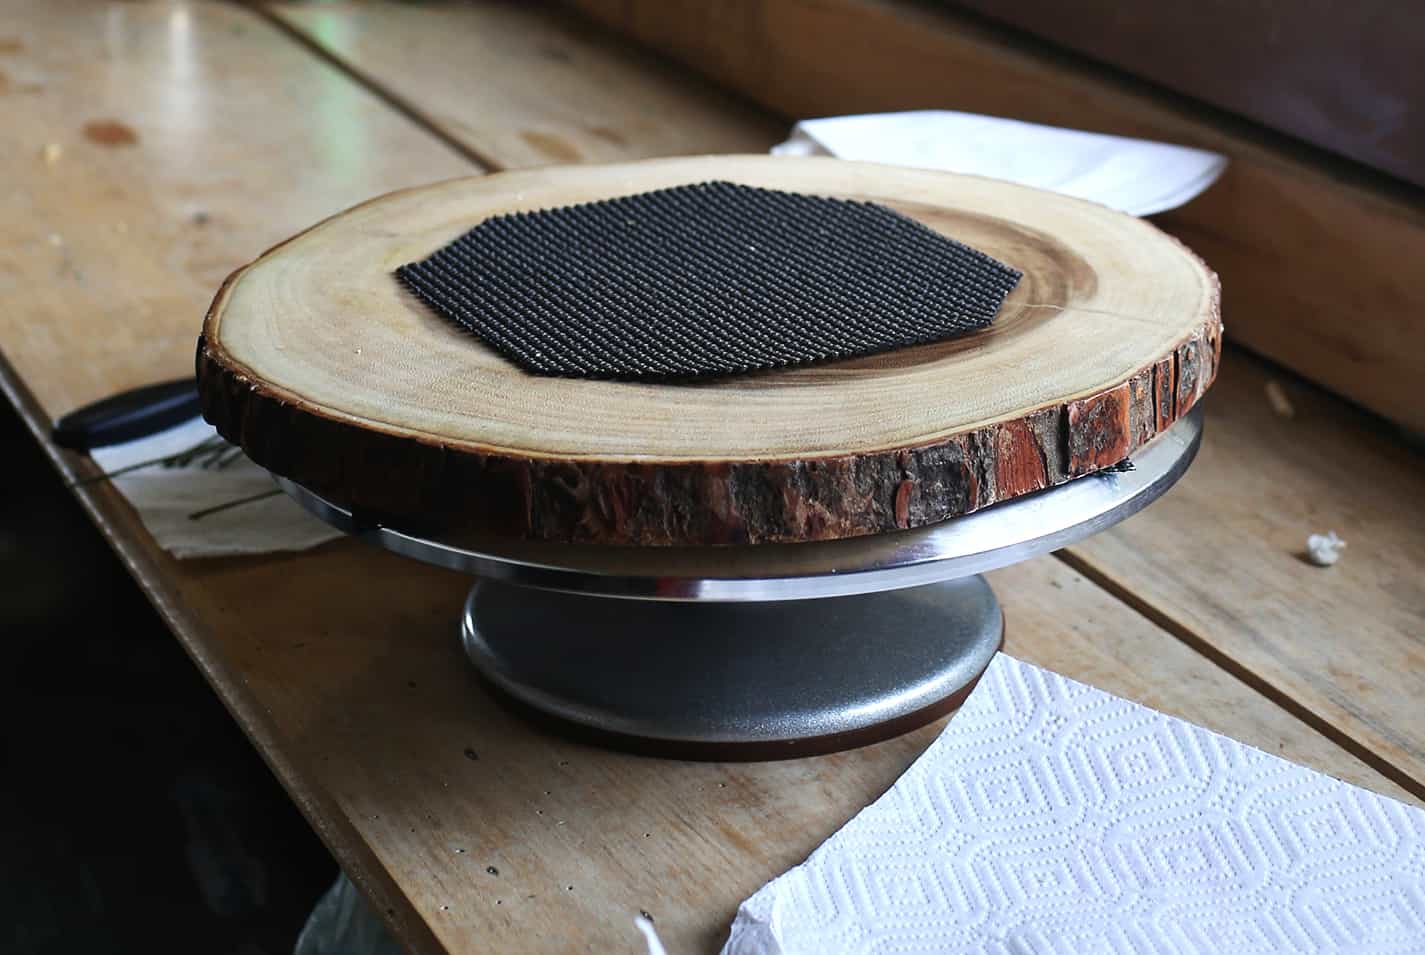
As you can see from the above photo, you’ll also want a turntable so you can easily spin the cake as you frost and assemble. Amber showed me that you can cut up some shelf liner to place underneath so the cake doesn’t slide around as you work. I displayed the cake on a wood slab, but you could use other cake displays for whatever look you you wanted.

 For a tiered wedding cake, you’ll also want to insert wooden dowel rods into the bottom tiers (all tiers except the top). This just makes the cake stronger and more stable. You can buy wooden dowels in the cake decorating section of any craft store or online. Just cut the dowels the size of the tier before carefully inserting (with clean hands—do everything while making a wedding cake with clean hands, of course).
Once we added the dowels, we popped the tiers back into the refrigerator, trying to keep them as cold as possible since it was so hot that day and we were outdoors.
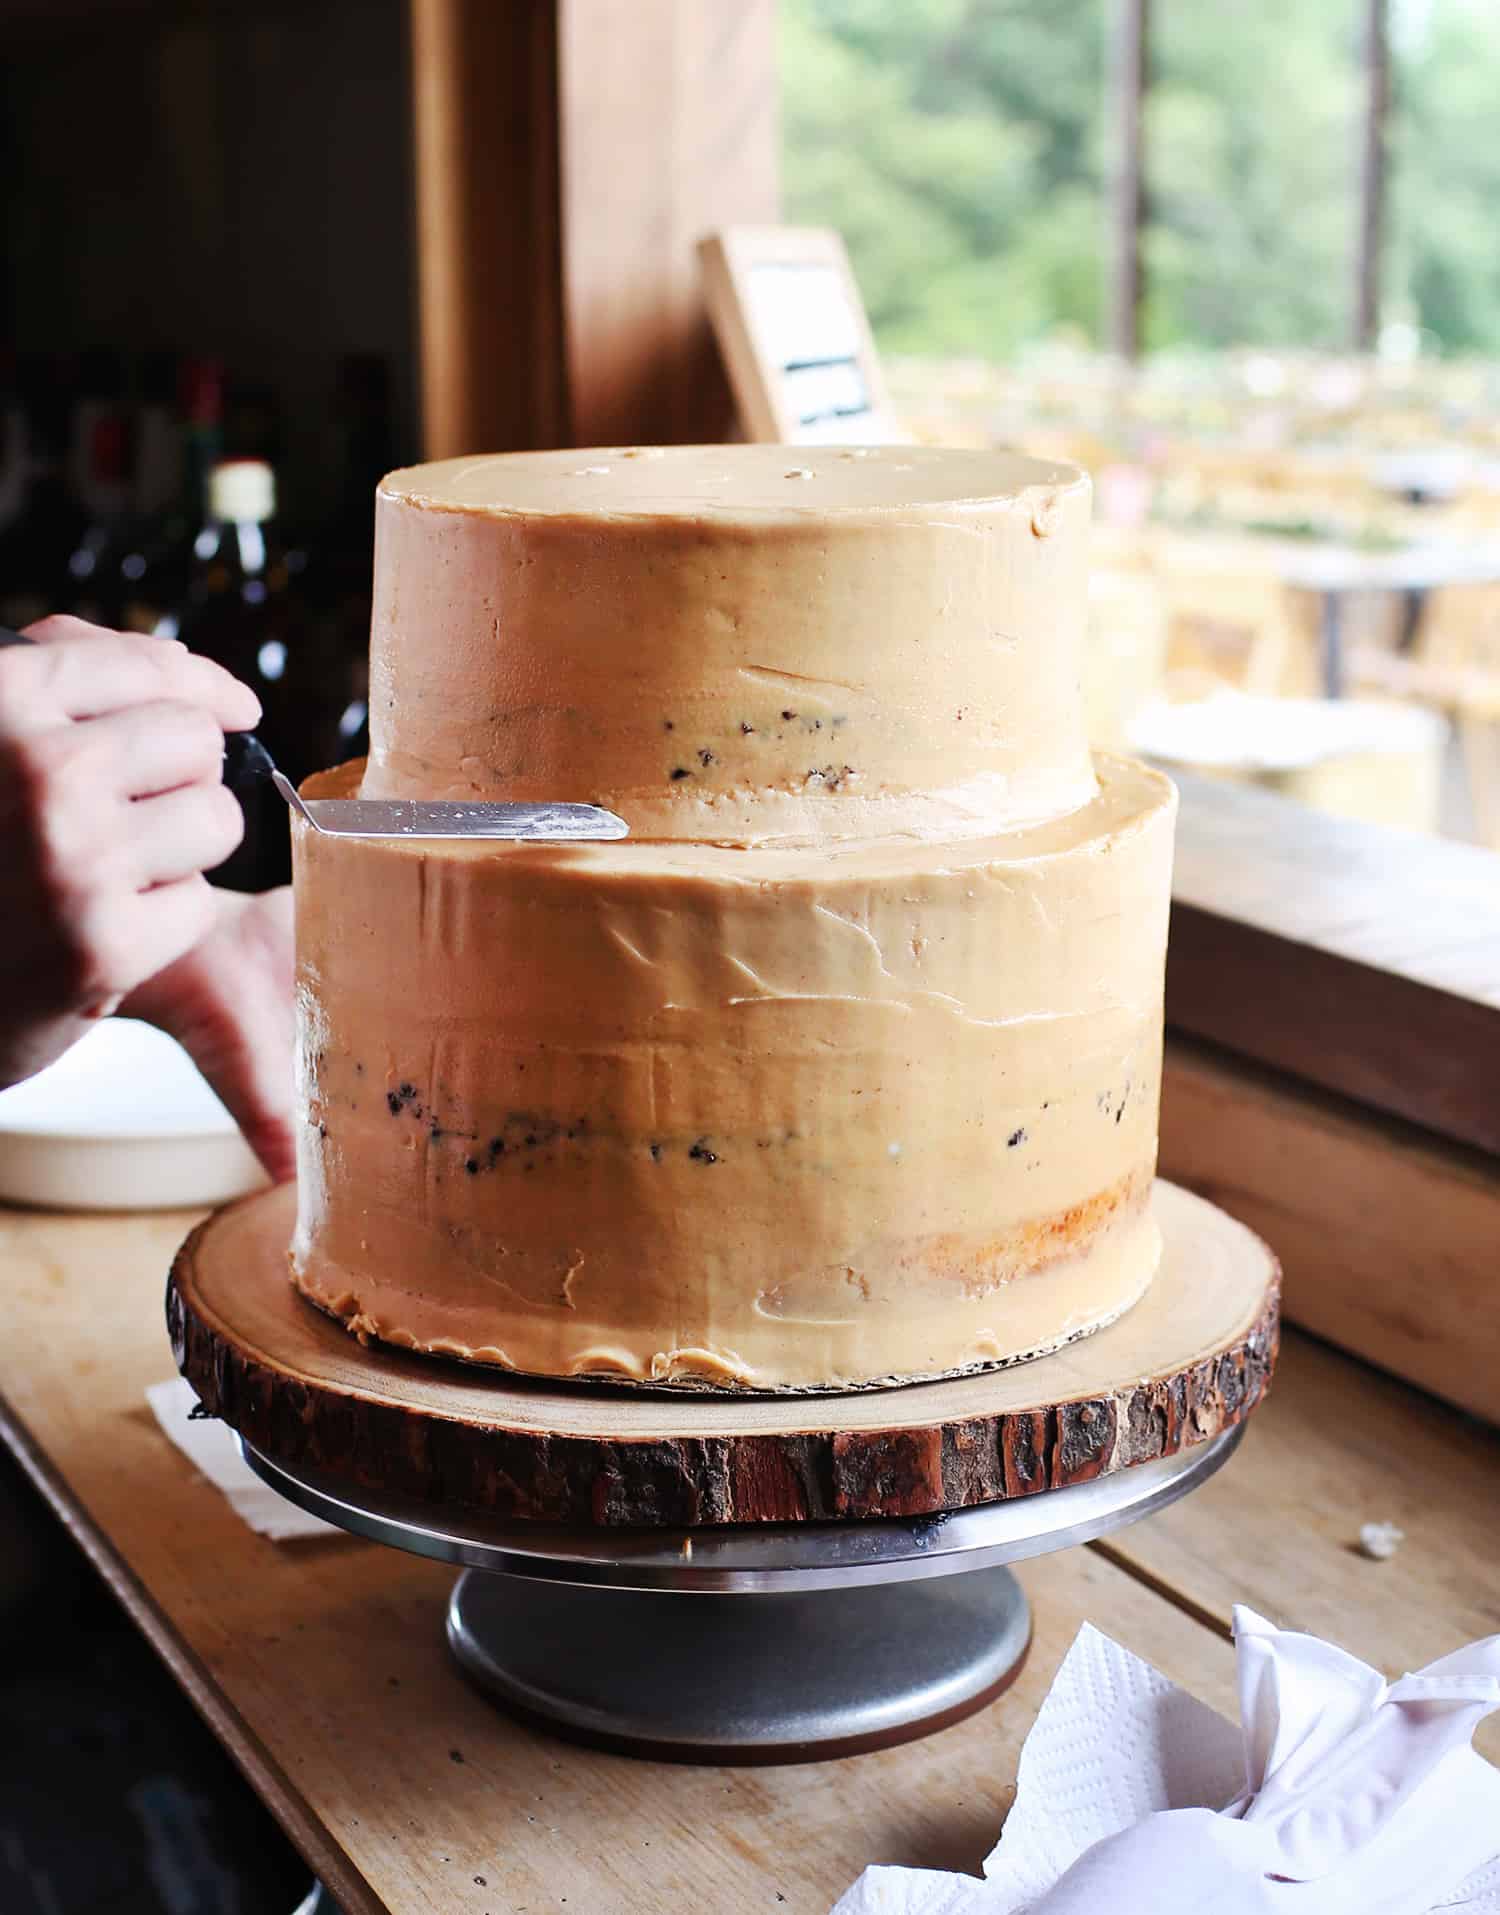
 Once you are ready to assemble, stack the tiers carefully. To cover the line between the tiers, pipe a little more frosting on the seam and gently level out with an offset spatula.
Just to better illustrate what all is in this wedding cake other than cake and frosting, here is a visual that I think really shows off my Photoshop skills as well:
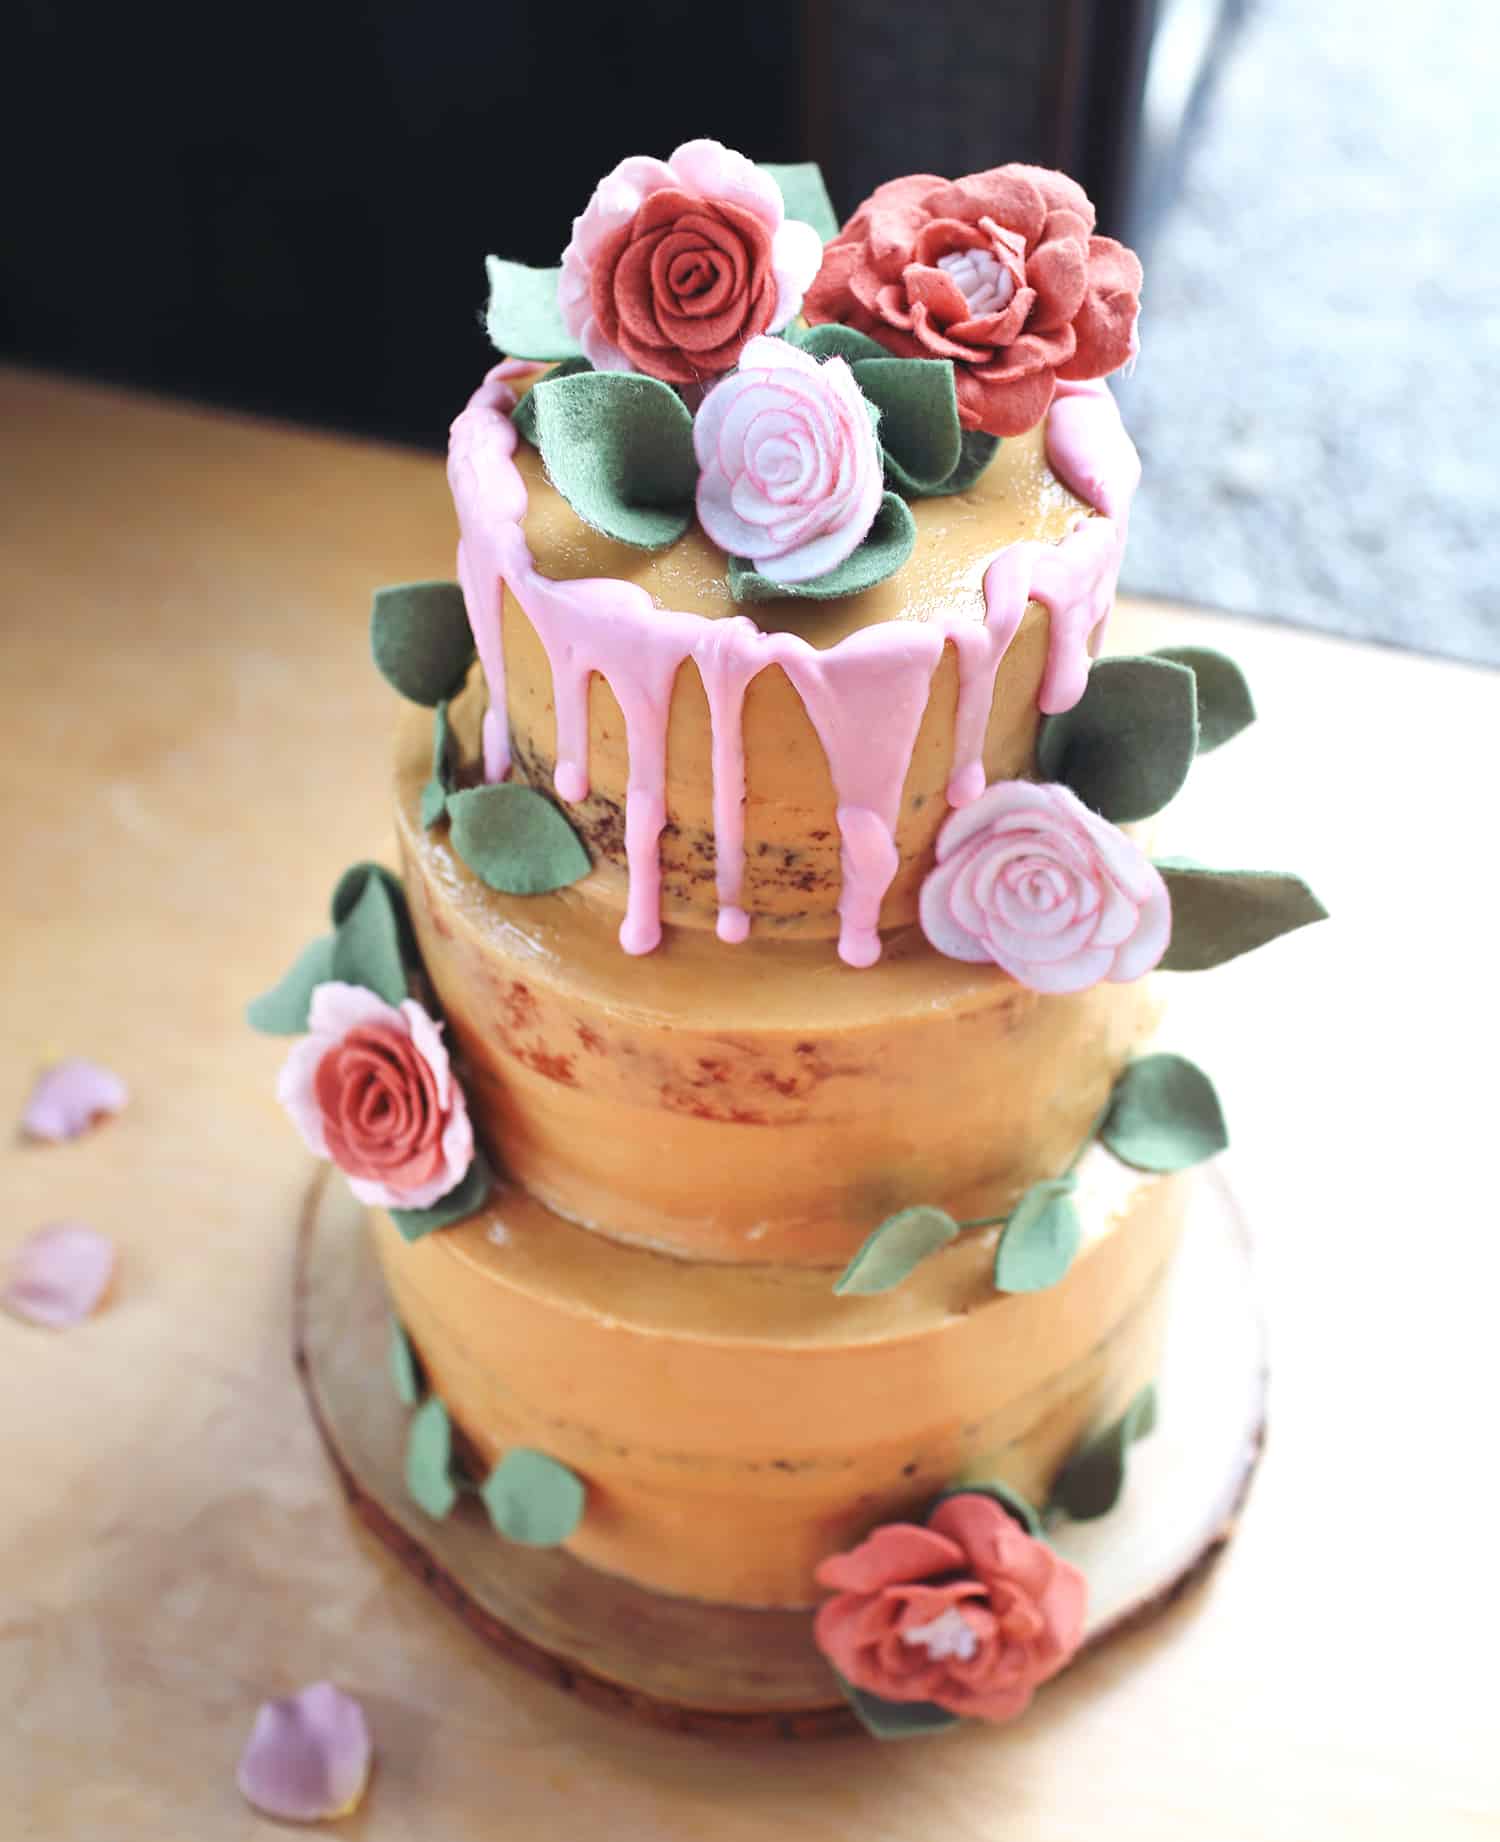
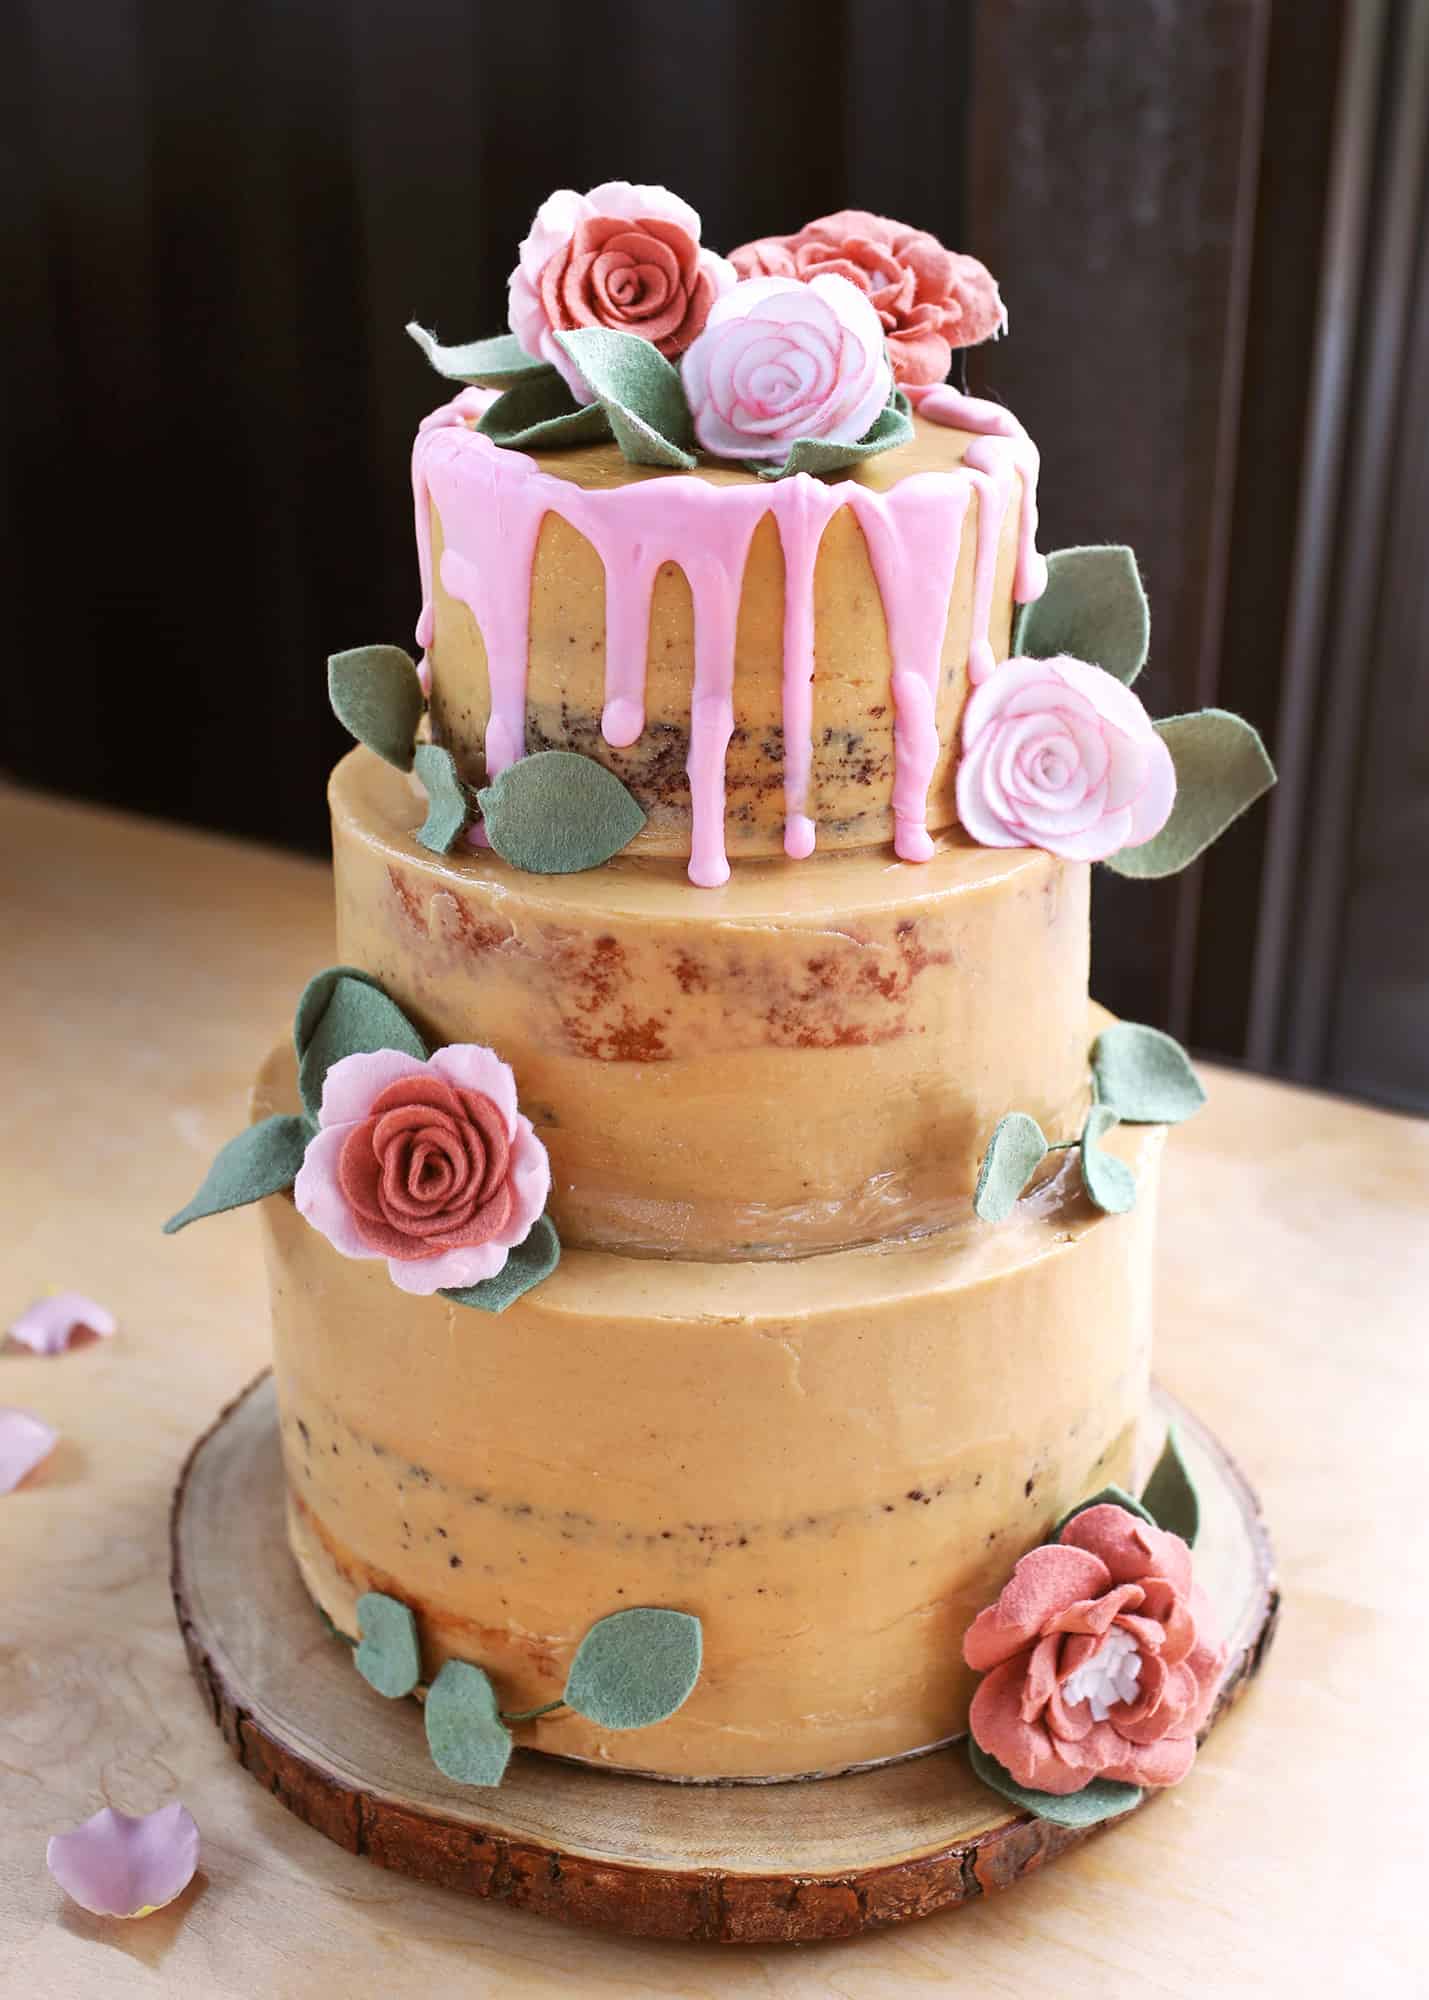
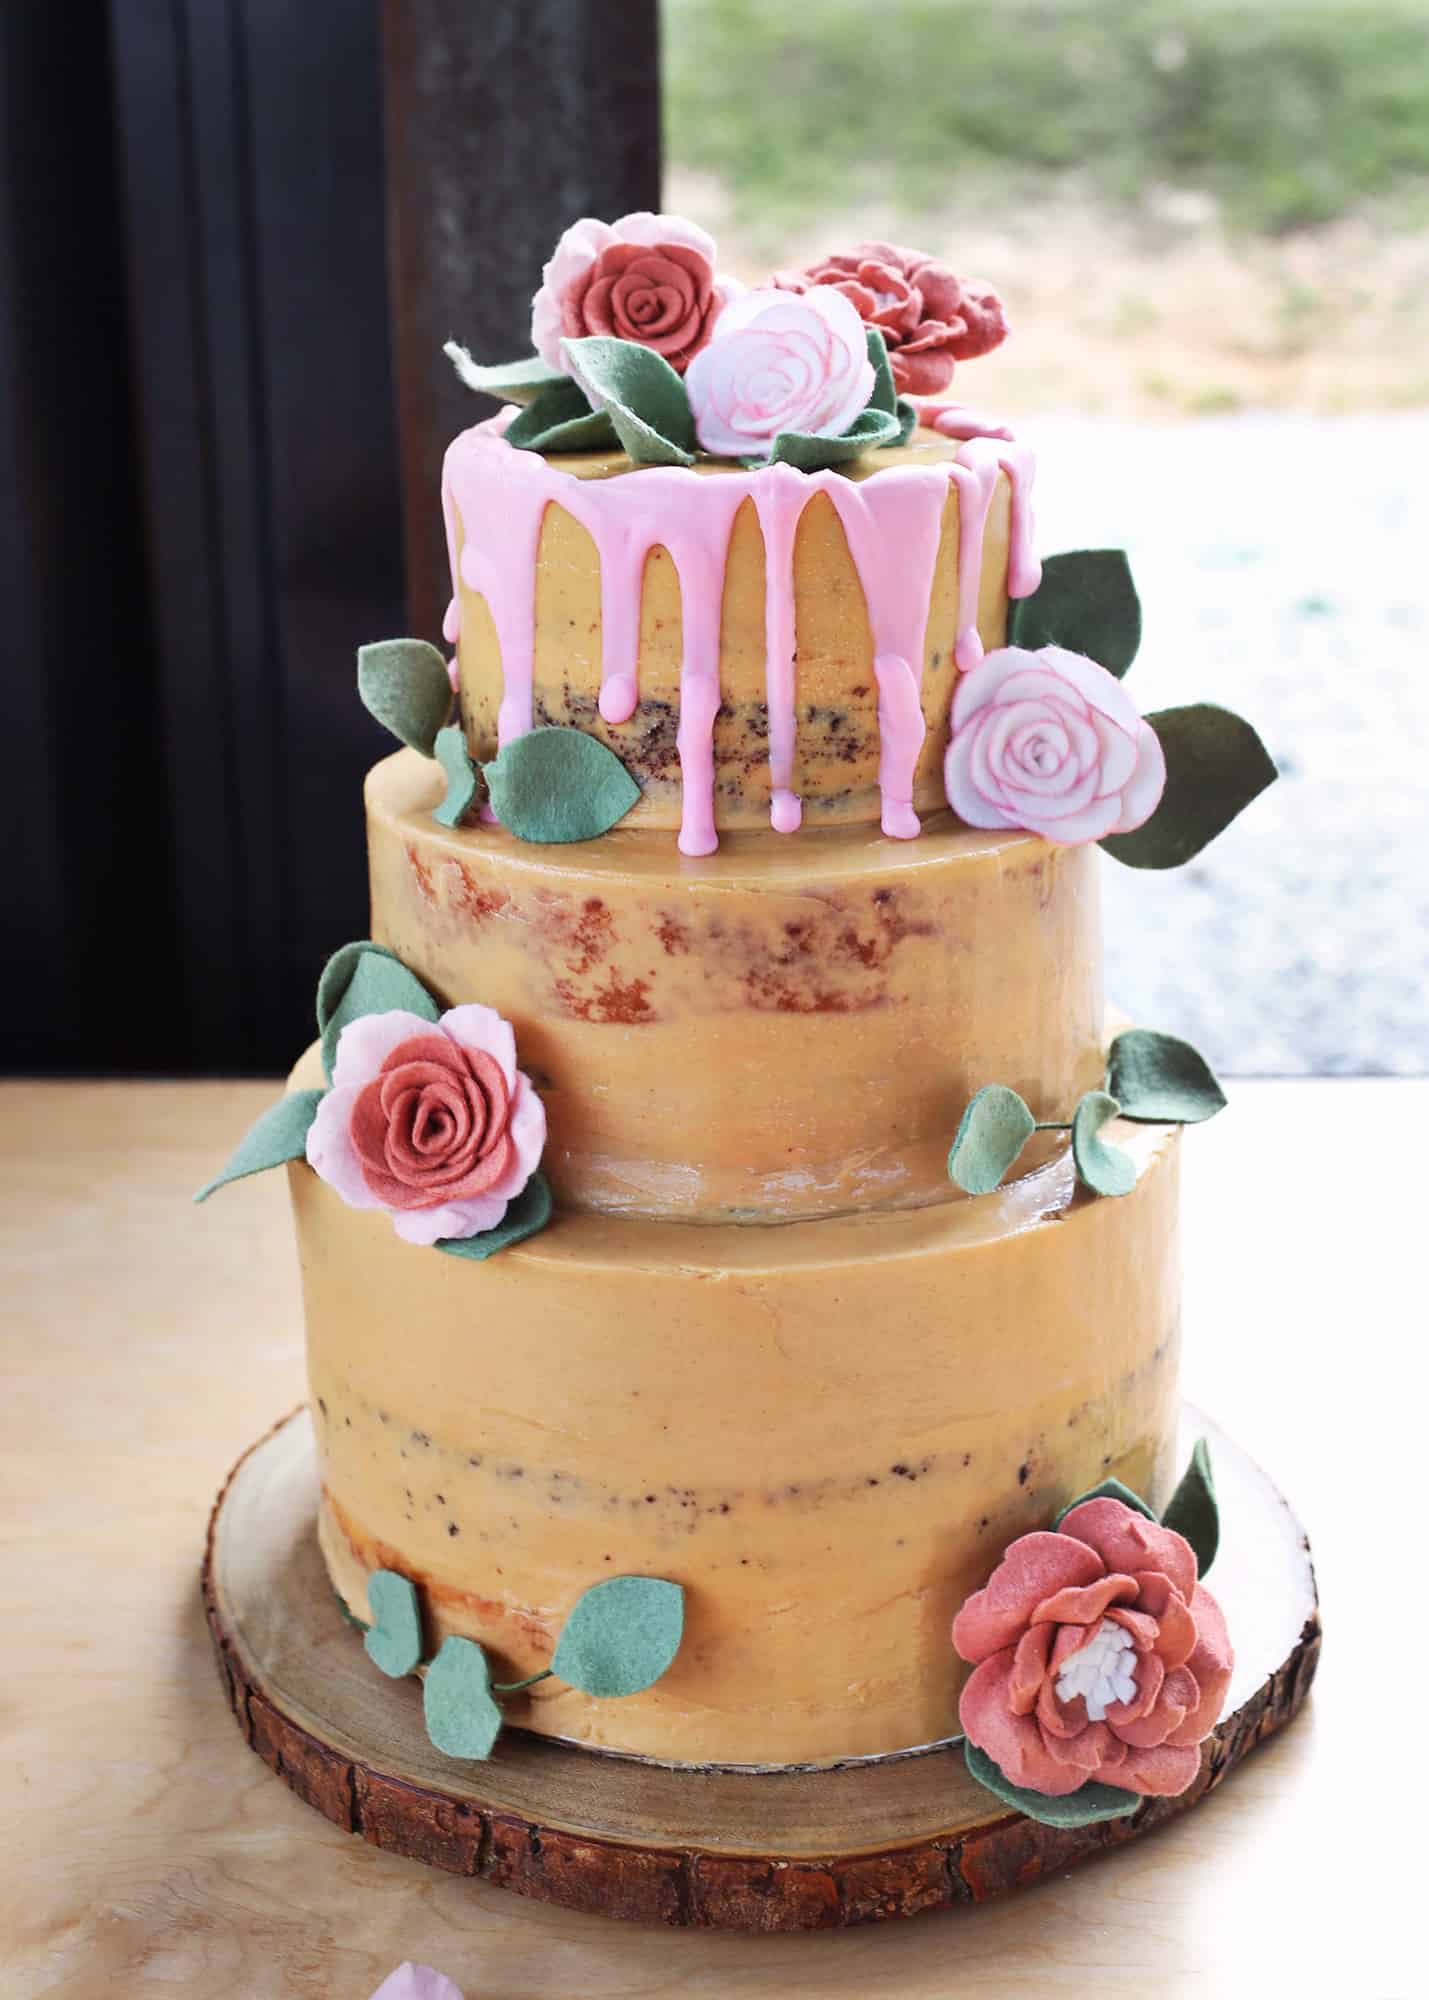
 Once fully assembled, you can decorate however you like. Since Shai had requested the peanut butter frosting, I knew the cake was going to be a light brown. Her wedding colors were gray and blush pink, so I wanted to represent those colors in any other decor I could. We added a pink chocolate drip to the top layer for some added color (done by simply melting pink candy melts and using a spoon to drip over the edge). I also purchased some pink felt flowers from Etsy that I had cleaned and disinfected as best I could to add some more color around the cake.
Another great option is to use edible flowers or edible gold leaf, but I had a hard time finding the right colors I needed, so I went with felt flowers in the end.
 It was really fun, although a little bit nerve-wracking, to get to be a part of making this wedding cake. But it was an absolute JOY to see my friends get married and be a small part of their day—I am so grateful. Thanks for letting me share! And I’d love to hear if any of you have made a tiered wedding cake for your or a friend’s big day. Do you have more tips? Tells us all the secrets! xo. Emma
13 Comments
Wowww, the cake looks amazing! I wouldn’t trust myself to make my own wedding cake, though, haha! 🙂
Charmaine Ng | Architecture & Lifestyle Blog
http://charmainenyw.com
Looks so splendid, aside from wedding, i think i can try to use this cake at our wedding anniversary with my wife.
https://www.lifebrown.com/
Making a wedding cake seems so intimidating but you broke it down so well! I definitely need to give this a try.
-Kate
https://daysofkate.com/
This post came at a perfect time! I just told my friend I would make her wedding cake! I have a year to practice, so I’m going to work on incorporating this tips! Thanks!
And we saved our top tier! We took some on our 1 year anniversary trip and just pulled out the rest of it! Even a year and a half later, it still tastes amazing!
Laura
http://www.laurelandfern.com
You kept your top tier! Awe. For some reason that doesn’t surprise me. How special.
My sister-in law asked me to make a three layered cake for my niece’s second birthday—bottom layer like an orange, middle layer like a watermelon and top like a pineapple. I’d never made a tiered cake either, and thought it would be fun. I also had a few friends that made cakes, so I picked their brains as well. I made marshmallow fondant from scratch and just did a boxed cake mix to save my sanity. I was sooooo surprised at how much time it took. The cake turned out really well, but I never want to do it again! Ha! It’s totally doable, and I love that you wrote this post. To anyone that likes to bake, I think it should be a bucket list item for sure. You can do it!
You hit all the critical points that I think many home bakers leave out, namely the freezing, the cake boards, and the dowels. The only tip I have for cakes that will be made and frozen ahead of time is to poke them with a fork OR just make sure the top is trimmed and use a squeeze bottle to drizzle simple syrup on each layer before freezing. This is also a good time to mix some booze into the simple syrup before applying if you’re into that.
Another great resource is the Wilton website itself. There are charts for how much batter you need for any size cake pan, how much frosting you need to cover any size or shaped cake (not including what is needed for additional decorations), and how many servings you can get out of a cake, with slice sizes for both weddings (smaller) and regular events. I believe they also have a chart for the correct way to slice round cakes – there are inner AND outer slices for cakes over 6″. That method is used to calculate the number of servings, so you’ll get fewer servings if you slice it like any normal person would all the way to the center.
My first cake for a wedding also had peanut butter frosting! A friend and I split the cupcake baking duties (white w/ raspberry, chocolate w/ PB) and we surprised the bride with a mini cake combining both sets of flavors. I got a laser cut acrylic Zelda cake topper and an 8-bit heart cookie cutter on Etsy and put pixelated red fondant hearts around the sides of the cake. She loved it.
hmm…if i can make a delicious cake like this
it’s just a masterpiece….bravo!
Xoxo
Tina
https://schriftle.com/blog/fazit-wissenschaftliche-arbeit
The cake turned out beautifully! I wasn’t sure how a light brown cake would look for a wedding, but you totally nailed it.
xoKaelen | https://darlingmarcelle.com
I offered to make a friends wedding cake for a September wedding so I am excited to read more! I’ve just started doing my research.
hi!!
i am excited to try a single tier version of this for my husbands’ birthday party… i am not sure what you mean by frosting and ‘ wrapping ‘ the cake the night before… do you mean with cling film?? wouldnt it mess up the frosting?? sorry but this is my first time!!
This is the right process of making the cake, I will definitely make a cake from this process, Really this is very great process of cake recipe