 Storage boxes are my favorite decorative tool for bringing calm and organization to the most disordered of shelving scenarios. If you’ve been stumped on how to handle your own cluttered bookcase or open shelving situation, making a set of custom plywood boxes could be a great organizational tool for you. And they look nice too!
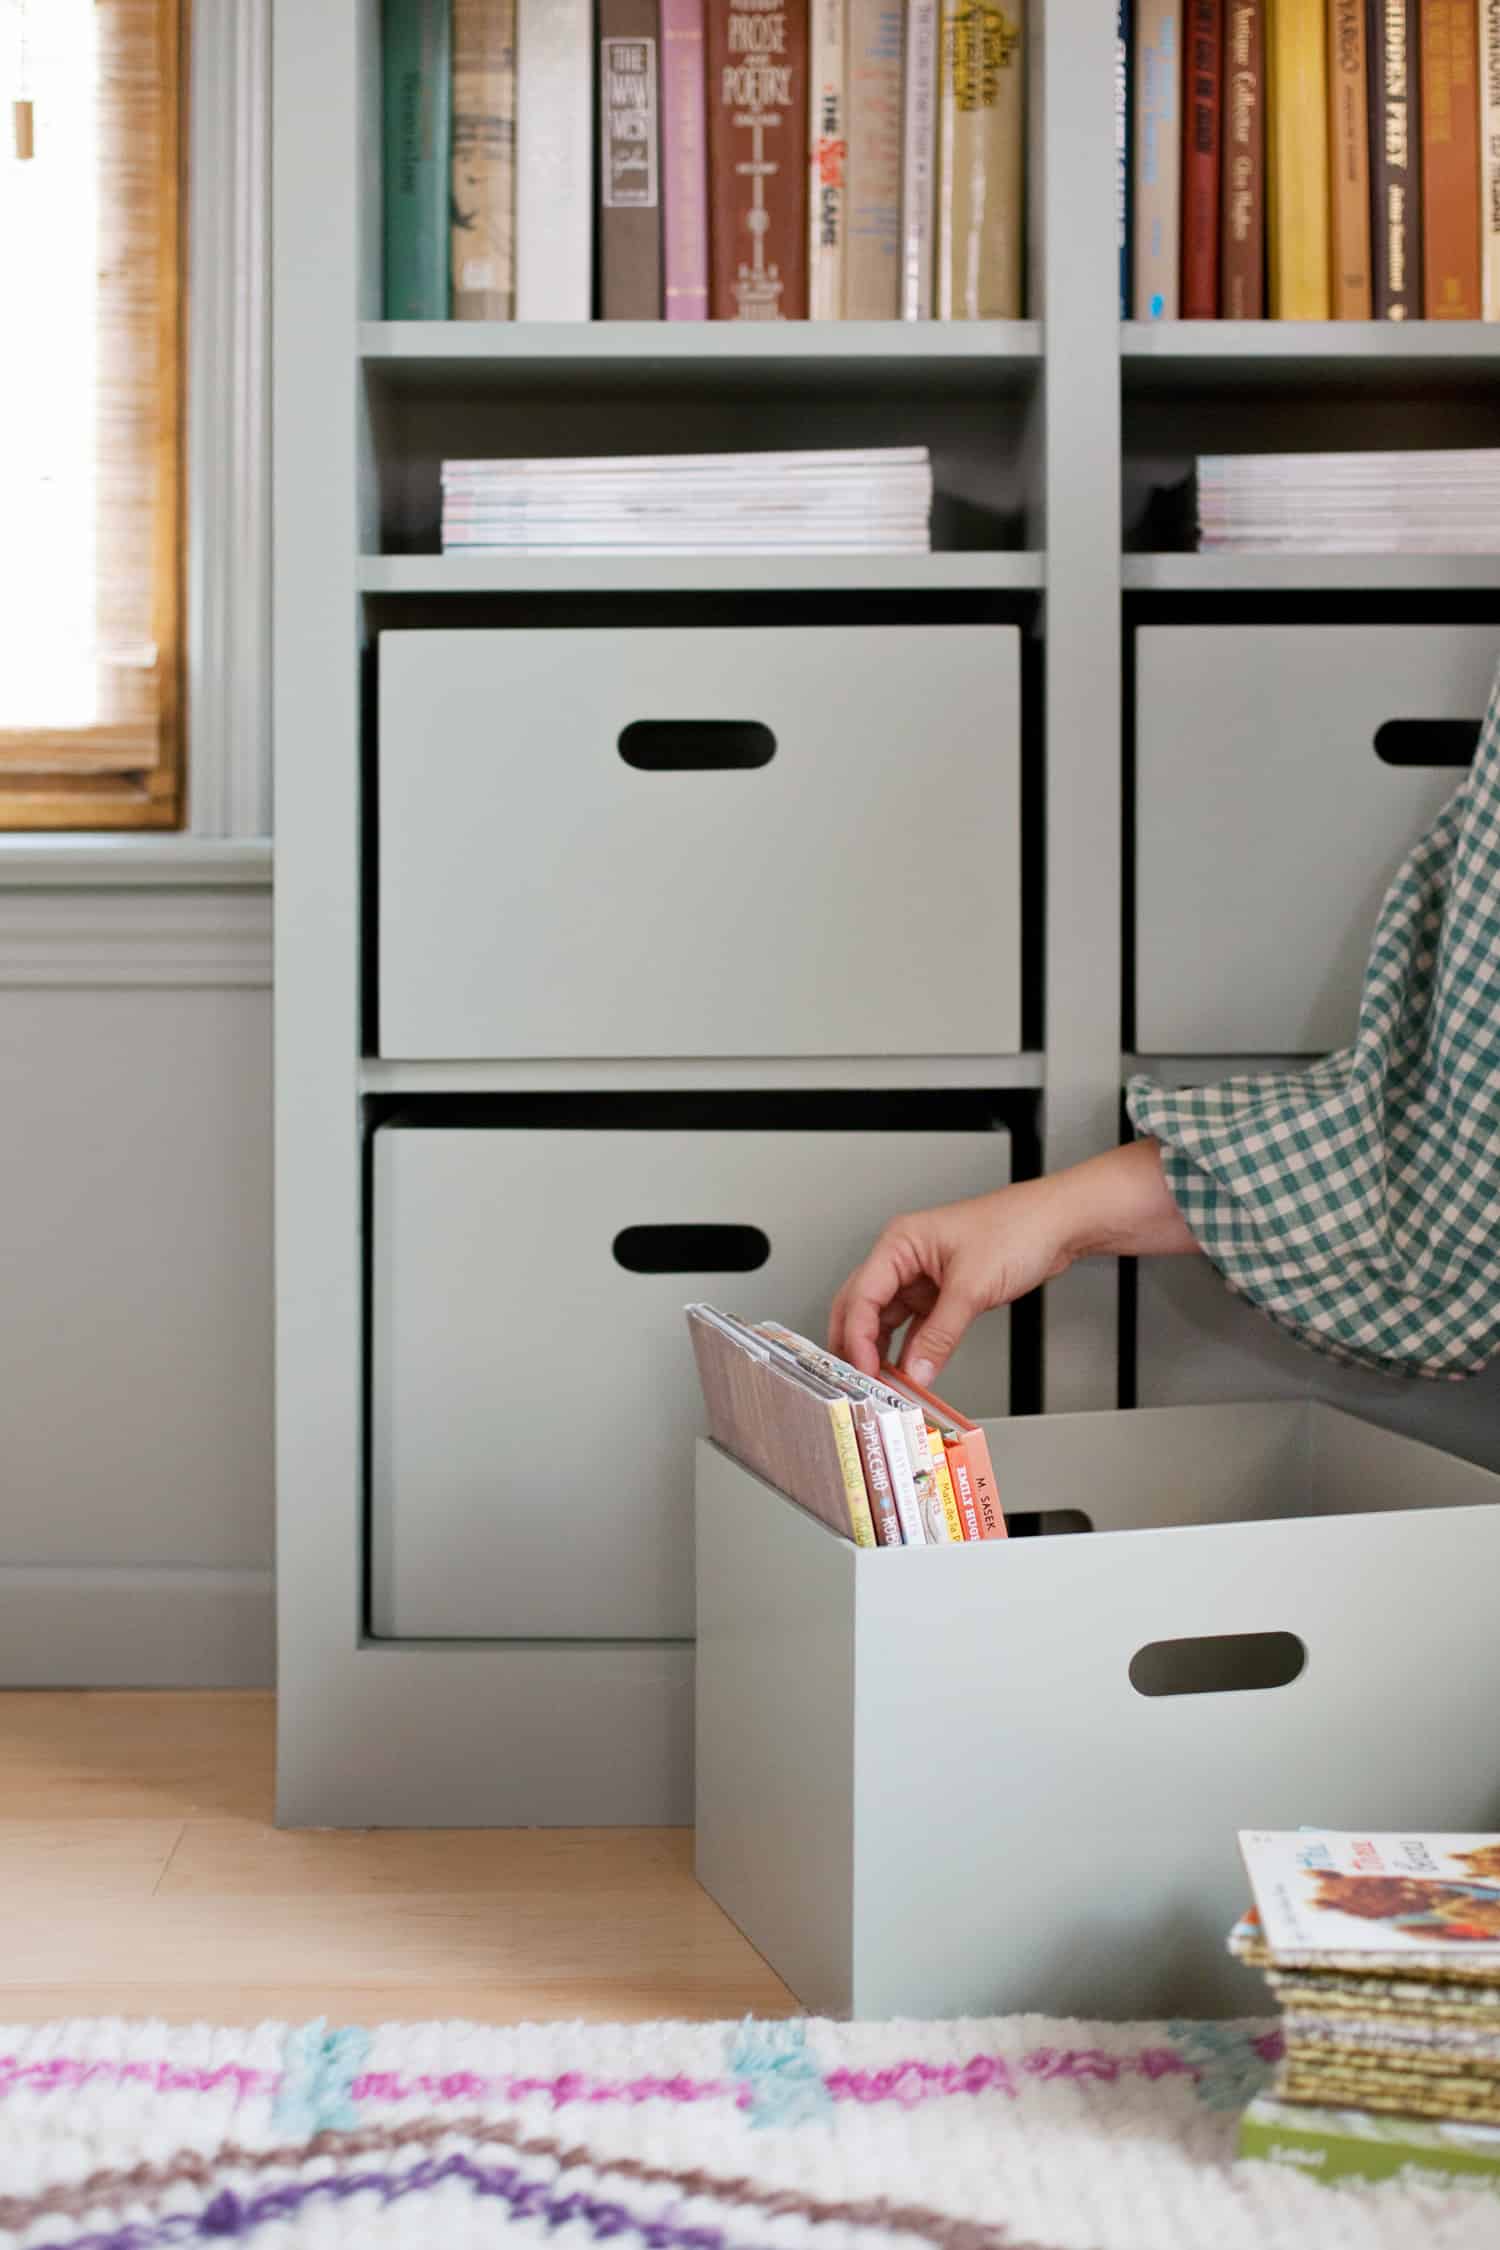
When creating my built-in Billy bookcase unit, I wondered if should put cabinet doors on the lower section to hide away less attractive items, such as office supplies and most of our children’s books. In the end, I decided matching boxes would be a nice look. Plus, boxes would offer portability to the items inside. The problem with this solution was that I couldn’t find any boxes I liked that were the exact size I needed. So I decided to make my own custom plywood storage boxes.
These boxes ended up being relatively easy to make—the perfect project for a beginner woodworker. The supplies are also much less expensive than buying alternative storage bins from the store. Check out how to make your own set of custom plywood storage boxes below!
 Measure Shelving To Determine Box Size
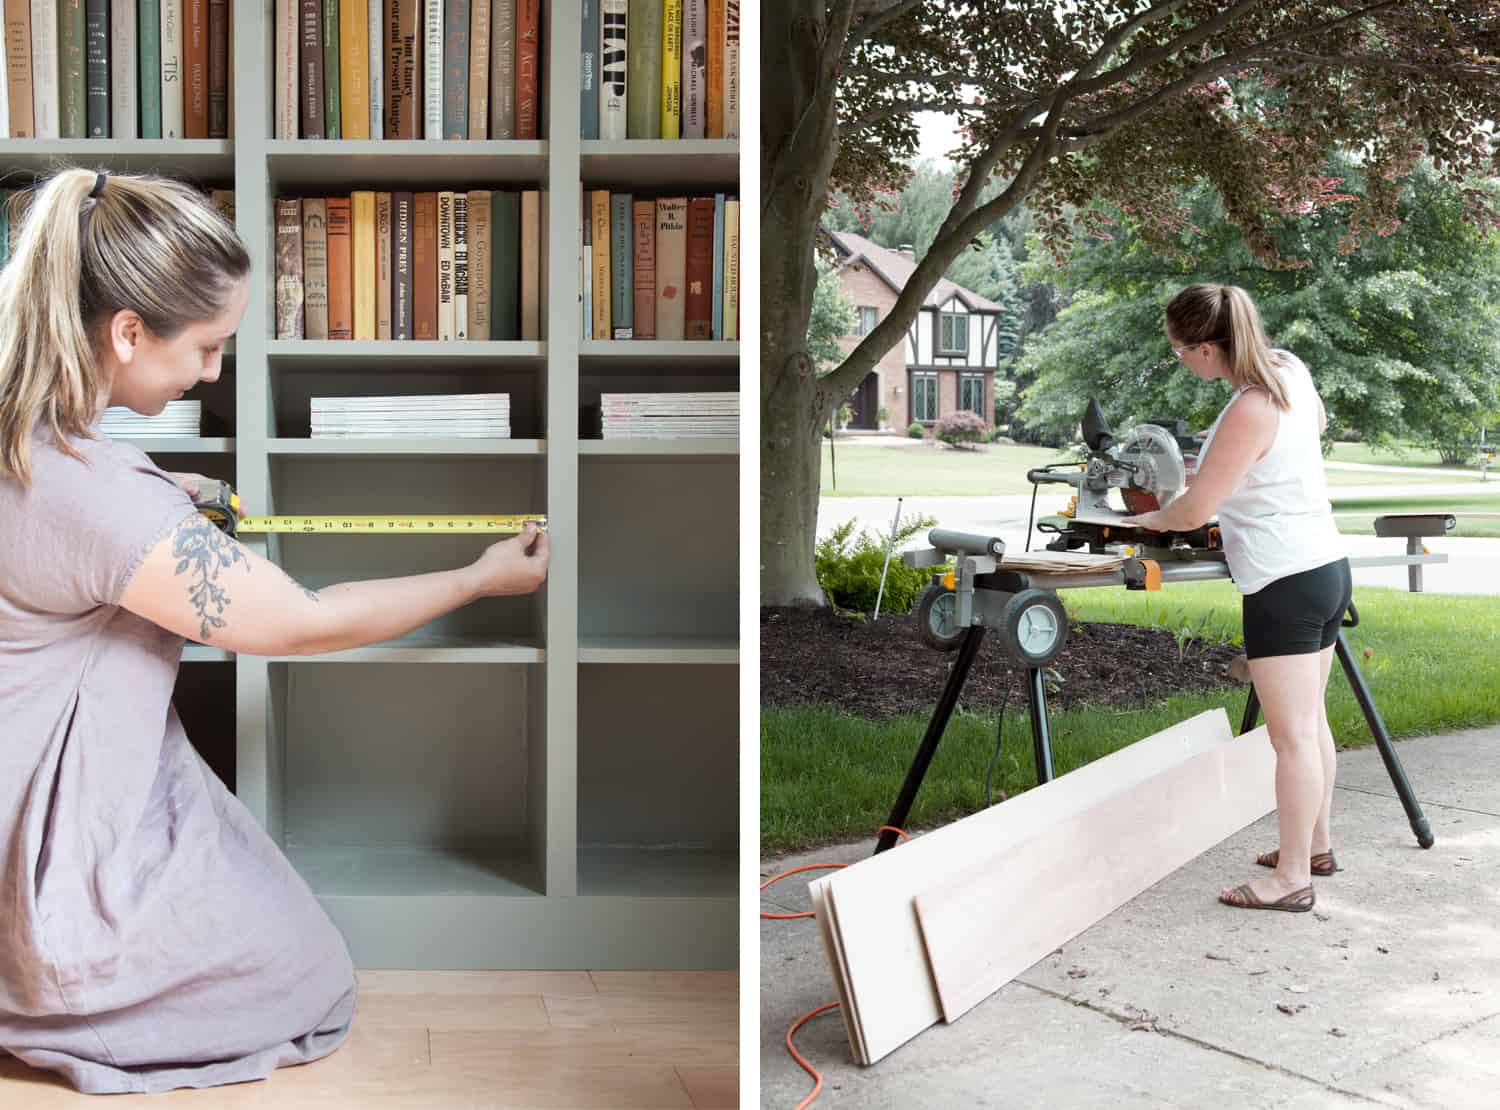
Because I was using IKEA Billy bookcase units with about 14″ width openings, I was restricted to a box size that would fit inside each little cubby. I chose to make my boxes 1″ more narrow than the shelving opening to give myself and my children wiggle room when returning each box to its space. I also made the height of the boxes 3/4″ shorter than the opening. I’m happy with how this sizing worked out for me.
Determine Lumber Needed
I recommend using 1/4″ plywood for the sides of your boxes, as it will produce lightweight boxes with adequate stability. Don’t use 1/4″ plywood to make boxes much larger than mine, or the boxes will lose their stability. For the bottoms of the boxes, use a thicker plywood for more stability. (I used 1/2″ plywood for the bottom of my boxes.) Do not use particle board for any part of your boxes, or they will be too heavy to manage.
After deciding on the height, width, and depth of your boxes, determine how much lumber you will need. Plywood is sold in 4’x8′ pieces, so I chose to have 1/4″ plywood sheets cut into strips at the hardware store. Half of the strips were cut to 13″ wide—the width I needed for the fronts and backs of my boxes. The other half of the strips were cut to 10″—the width I needed for the sides* of the boxes. I cut the strips of plywood to the height I needed using a sliding miter saw.
To make 11 boxes I used two full sheets of 1/4″ plywood plus about 1/2 of a sheet of 1/2″ plywood. (The 1/2″ sheet of plywood was leftover from this fold-away dollhouse project.)
*When determining the width you need for the sides of your boxes, keep in mind that these pieces should be 1/4″ more narrow than your shelf depth. Subtracting 1/4″ allows for the thickness of the front and back panels of the box.
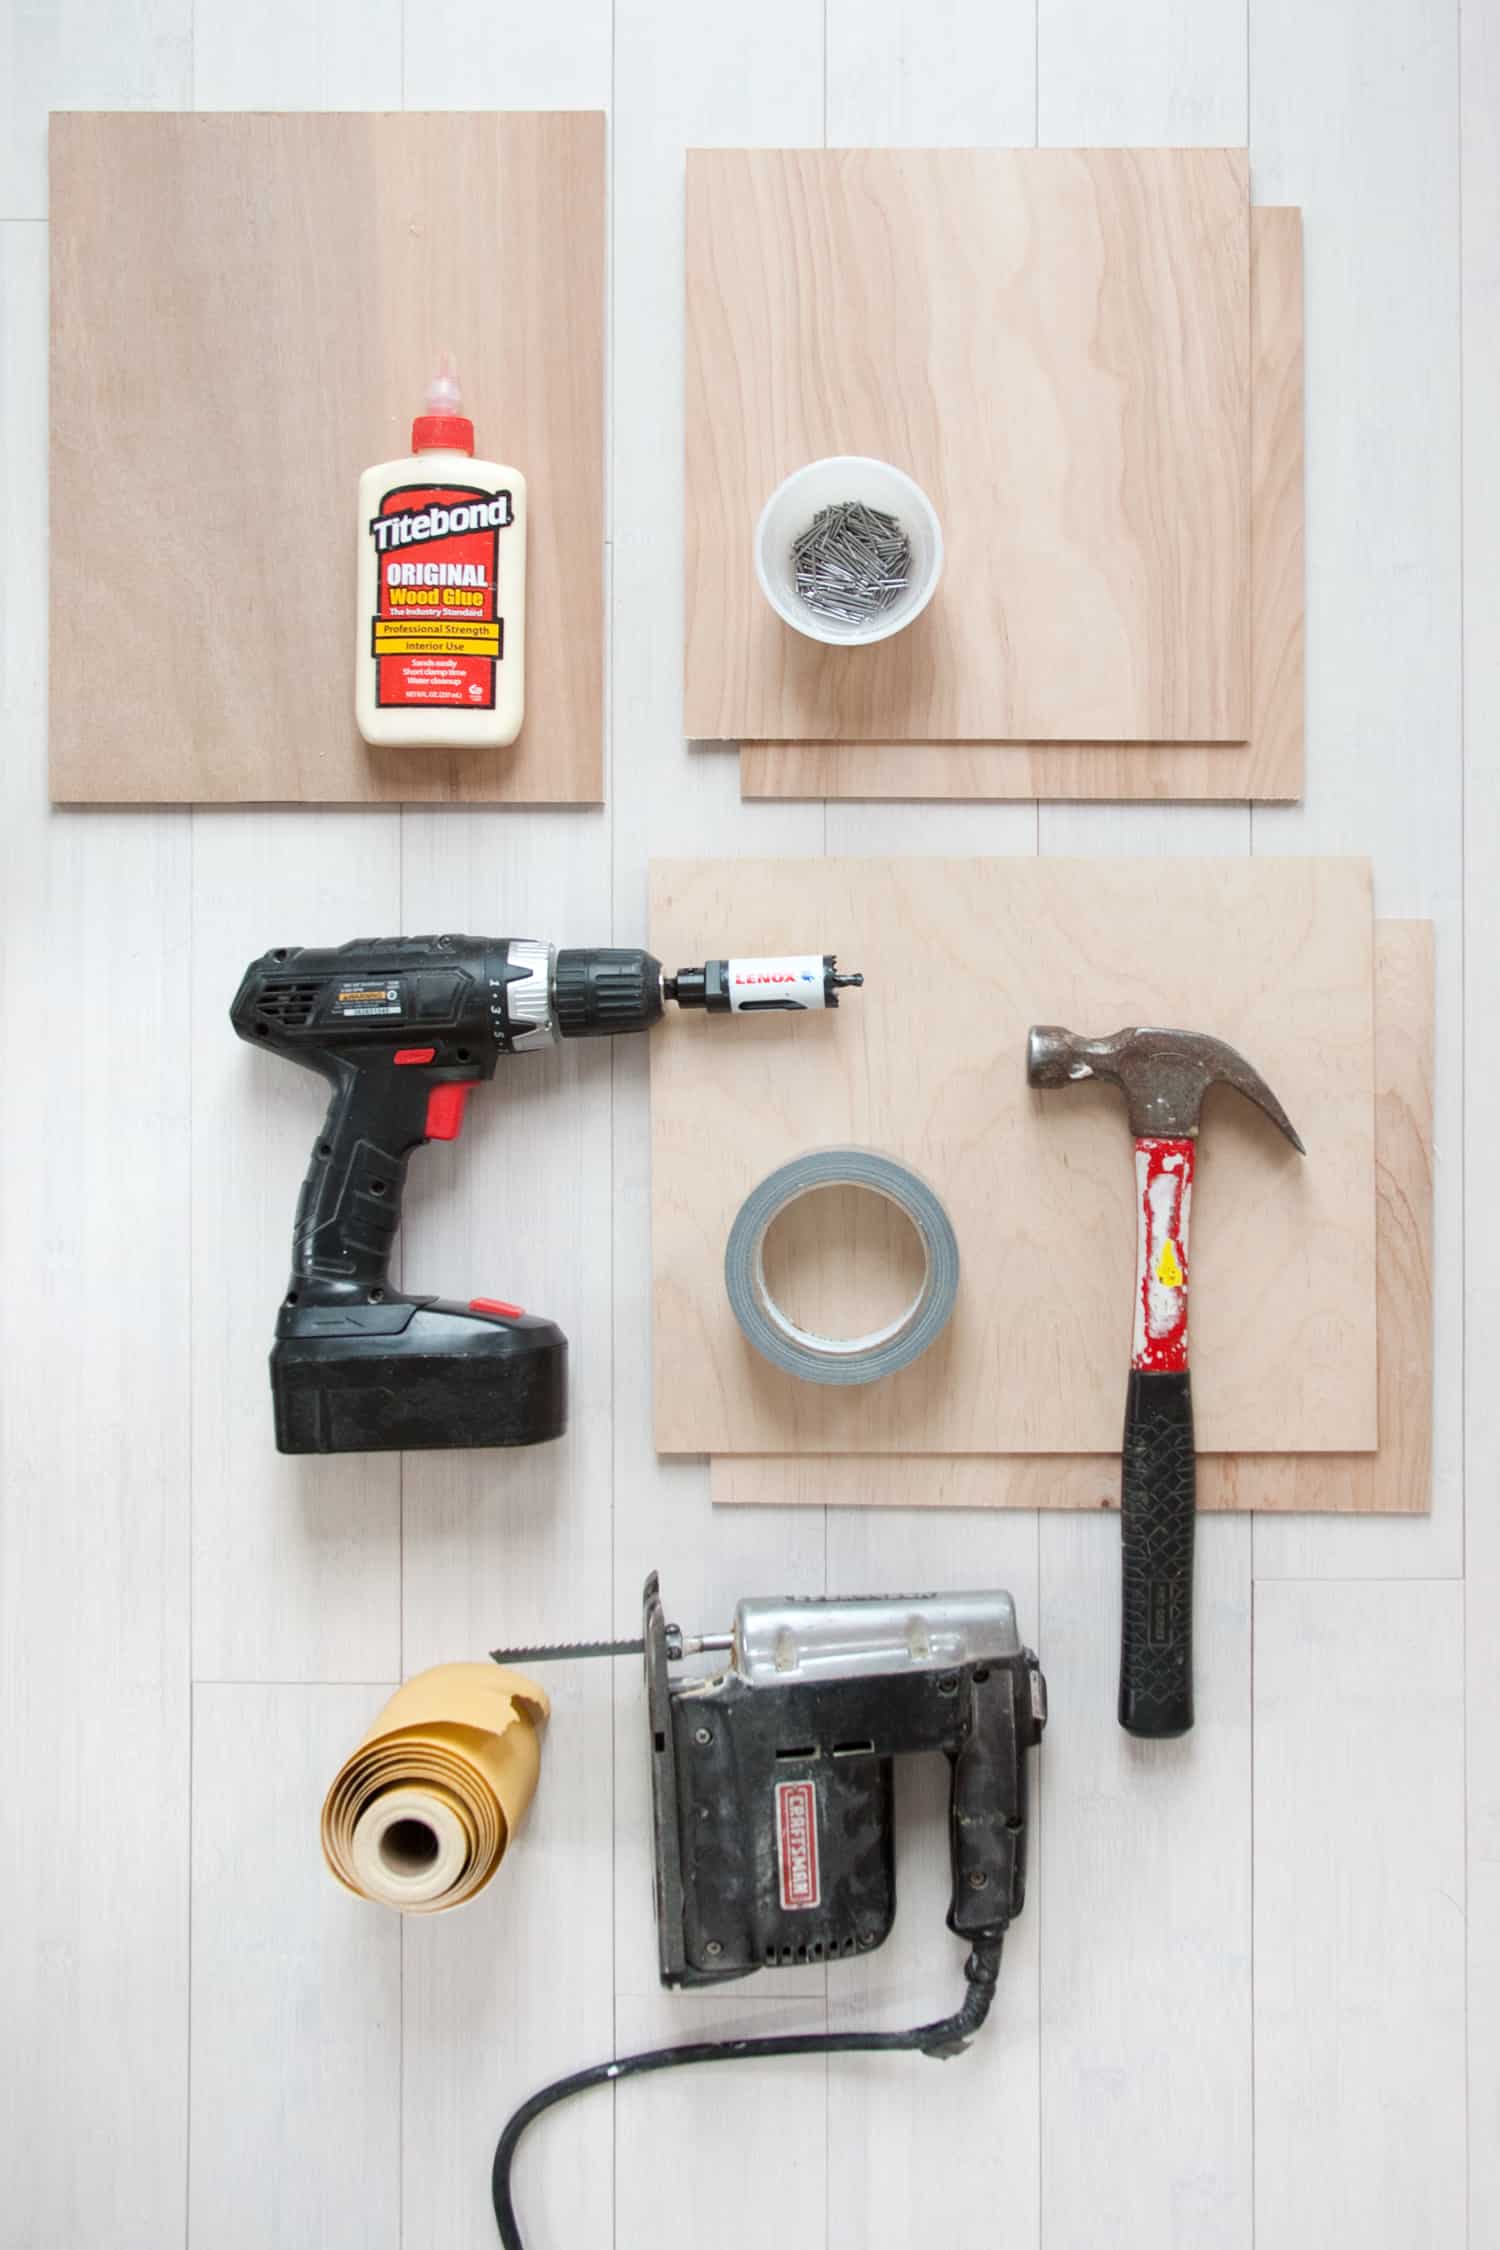 Materials
–1/4″ plywood for the sides of your boxes
–1/2″ plywood for the bottom of your boxes
-Wire brads (I used 1/2″ brads to nail through 1/4″ plywood and 1″ brads to nail through 1/2″ plywood.)
-Sandpaper—80 and 120, and 320 grit (120 is for sanding after box assembly, when a palm sander is handy. I always use adhesive sandpaper when using my palm sander.)
–Wood glue
-Duct tape
Tools
–Jig saw fitted with a fine-cutting blade
-Power drill
–1″ hole saw (drill bit)
-Hammer
–Palm sander (helpful but not necessary)
-Pencil
–Tape measure
How to Build a Simple Plywood Box
Step One: Cut the pieces needed for the sides and bottom of your boxes. See the section above about determining the sizes you need.
Make sure width of the bottom of your box is the same as the width of the left/right sides of your box. The length of your box bottom should be the same as the width of your front/back sides, minus the thickness of two pieces of 1/4″ plywood. (1/4″ plywood is actually closer to 1/8″ thick, but check your plywood to determine the actual thickness.)
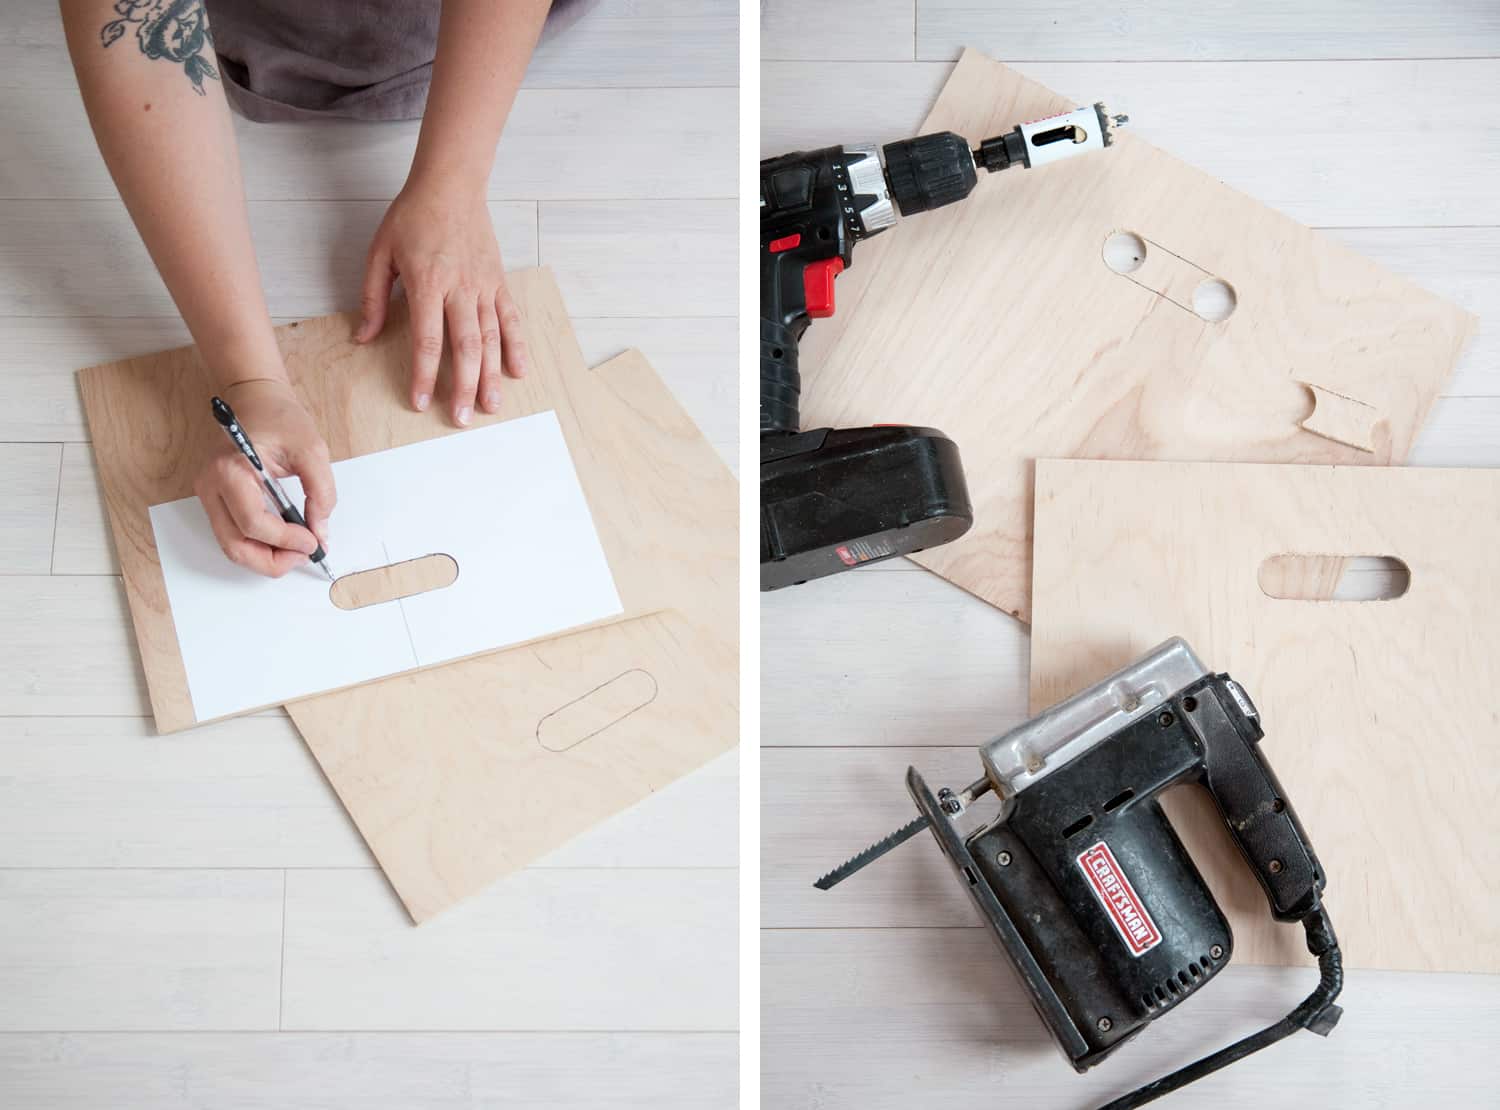 Step Two: Print and cut out this slotted handle template. Center the paper template at the top of your front and back box panels. Trace around the edges of the template where your handle opening will be.
Step Two: Use a 1″ hole saw bit to cut out the rounded edges of the slotted handle opening. Then use a jig saw to connect the holes, creating one opening. I recommend practicing on pieces of scrap wood before cutting into your box panels. Centering your hole saw and controlling the jig saw may take some practice to get it right.
When using the jig saw in this step, always err for a smaller hole rather than a larger hole. You can use sandpaper to make your jig saw cuts better match the hole saw cuts in step three.
Tips for using a hole saw: When cutting holes with a hole saw drill bit, I recommend marking the center part of your hole first, then using a smaller drill bit to drill through that point. Your hole saw will better be able to find the center point after making a pilot hole. Another tip is to only cut the hole halfway through the thickness of the board then stop. Flip your board over and cut the hole the rest of the way from the opposite side. This will help prevent the wood from splintering.
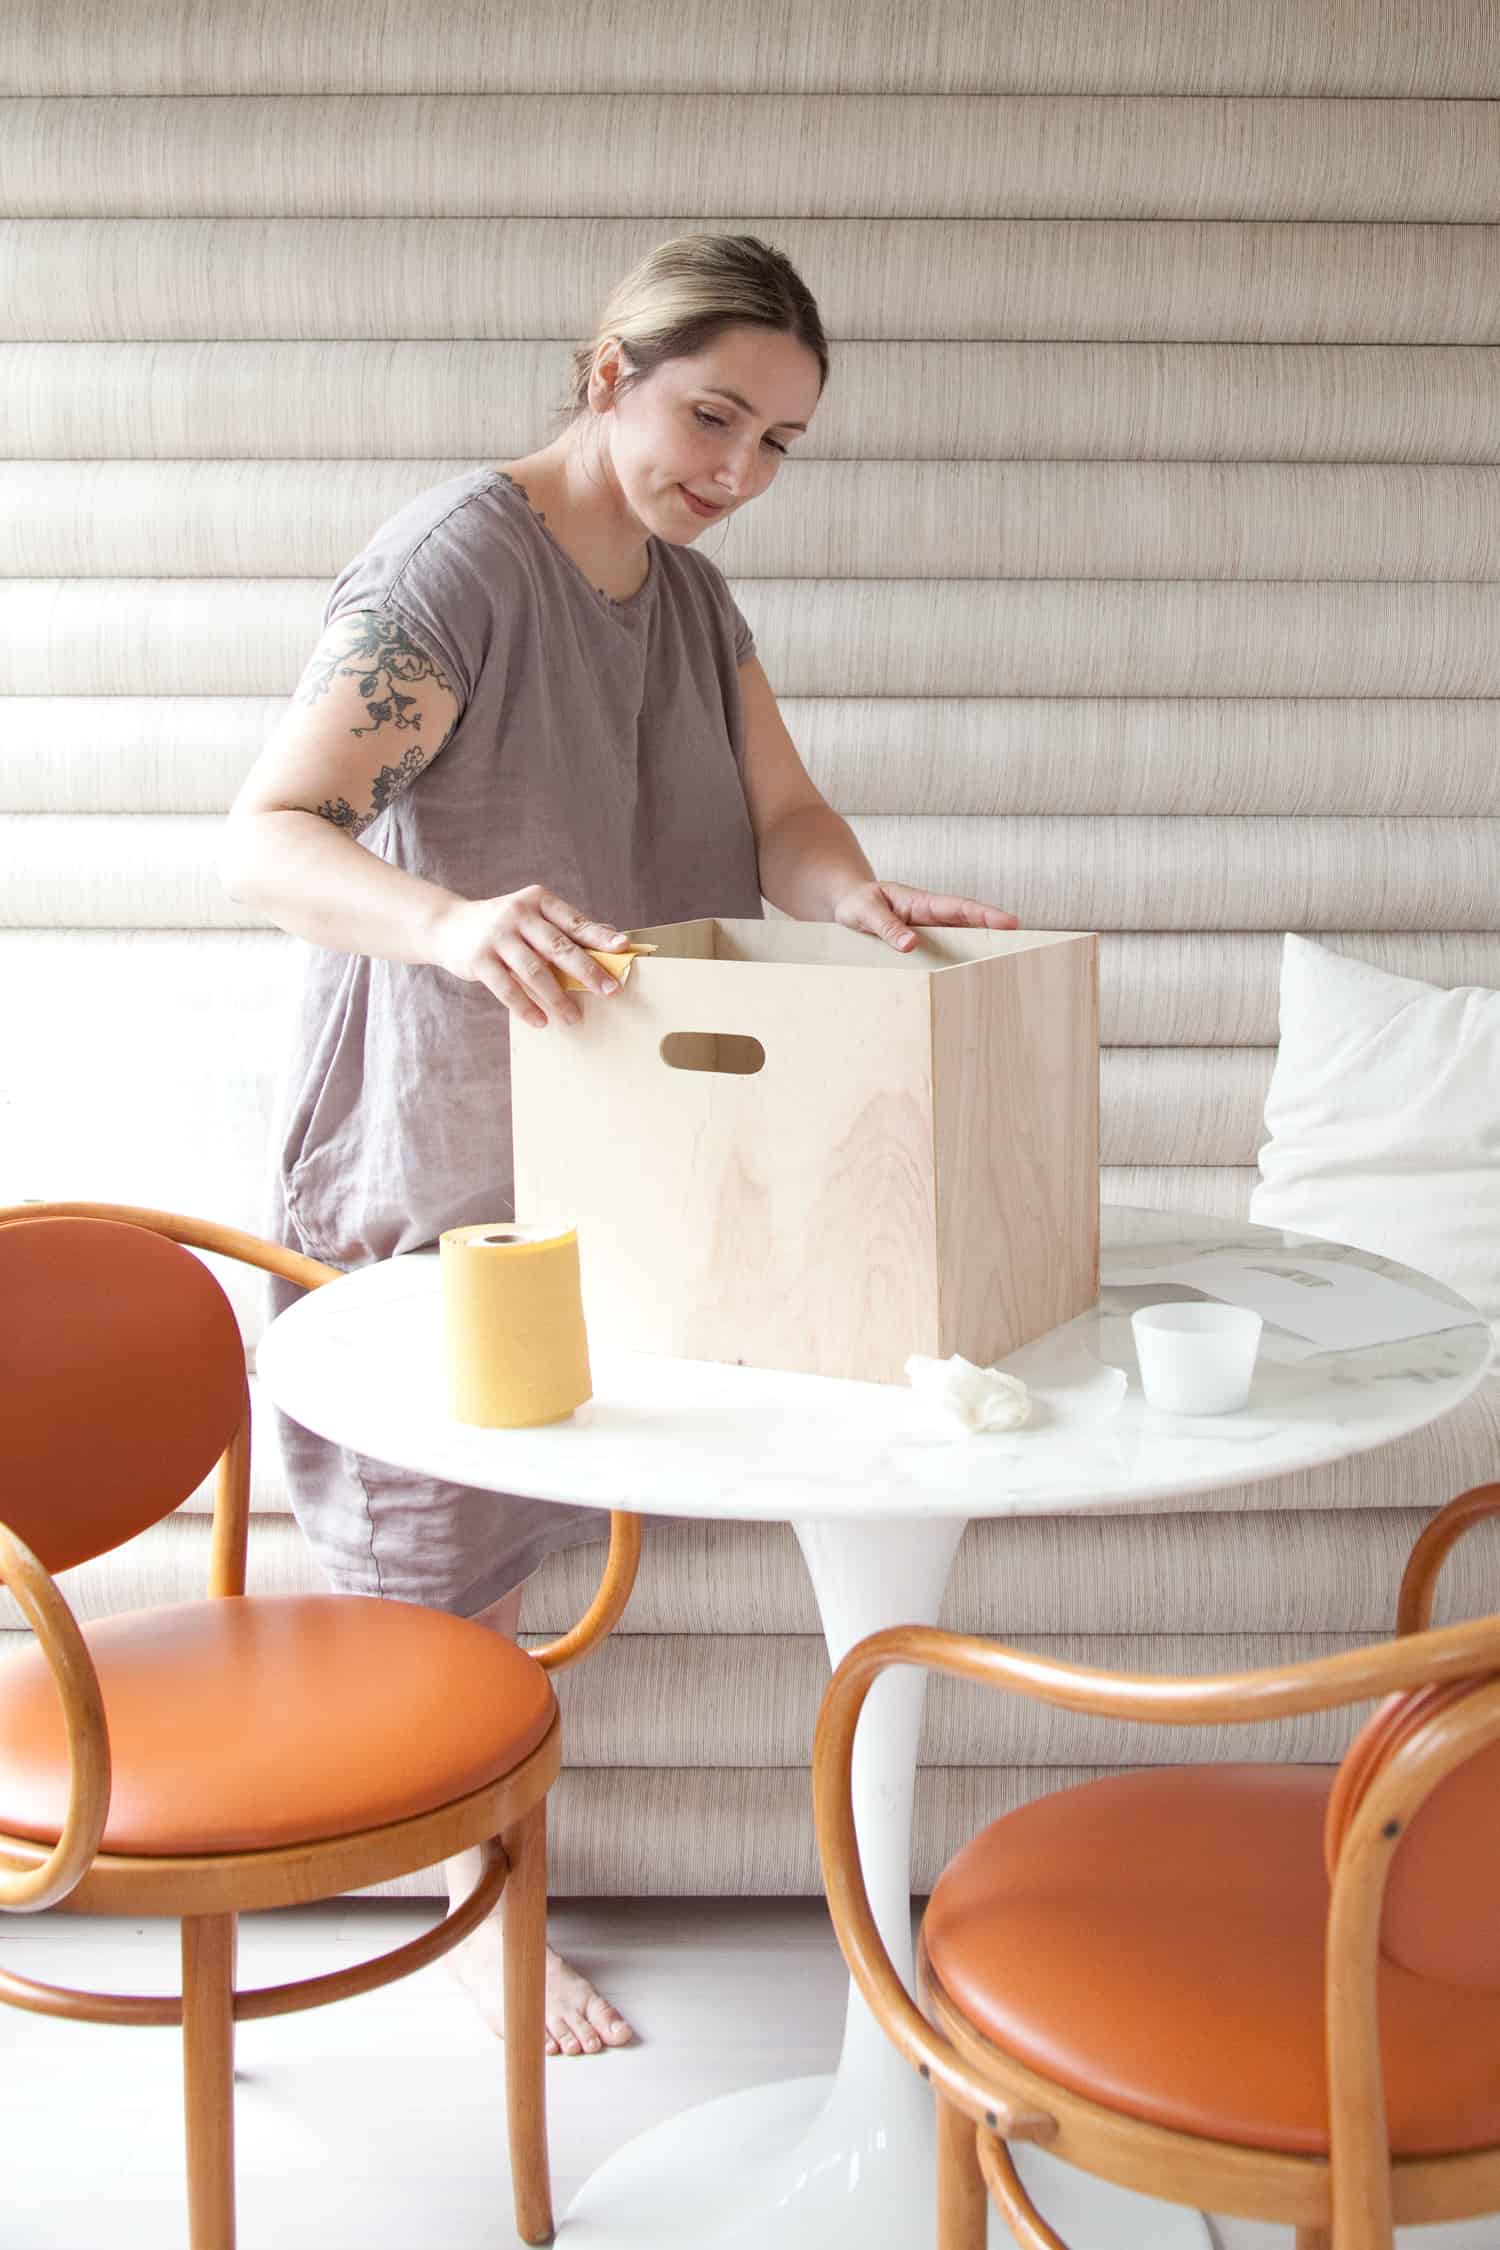
 Step Three: Use 80 grit sandpaper to smooth the opening, particularly the points where the jig saw cut meets up with the hole saw cut. It is useful to wrap adhesive-backed sandpaper around a thin scrap of wood to use as a sanding block for this step. Then use sandpaper without a block (only your hands) for the more nuanced sanding of the curves.
Step Four: Assemble the pieces of your box with wood glue* at all the joints, taped together with duct tape until you’ve added nails. The box won’t hold together super well with duct tape, so you’ll need to work gingerly as you begin to hammer in brads through the joints.
The first section I nailed was along the bottom edge of the the left/right panels of the box into the bottom panel of the box. Then I nailed through the bottom edge of the front/back section into the bottom panel of the box. Next, I nailed through either side of the front/back panels where they meet the 1/4″ plywood of the left/right panels.
Tips for nailing together your box panels: Use 1/2″ wire brads when nailing through the sides of the front/back panels into 1/4″ plywood, and use 1″ wire brads when nailing into the bottom panel. Be very careful when tapping the brads into place, particularly into the 1/4″ plywood, because if they’re not perfectly centered and perpendicular, you’ll end up with nails poking out inside or outside of your box. Haste makes waste, or in this case, haste makes more work for yourself!
*Be sure to remove any seeping wood glue before it dries! It is very difficult to sand away dried wood glue. And if you plan to stain your boxes, dried glue will repel stain and ruin your finish. Some people choose to wipe away wet wood glue with a damp rag (that’s me!), while others may use a chisel or blade to scrape it away as it begins to harden.
 Step Five: Carefully remove the duct tape from the joints after the nails are in place. Peel slowly and toward the edge of your wood panels, not away from the edge, or you may pull apart bits of the plywood in the process. After at least 30 minutes, your glue will be strong enough to handle sanding the boxes. I used 120 grit sandpaper and a palm sander for this process, and it went relatively quickly. Make sure to get every surface nicely sanded, inside and out.
Thoroughly sanding in this step is super important if you plan to stain rather than paint your boxes. If you don’t completely sand away scratch marks from the 80 grit sandpaper you used in step three, then those scratches will be highlighted after applying stain. But if you’re just painting the boxes, then a general smoothing down of the surface is good enough.
 Step Six: Paint or stain your boxes. I’d like to talk briefly about both options, because there really is a right and a wrong way to paint and stain wood.
Priming and Painting the Boxes: When painting your wooden boxes, you should apply a single coat of primer and allow the primer to dry completely. Next, lightly sand down the primer with a high grit sandpaper, such as 320 grit. This will smooth down all of the roughness that occurs when moisture causes the “hairs” of the wood to stick out. After smoothing down those hairs once, they will be sealed by the primer and will not stick up again in the next steps.
If you really want to take your paint job to the next level, try wet sanding your primer with a wet/dry sandpaper like this. Drip your sandpaper into a bucket of water, sand the primer, and keep dipping as you sand. Wipe down the box with a dry rag after you’ve finished sanding. You’ll notice it is super smooth, and much slicker than it would be with only dry sanding.
After dry or wet sanding your primer, you may have to do some touch-up priming in spots where you sanded away the primer. No need to resand these spots, though, unless they’re substantial areas. Lastly, apply two or three coats of paint and your boxes are finished!
Staining your Boxes: After sanding your boxes with 120 grit sandpaper, I recommend sanding one last time with 180 grit sandpaper before staining. You may choose to apply a wood conditioner to your wood before staining, which will help the wood accept the stain more evenly across its grain. Then apply your stain and allow it to rest for the period of time indicated on the label.
After staining, you will have rough wood that needs sealed and smoothed down again. I usually use polyurethane to seal my stained wood. If you’re using a light stain or no stain at all, you may want to use polycrylic instead, as urethane does yellow slightly over time. After allowing one coat of the sealer to dry, lightly sand with a super fine sandpaper or 0000 grade steel wool to smooth out any roughness. Then add one or two additional coats of sealer to finish it off.
 The bottom of my boxes were left unpainted, because I didn’t want paint scraping against shelves as the boxes are slid in and out. I had considered waxing the bottoms of the boxes so they’d slide more easily, but in the end I decided to use felt pads instead. I cut 1″ wide strips from these felt blankets and put them on either side of the bottoms of the boxes. They slide super easily now.
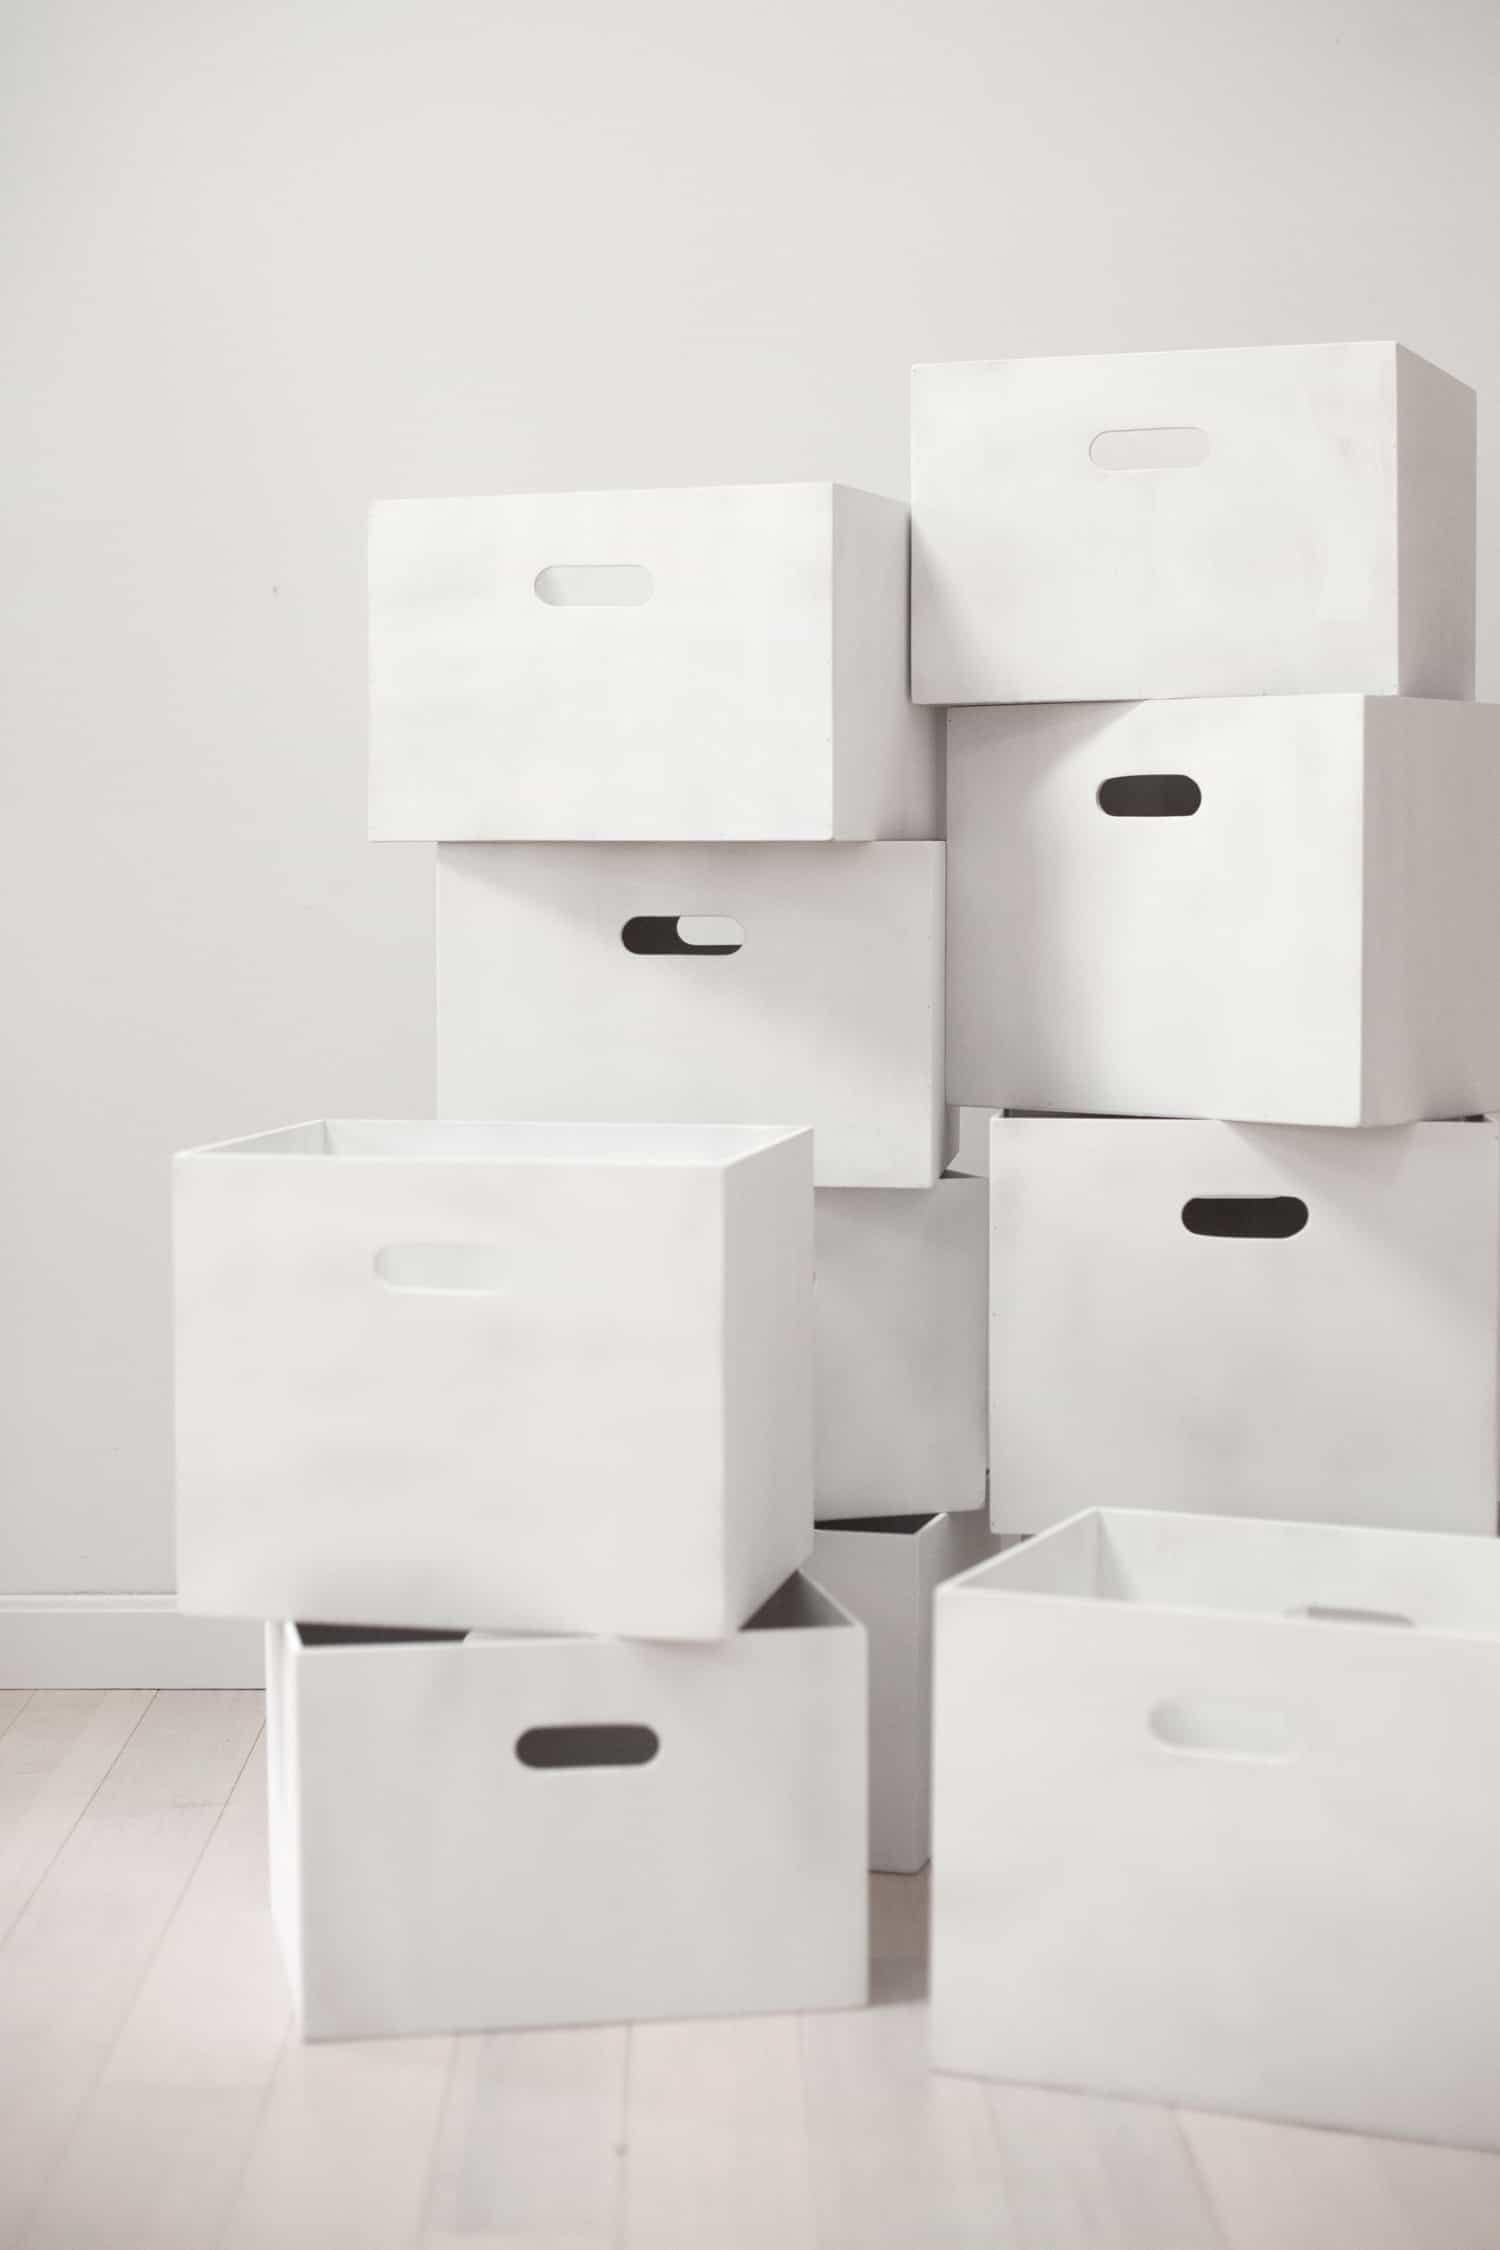
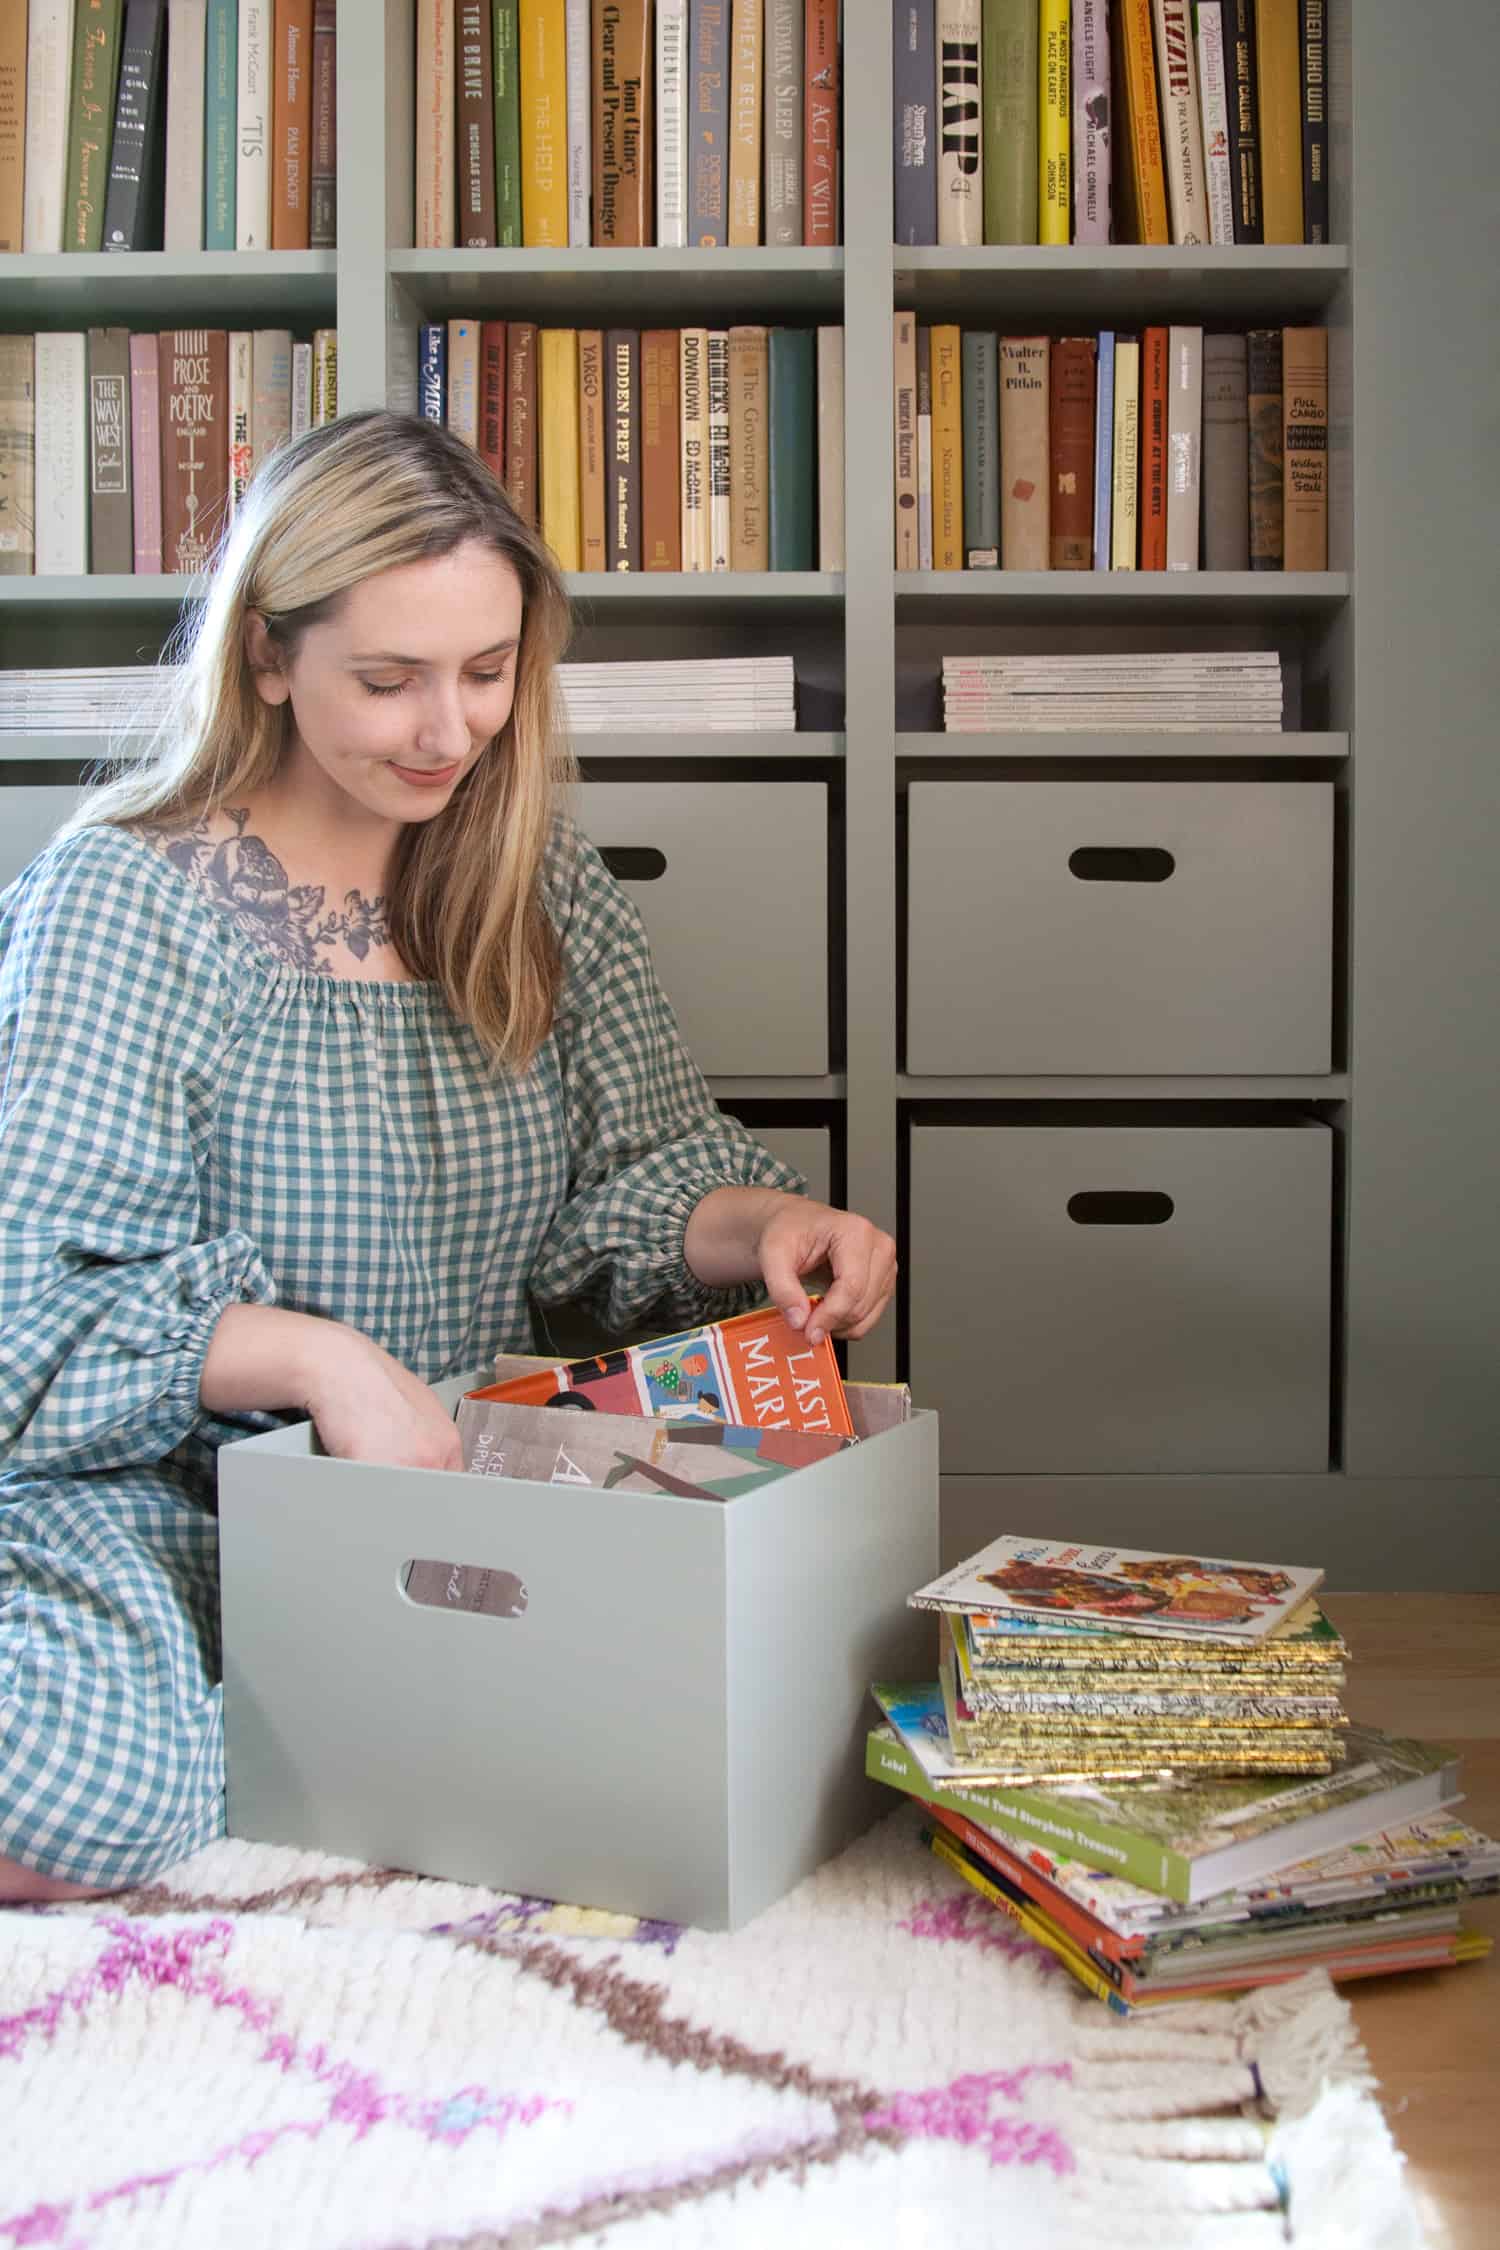
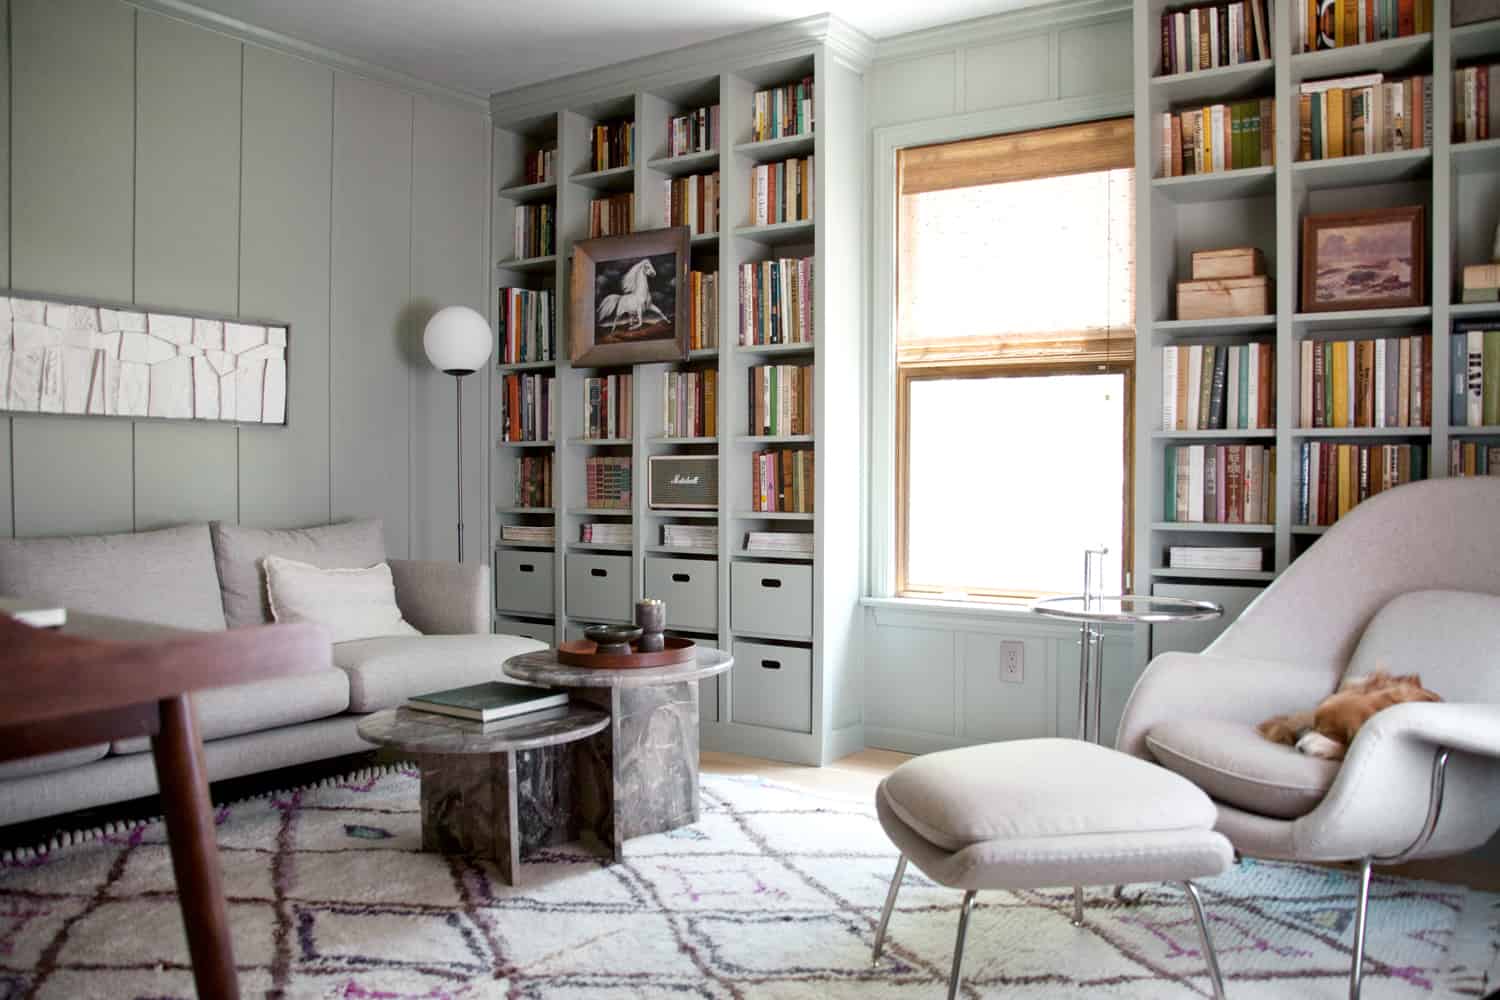 I’m really enjoying the organized look of my bookshelves with the addition of these custom plywood storage boxes! Keeping the kiddos’ books and office supplies tucked neatly away has done wonders for the look of this room. What would you hide away inside your bookshelf boxes? – Mandi
15 Comments
What a professional looking DIY! And so easy to do, too! 🙂
Charmaine Ng | Architecture & Lifestyle Blog
http://charmainenyw.com
I could live in this room! It looks so relaxing and welcoming.
What a great addition to your shelves! Such a great space!!
These types of boxes can cost up to $25 a piece and are often one universal size. I’m so excited you shared this DIY method for all the small nooks and crannies where a bin and catchall are needed but hard to find!
You guys have the most practical / useful DIY’s. Love this one and will try it (or get my hubby to try it for me :p)
I’m redoing my at-home studio right now and have wanted a giant floor to ceiling shelf of boxes JUST LIKE this to organize all my craft supplies. This DIY is absolutely perfect. I love how this allows me to make whatever bookshelves I want and create the boxes to fit instead of visa versa. Thank you so much!
I desperately need these in my life! Thank you for sharing!
I never thought making those boxes myself. what a brilliant idea!
https://www.makeandmess.com/
I love this room you did, but also how you’ve turned it into so many different ‘how to’ posts! Well done! Wish I was more handy. One day… I even have a Pinterest board for wood projects. Called…. I ‘wood’ if I could.
Ha! This cracks me up! But also, you totally can! Sometimes it just takes setting a deadline for yourself, like a time guests are coming over, or maybe a friend is helping you work on a project so you have to get started.
These are amazing! I have been eyeing some similar boxes, but haven’t pulled the trigger due to price. How much would you say these cost to make?
They cost less than $85 for all of the wood and nails and wood glue. But I already had the tools I needed to work on the project, so of course that’s helpful! I’m not afraid to ask people if I can borrow tools when need be, though. 🙂
Ok, so this was quite useful. And it inspired me to make some wheat grass boxes for tall, narrow windows at my showroom. I’d been holding back shopping for some and you helped me feel confident to just go ahead and do it. Thanks Mandi!
I love the way these look and also the really thorough, complete, professional directions. Thank you Dale
Hello! Would you mind telling me what color this is for both the book shelf and boxes! I am in love!