
 Redoing our deck has been such an exhausting and gratifying project! It’s definitely been a lot more work than I had anticipated, but I’m learning that’s just how most home makeover projects go! I learned a lot in the process of making over the deck, so I’m excited to share what I’ve learned with you all—starting with how we refinished our wood deck!
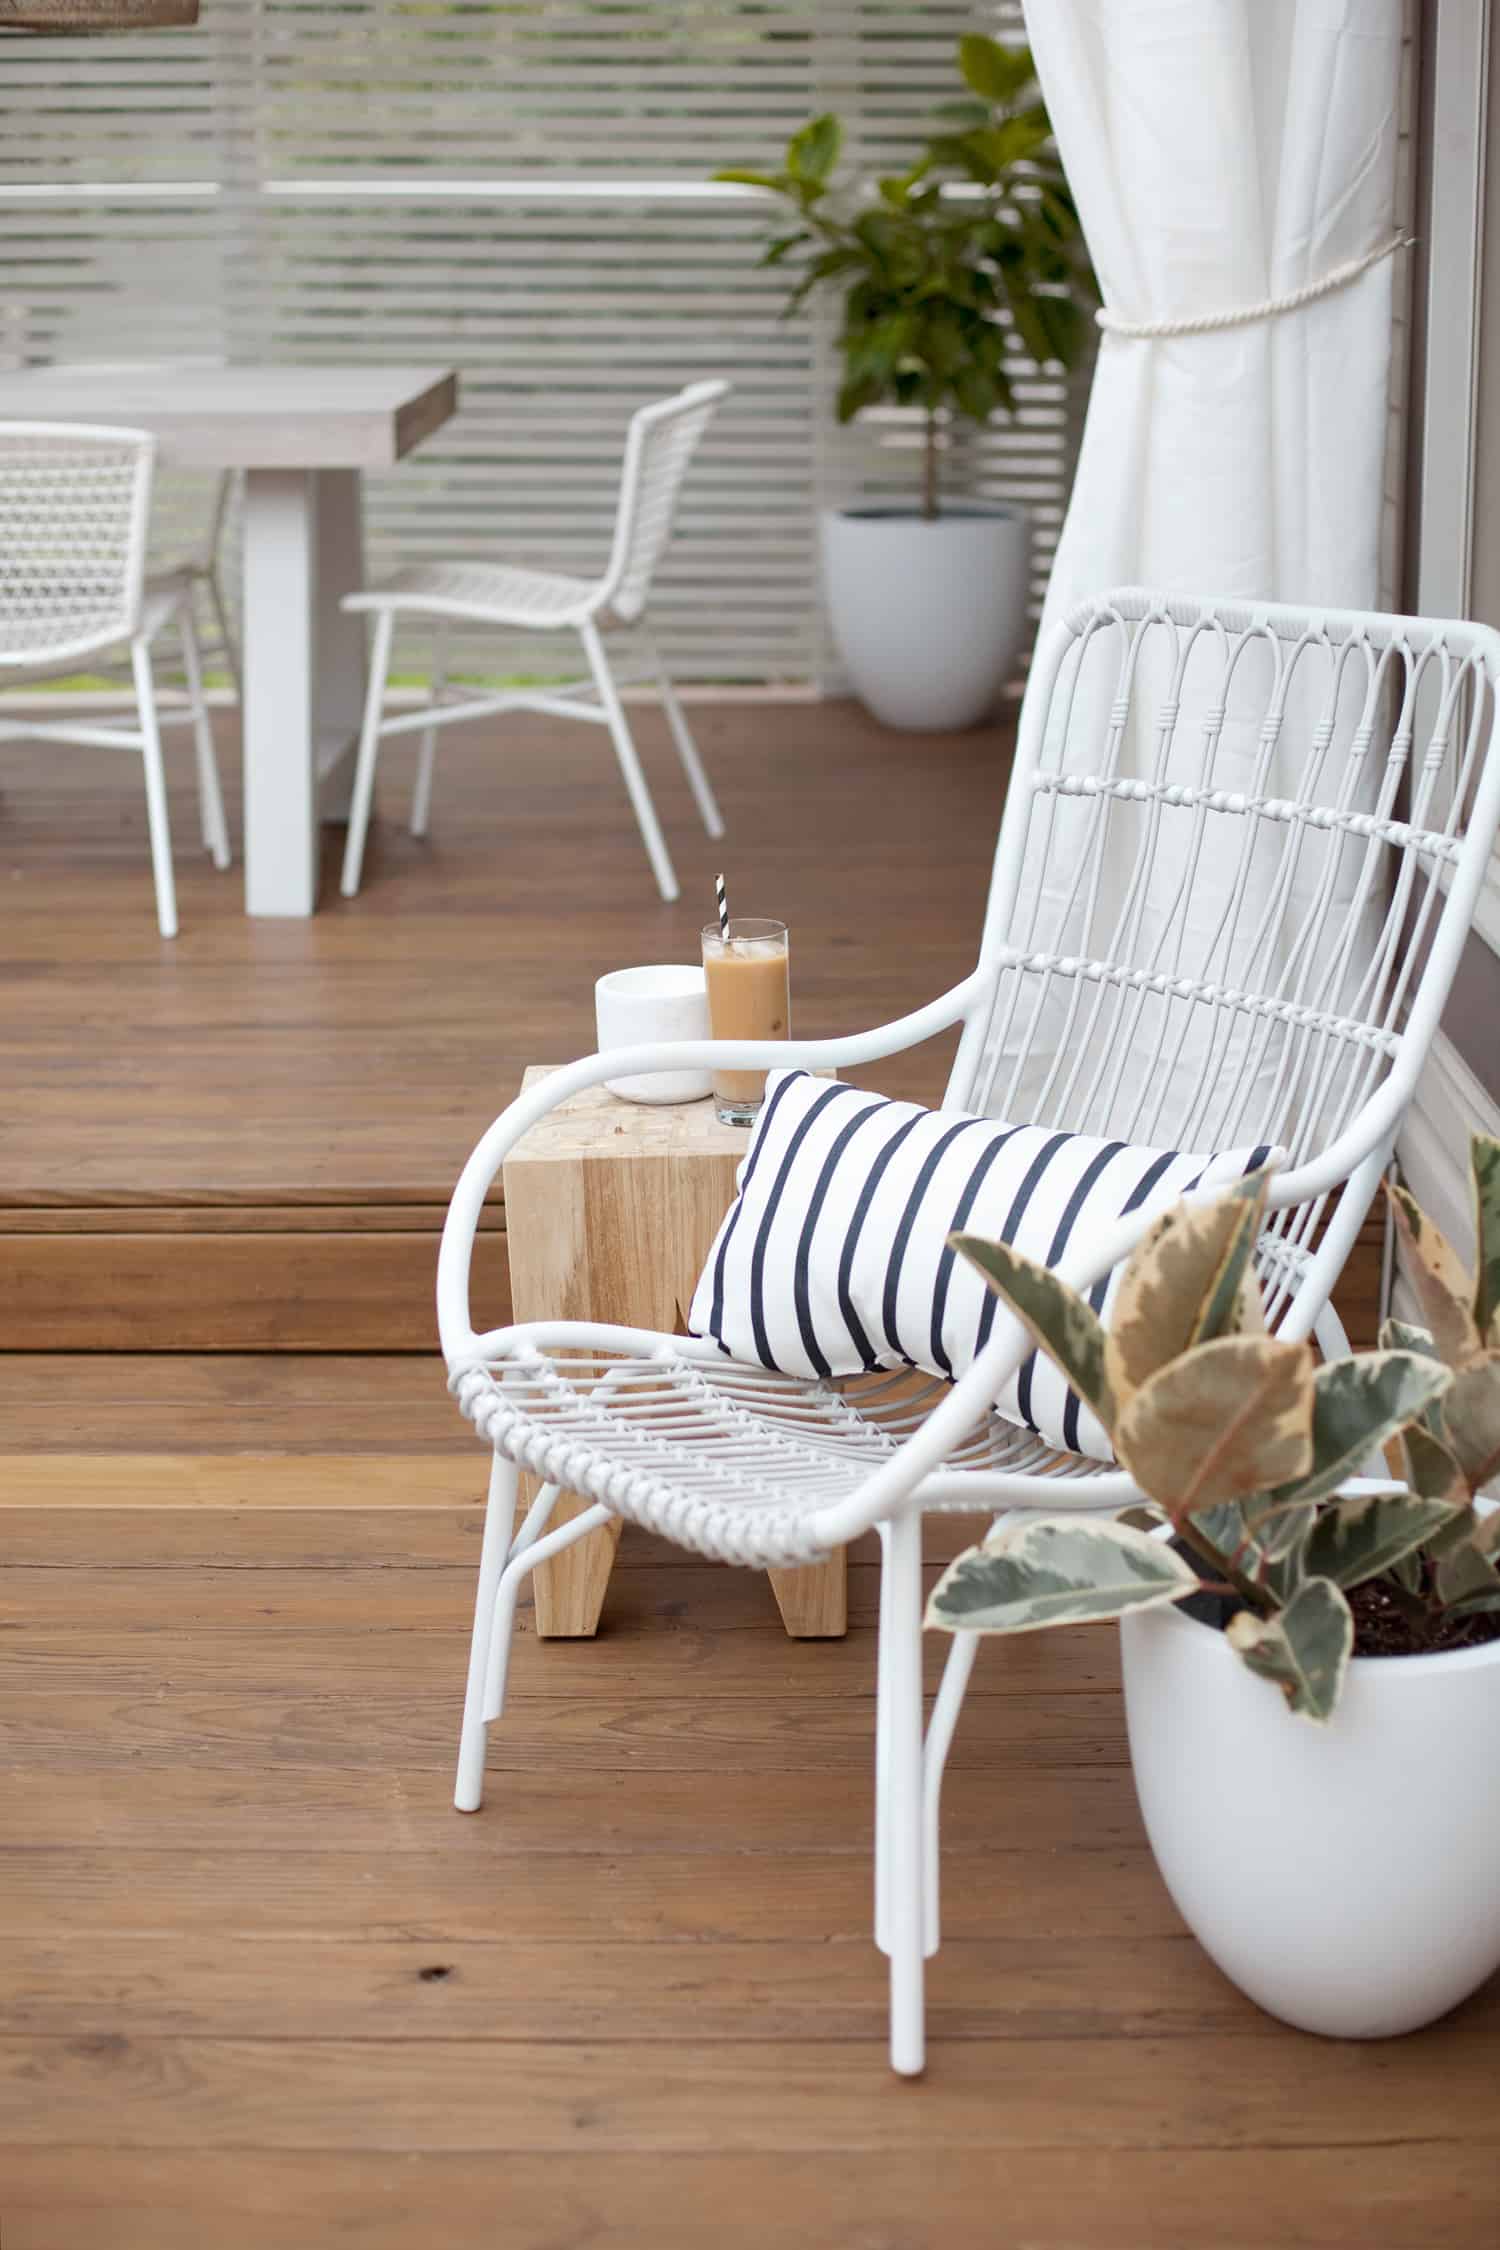
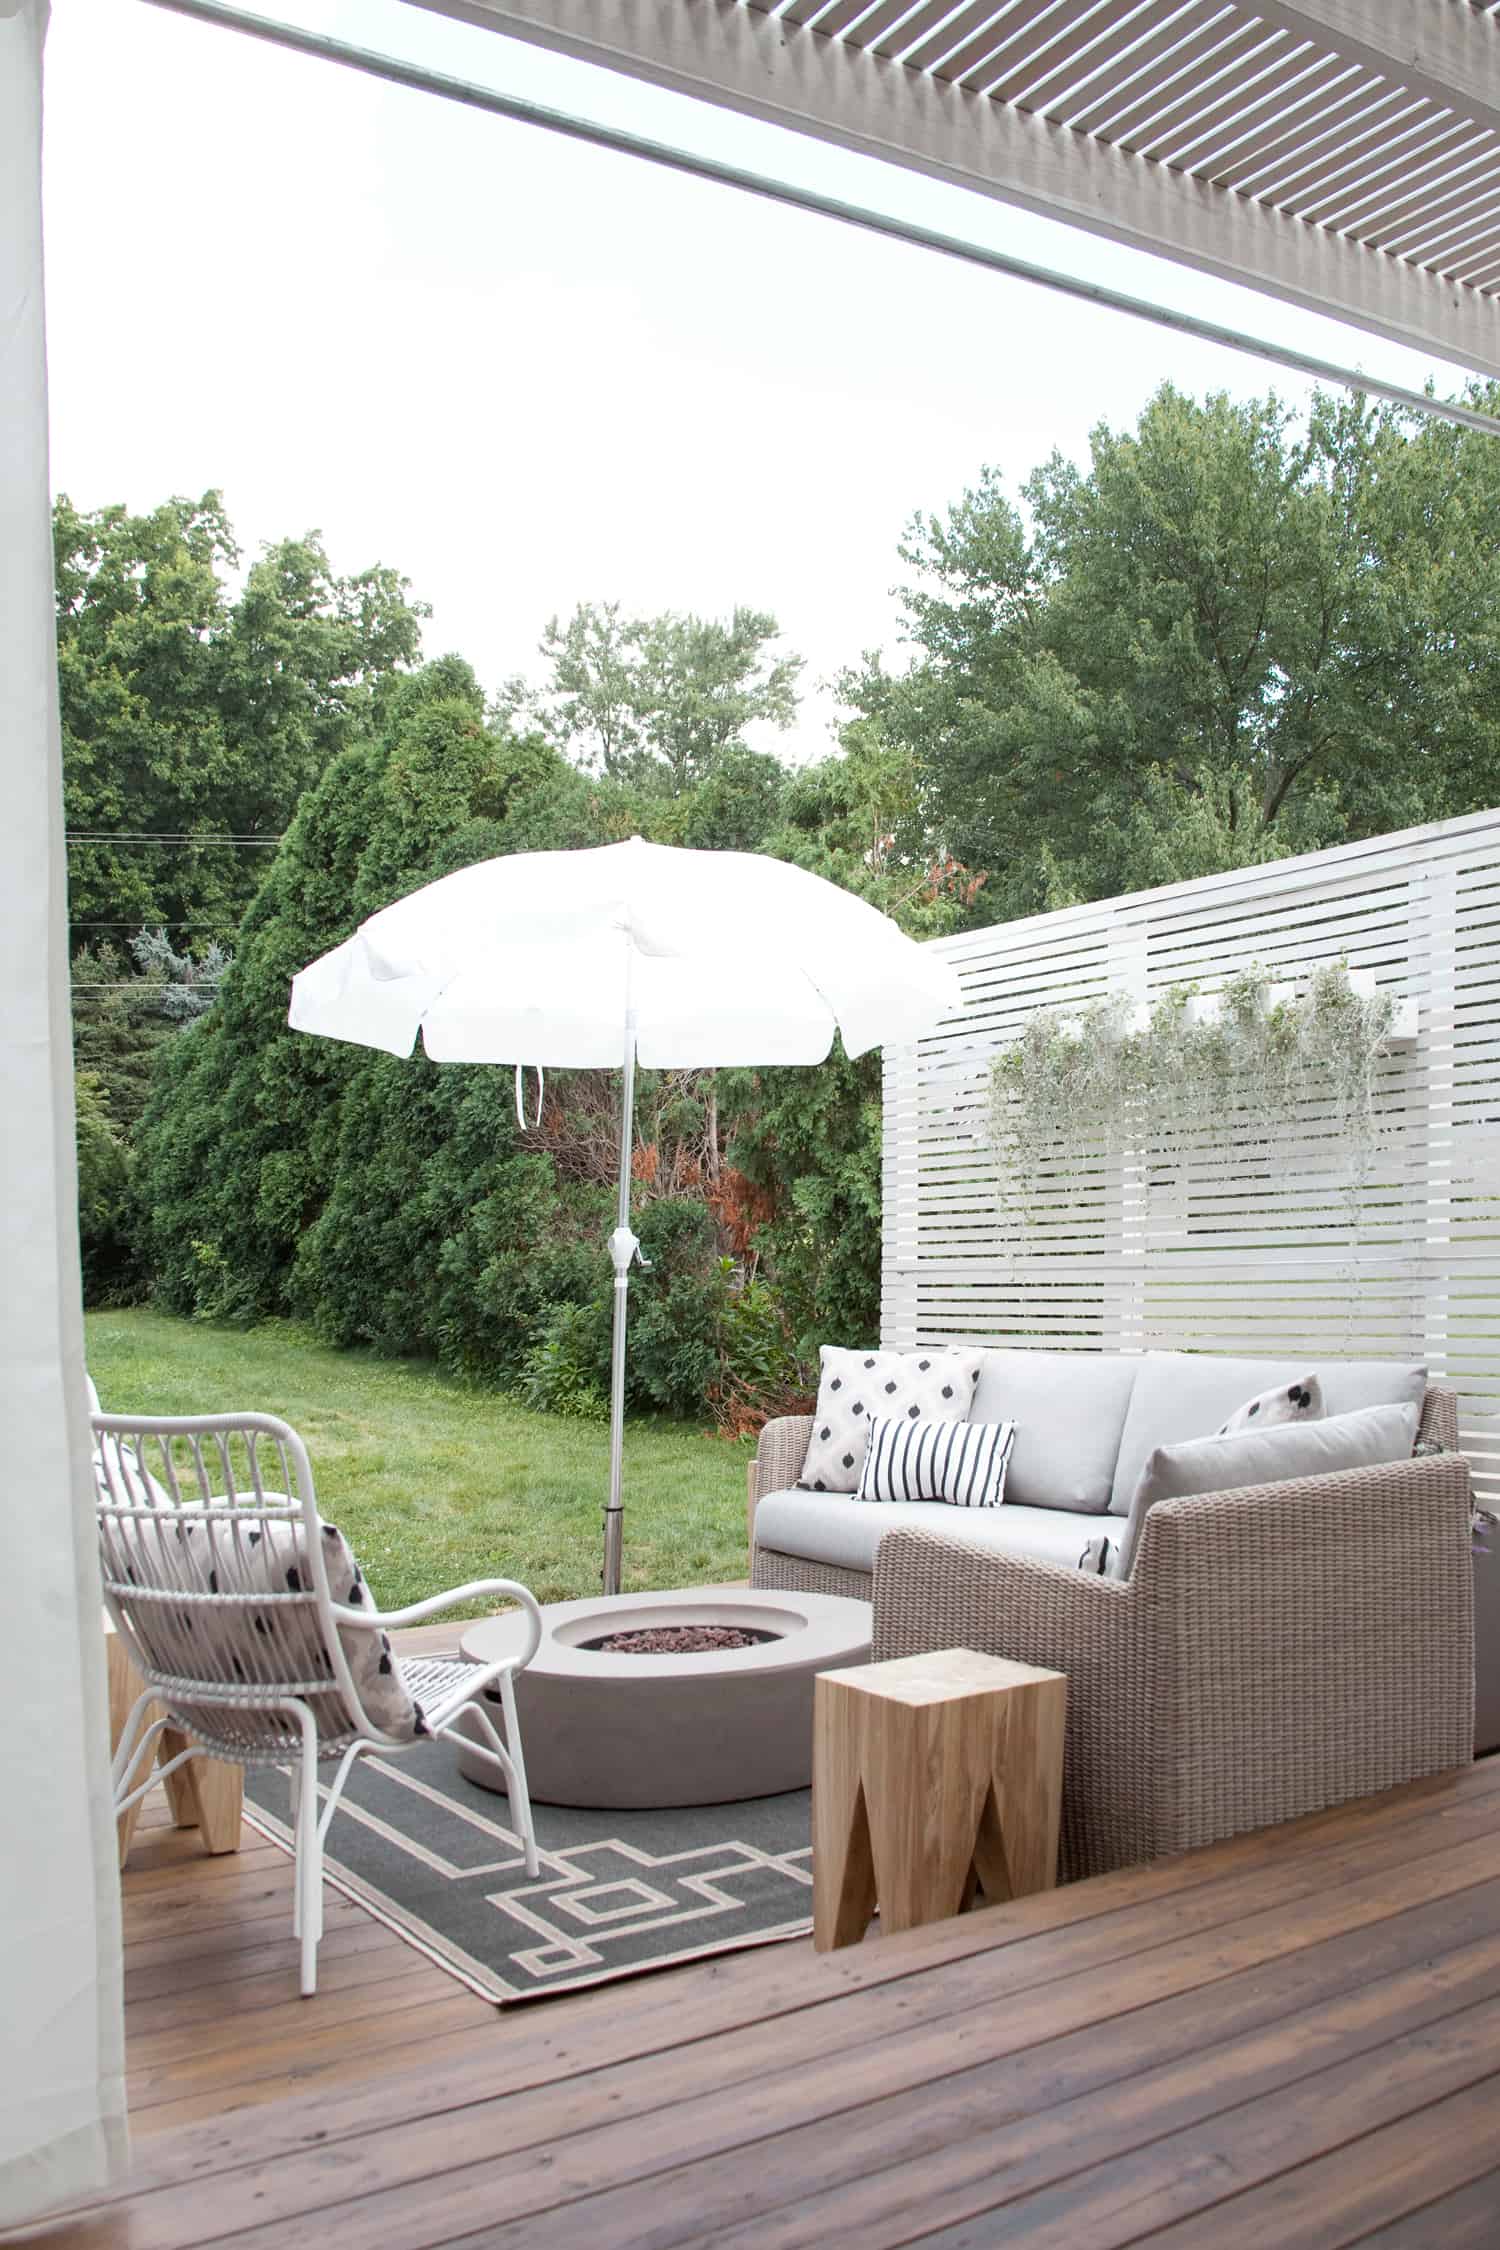
I’m lucky that my husband Phil was game for working on such a big project with me, and that he enjoys the same music playlists as we work. (That’s kind of a big deal!) After days of working in the blazing sun, we’re each rocking a farmer’s tan as we sip iced coffee on the newly finished patio, and I don’t care. I love it! (There’s your hint for what music got us through this project!)
Besides the so fresh and so clean deck, another big part of our patio makeover was the outdoor furniture provided to me by Article. Shown above is their Medan white lounge chair, which is made of coated metal and a synthetic wicker. I’m really happy to have beautiful new furniture that will stand the test of time, even though my new deck will surely need refinishing again before that chair starts showing its age.
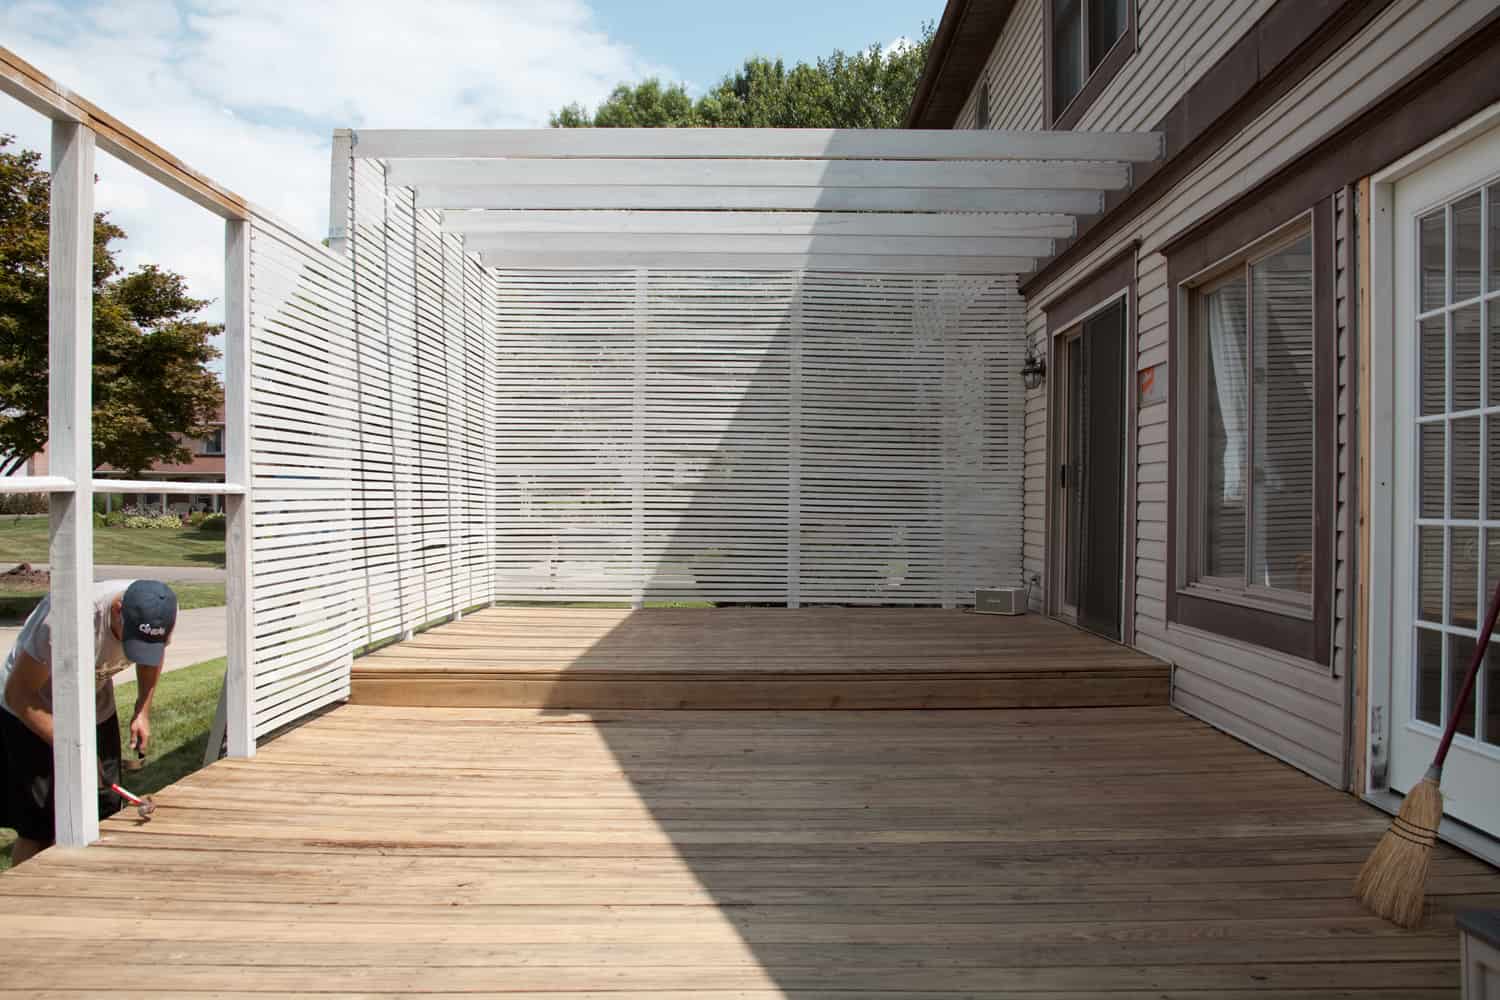
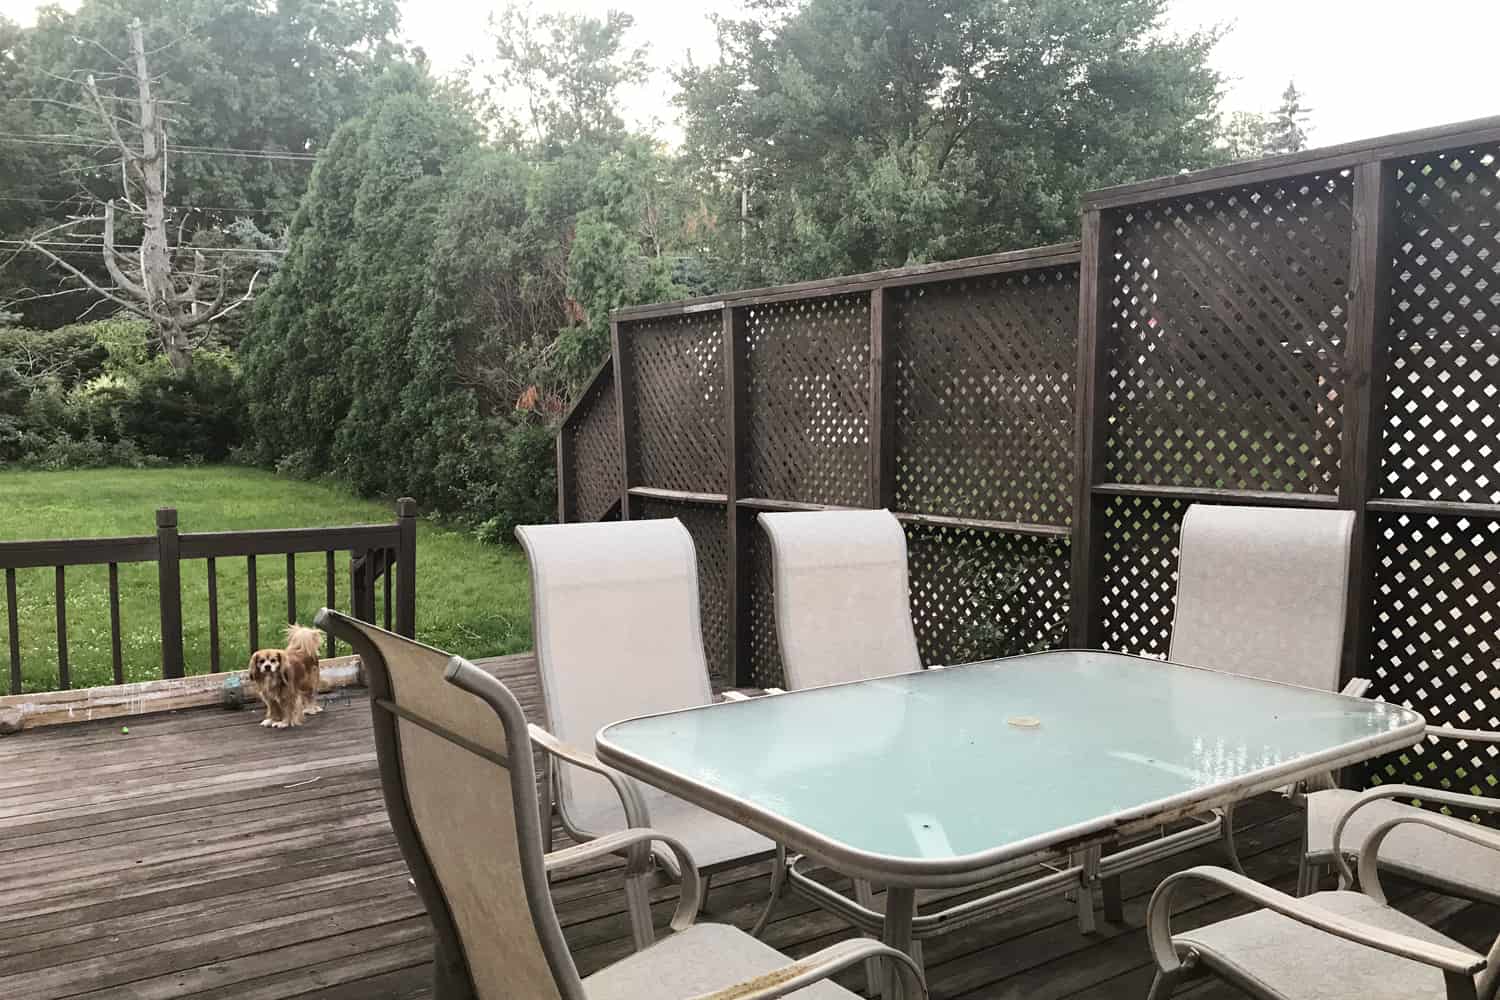
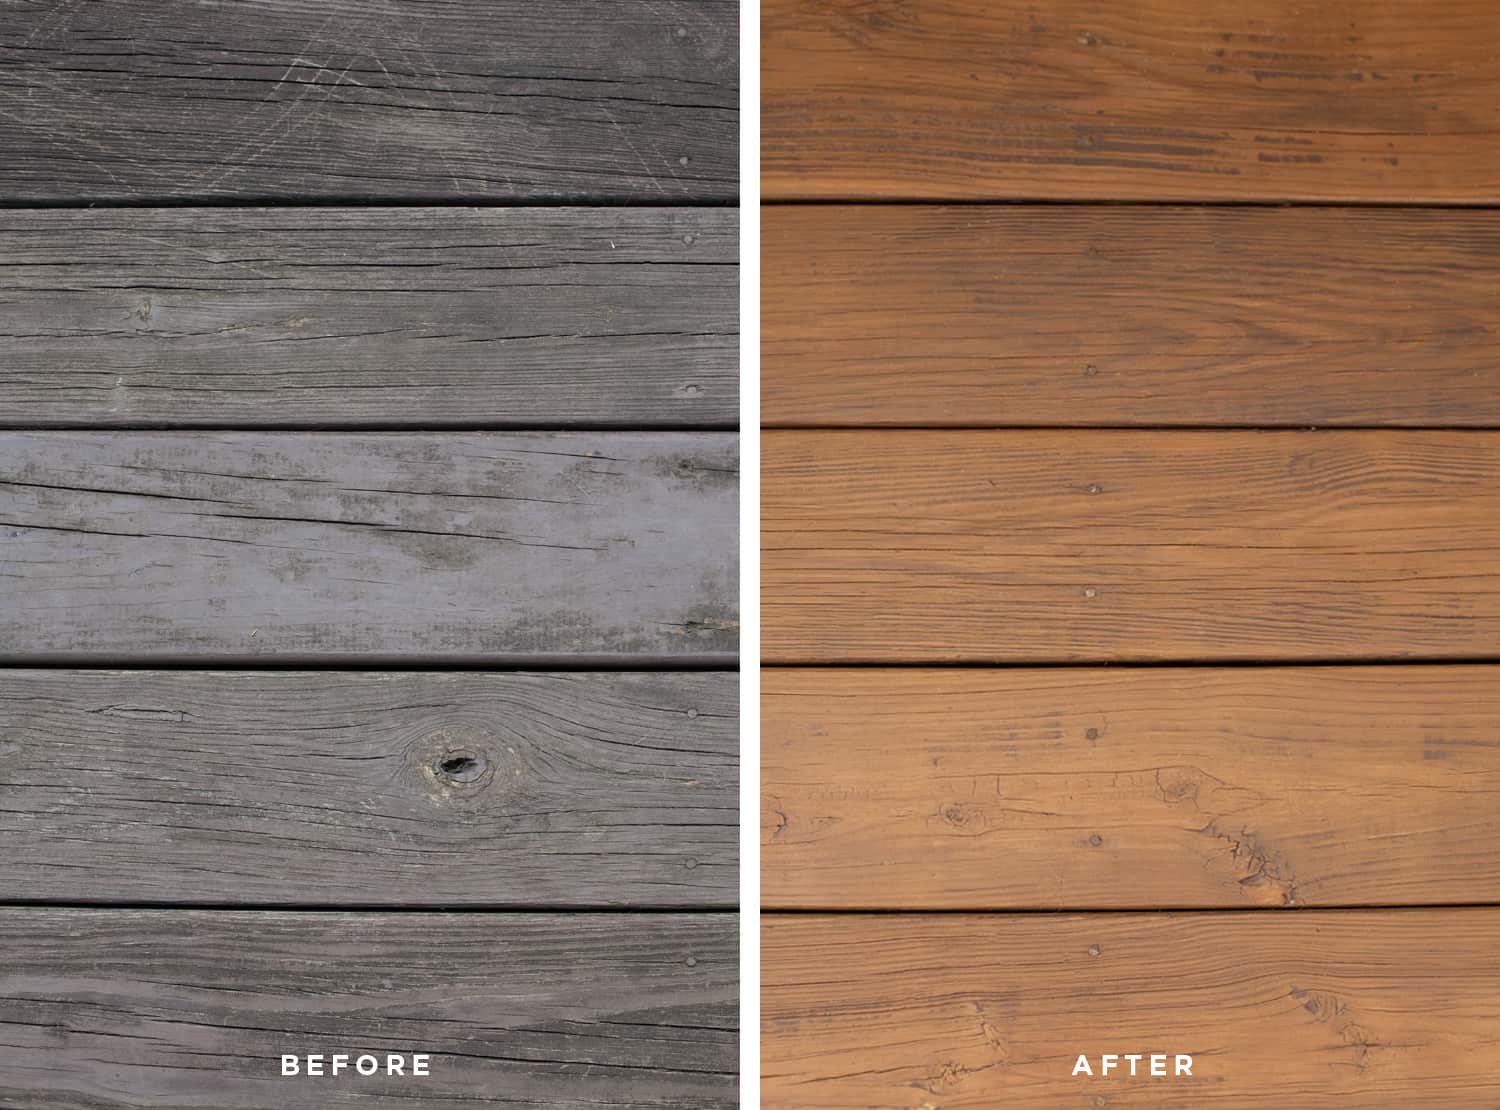 I’m not sure how our deck had been finished by the previous owners—or when—but it clearly needed a lot of TLC! You can see how faded and scratched the previous finish had gotten. Also, the wood was pretty damaged in some places. Seeing this before and after is so gratifying, honestly! Because in the midst of all the work, I think I lost sight of how bad it was before, and how necessary this work really was.
 Stripping the Wood Deck
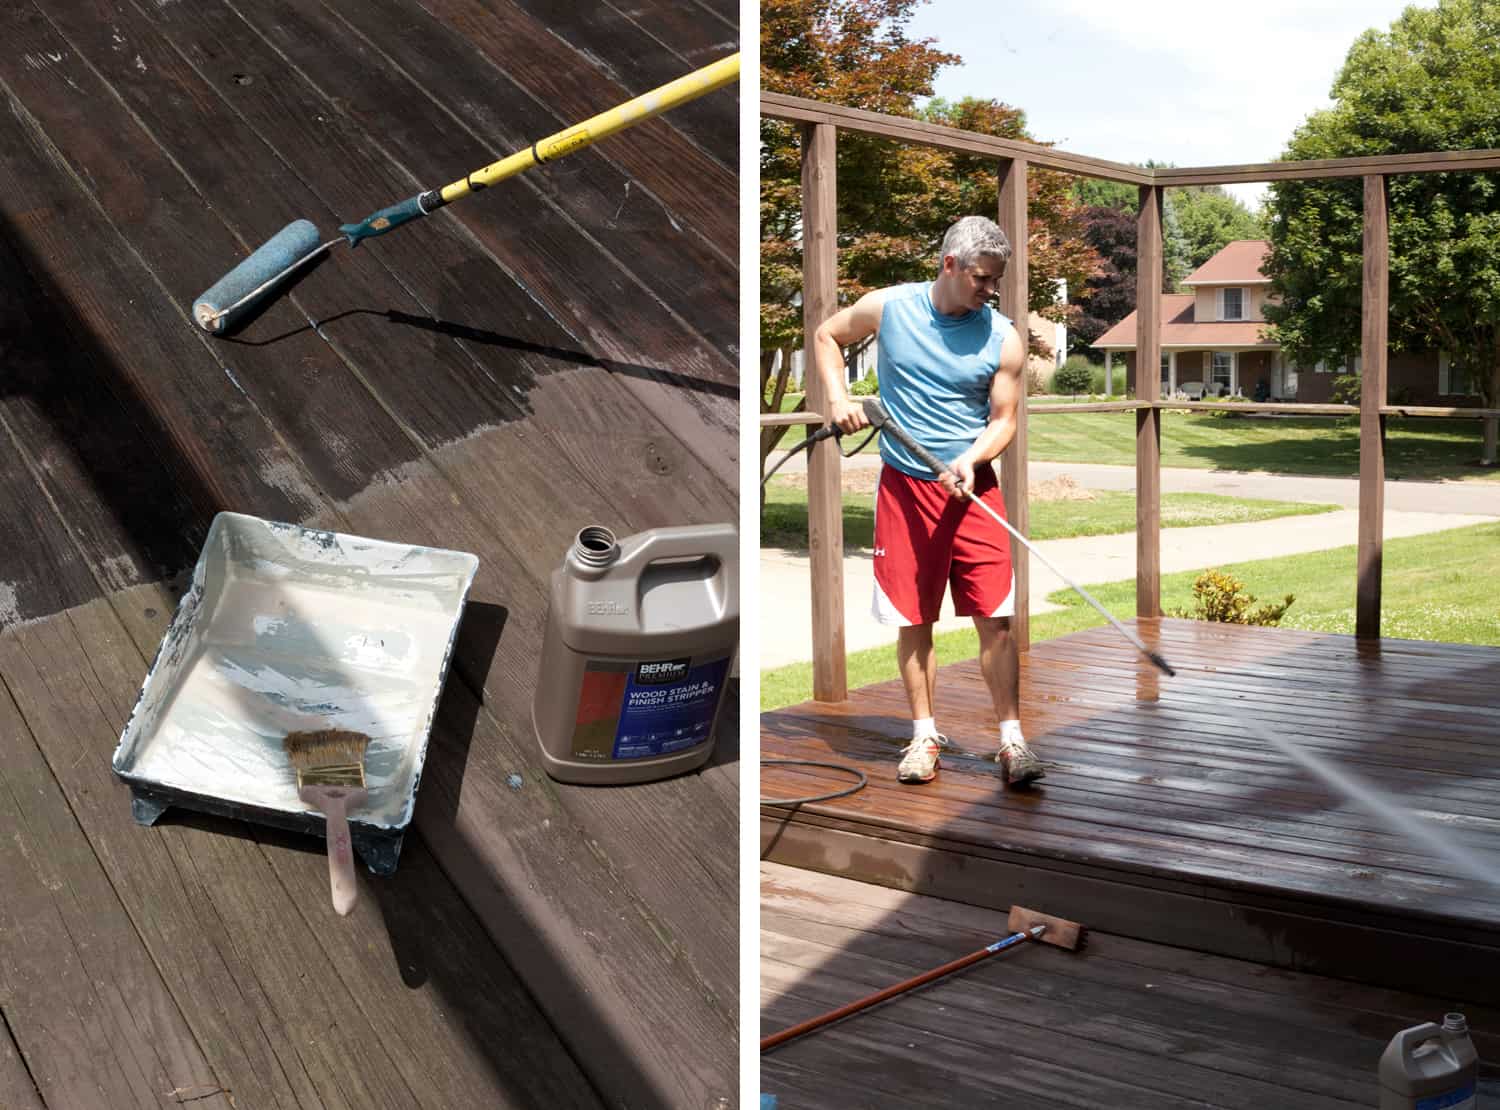
Step One: Wash deck thoroughly with hose water and a stiff bristle brush. Then apply chemical wood stripper* with a long-handled roller. Try to work in the shade if possible, as the sun will dry out the wood stripper faster than you want. Work in small areas so that it stays wet and can do its work.
*Be very careful when applying the wood stripper—it will burn your skin! I suggest wearing long pants, sleeves and goggles. I ended up splattering a bit on my legs and it was not good.
Step Two: Remove the previous wood stain with a long-handled stiff bristle brush or power washer, after the allotted time recommended by your wood stripper. The wood stripper I bought says to use a hose and a stiff bristle brush to wash away the old wood finish. This was very misleading for my expectation for this project, let me tell you! I’m assuming the old stain was a semi-transparent penetrating stain, and it was. not. coming. OFF! I brushed, brushed, hosed, brushed, let it dry, reapplied stripper, brushed, brushed, hosed, and cried as it seemed impossible to strip the finish. I spent hours and hours just scrubbing and rinsing the top deck level. It was a great workout, sure, but not very effective.
So we brought out the big guns—a pressure washer.
Be careful using a pressure washer to aid the stripping of a wood deck, because it will easily damage the wood, causing splintering and gouging of the wood. I never would’ve been able to strip our deck without a pressure washer, though, and while there was some damage to the wood, I was able to smooth out most of that damage while sanding in the next step.
 Sanding the Wood Deck
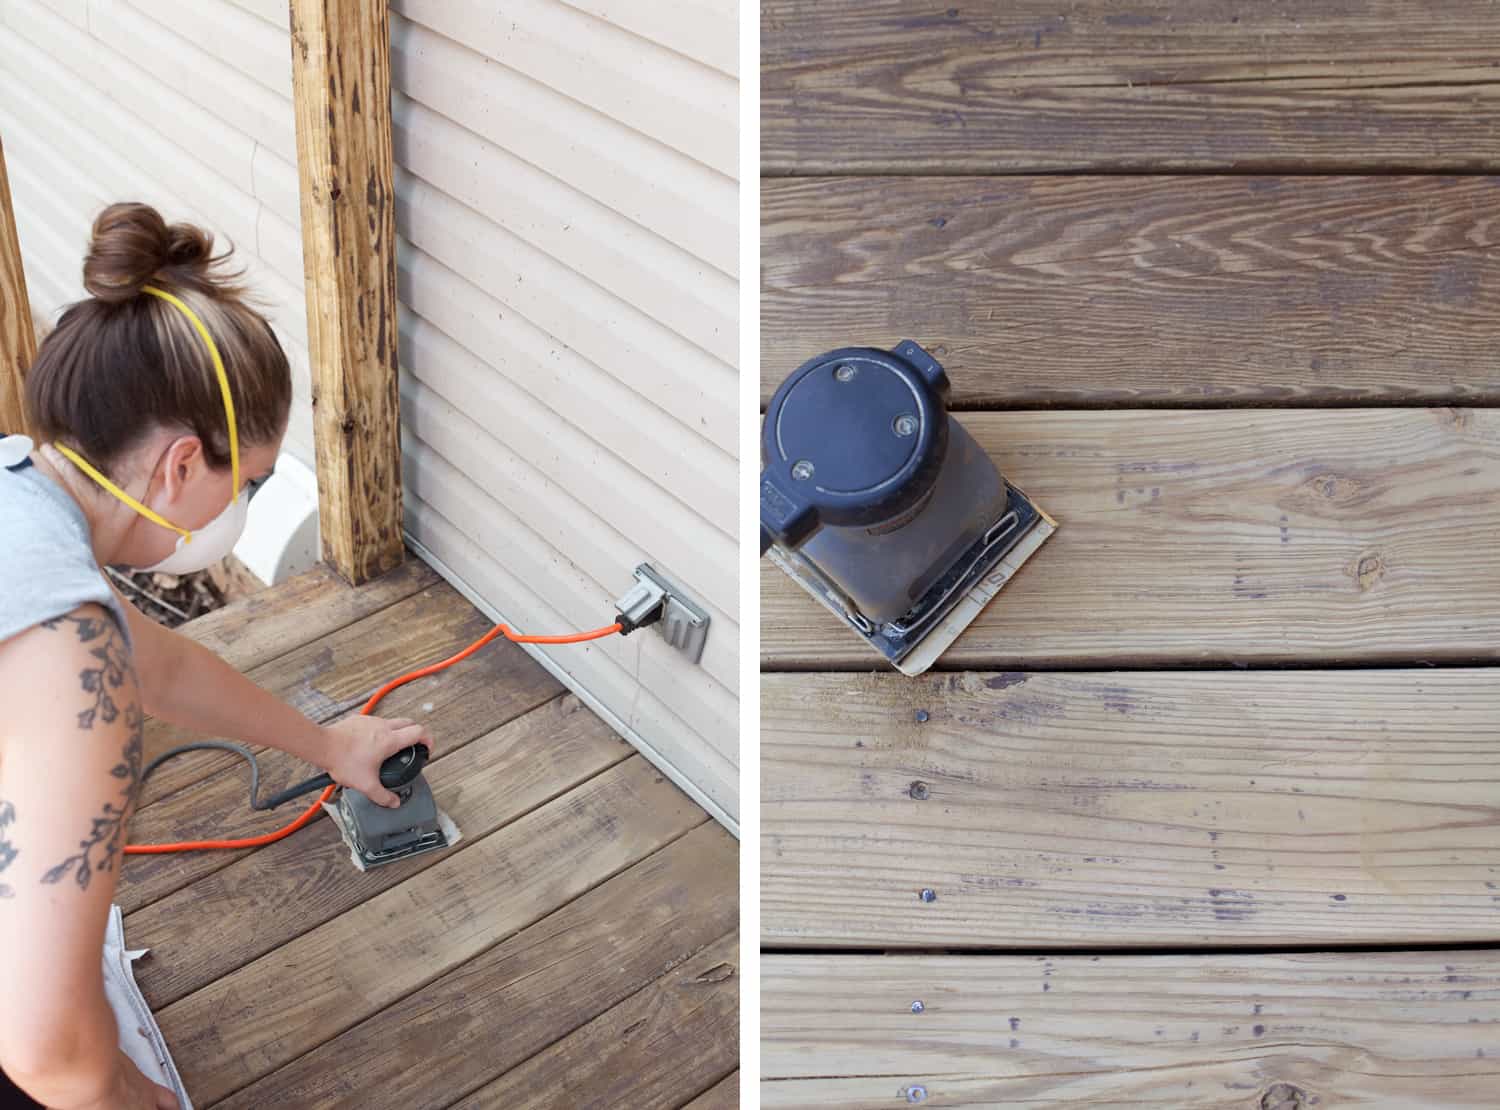
Step Three: Sand smooth the wood to prepare it for staining or painting. I used 80 grit, and wish I had used 60, because there was a lot of dark spots still to get off the wood. (I used what sandpaper I had on hand.) I used a palm sander to get the perimeter of the deck, while Phil pushed a drum sander to get the rest of it.
Originally, I didn’t think we would need a drum sander, but after an hour of palm sanding with little to show for it, Phil ran to The Home Depot to rent a drum sander. It was SO worth the cost of renting for a few hours and buying a couple of sanding belts! We ended up with a 5-gallon bucket full of sawdust from all of the sanding.
When using the drum sander, Phil tried two techniques—walking along the length of the boards, and walking across the boards. When walking along the length, the sander is unable to get into the uneven spots of certain boards, but going across the boards helps out with this.
In addition to the palm sander and drum sander, I used a belt sander to sand down the wood posts. The belt sander was too difficult to manage on the actual deck, as it created grooves in the wood along the edge of the belt sander. I was hoping I could control the belt sander a bit better, because it’s so powerful! But in the end, we just decided enough was enough, and we would never be able to get the deck perfectly sanded, with zero trace of the previous finish remaining. You can see in the above right image that there are still some dark spots on the wood, but I’d much rather have some dark spots than spend an entire week of my life sanding the deck!
Safety
Don’t neglect your personal health and safety! When using a palm sander or belt sander without any kind of vacuum dust collection system, you must wear a respirator or breathing mask! Treated lumber makes this especially essential, as it is full of chemicals, even arsenic, which will find their way into your lungs without protection. Wearing goggles is also beneficial, which I did during the messiest parts, like belt sanding the fence posts.

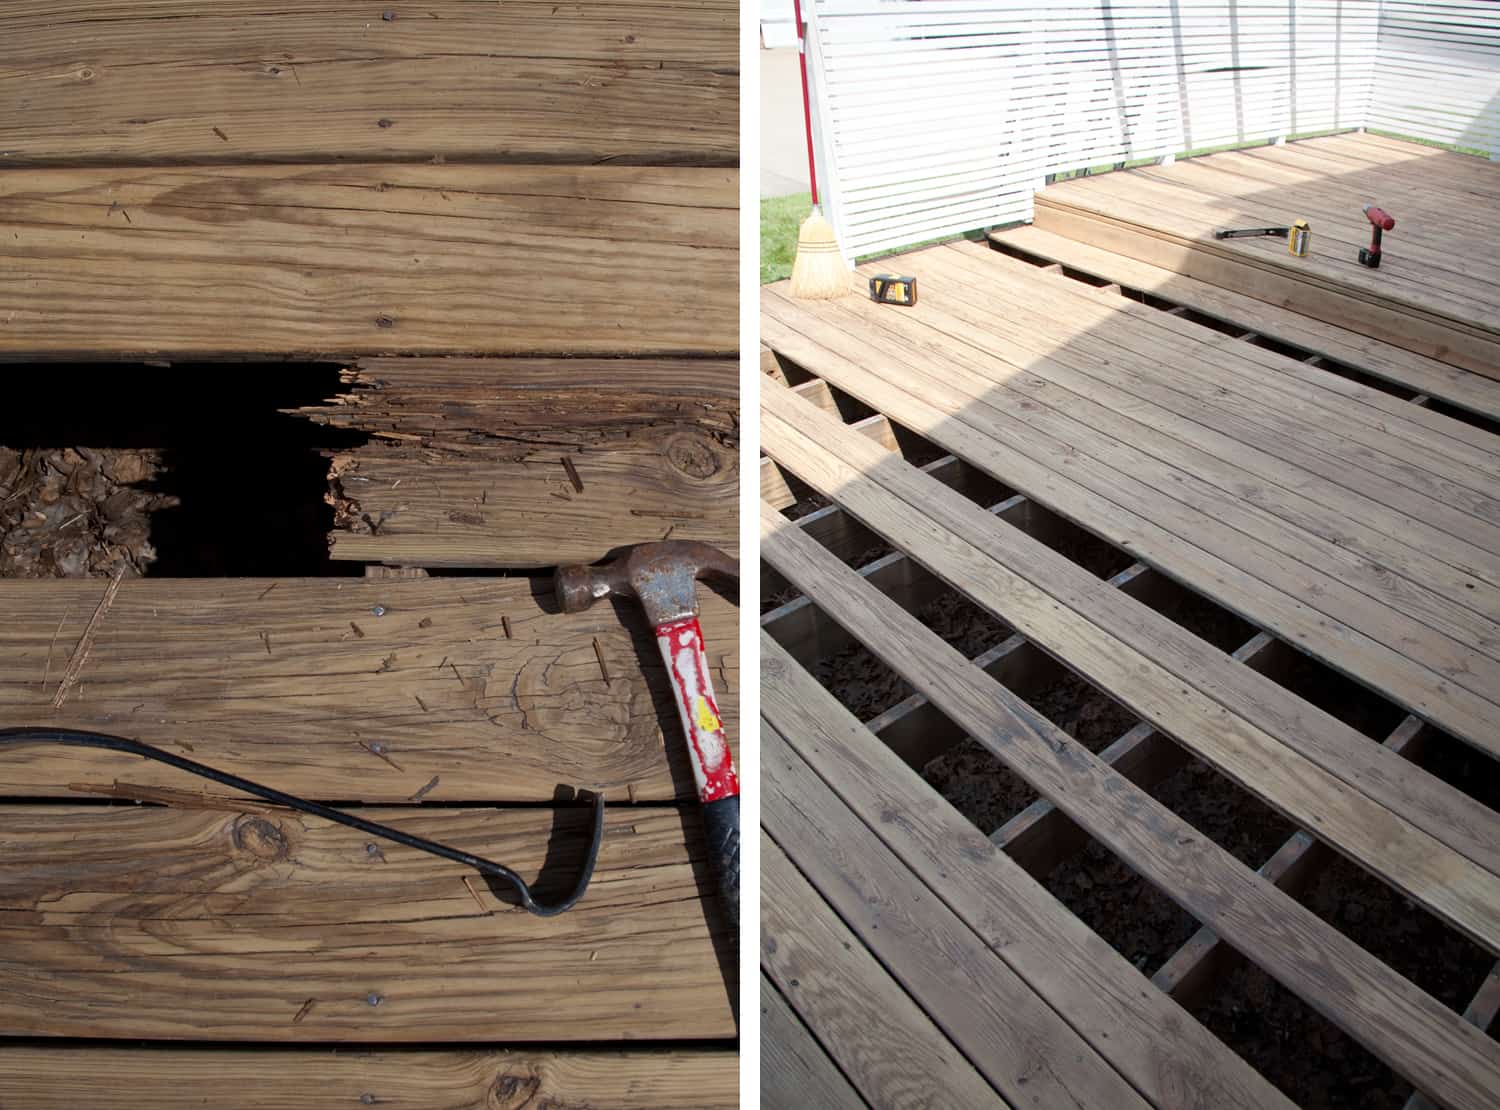
 Step Four: Replace any badly damaged deck boards. Quite a few of our deck boards were very splintery and chewed up, but we decided to select the four worst boards to replace. It just wasn’t in my budget to do any more than that.
Together, Phil and I used crowbars and hammers to pull out four of the boards, replacing them with new treated deck boards that looked alarmingly new and bright against the old boards. Oh well! They needed replaced, and the lumber will darken over time to become more like the older boards.
To attach the new boards to the support beams below them, we used specially coated screws designed to be used for treated lumber. If you use standard screws, the chemicals in the treated lumber will cause them to disintegrate over time.
 Step Five: Wash your deck a couple of hours before you’re ready to stain. A quick wash won’t waterlog your boards, so you don’t need to worry about wetting it before staining. Just don’t go crazy and use a ton of water.
To wash my deck, I used dish detergent in a large bucket of hot water, and quickly mopped the deck. Then I rinsed thoroughly and towel-dried to speed the drying process.
 Applying New Stain
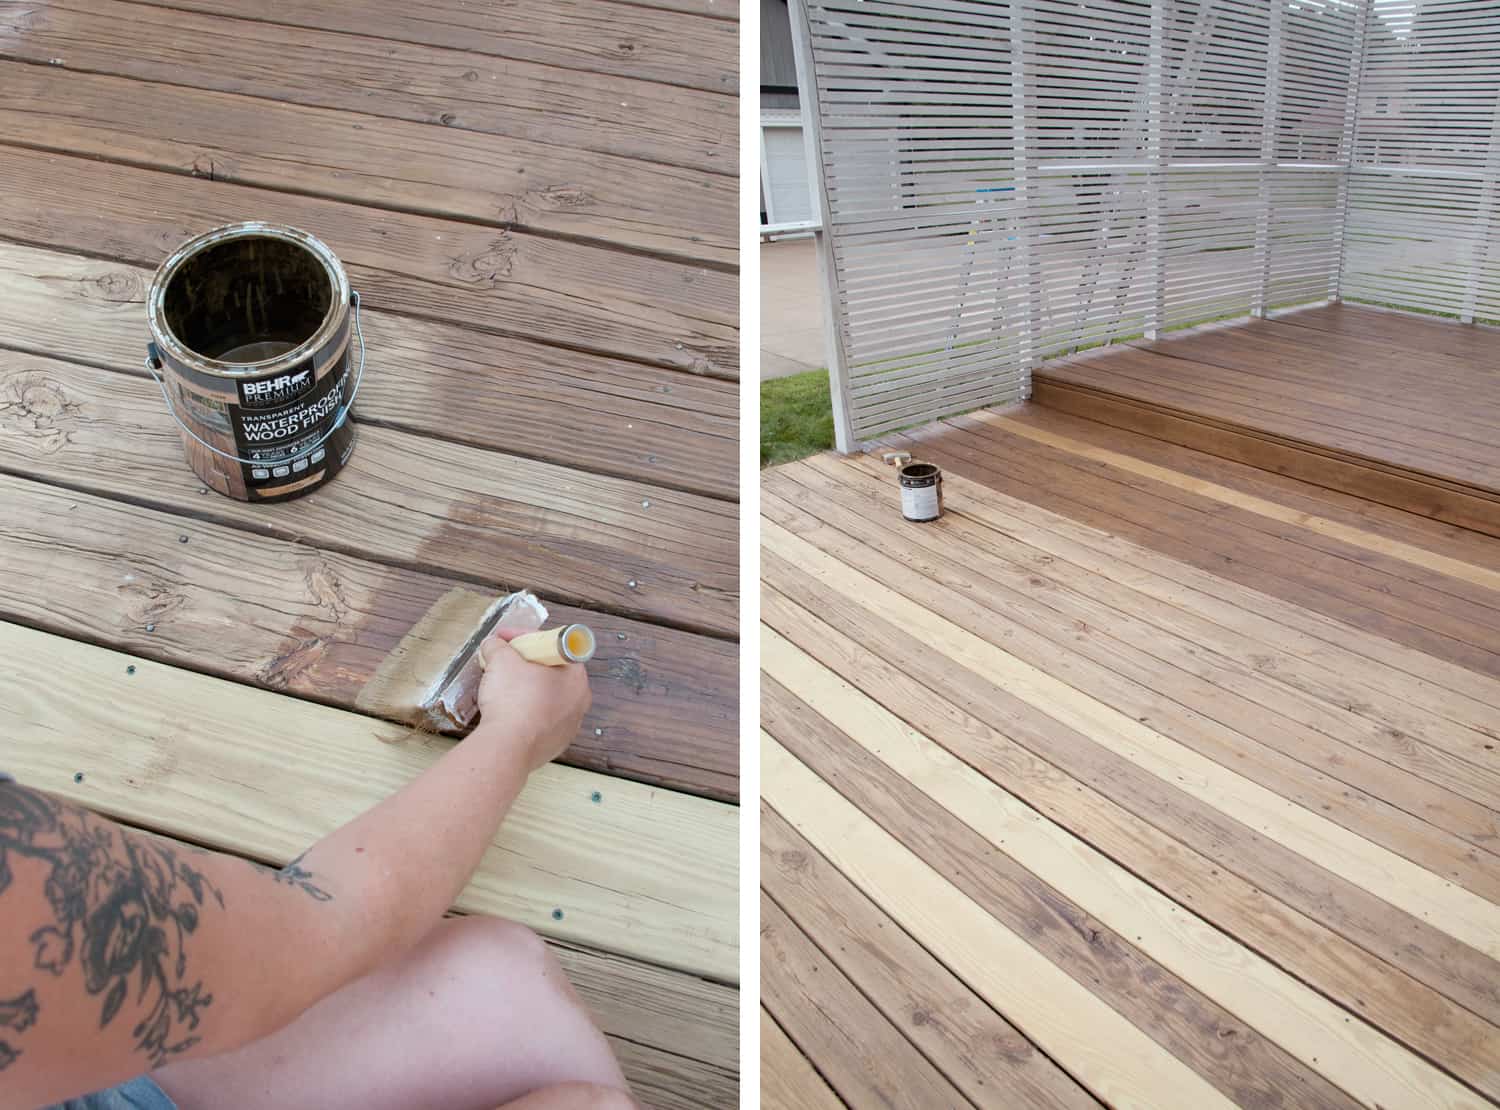
Step Six: Apply new wood stain. I used a large brush and hand brushed the deck to apply the stain. You’ll want to make sure that you aren’t putting it on too heavy, or it may not properly soak into the wood. Nobody wants a literally tacky deck!
Before planning to stain your deck, make sure that it has had a chance to completely dry out at least 24 hours since the last time it rained. In addition, be sure that no rain is in the forecast for 24 hours after staining it. Particularly if you are using oil-based stain, the wood will reject the oil and cause blotchiness in the stain’s finish. You also run the risk of trapping water inside the wood, which will cause splitting and buckling over time.
I used a water-based acrylic deck stain (Behr’s Waterproofing transparent deck stain in Antique Oak), and it was still tacky even two days after applying it. I was pretty nervous about that, but the can says to wait 72 hours for a full cure, so I gave it time. The weather I was dealing with was extremely high humidity with sprinkling rain off and on, so I think that affected the timeline for the stain setting up. Still, I wondered if I had made a mistake by not using an oil-based stain.
Although it’s technically permissible to put on the second (and last) coat of stain after two hours of the first coat, I waited because of the weather, and because of my concern about the tackiness of the first coat. Turns out, everything has cured nicely after finishing up the second coat during a sunny, rain-free week. Woo hoo!
 Timeline
All in all, stripping the deck took an entire weekend, with Phil and I working almost nonstop from about 10 a.m. to 9 p.m. We worked all day Saturday stripping the deck, and finished power washing when we lost all traces of daylight. On Sunday, we sent out SOS texts to our loved ones, and ended up with some extra hands to wield power sanders! We had four people sanding—Phil with the drum sander, me with a power sander or belt sander, and Phil’s dad or our friend Jared with the other two available sanders. My mother-in-law was also there to sand as I worked on prep for the next part of the job (fencing), and also to power wash the mildew on our siding.
So thankful for all of the help, and honestly, I’m not sure if we would’ve finished stripping everything in one weekend if not for them. Keep in mind that we were also stripping fence posts as well as the actual flooring of the deck, so there was more labor involved.
Staining the deck was pretty quick. I think the first coat took me a couple of hours to brush on. Walking around the fence to cut in on the other side was a bit of a time-suck. Phil helped me with the second coat, and it probably only took about 30-45 minutes to apply. We did this on two separate days because of the weather situation we were working around.
 Budget
It’s difficult to advise what to expect as far as budget goes, because every deck is different. What’s the condition of the wood? How was it finished before? How large is your deck? Will you need to replace boards?
I will try to lay it all out so you can get an idea of the materials I used for our deck refinishing. Some things I had on hand, like power sanders, pressure washer (thanks, Dad!), a paint roller with long handle, paint tray, that kind of thing. So I omitted them from the list. Also, I had purchased a deck cleaner/conditioner, but decided after stripping so much of the wood during sanding, I didn’t need to use it.
- 6 gallons of deck stripper (I had budgeted for two—oops!)
- One roll of adhesive-backed sandpaper for a palm sander (sandpaper cost can add up!)
- Renting a drum sander + buying sanding belts for it
- 2 long-handled stiff bristle brushes
- 2 gallons of deck stain
- 4 14′ treated lumber boards
- 1 box Deckmate screws
 In the end, Phil and I decided it would have been soooo much easier to just replace the deck boards than try to polish up the old and worn boards that were there. But, sometimes you just have to work with your budget and make do! Refinishing the deck wasn’t the cheapest project, but it was still significantly less expensive than replacing all of the deck boards. I will say, we do still have some damaged boards we probably should have replaced, but an outdoor area rug is super helpful with hiding that!
The deck obviously looks so much better than the old, worn finish that was on the deck when we bought the house. Worth all the work? Definitely! Can’t wait to share more of our deck project with you all! – Mandi
35 Comments
This transformation is just amazing! I would sit out there every night until it gets too cold this winter. It’s so beautiful and cozy!
Thanks, Emma! We’ve been trying to do that as much as possible! It was so ironic that the day after we finished up, it rained for like a week straight. But I was thankful that the weather was so nice when I needed to do the work!
I love the outcome of the deck! It’s beautiful! 🙂
Charmaine Ng | Architecture & Lifestyle Blog
http://charmainenyw.com
I love how this turned out. So simple and modern.
http://www.thekaytimes.com
It looks so good. Nice work.
This is very, very impressive, Mandi!
This is perfect timing! We just bought a house that definitely needs some TLC on the deck! Saving this for when we tackle that project next year!
Paige
http://thehappyflammiy.com
This is so very timely for me. We’re knee deep in planning for our deck upgrade that starts on Monday! Eeek. Picking a deck stain has caused a lot of stress in our household. lol. Like you, Antique Oak is on my short list. I love seeing how great it looks on your deck in these photos. I know you are planning to share more soon but I’m hoping you might be able to tell me what size boards you used for your privacy wall. We’re planning something very similar and I’m wondering just how thin to go. Great transformation!
Best of luck to you! It may feel like the worst when you’re in the thick of it, but keep your eye on the prize! We did publish a blog post all about the fence, so take a look! There’s a lot I had to say about the material we used for fencing. So brace yourself! 😉 Check it out here: http://abeautifulmess.com/2018/07/how-to-build-an-inexpensive-slat-wood-privacy-fence.html
Beautiful! I need to do mine….. gearing up to do it. 😮
Thanks for being so thorough with the entire process and stressing safety measures. I am loving all the improvements you have made to your new home!
This turned out absolutely stunning! Serious deck goals lol.
What a transformation! A new look! Amazing! Thank you for the tips!
Absolutely STUNNING transformation. It looks like a lot of blood, sweat, and tears but boy did it pay off! Now you get to sit back and enjoy the patio. Well deserved!
Eva | http://www.shessobright.com
I used to be a housepainter in my early 20s and had to power wash and sand many a deck to get it primed for another coat of stain. I feel your pain!
The deck looks great though and I bet it feels so worth it now! I love the fence along the deck for the added privacy. Now thinking about how I could get my husband on board with that idea when we redo our deck so I can sunbathe in privacy 🙂
Ah! Mad respect for you. It kills me knowing that I’m going to have to do this again eventually. I can’t imagine doing it frequently!
Great job as always, it looks wonderful! How will you keep that beautiful furniture clean and how will it hold up outside in the weather? My furniture, while not nearly that nice, is on a covered porch and it still gets filthy sitting out there. Hard to keep up with cleaning.
It’s outdoor furniture made from a synthetic wicker, not actual wicker. So we can give it a thorough cleaning without worrying about damaging it. Also, cushion covers are removable and washable. However, I do plan on buying covers for everything once Fall comes around!
Hey!! Love this makeover so much! Could you share where you found your fire pit? I’m looking for one similar to yours 😉
Thanks!!
Sure thing! http://bit.ly/2lA5hQ2
Wow, Mandi I am so impressed, in my other life (before cancer) I built our patio. So now that we have a deck and though I cannot physically do the work I know exactly what’s involved and how much is involved. You did a wonderful thorough job. Congrats to you and your husband
As someone who has recovered from cancer, I know how you feel! I truly appreciate my abilities and time much more than I did before cancer. You’ll be back in the saddle soon enough, but you’re right— now is not the time for all this manual labor! xo
It looks great! We replaced ours and it definitely adds up quickly. Our issue is when our Bernese Mountain dog was a puppy she chewed the wood slats to the iron spindles we added. So we need to replace the wood railings with iron. Ugh! But, she is sooooo cute! laura
Wow! This is knock your socks off incredible. The entire space looks so different!
Mandi! So amazing!
I’ve said it many times before and I’ll say it again: your posts are so inspiring!
Mandy, I really really seek your counsel as I am trying to refurbish my deck. I have specific questions. Could you pretty please contact me at the e mail indicated. I would be MOST GRATEFUL. Sincerely, Judy
If you have specific questions, I’d be happy to answer them here so everyone can benefit! xo
Hello Mandy:
Thank you for your good counsel about how you refurbished your deck. Your deck looks absolutely beautiful, and is truly inspiring.
I too am in the process of refurbishing my deck and I seek additional information.
Are there specific videos, books or other sources of consultation available about stripping old paint? This is the first step but this is where I am stuck.
I applied the paint stripper on my deck and there was no result. It is as if nothing happened. Do I need to use muscle to “mash” the stripper into the deck in order to get the chemical reaction to remove the old paint? Do I need to get on my hands and knees to scrub the stripper into the deck?
I am really hoping you can provide some light consultation and point me in the right direction. I am willing to do what needs to be done but I keep getting bum steers from
• YouTube videos
• Internet articles
• The people at Lowes and Home Depot
• Various relatives
The way I understand it, I need to
1. Strip the paint that is on the deck – But why can’t the sanding remove the paint? Why is stripping necessary.
2. Power wash – why can’t the sanding remove the dirt and debris? What is the point of this step?
3. Sand – I understand what you are saying about a specific grit and a specific type of sander. No problem. I know where to rent the sander and power washer.
4. Apply stain – If I can get to this point I will be a happy camper.
I am doing this alone with no help. As I said your deck looks remarkable. I do not want to bug you but I would be most grateful for your light counsel
Thank you. Judy Allen
Hi Mandi: 8/26/18 I do not think you will be able to get back to me, so I take this moment to thank you for a great article and to wish you continued success and good health. Thank you for your contribution. I will continue my journey to find info to refinish my deck using your blog as one piece of the puzzle. God bless you. Judy Allen
Hi Mandi! Love this project, great job! Sounds like it was a true labor of love. Where did you find your pendant lights? Been on the hunt for the perfect ones and love these!
Hi Kelly! They’re a DIY 🙂 http://abeautifulmess.com/2018/08/indoor-pendant-light-for-outdoor-use.html
Great job as always, it looks wonderful! ????????????
https://www.parchetpeviata.ro/accesorii#
We always encourage testing first when cleaning a new surface for the first time. In a small, inconspicuous area apply a bit of cleaner, let sit about 5 minutes, rinse and let dry to see results.
Nice work! The deck looks great. We recently wrote a blog post about how to find the right day and temperature for staining your deck! Check it out here: https://deckmaster-us.com/the-right-temperature-for-deck-staining/
LOVE the deck refresh and TOTALLY agree that wood is the way to go! All the fake/alternatives will eventually look dated, but wood never goes out of style. o happy I in love with your house.