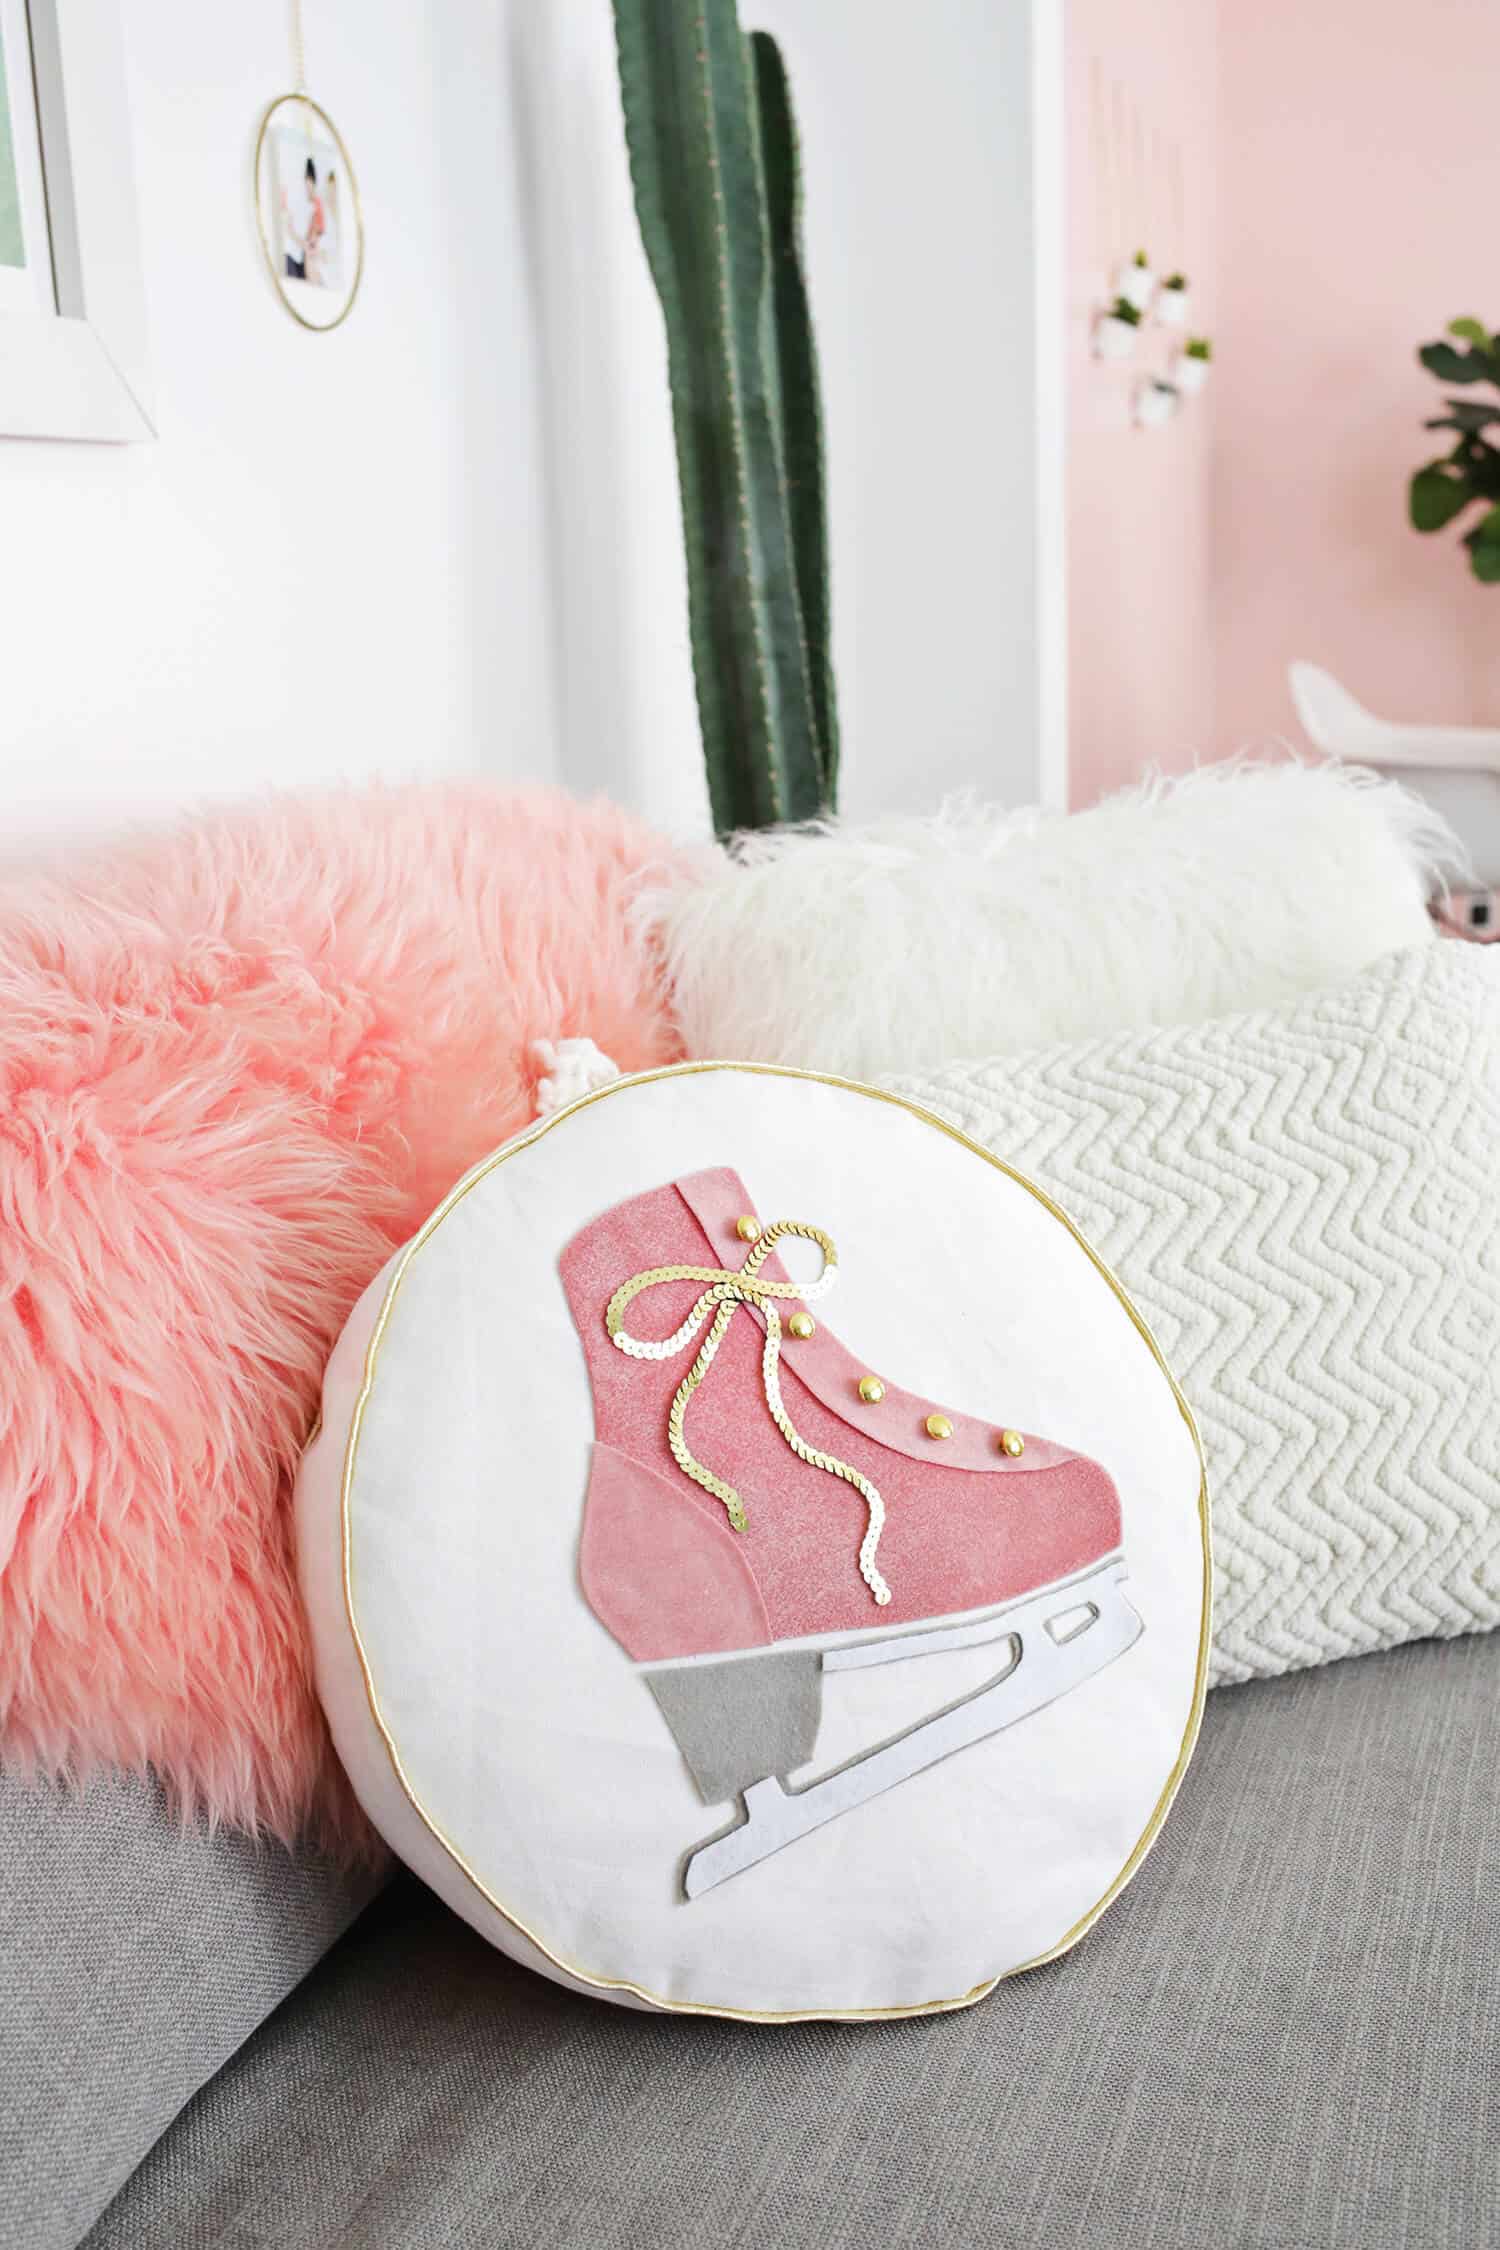
 Making seasonal decor is one of my favorite holiday things to do. I’ve also realized that if you make something a seasonal theme, it has a bit of a longer shelf life than a strictly holiday item, so I decided to make a winter ice skating pillow to keep out all winter long!
I love ice skating no matter what the season is, but there’s totally something magical about skating outside with Christmas lights twinkling about, so it feels very holiday-inspired too!
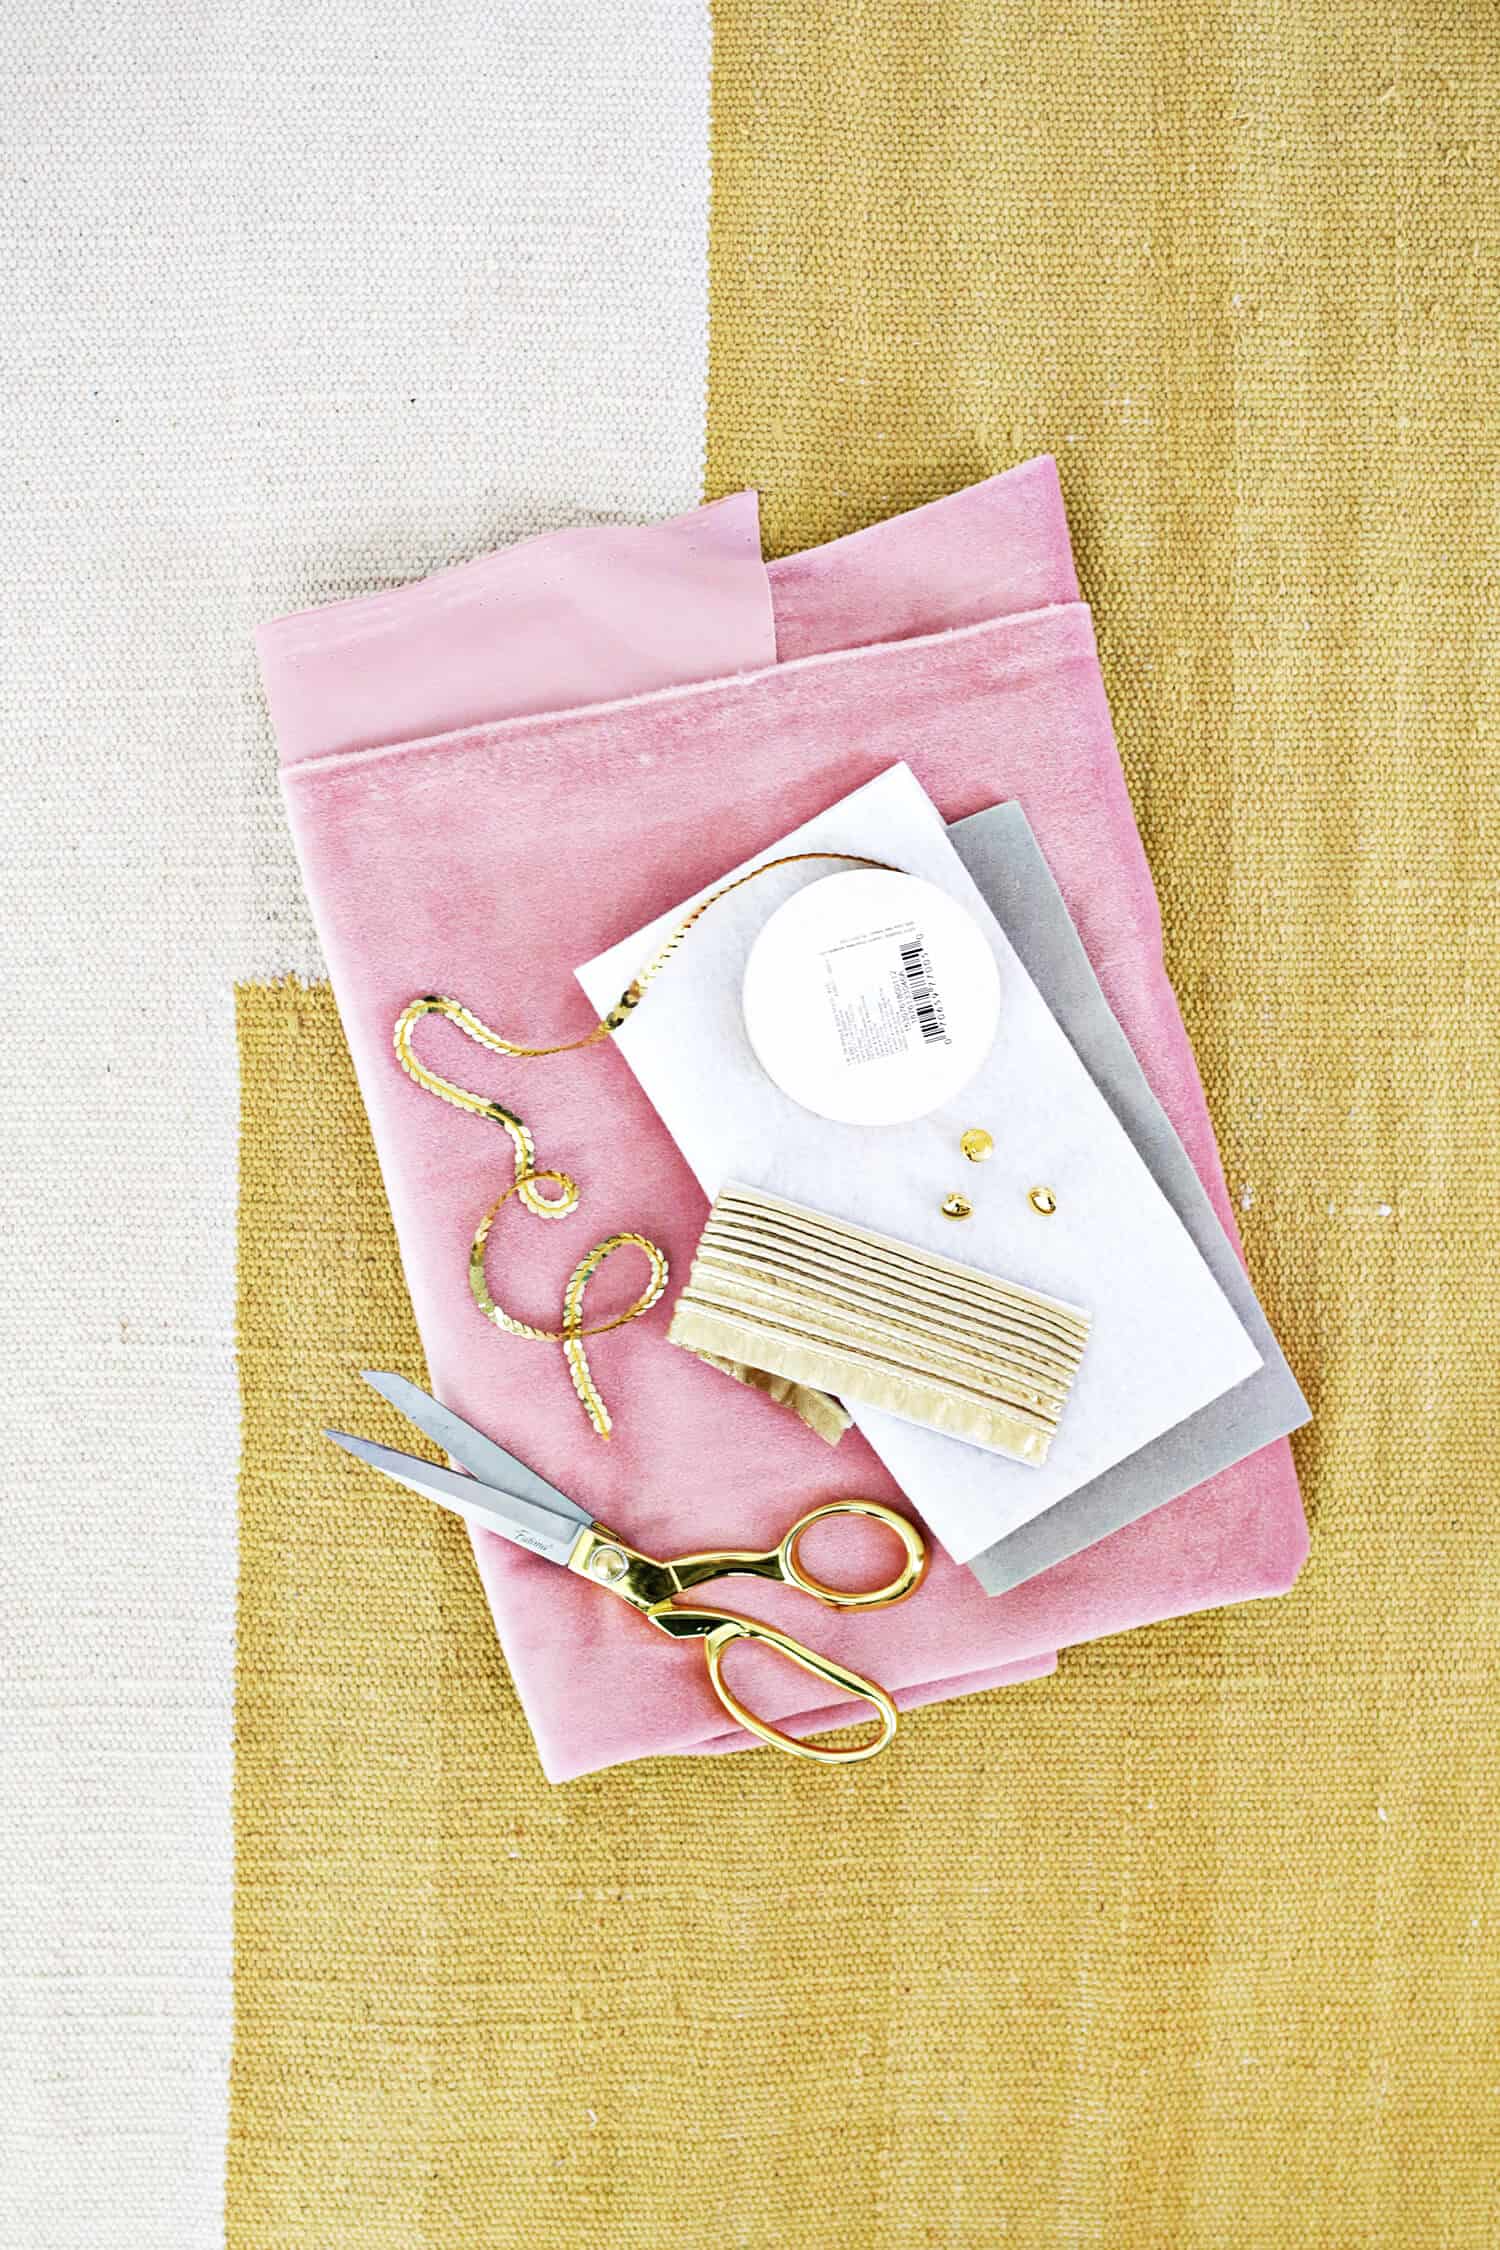 Supplies:
-small piece of pink velvet upholstery fabric (or whatever color you want, upholstery fabric tends to be thicker which is better for this DIY)
-small pieces of white and grey felt
-1/2 yard white fabric
-fabric scissors
-5 gold dome buttons
-sequin trim
-fabric glue
-pillow stuffing
–gold piping trim (you’ll want two pieces that are 50″ long)
–ice skate pillow template
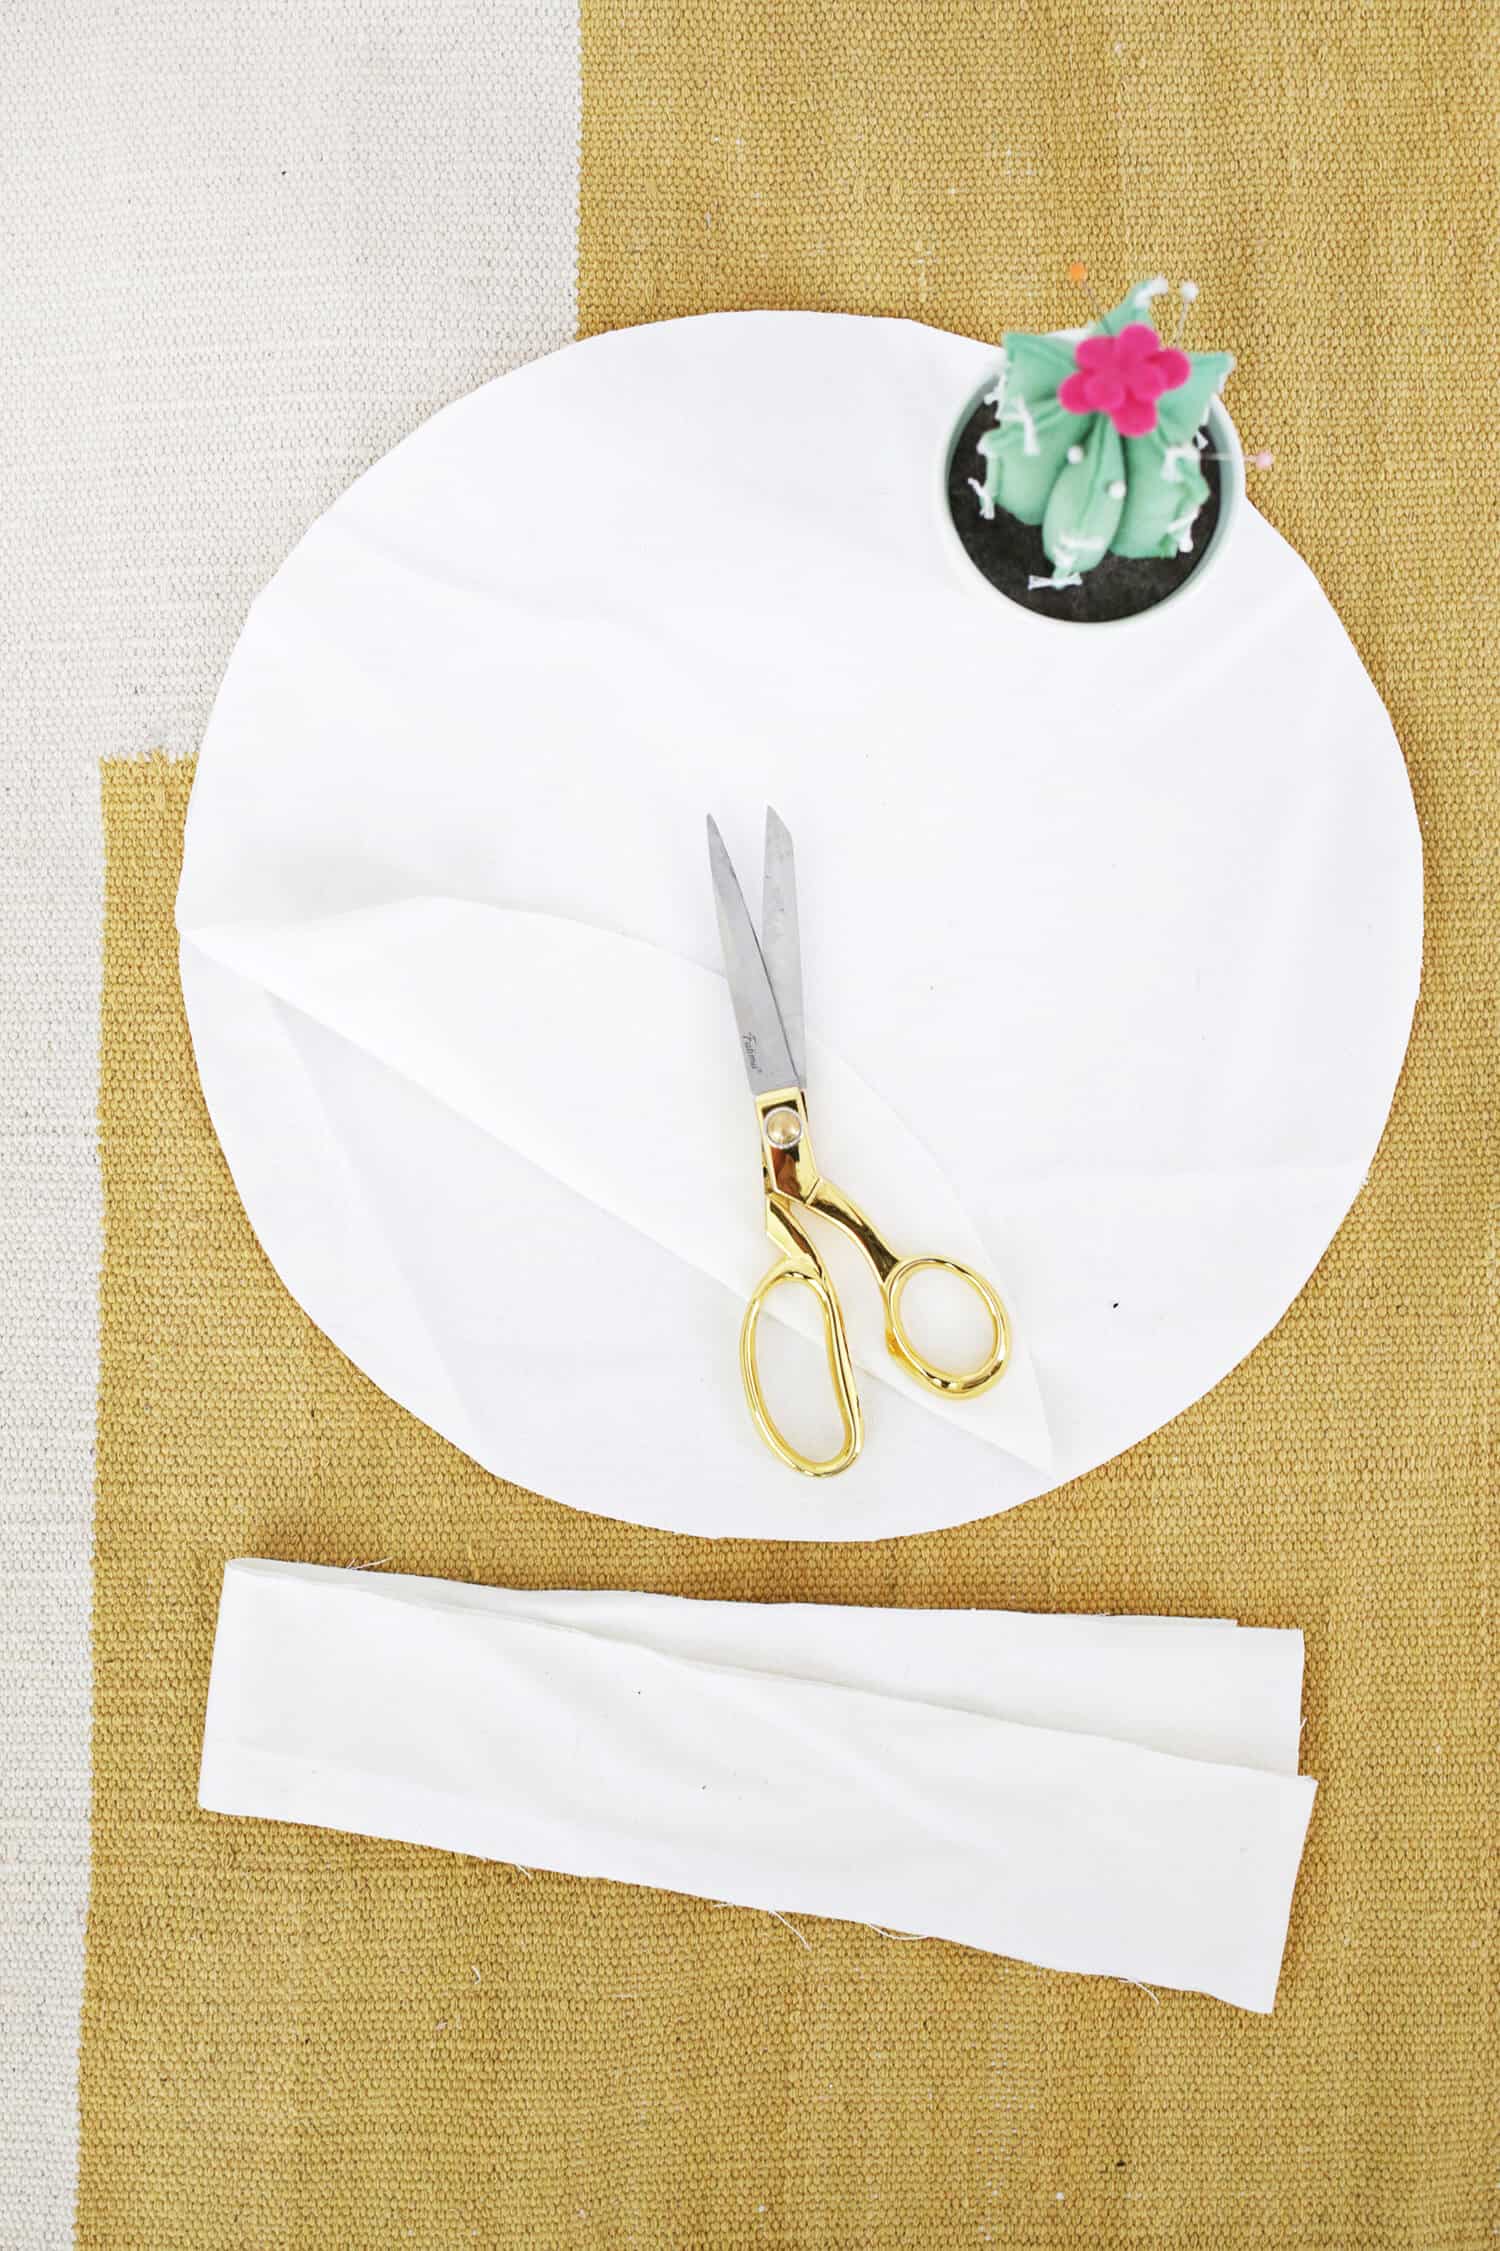 First, you’ll cut two 16″ circles from your white cotton cloth (this is a good way to cut a large circle if you don’t have something to trace). Cut a long strip of fabric that is 3″ wide and at least 54″ long.
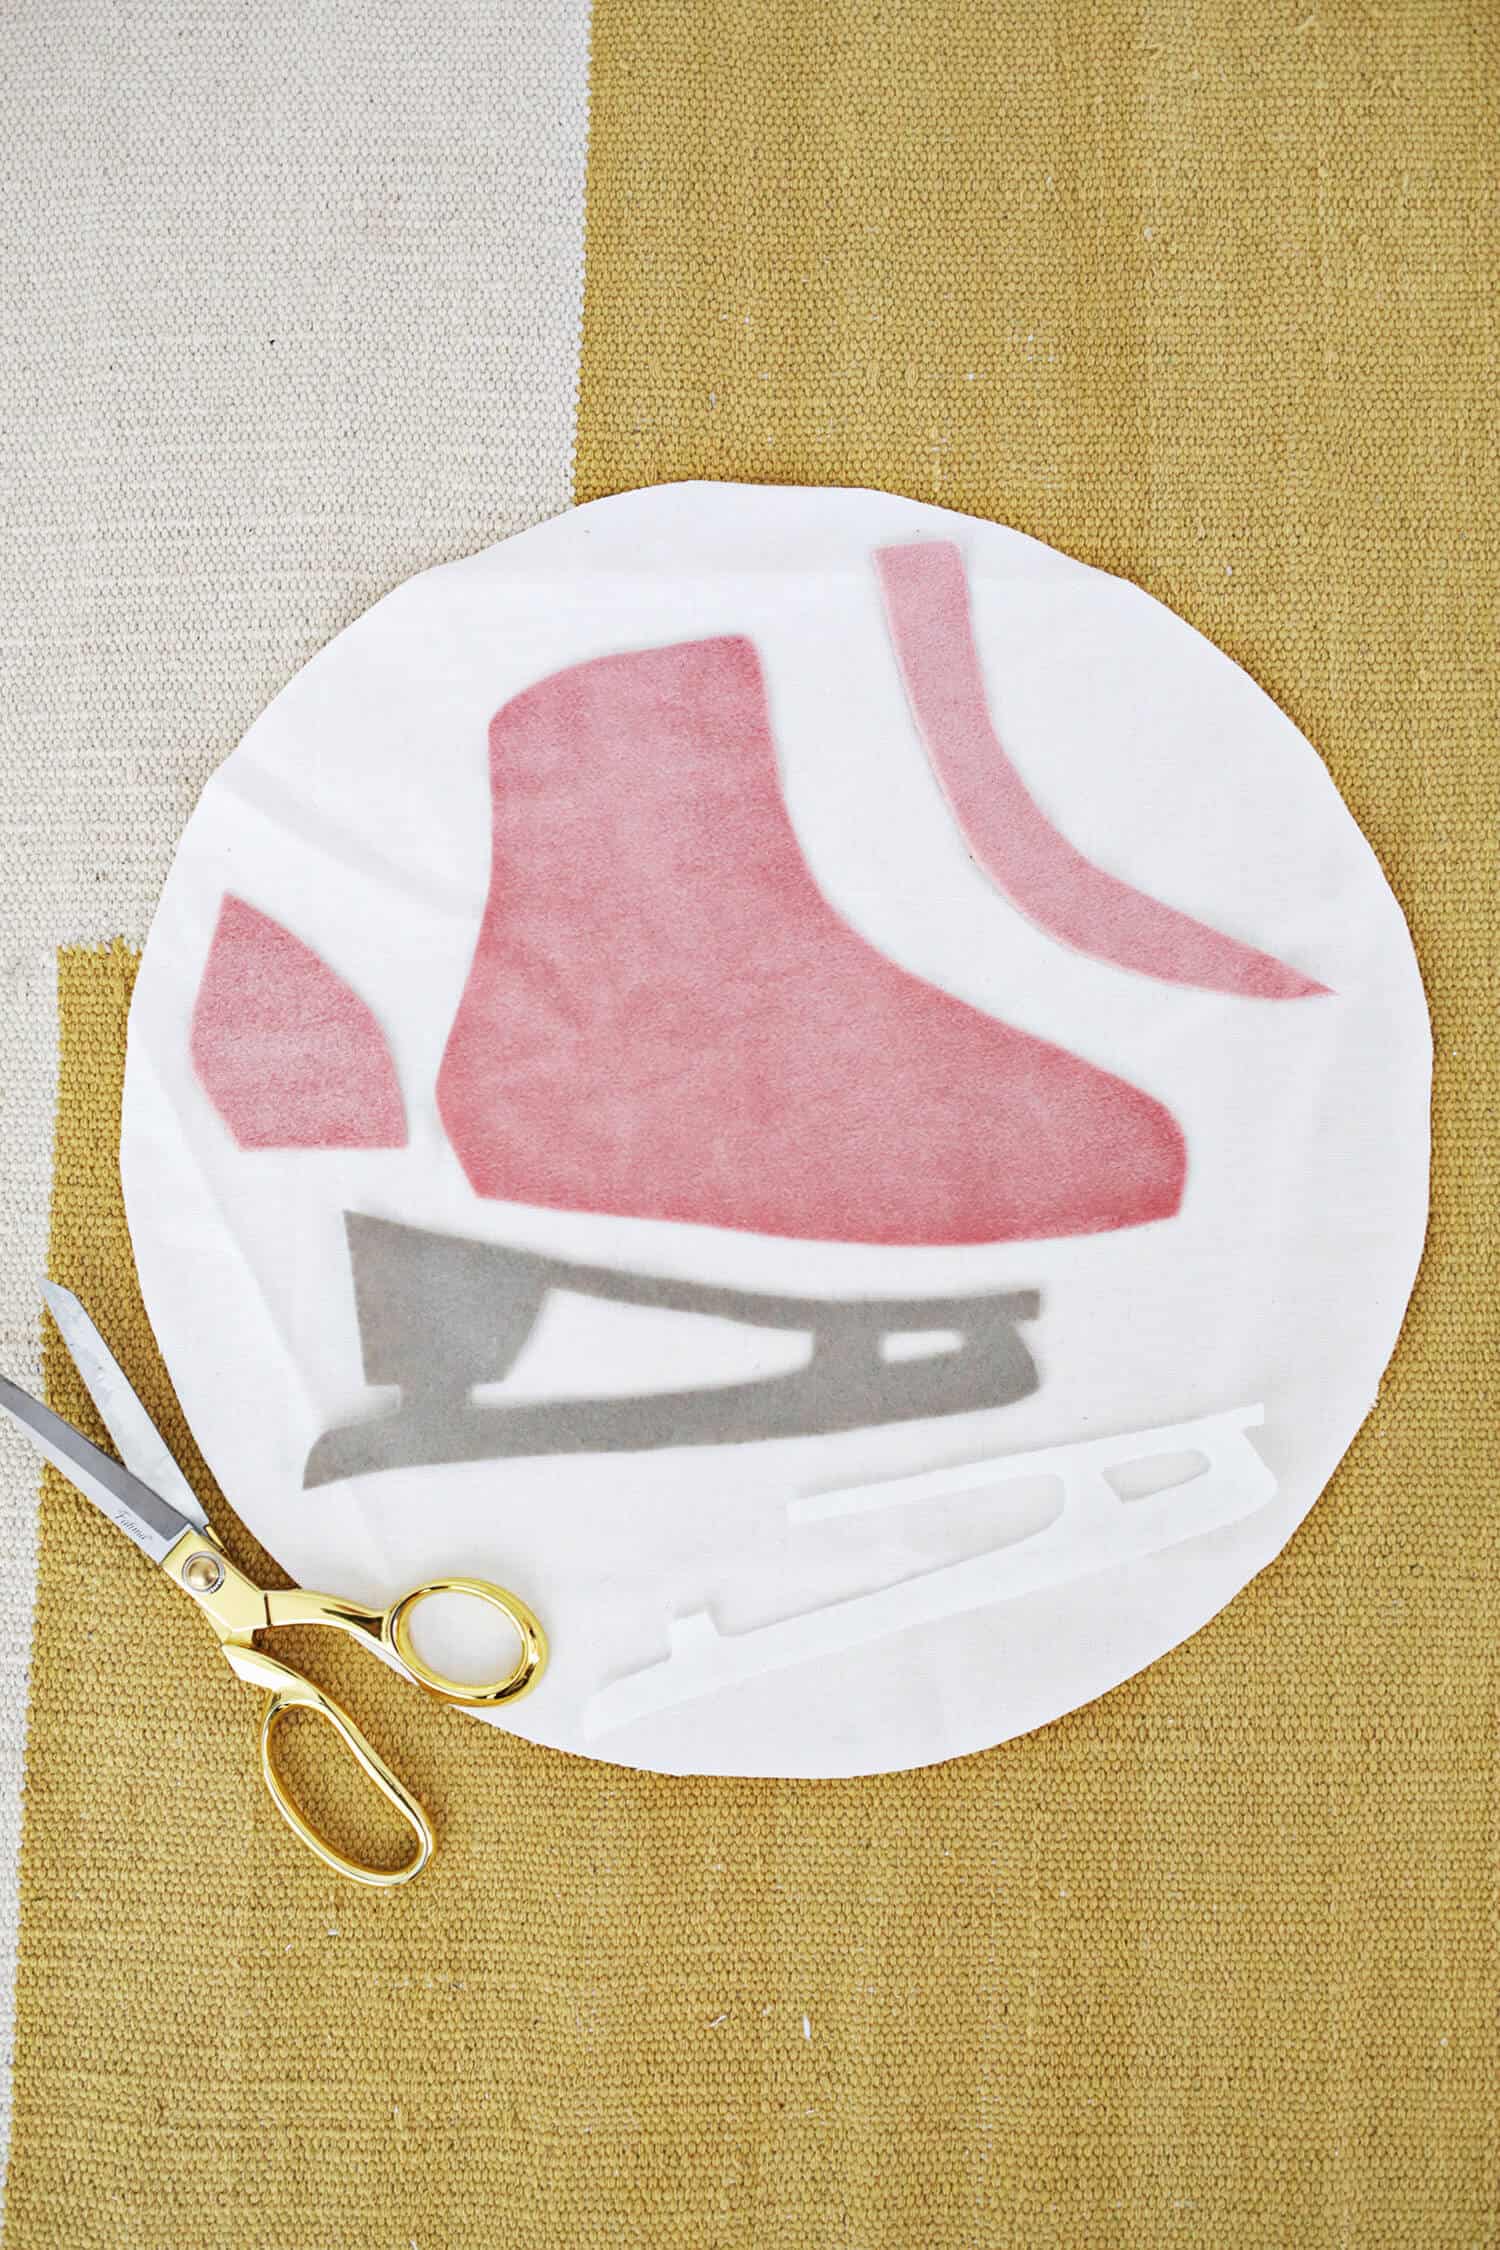 Use your ice skate template to cut your three boot pieces from the velvet fabric and your skate pieces from your grey and white felt.
If you want your two smaller accent velvet pieces to stand out more on the boot, cut those shapes on different grain direction than your boot and the sheen will be different and make them more distinct.  Use your fabric glue to glue all your pieces in place centered on one of your cotton circles (leave a little sliver between the bottom edge of the boot and your skate).
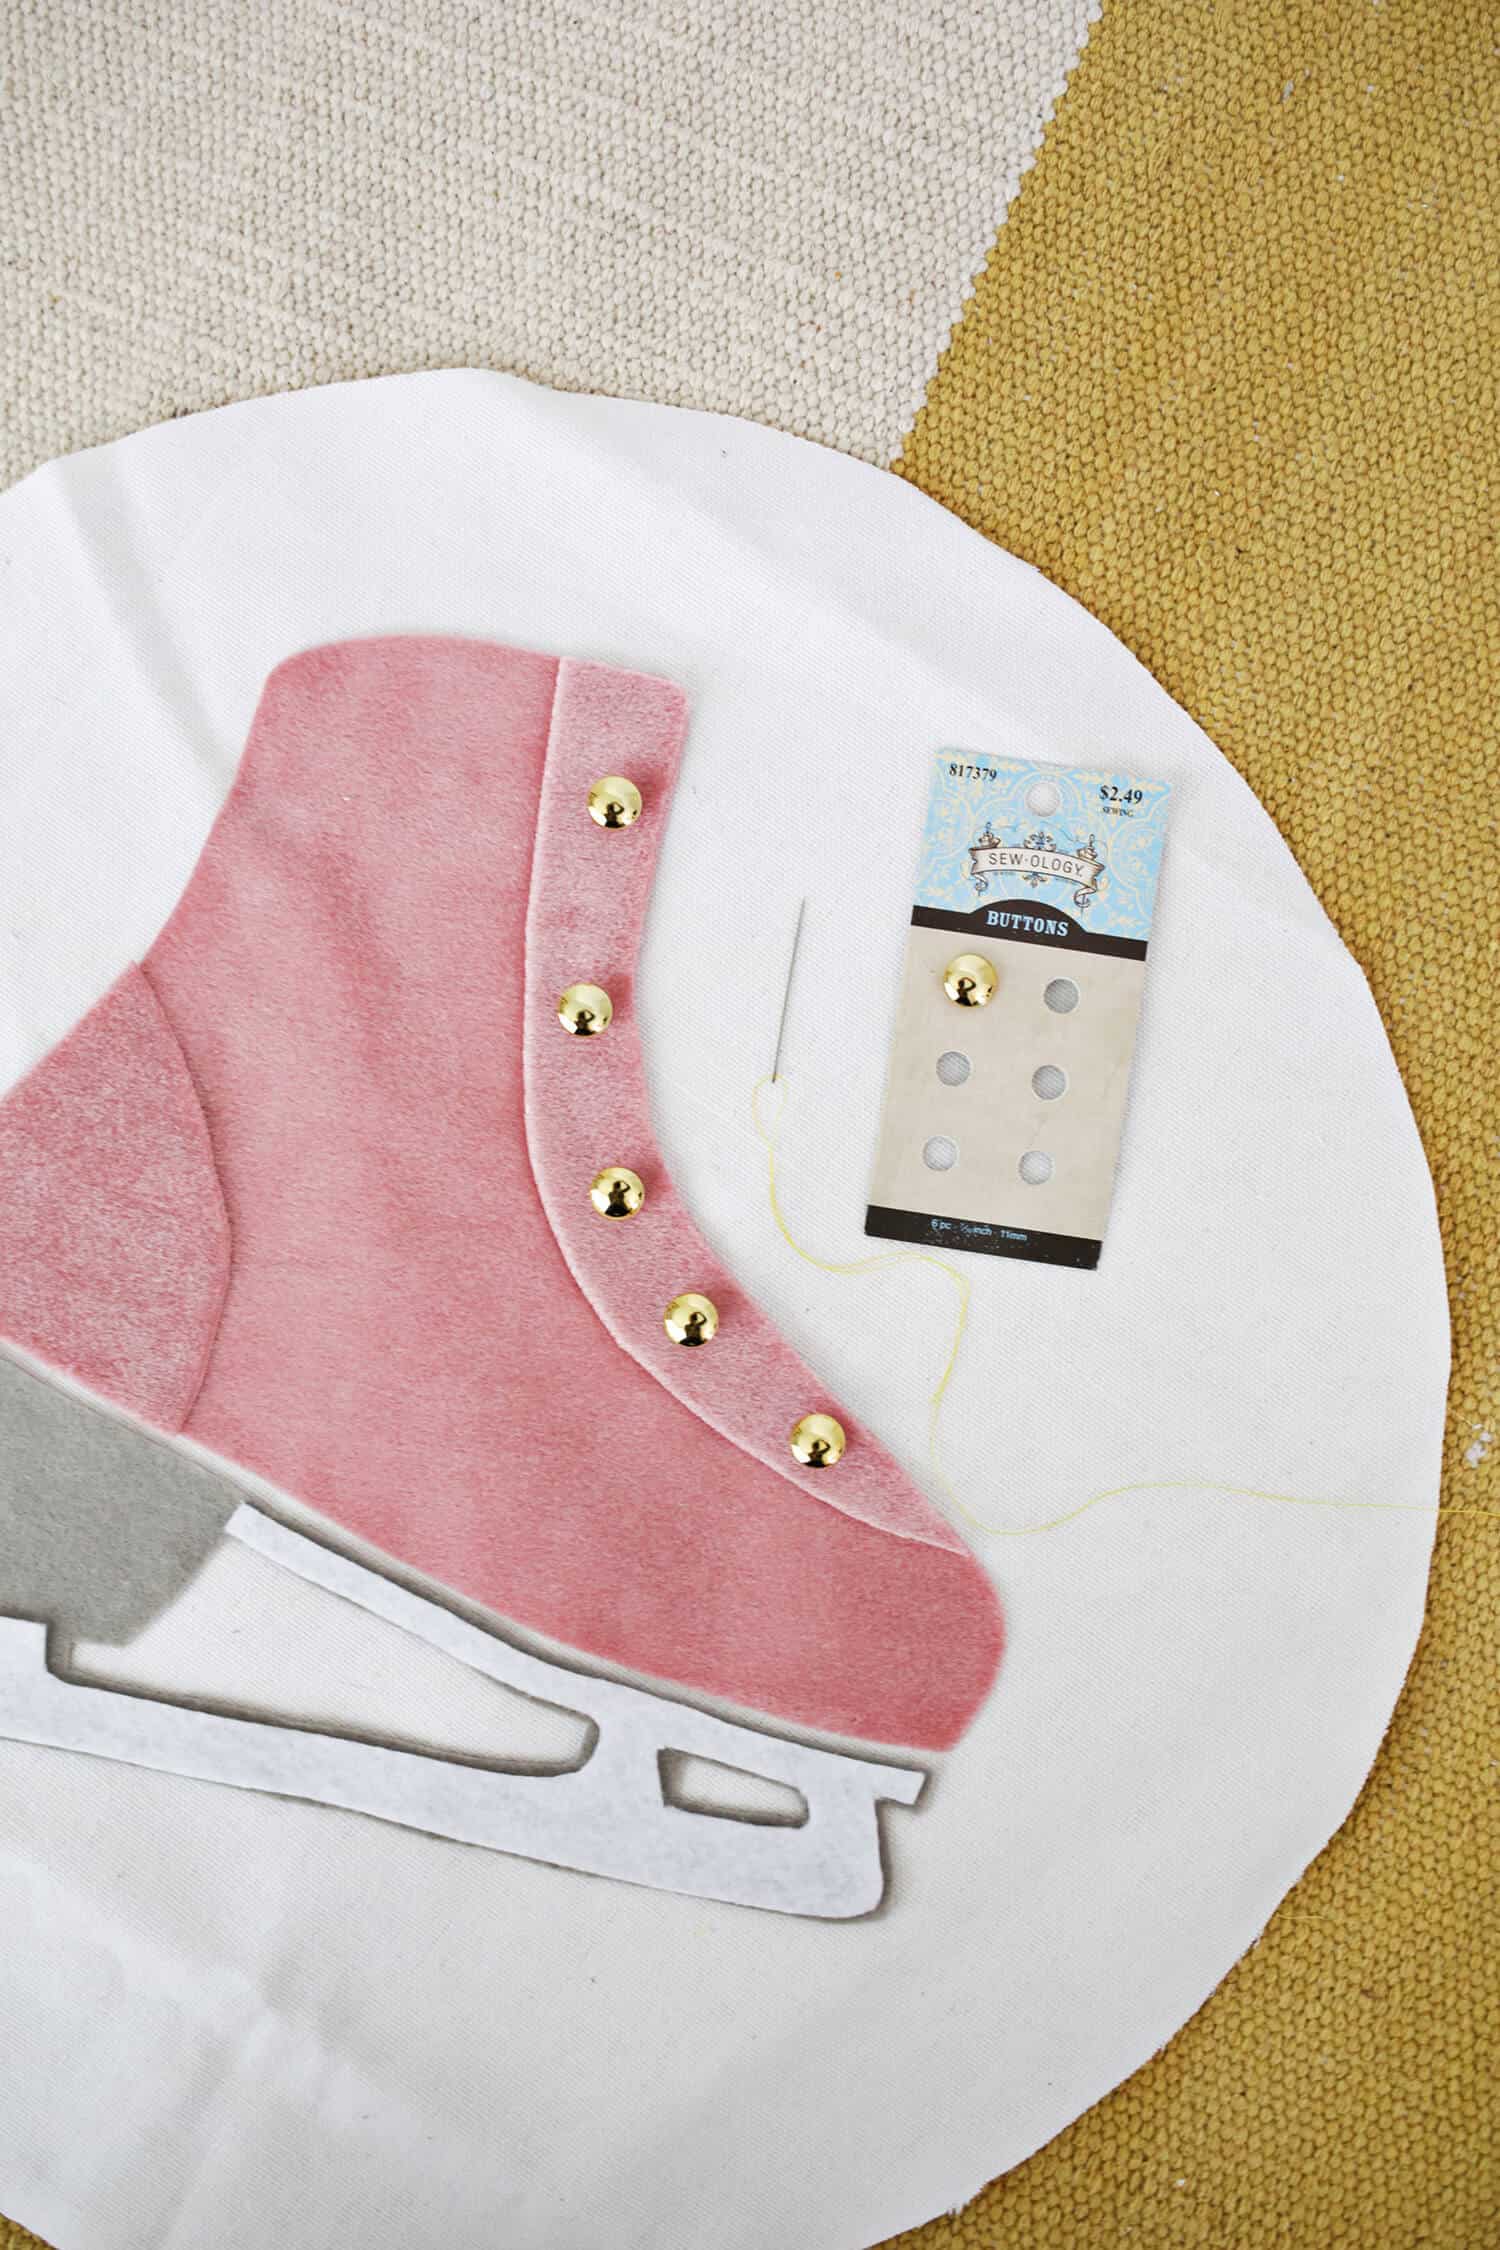 Use a needle and thread to sew your 5 buttons evenly spaced on the lace up area of your boot.
 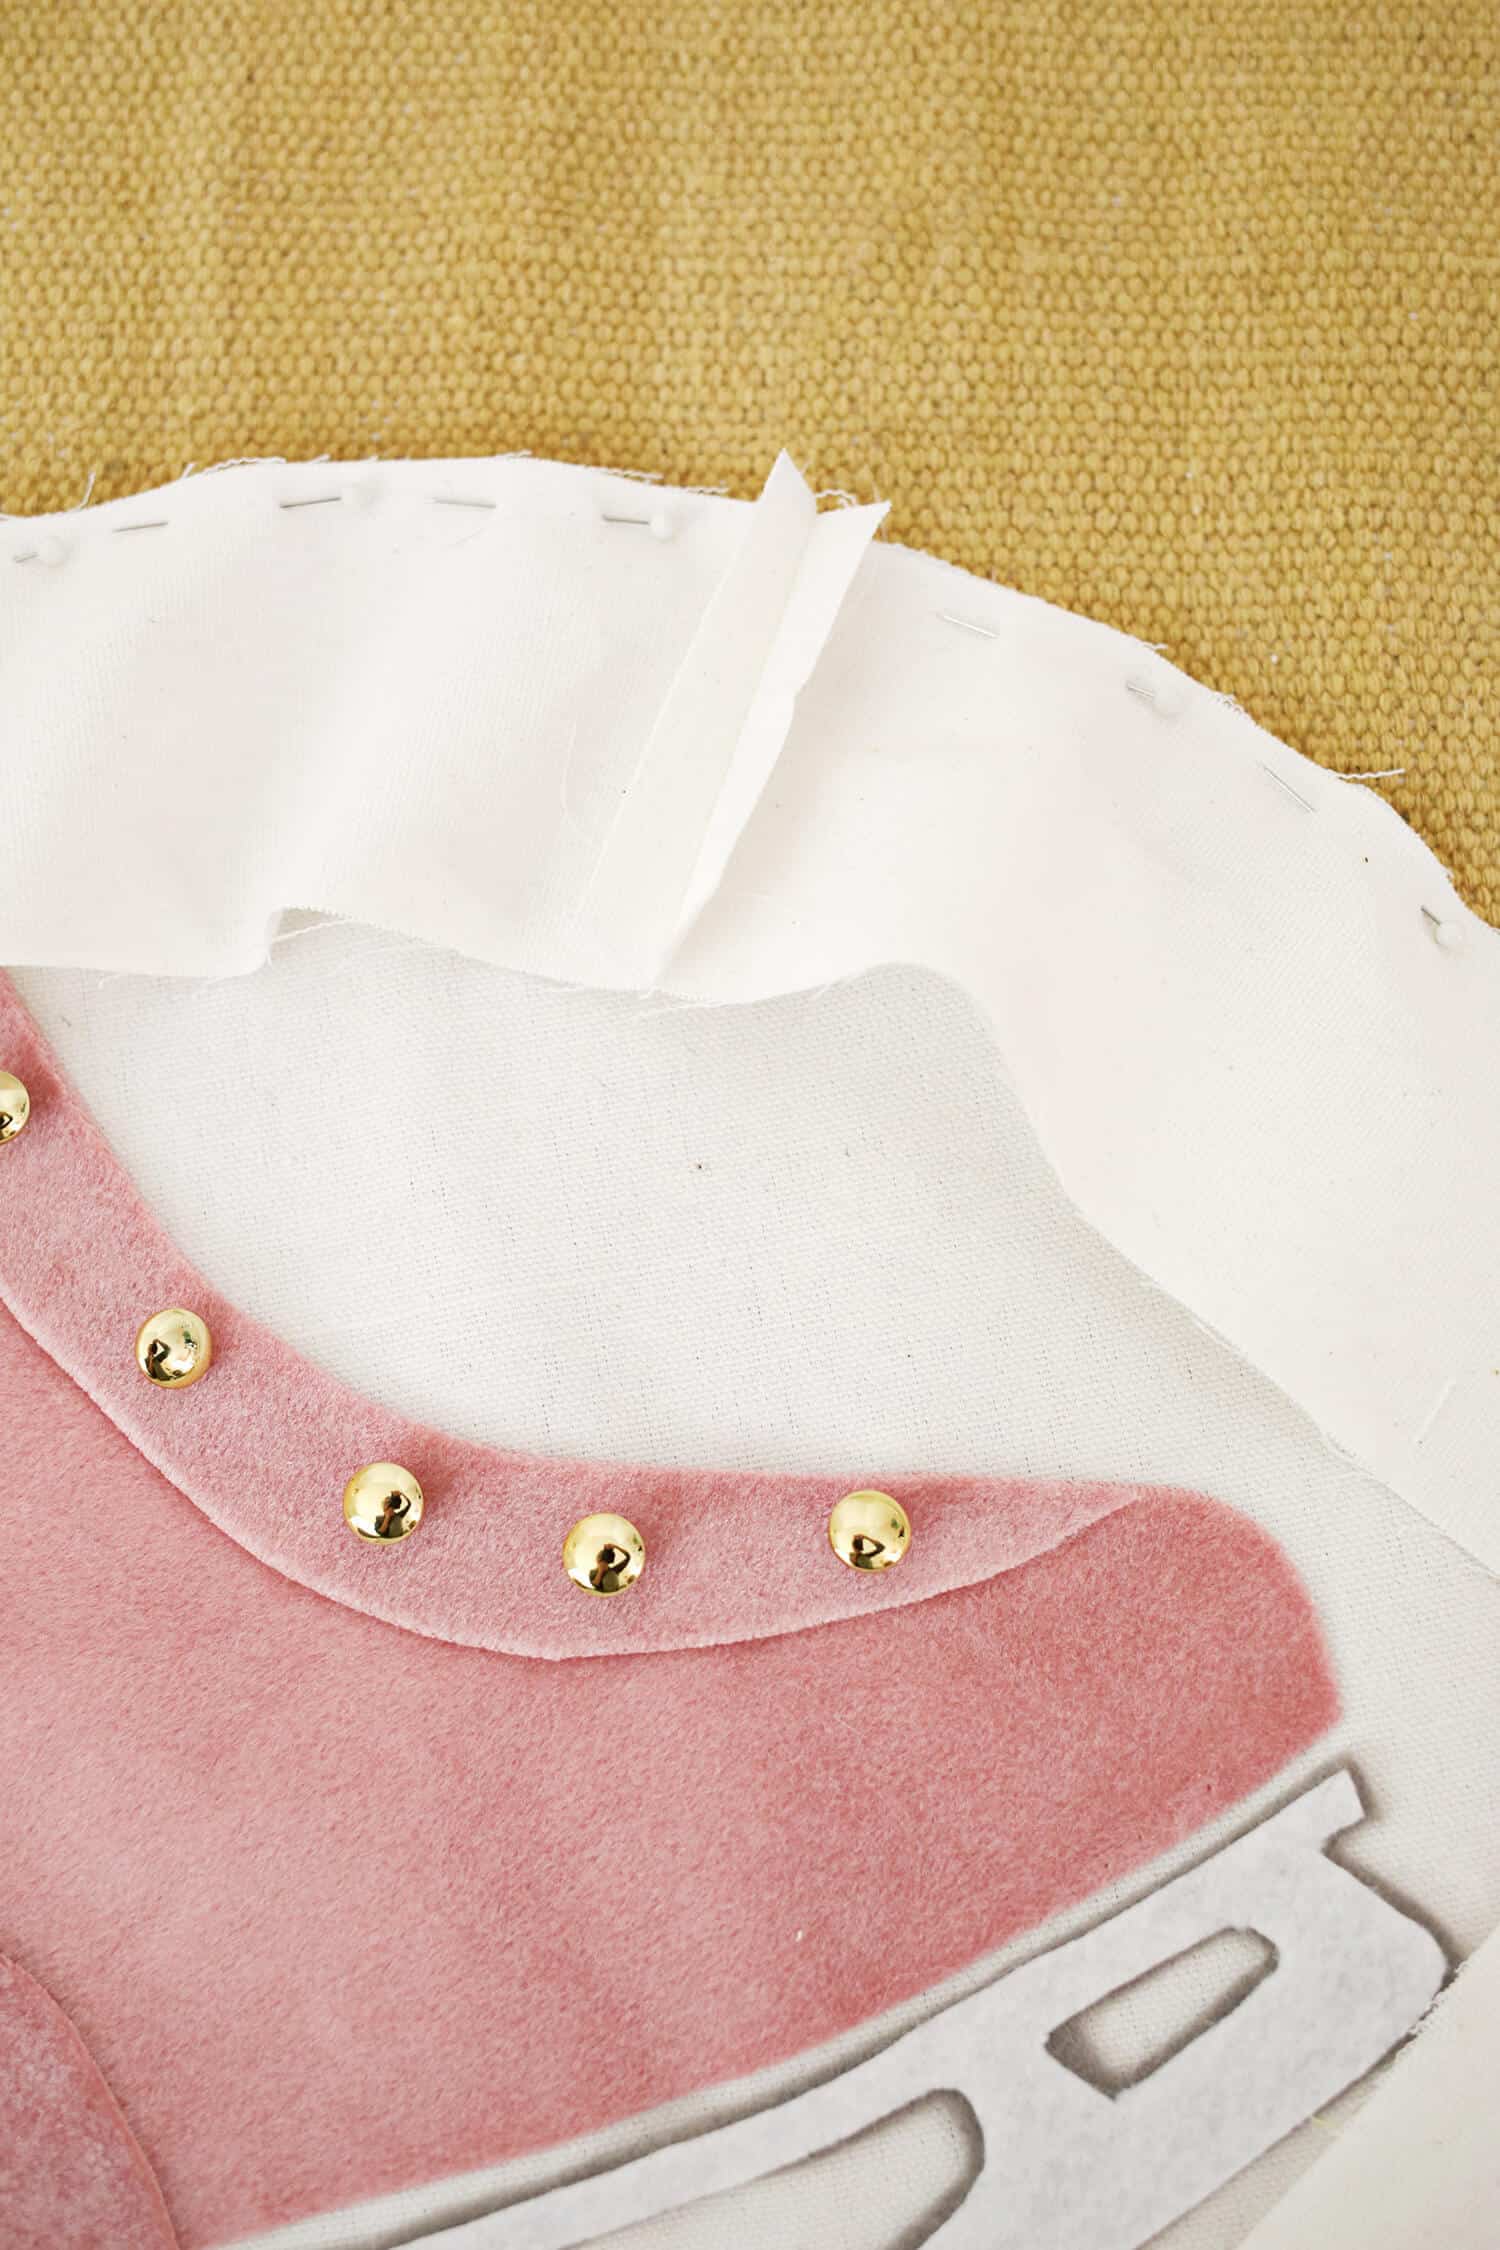 To make the “sides” of your pillow, you need to figure out how long your 3″ strip should be. You should be able to take the finished diameter of your pillow (you cut a 16″ wide circle but you need 1/2″ of seam allowance all the way around so your pillow will be 15″ wide when finished) and multiply that by 3.14 to get how long your side loop should be. So, 15 x 3.14 = just about 47″.
Sew your loop closed so that it’s 47″ long and pin it around the front of your circle (right sides together) to double check that it fits.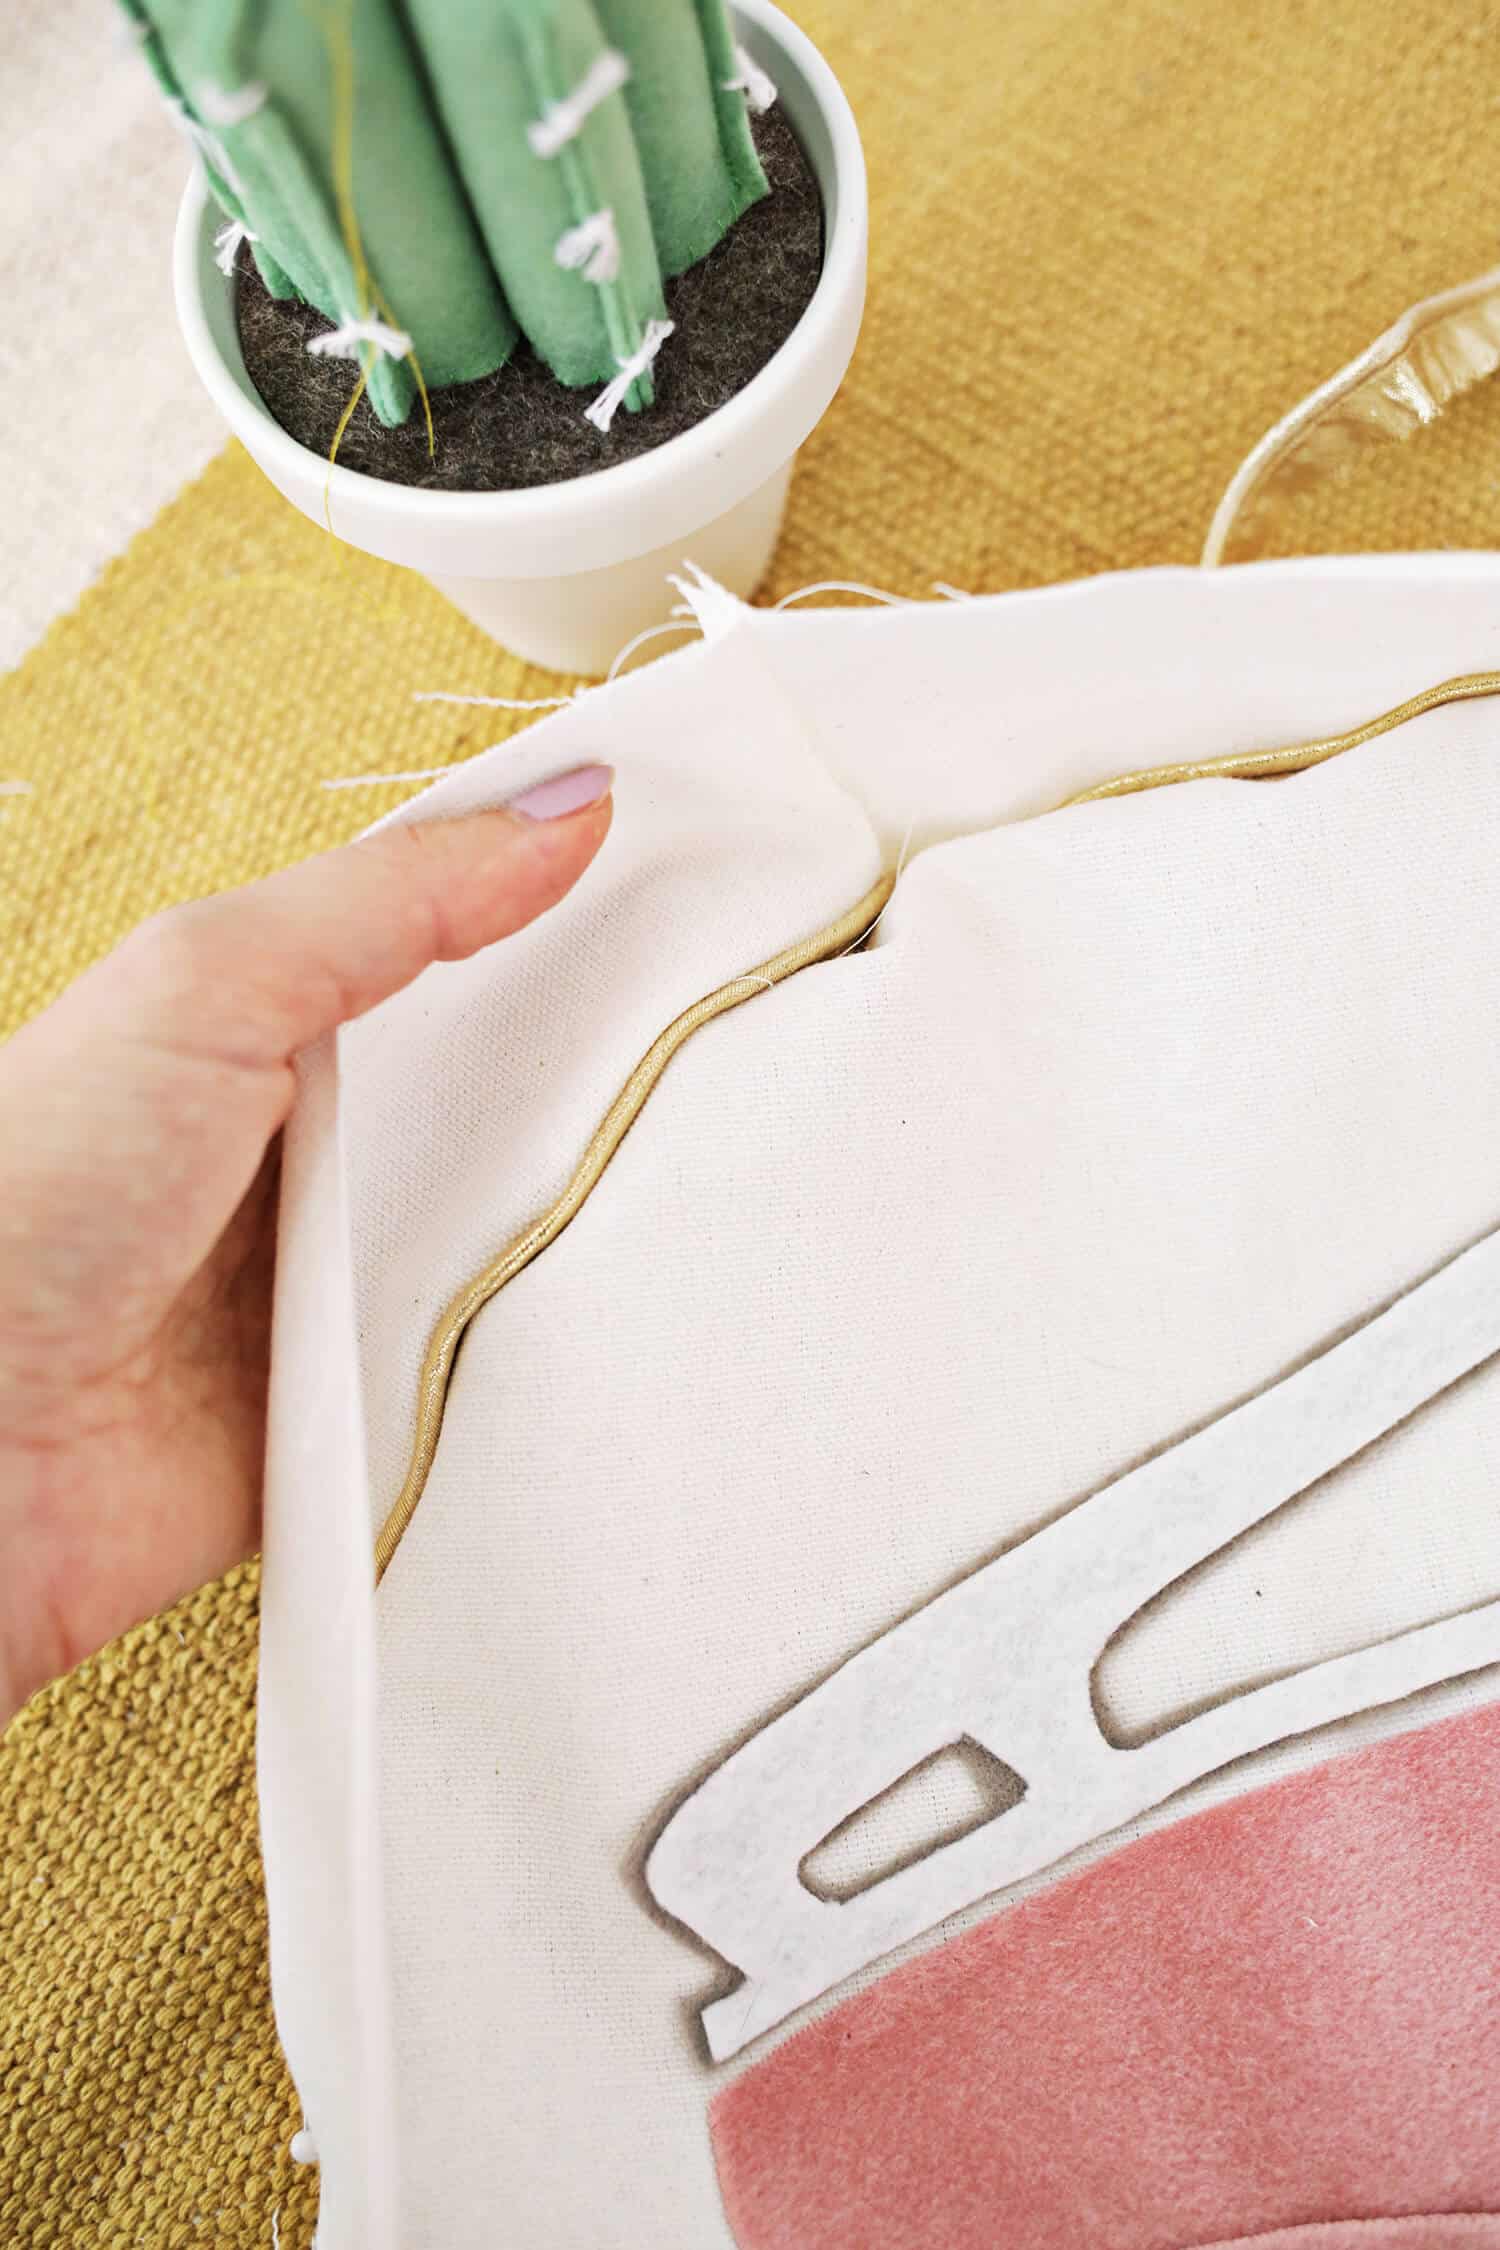
 Unpin your side loop once you know it’s the correct size and repin it together again but this time, starting at the bottom of your pillow, put your piping tape between the two layers with the rounded piping side in towards the middle of the pillow.
Pin just on the outside of the piping so that when you peek in between the layers like the first above photo you see the gold piping in between them. To finish the piping, just cross the end over the beginning like in the photo above and when you sew over that spot the piping will disappear and then reappear, giving you a seamless look. 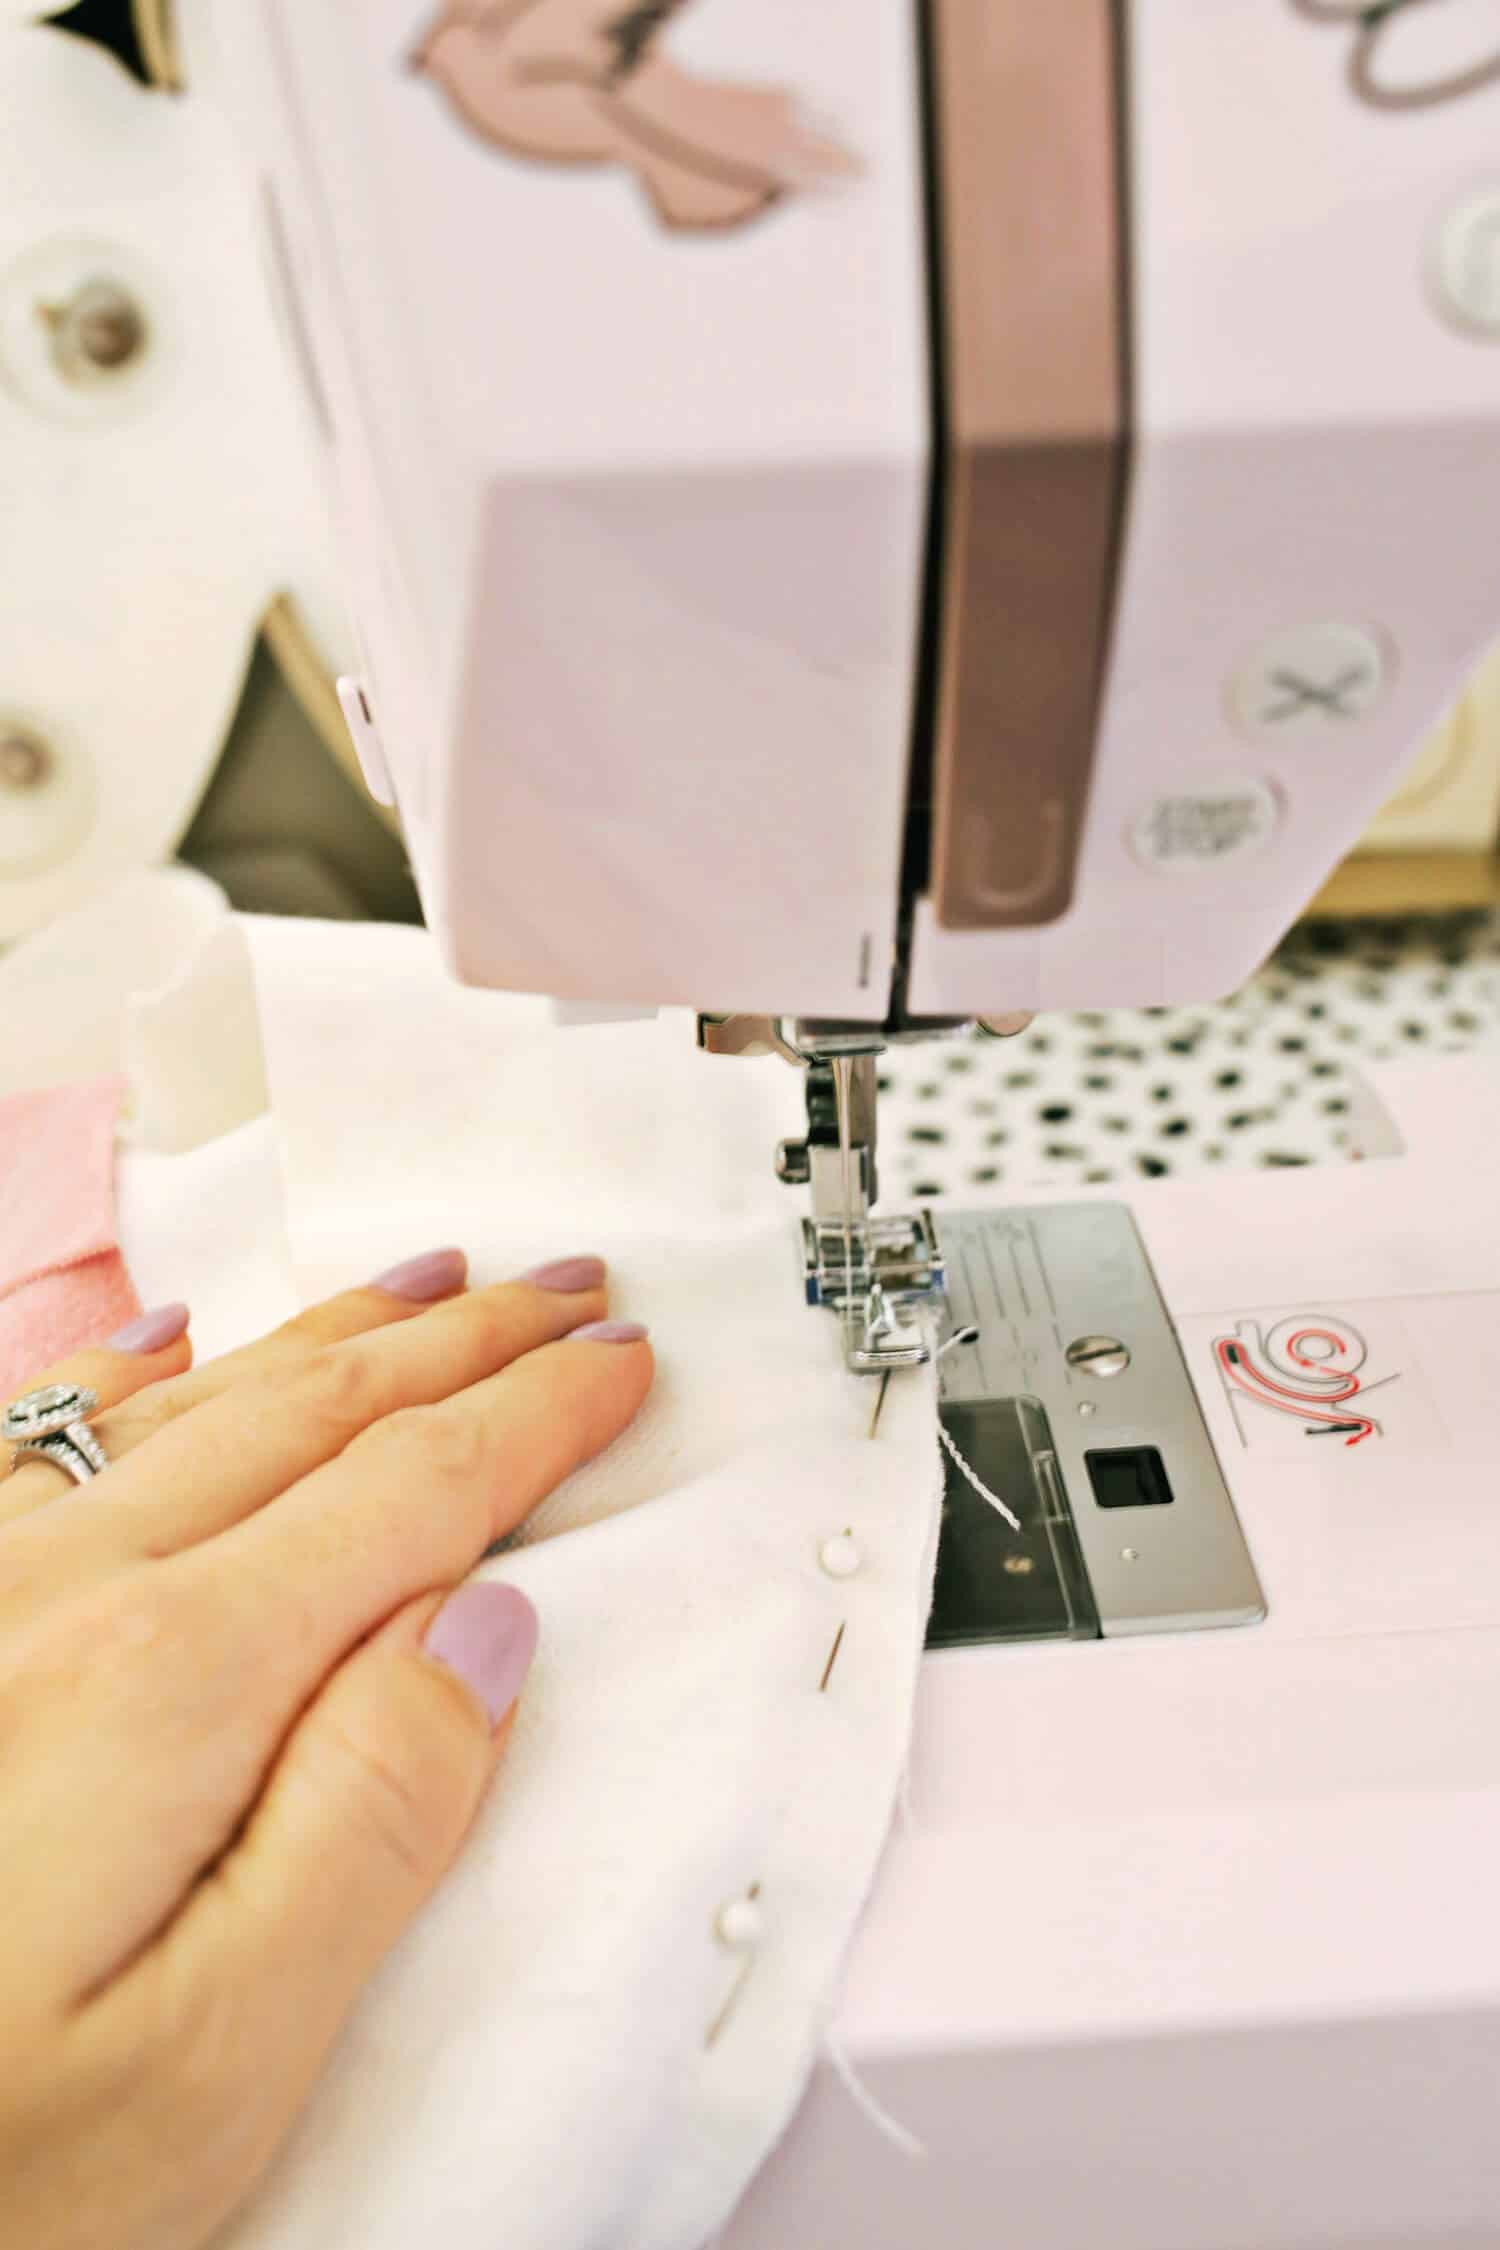 Sew all the way around your pillow with a 1/2″ seam allowance. I like to use a zipper foot when sewing next to piping because you can get really close to the piping that’s just to the left of your needle under the fabric layer.
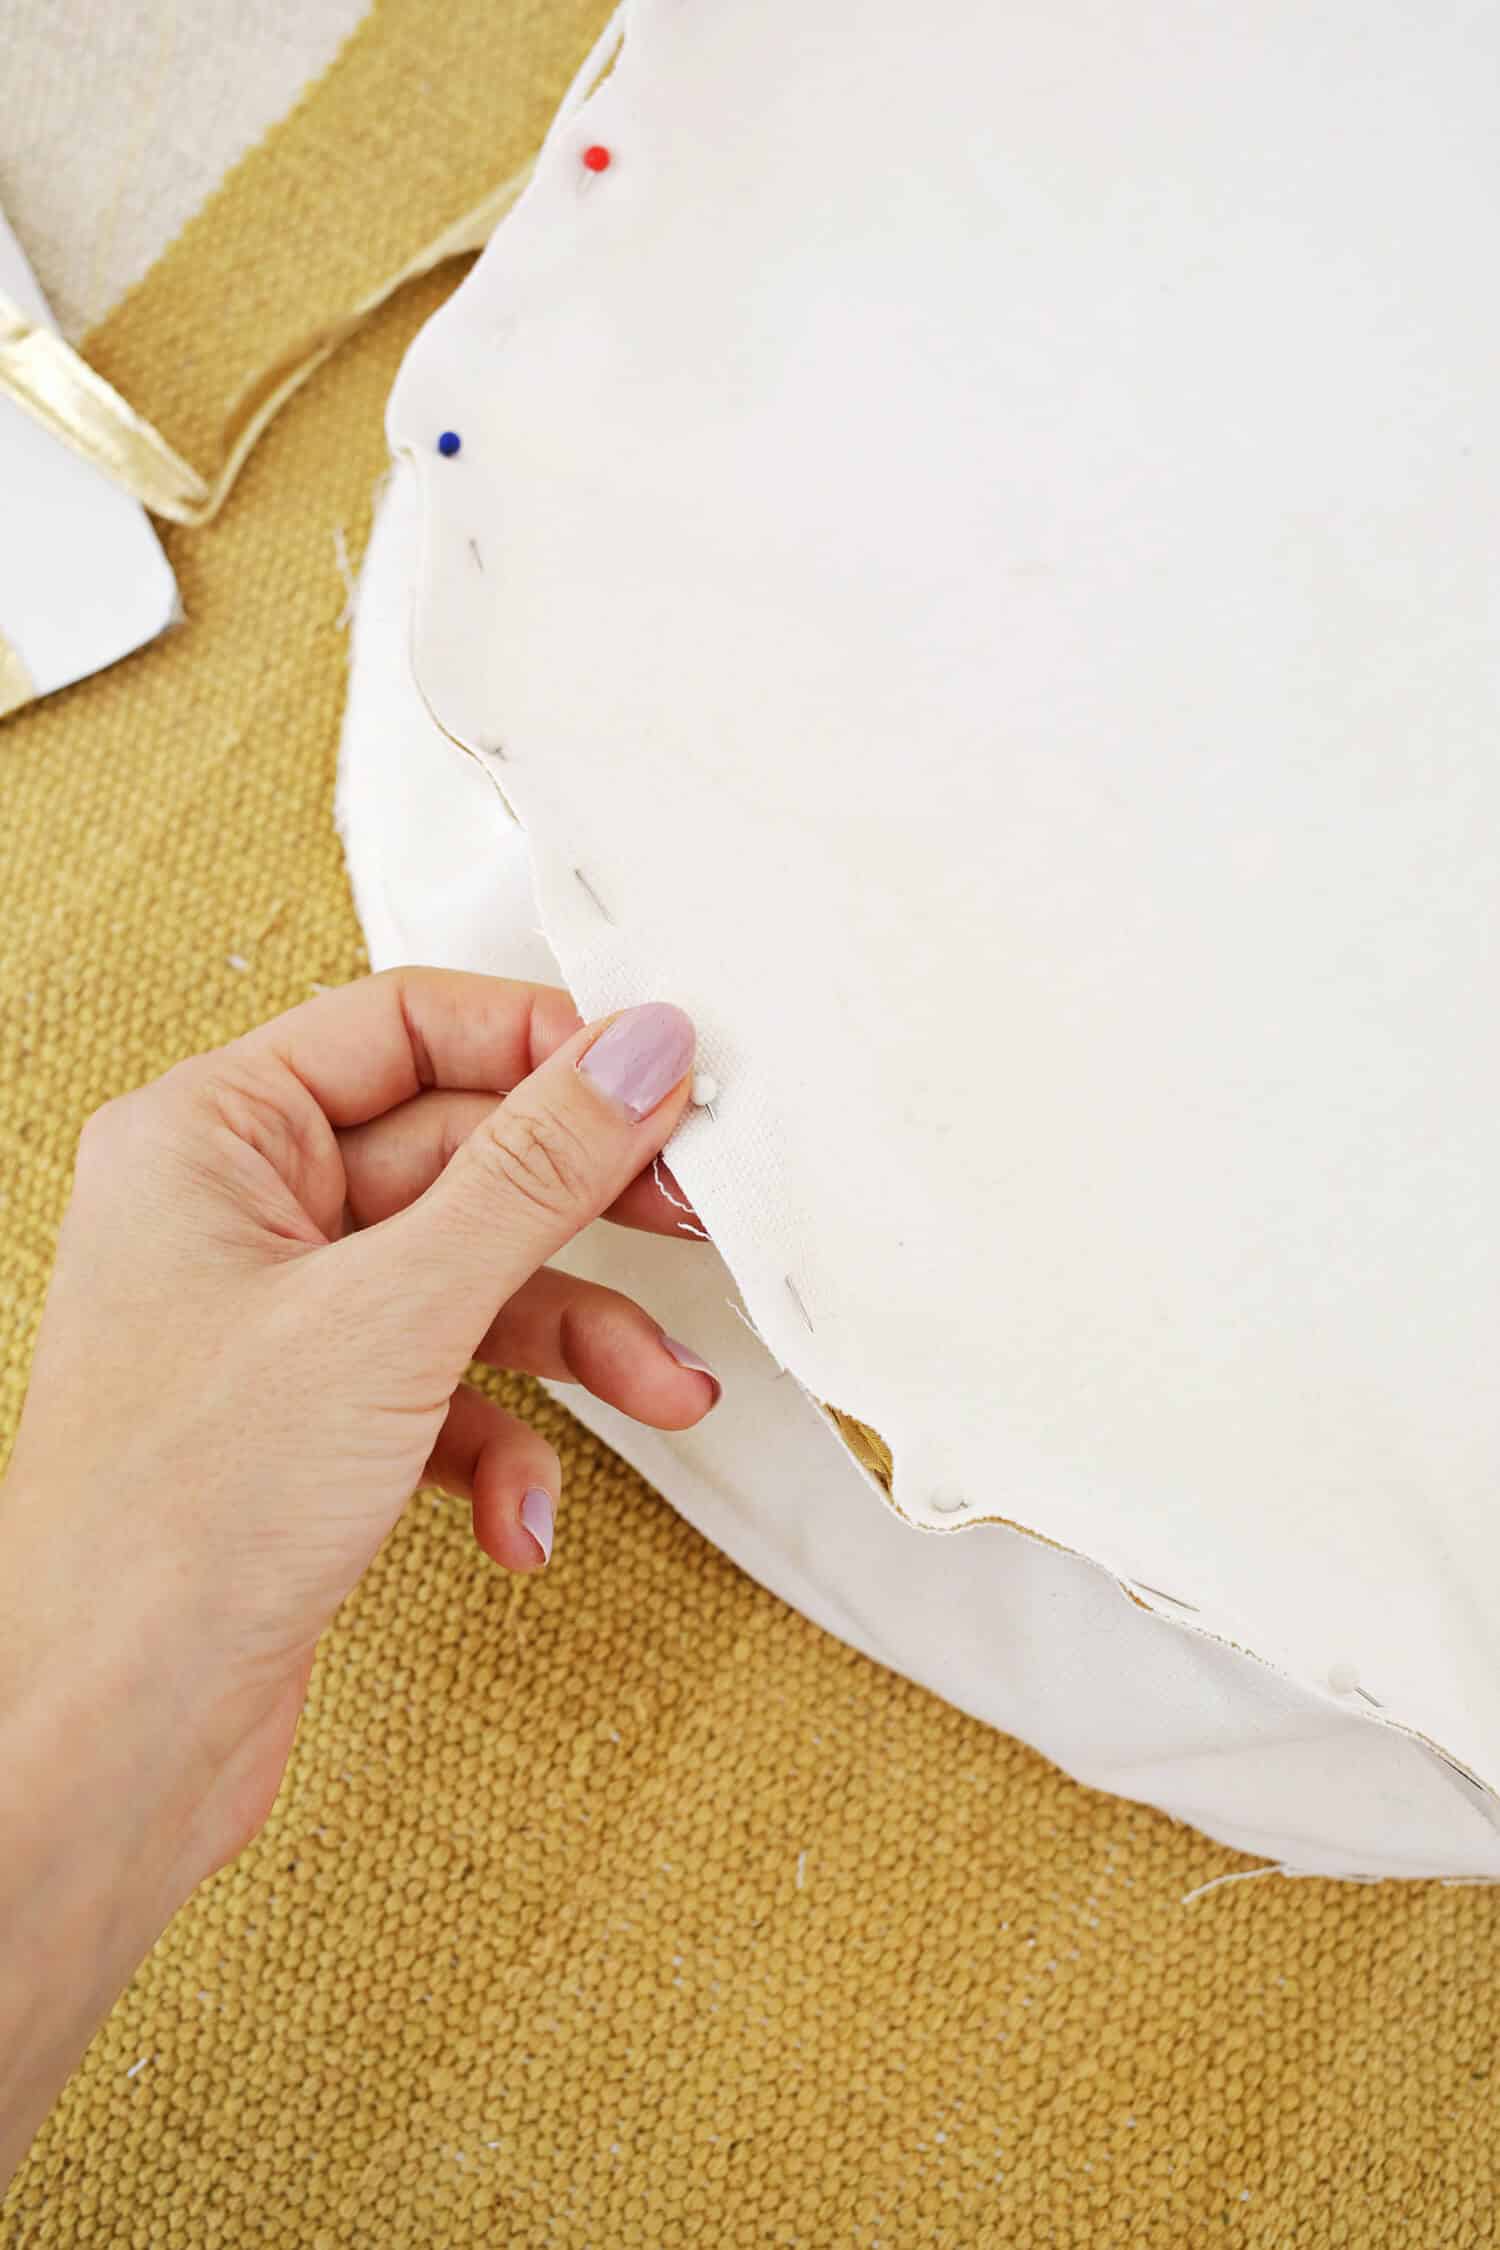 Repeat the process of pinning your back circle to your side loop (right sides together) with the gold piping in between so that you have a flat drum shape. Sew around that with a 1/2″ seam allowance and leave 2-3″ opening so that you can turn your pillow through the hole.
 Once you’re all done sewing, turn your pillow right side out and use your glue to make a bow out of your sequin trim at the top of your boot.
 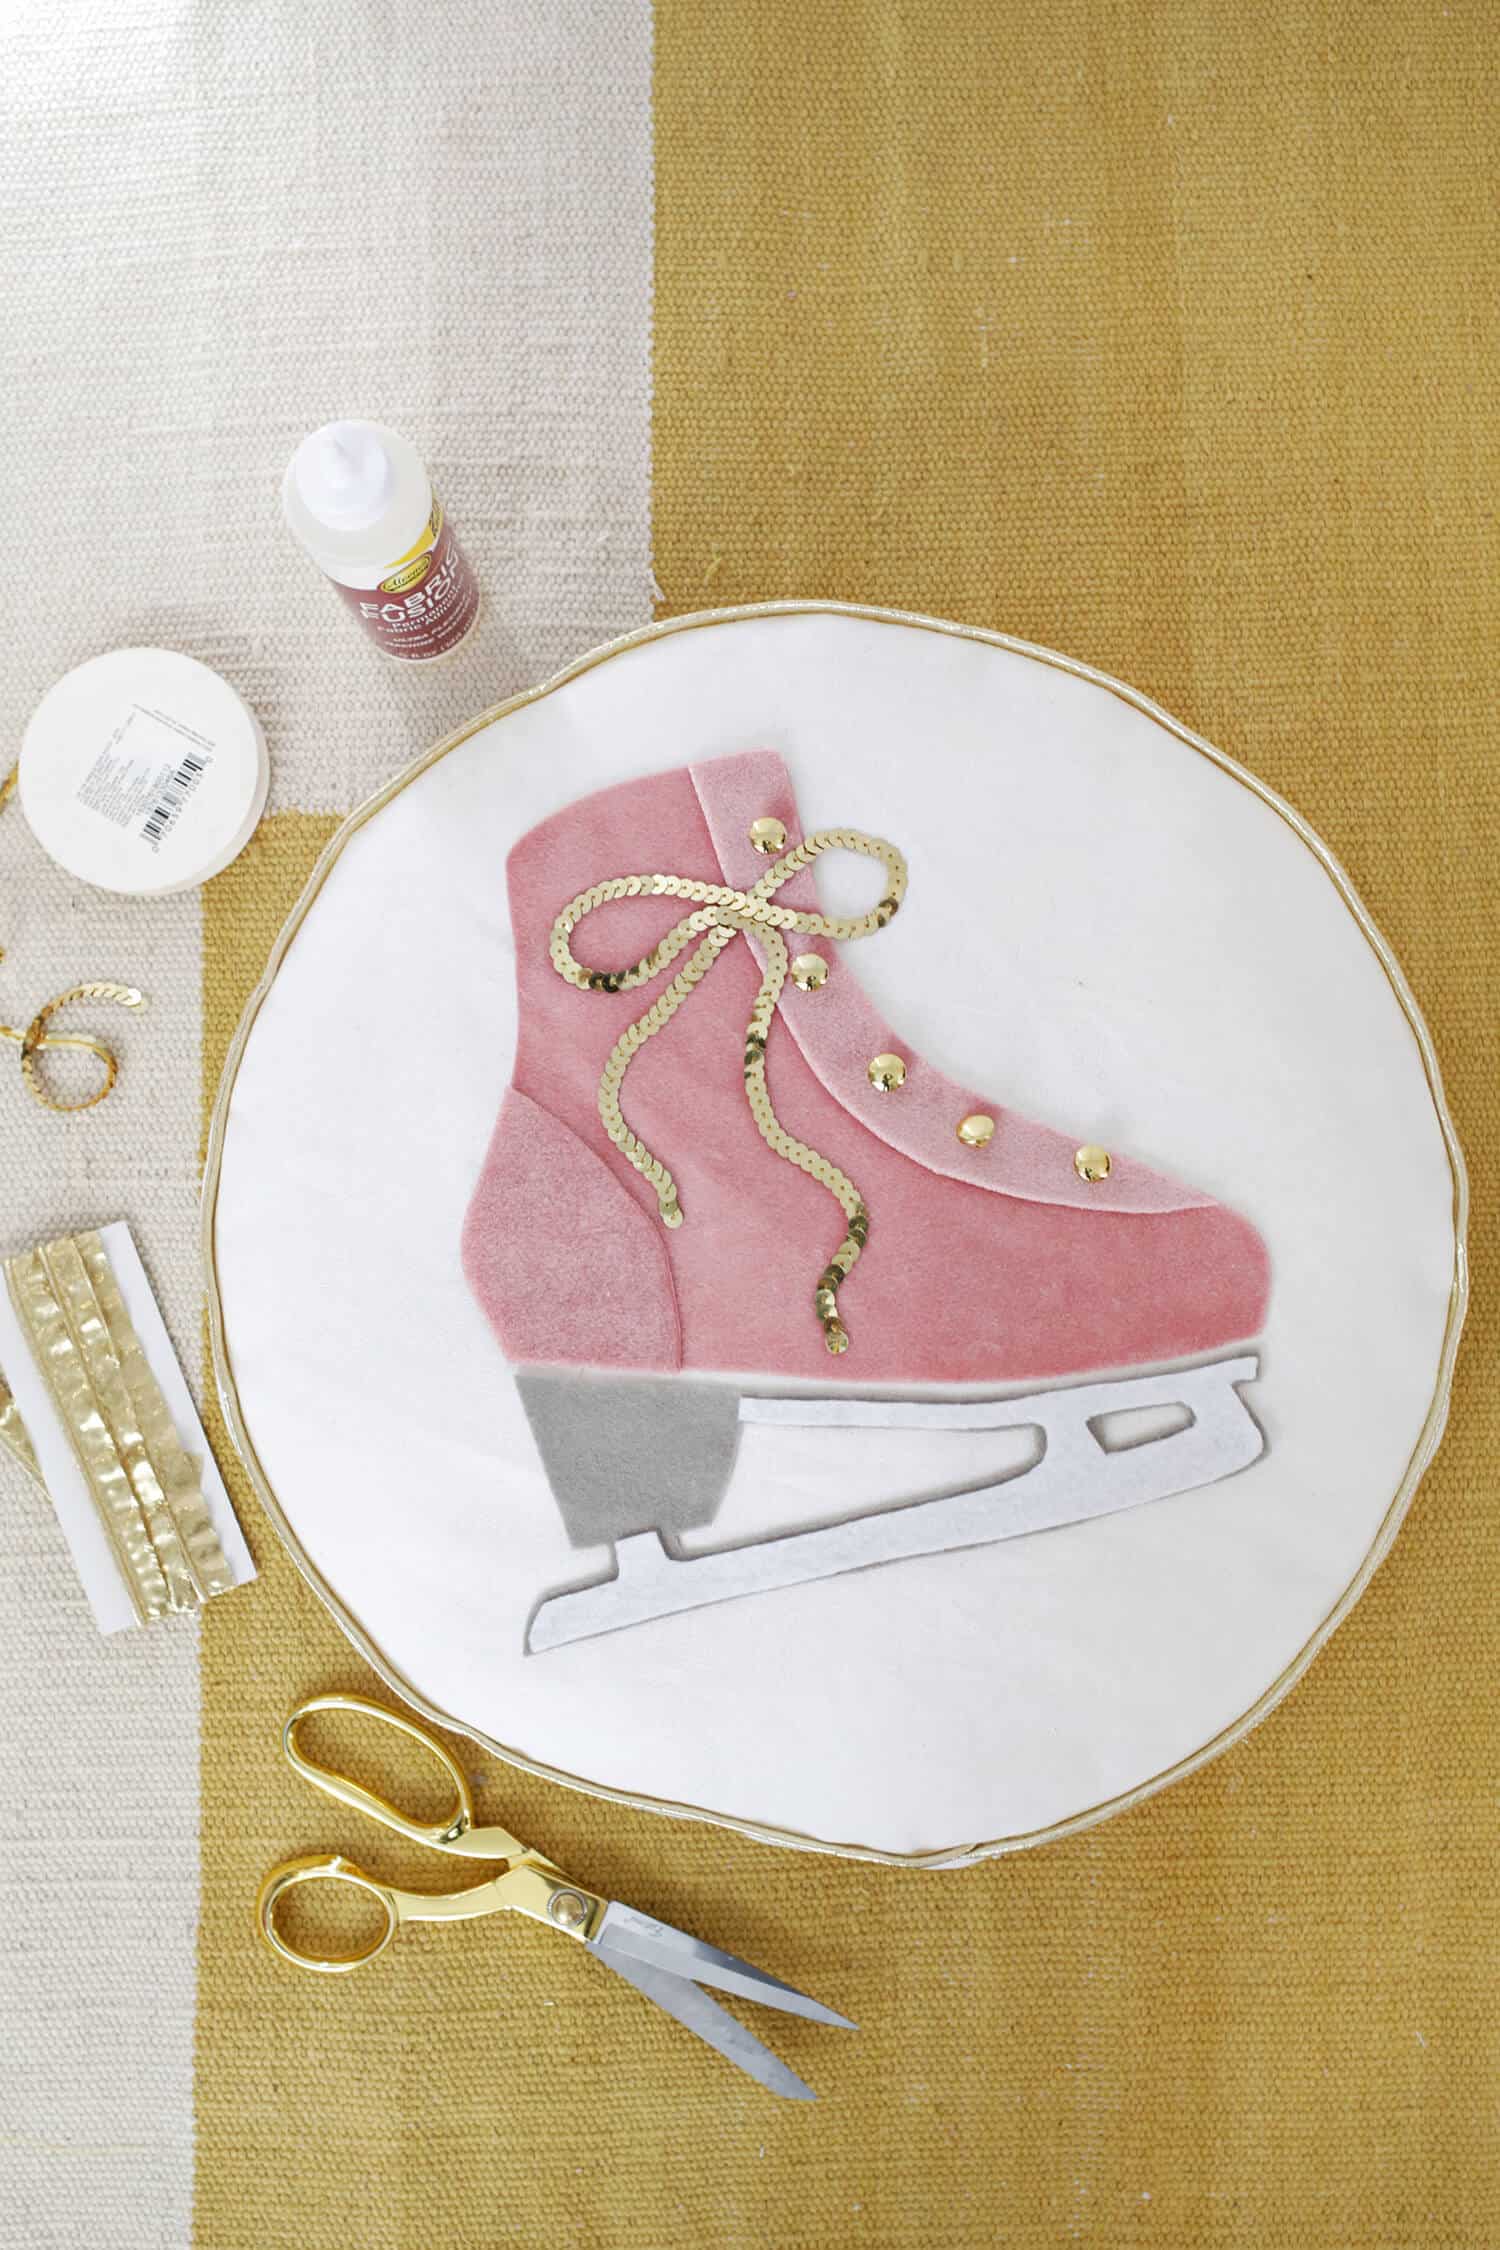 Once your glue is dry, you can stuff your pillow and close up your opening with a hidden stitch. All done!
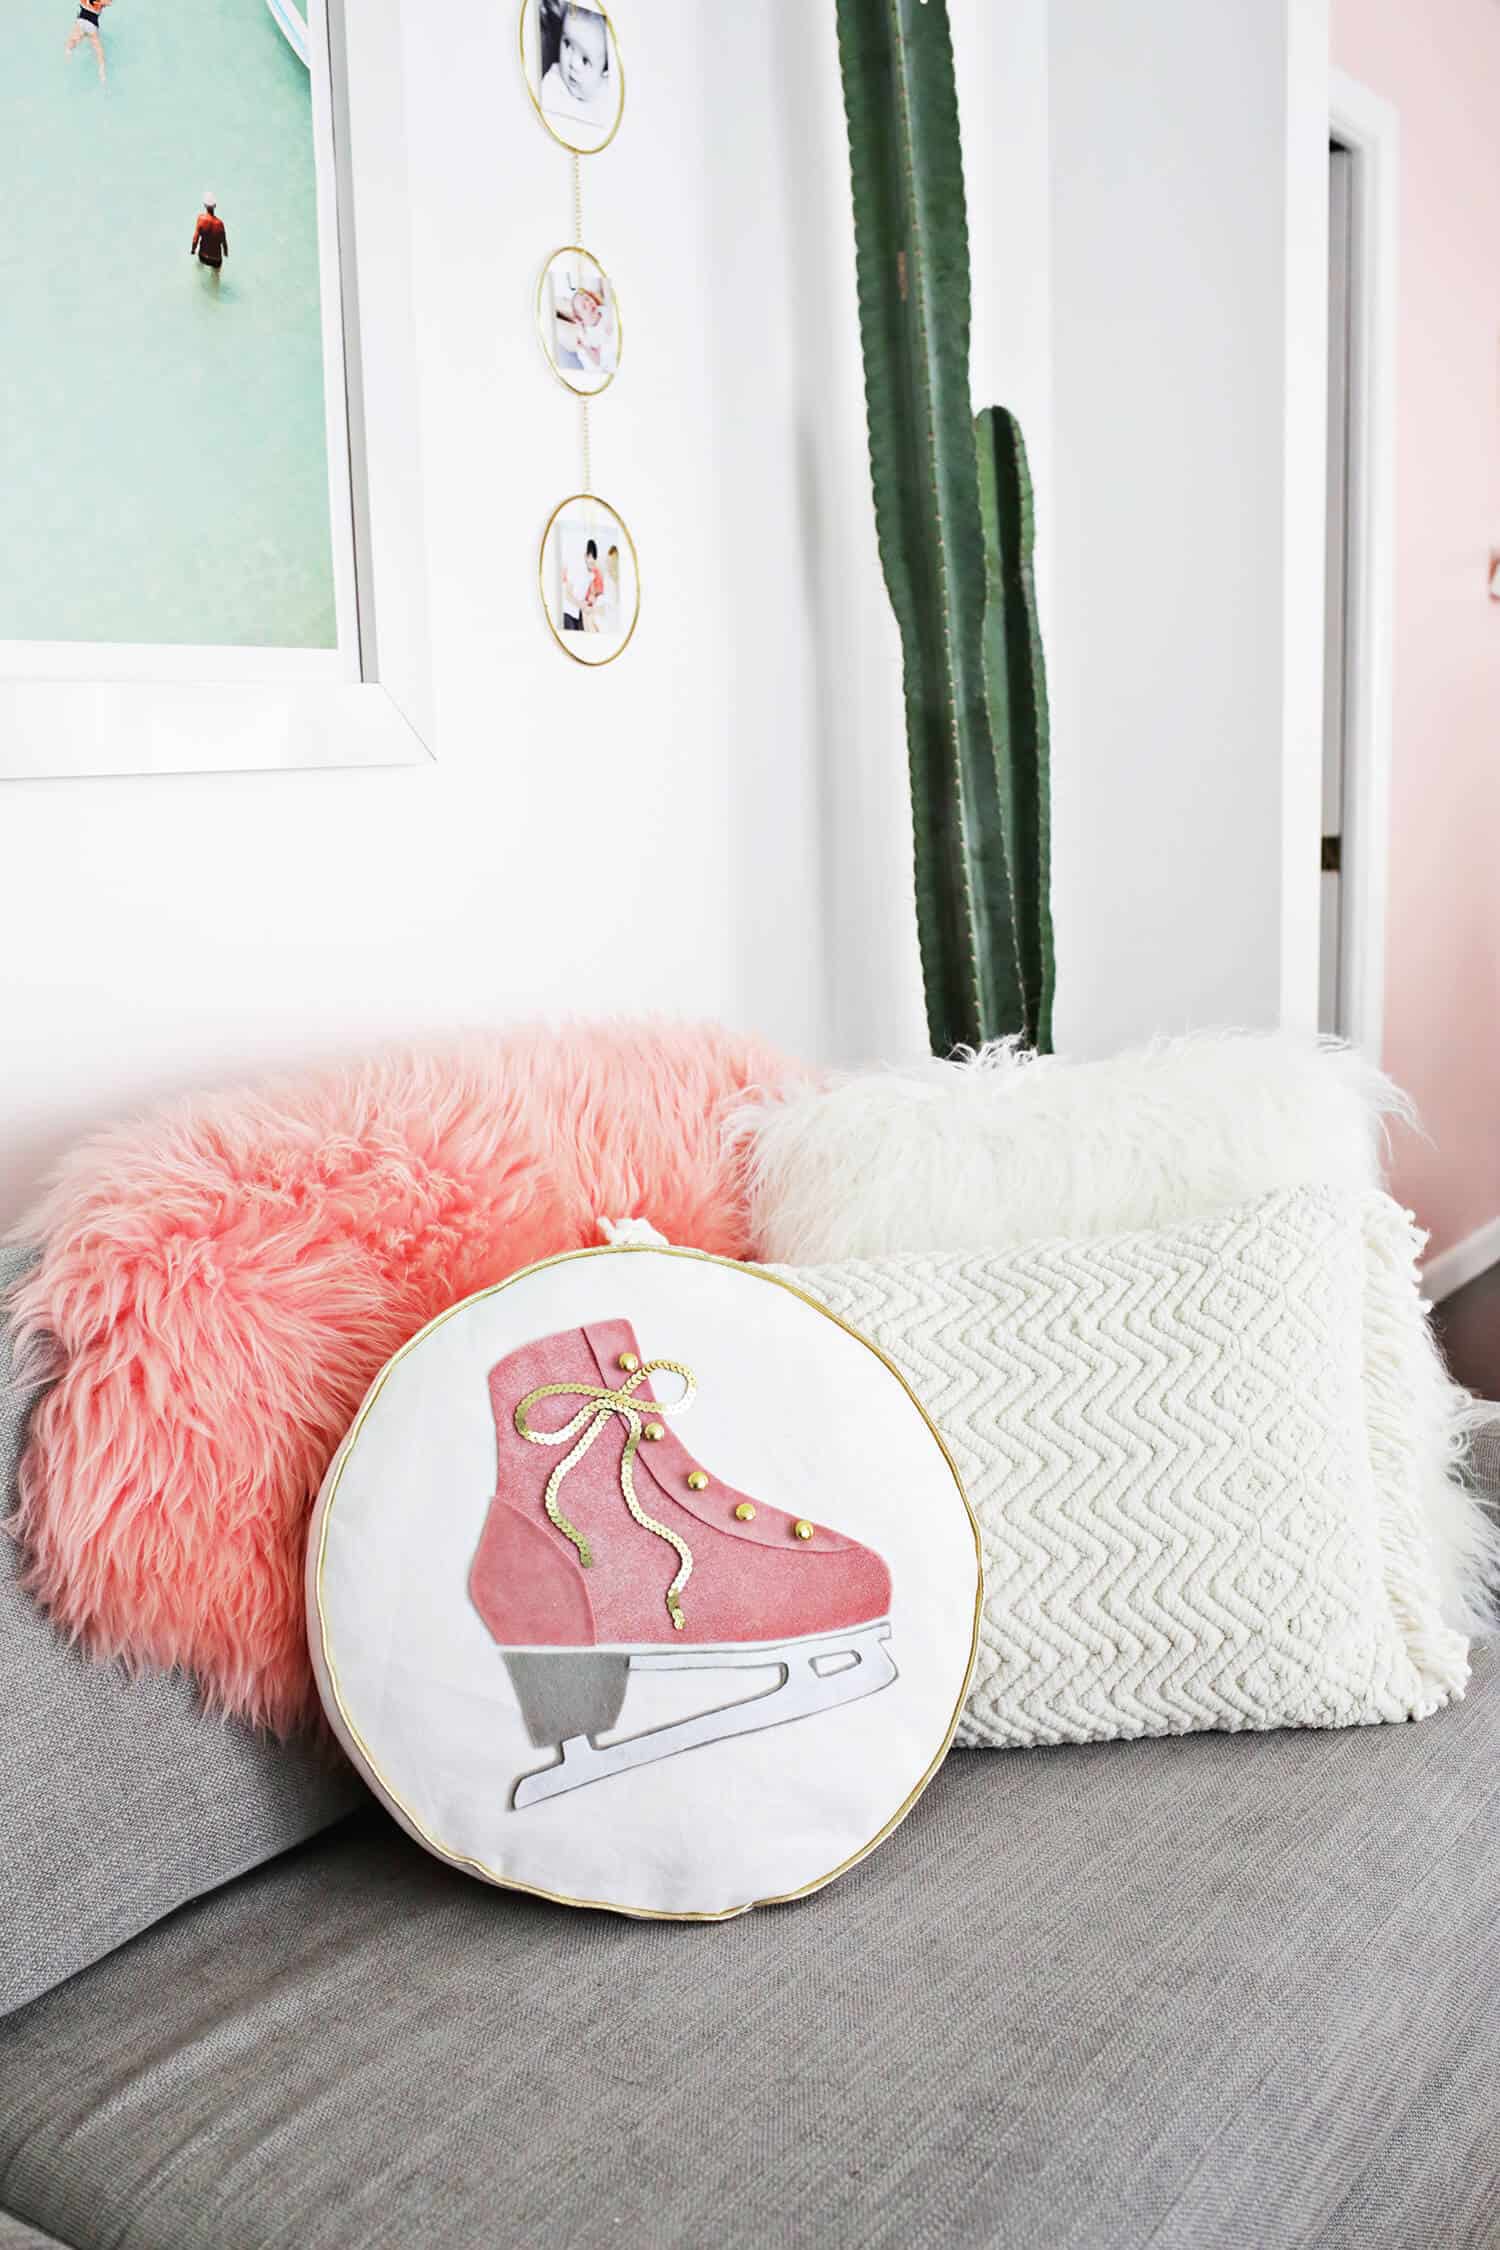
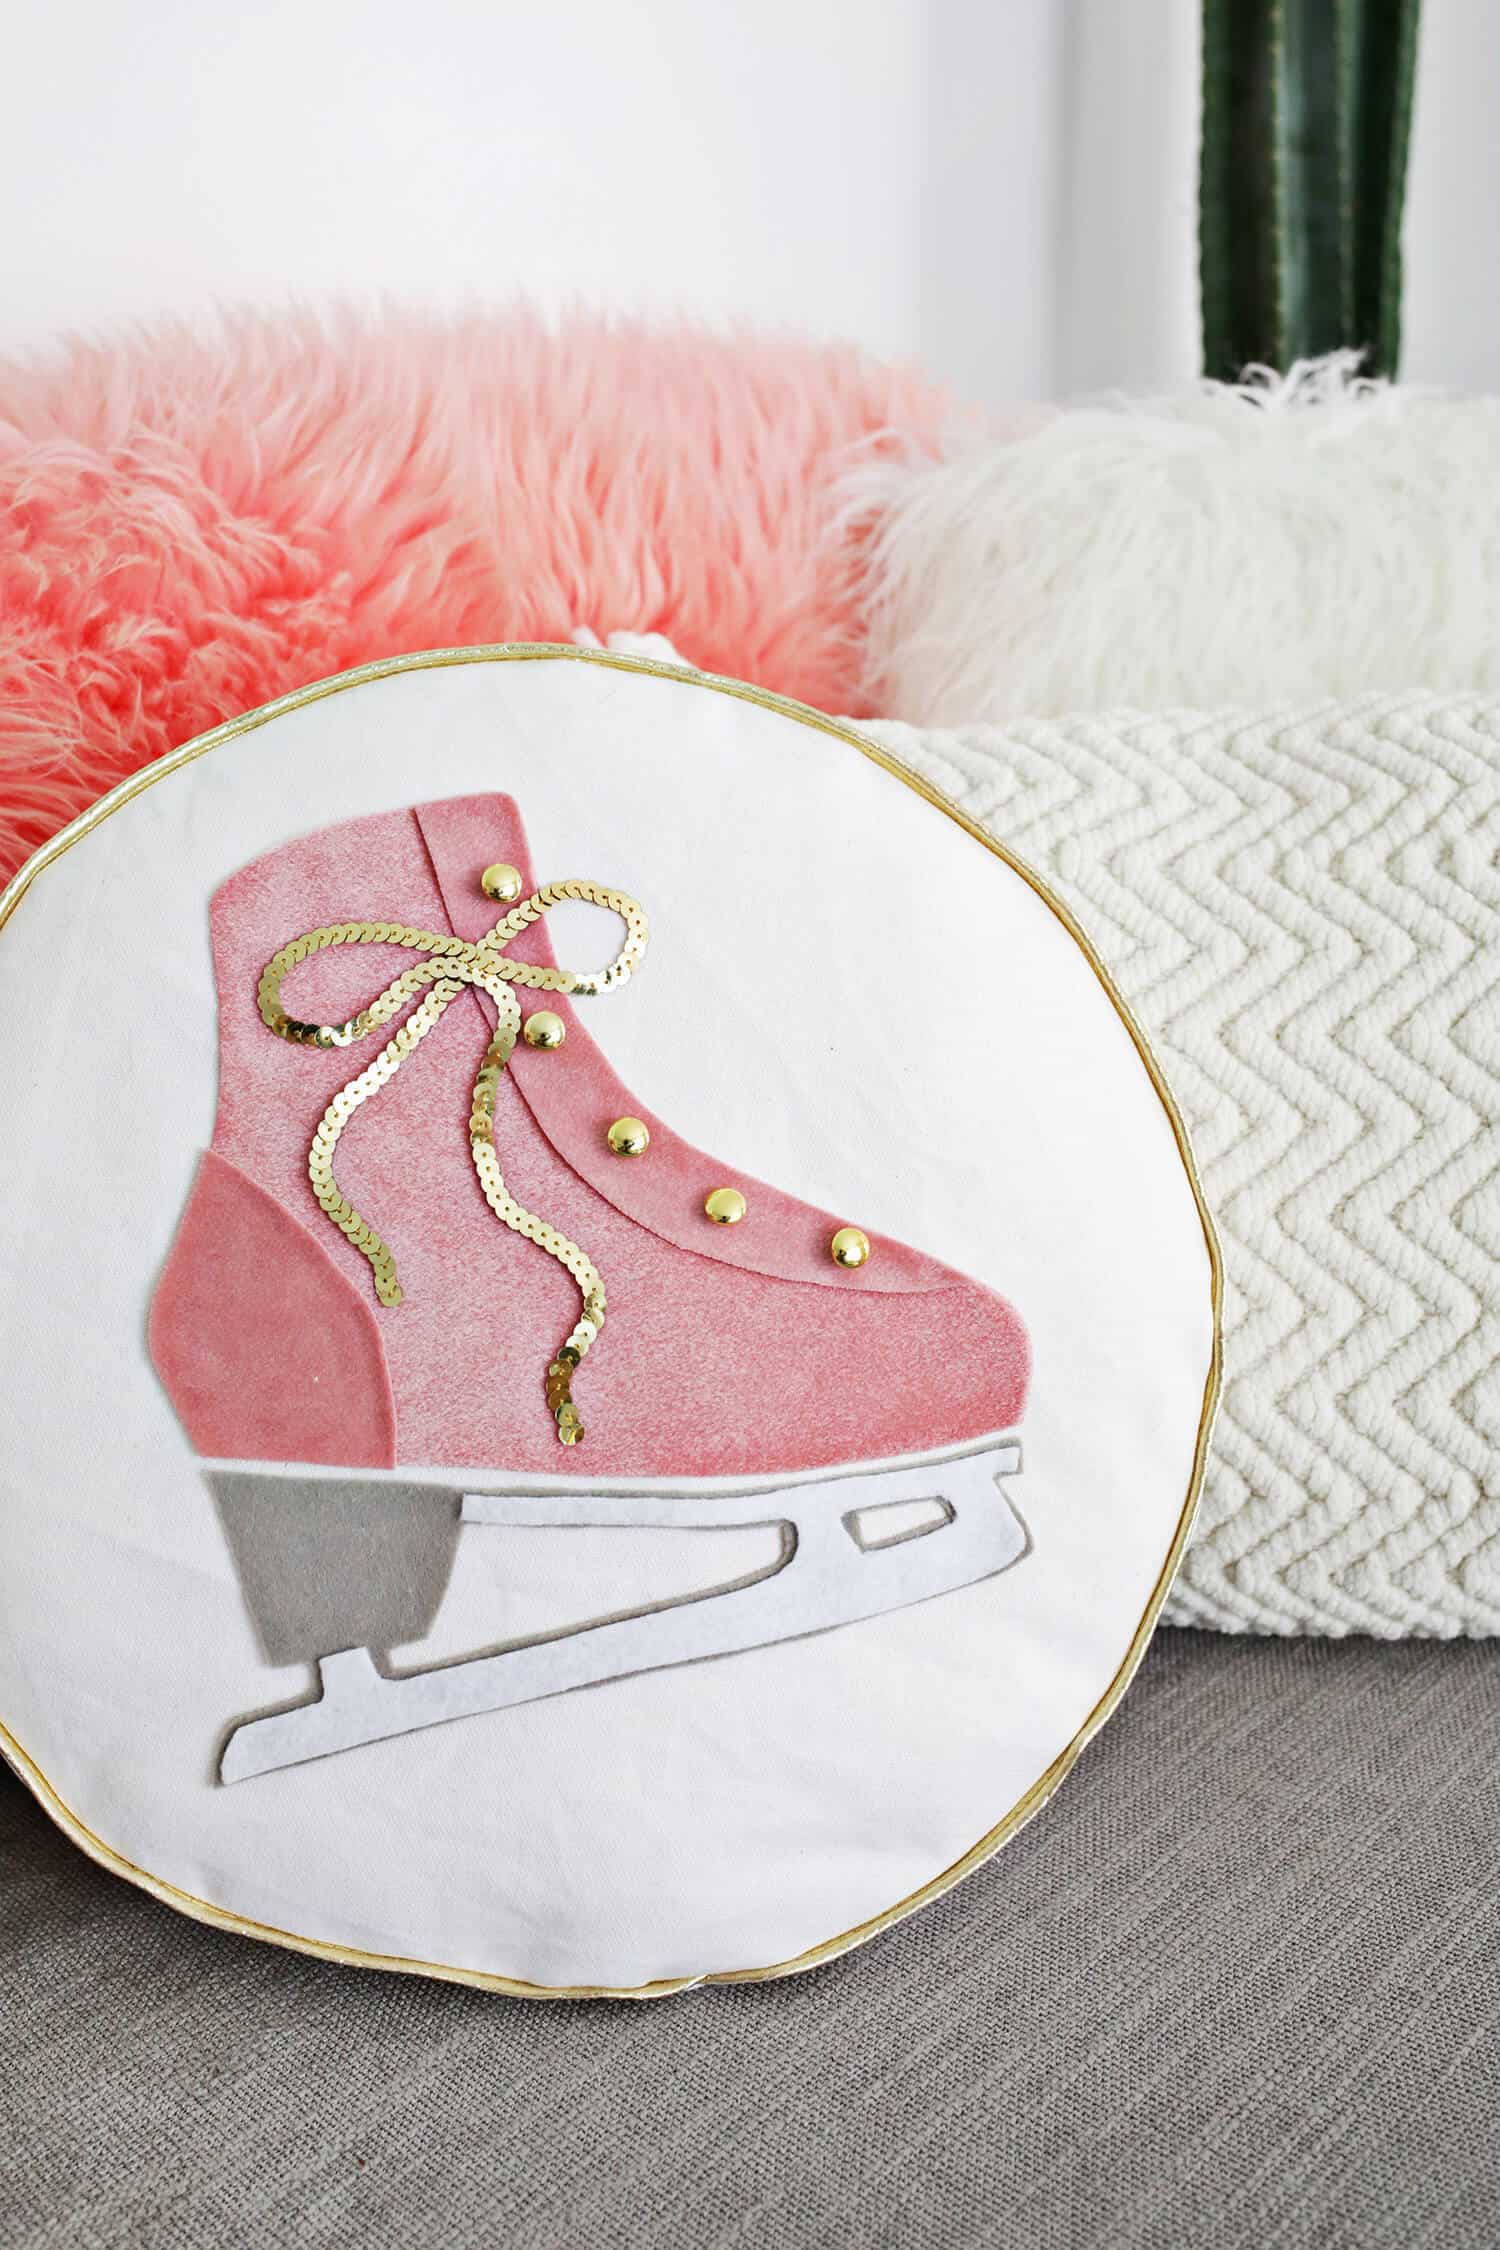 I love the velvet texture and the gold accents—so fun! I’m always into a pile of white pillows in different textures (like some furry and some texured) and white is a good color for both summer and the winter months as well.
This pillow blends in with the gang while adding a little pop of color to the party! Whether you are an ice skating fanatic yourself or just want something cute to celebrate the winter season, this may be just the pillow for you! xo. Laura

15 Comments
Really cute! It says the download for the template is forbidden; has it been taken down?
Hi! The link is working now 🙂
This is pillow very good design i choice your pillow
Great pillow and very clear tutorial!
This is so adorable and original! Love the sequin lace detail. I am regretting giving away my sewing machine now. Argh. 😛
That is seriously sweet! I love it!
Michelle || www.byquinn.com
I love that pillow
http://thepinkpineappleblog.blogspot.com/2017/11/black-friday-2017.html
So cute!!
I love this pillow DIY! So cute! I don’t know if I could cut it as well as you did but it’s adorable! I love the pop of pink 🙂
xx, mel
http://melinspired.com/get-designer-bags-ysl-gucci-prada-sale-ft-reebonz/
I love this, its adorable. I want to make it asap. Thanks for the great idea.
I always love your projects Laura! So beautiful 🙂
www.shessobright.com
That pillow looks amazing with all those details, I love it!
https://www.makeandmess.com/
This pillow is so cute! You did an awesome job!
Paige
http://thehappyflammily.com
Love blog posts where you guys work your magic with your DIYs! The colour scheme of this pillow is so darling. ❤
Charmaine Ng | Architecture & Lifestyle Blog
http://charmainenyw.com
This is the cutest pillow I have ever seen!
www.petiteelliee.com
Ellie xx