") While we’ve tried a few different ways of making soaps here on ABM, a soap trend that I’ve been seeing that I haven’t gotten the chance to test drive yet is the layered soap technique. I’ve seen some pretty handmade soaps that are not only layered, but that also have irregularly shaped layers, and I really wanted to see if I could create something that had that same organic quality to the layers. Turns out, it’s actually harder to make not perfectly even layers of soap (it’s like any other liquid that just wants to lay flat), but a few tricks gave me the wavy layers I was going for!
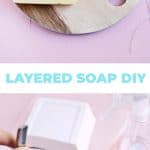
While we’ve tried a few different ways of making soaps here on ABM, a soap trend that I’ve been seeing that I haven’t gotten the chance to test drive yet is the layered soap technique. I’ve seen some pretty handmade soaps that are not only layered, but that also have irregularly shaped layers, and I really wanted to see if I could create something that had that same organic quality to the layers. Turns out, it’s actually harder to make not perfectly even layers of soap (it’s like any other liquid that just wants to lay flat), but a few tricks gave me the wavy layers I was going for!
") Supplies:
Supplies:
–soap dye
–melt and pour soap (I used a little more than 1 1/2 pounds for my loaf.)
-small loaf pan or silicon loaf pan
-sharp knife
-glass or microwave-safe container
-wax paper
–essential oils
-small spray bottle with rubbing alcohol
") If you don’t have a silicon loaf pan, start by lining your pan with wax paper so the finished soap won’t stick to your pan when it’s time to remove it. I basically folded a piece down into the pan, cut the excess out of the corners and taped the cut seams together.
If you don’t have a silicon loaf pan, start by lining your pan with wax paper so the finished soap won’t stick to your pan when it’s time to remove it. I basically folded a piece down into the pan, cut the excess out of the corners and taped the cut seams together.
") Cut about 2 cups of small cubes of melt and pour soap and place them in a microwave-safe bowl or cup. Melt at 30 second intervals in microwave until melted, stirring between each session. Add your first dye to achieve whatever color you want the first layer to be.
Cut about 2 cups of small cubes of melt and pour soap and place them in a microwave-safe bowl or cup. Melt at 30 second intervals in microwave until melted, stirring between each session. Add your first dye to achieve whatever color you want the first layer to be.
") Pour a little more than 1/3 of your melted soap into your loaf pan and elevate one side so that it all pools up on the lefthand side (tip: give the soap a quick spray with rubbing alcohol after each pour to remove air bubbles). Allow it to cool for a few moments until it won’t roll back when you flatten it again. Repeat the process on the right side so you get a ridge on that side as well.
Pour a little more than 1/3 of your melted soap into your loaf pan and elevate one side so that it all pools up on the lefthand side (tip: give the soap a quick spray with rubbing alcohol after each pour to remove air bubbles). Allow it to cool for a few moments until it won’t roll back when you flatten it again. Repeat the process on the right side so you get a ridge on that side as well.
") Once you have a dip up both sides of the pan, pour the rest of the soap into the middle of the loaf pan and gently rock the pan from side to side so the middle makes an imperfect shape as well as it cools.
Once you have a dip up both sides of the pan, pour the rest of the soap into the middle of the loaf pan and gently rock the pan from side to side so the middle makes an imperfect shape as well as it cools.
") Next you’ll melt two more cups of soap cubes and add whichever soap color you want for your next layer. While you are waiting for the soap to melt, cut a few thin slices of soap from your un-dyed soap block. Make lengthwise cuts so you end up with long white soap strips. Pour half of your melted soap into your loaf mold, wait 30 seconds, and then add in as many of the white soap strips that will fit while still leaving some room between them.
Next you’ll melt two more cups of soap cubes and add whichever soap color you want for your next layer. While you are waiting for the soap to melt, cut a few thin slices of soap from your un-dyed soap block. Make lengthwise cuts so you end up with long white soap strips. Pour half of your melted soap into your loaf mold, wait 30 seconds, and then add in as many of the white soap strips that will fit while still leaving some room between them.
") Pour in the other half of your soap to completely cover the white strips.
Pour in the other half of your soap to completely cover the white strips.
") Melt another 2 cups of soap for the top layer, add your dye, and pour in about 3/4 of your soap into your mold.
Melt another 2 cups of soap for the top layer, add your dye, and pour in about 3/4 of your soap into your mold.
Let the soap in your melting bowl cool a bit. As it cools, scrape off the semi-solid top layer that starts to form and spoon it onto the top of your soap to create a textured top. Repeat until all the halfway cooled soap is spread across the top of your soap loaf. Allow your soap to totally cool, and then you can remove it from the pan, peel off the wax paper, and slice your soap into 1″ bars!
")
") While all of the layers and different colors can be a bit of a pain, it’s so fun to slice the soap at the end and see how pretty your layers look together! The long white sticks that you inserted into the middle layer will look like floating dots and the irregular layers give it that special handmade look and feel. You can also mix in some soap fragrance or essential oil into each layer as you mix in the dye for a dreamy scent as well as a dreamy look. Have fun making your own creations! xo. Laura
While all of the layers and different colors can be a bit of a pain, it’s so fun to slice the soap at the end and see how pretty your layers look together! The long white sticks that you inserted into the middle layer will look like floating dots and the irregular layers give it that special handmade look and feel. You can also mix in some soap fragrance or essential oil into each layer as you mix in the dye for a dreamy scent as well as a dreamy look. Have fun making your own creations! xo. Laura
Credits//Author and Photography: Laura Gummerman. Photos edited with New A Beautiful Mess actions.
22 Comments
That looks so cool, almost like candy!
https://www.makeandmess.com/
Thanks for another lovely diy! Quick question: the plant in the first picture. What is it, and how do I take care of it? Got one in our master bath and Im qlueless… Thanks!
Anyone else think they look a little like cruise ships or boats?
The soaps you are seeing with uneven layers and textured tops are most likely cold process soaps. When you make soap from scratch (cold or hot process) you are able to manipulate the texture more. From thin to more like pudding! It’s super fun, I recommend it 🙂
I’ve been wanting to get into soap making over the last little while. This is such a fun and easy idea!
Paige
http://thehappyflammily.com
Yep! ?
I loved the colours you used to this soap!
Charmaine Ng | Architecture & Lifestyle Blog
http://charmainenyw.com
These are so cute!
http://www.petiteandhungry.com
This is such a cool DIY! These remind me of ocean waves or a beach day! Haha <3 I'm going to try this one out x
PS: There's a iPhone case/ Laptop skin giveaway happening right now on wildfirecharm.com
Oh my, for a second there I thought you actually tried to make soap and it reminded me off the dark time when me and my friend decided to cook some soap for a chemistry project at school, and it was so disgustingly stinky, and it was middle of the winter so windows were shut, and it had to be cooked for like 5 hours, so we were taking turns wrapped in scarfs for protection mixing it (otherwise it could burn), and it was the worst experience of my life x.x
How nice! x
Jessica — NinetyCo
Yes! I thought it was actually a ship soap diy!
http://victoriaspongepeasepudding.com/
Wow! This is amazing, going to try it out! Sophie x
sophiehmstewart.com
This is the absolute cutest!
Wow, this is beautiful. You still think ideas to make this one. I will try this because they are so adorable.
This is basically like Lush! I love the idea of making these as gifts!
http://thatsmagsforyou.com
Oh fun! Good to know!
Laura 🙂
Love the suggestion to mix in some essential oils! This is so colorful and fun! All about a good natural, at home substitution, especially if it’s unicorn colored! 🙂
xoxo,
Cortney
A Whimsy Wonderland
These are so pretty, and I be they smell amazing! <3
http://www.wonderlandsam.com
I’ve never heard of the layered soap trend, but after reading this tutorial I may have to try it out! Thank you for sharing.
wow these are super super cute!!
erinkanee.com
How did you work fast enough toget the top to set into the last layer of soap? Mine is falling off because it didn’t melt in the top layer. Fun to make!