 When I was a 7-year-old, all I wanted was a Barbie Dream House for Christmas. After what seemed like years of wishing, my dreams finally came true. But then I had this monstrous toy that was basically a piece of furniture in my bedroom. Fun, yes. But practical? Ehhh … not so much.
This year, my daughter requested all kinds of dolls and doll accessories for Christmas, and I began having flashbacks to the ol’ Barbie Dream House. Was this our future? Say it ain’t so! I didn’t think it was justifiable to add another dollhouse for every scale doll that my kids play with, so I came up with an alternative space-saving solution. A fold-away dollhouse!
 The OG American Girl doll fans amongst you may remember the “Scenes and Settings” you could buy to play with the 18″ historic character dolls. I had the Samantha one and would spend hours setting up lifestyle scenes with my cousins before one of our parents would take photos as we directed the shots! I still remember the excitement of getting those photos developed, and cringing at the reflection of the camera flash on the glossy background pages.
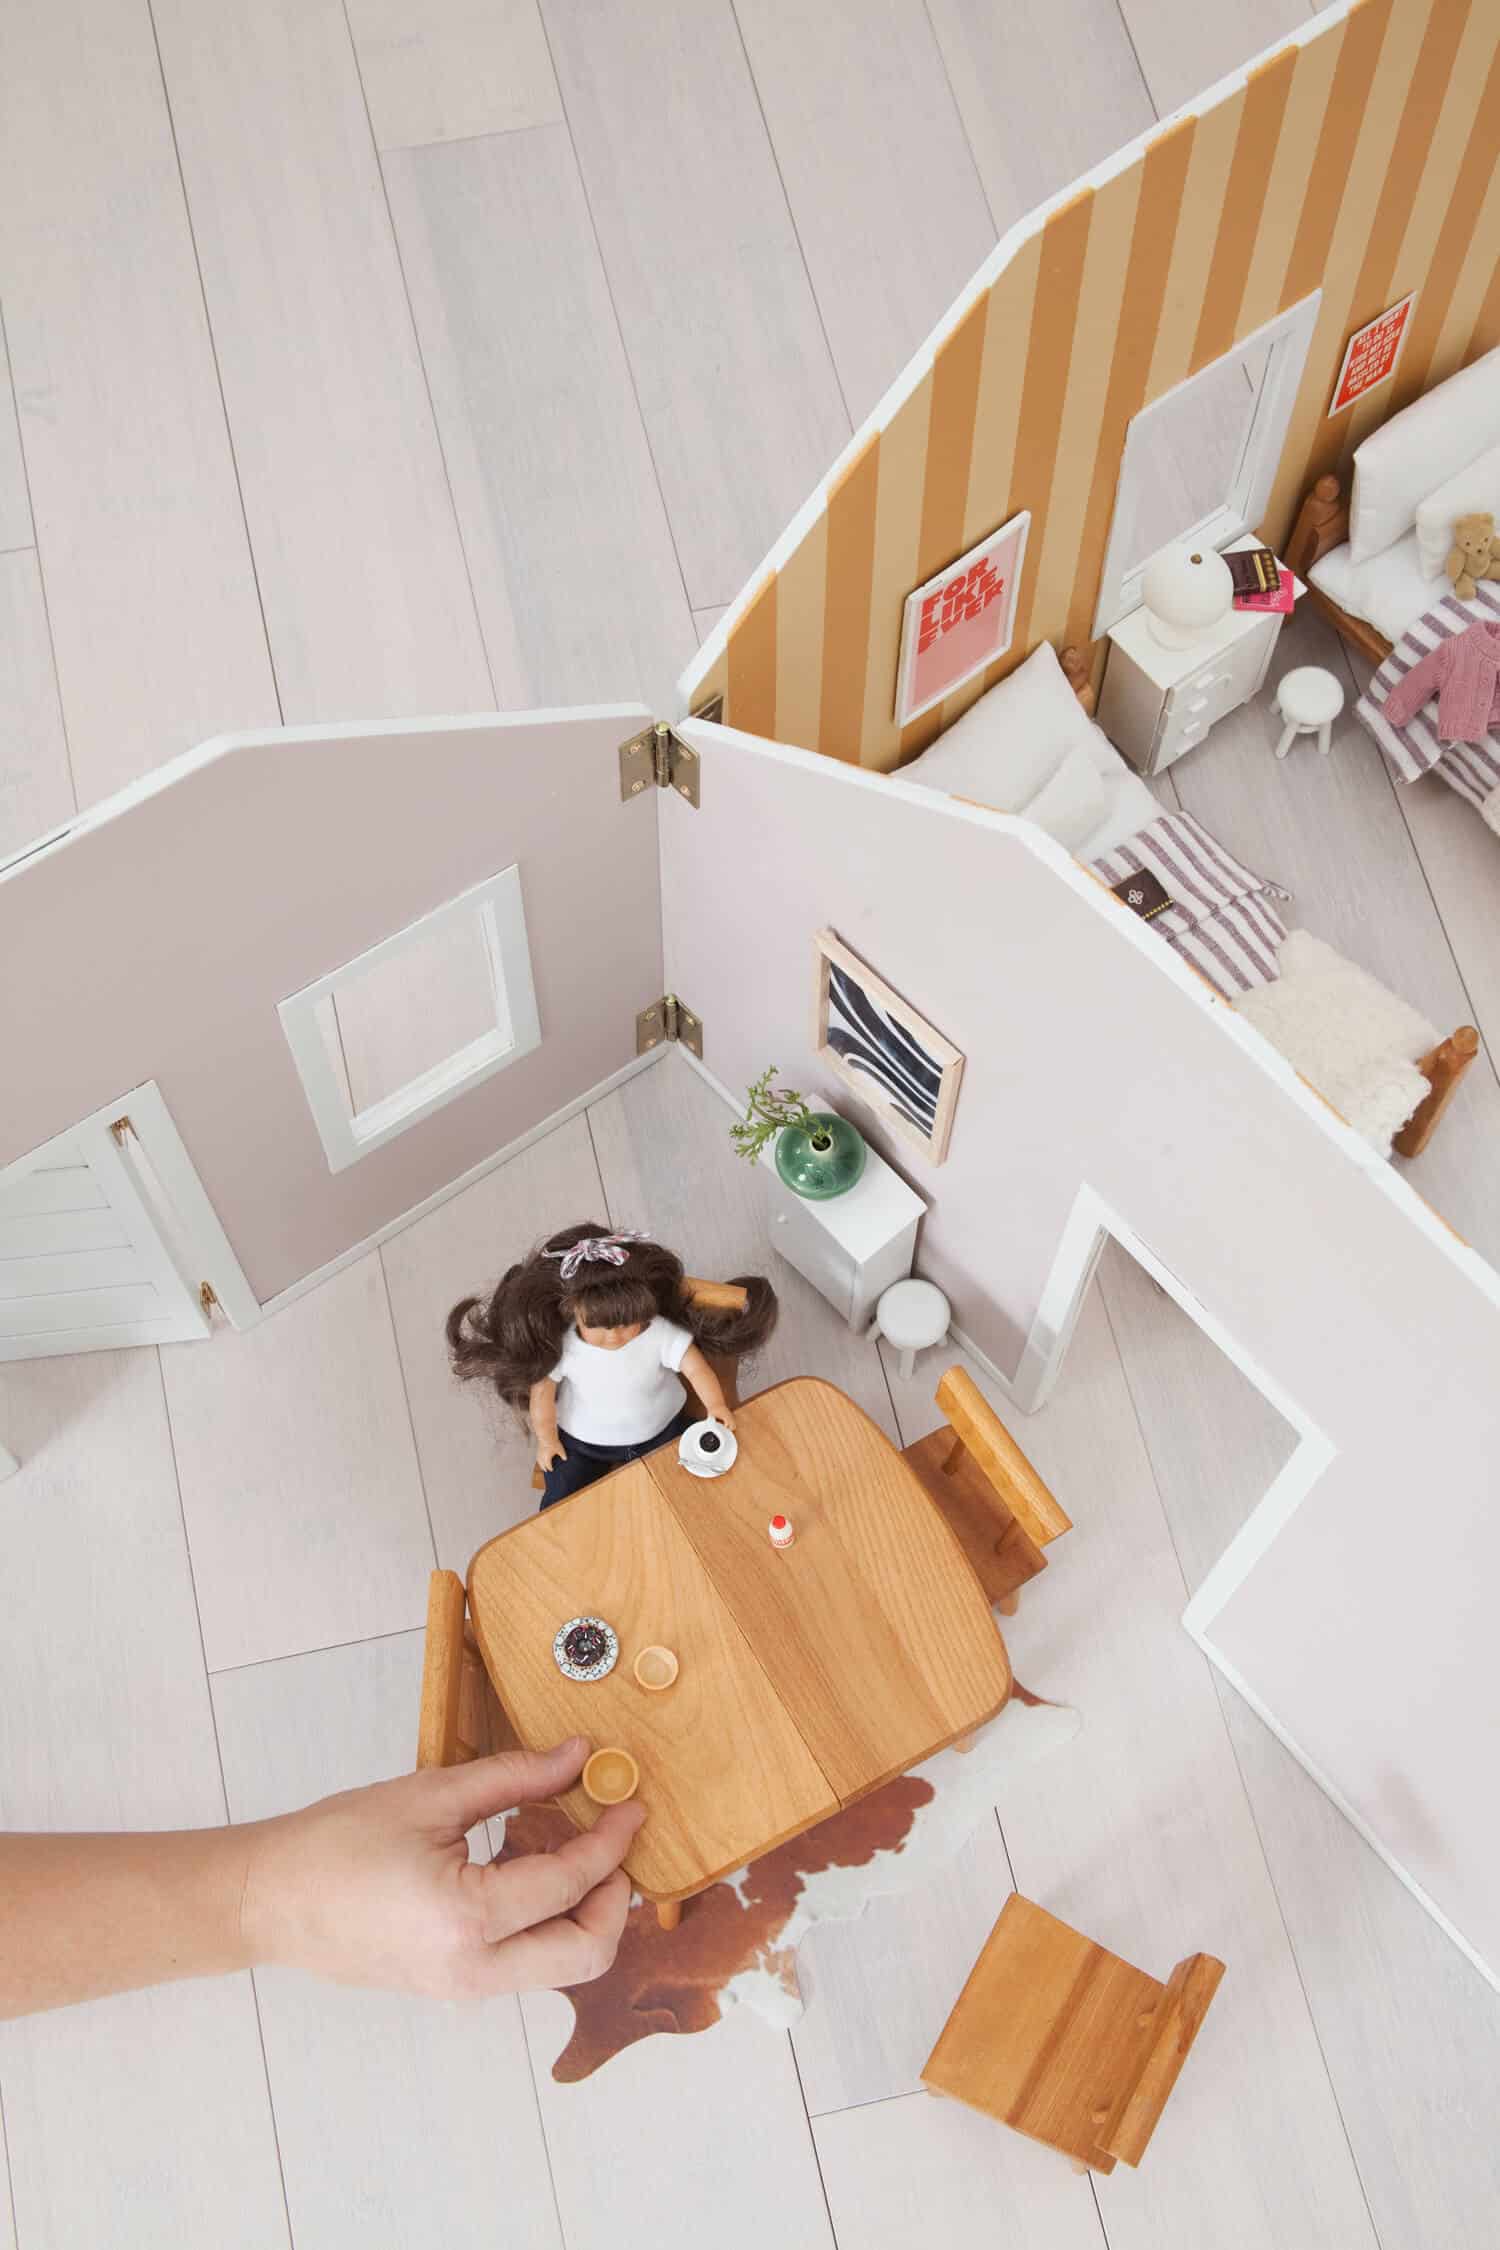
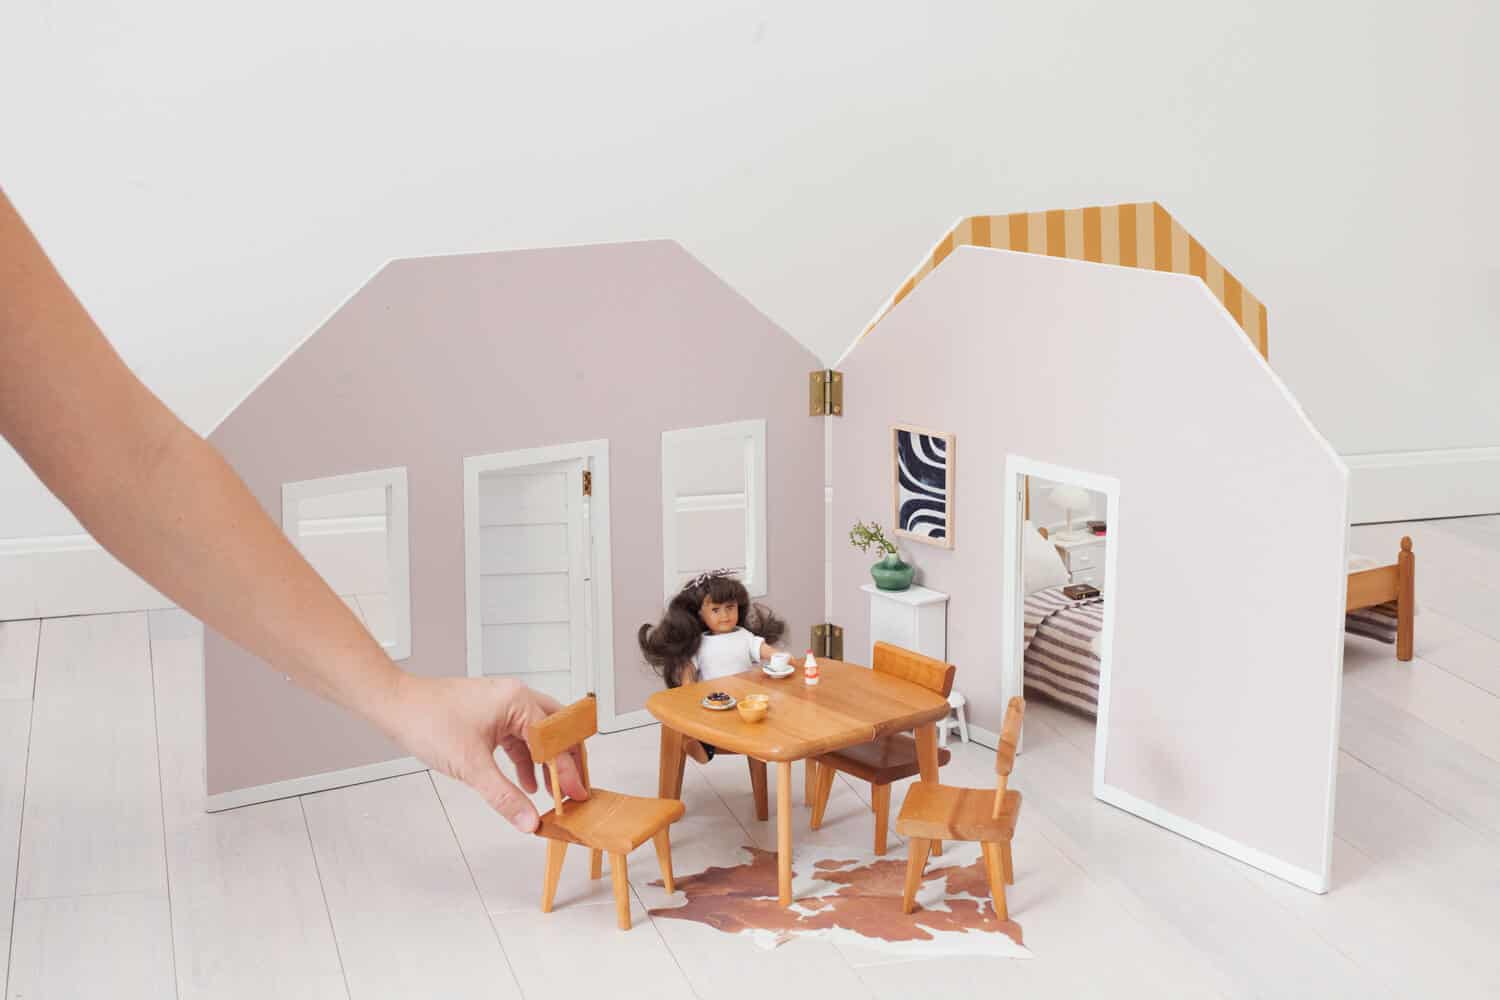
Perhaps my background in American Girl doll lifestyle shoot art directing (ha) prepared me for this very moment in time? I borrowed from the Scenes and Settings idea to create a simple plywood backdrop for my children’s dolls, so when they’re not playing, the dollhouse can be folded up, the furniture and dolls stored in a basket, and everything neatly put away until another day.
 There are a lot of options with this project. You can make it in any scale to suit your specific needs, and you can add as much or as little decoration as you’d like! Some of the supplies shown above ended up unused in my project, but adding shingles or painting bricks may be something I’ll add if I make another one of these fold-away dollhouses one day.
Materials:
-1/2″ plywood (You only need about 1/4 of a full sheet.)
-hinges for the walls and the front door (The size depends on your scale, but you may need to get shorter screws so they don’t poke through your plywood.)
-basswood trim pieces
-sandpaper (I used 80 grit, 120 grit, and 400 grit.)
-wood glue
-primer + paint
-pencil
-(optional) painter’s masking tape
Tools:
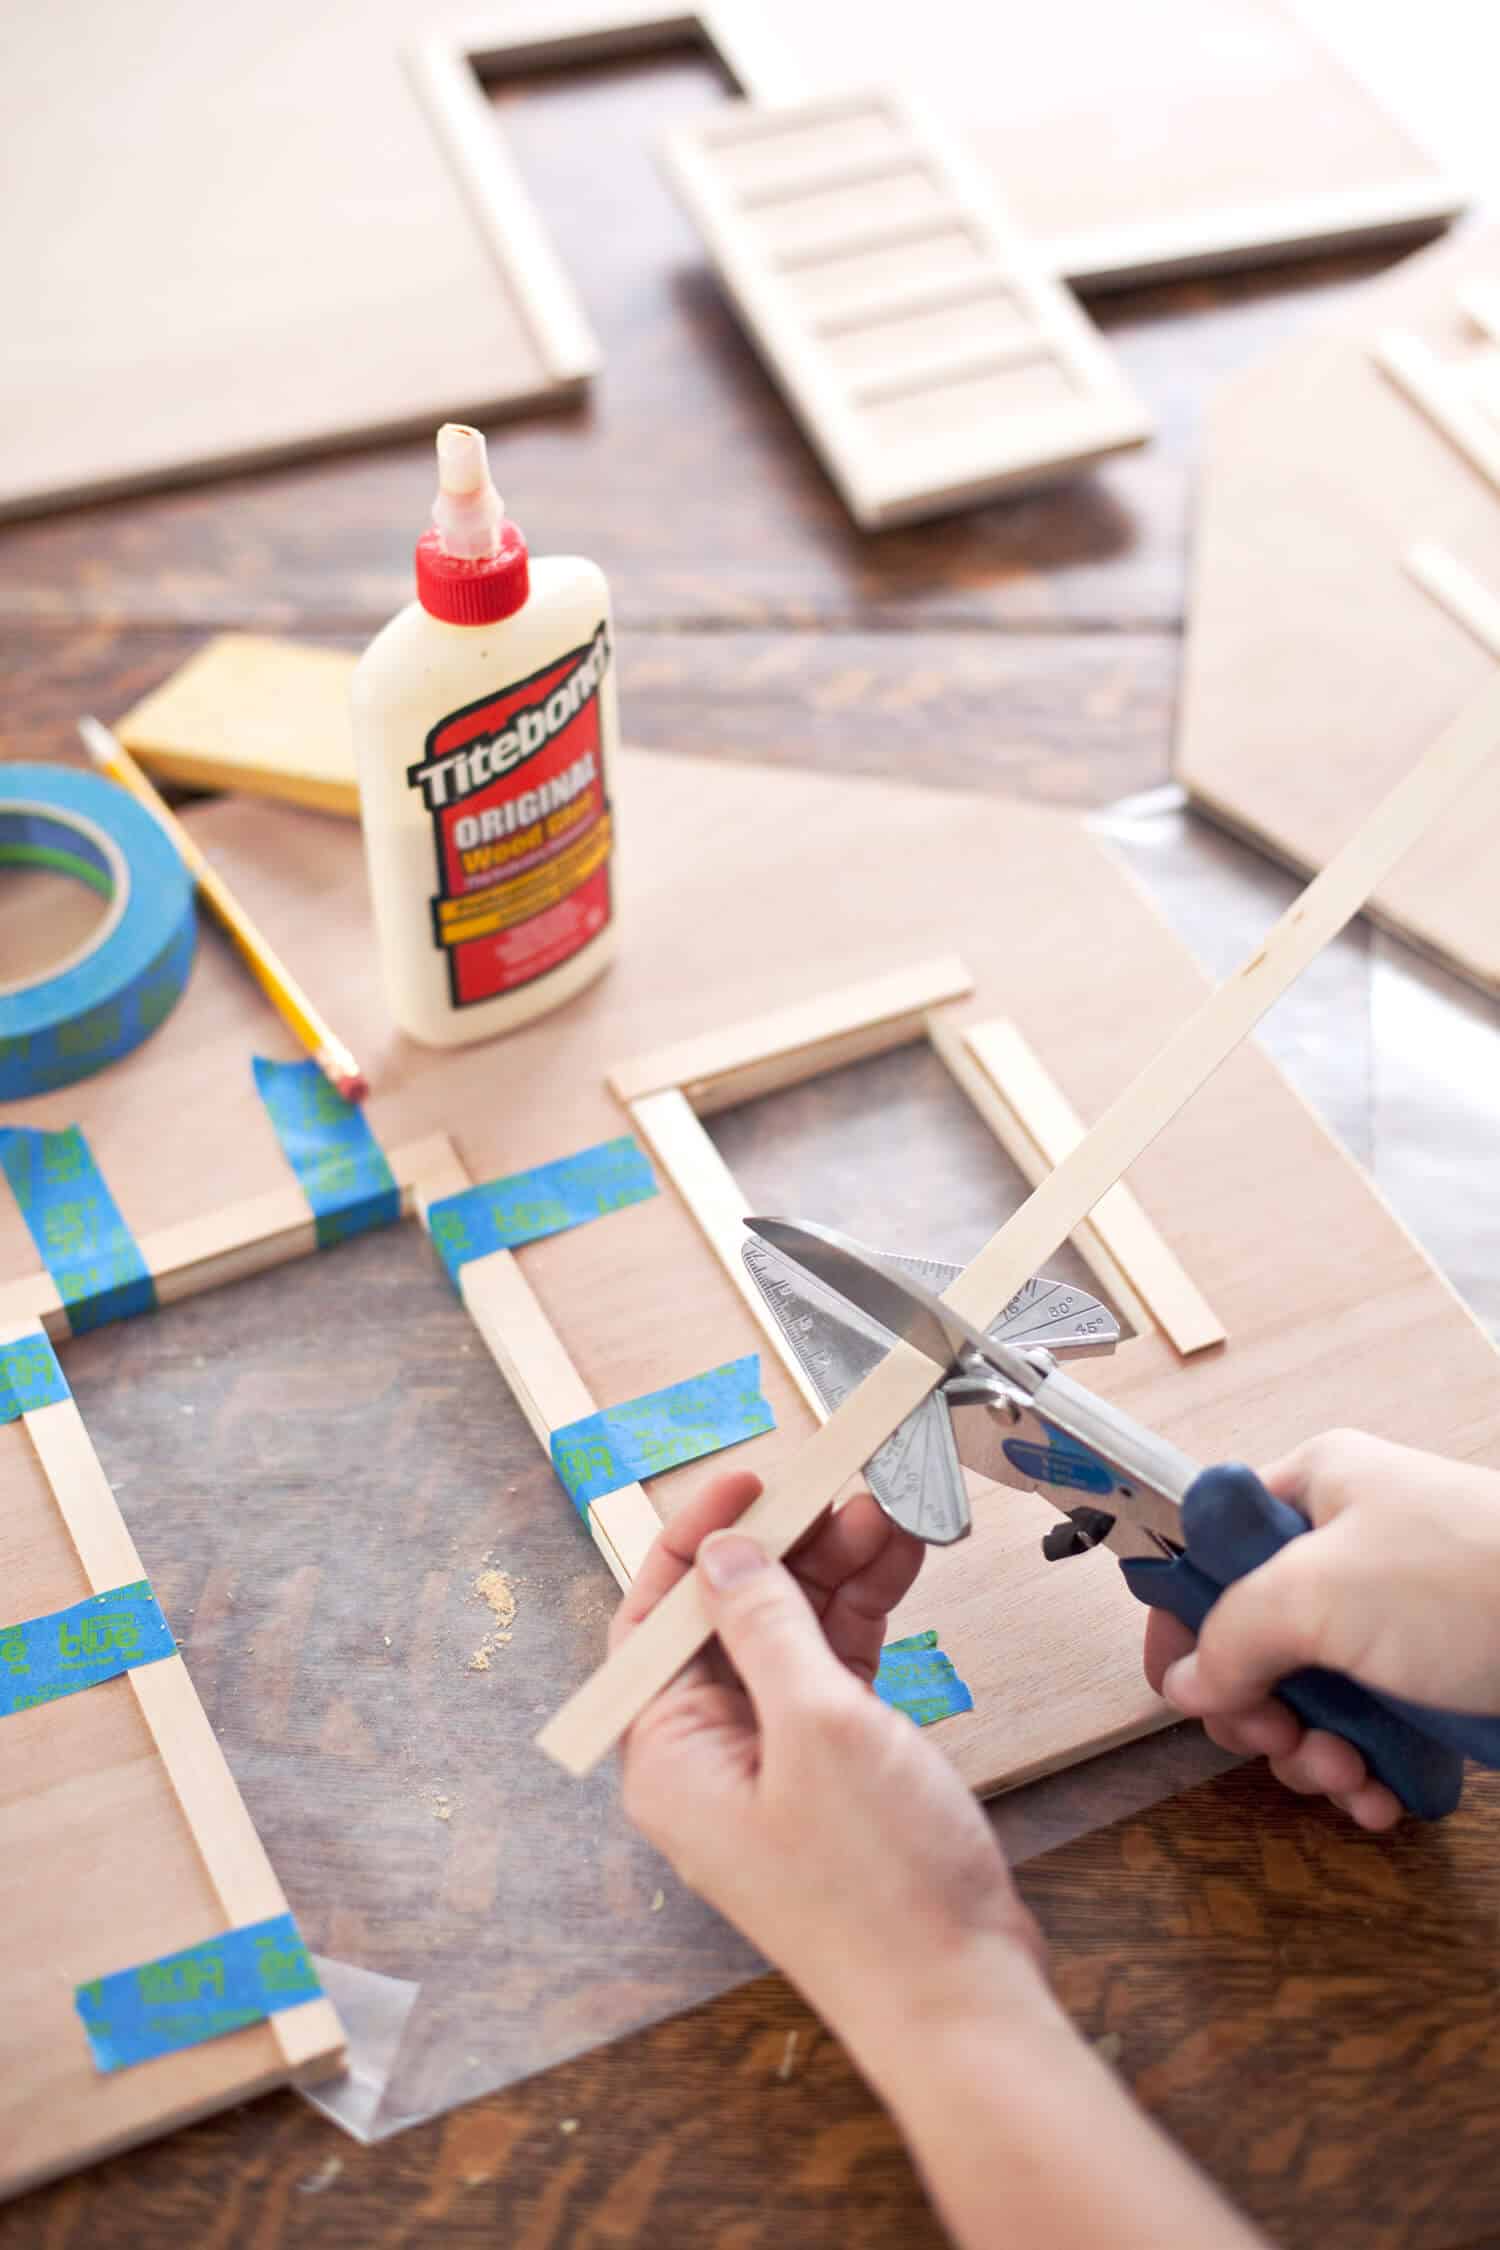
–miter shears or sharp scissors
-power drill
-jigsaw
-square
-(optional) paint brushes or sponges
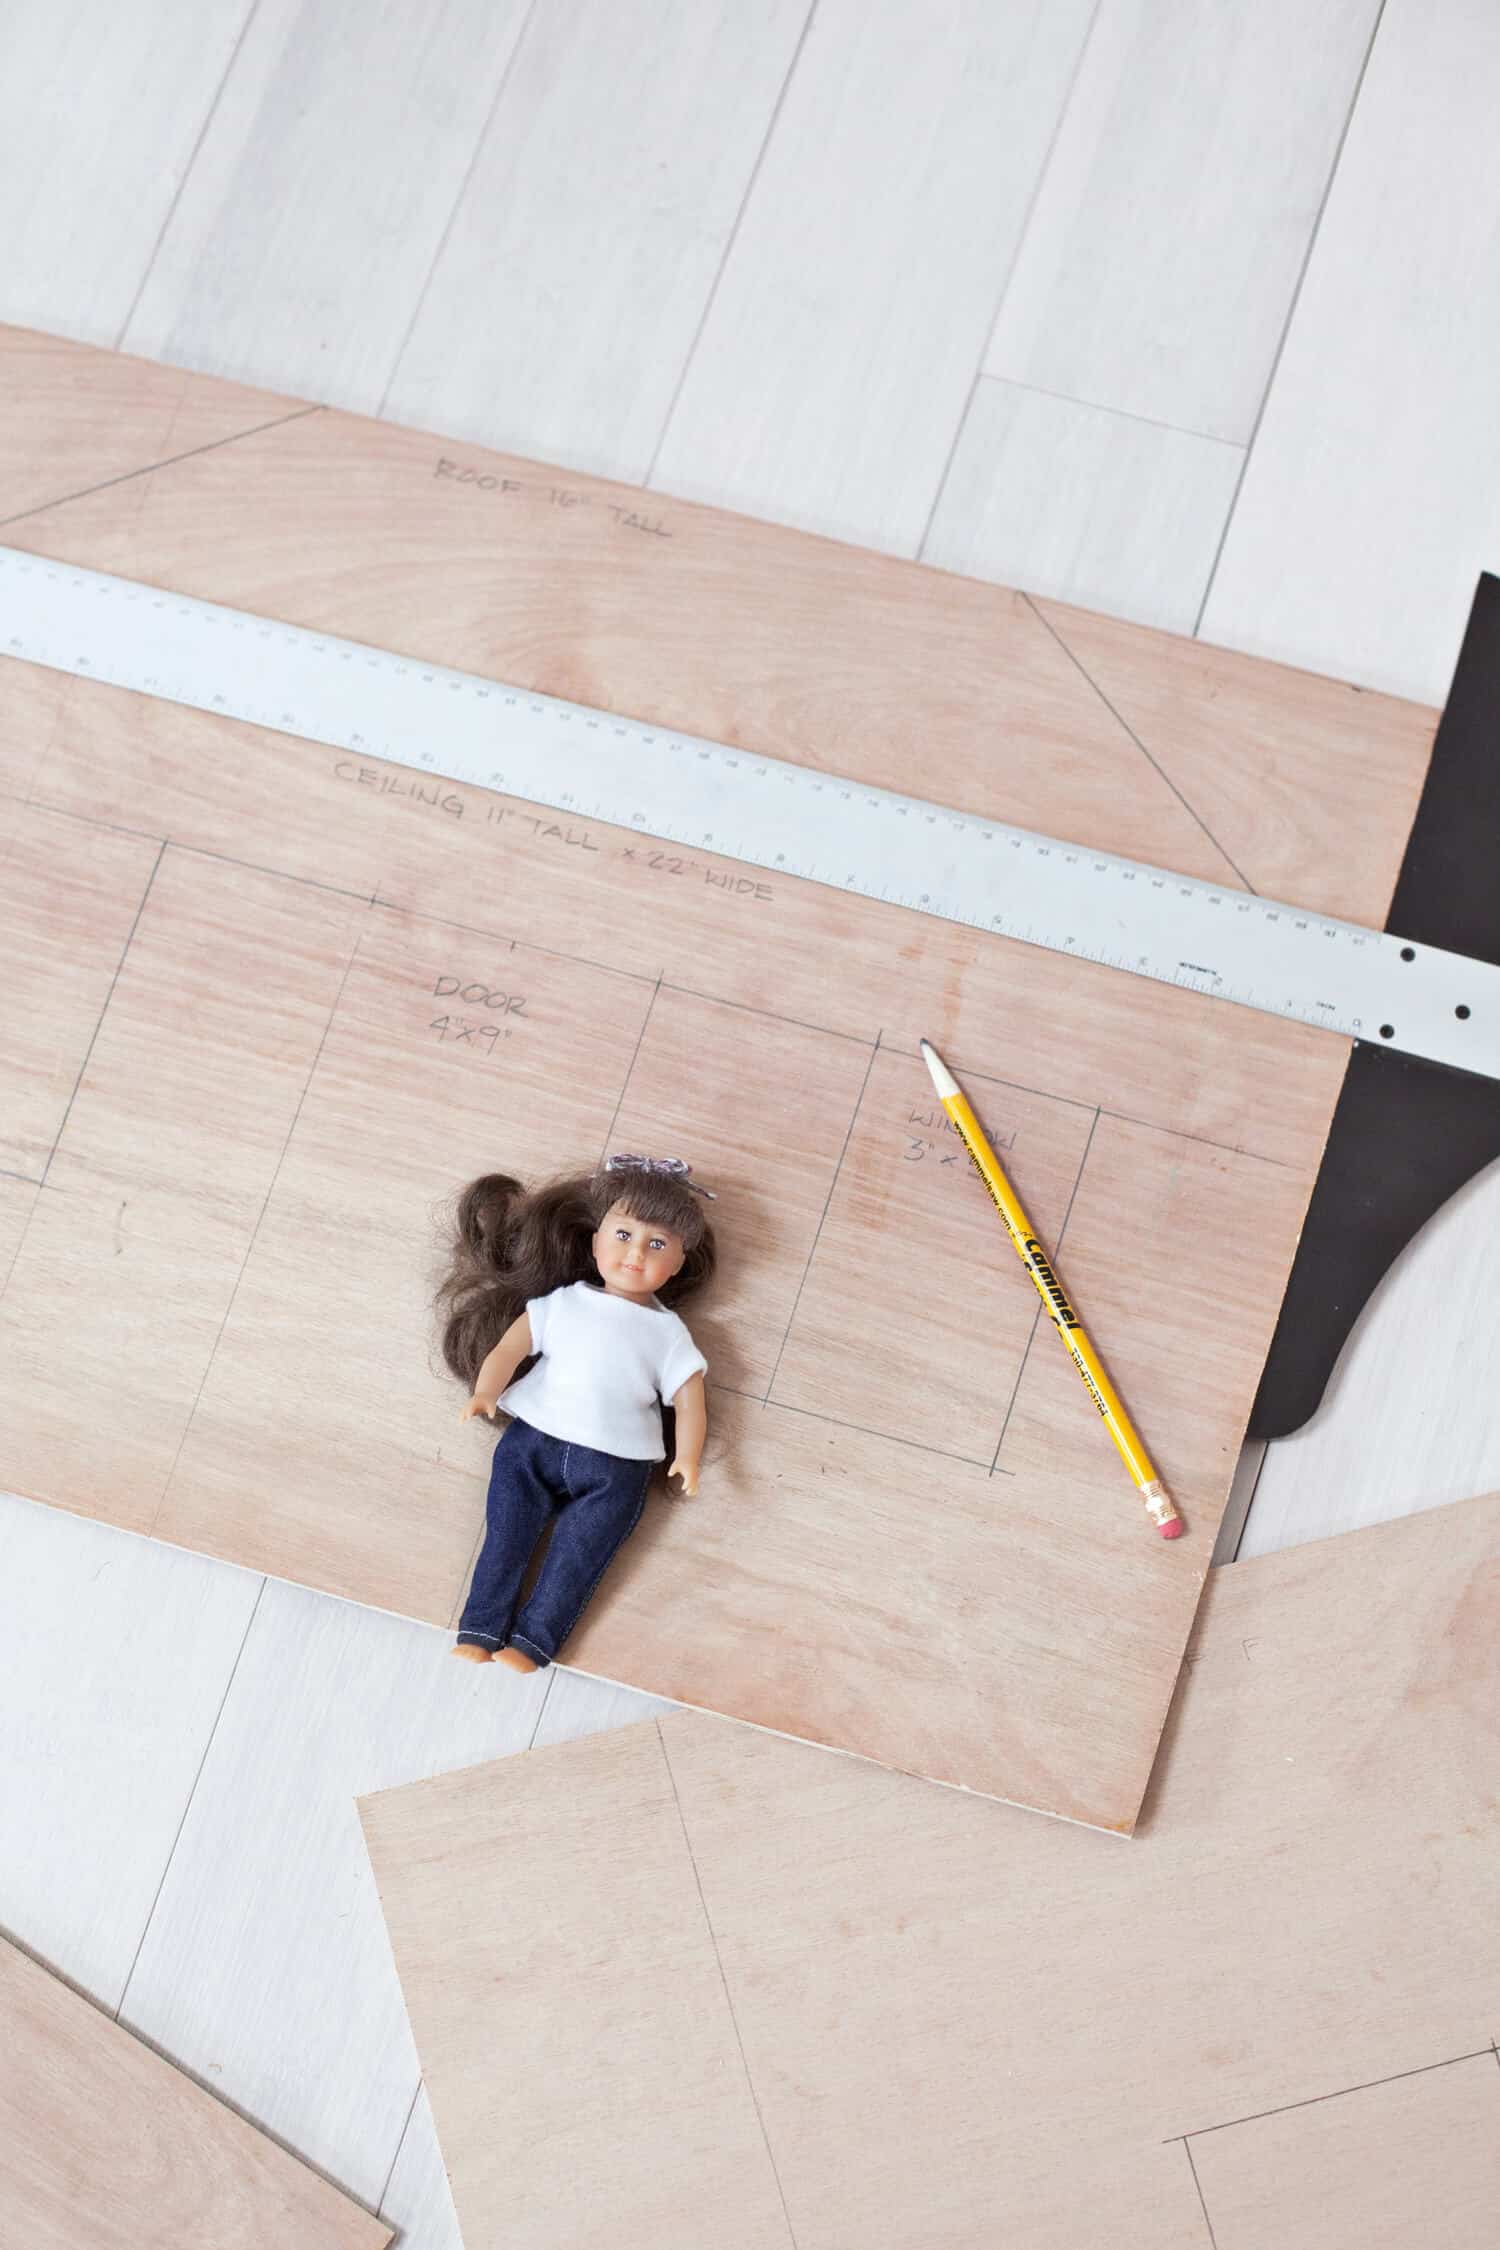 Step One: Have your plywood cut to the size you want each wall of the dollhouse to be. For a 6″ doll, I made my walls 22″x16″. Then use a square or t-square to draw where you want your windows, doors, and roof lines to be.
 Step Two: Use a jigsaw to cut out the the shapes you drew in step one. If you need tips for cutting out a hole using a jigsaw, this post by Laura is helpful!
You’ll also need to cut a new piece of wood for your front door. Make it smaller than the opening, because hinges and swinging will make it fit tighter than you expect.
 Step Three: Sand down all of your rough edges with a block wrapped with 80 grit sandpaper. I like using sticky-back sandpaper for this reason! After you’ve leveled out any rough edges from the jigsaw, go over everything with 120 grit to make it nice and smooth.
Step Four: Cut pieces of your basswood strips to act as trim around the windows, doors, and “floors.” Glue each piece onto your walls and door using wood glue, then “clamp” the pieces in place with masking tape until the glue has dried.
You could paint your trim separately and glue it on after painting the walls, but I’ve done it both ways and found it easier to just spray paint the whole thing, trim and all, then cut in with paint. If you are stenciling on any kind of pattern, adding trim after painting the walls would be smart.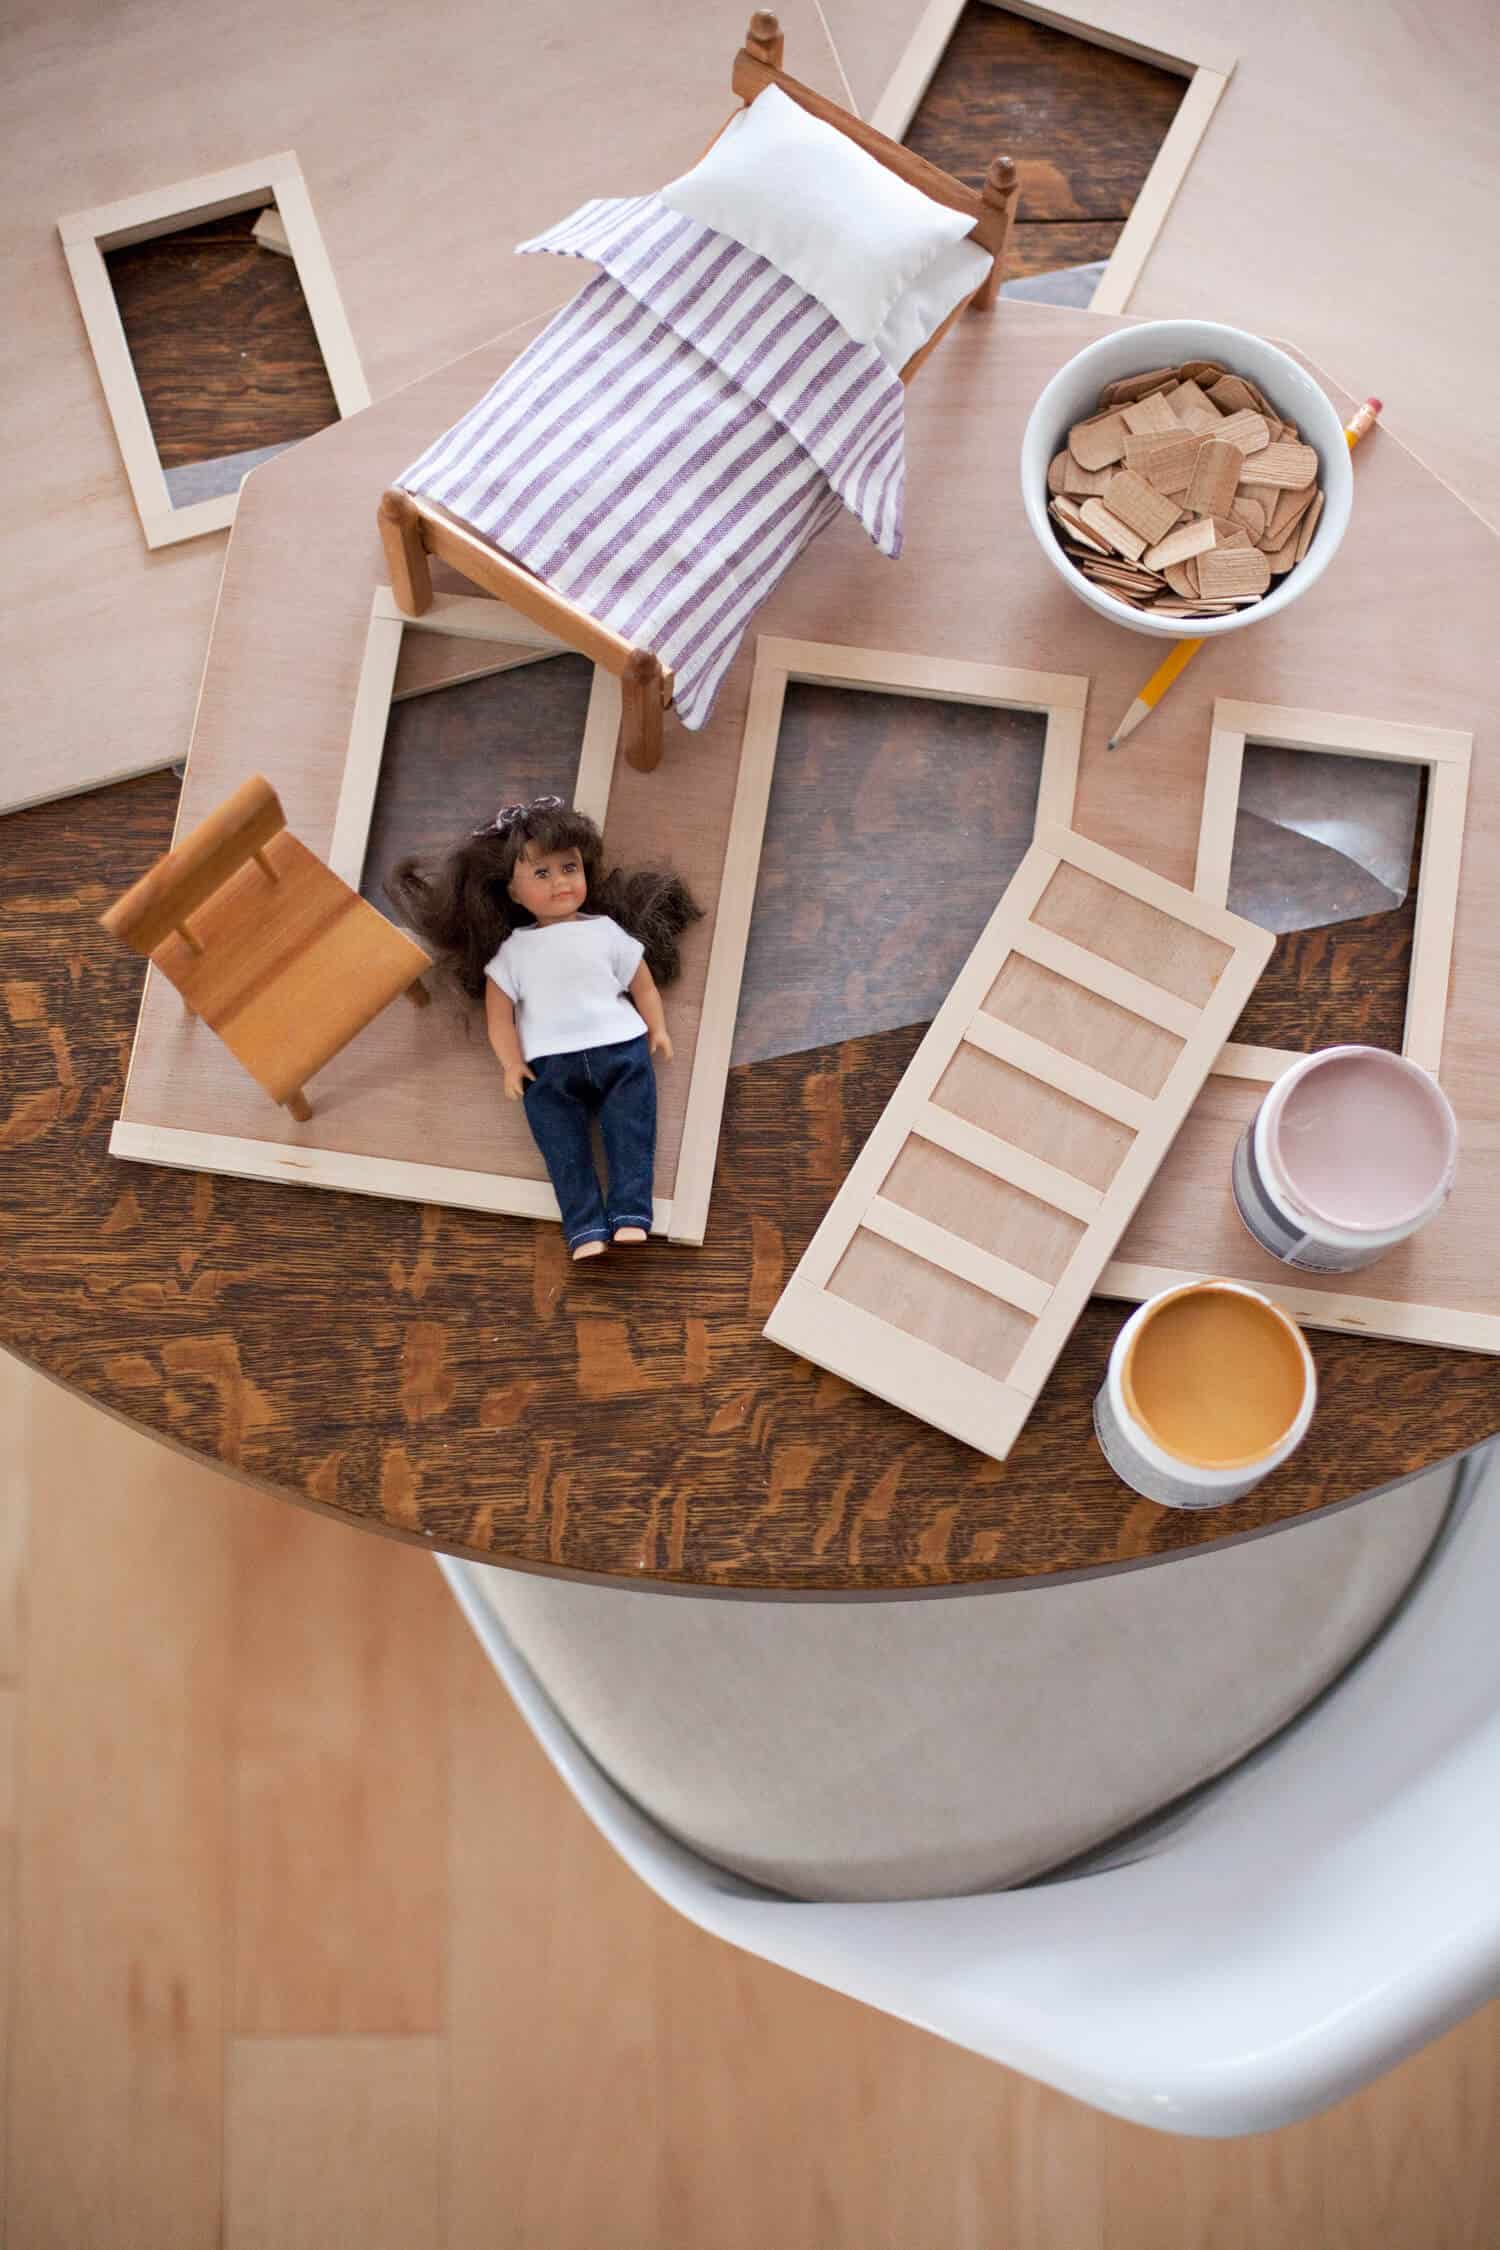 At this point, you may choose to leave your wood natural and unpainted. If that’s the look you’d like, I’d caution you to keep that in mind when selecting your plywood, because as you can see, my basswood strips are a different hue than the plywood I used, which provides a nice contrast … but not everyone would want that kind of contrast in their finished product.
Also, if you plan to leave your walls and door unpainted, I would definitely seal everything with a few coats of polyurethane. Lightly sand with 400 grit sandpaper after your first coat to ensure the final coats are silky smooth.
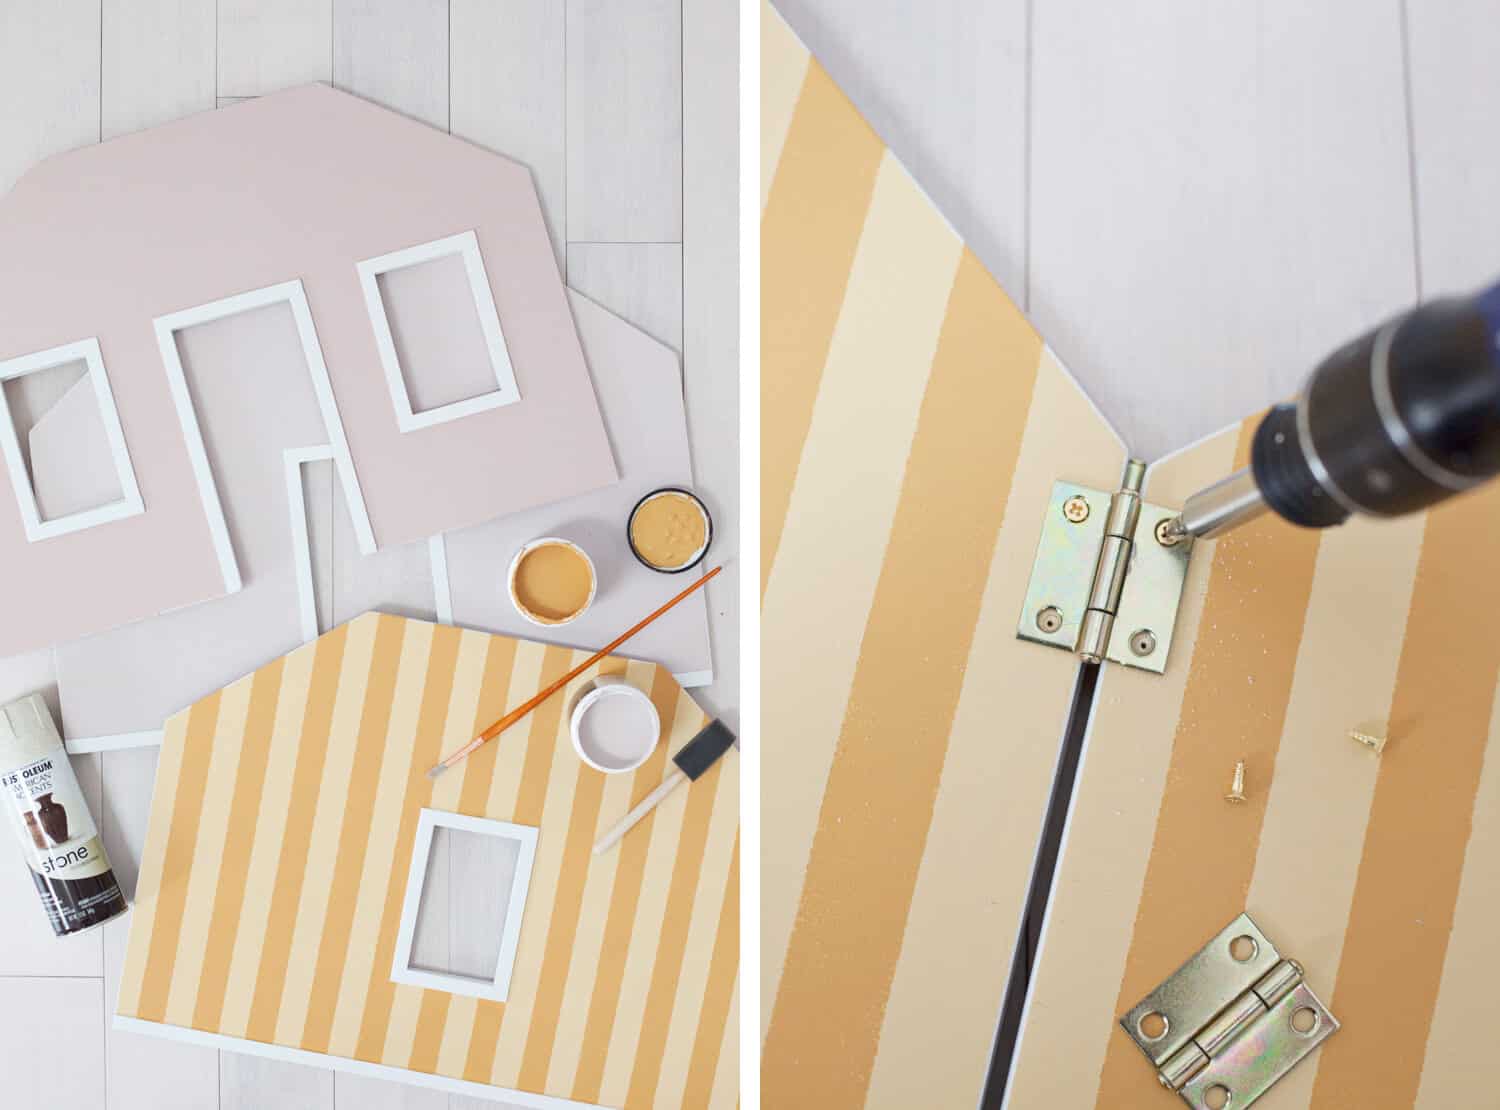 Step Five: Prime and paint the walls and door. After one coat of primer, use 400 grit sandpaper to make the surface silky smooth. Then move on to your final paint colors.
I had considered wallpapering the walls with a tiny floral wallpaper, but in the end I decided that the wallpaper would probably end up peeling up with wear and tear, so I kept things as indestructible as possible and just used paint. (That was my same reasoning behind not using shingles on the exterior as I had initially planned.) I did use a textured “stone” spray paint on the exterior walls to give the finish a miniaturized stucco feel. It isn’t so noticeable in pictures, but I think it adds a significant touch in person.
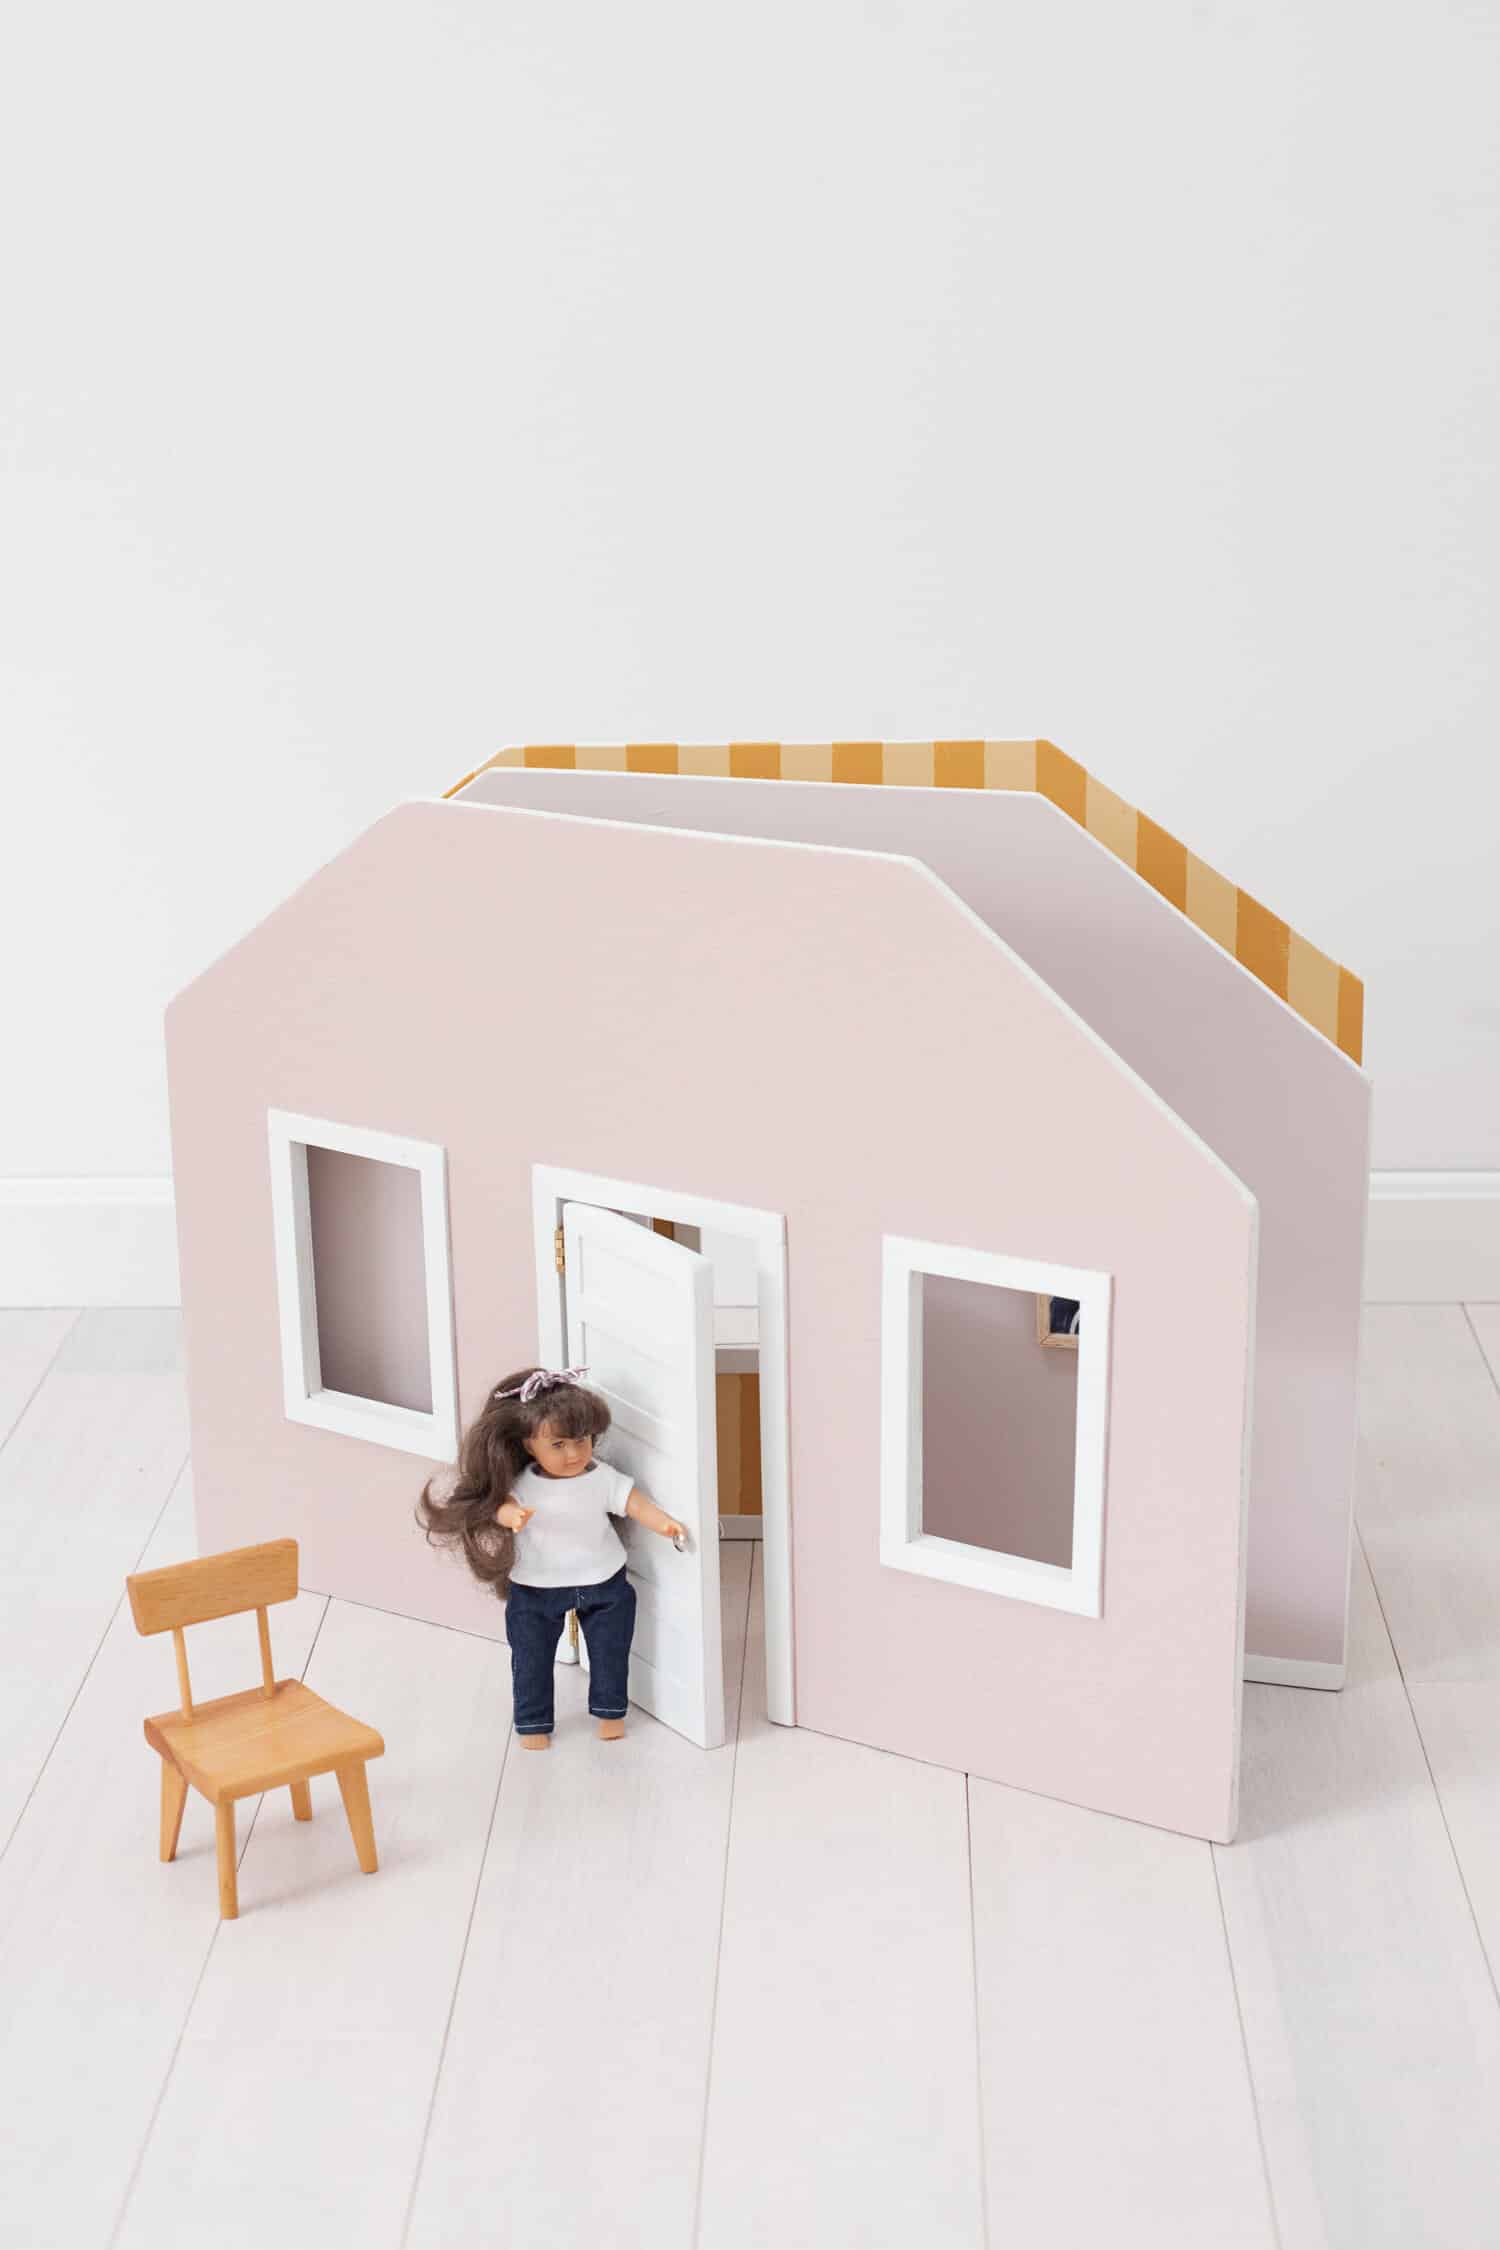
Step Six: Add hinges to connect the walls. Make sure to stagger your hinges up or down on either side of the middle wall, or else your screws from each side’s hinges will hit each other and give you lots of grief.
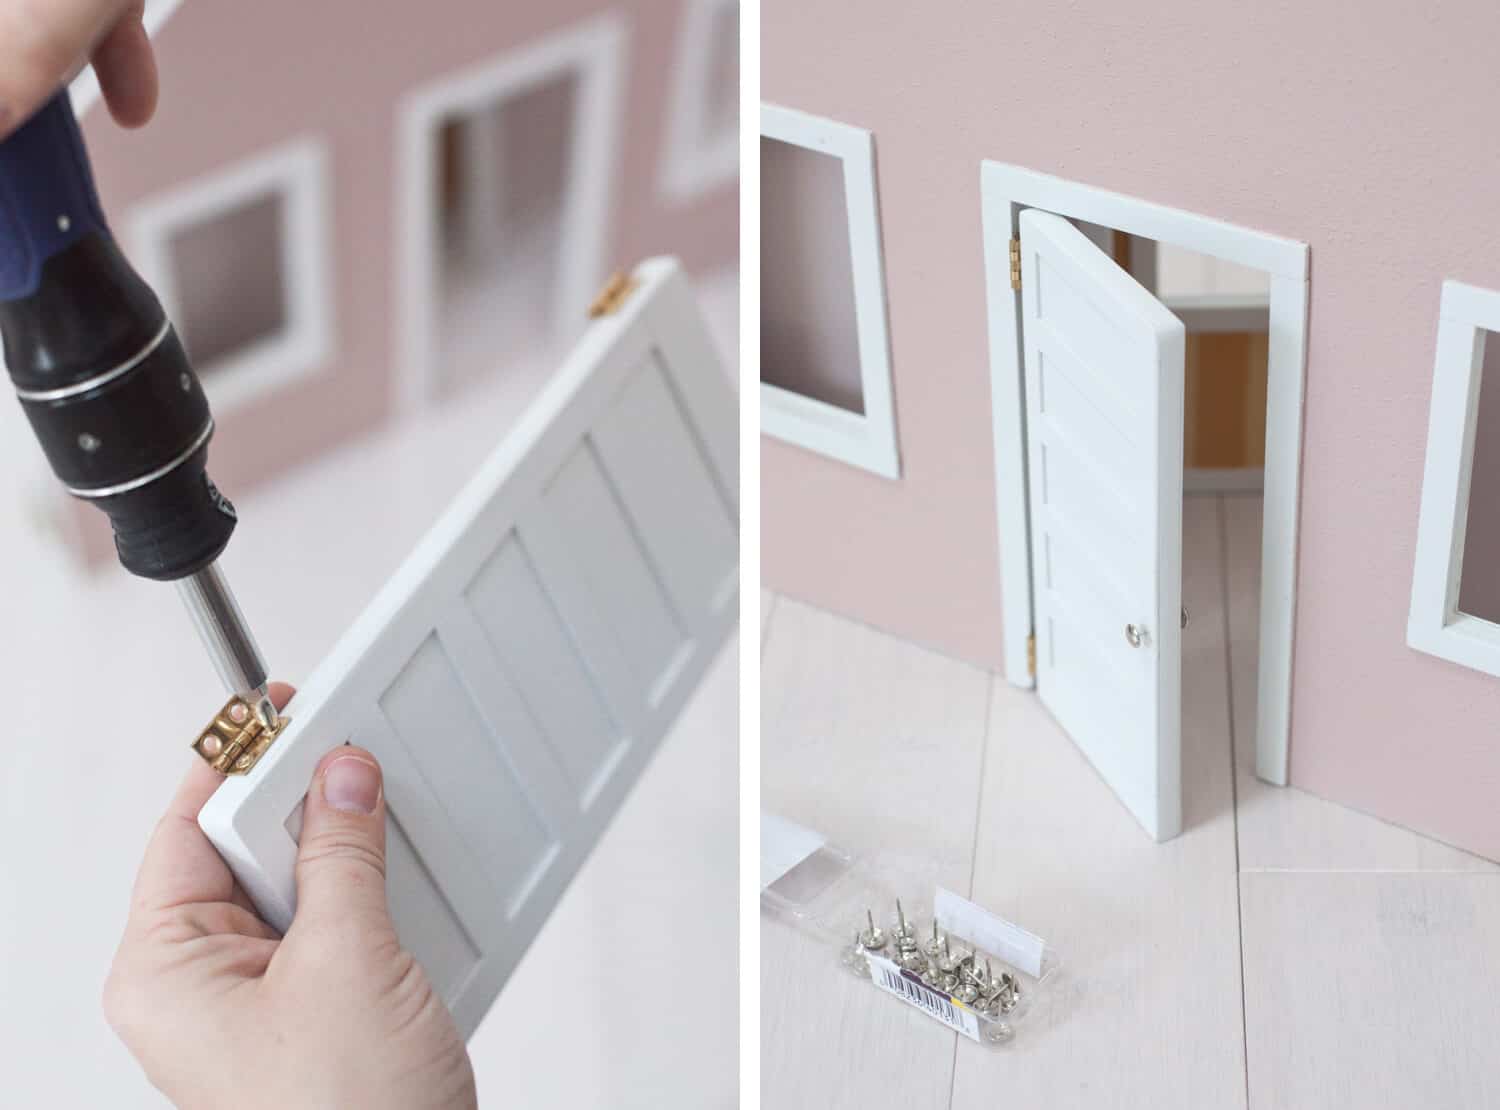 Step Seven: Add hinges to your door. I was worried about being able to maneuver my screwdriver into the tiny door opening in order to screw the hinge into place, but it worked fine to come at the screw at a slight angle. Whew!
Lastly, add some sort of knob to your front door. You can glue on beads, fashion a knob out of polymer clay, or do as I did and simply use a metal push pin on each side of the door.
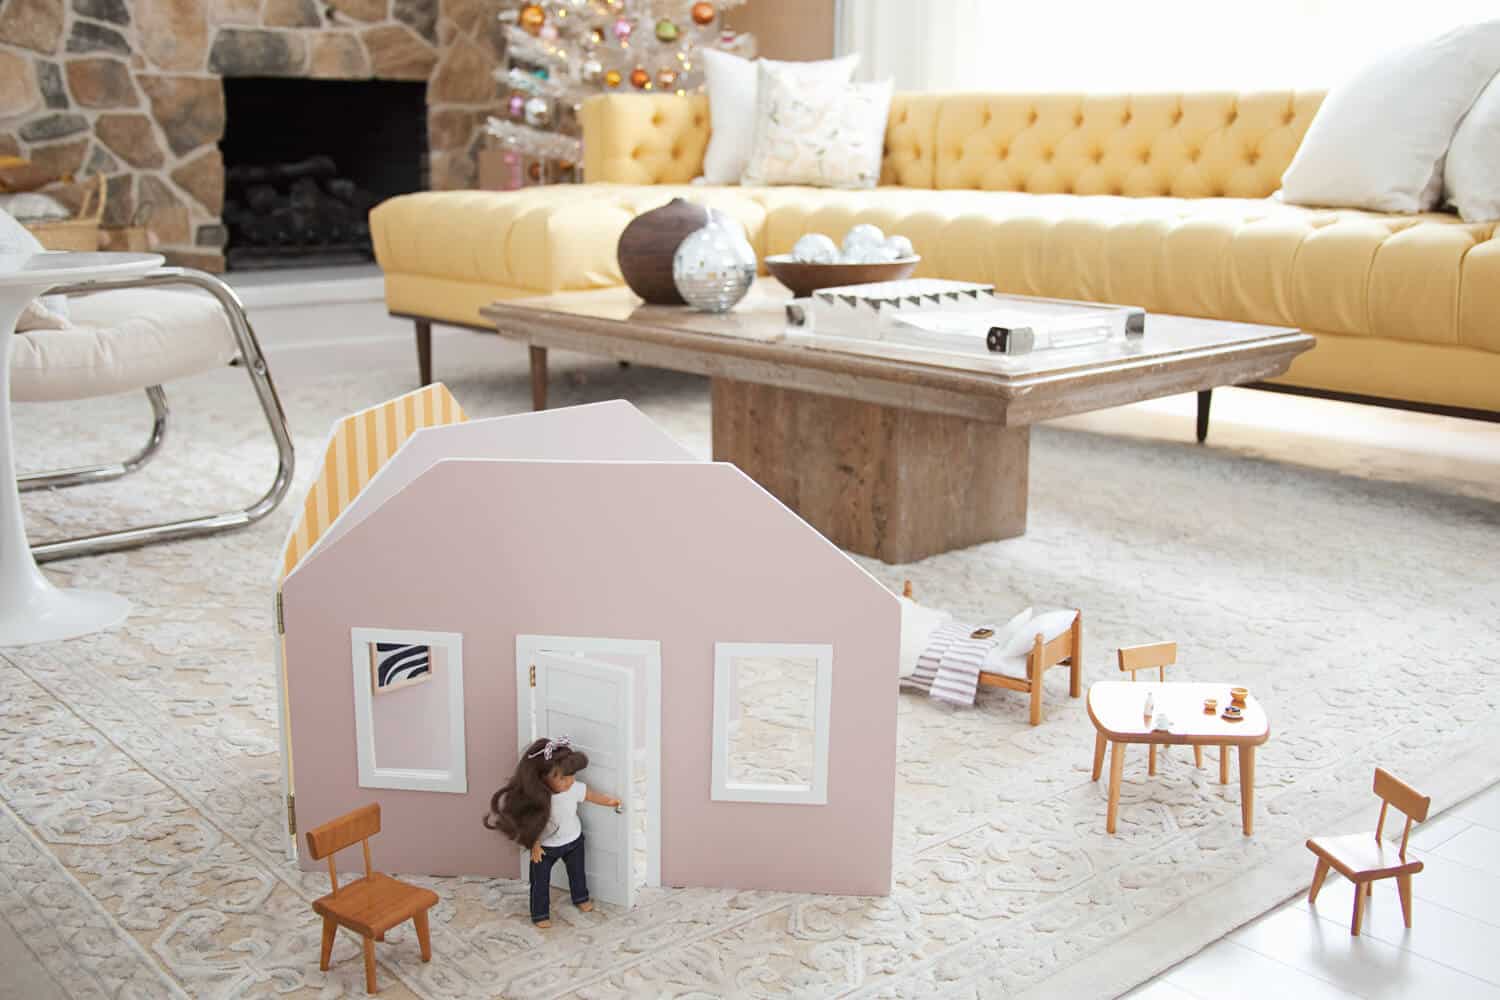
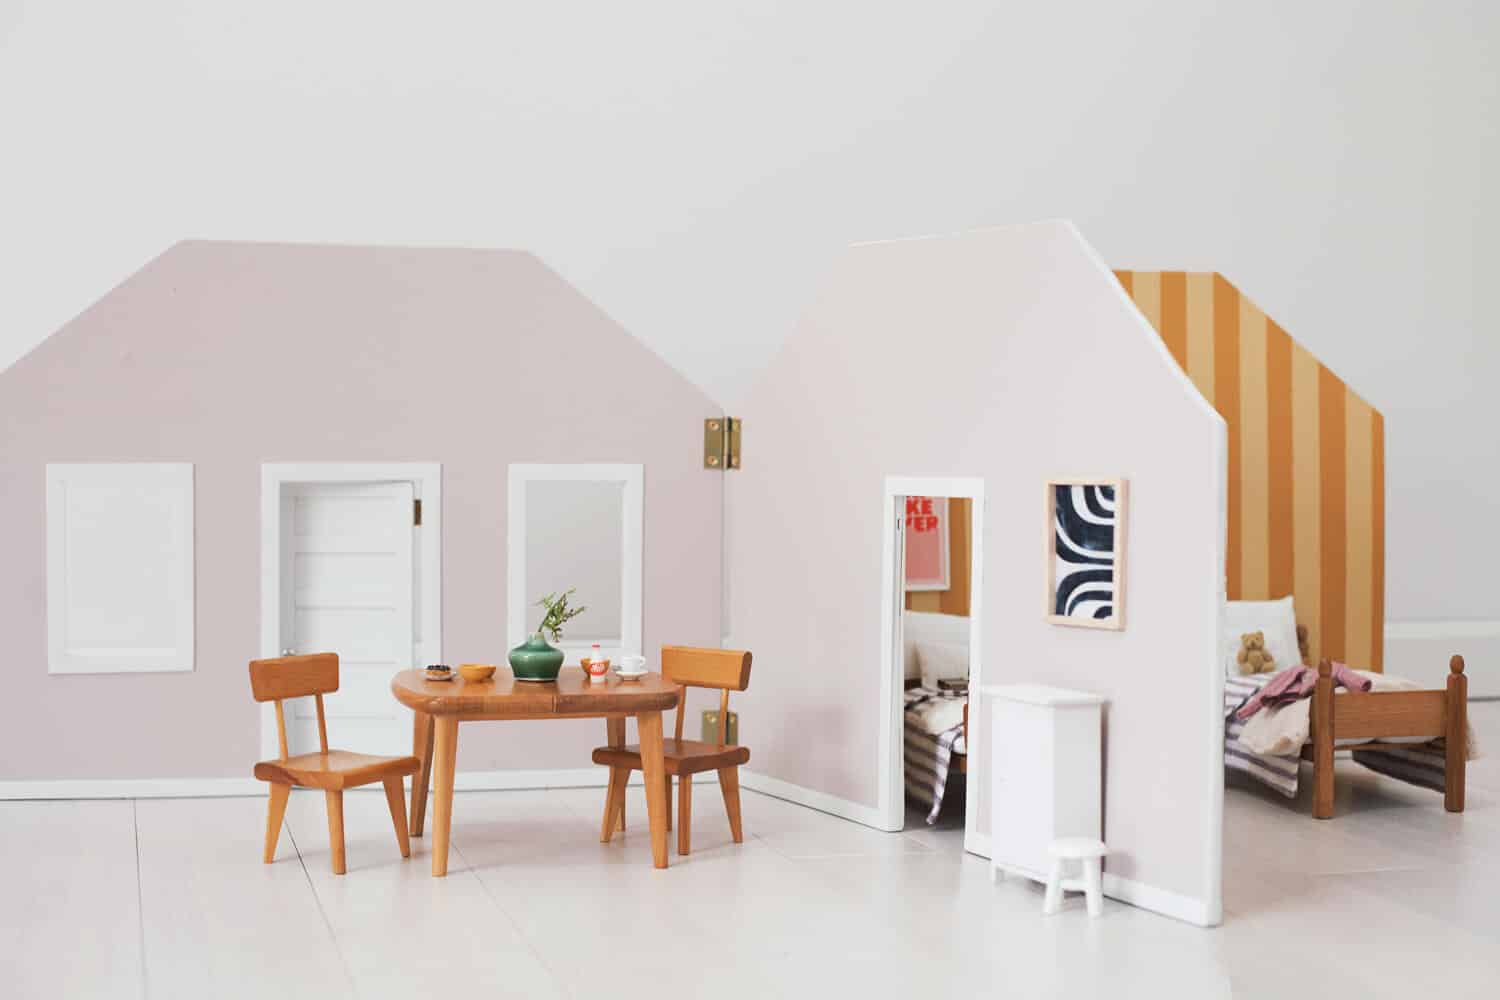 This simple little dollhouse still feels plenty charming, but it doesn’t have the destructible elements of the fancier dollhouse I made two years ago. Plus it has the added benefit of being space-conscious and portable!
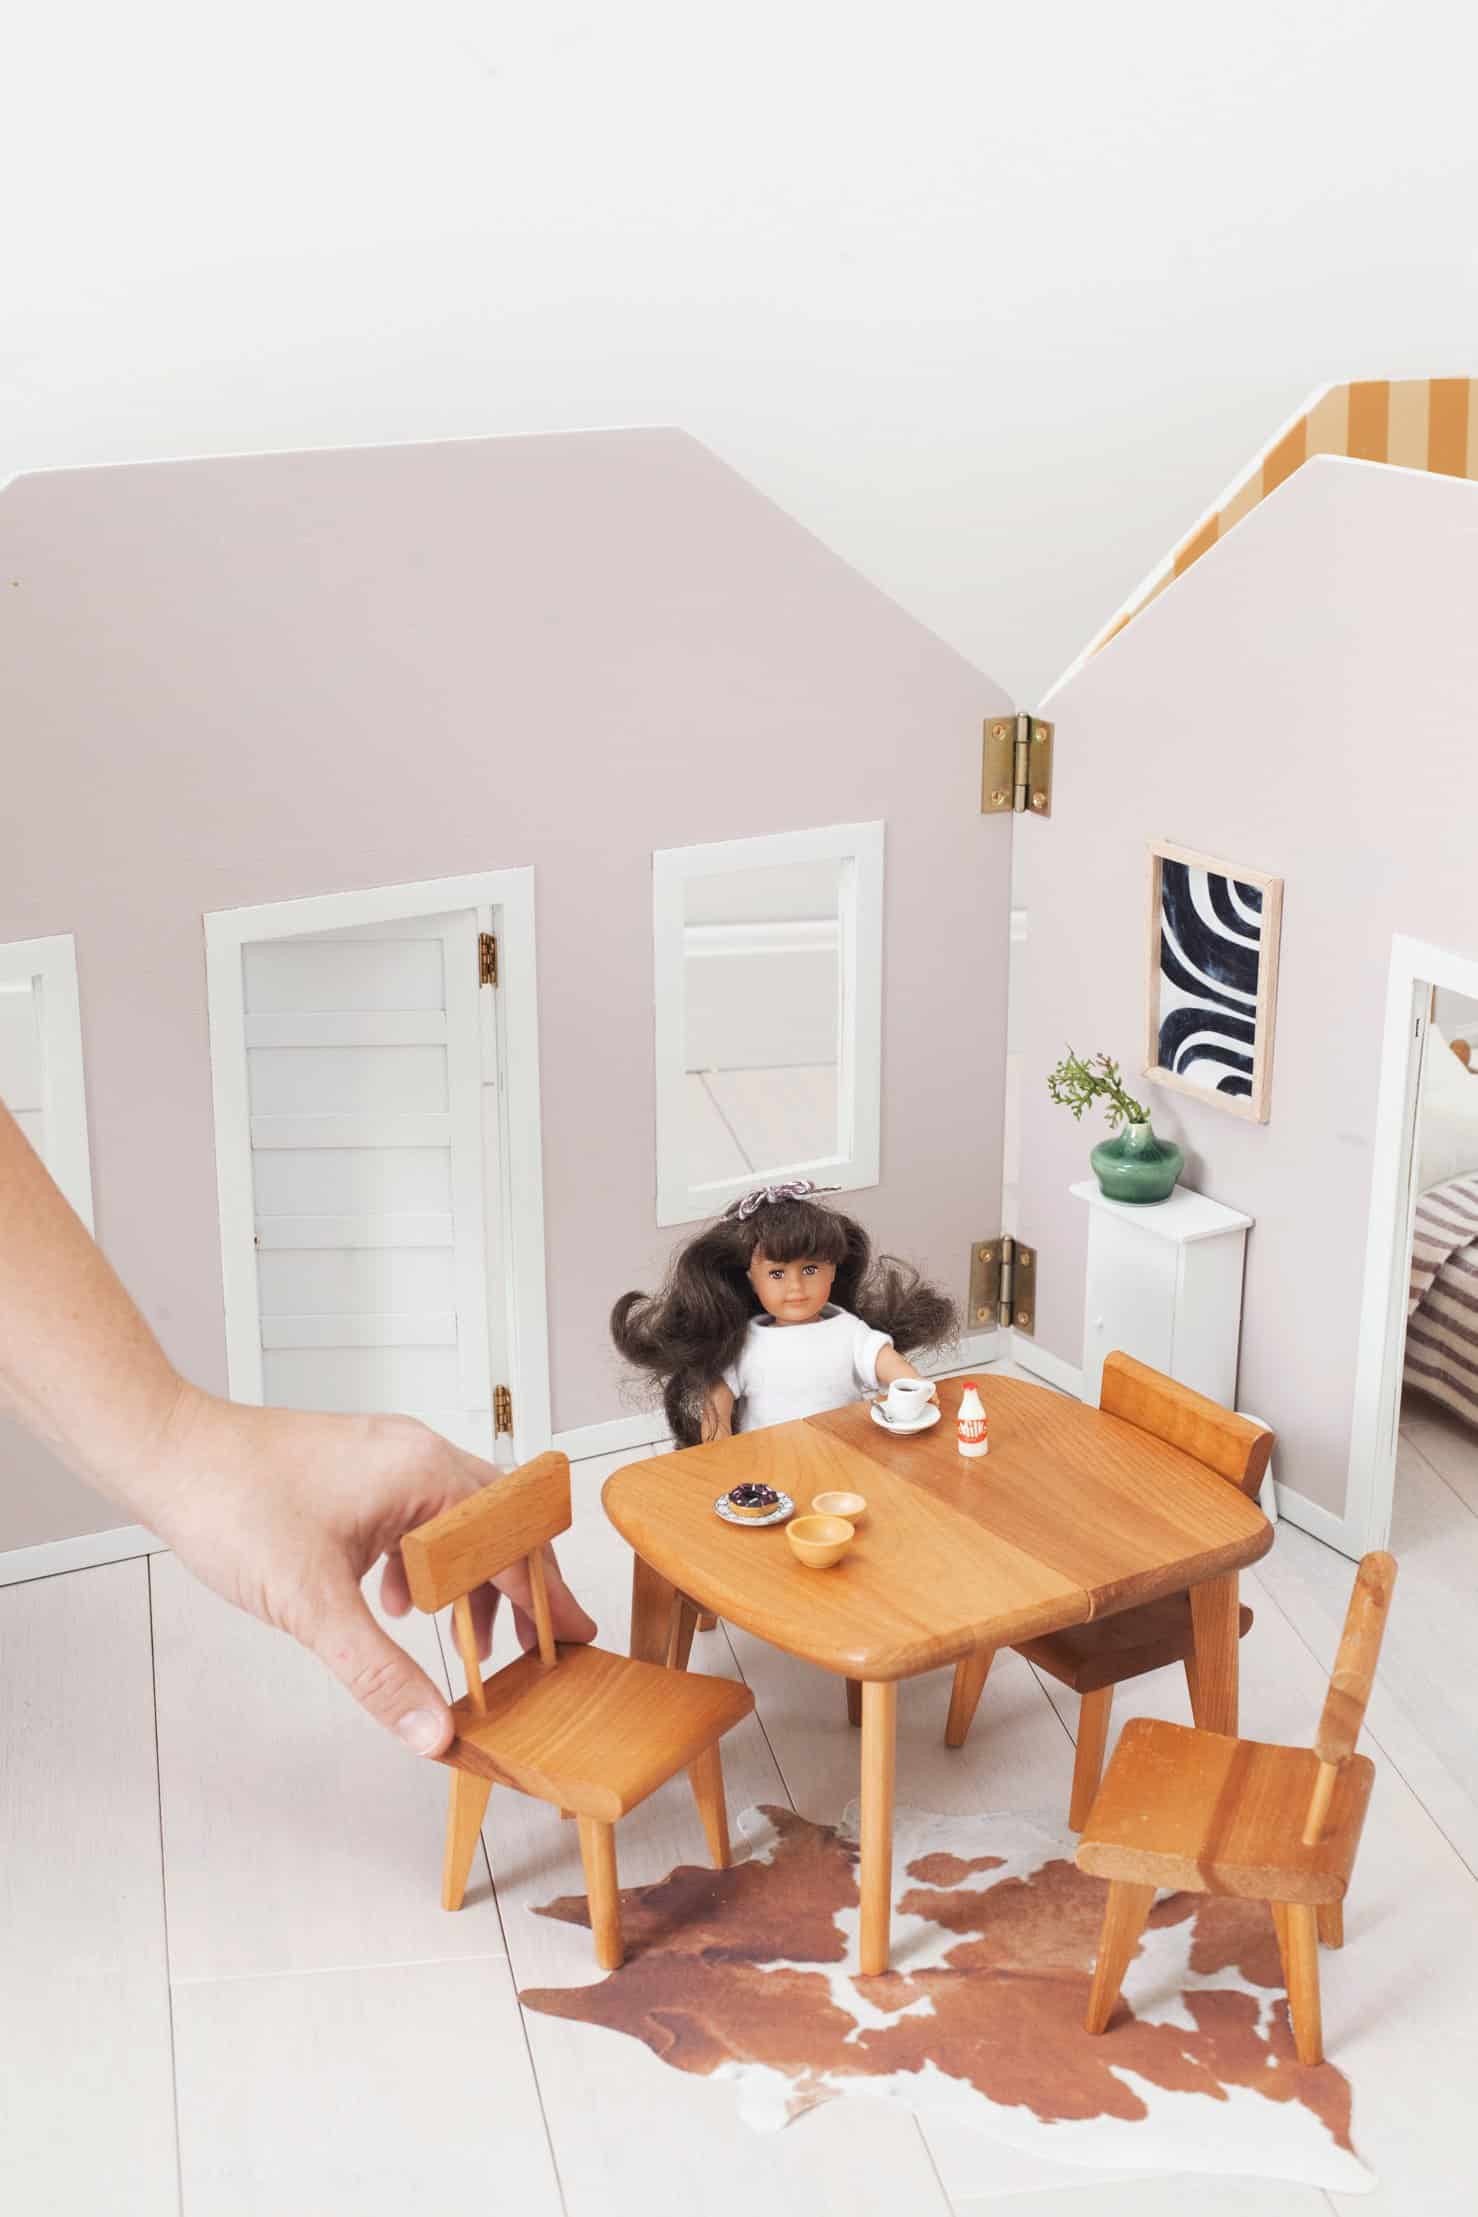
 Before I built this fold-away dollhouse, I had selected my dolls and the furnishings. The doll shown is a mini American Girl doll (Samantha) in casual clothing I got from Hole in My Bucket on Etsy. Mini American Girl dolls are easily found for sale online, and they’re the same size as the 6″ Lori dolls.
 It’s difficult to find furniture for 6″ dolls, though the Lori brand does have some furnishings available, just not in a style I prefer. I found this well-made vintage Strombecker* furniture on eBay, and other furniture in this scale by searching for “Ginny doll furniture.” (Ginny is a vintage 7 1/2″ doll from the ’50s.) After I found the furniture, it helped me decide what size to make the rooms in the fold-away dollhouse. This project could easily be adaptable to 1:12 scale—the traditional size for miniatures—which means doll furniture in this scale is available everywhere. Or you could even size it for Barbies or 18″ dolls.
*Not all Strombecker doll furniture is in this scale, so please check measurements before you buy any doll furniture!
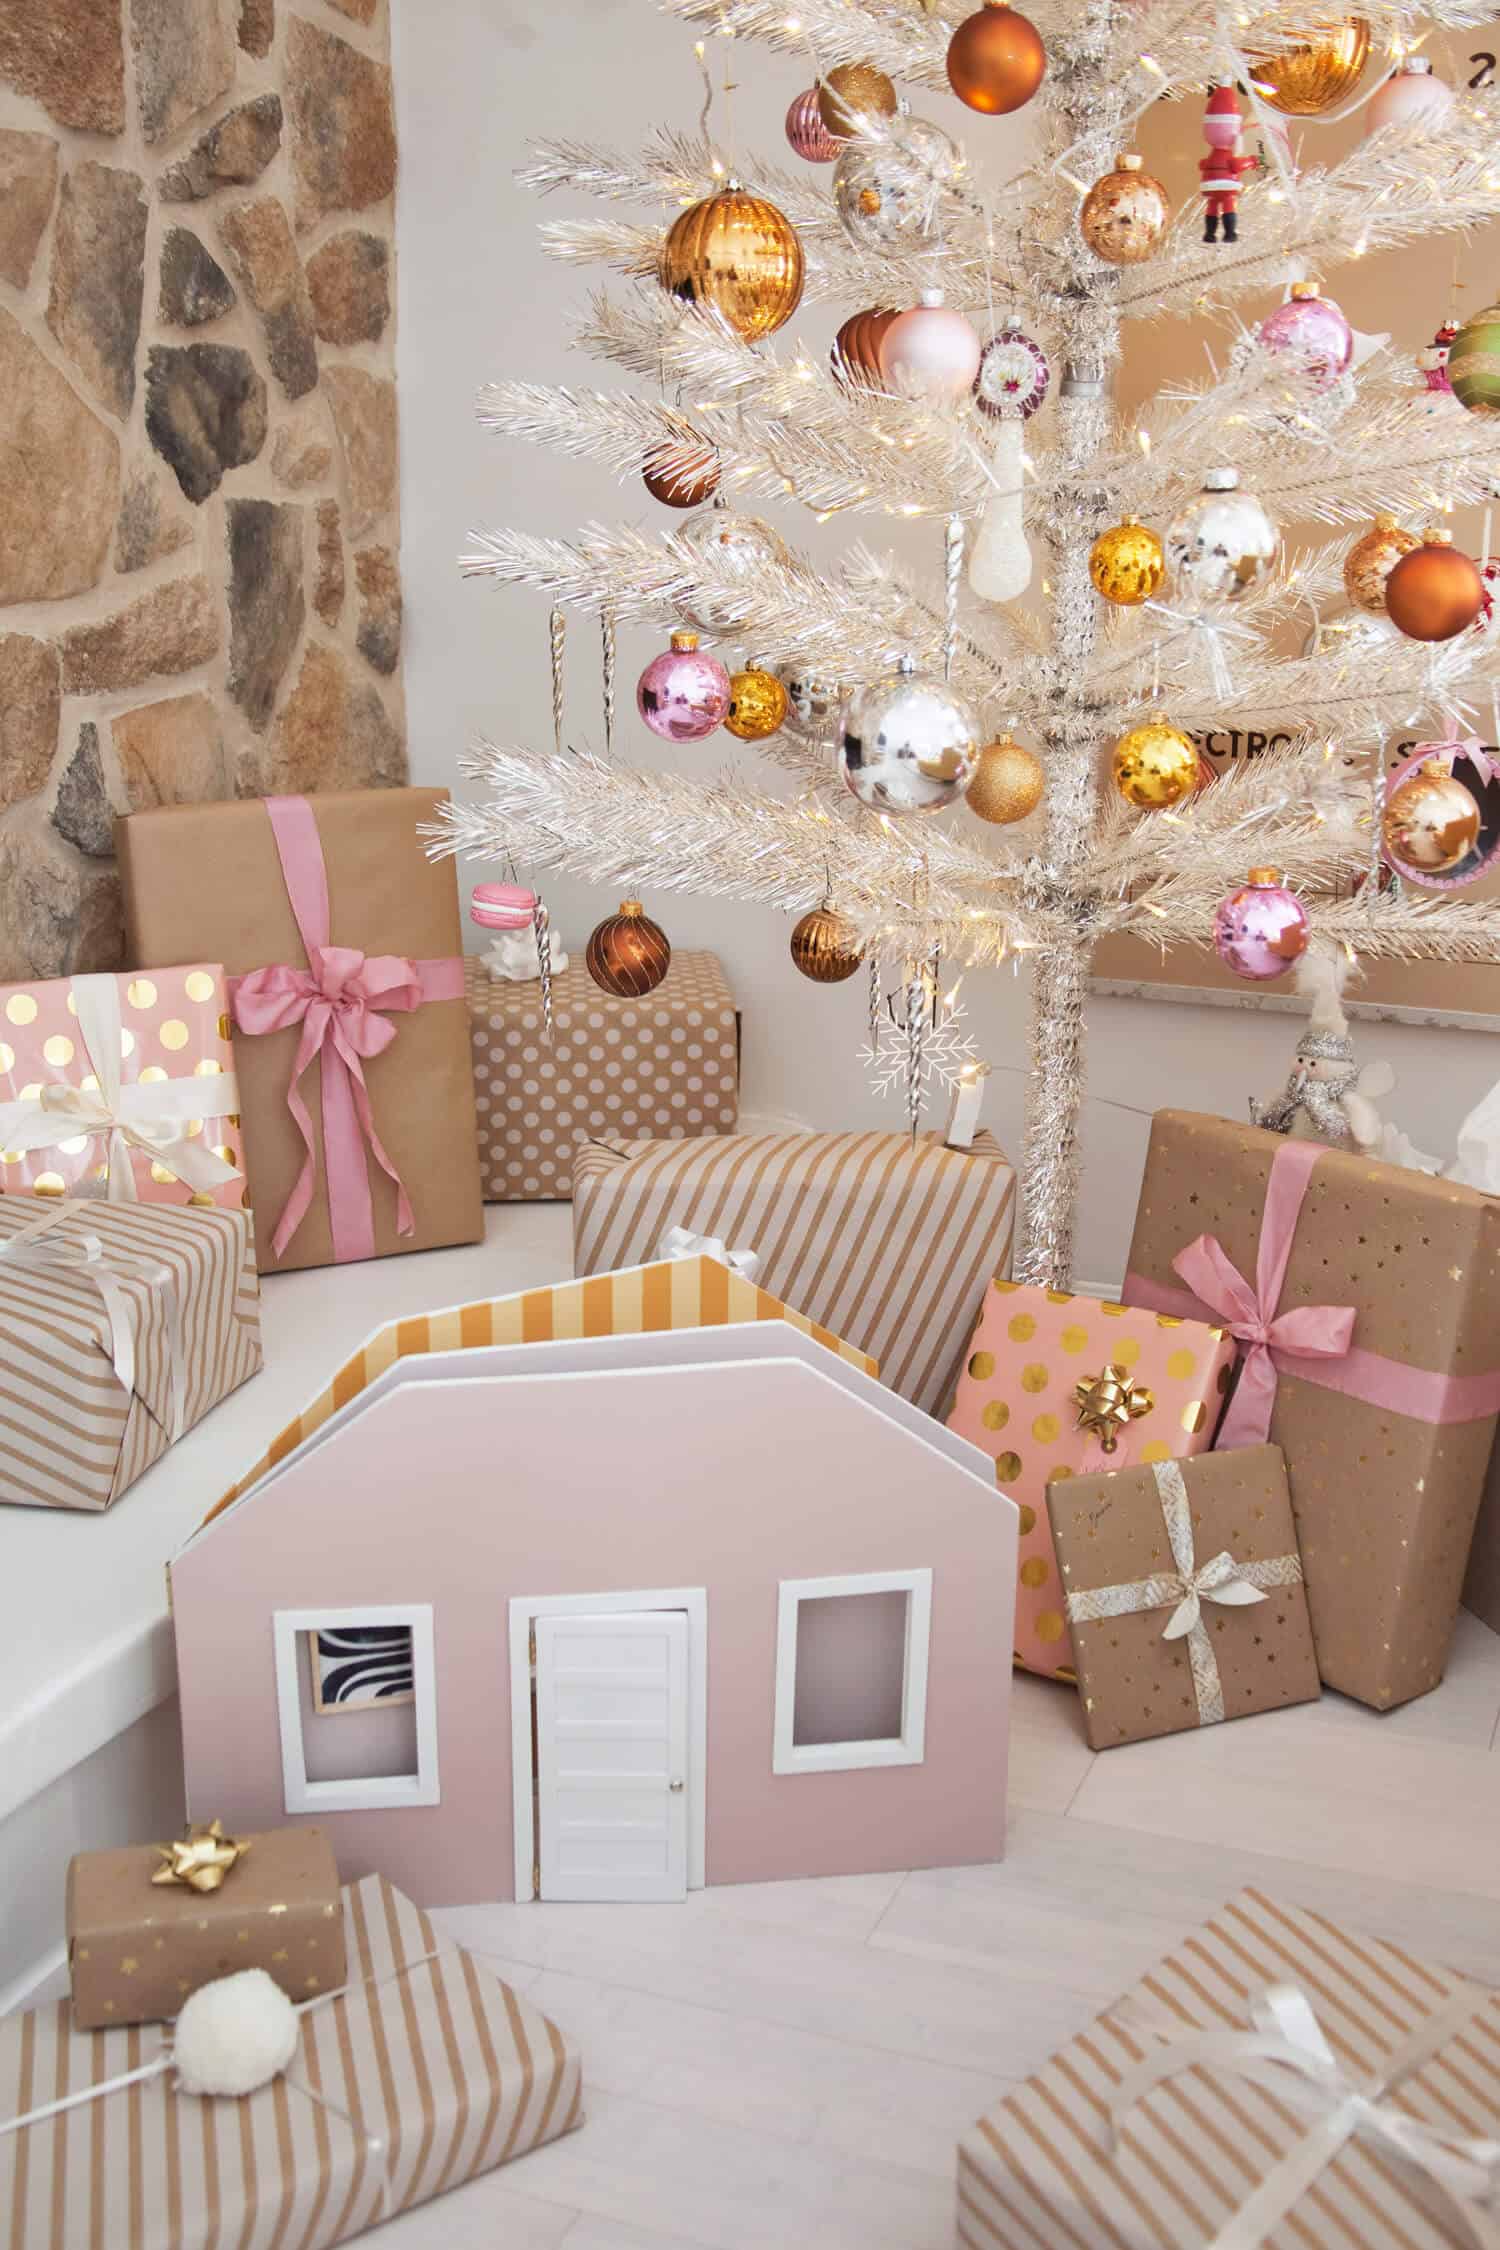 I can’t wait for my girls to wake up and find their new dollhouse under the Christmas tree! I won’t have to sneak around after they’re in bed to paint and build it, but that doesn’t mean I won’t still be sneaking to play a little and set up scenes for them to discover in the morning! – Mandi

27 Comments
Mandi!!! This is incredibly well made and so beautiful! You always outdo yourself (and that’s saying a lot)!
Agree. This project is AH-mazing
This must be the most sophisticated dollhouse I’ve seen. I love how minimal it looks. So cute. 🙂
Charmaine Ng | Architecture & Lifestyle Blog
http://charmainenyw.com
This is adorable! And so well-made. The kind of thing that can be passed down for generations.
When I was little, my best friend and I made Barbie houses from cardboard boxes, decorated with photos cut from the Sears and Penneys catalogs. We could add rooms by adding boxes, preferably boxes that stacked inside each other. A plus, though we didn’t give it a thought but surely our parents did–it was free. It isn’t so important that a dollhouse be perfect; it should be a canvass for the child’s own imagination.
I am dying. this is so good mandi.
This is SO clever (and cute)!
MANDI THIS IS AWESOME!!
Laura
This is such an incredible idea! It came out so beautifully! what a great, minimal alternative to a big doll house
How cute! I don’t have any kids, but I might just make one for myself! Very creative!
WOWZA! This is a dream come true for all mamas that loved their dollhouses but live in small houses now!
This is such a beautiful and fun idea! I absolutely love it! so creative! Well done!
This is so good!!! I always loved dolls growing up (American Girls and Barbies for sure) and I’d love to customize a dollhouse one day if I have a little girl but since embracing more minimalism in my life, the thought of a large stationary dollhouse is less appealing. This is a perfect portable and storable solution!!
I’m so excited about this diy and love how easy this will be to store. I can’t wait to make this for my girls. Thank you for sharing!!!
This is precious. SO CUTE. Such a great gift for a little girl.
Meghan | http://tanlinesanddaisies.com/
I love idea!thanks for sharing babes
http://thepinkpineappleblog.blogspot.com/2017/12/5-ways-to-dress-in-holidays_19.html
Wow, this is so adorable! *_*
That’s a great idea! I’m filing this away for later!
Could you share the tool you are using to cut the wood? It looks like snippers with an angle measurement? Thanks!
Miter sheers for cutting pieces at a variety of angles.
Oh I like that su much. I want to do the same house for my doll. It will be my project of 2018 !
This is so adorable!!!
-Jacqueline
http://www.jackieomy.com/
I never comment on this blog but had to with this project. This is FABULOUS. When I was young, I wanted a Barbie Dream House. However, we could not afford one but my mother made us, with one of our neighbor’s help, that could be taken apart and put under the bed to clean up. The base was made up of four pieces of rug that were gotten free as discarded samples, and then the “rooms” were made up of pieces that slid together and then she made two sides with a front door. Our neighbor made the furniture and gave that to us as a gift. My sister and I played with it for YEARS!! I love your idea better, though, because it folds up and is much smaller. It also can be played with using multiple types of dolls. Thank you for reminding me of such pleasant memories of my childhood.
Absolutely wonderful! I don’t have a daughter but I HAVE to make one of these for somebody! Maybe I’ll keep it for myself! 🙂
Wow! This is incredible! I had this wish for a big Barbie dream house but that never came true. Instead, I got a Barbie supermarket thingie to play with which was fine too 😛
Anyway, this foldable doll house is not only brilliant but incredible well thought and soooo
beautiful!!
Xx http://icepandora.blogspot.com
Mandi’s dollhouses are so amazing they always look like real life-sized houses on instagram! So cute <3
Thanks for the idea! We gifted our daughter hers today. https://twitter.com/UaMV/status/966557649587367936
Hey there, I’m attempting to make this adorable doll house. In the plans it says half inch, but the pics look like quarter inch, can you confirm the thickness. Thanks!