
 When you start to switch out items in your home for more natural or reusable items, the kitchen is a great place to start! We’ve been using containers like this or just good old mason jars for most of our leftovers (these bags are great too!), but sometimes you want to have something like cling-wrap to wrap something up like an avocado half, part of a cut up fruit or vegetable, the rest of an uneaten sandwich or to use as a cover for a bowl or cup in the fridge. That’s where beeswax wraps come in! These cloths are lightly coated with jojoba oil, beeswax, and tree resin to make the cloth moldable and sticky enough to stay in that molded position until you unwrap it. I had been buying my wraps for a few years, but they can get rather expensive and if you make your own you can simply re-wax them once they eventually loose their stick. I looked into a few different DIY methods and this is the one that I think is the easiest and least messy once I tweaked it a bit:
 Supplies:
-thin cotton material like quilters cotton (organic would be preferred since this will be touching food); I used this pattern for mine.
–organic beeswax pellets (they also have white ones that would yellow your fabric less)
–powdered pine resin
-new paintbrush
–pinking shears (optional but helpful)
-baking sheet and parchment paper
 Wash your fabric to remove any chemicals still on the fabric and dry. Cut your fabric into 8″ x 8″ squares with pinking shears (this will help your fabric not unravel at the ends). You can cut squares much larger and adjust the amount of your ingredients, but I just stuck with an 8″ x 8″ since that’s what fits best in my smaller oven cookie sheets (I have one of those smaller apartment-sized ovens—thanks, house designer!).
 Lay out parchment paper on your cookie sheet and place your fabric square on the sheet. Sprinkle 1/2 teaspoon jojoba oil, 1 1/2 teaspoons pine resin, and 2 teaspoons beeswax pellets over the sheet as evenly as you can. Preheat your oven to 225° and place your sheet in the oven for 5-10 minutes or until you can see that all the elements have melted.
 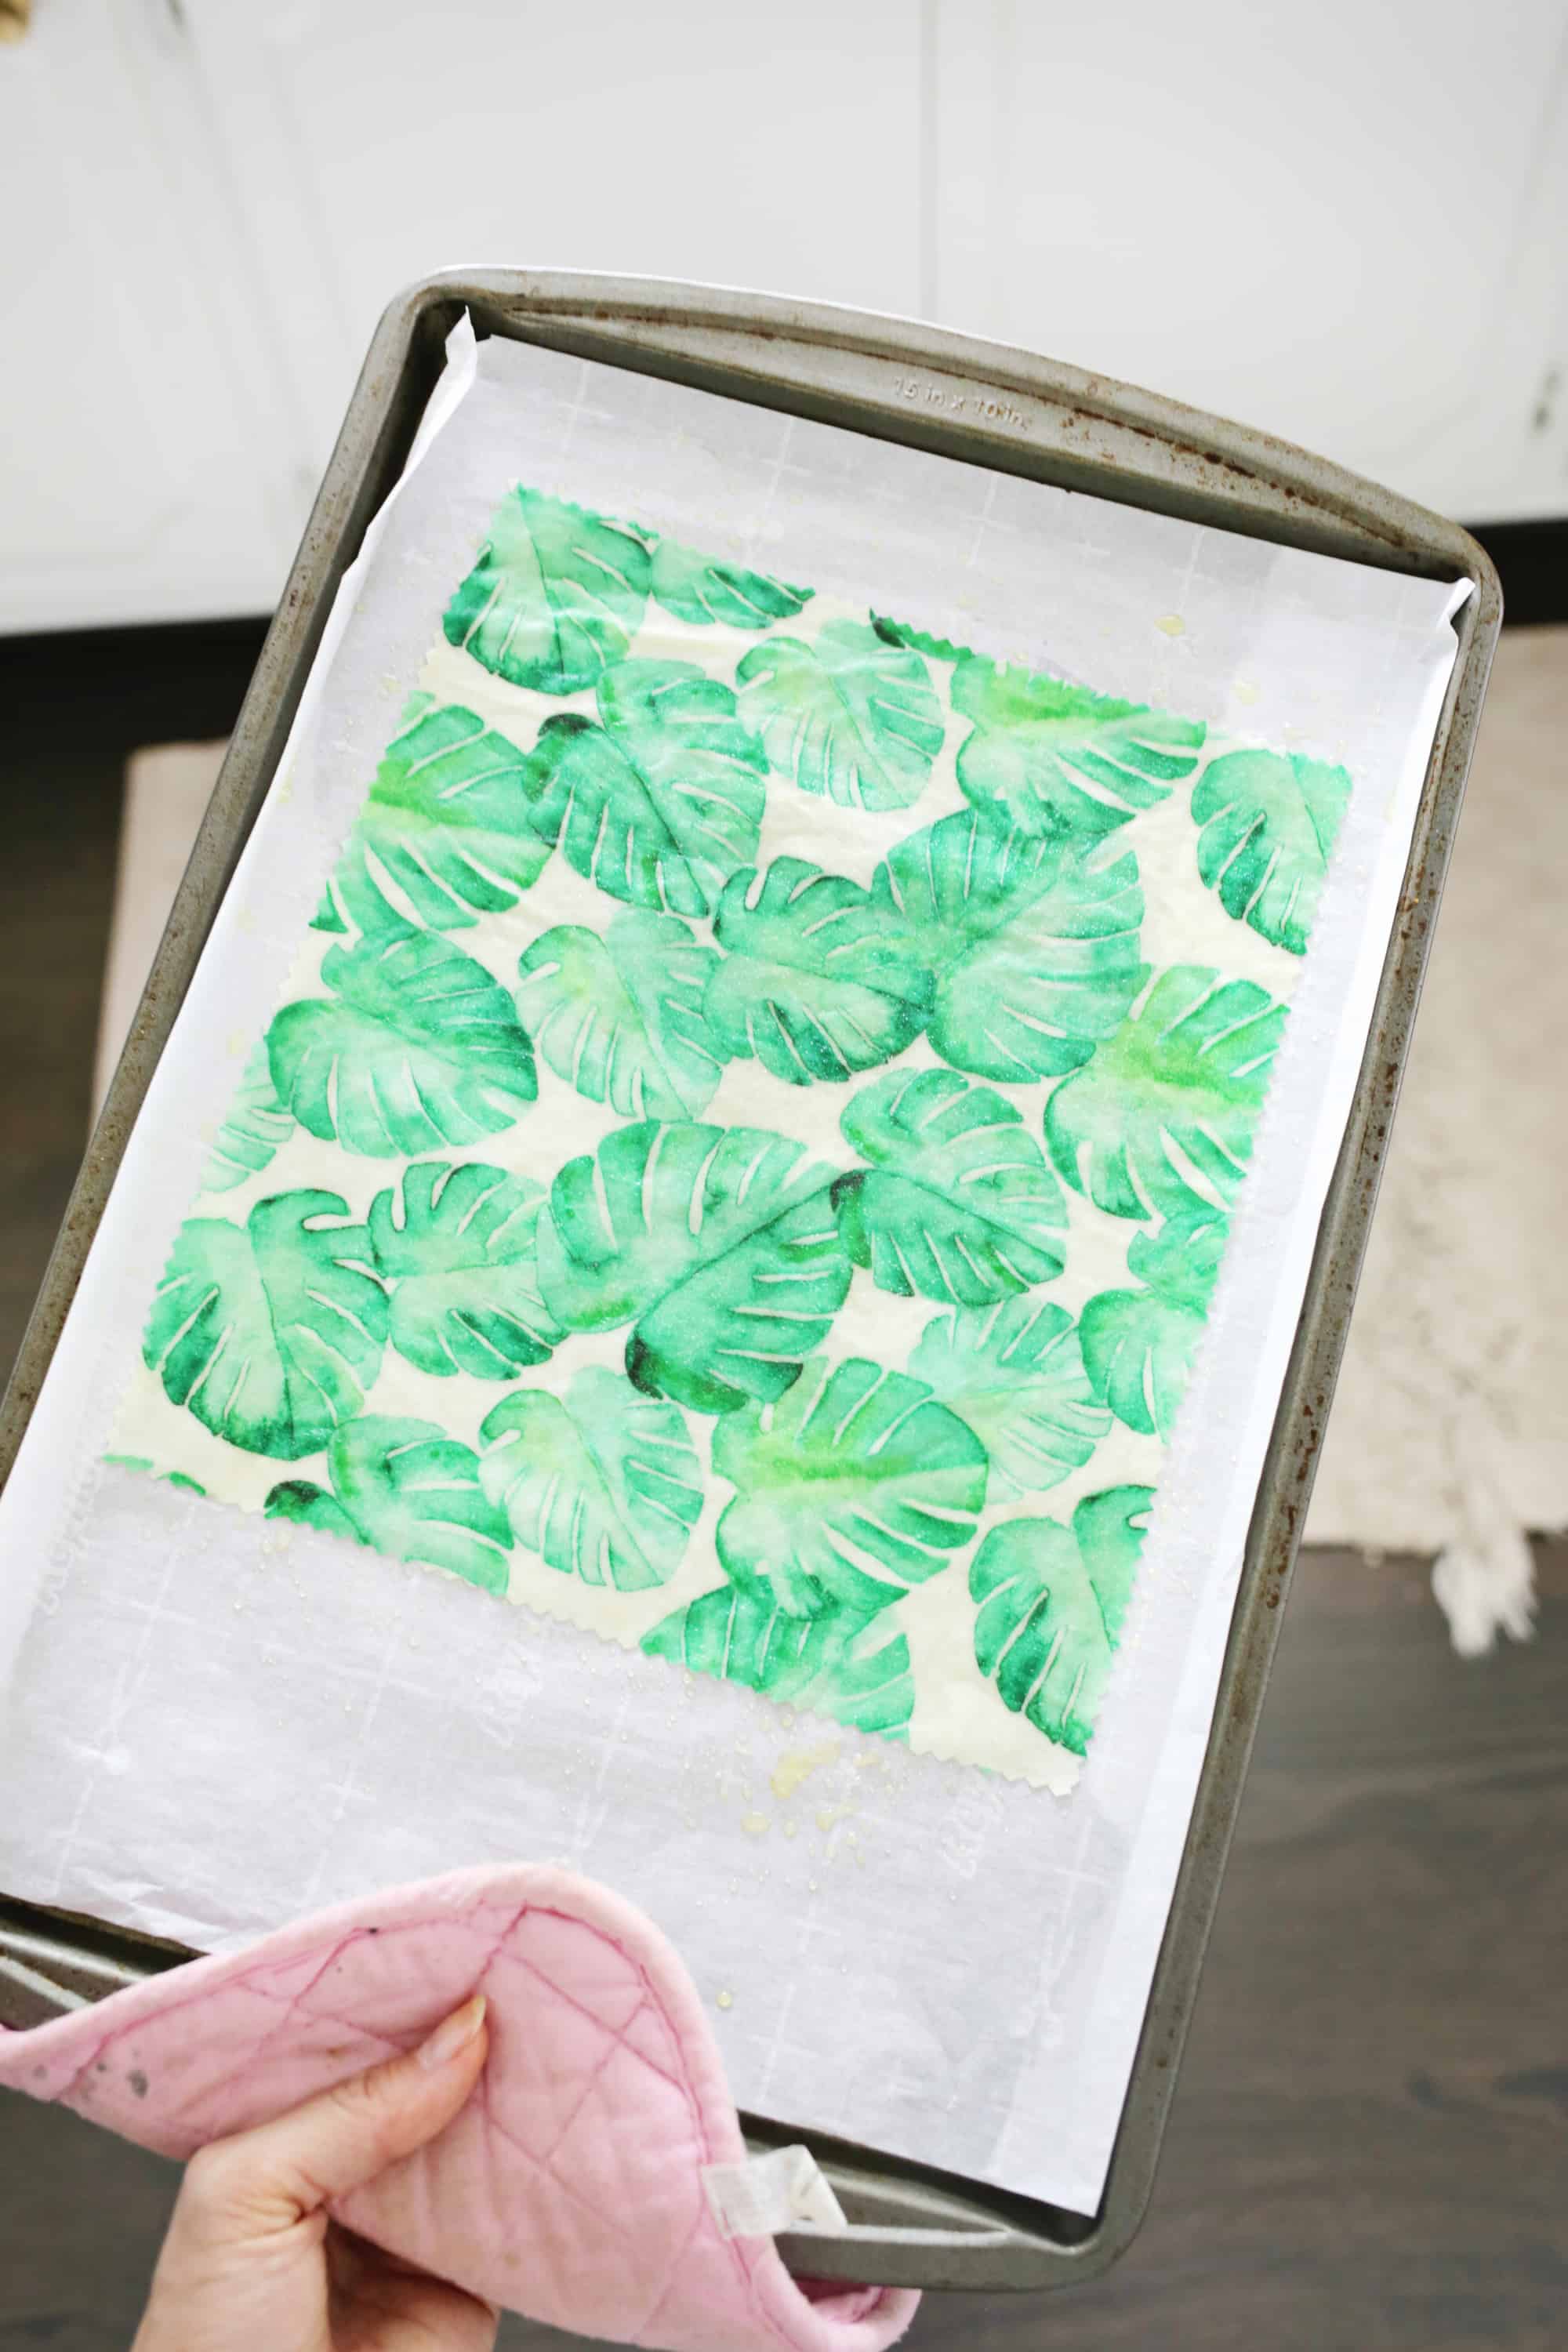 Once you see everything has melted, use your paintbrush to smooth out the mixture all over the sheet. One thing I added to the process is that I also used the brush to lightly squeegee the excess mixture from off the sheet so only a light coating remained. When I just brushed and evened out what was on there and let it dry, it was too thick and I had to put them back in, let it melt again, and remove the excess. I’d rather have a little too much though and squeegee it off than too little, so I would suggest doing it that way.
Once you have thin coating after brushing, place the sheet back in the oven for 1-2 more minutes.
 Use tongs to pick up the sheet off the tray and wave it around in the air for a few seconds to allow it to cool (it cools pretty quickly), and then hang it over something to allow it to fully set. I see that some people use them right away after they have cooled, but I waited 24 hours to give them time to fully dry.
  Once your sheets have set, they are ready to use! Oh, and it may take a little longer to get the resin powder and beeswax off, but you should be able to clean up your tools with just hot water and soap.
 When it come to caring for your wraps, wash in cold water (hot will melt your wax off), use mild soap, and allow your sheets to air dry before their next use. You don’t want to use these with items that you would want to wash in hot water/soap after touching (like meat) so this is more for wrapping up fruits and veggies, bread, and cheese, or as a bowl cover.
While I love using these for food storage, be advised that they are not completely sealing in your item like it would be in a glass container with an airtight lid. So if you want a little extra closure, you can also use a rubber band or a piece of string to tie your item with to keep it a bit more closed. So it’s more like sticky wax paper that you can reuse over and over rather than an airtight jar situation. In case you don’t feel like making your own, I’ve bought these several times in the past and they work really well, but I think you’ll have fun if you decide to give these a try! xo. Laura
29 Comments
I love how environmentally friendly this is. I use a lot of cling wrap, so this is great! 🙂
Charmaine Ng | Architecture & Lifestyle Blog
http://charmainenyw.com
Great tutorial! I tried to make some in the past, but wasn’t really convinced… But you’re using pine resin (which wasn’t in the tutorial I used previously) and this sounds like a great addition. I’m going to give it a try this week-end 🙂
I have one question: why jojoba oil specifically and not any other type of food-grade oil (like olive or coconut)?
You could give those a try but most of the tutorials and prodcuts I saw used jojoba so I figured there was a reason!
Laura 🙂
I have always wanted to try this! I know a new weekend project for me!
Paige
http://thehappyflammily.com
Love this DIY! So helpful and cost efficient!
I appreciate so so much the amount of earth conscious posts and DIYs that have been popping up, this one is super accessible and has great impact with cutting out/ cutting back plastic wrap! Thank you 🙂
Do NOT wash beeswax down your kitchen drain. You will end up with big plumbing bills if you do.
I love this bio DIY! Thanks!
Thank you so much now I will save a little more thanks to you
https://thepinkpineappleblog.blogspot.com/
This is a very cool tutorial! I’ve been eyeing the bees wraps and never considered that I could diy them. Thanks!
This is a great idea! I think I’d melt the wax in a double boiler first and combine the ingredients there, then brush it on, or maybe dip, it seems like you would get much more even coverage that way. I think the resin and wax would combine a lot better if they were melted together first. And then maybe you wouldn’t need the oven at all! (I live in a crazy hot place and try to avoid turning the oven on at all lol)
You can but then you have to wash the pot so that’s why I think the oven is easier since it’s on parchment paper 🙂
Laura
Yes Cory I actually melt my wax, resin, and oil in a skillet then dip my cloths. I have made hundreds and it works well. No need to use an oven
Would you recommend placing the fabric face down & painting the wax on the back, or does it really soak through so it doesn’t matter which side of the fabric you apply the wax mixture? Def want to try this. Could be a good gift. Thanks!
I didn’t find that it mattered since it soaks through to the other side!
Laura 🙂
Wow, I cannot wait to give this a go! I have been looking at them in the shops for a while now and it would be great to make my own to test them out before investing! Now all I need to do is remember not to wash them in warm water – thanks so much for sharing!
Holly from The Art of Being Holly xo
I’ve bookmarked this as a potential Christmas gift for this year and am ready to try it! Do you have an update now that it’s been a few months? Are they holding up well?
They are holding up really well so far!
Laura 🙂
Where did you find/buy pine resin from? Was it food grade?
Hi Laura! I am about to try this. My first time.. I have a question regarding the cloth. I bought the Basic Cotton Ultra, is it possible? Is it effective in this project? I need your advice.
Thank you.
I tried this method and had noticed that the pine tar stayed in little droplets instead of melting all the way into to wax. It all looked melted but then when they dried you could see the spots. I mixed the three items together and then sprinkled over fabric, and I tried brushing it but that didn’t help. Any suggestions?
Sorry, not sure if I should be asking you this but am sure you will know the answer. I just had my first try at the beeswax wrap using beeswax and coconut oil but I obviously didn’t use enough beeswax as it’s not stiff enough, nor is it covered properly. Can I just re-do the whole thing again, or should I throw that cloth and start all over again?
Thanks in advance, Vicki
Do you only coat one side or do you do both.
Thanks
You talk about covering bread. Could you make a big sheet, and sew it and store bread in it? Thanks
I’ve made some wraps and would like to send them to my friend as a gift. Do you have any recommendations on shipping and packaging? I’m worried that the wax could possible melt and damage the wraps during travel.
Slip them into a zip lock bag. Everything should be fine even if the wax gets too hot.
Ummmm if you slip them into a ziplock bag aren’t you using plastic, that’s the whole point to using these wraps, lol
Trying these and they are fab!
One problem though… once you give them a rinse the wax begins to crumble- is this normal? Or am I doing something wrong? I give there a very light rinse with cold water only
Hello,
I am preparing beeswax wraps for one of my school projects. We are planning to collect specific wastes from restaurants and coffee shops like a coffee waste, eggshells, orange peels, etc. My plan is to rather than using plastic bags to collect these bags, using cotton bags coated with beeswax, linseed oil, and pine resin. Because beeswax is also antibacterial it might be a good idea. However, I have some concerns. What are you thinking about collecting food waste ideas? Do you think it is not hygienic? Also, I don’t want these bags to be sticky that much. Do you have any suggestions about how to get rid of this stickiness?