
If you’ve ever searched in vain for that special shade of pink or the perfect sheer glittery polish, this project is for you! By combining a ready-to-use polish base with your own blend of mineral colorants, you can create your own original shades of nail polish in minutes! This project is a really fun way to bring DIY nail art to the next level.
I like using a 3-free suspending base to make my own nail polish, but if you prefer using polishes that are 5-free or 8-free, you can use your favorite clear nail polish instead. This 8-free topcoat would be a good choice. Just keep in mind that regular clear polish may not suspend the colorants as well as a suspending base, so you’ll need to shake the polish a little bit longer before use.
 You can use pretty much any oil-based or oil-dispersible cosmetic colorant to color your nail polish. Just make sure that whatever you are using is made for cosmetic use. Craft glitters, food dyes or other non-cosmetic colorants might not behave well in nail polish since they aren’t designed for that purpose.
My favorite colorants for nail polish are mineral micas. These powdered colorants provide shimmering color in a whole rainbow of shades. For bright colored shades that are clear and glossy, look for oil-dispersible colorants like ultramarines and oxides. For matte color, try adding a pinch of cornstarch.

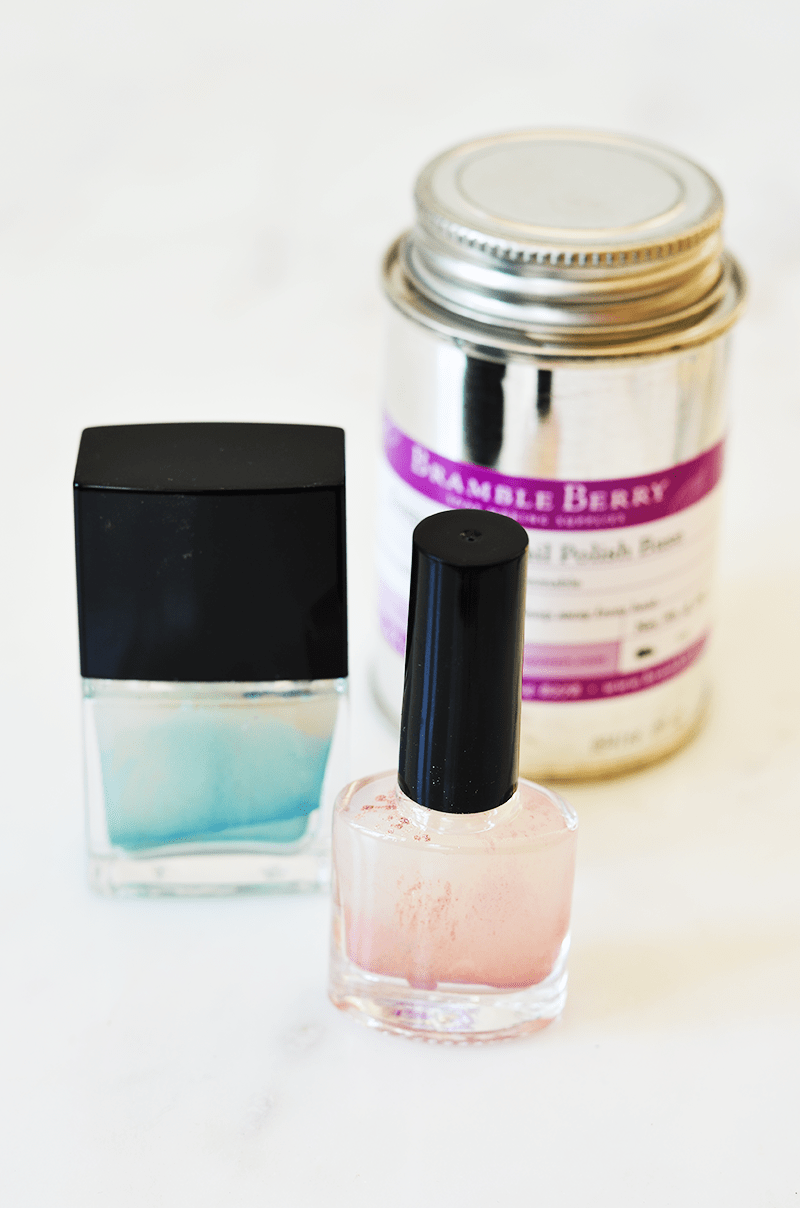
Supplies:
–suspending nail polish base
–empty nail polish bottles with tops and nail polish mixing balls
–miniature funnels
–micas, oil-based colorants, and/or cosmetic glitters
-popsicle sticks or miniature scoops

Step One: Place the nail polish mixing balls into the empty polish bottles, and insert a miniature funnel into the bottle’s neck.

Step Two: Use the tip of a popsicle stick or a miniature scoop to add glitter or colorants to the funnel. You can stick to one color or create your own blends by mixing multiple colorants together. Add a large pinch of color to make a sheer polish or as much as 1/4-1/2 teaspoon for a heavier, more opaque color.

Step Three: Gently tap the bottle and funnel to drop the colorant into the bottle. Be careful not to spill the colorants or get glitter everywhere. This part can be VERY messy!
Step Four: Remove the funnel, carefully fill the bottle with polish base, and screw the cap onto the bottle.


Step Five: Shake. Shake. Shake. It will take a lot of effort to mix the polish for the first time. Shake the bottle for 30-60 seconds, or until the colors are well blended into the base.

Step Five: Apply to your nails! Be sure to use a good base coat and top coat along with your custom polish. This will help make the color last and show off your gorgeous custom polish its best.
 I had so much fun blending new nail polish colors for this project. Now that I’ve got the basics figured out, I can’t wait to try my hand at something more advanced. Galaxy nail polish? Mood nails? Glow in the dark manicures? The possibilities are pretty exciting. xo. Mary Helen
24 Comments
Thank you for the DIY, it was super interesting! I don’t paint my nails all that often but I didn’t know you could so easily make your own custom nail polish. What a great tip!
Charmaine Ng | Architecture & Lifestyle Blog
http://charmainenyw.com
This is such a cool idea!!! I’ve never even thought about making my own nail varnish. Also a fab review 🙂 x
Abi | abistreetx
I’ve always wanted to try this! but my attempts have failed miserably (and made a huuggee mess). Excited to try this out!
This is so cute and interesting! My only concern is that it looks a bit lumpy when you apply it, but cool DIY nonetheless <3
https://www.myblackcloset.com/
How cool!
Lovely post
The Pink Pineapple
New post:http://thepinkpineappleblog.blogspot.com/
I feel like an idiot that I’ve never considered that it’s possible to DIY nail polish! I’m curious as to how long it lasted without chipping? Really cool tutorial!
I think it will really depend on the type of base you use for the polish. The better the base, the better the performance! Choosing a great base coat and topcoat will help improve the longevity of the polish as well.
What?! DIY nail polish?! Mind blowing.
This is such a great idea, I cannot wait to try!!
xo
Phyllis
http://desgeulasse.com/
This is such a fun idea!
OMG THIS IS SO COOL! It seems so simple and easy to do as well! As a chemist, I feel like I should have thought of this before hahah thanks for sharing! x
Ariadna || RAWR BOWS
I like the mood polish idea.
Ahhh gorgeous colors, I’m in love! The blue one is to die for.
Joanne | Life in Blue Skies
I didn’t know you could actually do that, this is amazing!
https://www.makeandmess.com/
THIS IS LIKE THE COOLEST POST EVER! I have never thought of making my custom nail polish color, but I have had moments where I am like I want this color haha I really am so excited to try this out!
Cat // https://fromgirlc.wordpress.com
Awww! I used to do this in Grade 7! We would add food colouring to white Wet ‘N Wild polish. We were so obsessed with pastels in those days….
Awesome post!
The homemade nail polish was very cool..Thank u for the diy. I have lots of top coat . I saw this and started to make my own nail polish colour.
Awww! Lovely post thanks for sharing.
Cool idea never thought of this.
Hi! I’ve been researching methods on mixing polish for a while now, and even have some supplies on the way from TKB trading!
My deepest burning question still yet remains tho..say I have chosen a colour on a colour wheel and want to make a polish that matches it exactly. The struggle now I’m facing is how exactly to mix the powders EXACTLY to get the ratio that will create the perfect colour match. What kind of math or methods do you think I need to research in order to figure this out?? How do you think they figure it out in a lab??
VERY interested! 🙂
Where do I get the base?
Here’s the link! https://www.brambleberry.com/shop-by-product/ingredients/bases/body-care/suspending-nail-polish-base/V000520.html 🙂
What a great idea!
https://goodvara.com