 _") Hello lovelies! I’m Kara from the blog A Kailo Chic Life, and I am so excited to be joining the ABM team to bring you colorful DIY projects every month. I jumped into the creative world 12 years ago with my company Kailo Chic and have been sharing my love of prints, patterns, and all things colorful with the world ever since. So thank you for letting me share my passions with you!
Hello lovelies! I’m Kara from the blog A Kailo Chic Life, and I am so excited to be joining the ABM team to bring you colorful DIY projects every month. I jumped into the creative world 12 years ago with my company Kailo Chic and have been sharing my love of prints, patterns, and all things colorful with the world ever since. So thank you for letting me share my passions with you!
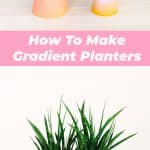
I have made it my New Year’s goal to add more plants to our house. The greenery just livens up every space and makes it feel so fresh and alive. But along with all these new plants comes the need for more planters. These DIY gradient planters are so colorful, and the unique shape makes them perfect for pretty much any room in the house. Plus the fact that you can customize the colors to fit your decor, well, that’s just a bonus!
_") Supplies:
Supplies:
-large planter
-small planter (you want to make sure the bottoms of the two planters are roughly the same size)
-spray paint in several colors to create your gradient
-industrial strength adhesive
-plants, soil, and white rocks
_") Begin by taking the planters outside and use the spray paint to paint bands of color around the planters. The smaller planter will be turned upside down when you attach the two planters together, so take this into consideration when spraying the layers. You might also find that you need to go back over layers at the end to create the perfect gradient effect.
Begin by taking the planters outside and use the spray paint to paint bands of color around the planters. The smaller planter will be turned upside down when you attach the two planters together, so take this into consideration when spraying the layers. You might also find that you need to go back over layers at the end to create the perfect gradient effect.
 _") Once the paint has dried for an hour or two, use your industrial strength adhesive to line the bottom ring of the smaller planter. Then set the larger planter on top and let the glue cure for 24 hours.
Once the paint has dried for an hour or two, use your industrial strength adhesive to line the bottom ring of the smaller planter. Then set the larger planter on top and let the glue cure for 24 hours.
 _") The final step is to add your plants, dirt, and decorative rocks. If your planter has a hole in the bottom, you may need to add a drip tray under the planter, or cover the hole with plumbers putty to prevent the water from getting all over the ground.
The final step is to add your plants, dirt, and decorative rocks. If your planter has a hole in the bottom, you may need to add a drip tray under the planter, or cover the hole with plumbers putty to prevent the water from getting all over the ground.
 _") If sealing up the drainage hole, remember to add a few rocks to the bottom of the planter to keep the plants roots from staying too wet after watering. Once your plants are in, you can add a few decorative rocks to hide the soil, and then place them near a bright window. These planters will even work outside!
If sealing up the drainage hole, remember to add a few rocks to the bottom of the planter to keep the plants roots from staying too wet after watering. Once your plants are in, you can add a few decorative rocks to hide the soil, and then place them near a bright window. These planters will even work outside!
 _")
 _")
 _") I love the subtle gradient of color in these planters! And after making these two, I have a feeling I will be adding new ones to every room of my house. So, what colors will you choose for your planter? xo. Kara
I love the subtle gradient of color in these planters! And after making these two, I have a feeling I will be adding new ones to every room of my house. So, what colors will you choose for your planter? xo. Kara
Credits // Author and Photography: Kara Whitten. Photos edited with the NEW A Beautiful Mess Presets for Lightroom.
Save
Save
Save
27 Comments
I love this idea! I am obsessed with plants right now so I am 100% going to try this!
http://thatsmagsforyou.com
These are so cute! Love the organic shapes of the planters too!
Charmaine Ng | Architecture & Lifestyle Blog
http://charmainenyw.com
This is a really fun idea. I love the shape.
They look so beautiful, I love the colour gradients!
https://www.makeandmess.com/
Love it!! oxoxo
Amazing job! I’m going to build my mom a garden for her birthday and this will be an amazing add on! Thanks
SO GOOD Kara! I love these!
xx- Elsie
Thank so much Michelle!
These are cute.. reminds me of Angel Oloshove’s pottery works:
http://www.angeloloshove.com/paintings/
These are so pretty! Love the gradient color. <3
http://www.wonderlandsam.com
Hello! How can I email you all? I have been searching the site for an email address but can’t find one!
Hey Sondra! You can contact us at support AT abeautifulmess DOT com 🙂 -Jacki
I’m obsessed!
https://objectsicantafford.com
Welcome! This turned out super cute 🙂
Do you have any tips for creating the gradient? It’s so pretty!
Ps. Are you guys accepting new contributors?
Thanks Julia!
I started by spraying bands around the two planters and then went back and over lapped the bands with a light mist of each color to get a good gradient effect.
Looks like something that came out of Palm Springs! So colorful!
– Katie
https://thebippityboppitybeautifulblog.wordpress.com
I love this! It will look great on my sun porch.
These planters look amazing! We totally need to add some to our dinning room!
Paige
http://thehappyflammily.com
Super cute! I love the colors!
http://www.petiteandhungry.com
These are the prettiest planters ever!
xo,
Vicky
http://www.aspiringsocialite.com/
This looks awesome! http://www.likehanna.com
What a great idea and its so creative. I really want to make some of these. Thank you!
Oooh I’ve just started using Powertag now! I was given a tube to review for my blog (coming next week) I can’t stand E6000! THE SMELL!!! 😛
Gorgeous! Was distracted by the beautiful butterfly print as I’m trying to make one for my display wall!
Love them!! Great idea and it’s perfect for the spring!!