 I have had a bit of a dream for a while now of having my own garden out back and it’s finally happening this year!! We love cooking food that’s as fresh as possible here in our house, so it only makes sense that we would also have a little garden out back to get some produce from as well. Plus, now that we have a toddler, I definitely want to teach our daughter how to love the outdoors and how to grow things out there, so I should probably learn soon so I can show her how!
 This post is sponsored by Gilmour, a brand that makes simpler solutions for gardening and watering. When making the garden, we wanted to plan ahead on how we’d take care of it too, and the Gilmour products make watering a garden really convenient. As a working mom, I definitely wanted a process that was quick and easy, so here’s what we did and I think you’ll be surprised how easy this is to make, too!
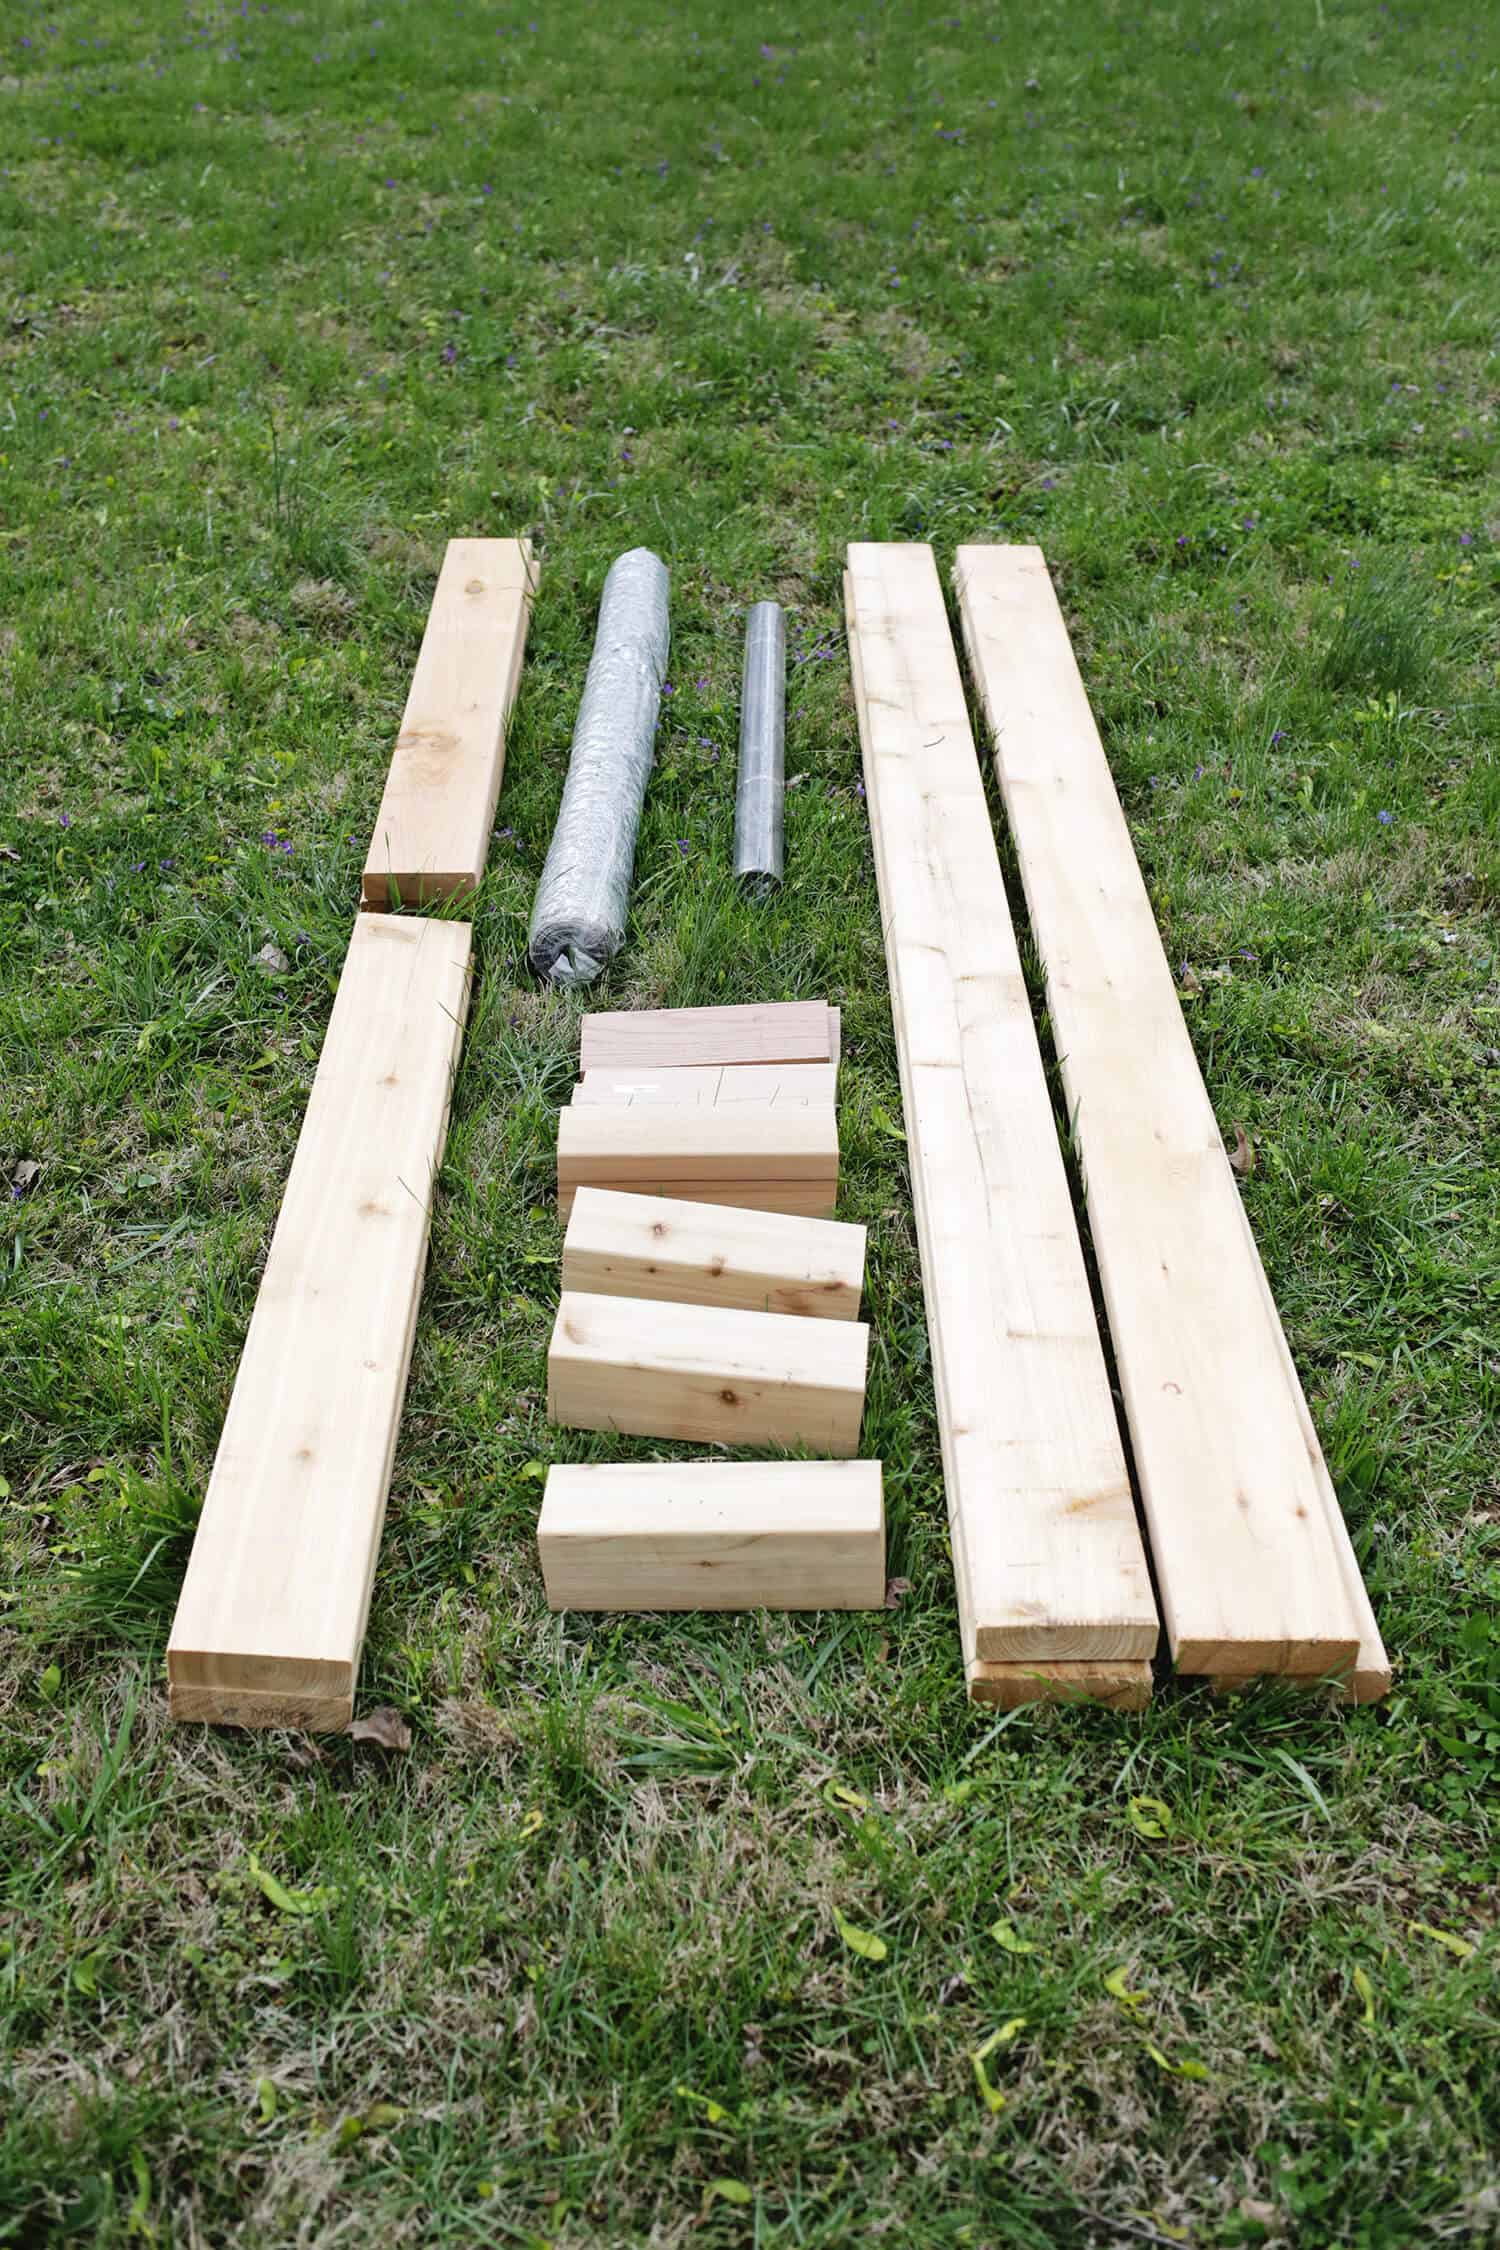 Supplies:
-2″ x 6″ x 8′ cedar boards* (6 of them)
-4″ x 4″ cedar board (at least 4′ long)
-3/4″ x 4″ board (at least 4′ long, doesn’t have to be cedar but should be untreated wood)
–galvanized wood screws 2″ long
-access to a saw (or ask lumber store if they can cut the pieces for you)
–weed barrier cloth
–staple gun and staples
-drill
-4′ wide chicken wire (optional)
*Cedar is a super durable outdoor wood so I would suggest getting cedar if you can, even if the measurements are a little different. Call a lumber store if your home improvement store doesn’t carry it.
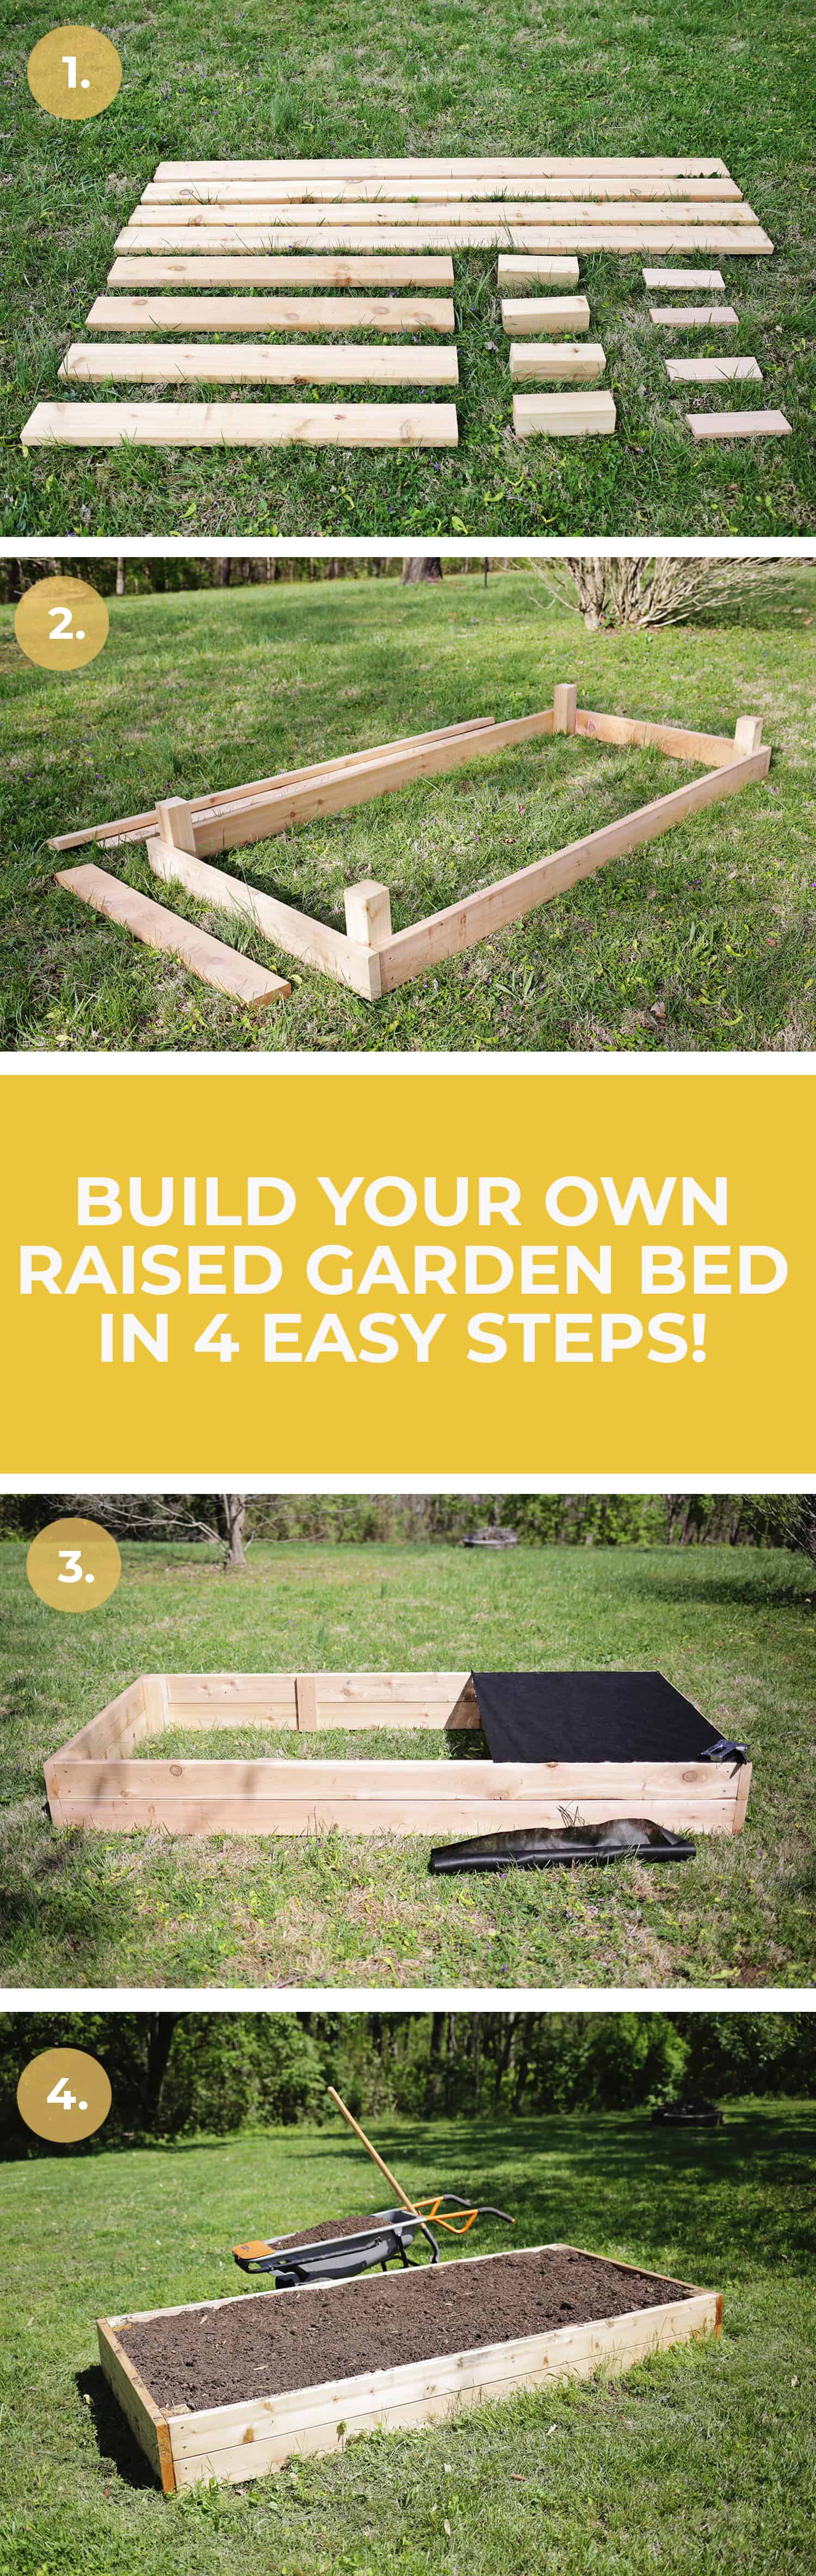
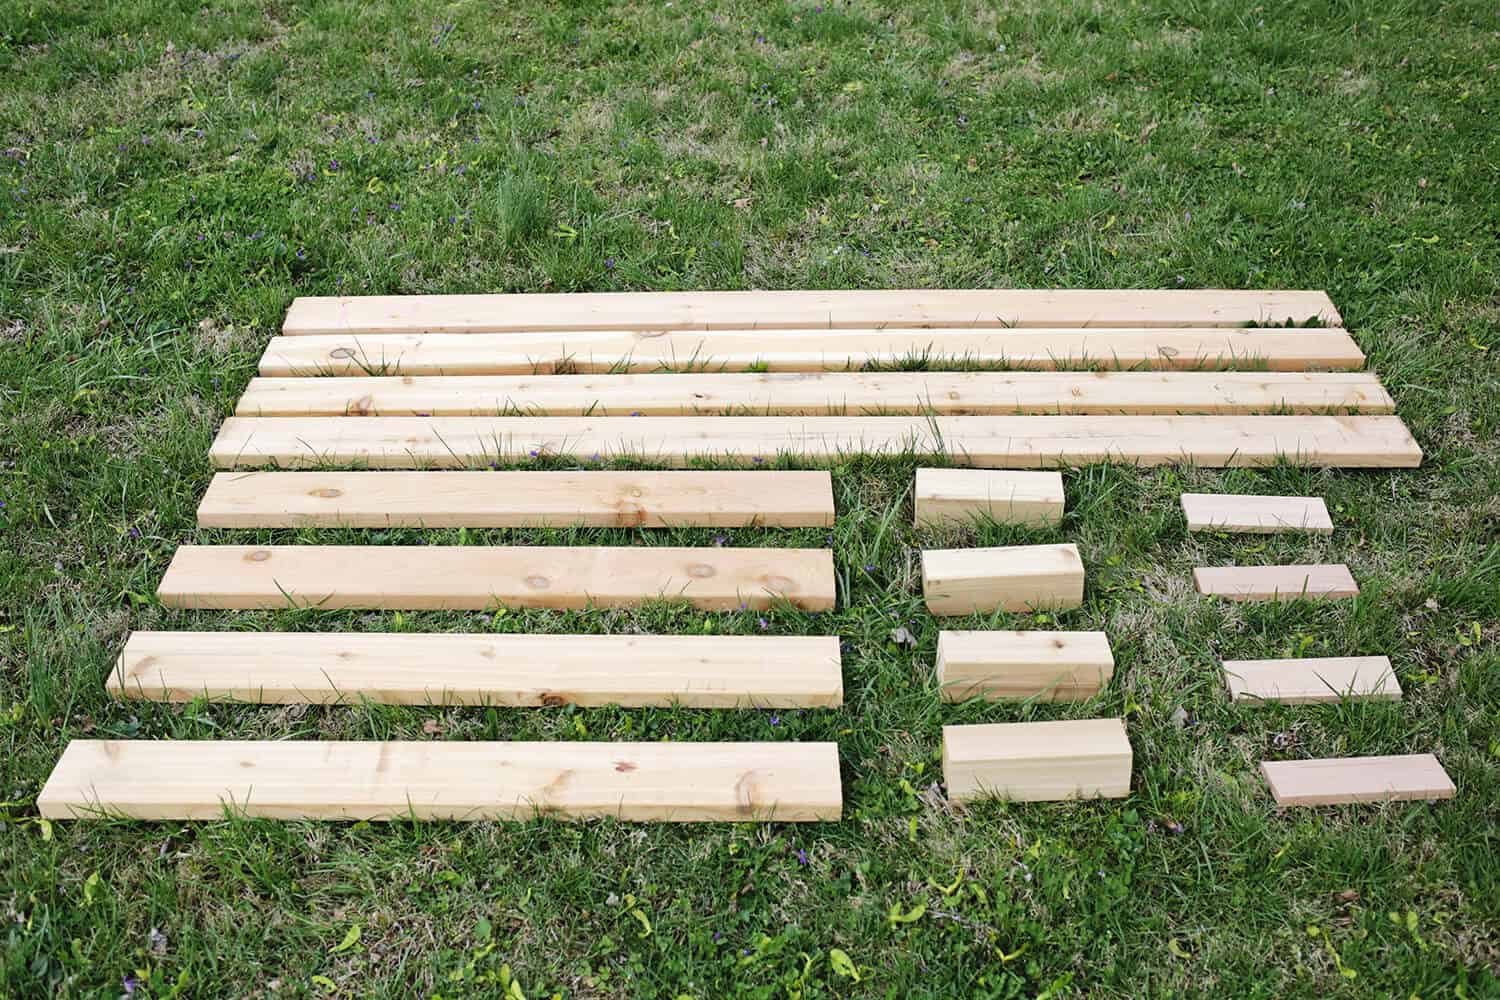 1. Cut Your Wood!
Start by cutting 2 of your 8′ boards in half so you have 4 boards that are 4′ wide (leave the other 4 boards as is). Cut your 4″ x 4″ board into 4 pieces that are each 1′ long and do the same with your 3/4″ x 4″ boards.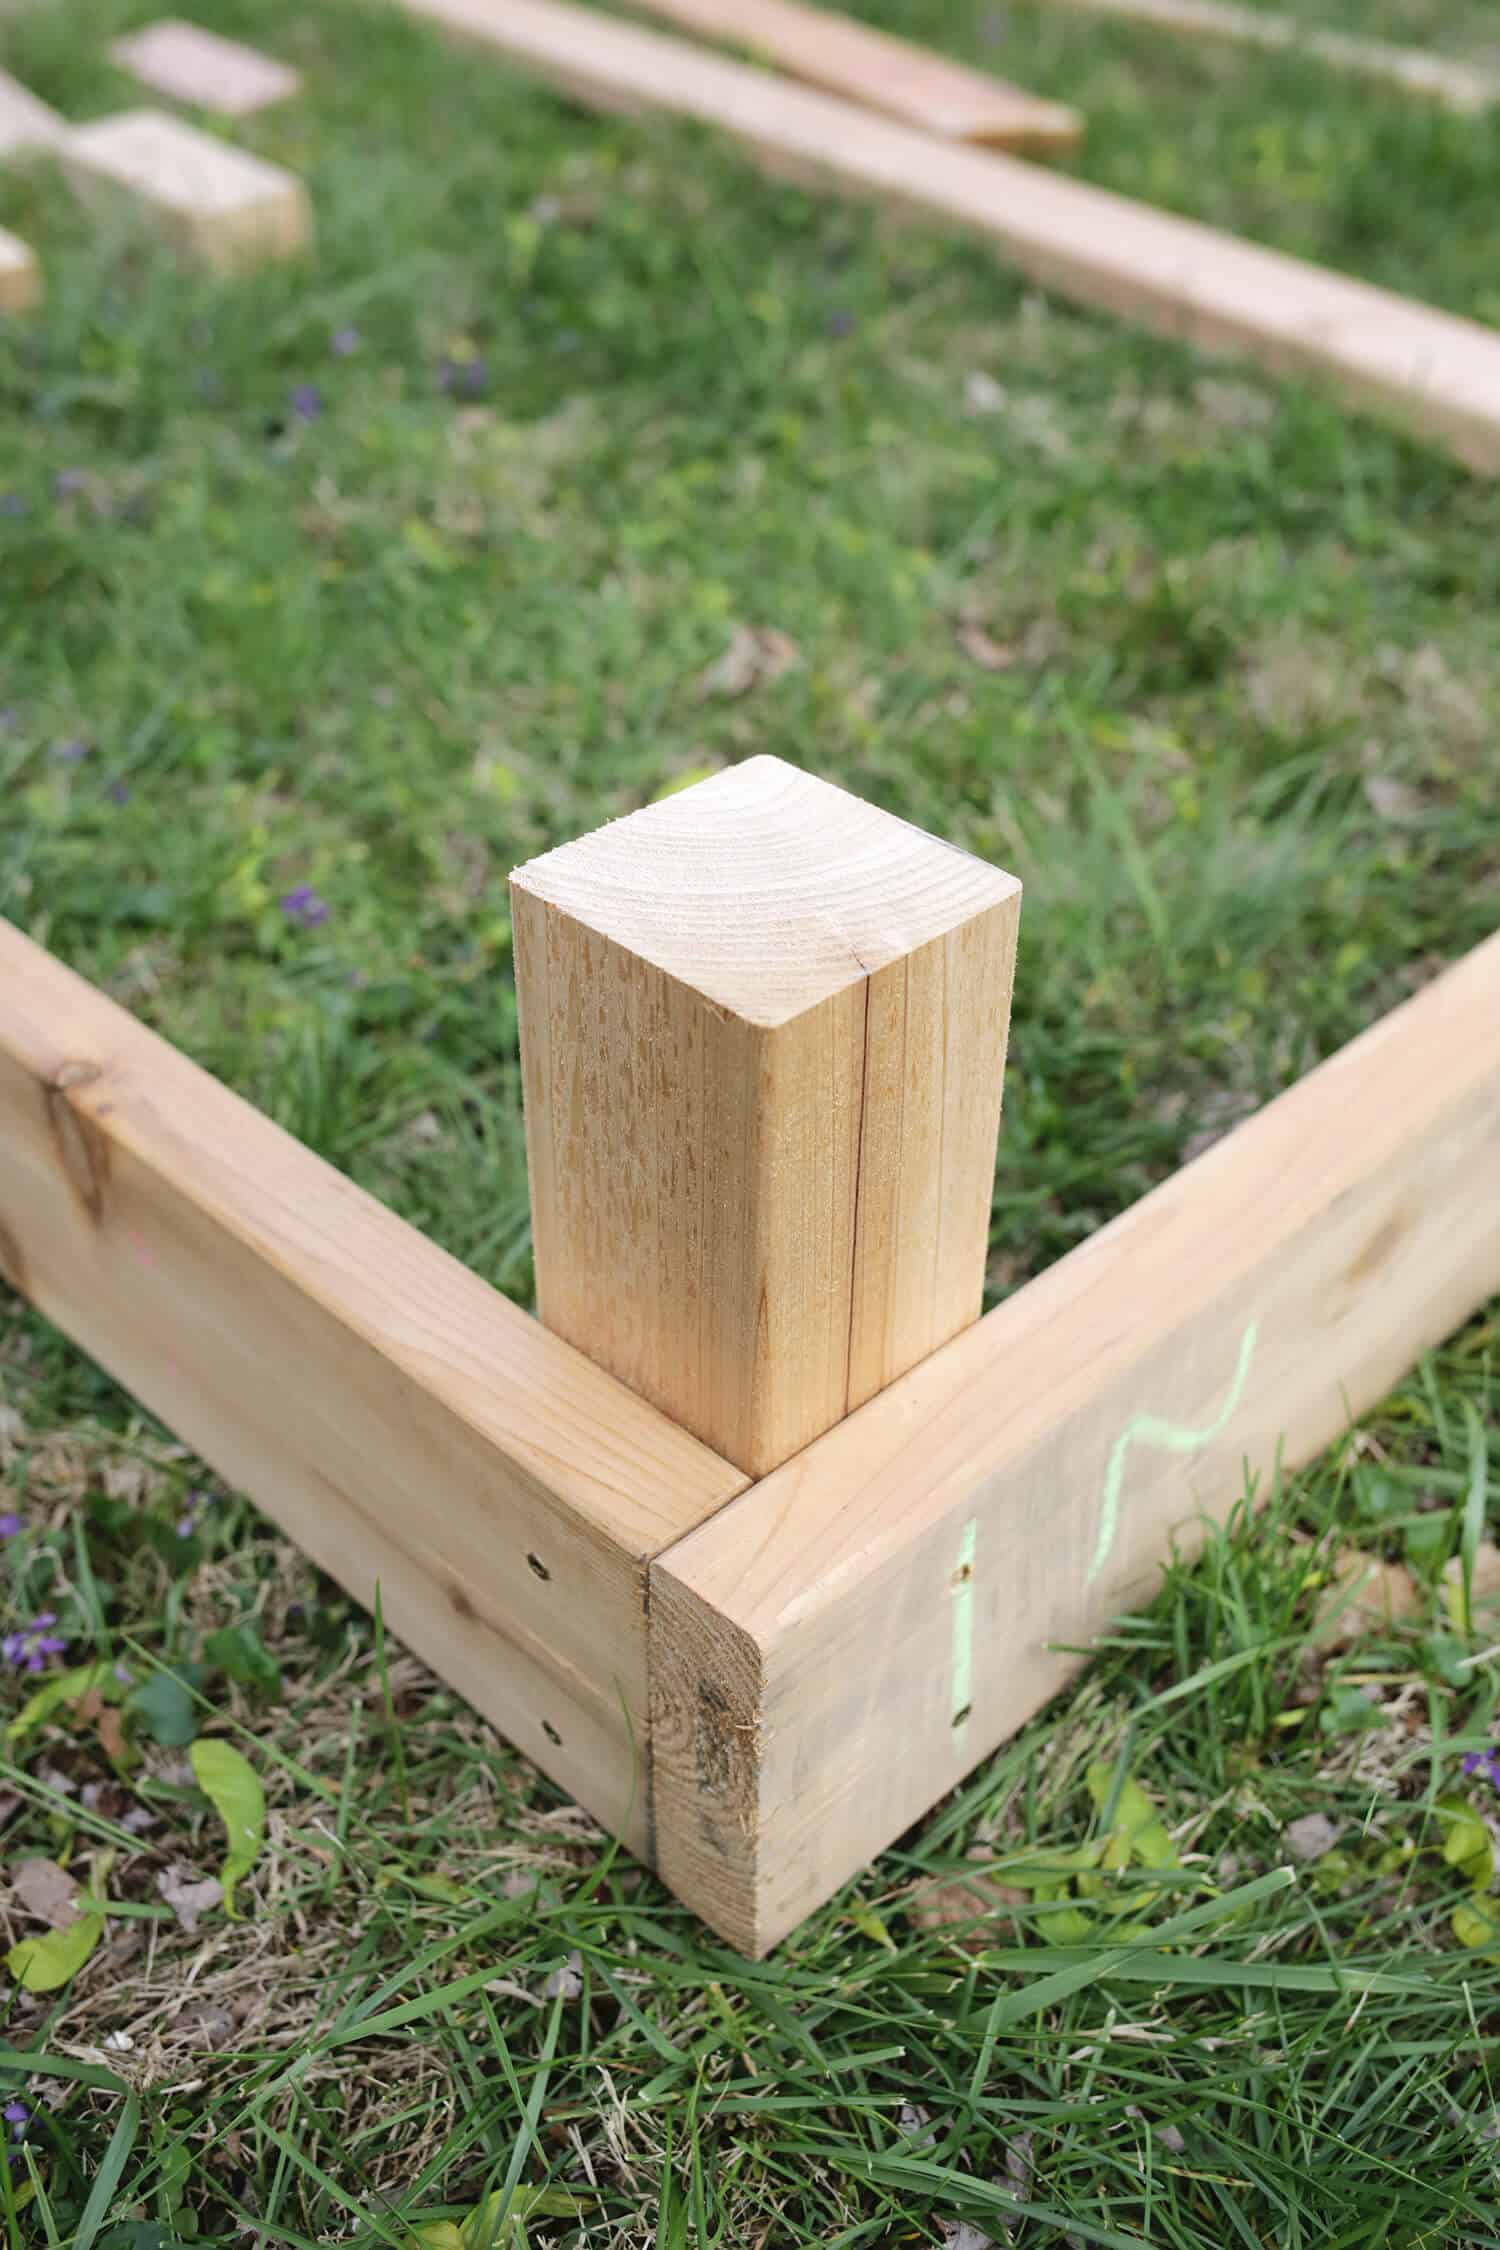 2. Build Your Frame!
You’ll use one of your 4″ x 4″ posts for each corner. Line up a 4′ and 8′ board with the bottom half of your post and screw into place.
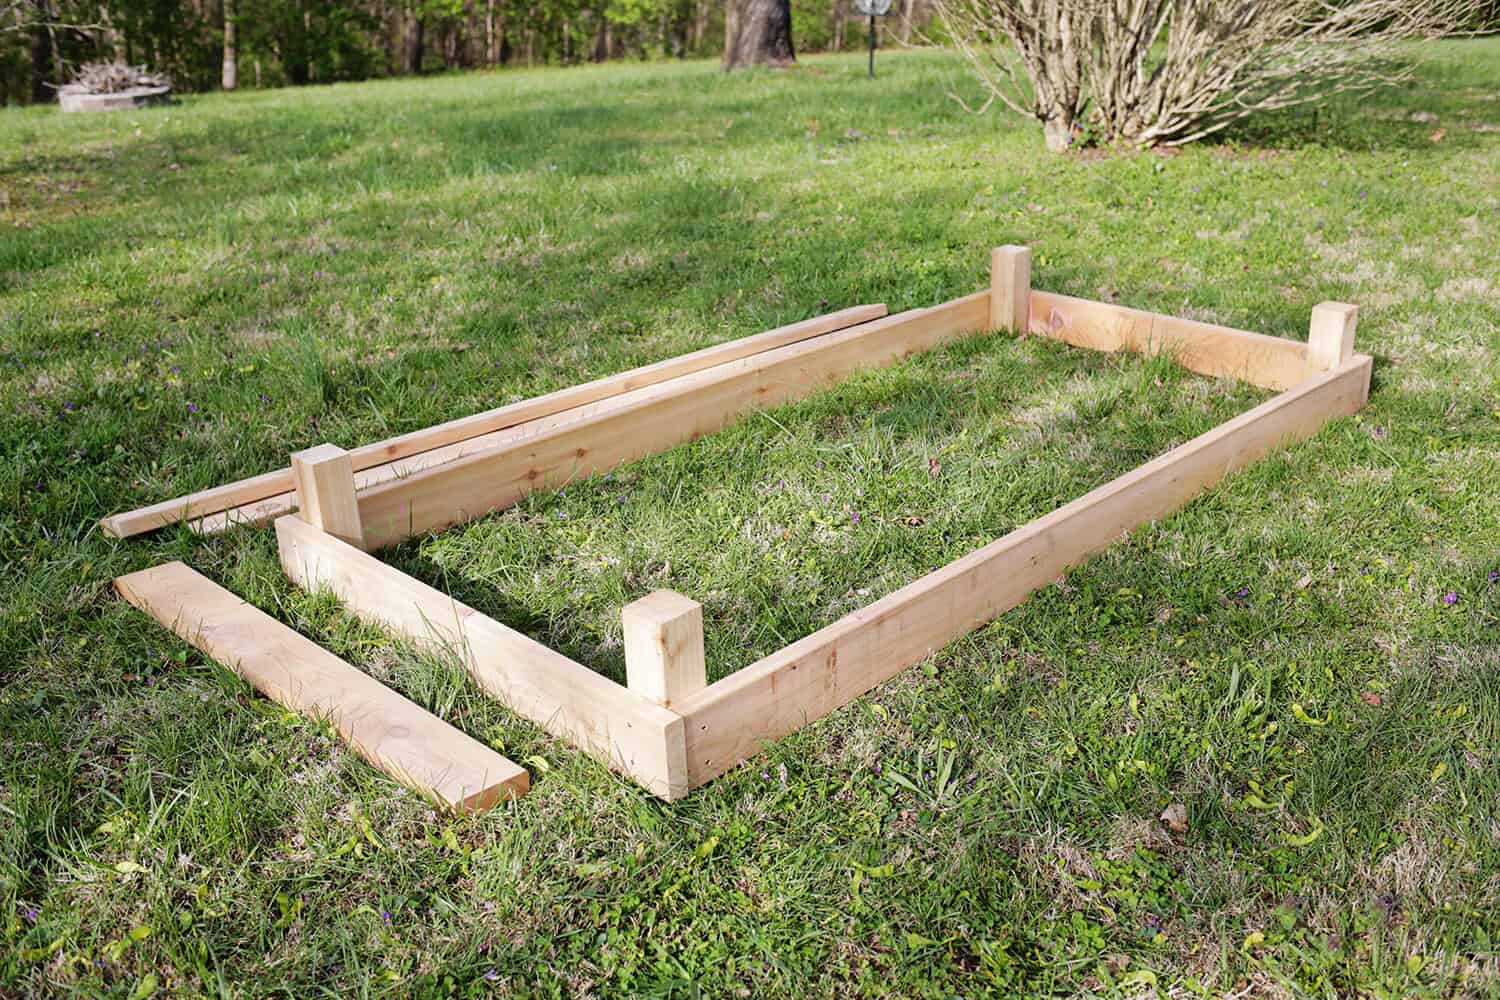
Repeat the process with each corner until you have a long rectangle built. You can see I positioned the two shorter end boards past the post a bit so the side 8′ boards would fit in snugly between them to complete the corner. 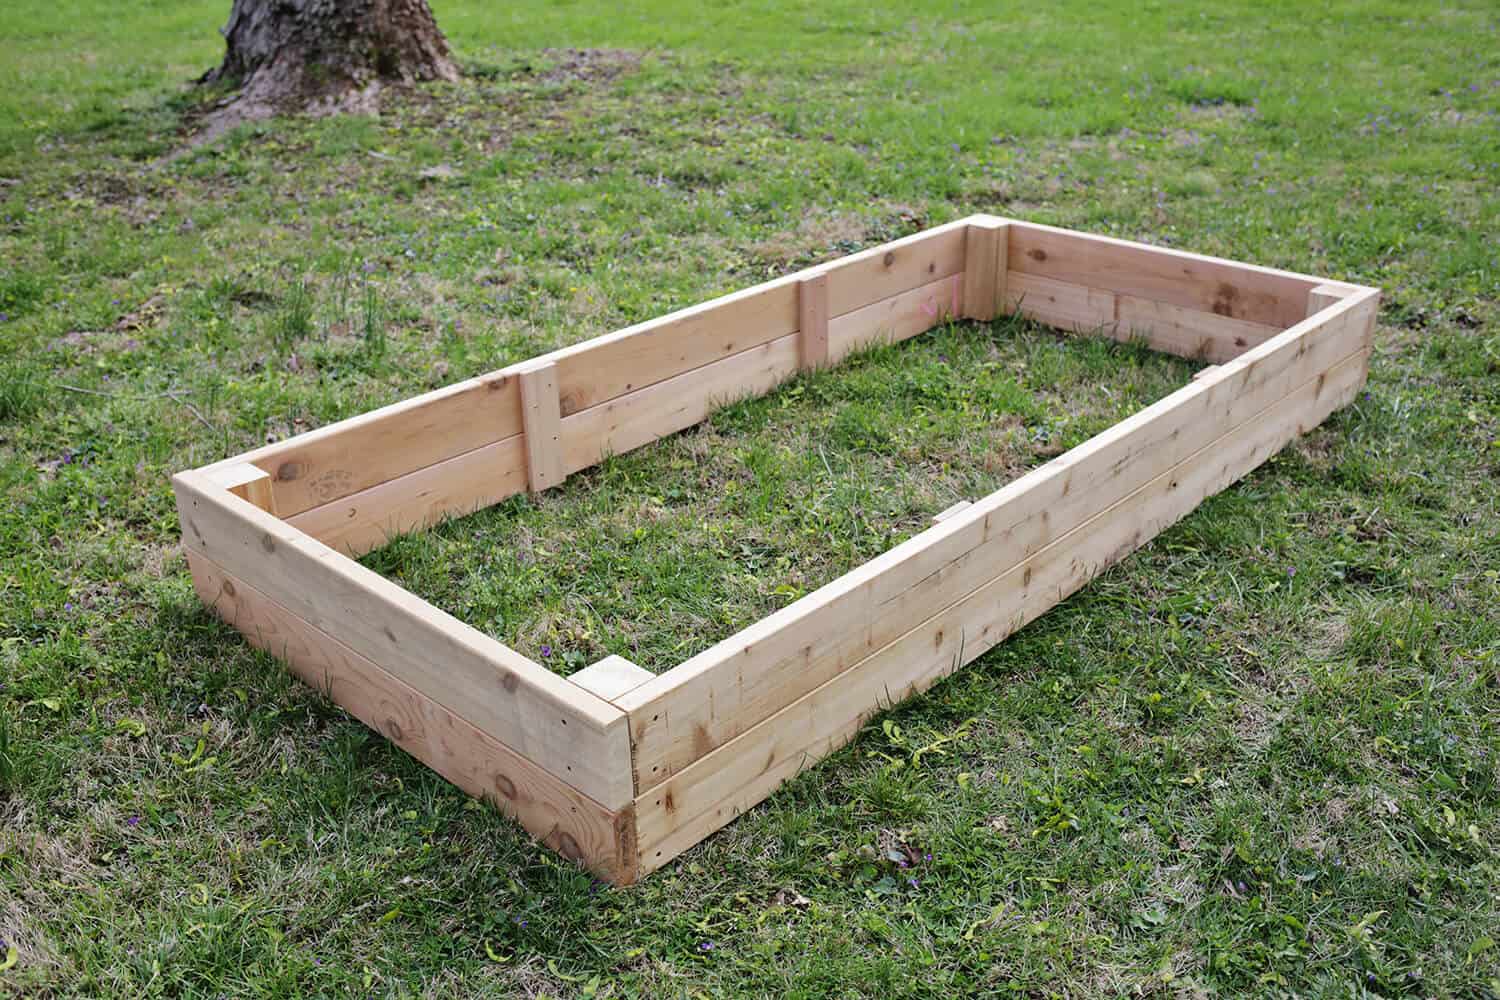 Repeat the process with the remaining four boards to complete your sides and use your four 3/4″ x 4″ x 1′ boards to brace the interior of the two long sides as shown above.
 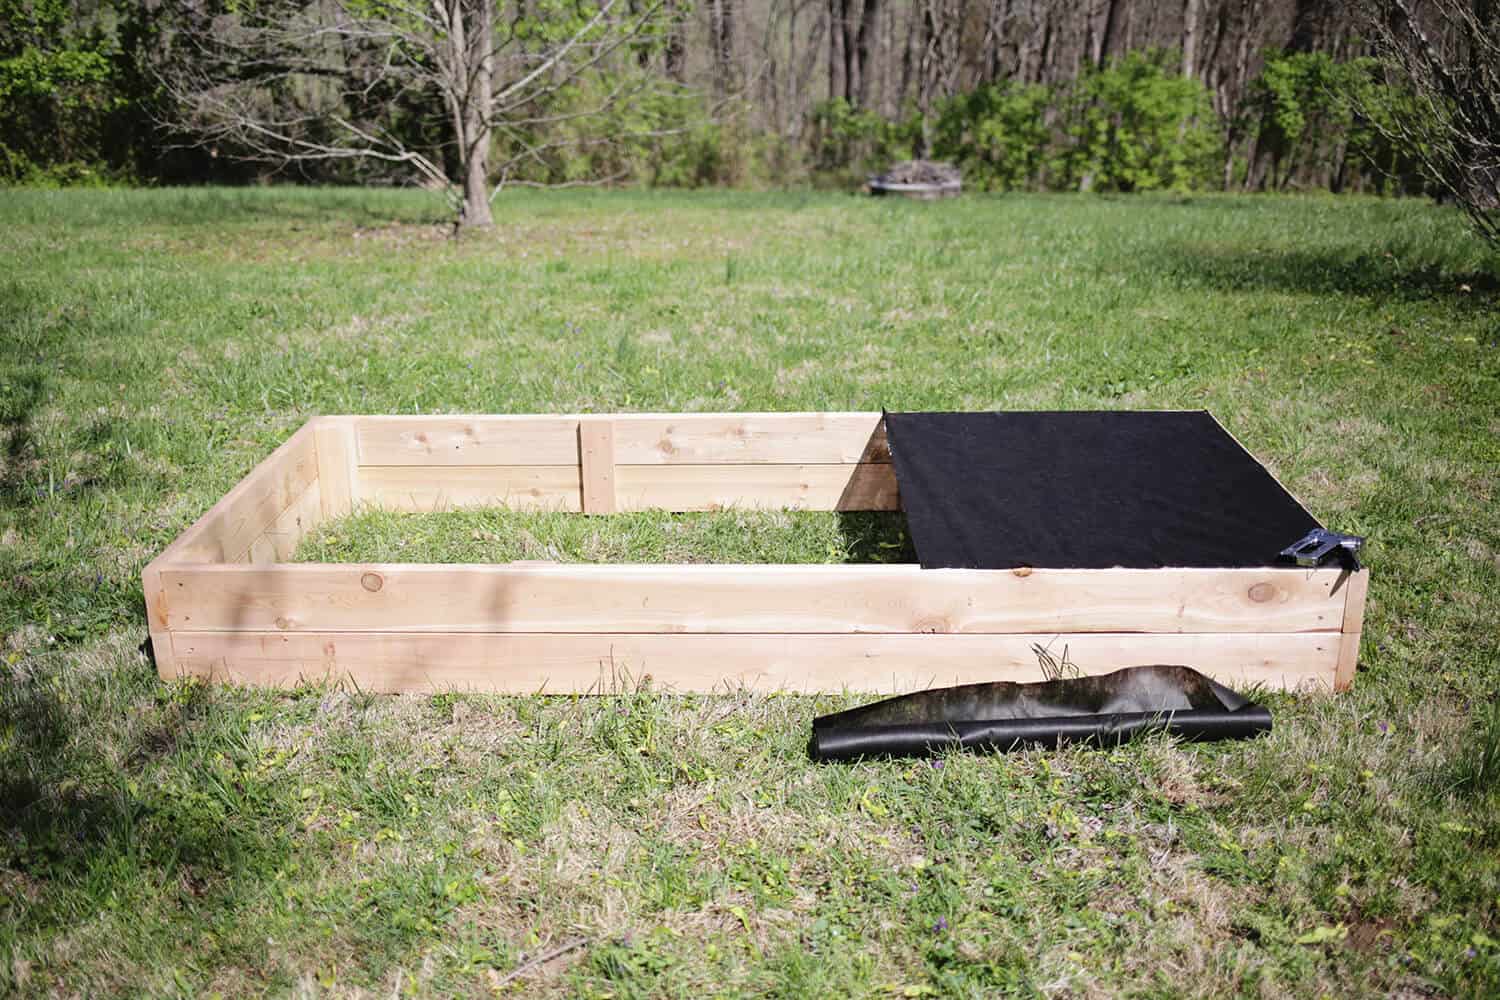 3. Line the Bottom!
Take your weed cloth and staple it across the top of your garden bed in strips until it is covered (the top will now become the bottom). I lined it in overlapping strips in one direction (like above) and then did a few strips the opposite direction (longways) for double coverage. 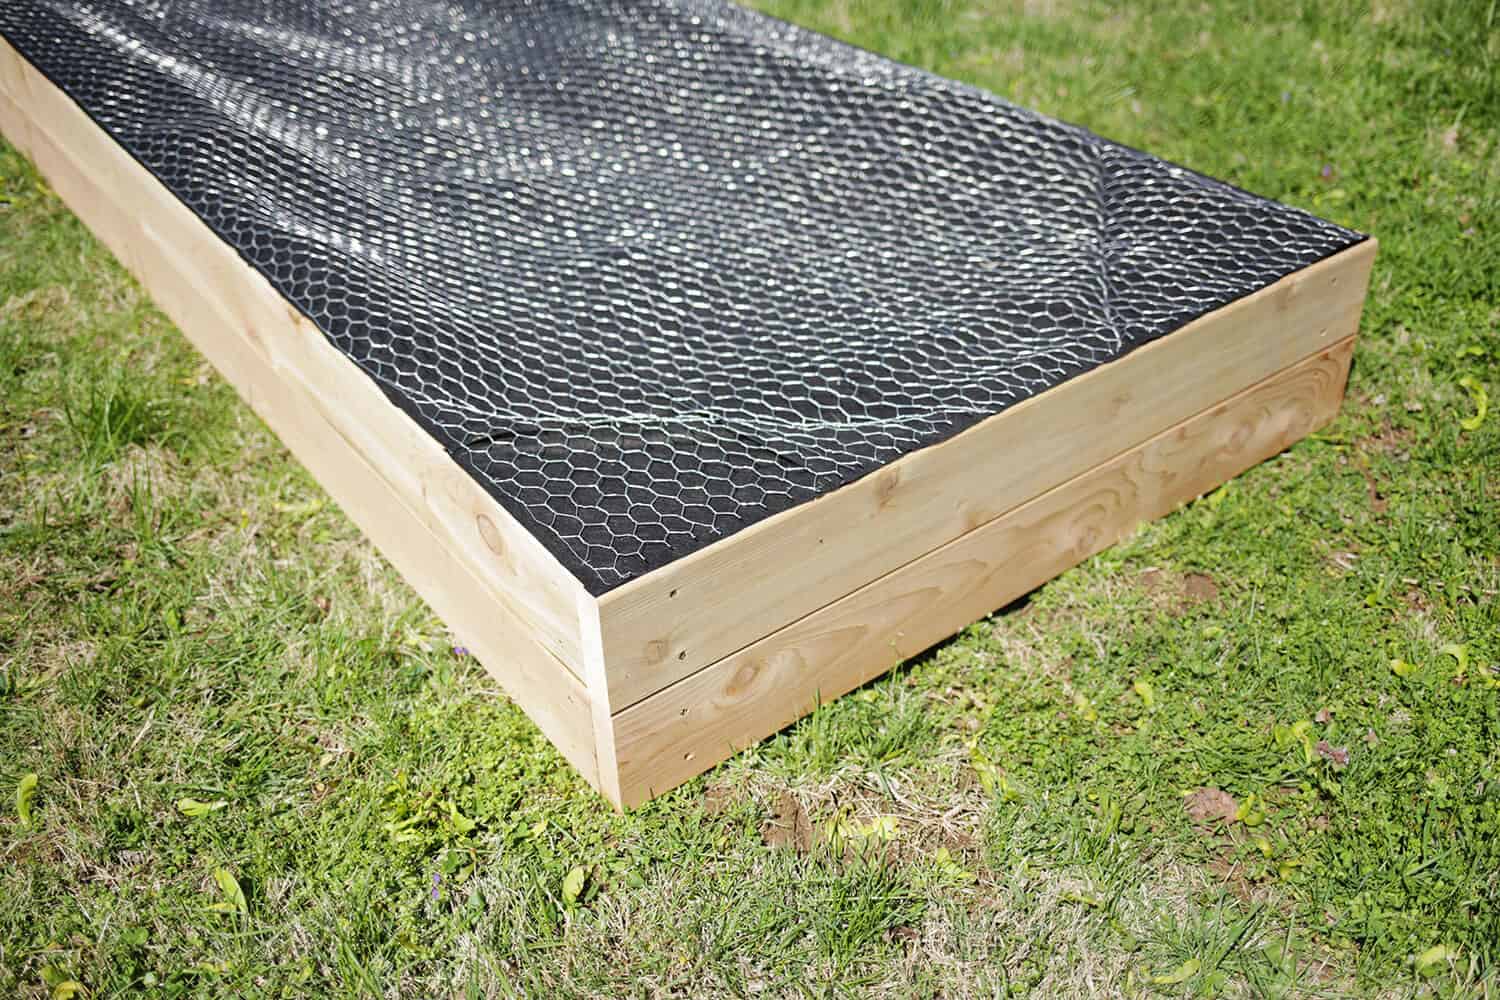 As an optional move, if you have problems in your yard with moles, voles, or gophers, I would also line the bottom with a layer of chicken wire on top (use your staple gun to attach) to keep them from digging up through your garden. We have a huge mole problem in our yard, so this was a necessary step for us!
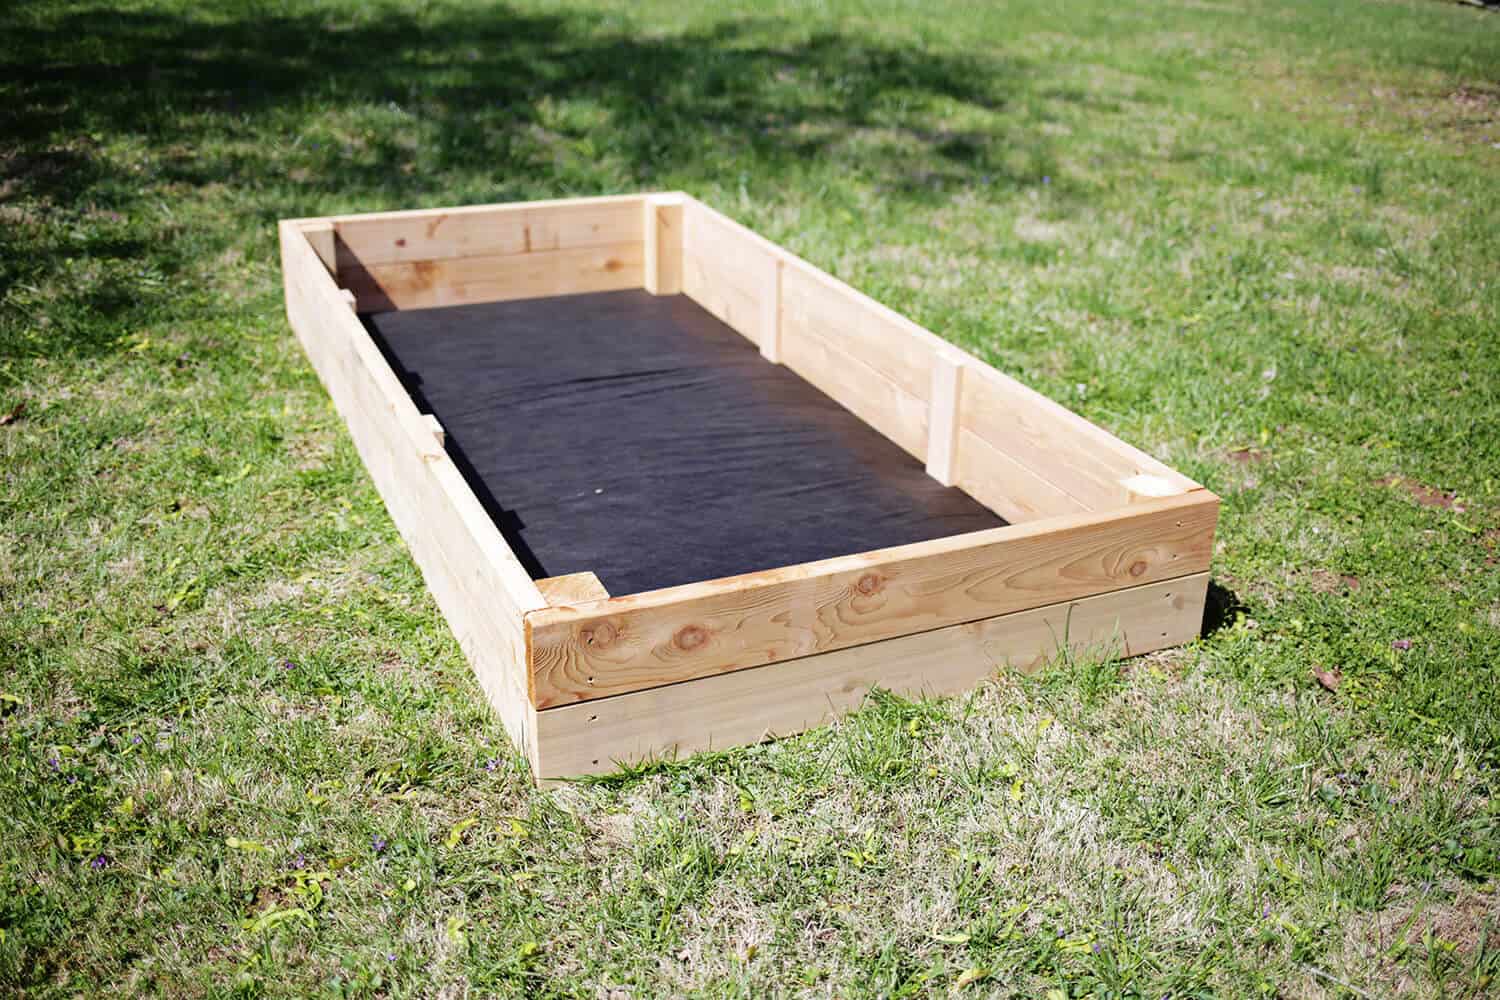 4. Flip ‘N’ Fill!
Once your bottom liners are attached, flip your garden bed over, place it in the spot where you want it to stay, and it’s ready to fill!
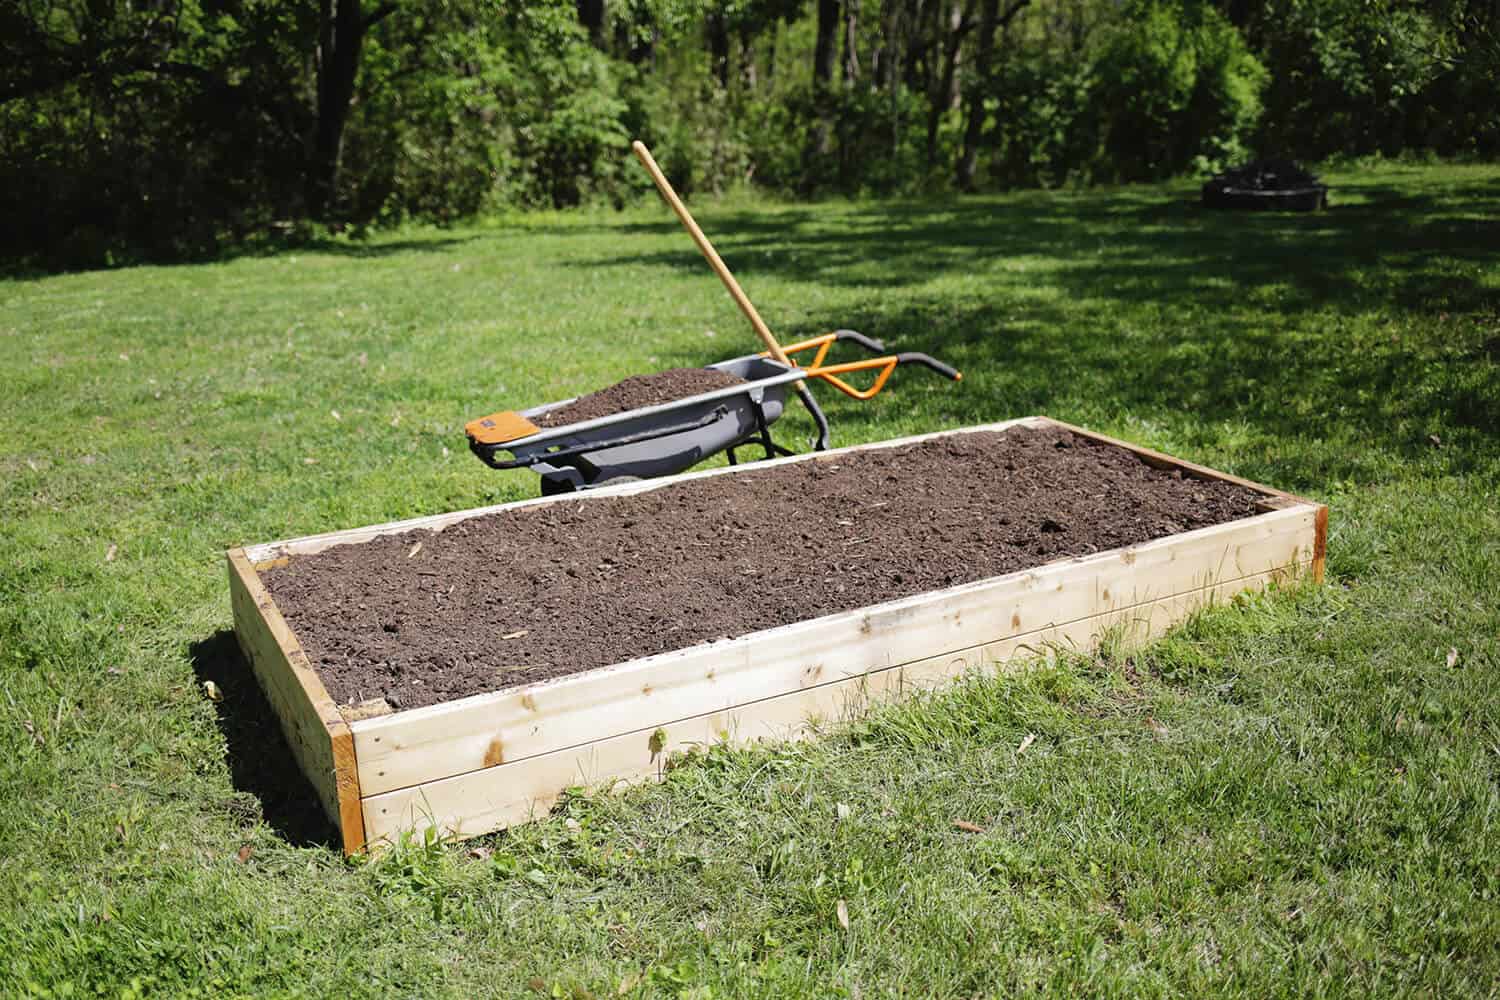 I would ask your local garden/plant store if they have soil they sell in bulk since that’s the best deal. The place near us did and they also delivered the soil, which was a big help—he even backed the truck up and dumped the soil right in!
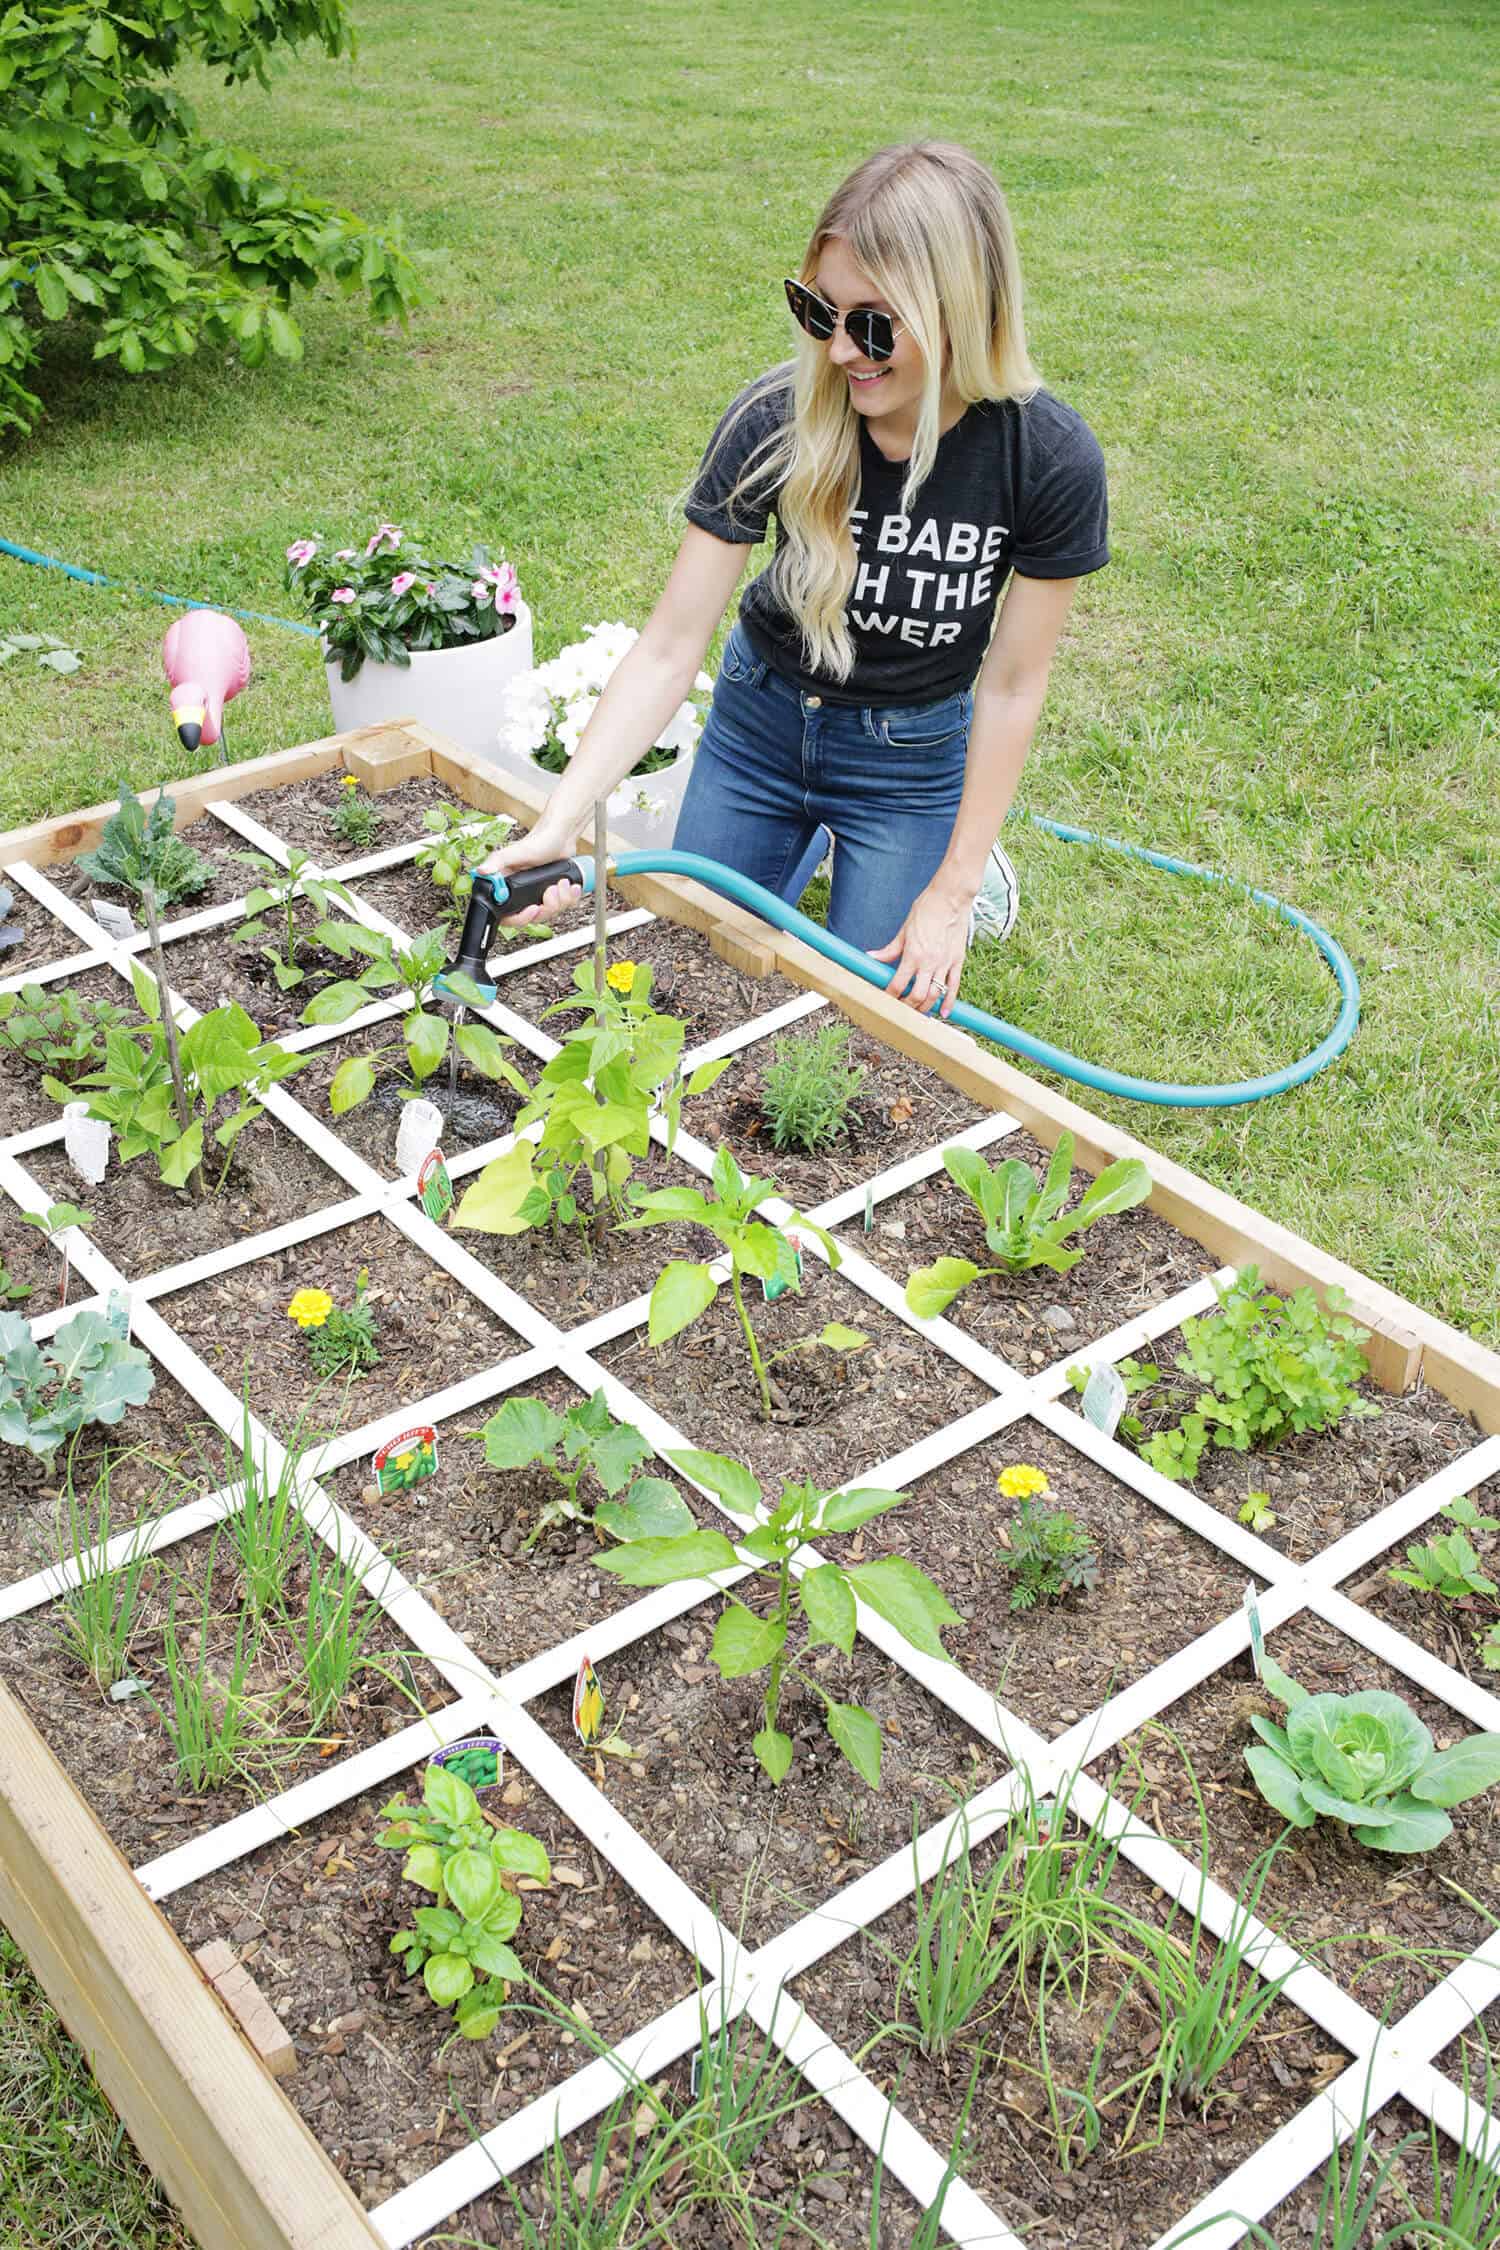
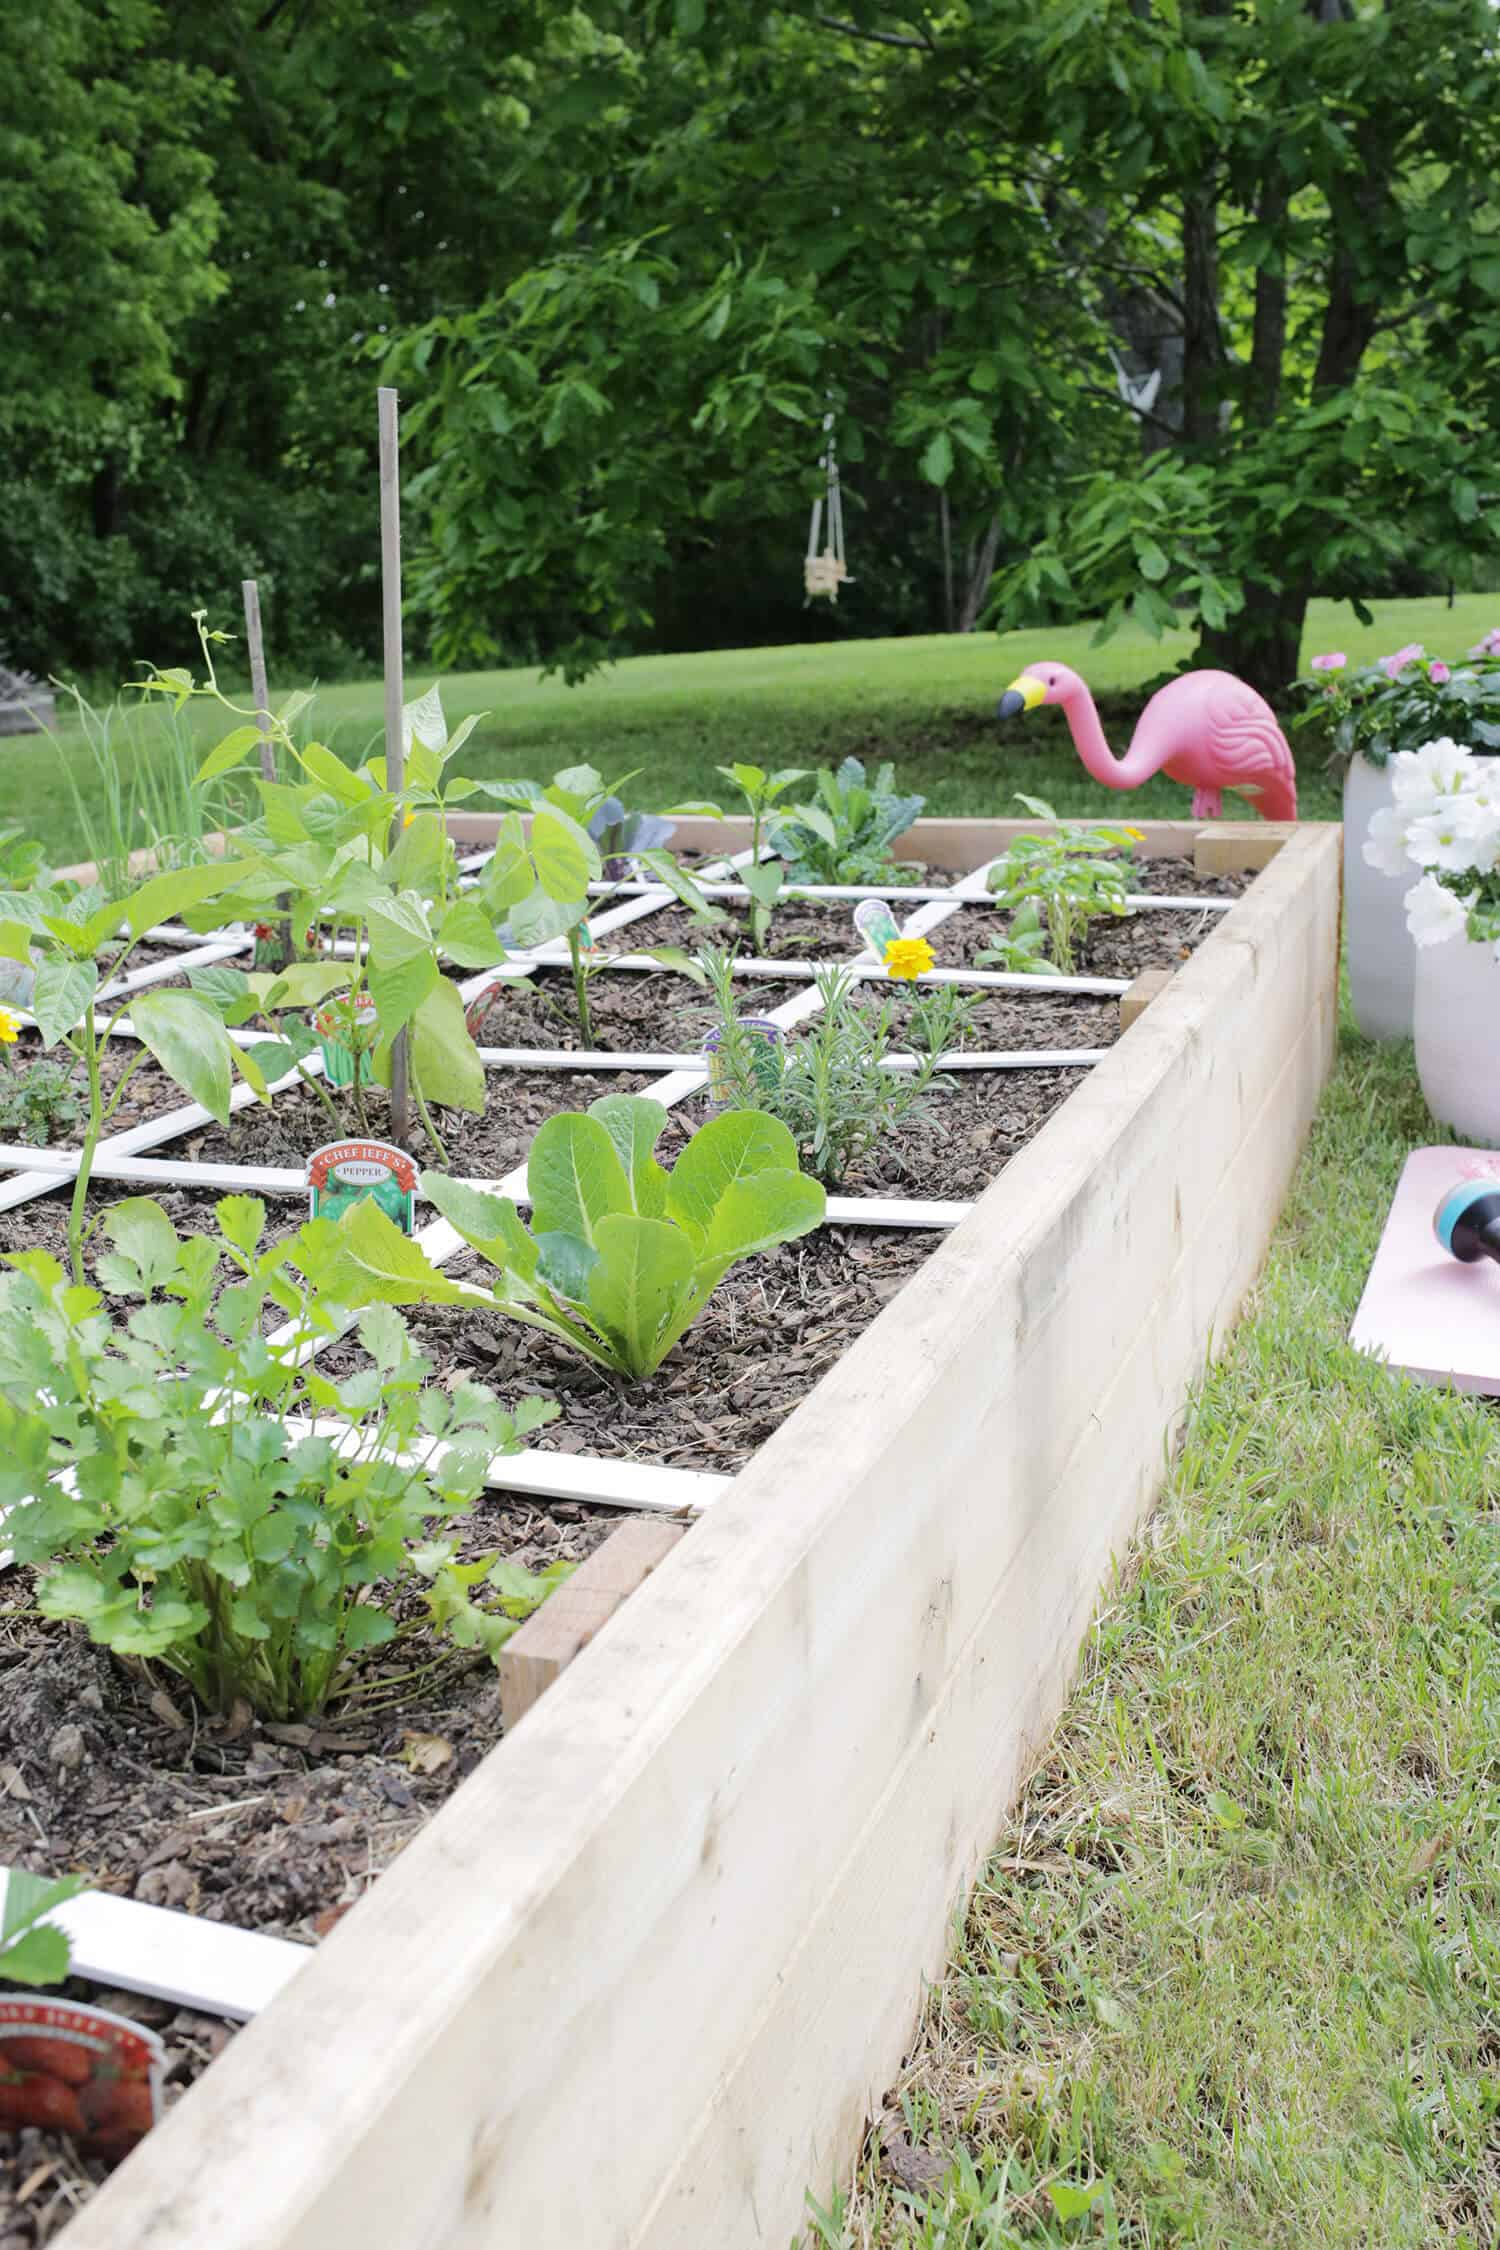
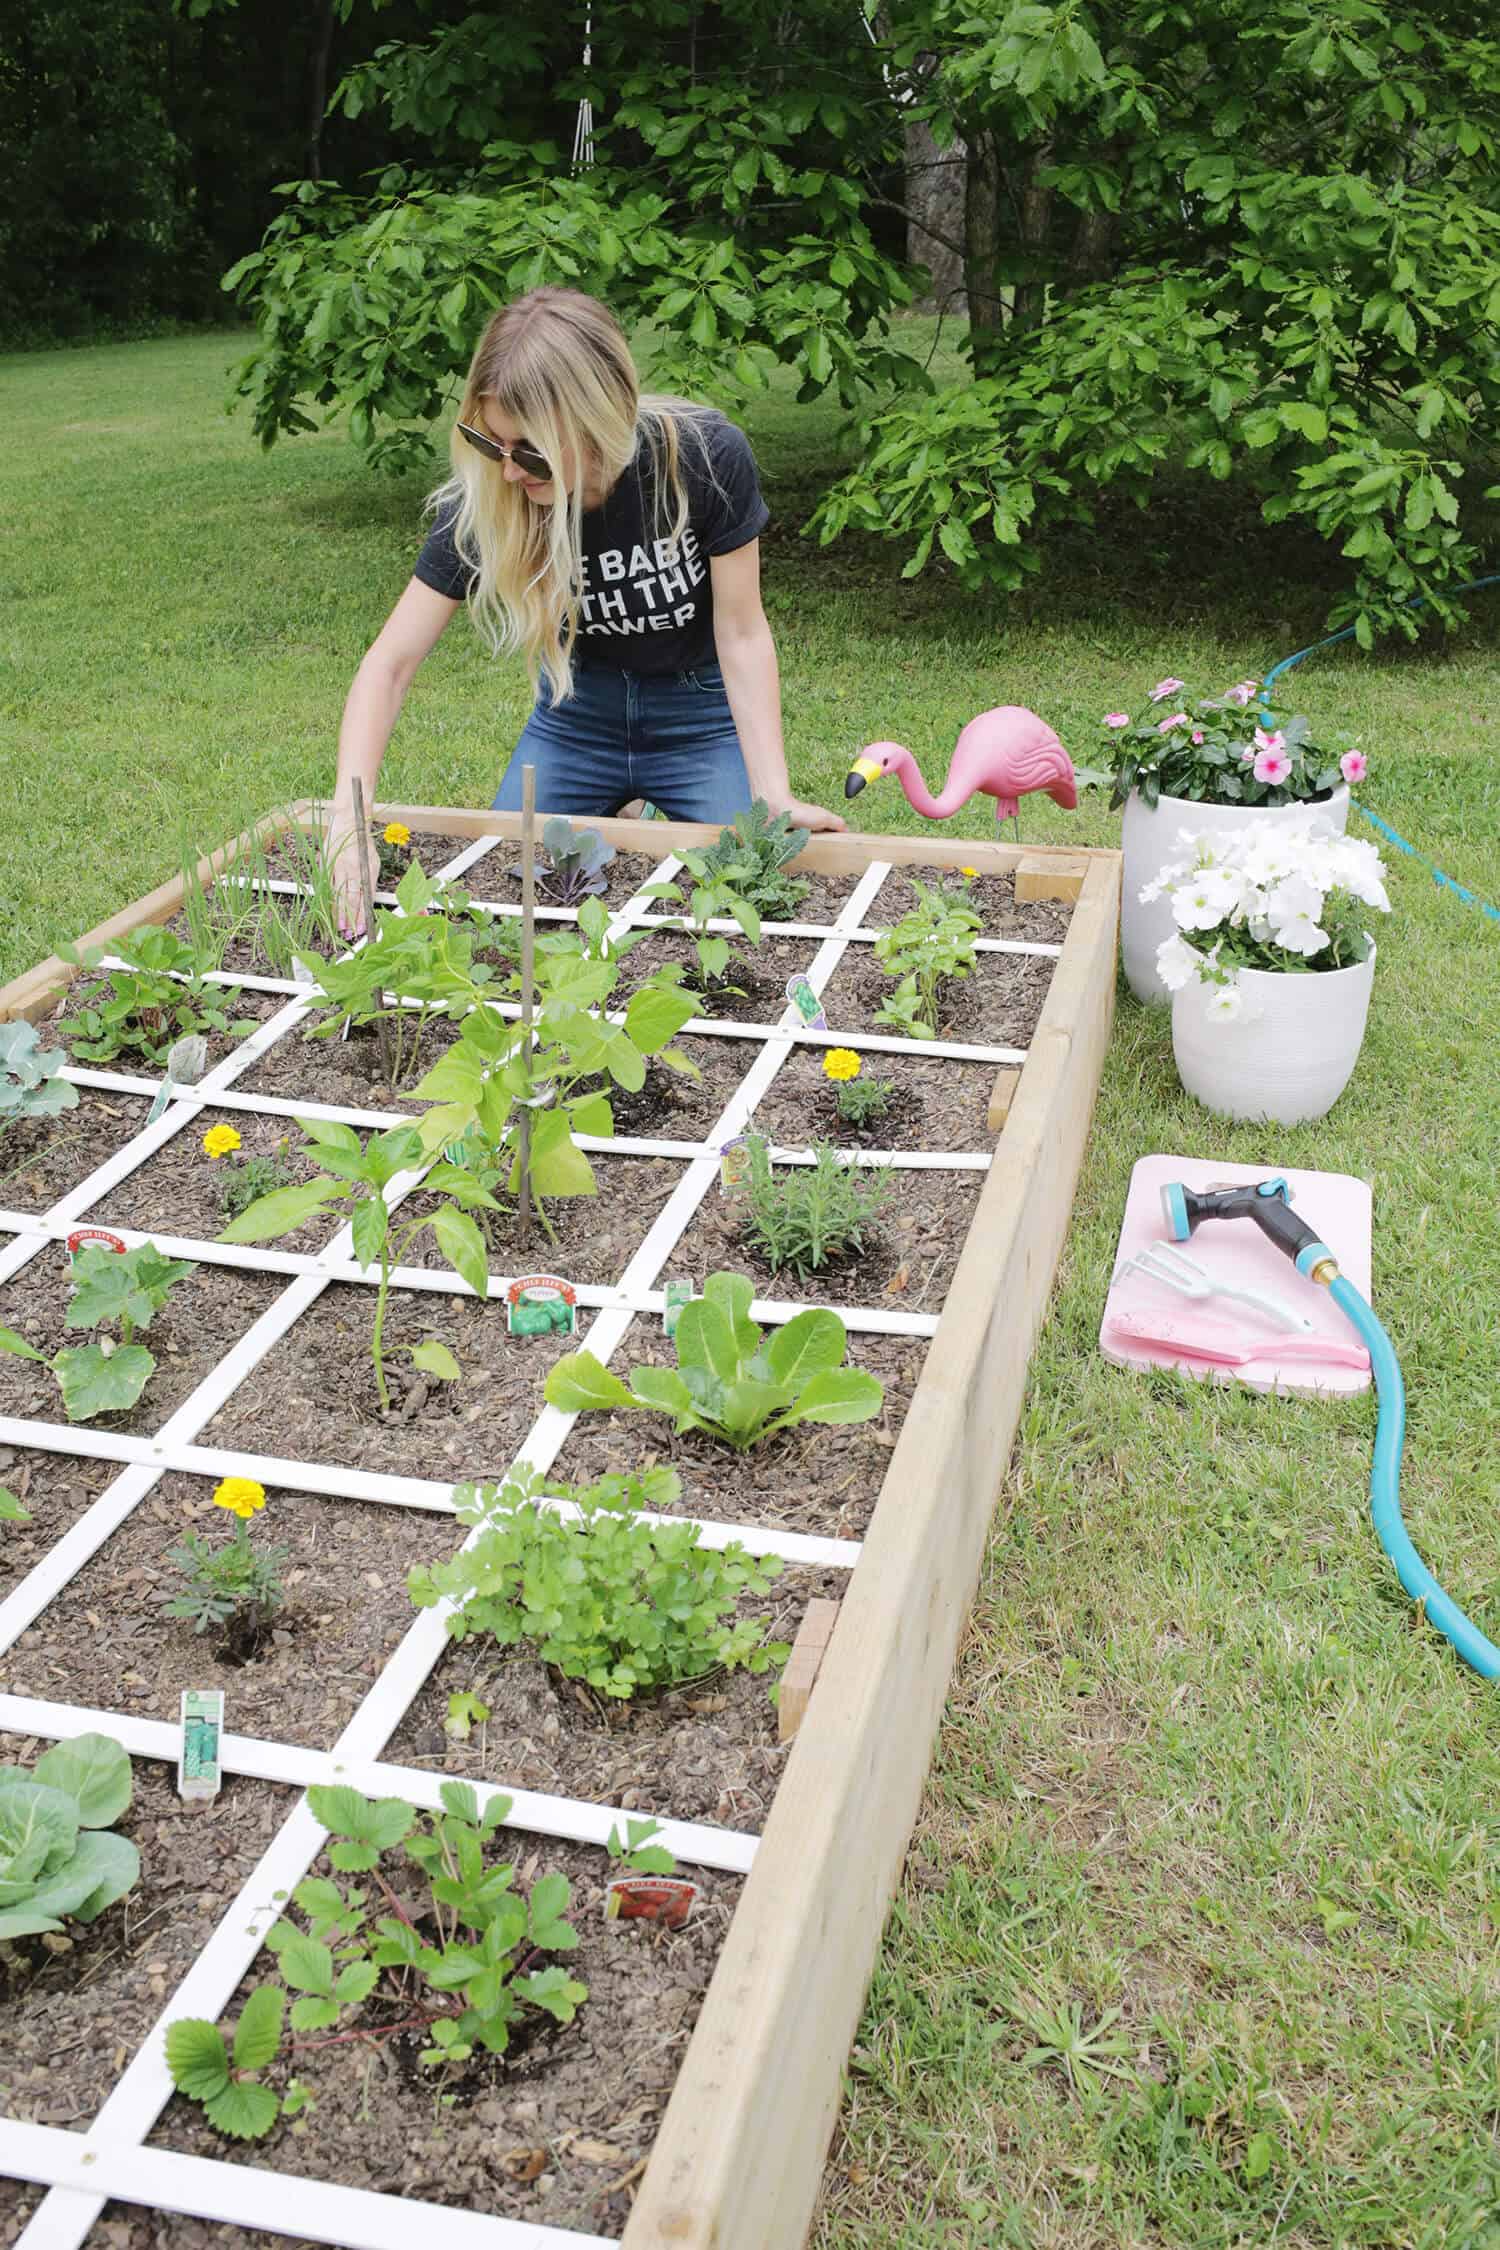
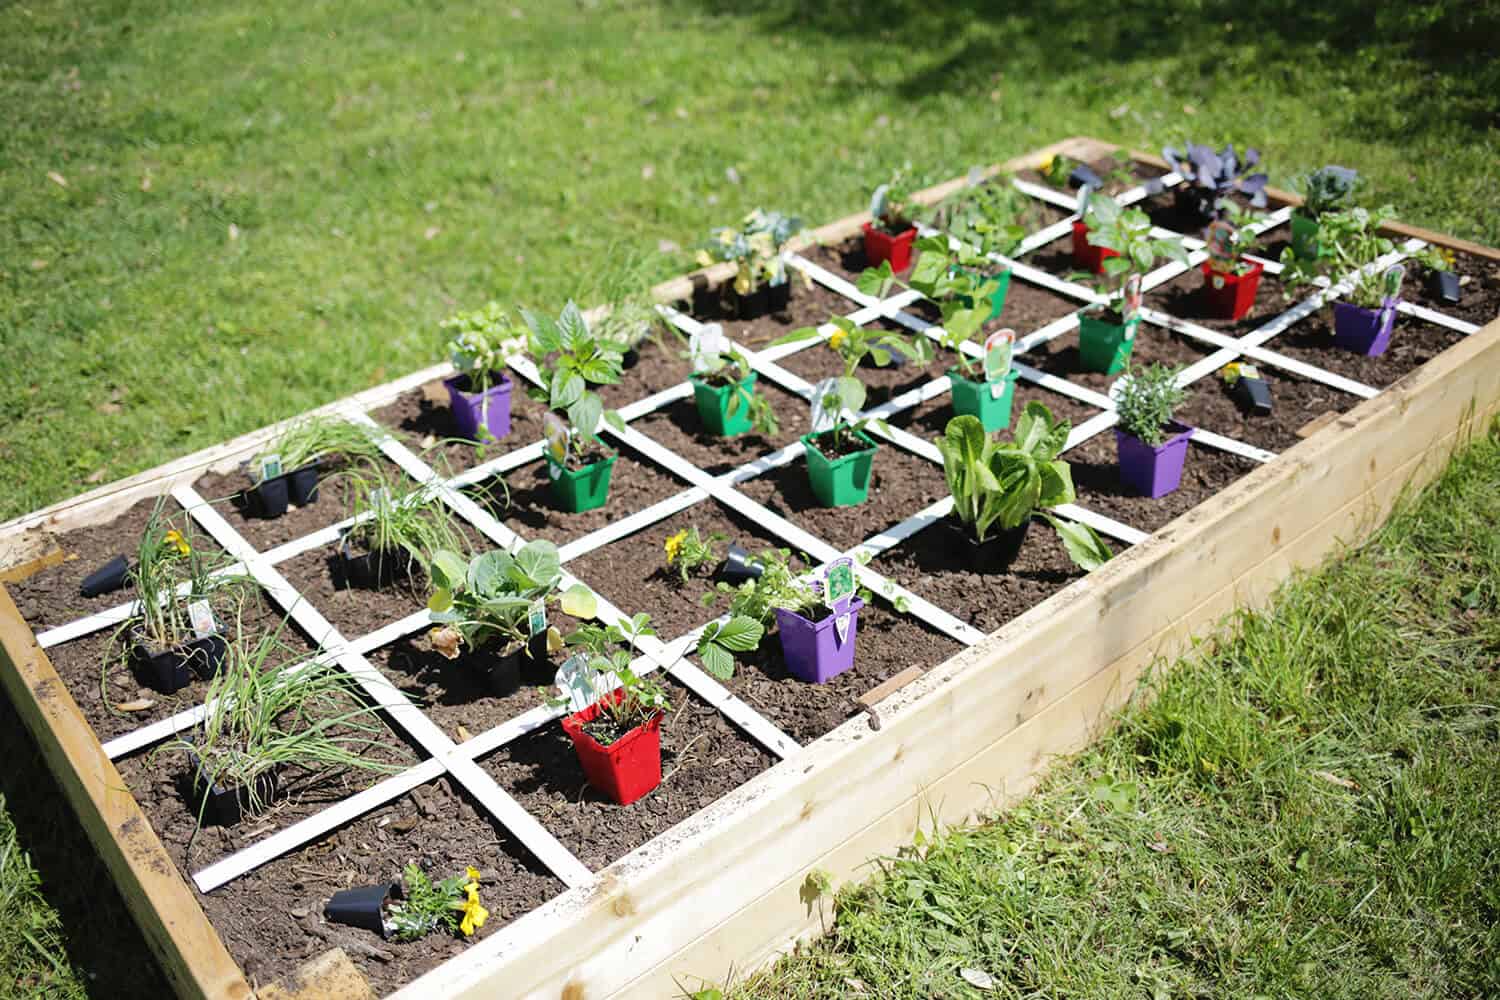 You did it! Now it’s time to pick out your plants and get this garden planted! You’ll notice that I have a grid on top of my garden which is another optional thing to do, but it helps to keep your plants all organized and it’s easy to add if you want to. I got PVC flat trim from the home improvement store (it’s a little over 1″ wide and super thin) and cut seven pieces that just fit inside the box widthwise and three that fit inside the box lengthwise. I spaced them out evenly and then screwed them together at each juncture with a small short screw—easy!
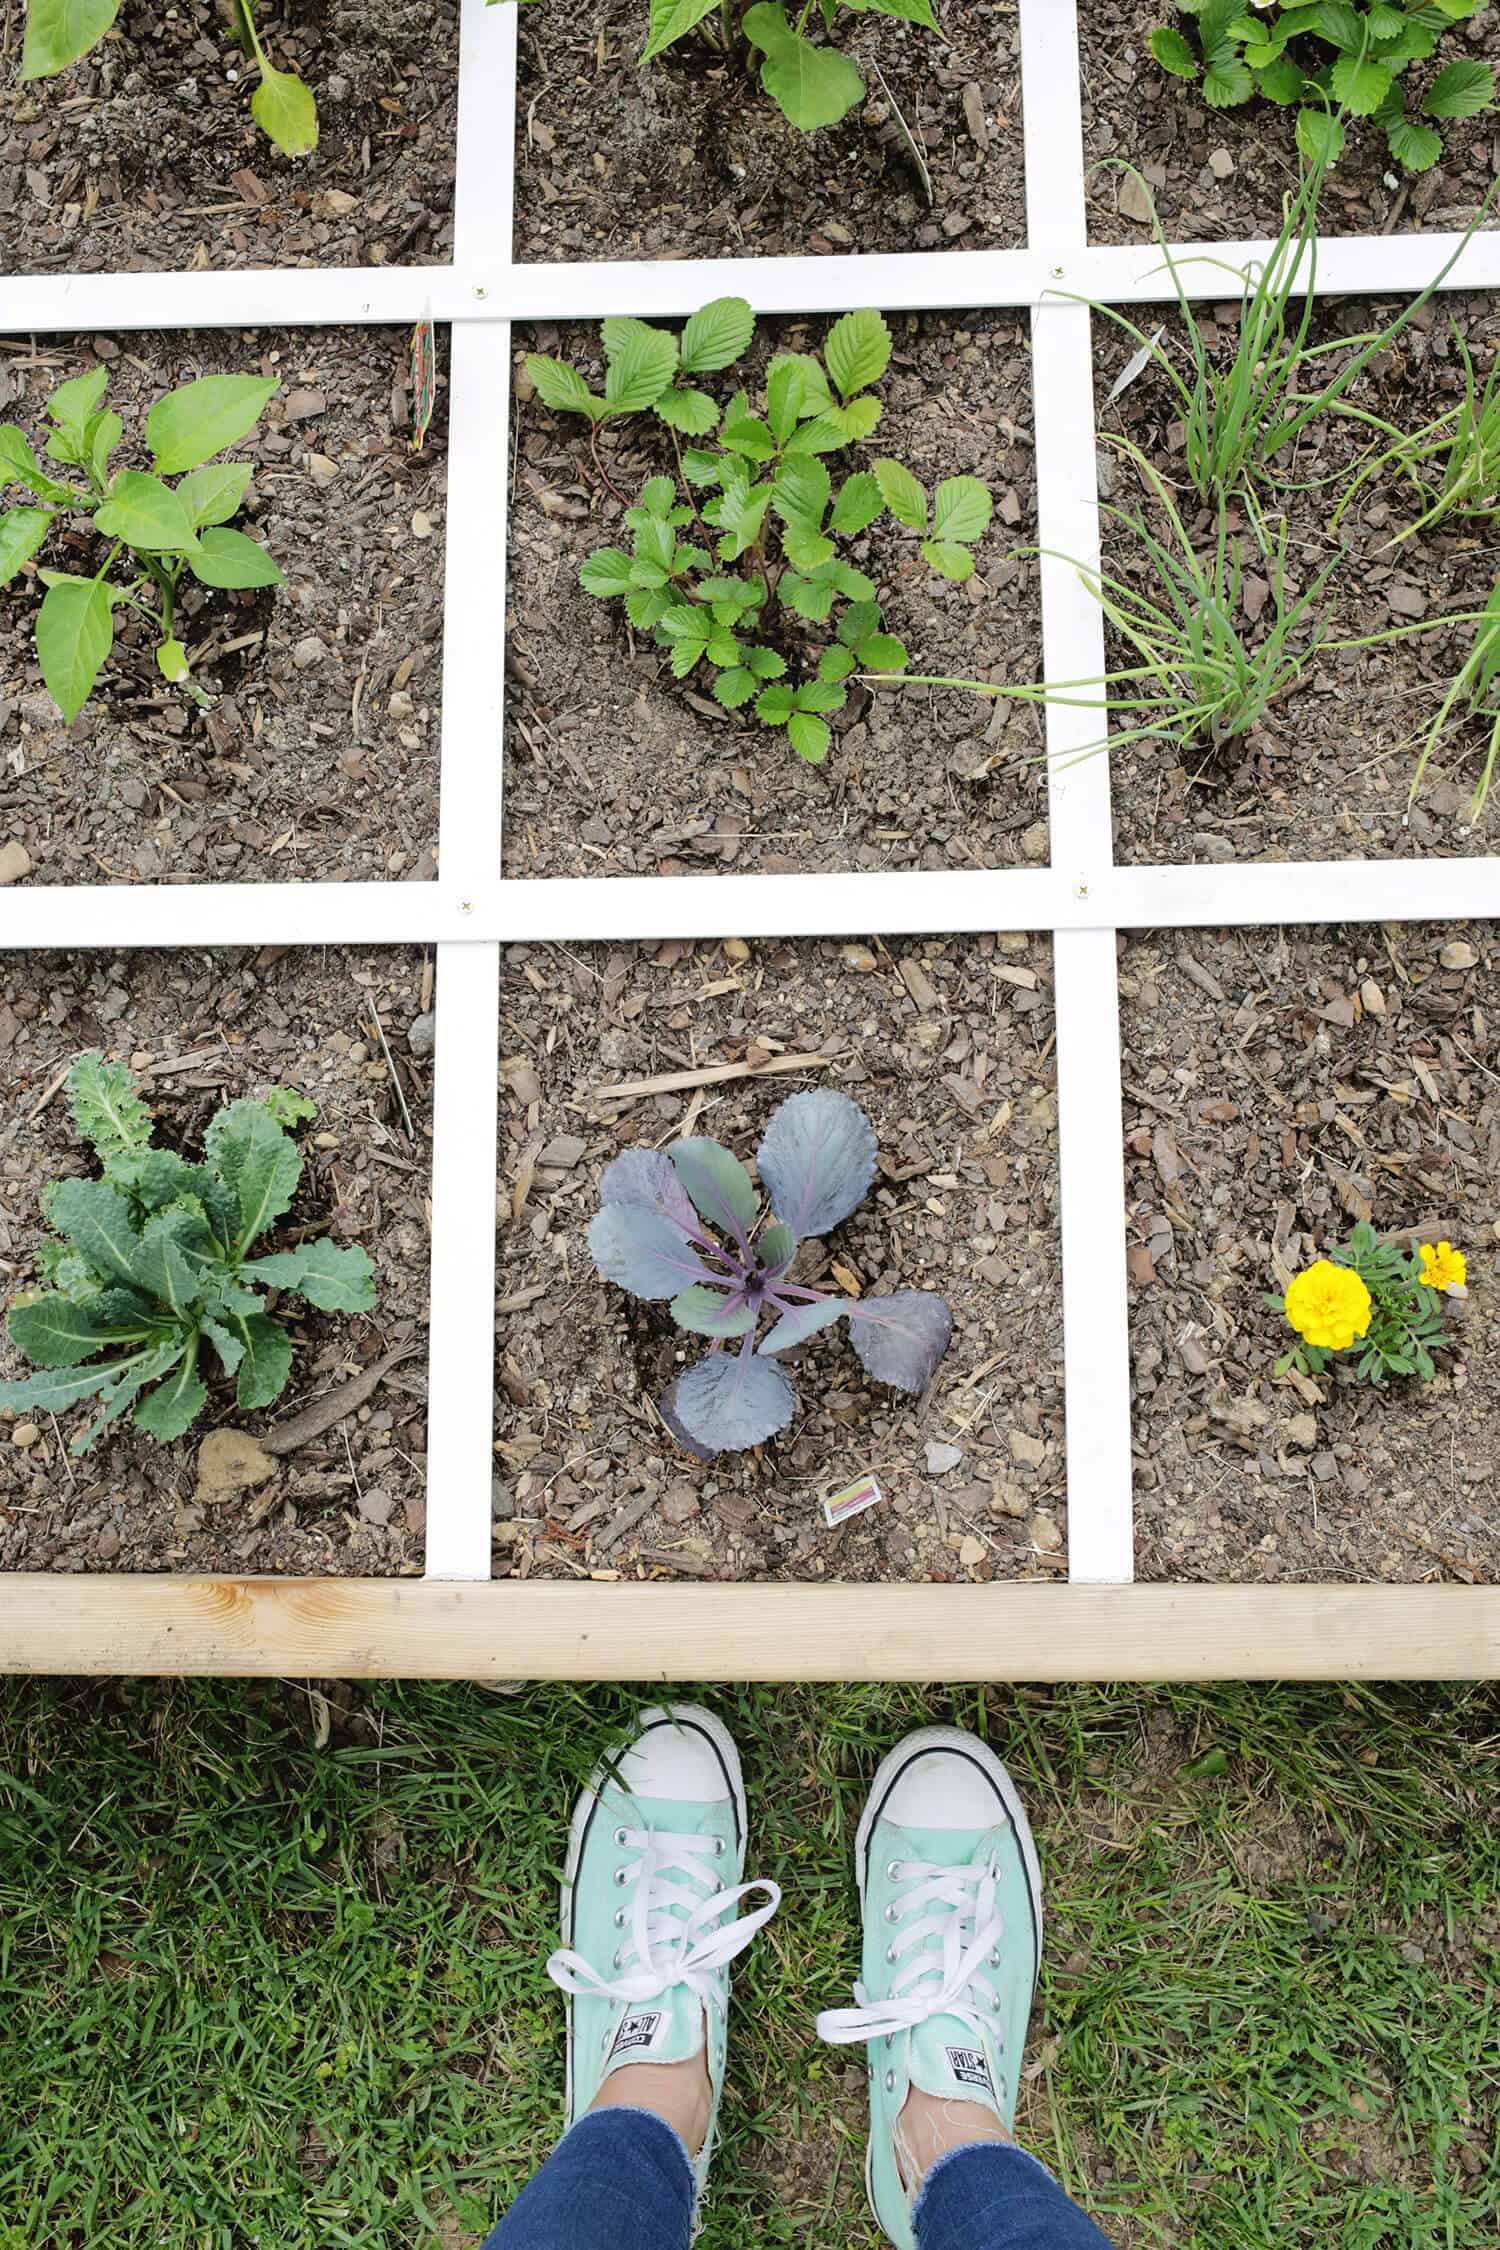

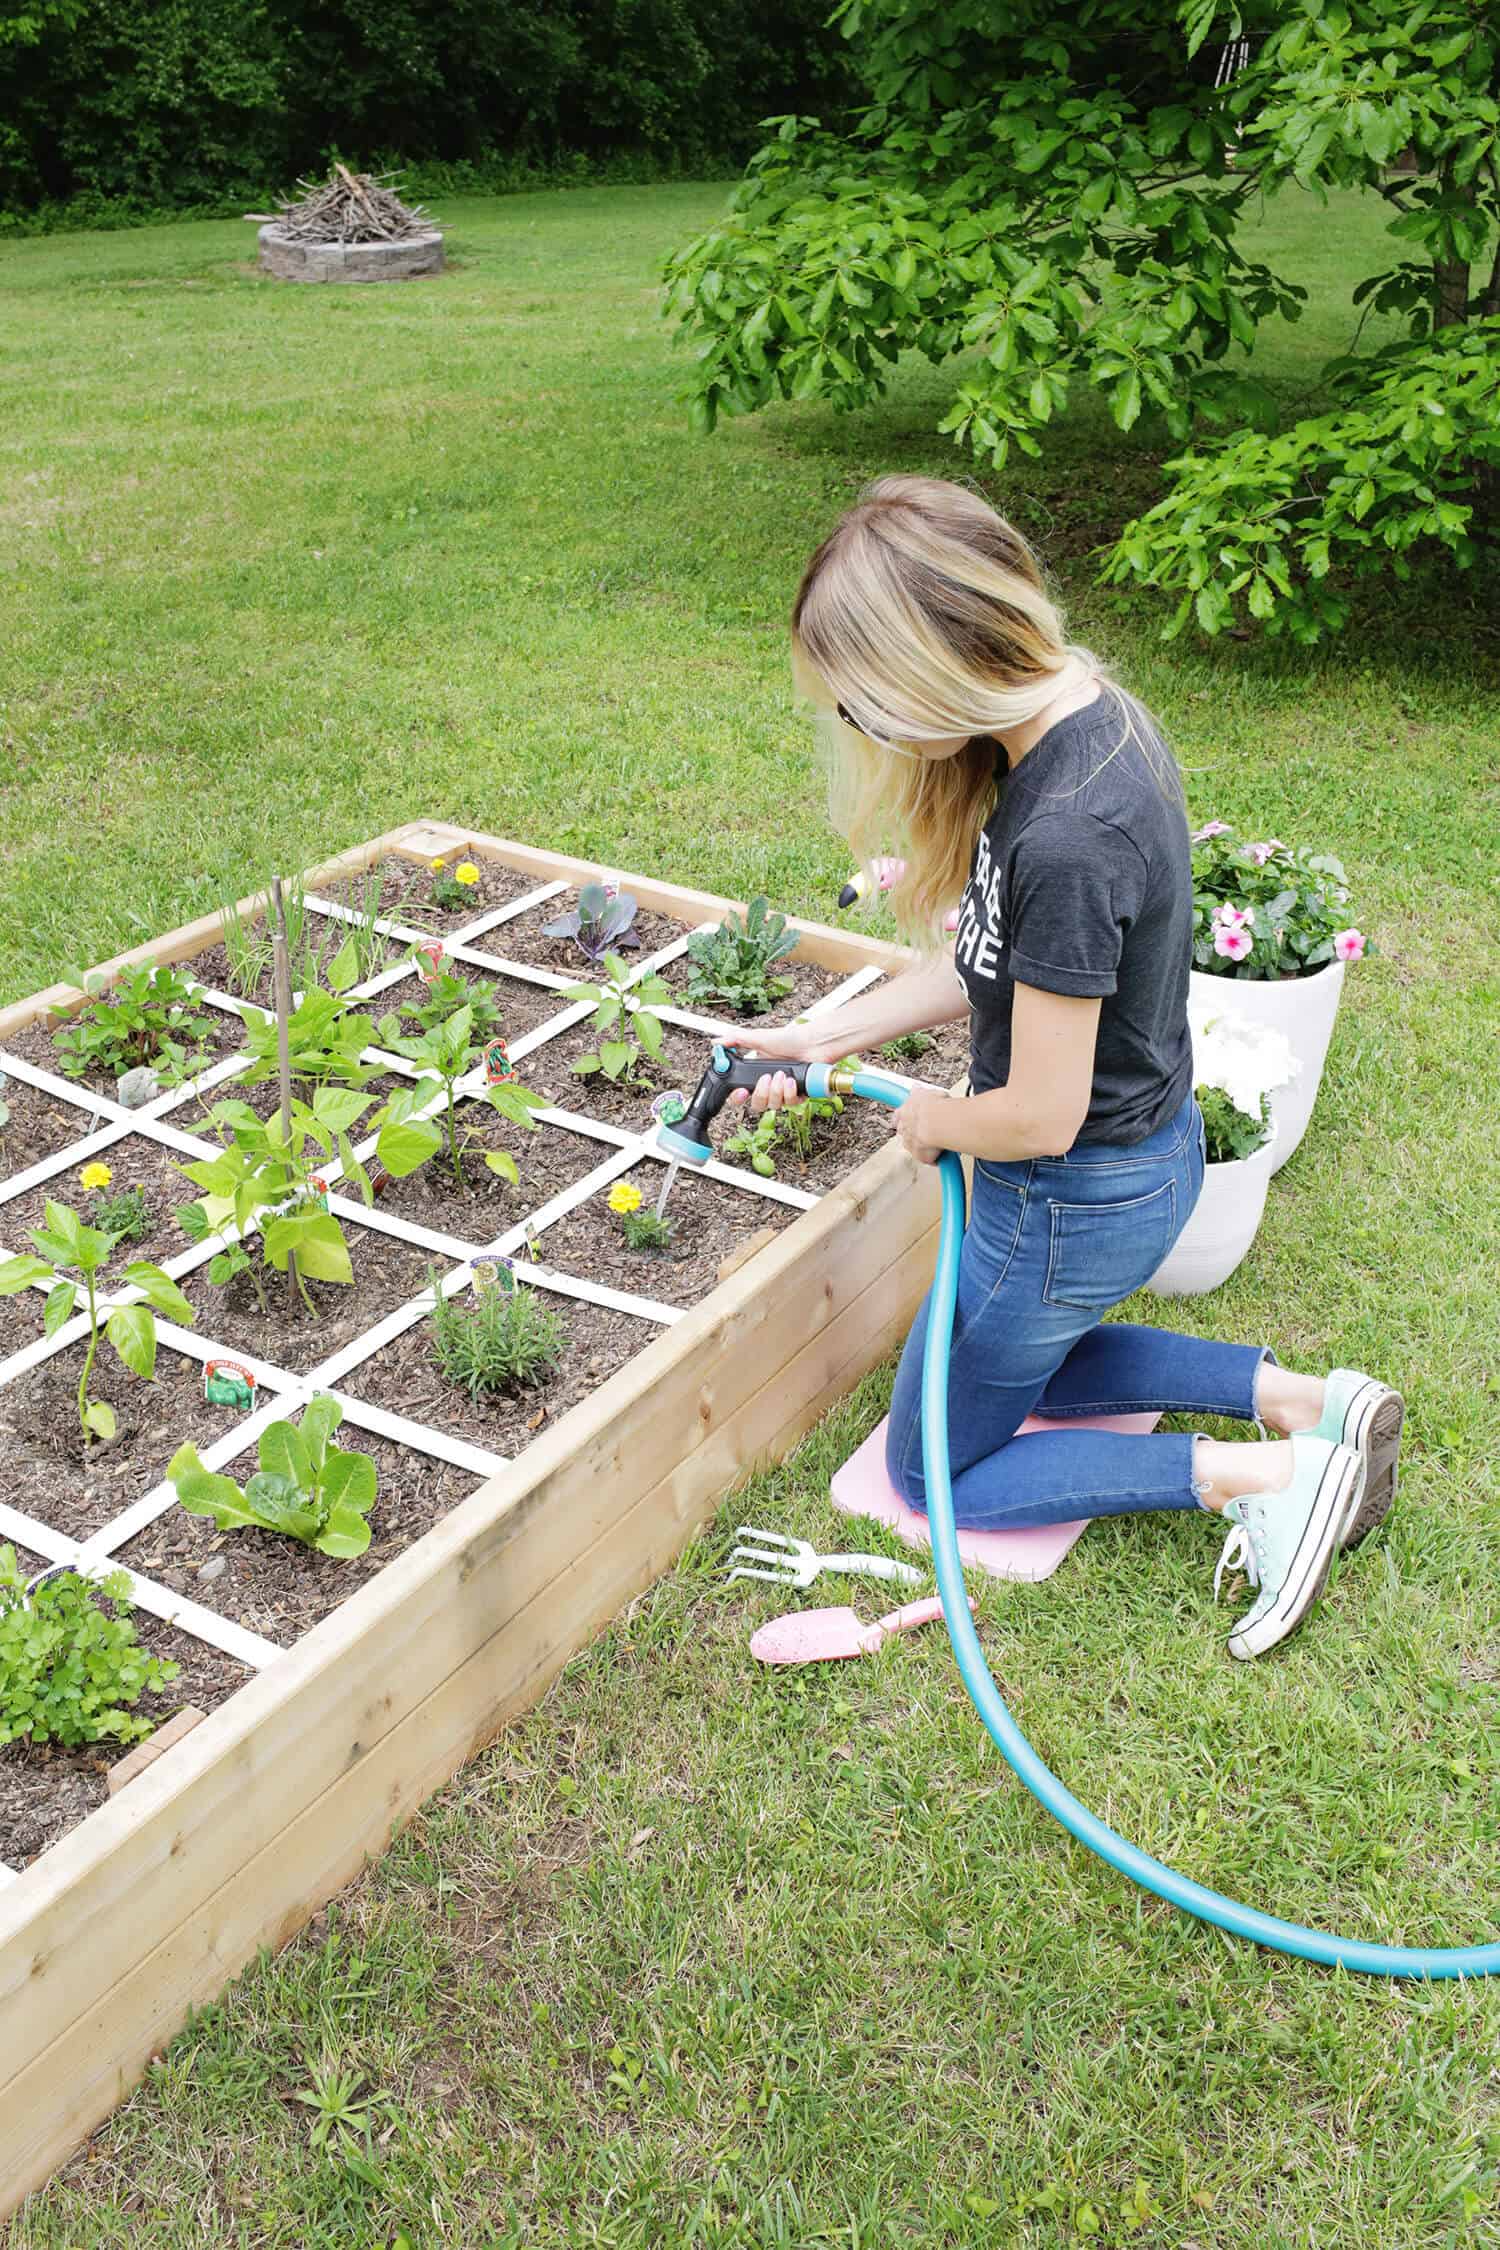
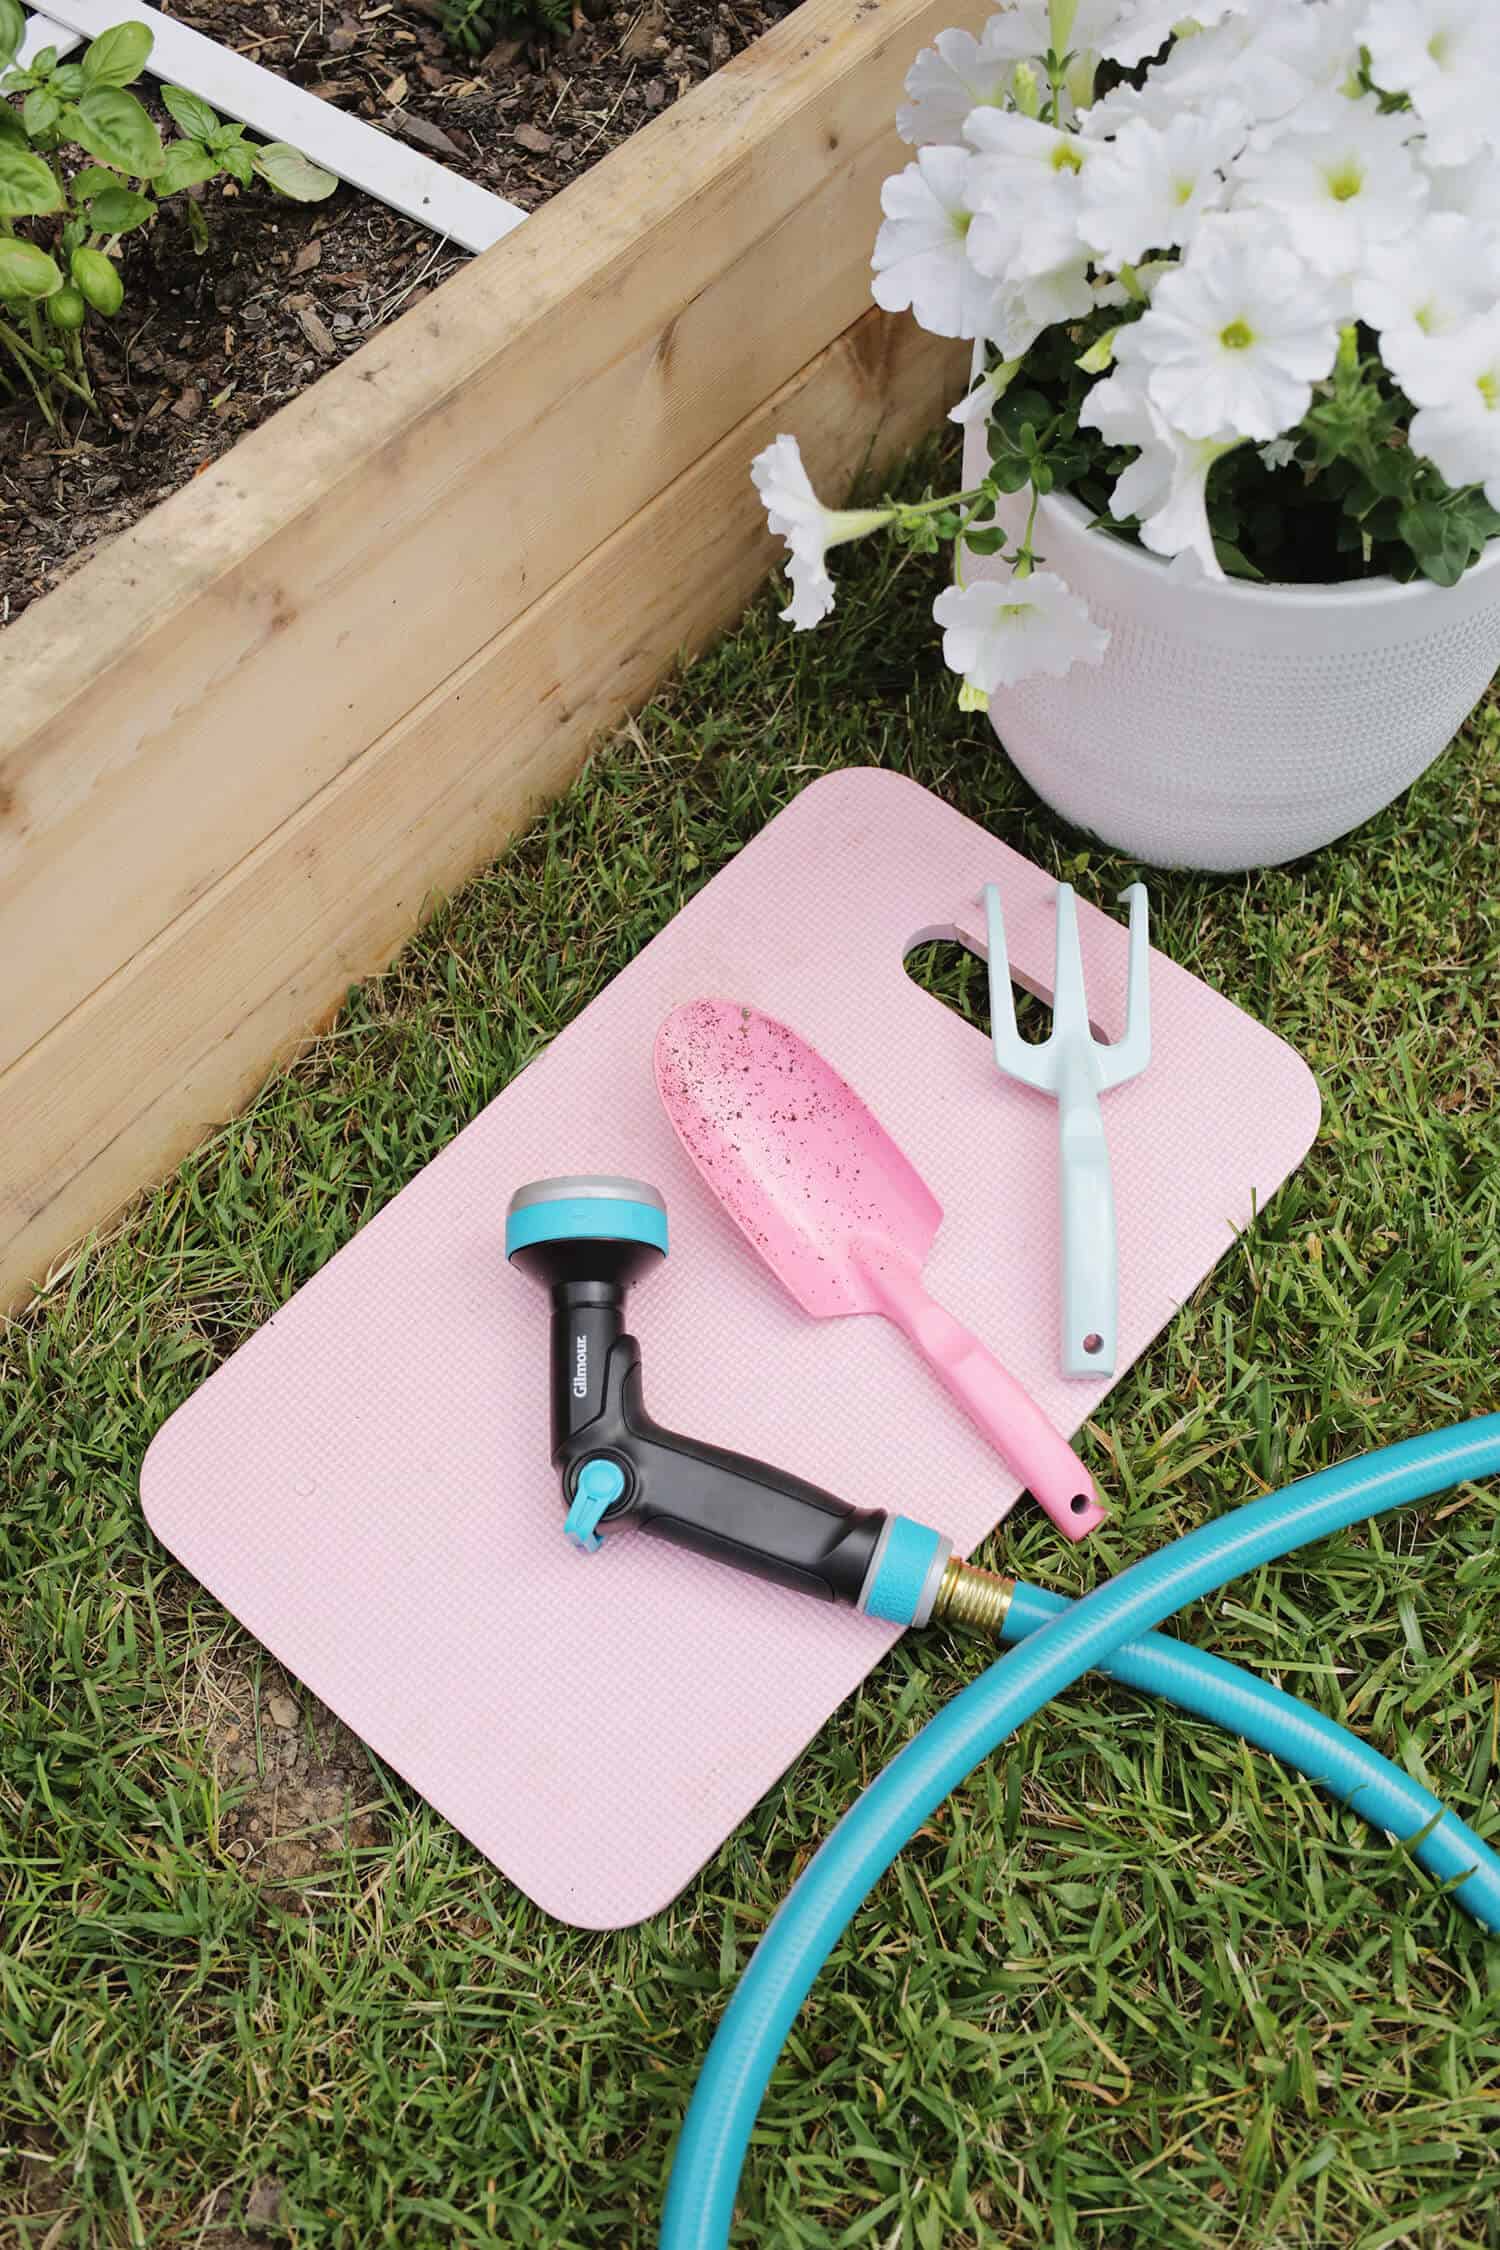 Watering your garden is obviously a super important step, so make sure you are planning to put your garden not only where it will get a lot of light (8 hours of sun a day is ideal), but where you can also get to it with a hose (or not too far from a hose so you can fill up a bucket and carry it over). Our hose was too short to reach our garden location, so we got a pretty new hose and this awesome nozzle with swivel connect, which lets the nozzle turn or pivot without getting the hose all twisted! It has a bunch of settings so you can choose one that’s perfect for gentle watering at the base of each plant (it’s best not to get the leaves wet if you can help it, so that’s why I water at the base). It also has a thumb control on the nozzle so you can easily control the water pressure as well as needed for more fragile plants—love it!
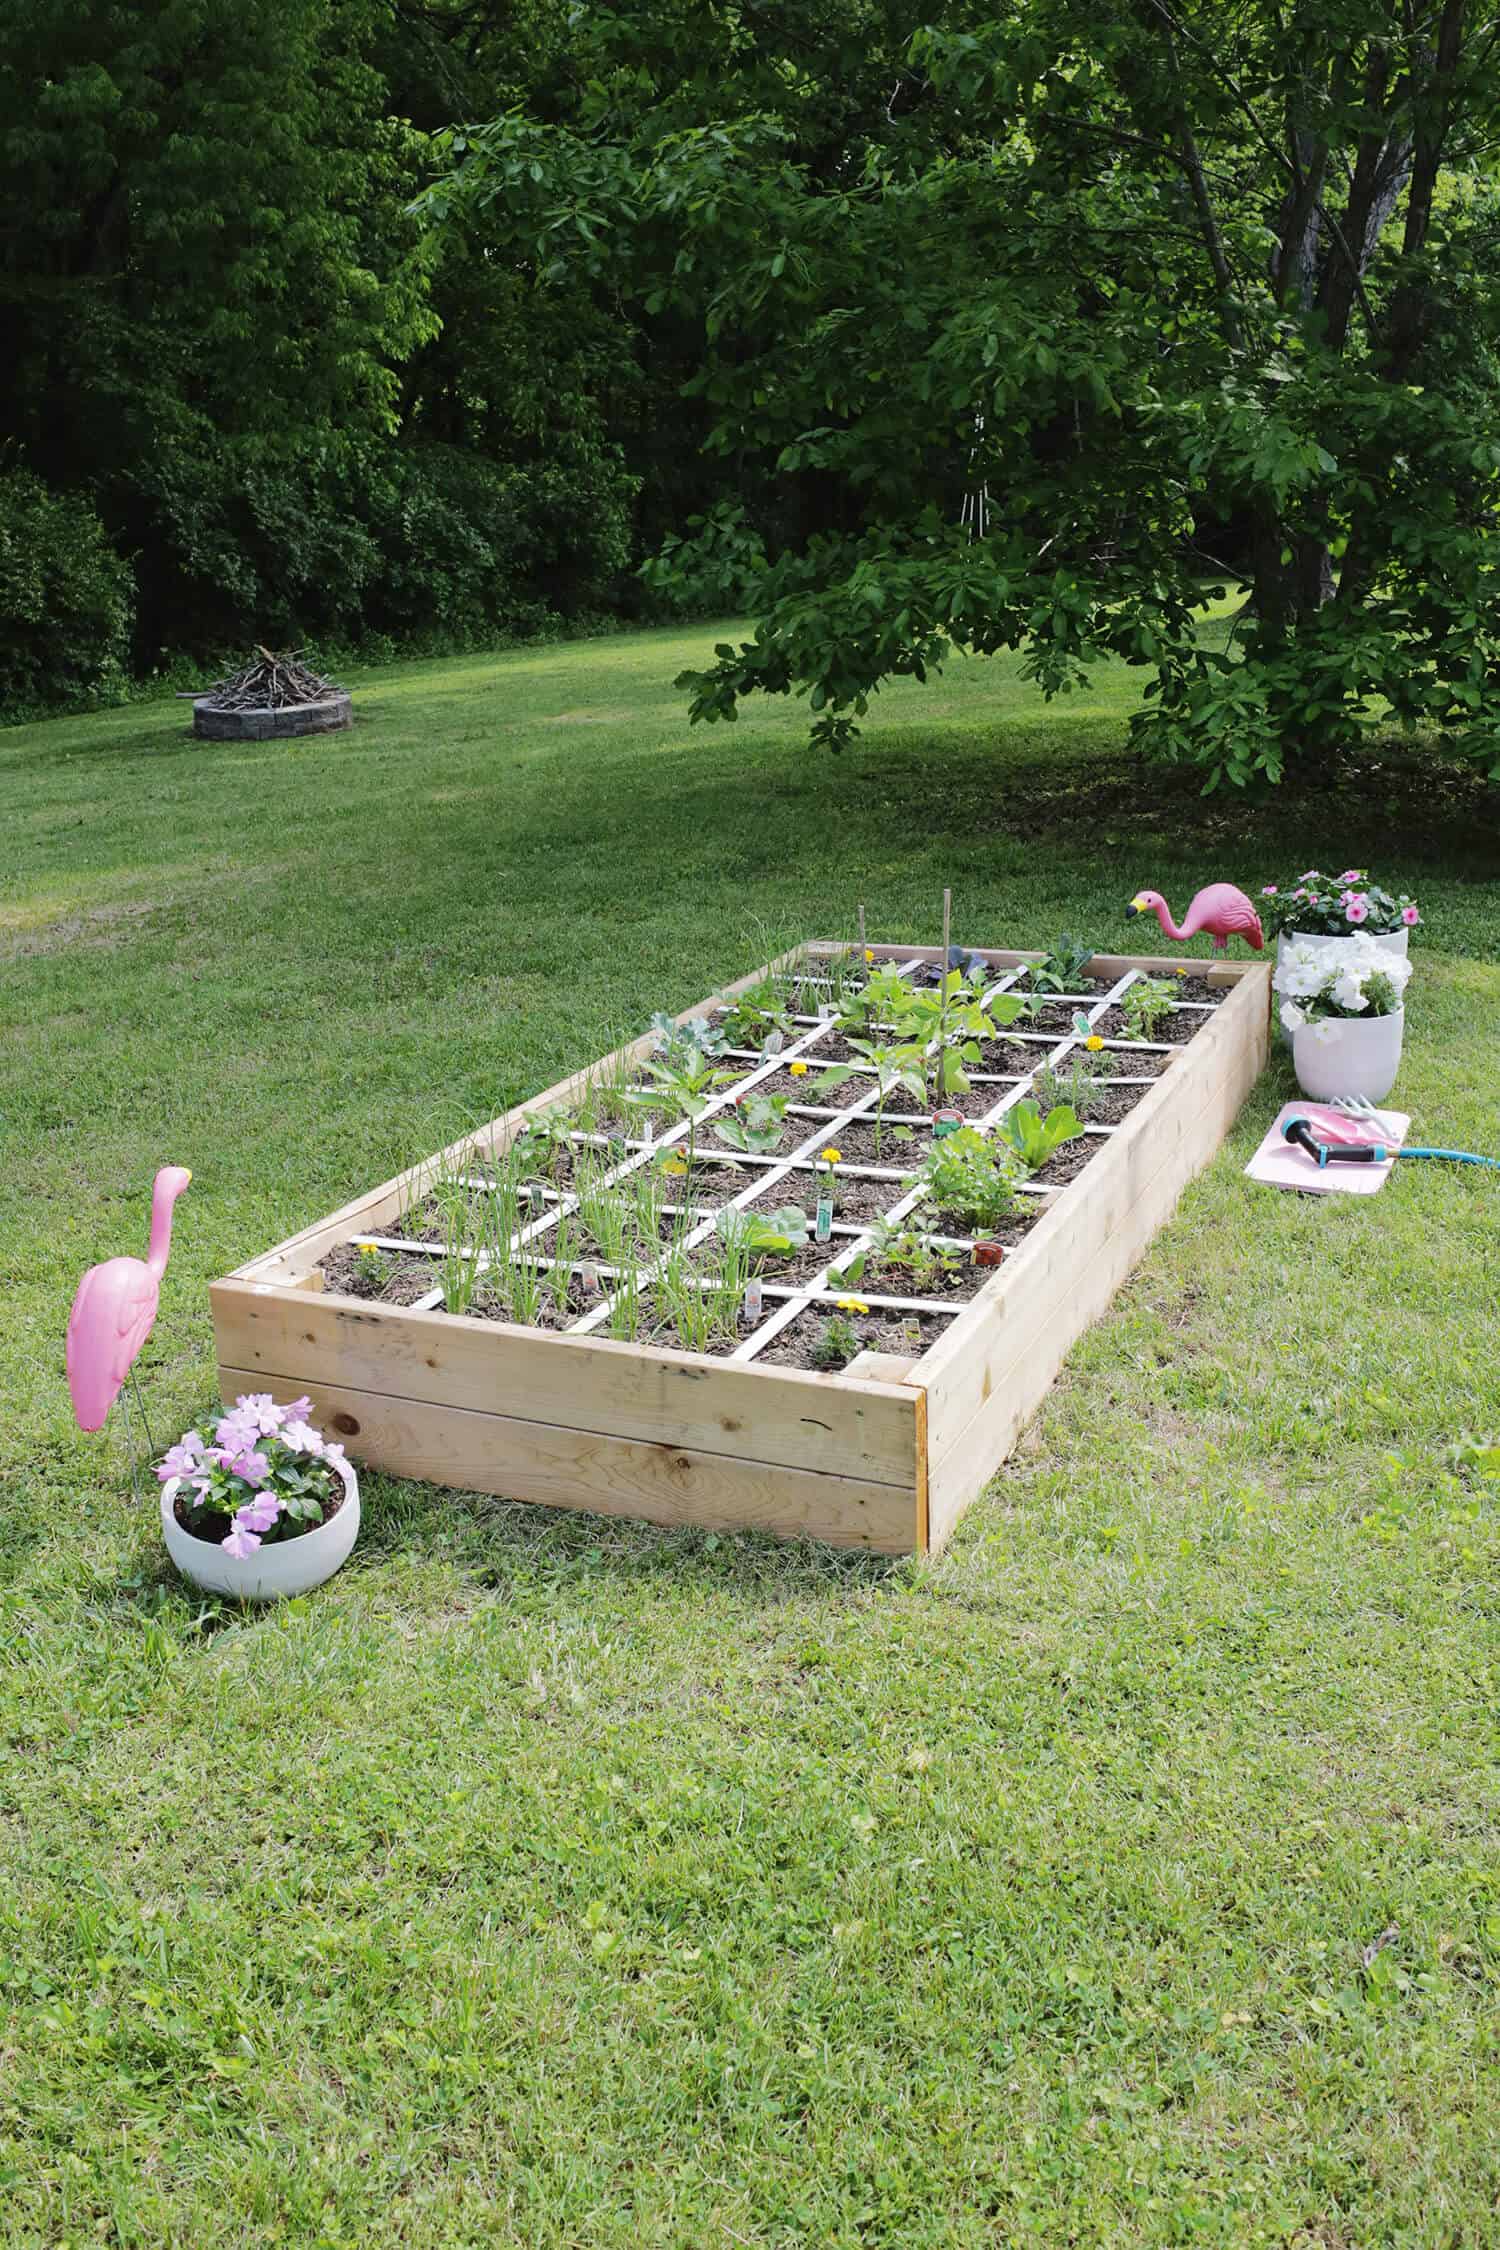
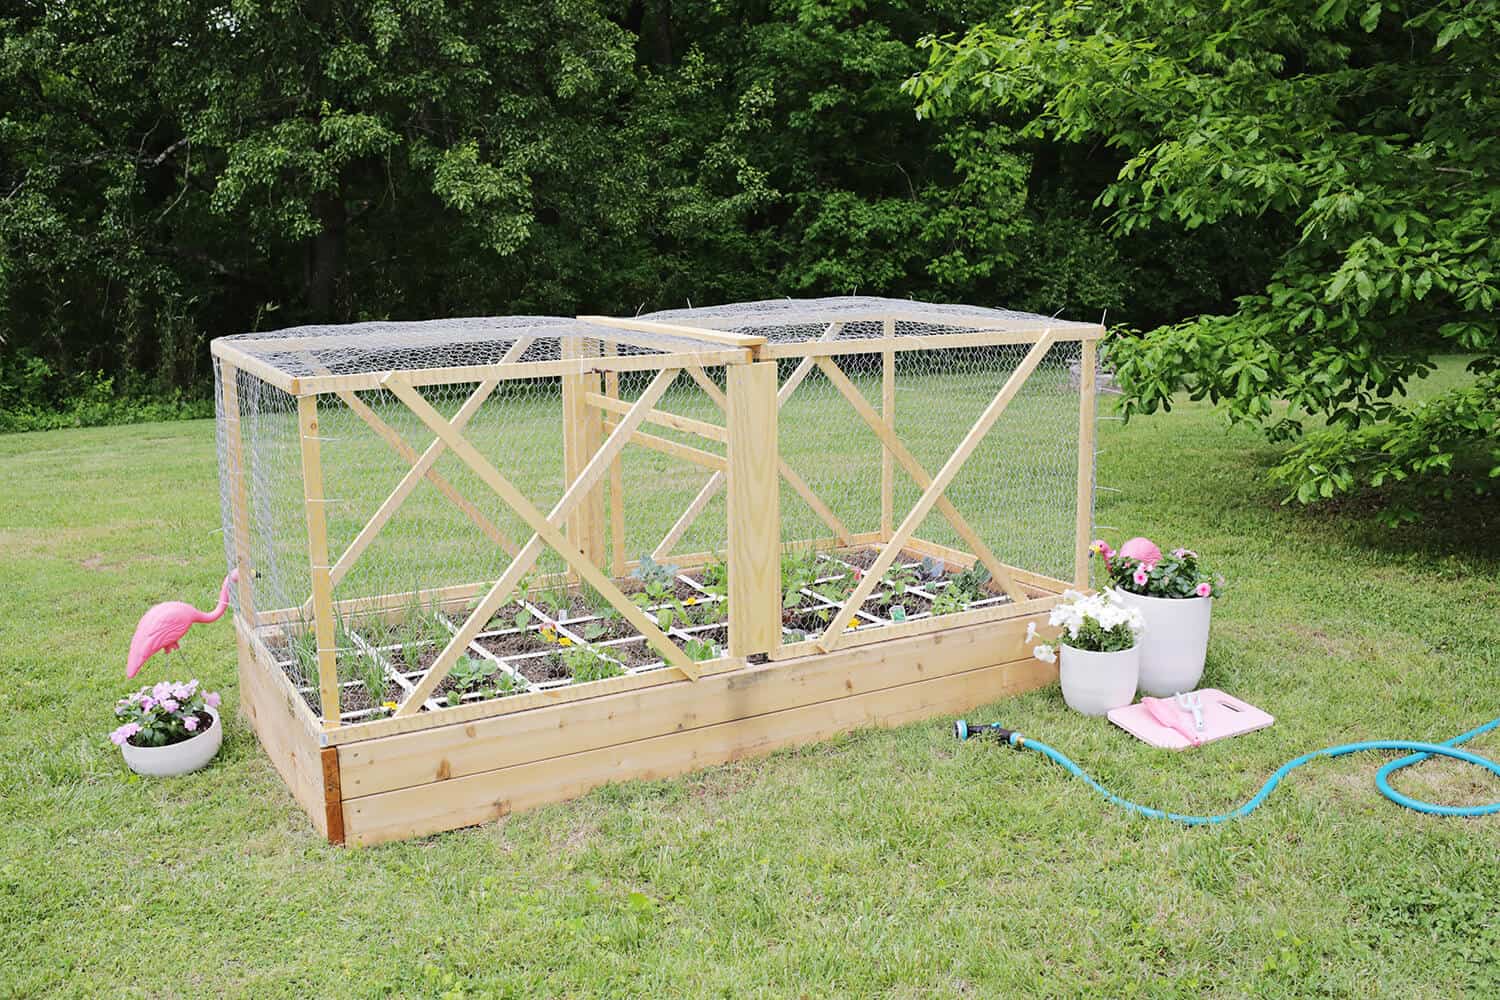 We ended up adding a cage to the top of ours because we have a lot of animals around (since we live right next to the woods) and didn’t want them to get all the goodies as they grow. You may need to consider that depending on where you live and what you are growing (not all animals are interested in everything in your garden).
We built box frames out of thin boards, draped chicken wire over them (up, over, and down one side and then up and over the top on the opposite side leaving one section that would face the middle open) and stapled that on, and then added two wooden “X”s on each cube for stability. Then we lined each cube up with an end (the only side without chicken wire facing the middle so that area is open) and used hinges on each end so I can flip them open to water and then flip them back in place. If you have any gaps in the middle where a critter can get into, just use some extra boards on one of the cubes to close the gap and open that side first and shut that side last. Again, you may not need this step, but I just wanted to show you what we came up with!
Also, as a side note, some people advocate that you don’t need a 12″ tall garden box and can grow almost everything in a 6″ tall box, so that’s possible if you are trying to be more budget conscious. It’s a little easier on your back to have the taller bed and you can grow some things (like carrots) that have roots too deep for a 6” deep bed, so just make sure you can grow the items you want in the shorter bed if you decide to do that.
I’ve been using this book as my gardener’s guide so far (it was recommended to me at the plant store!), so I would definitely recommend that to any of you other first-time gardeners as well. It also tells you how to care for and troubleshoot different plant problems. I can’t tell you how excited I am to watch all these guys grow and eventually eat some good food too! Hope you decide to give it a try and let me know if you’re an old pro and have a gardening resource that you love to use as well! xo. Laura
P.S. Could you believe I couldn’t find my Plant Lady shirt the day we took pictures? I guess I’m at least the “Babe With The Power (To Garden)” ????

32 Comments
I love how this looks! Wish I had a garden to plant my own herbs or veggies! ????
Charmaine Ng | Architecture & Lifestyle Blog
http://charmainenyw.com
This is an awesome raised bed! My husband built us one this weekend for our backyard, he ended up using cedar and corrugated metal. I love how you put the strips on top to organize the plants!
Felicia
http://www.casalibrablog.com
how cute would be these be for your little one?
https://www.amazon.com/Curious-Gardener-Piece-Gardening-Collection/dp/B07487C18P/ref=sr_1_6?s=hi&ie=UTF8&qid=1527018640&sr=1-6&keywords=Curious+Gardener
Aw, so sweet!
Laura 🙂
How I wish I had a yard so i could do this! Looks so easy!
xo Jessica
My Style Vita
That book is the exact same one I used as well! It’s a great resource for both new and experienced gardeners. We built similar boxes in our yard a few years back and even took them with us when we moved. Can’t wait to see how your harvest goes!
http://Etsy.com/Shop/SouvenirAndSalvage
Where are your garden tools from?
Looks as though you planted strawberries and tomatoes in that box. They will take over the entire box, so you may want to give them each their own. Also, the strawberries prefer shade, so maybe keep a shade net over them if they’re going to be in the sun. Both the strawberries and tomatoes will get sunburned. I like the simplicity of this box and the space you put between the ground and the plastic sheeting!
There aren’t any tomatoes in the box (I have them separate in a pot on my porch since they can get so big) but I do have a few strawberries! And yes, I need to experiment with some shade cloth as needed 🙂
Laura
Hey there Laura,
It looks like you added bark chips to the top layer. Maybe I missed the explanation in the post – is that to keep weeds away? And if so, do you find that it really works?
Thanks!
Kat
No, I didn’t add any chips (although some do suggest mulch for certain plants), I think that’s just what the soil looks like 🙂
Laura
Awsome raised square foot idea garden! Beautiful! Thanks for inspirational ideas.
I don’t want to be a dork but it looks like your materials list says one by six dimension Cedar and when I look at your photographs it looks like you actually used 2×6 Dimension cedar boards for the sides of the raised bed.
Yes, you are right! Thanks Joy!
Laura
Square foot gardens and Mel Bartholomew’s book are great for beginner gardeners. I started out with a 4×4 foot bed and now garden in a 50×50 foot space. You will learn which plants need more space, like tomatoes (roughly 2-3 feet squared), and what your family eats most from the garden. Strawberries produce runners, so you could actually plant a full bed with about 6 to 8 plants and they will multiply like crazy. If you don’t want them taking over, just snip the runners.
Also, my strawberries and tomatoes do fine in full sun, I have never heard of them getting sunburned.
I recommend mulch for raised beds because they dry out more quickly. Grass clippings make a great mulch (and the worms love it – worms in the garden mean more worm castings which are excellent plant food) as well as hay. (Make sure the grass hasn’t been treated with anything you wouldn’t want on your food). Happy gardening!
Great tips, thanks!
Laura
We planted raspberries, strawberries and cherry tomatoes in our backyard as a snacking garden. The swing set was there, and our kid would play and then munch on organic goodies at will.
SO FUN!
Laura
I wanted to do this for ages in my garden, this is so cool! Now I have the tutorial to build this thing 🙂
https://www.makeandmess.com/
I think you can make it look better by painting the borders of the raised garden. This idea is really brilliant.
This is so cute! I love it! And not too difficult to build at all 🙂
Especially good for someone with a small garden!
Debs @ https://tiger-mint.com
Awesome! I made raised beds for my garden last year, and they’re still going strong over 12 months later! I love the addition of the frame on top of yours – you could also cover this in a clear, durable plastic to create a makeshift greenhouse!
The Crafty Gentleman | DIY and Crafts
https://www.thecraftygentleman.net
Love this! Could you share some day what you like to grow / what grows best with what (in your experience). Happy gardening!
Soak the soil in between the plants with water as well. The entire bed should be damp when you’re finished. This will help both root and soil health. Also adding organic matter to the soil before planting makes a big difference in the health of your plants. Compost, bat guano, worm castings, etc. enrich the soil and your food. And if you want your plants to really shine, they would love a weekly dose of fish emulsion or maxicrop. Good luck!
The house we’re living in came with raised garden beds and I love them so much! I’ll be sad to lose them when we move this fall!
Paige
http://thehappyflammily.com
How awesome! I’d love to have a full garden, but it’s quite a bit of work. Such a great job you did!!
Eva | http://www.shessobright.com
This is such a brilliant idea! Will have to start sourcing materials xx
Just curious, where did you order from? I live in Nashville and I have some raised beds that need some dirt. A LOT of dirt. It is too expensive to buy bags, so I still have empty planters sitting on my porch.
This looks like an amazing idea. Great solution if you also want to save space. Thanks a lot for sharing! 🙂
– Jack
I’m having a difficult time imagining the construction of the box cages with the chicken wiring. How are they secured/anchored to the raised beds? Where are the hinges attached? I would also like to see how you’ve attached the extra boards on the sides to block the middle gaps between the two cube cages, did you use nails to attach them?
I would like to create a similar cage for my raised beds but would need clearer and more complete instructions. Thank you!
I built myself a flower bed made of wood last year. This idea has inspired me a lot now to build a bed like this one!!
Thank you!
Juergen from Loy (PJP as Blogger)
How difd you make the sq. Ft grid on top of the box to space plants?