
 Apparently the other night my husband, Trey, walked into our bedroom after I had already gone to bed and tried to start talking to me. He says I turned toward him, looked him right in the eye, and said, “It’s your birthday?” To which he said, “You’re asleep.” And I replied confidently, “It’s your birthday!” It wasn’t his birthday. I was asleep. I’m not much of a sleep talker or sleep walker, so this is hilarious to me! But also, for some reason, kind of freaks me out too. Do any of you sleep walk or talk?
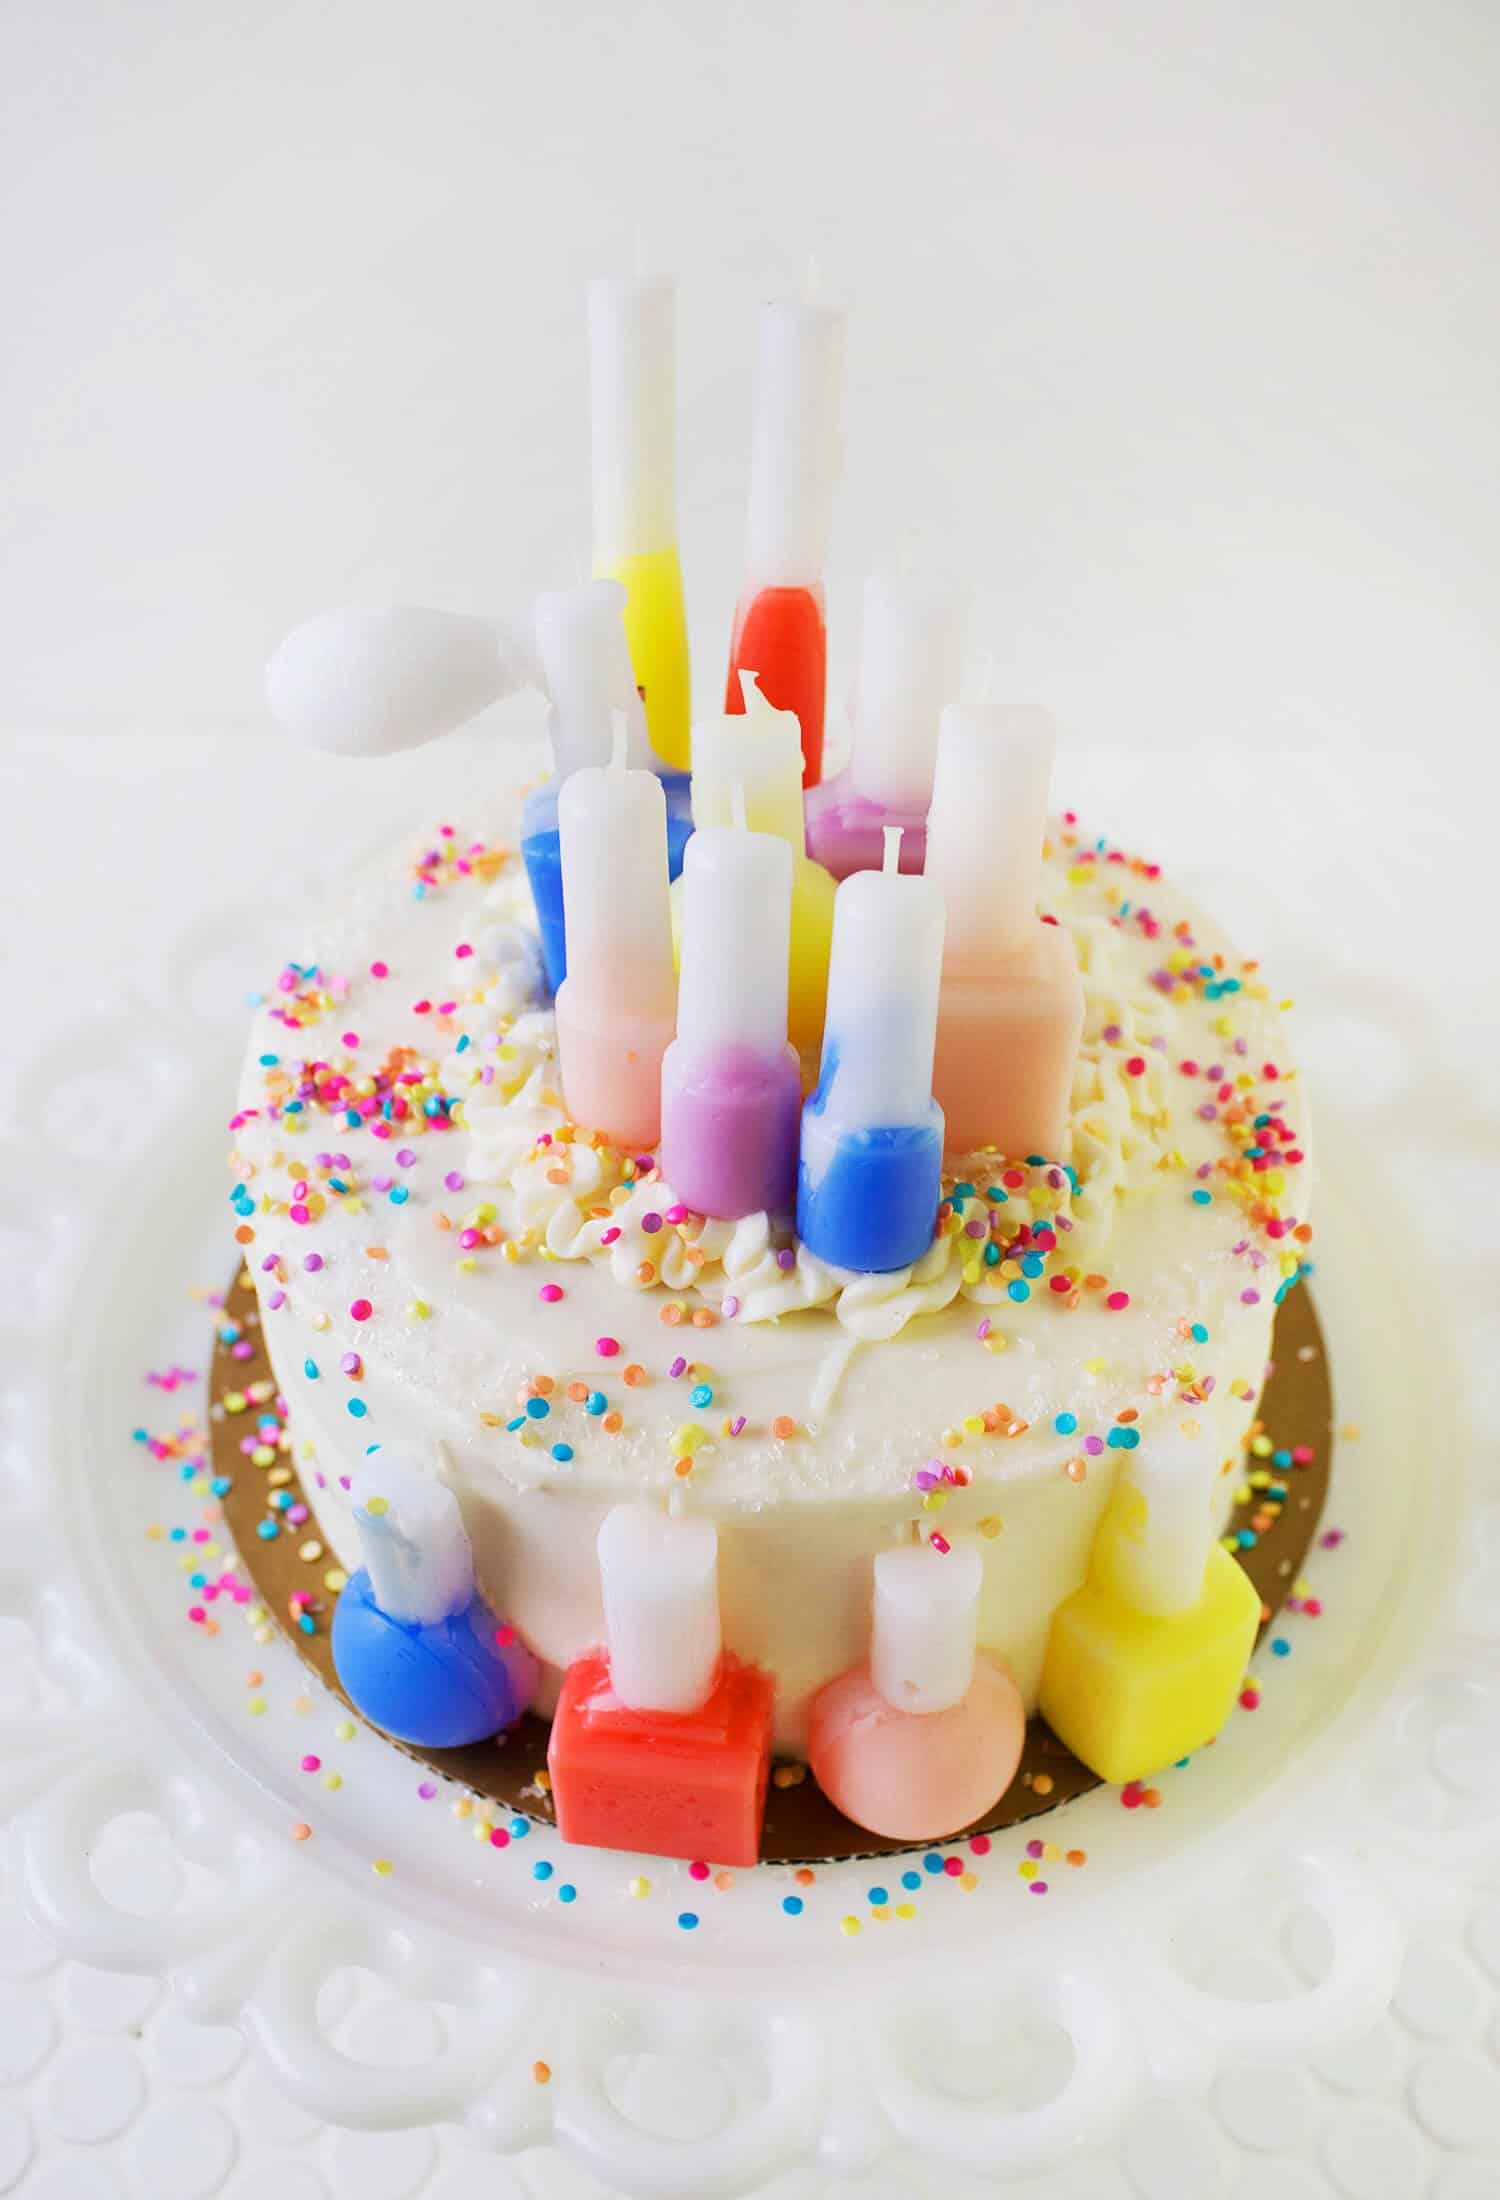
But, my main point today is not about sleep habits (although that would probably be a pretty interesting post), today I want to talk about birthdays. Specifically, birthday candles. 🙂

 I love novelty candles, like SO much. And I was curious about how to make my own candle molds to make novelty shaped candles. Turns out it’s pretty easy although a little time consuming. Making small candle molds is one of those crafts that feels like it’s mostly waiting for things to dry/set. Sometimes I think crafting is almost more of an exercise in patience and meditation as much as it is creativity.
If you’ve ever wanted to learn how to make your own molds for small candles or little soaps (cute guest soaps!!!!!!), then see below for a simple tutorial. I tried a few different techniques and learned a few things along the way including totally messing one up! So I’ll share about that too so you can avoid the same issue. 🙂
 Supplies:
-items you want to make a mold from (I used nail polish and lipgloss)
-plastic container that can hold items
–Smooth-On Silicone Mold Making
-disposable cups and spoons for mixing
-wax for candles
-candle thermometer
-candle coloring
-wicks
-tooth picks or sticks
There are other brands and types of silicone mold making products out there, this is just what I used. If you use something different, you will want to read the directions carefully as some things could be very different than what I used.
 Step One: Create your mold(s).
If using the Smooth-On, mix the two compounds together in equal parts (ratio 1:1). Then use to create your mold. The two parts are red and blue, so when you mix, they become purple and this helps you to see how well you’ve mixed them together. Use disposable cups and utensils to do this and take care not to spill or get any on your skin. I did get a tiny bit on my leg at one point (I was wearing shorts at the time), and it washed off easily and didn’t irritate my skin, but it’s still good to take care when working with chemicals of any kind.
I created my mold two different ways. First I used a small plastic container and filled it halfway with sugar. Then I added two nail polishes to the sugar and pressed them in so that only half of the bottle was sticking out of the sugar. Then I poured the prepared Smooth-On over that and allowed it to cure according to the directions. The second mold I made I poured the prepared Smooth-On into my plastic container first, and then added my objects (see photo above).
I found that both methods work, but I probably liked the second a little better as it was less messy (no sugar to clean off the final mold). The only thing you have to be careful of with the second method is if your objects are heavy enough that they sink all the way through the Smooth-On. If that happens, then your mold may not work as it won’t be able to hold the wax as it dries. So again, two methods that both work… what works best just depends on what objects you are using.
 Here you can see the mold I made by adding sugar to the container first.
One note about choosing objects to make molds from. So the mold I messed up was from when I tried to use this perfume bottle for a mold. I LOVE the shape (I also love that perfume) and thought it would be a really beautiful candle. But I didn’t think about how the Smooth-On would have to completely encapsulate the flowers on the top of the bottle, which would then be very difficult to pull out without ripping up that part of the mold. I tried it, but it didn’t work at all. So I would stick with objects that can more easily be pulled from the silicone after the mold has cured.
 Step Two: Prepare your wax. I used paraffin wax that I bought from a craft store. You could also use soy wax or beeswax. You will want to use a wax thermometer to make sure your wax isn’t too hot before adding to the mold. The Smooth-On suggested keeping waxes around 170°F, but again you should check the mold instructions as it could be different if using a different brand. I also added some coloring to my waxes, to give the candles the look I was aiming for.
Step Three: Pour the wax into the molds and add a wick. You should also add a small stick or toothpick to the bottom if you want these to eventually be used in a cake (so it can stand upright). I clearly forgot to do this in the above photo, but figured out my mistake for the other ones. 🙂
As the wax cools, it may cave in some. So it’s good to have some extra wax you can add later. Keep in mind these candles will have flat back sides.
 Once the wax completely sets, you can unmold and use the mold again. These are really, really fun! And my next plan is to use these molds I made to make tiny guest soaps for when people stay the night at our house. Silly, or totally awesome?! xo. Emma
14 Comments
Back in architecture school, we used to make our molds for casting concrete from foam or wood. This totally reminds me of it – just a lot prettier and a lot easier!
Charmaine Ng | Architecture & Lifestyle Blog
http://charmainenyw.com
Oh these are so so cute!!! They look fun to make too! And that is so funny about talking in your sleep, and how random! I had a dream awhile ago where I was at an aquarium (sea world I think?) and ET (yes from the movie ET) was drowning in a tank….so weird. And I started freaking out and my husband said I started crying while I was sleeping. ? it was the most intense/effed up dream I have ever had and it still makes absolutely zero sense to me ??♀️
Great tutorial! I love that you made little nail polish candles. That is so original and fun. You’ve got to tell me why that green polish has a little atomizer bulb on it! Haha. I can’t figure it out and I’m curious!
Me too!!! Why is it there hahaha
This is so cute! I like that I can control each part of it, I’ve never made molds before but this would be a great skill to have!
These are so fun and cute!
Paige
http://thehappyflammily.com
I can just imagine hundreds of flamingo shaped candles right now!
This is soooooo cool, I want to try this with a million things! Thanks for sharing this!
https://www.makeandmess.com/
This is such a cute idea!
This is so fun for a custom look.
Okay, even though I haven’t worked with molds in 20 years, I know a couple of tricks. One of my primary school teacher’s actually had a little shop that sold molded plaster figurines for people to paint…& he used them in class to give out as rewards (we’d earn tokens which we’d save for different price figurines). He’d also make molds from figurines we brought in.
But he used a different method, instead of one big mold, he’d paint layers of rubber over the figurine…some would take more than 10 layers, with drying time inbetween. You have to do enough layers that it would be strong enough to hold the shape, but it would also be flexible enough to pop out odd shapes…like your candle molds. That means you can make the mold so that it’s the bottom of the bottle that’s flat! If you use this method, but aren’t quite sure about the rubber mold’s strength, you could carefully arrange the molds upside down in a container of sugar or sand.
I don’t know how flexible the molds are that you made here, but if they are flexible enough to stretch a little when trying to remove the candle, you could try this cheat: instead of one big mold, make each individual mold in a container only slightly bigger than the polish bottle (or whatever you’re copying), in this case a small plastic white glass maybe?…& put the bottle in UPSIDE down, so the bottom will be flat instead! This will make it easier to layer the different coloured waxes properly, & use less rubber! Just make sure there isn’t a gap between the polish bottle & the base of it’s lid…but if there is, just carefully fill it in with putty or bluetak before making the mold (otherwise that spot will become a weak spot that causes the candle to break in that spot when you try to remove it from the mold).
Hope this helps.
Love this. How did the silicone smell though? I had similar intentions with making jewelry using silicone from target. I couldn’t get through 5 minutes. It was like rotting vinegar, is that all silicone? I’ve been terrified to try again.
I was looking for a way to make molds for Candles I plan to give for Christmas and the shapes I was looking for were more like Crosses, praying hands, Jesus, etc. Do you know how I can do these shapes?
I’m looking to do crosses myself for Easter any ideas.