 I looooove matching items for moms and kids. It’s really hard for me to pass up a matching set of items, but sometimes it’s hard to find items that fit/flatter both of you (or all of you if you have more than one kid). So it can be really helpful to do something where you can simply customize your own items you like/find.
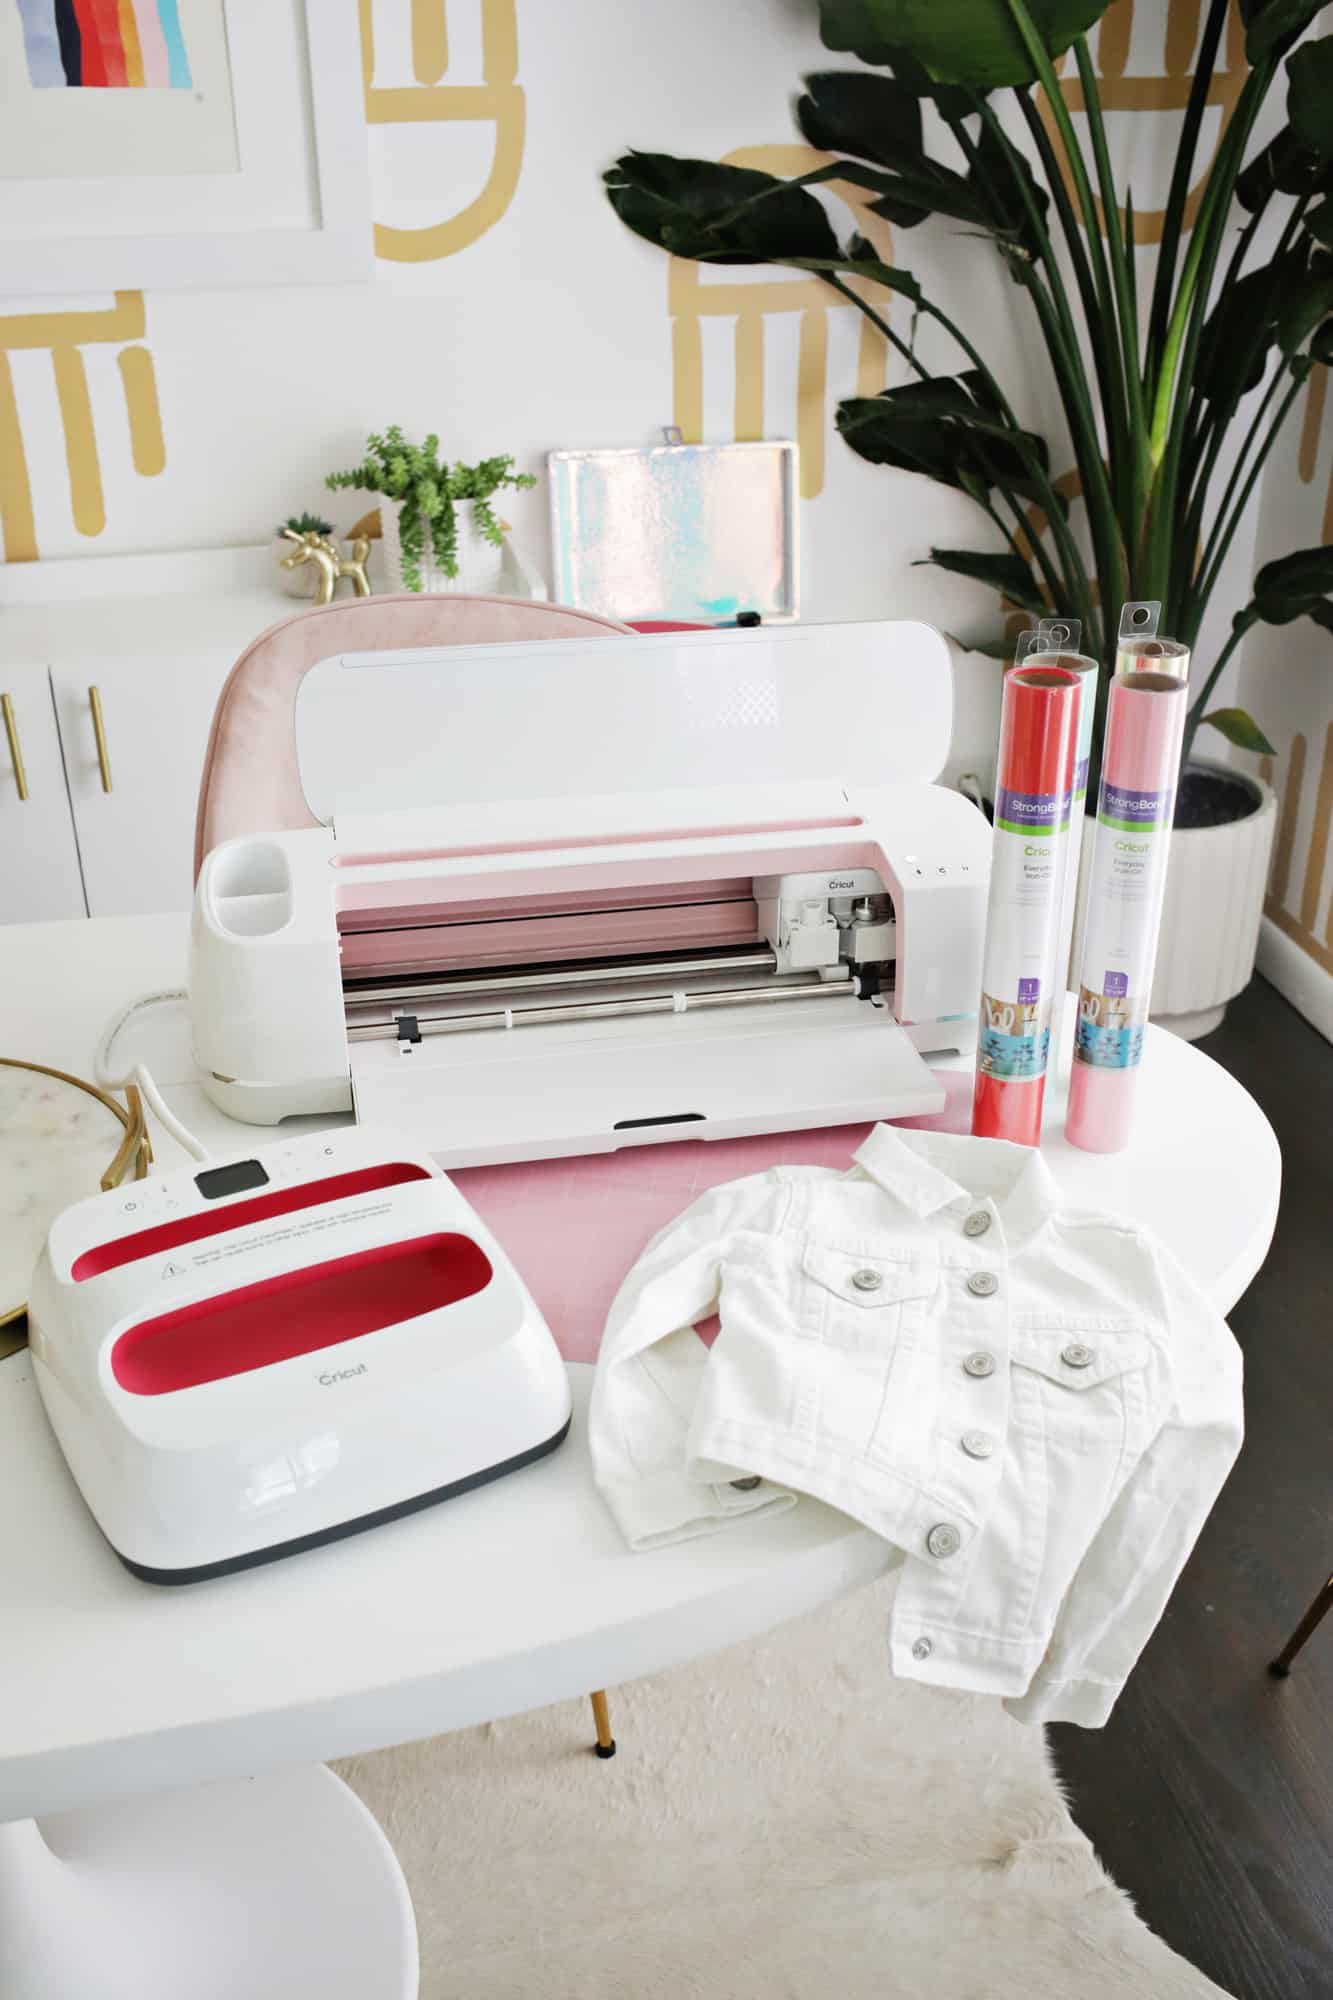
This post is sponsored by Cricut and we used their tools to customize these jackets. The Cricut Maker is an electronic cutting machine that can cut all kinds of materials, including things like iron-on vinyl for our project and heavier materials like chipboard or leather. I love that using it you can totally customize your look with whatever size decal you want and just about any color you can think of—all from your craft room! I also love a good jean jacket for a coverup in the warmer months, so I thought a matching Mommy + Me jean jacket would be just the thing!
 Supplies:
–Cricut Maker
–Cricut EasyPress 2
–Cricut Everyday Iron-On vinyl ( I did Red, Petal, and Bright Teal) and Cricut Iron-On Foil (in Gold)
–Rainbow files for Cricut Design Space
-white jean jackets (I used this one for me and this one for Lola)
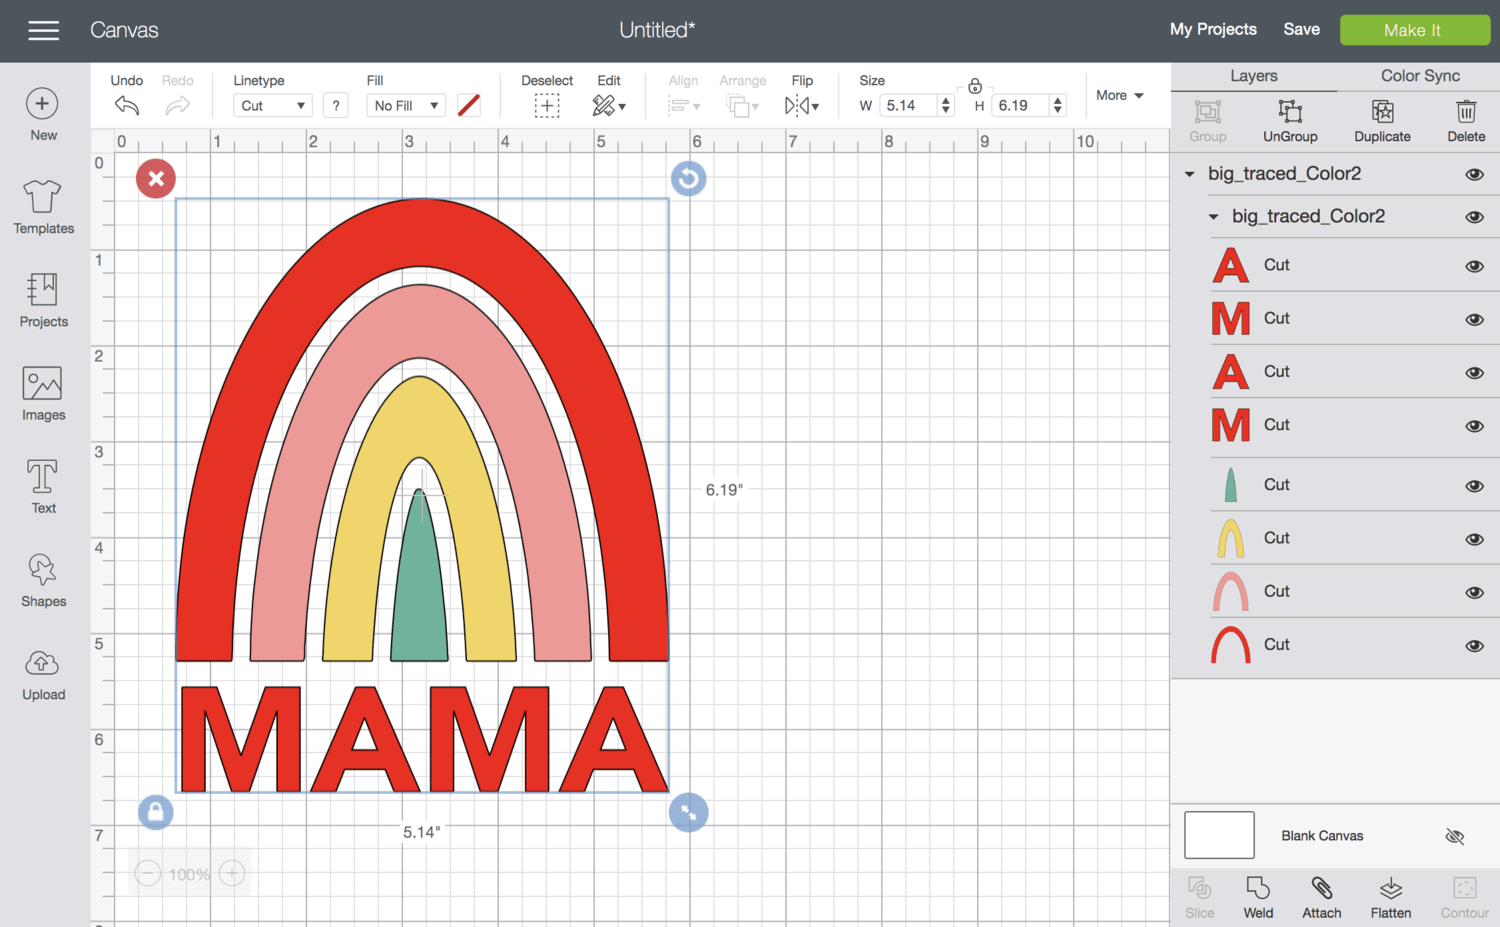 Create a new document in your Cricut Design Space. Click the “upload” button in your bottom left corner and upload your Mama rainbow design. Once your design is on your screen, resize the rainbow to your desired size (I did a little wider than 5″ for mine) by pulling on the two little arrows at the bottom right of your selected image. Make sure to note on your jacket where the jacket seams are on the back (if there are any) so your design will fit in between them with some space all around the edges.
 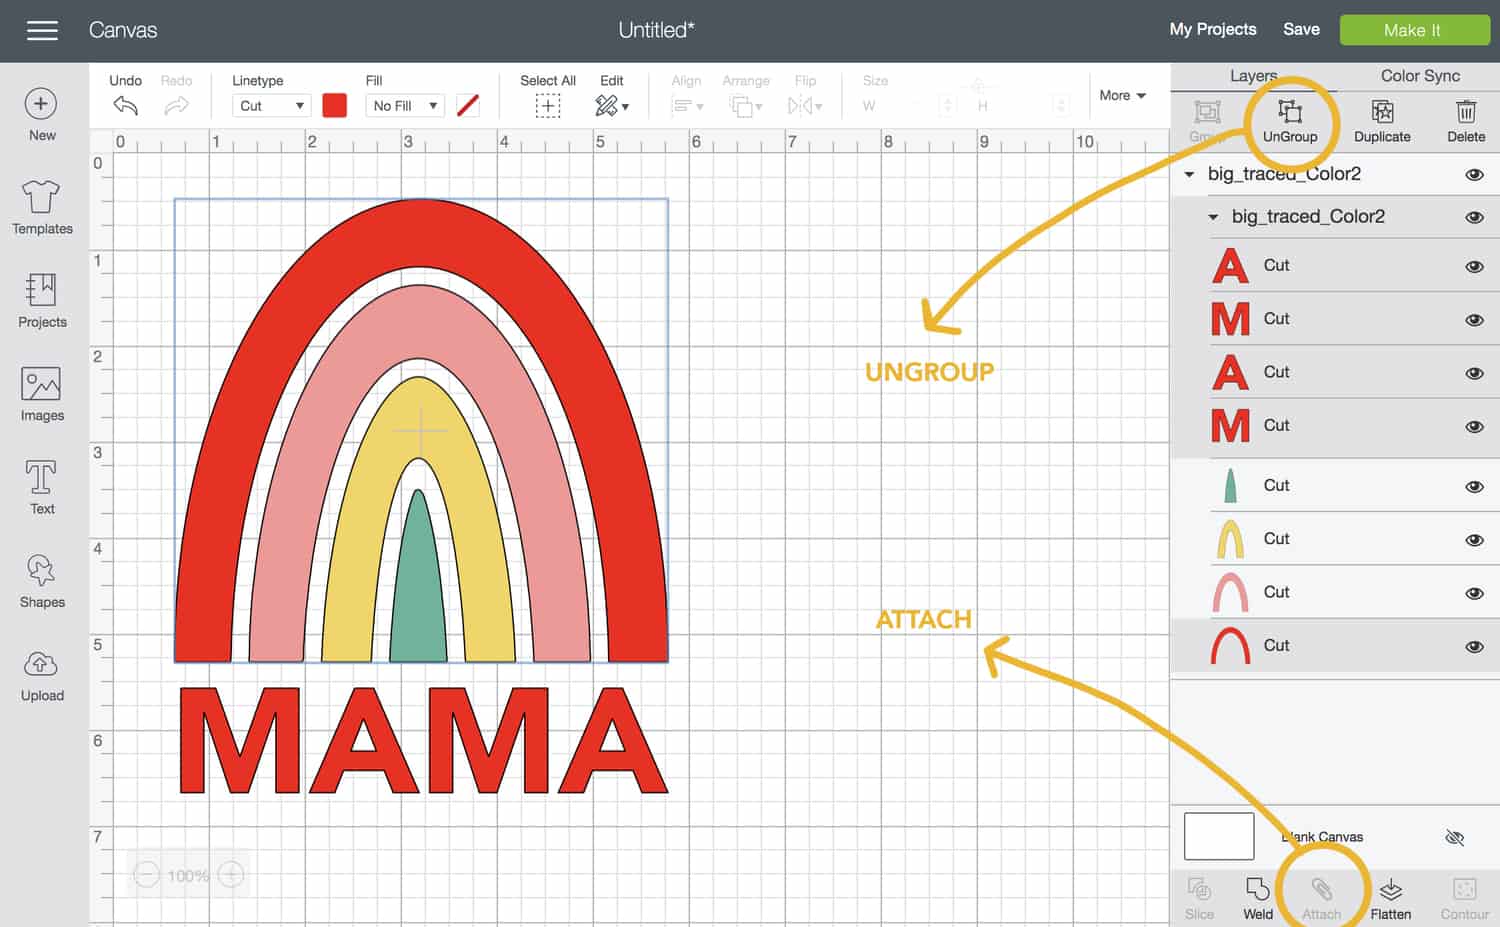 Go to the individual shape layers on the right side of the screen and select only the red layers while holding down the “shift” key. That will allow you to select more than one layer at a time so you can get all the red selected together. Once only the red layers are selected, click the “ungroup” option that appears directly above the layers and then on the “attach” option that will become available directly below all the layers. Basically, we are trying to keep all the red layers within that same proximity to each other, so we are unattaching them all from the larger group and then reattaching them together.
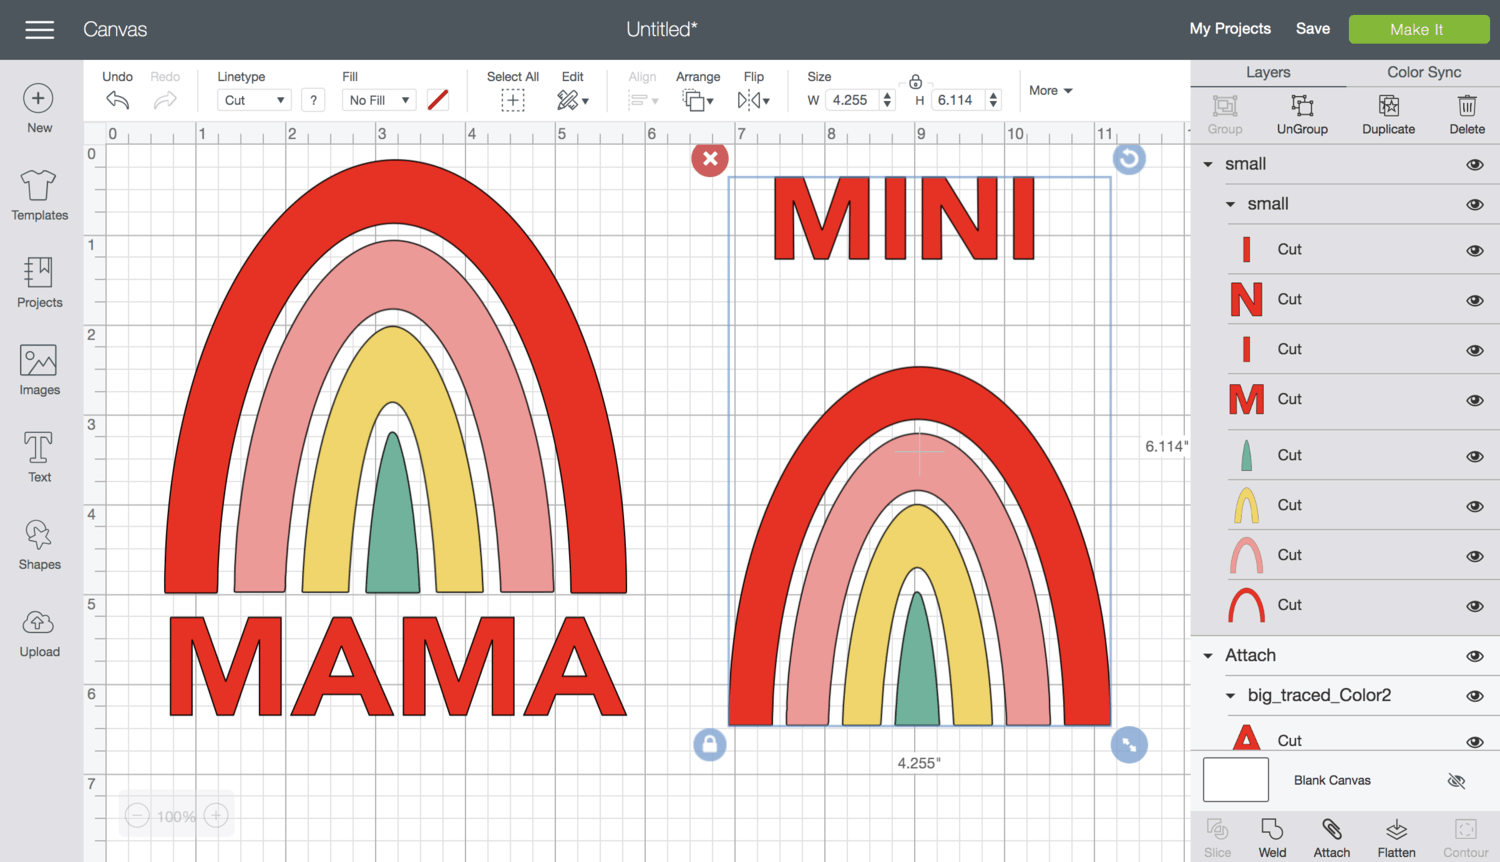 Next, repeat the process of uploading, resizing, ungrouping all the red, and attaching all the red with the Mini rainbow design.
  Click your green “Make It” button in the top right corner and it should take you to the cutting page where it previews four different colored cutting boards. Before you do anything else, make sure you turn on the “mirror” slider that appears at the bottom of each board (turn it on for each board) so your words won’t be backwards when you go to iron them on. You’ll also notice that it has placed the rainbow pieces pretty close to each other so you’ll want to move them further apart on each board so you can cut them into two halves, one for each jacket design.
  Since we are layering designs, I wanted to make sure that each color would have a clear film big enough to cover all the other colors that may already be ironed on so you are protecting the vinyl you’ve already ironed. So I placed the red colors where I wanted them first and then placed all the other colors in the same spot so they would all have the same amount of clear film around the edges. It doesn’t matter which grid lines you pick to be your marker, but for the Mama one I placed the rainbow edges to sit on line 6 with the middle of the arch centered between the 3 and 4 markers and the Mini rainbow edges sit on line 7 with the middle of the arch between 9 and 10 lines.
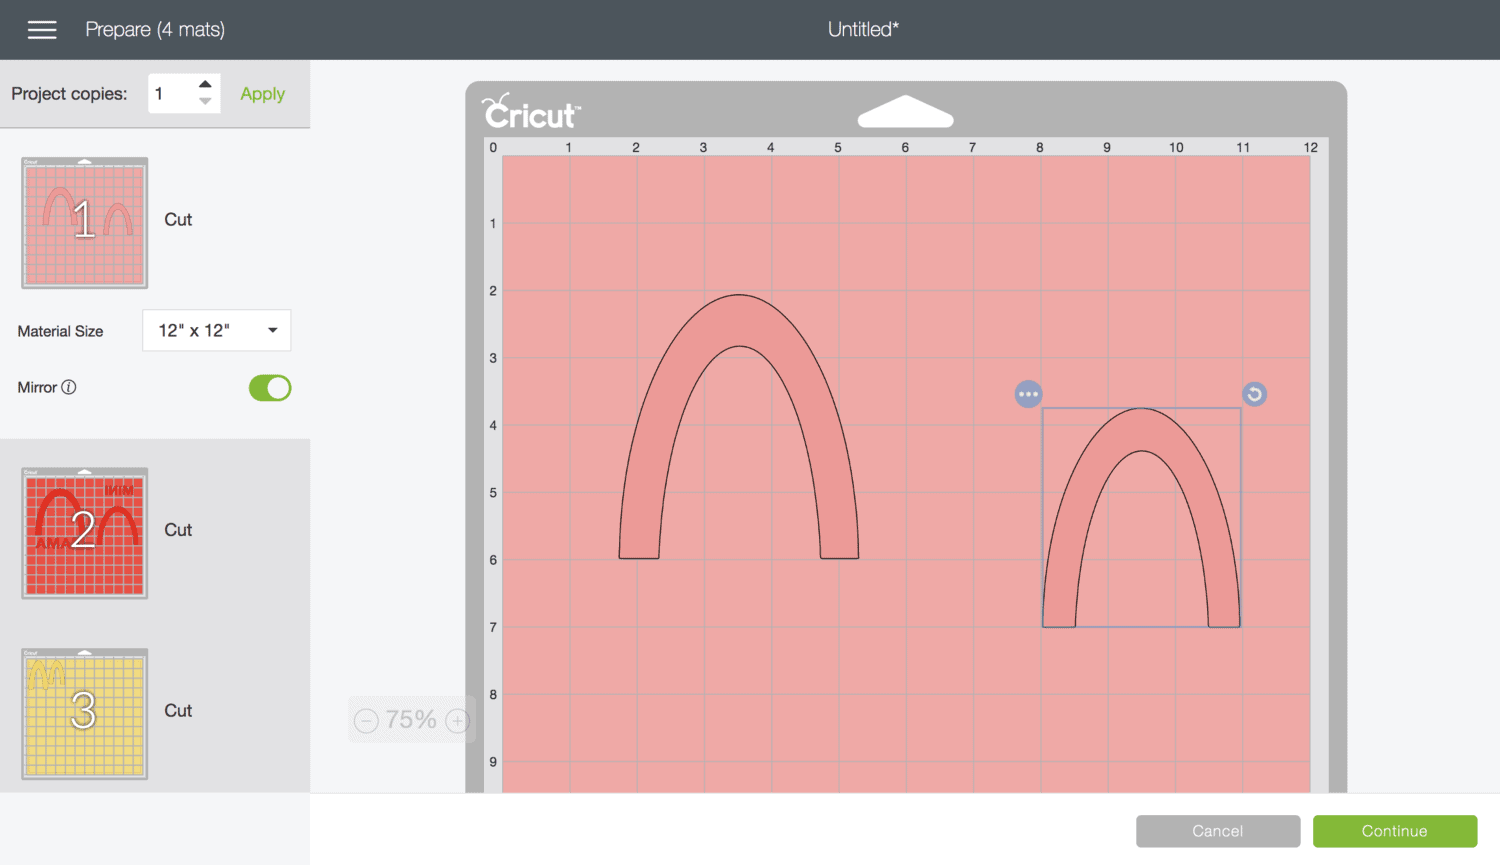 Line up the rest of your colors to also sit on the same lines centered at the same points.
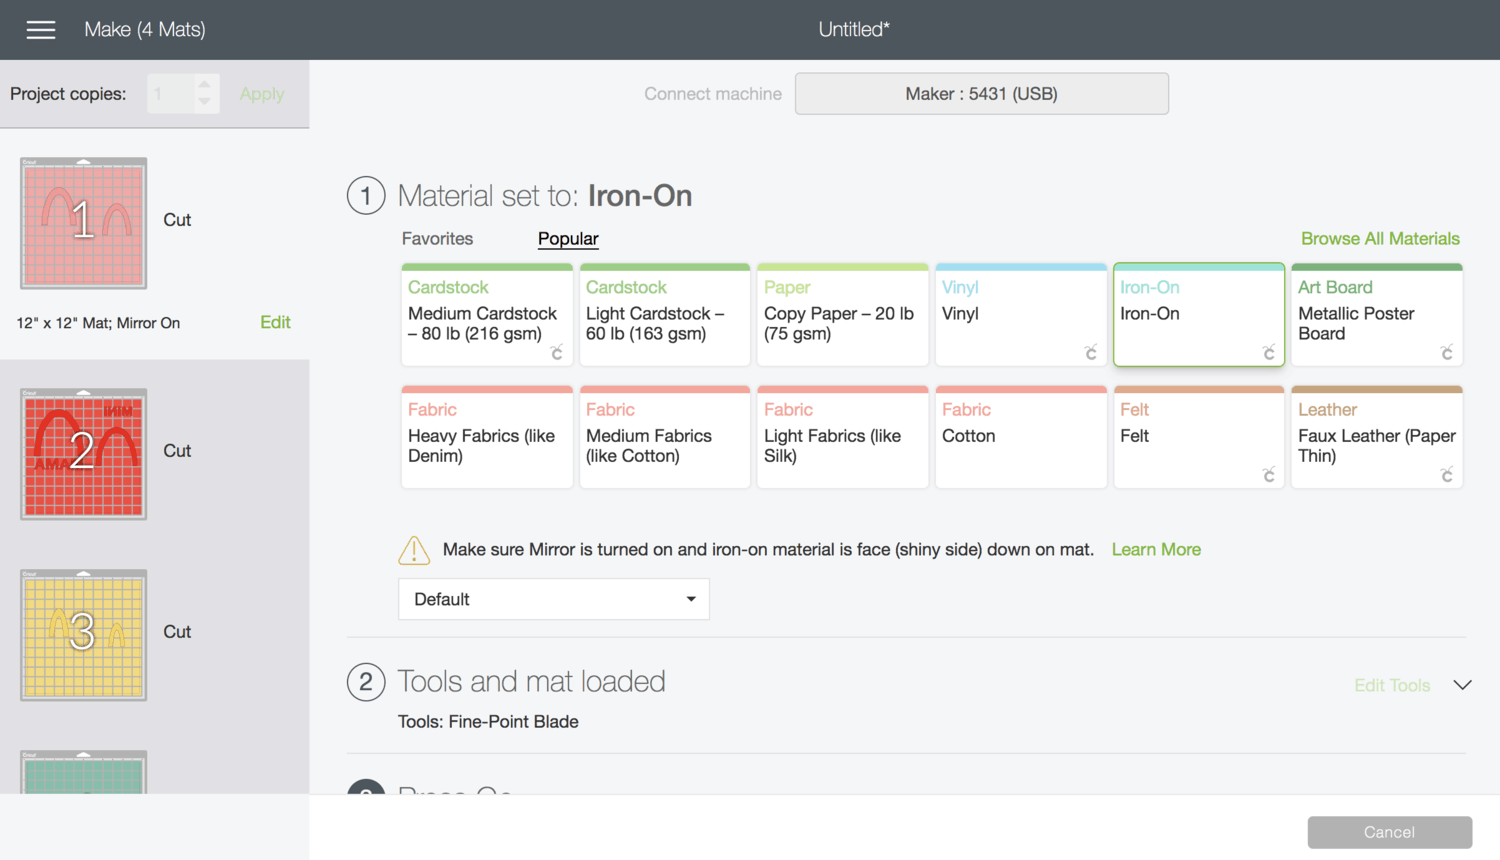 When you’re done lining them up, hit the green “continue” button at the bottom right of your screen and it will take you to the cutting screen. From there, you’ll select your Cricut machine from the drop-down menu at the top and then you’ll select “iron-on” for your material and prep your Cricut mat into your machine for the first color. You’ll want to load your iron-on vinyl onto your mat in the order they appear in the cutting cue (so pink, red, gold/yellow, and then mint). I cut all my vinyl pieces to be 12″ x 8″ instead of 12″ x 12″ to save some vinyl since I knew by looking at the cutting preview that my design didn’t go below the 8″ mark.
  Place your iron-on vinyl shiny side down on your mat, aligning the top edge with the side that has the triangle hanging tab on it and load it into your machine by selecting the flashing arrow on your Cricut Maker. Once it’s loaded, hit the flashing Cricut symbol on your machine and let the Cricut do its job! Unload the machine, remove the vinyl, and load the next color until all your colors are cut.
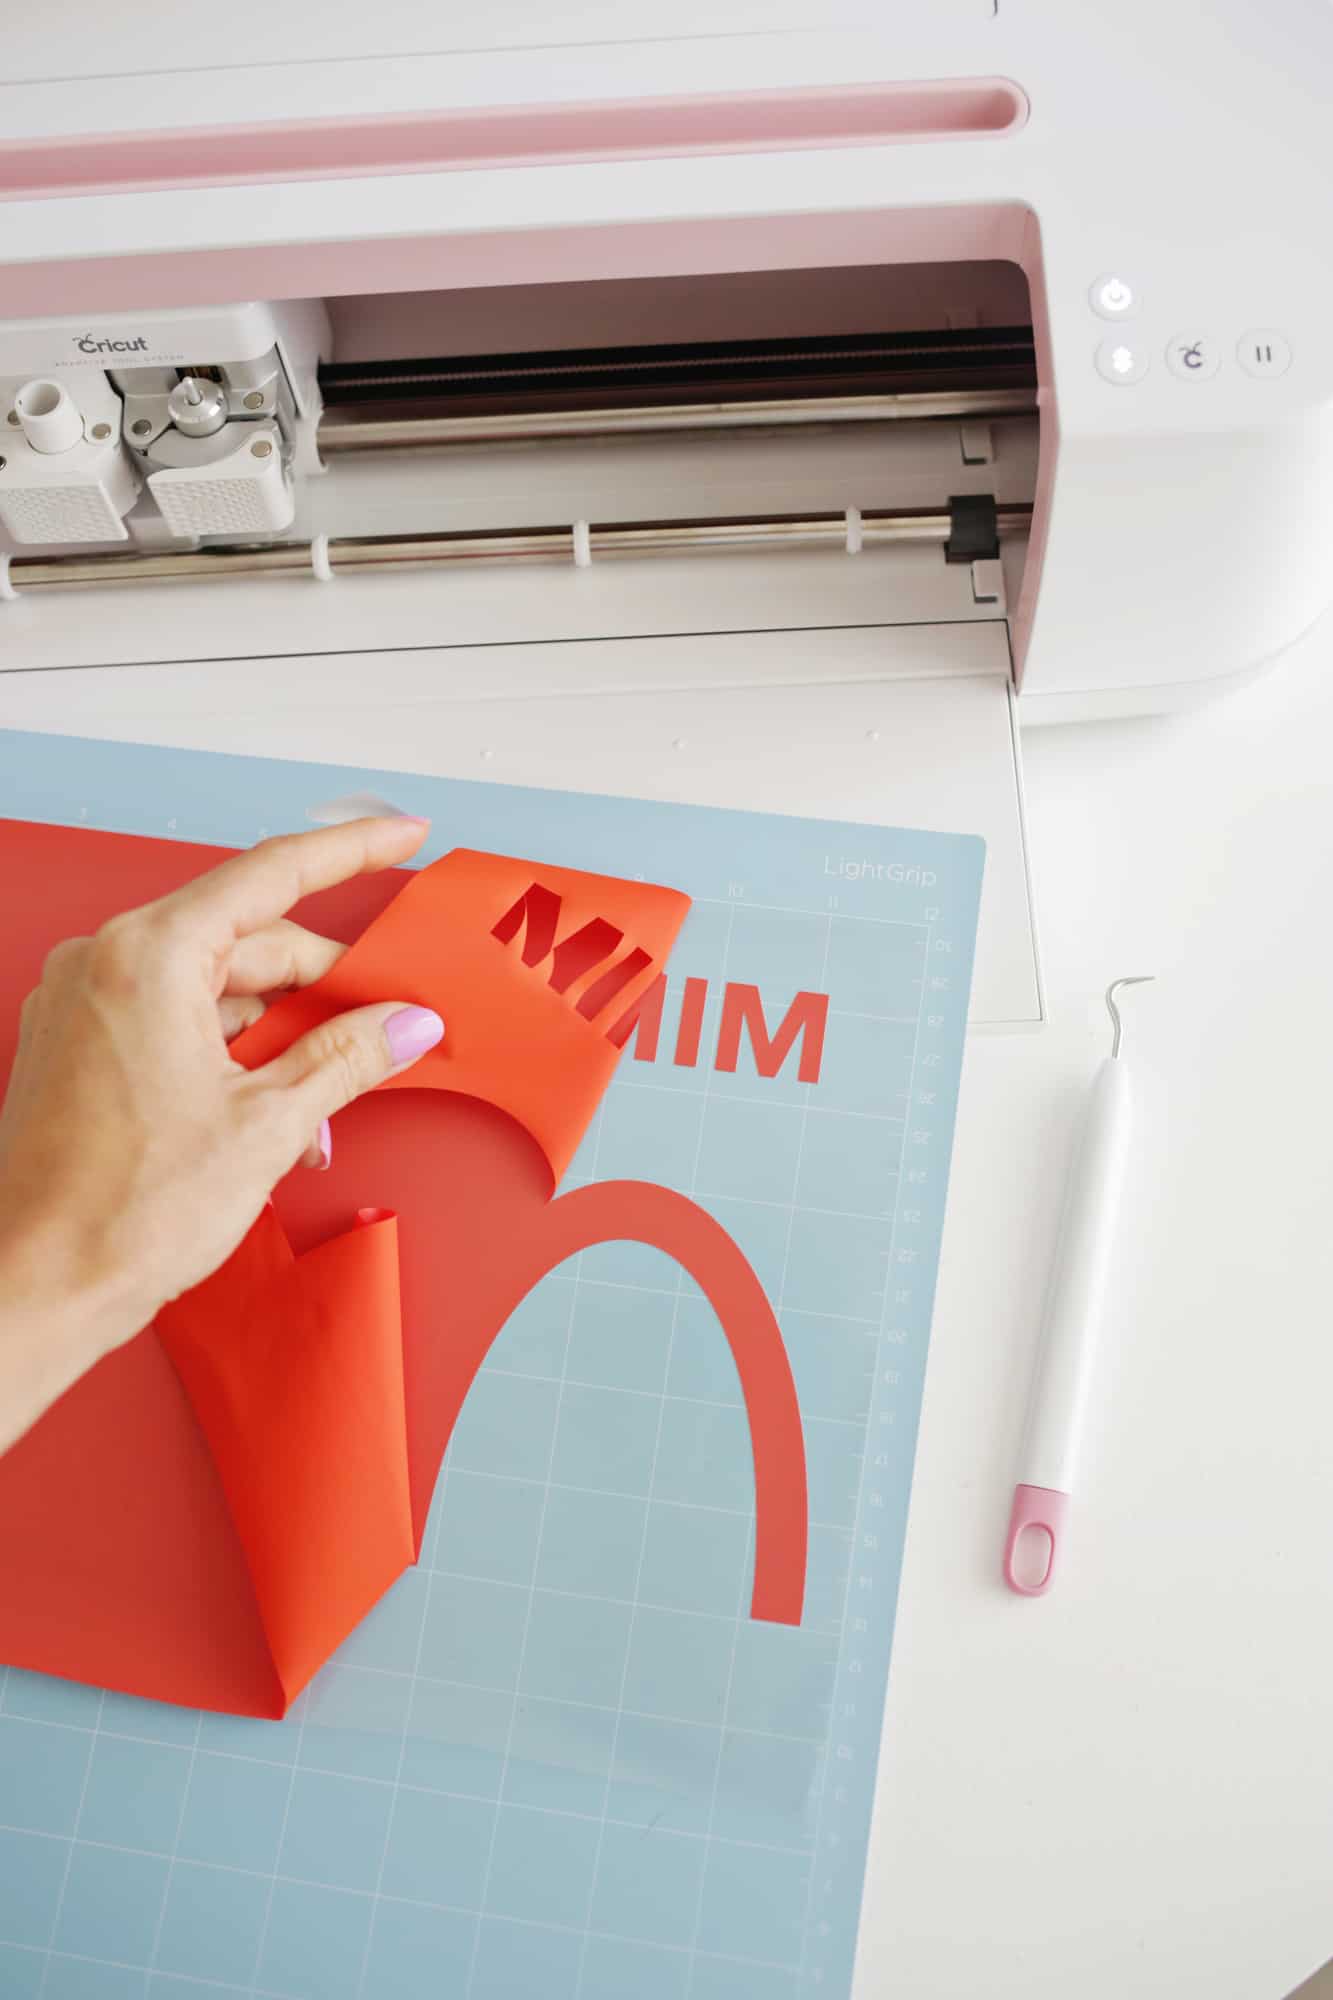
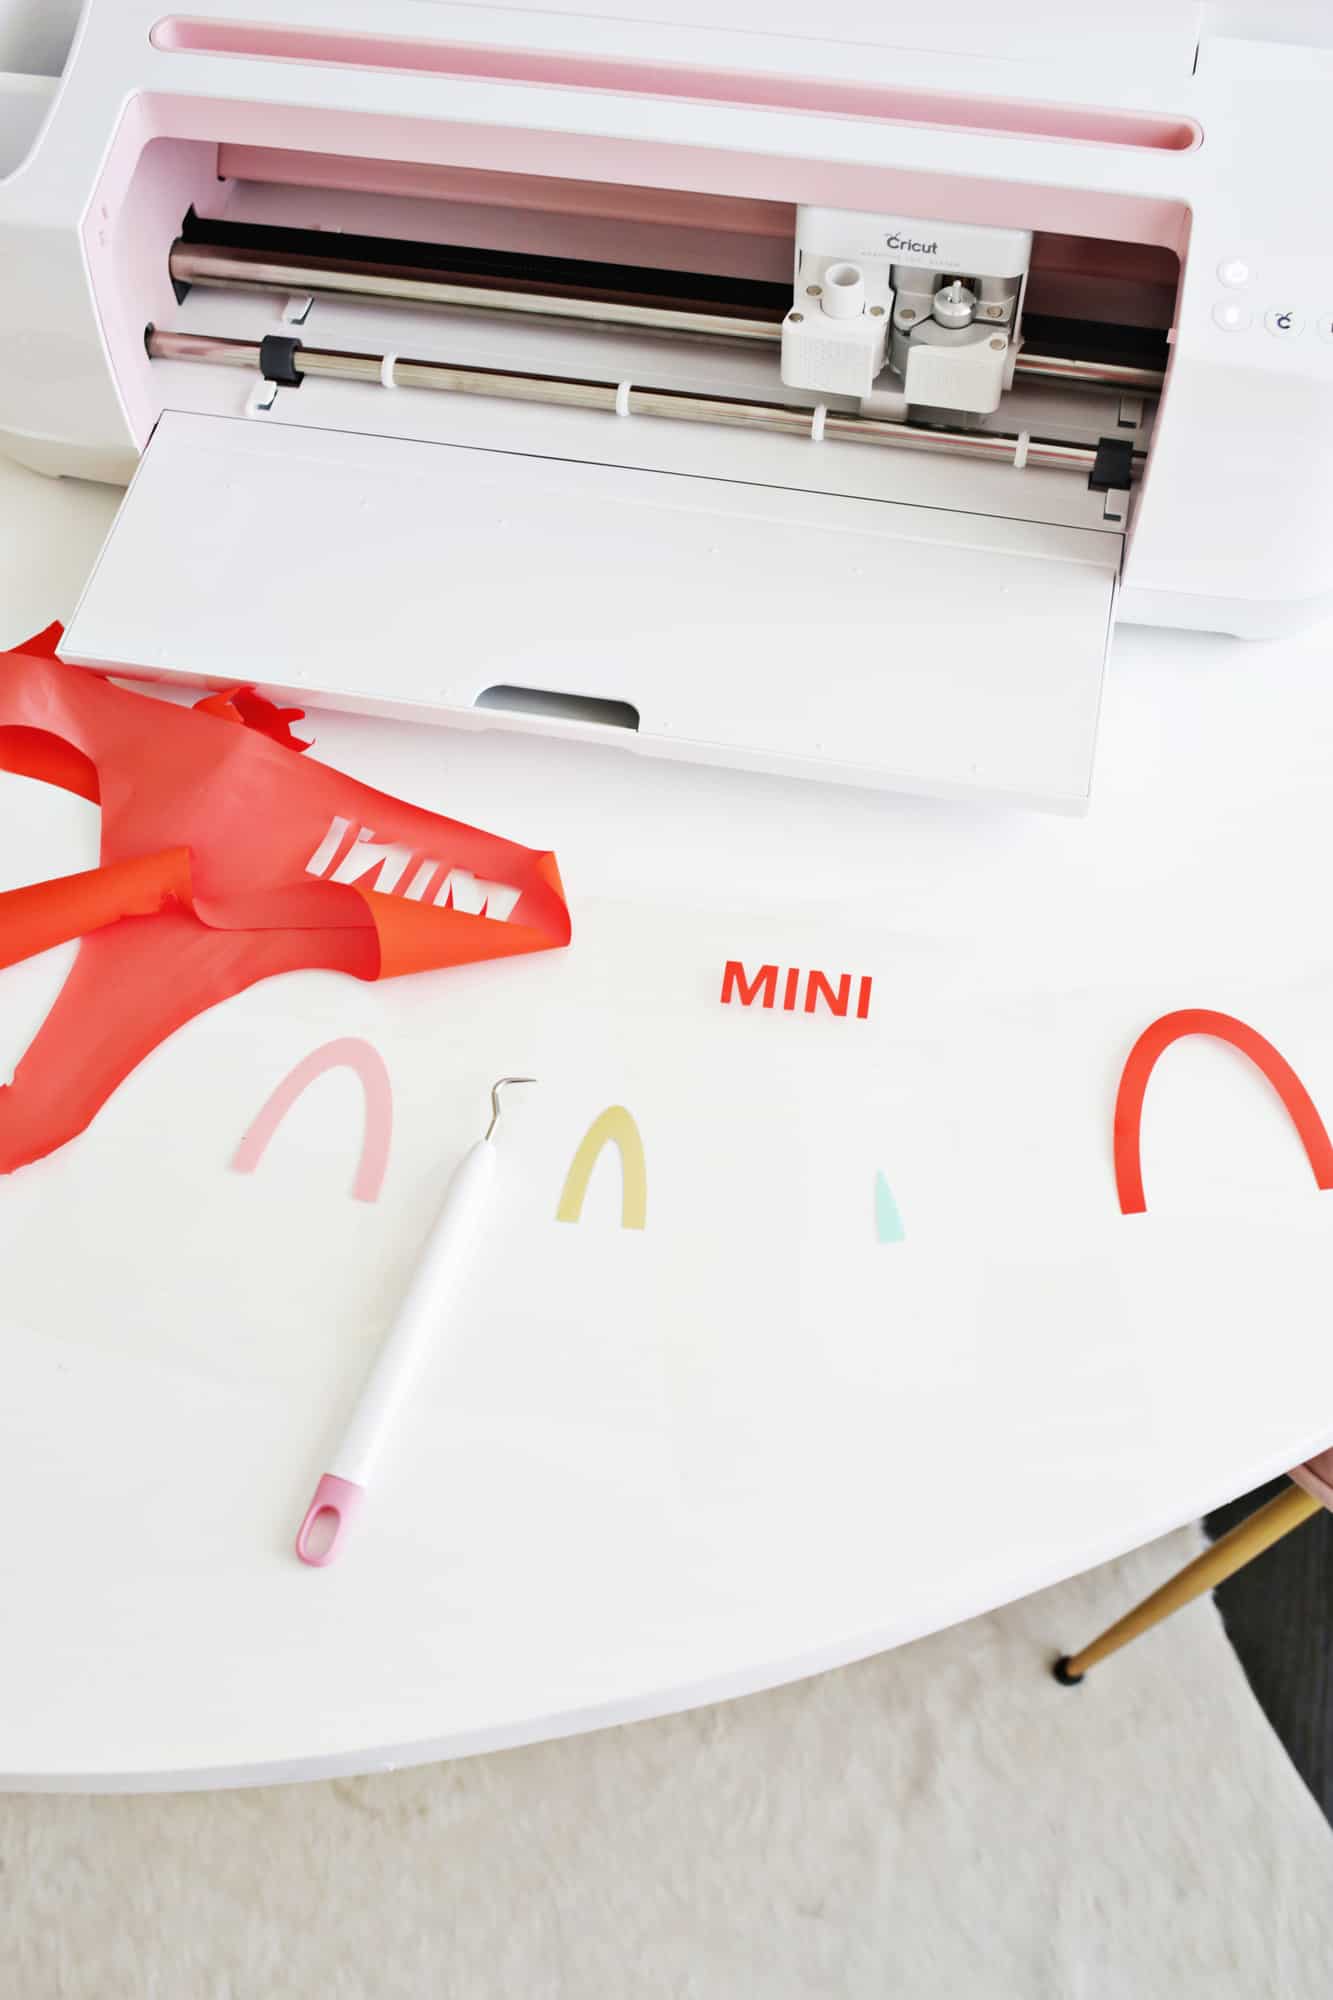 Once your colors are cut, you can use your weeding tools to remove the excess iron-on vinyl around your shapes and cut your vinyls in half to separate the Mama from the Mini designs. OK, now it’s time to apply!
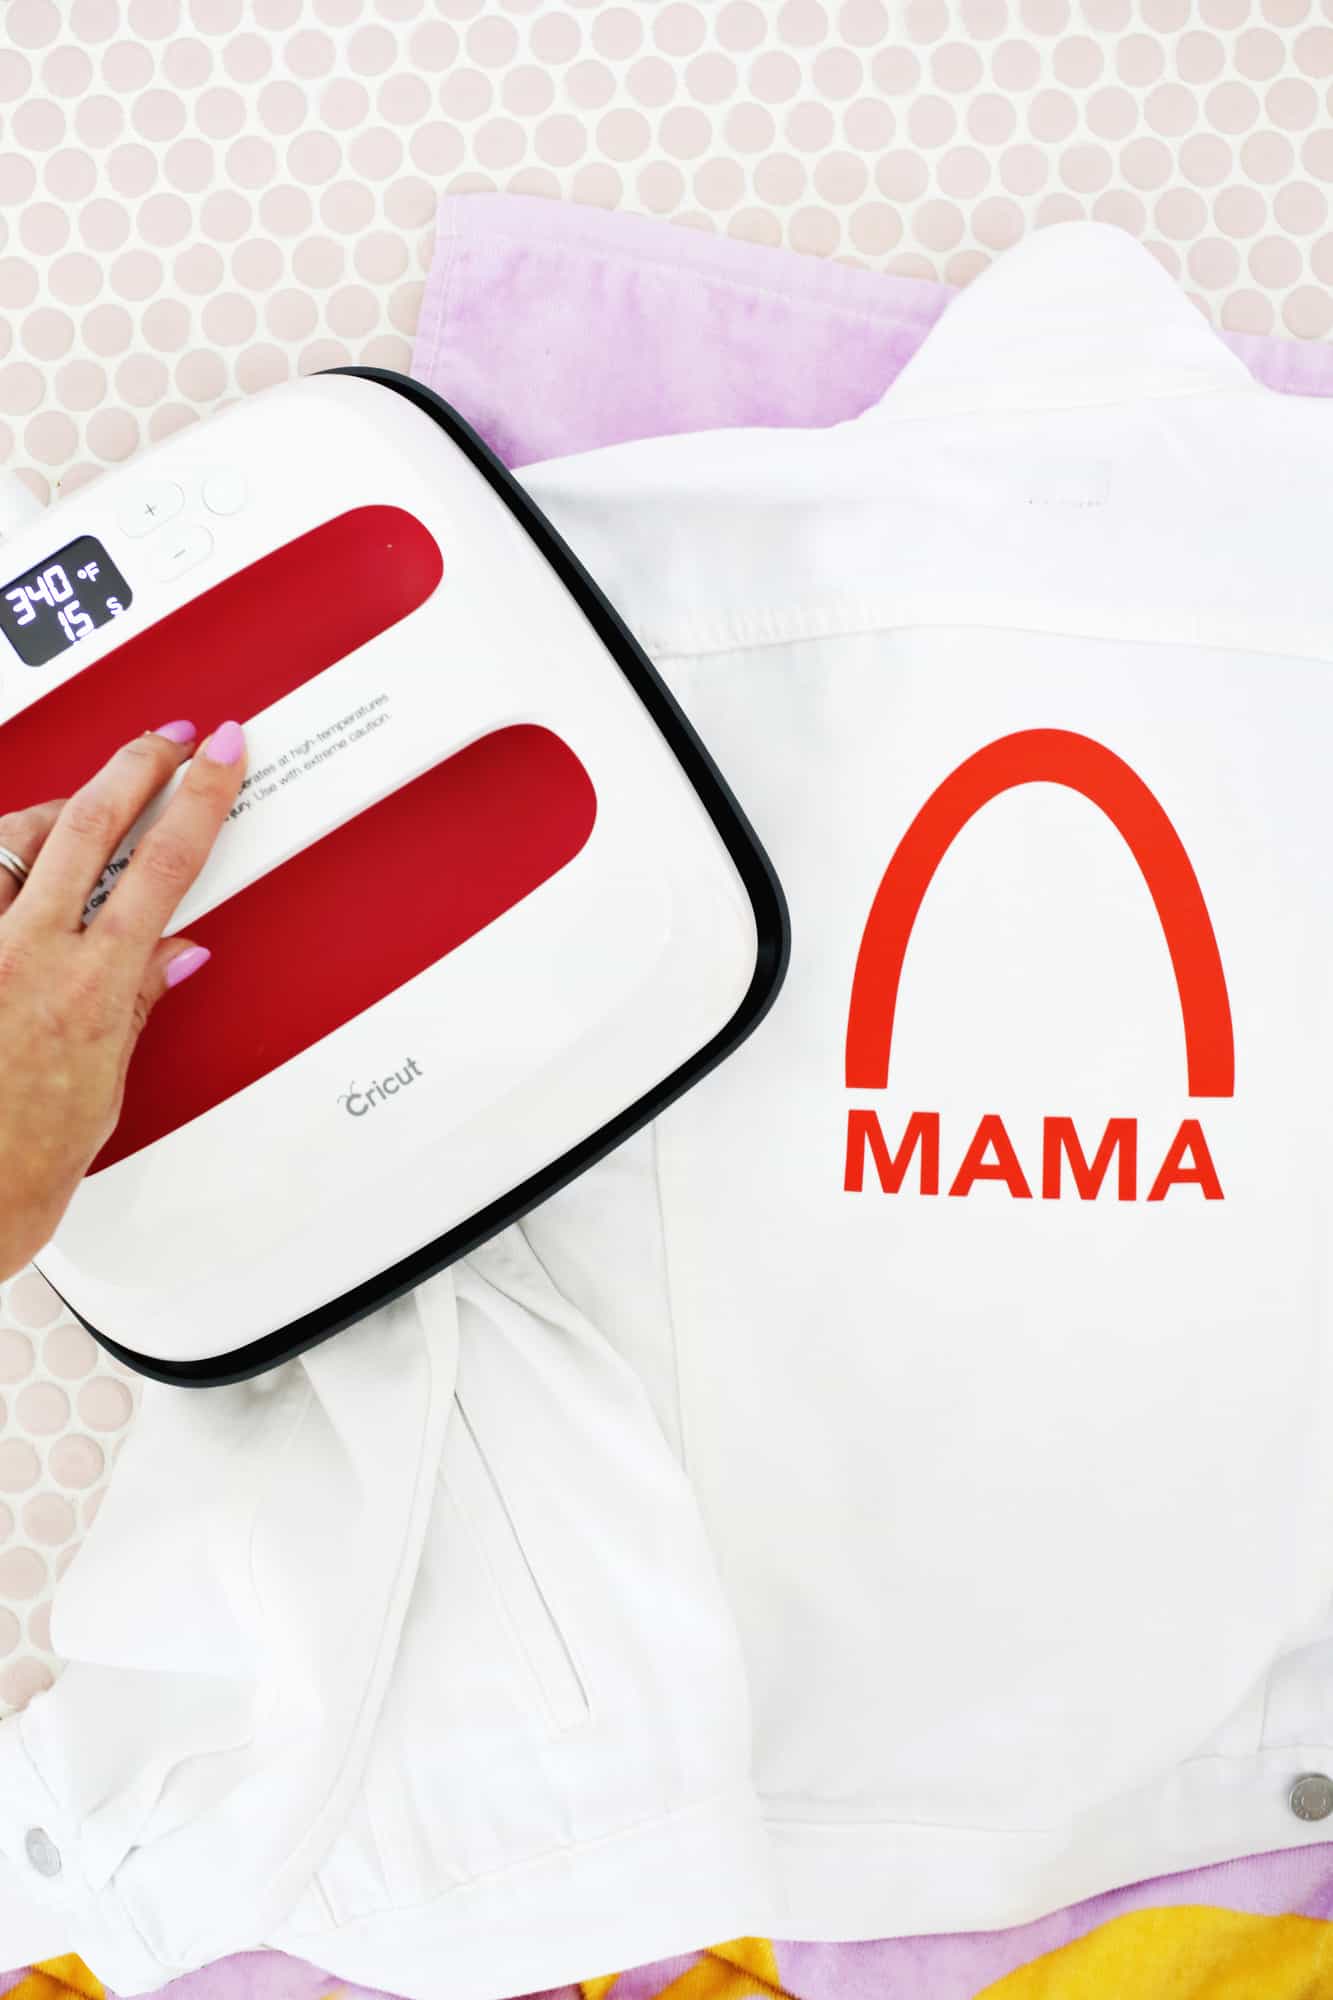 I basically followed this guide to layer multiple colors for one design and used this reference guide to know what temperature to set my EasyPress 2 to for my Everyday and foil iron-ons. Since the foil has a lower temperature of 305° (while the normal iron on is 340°), I did my foil layer last so I wouldn’t melt that layer with the higher temperature. So I would suggest doing any higher temperature layers first and the the lower ones last. I set my EasyPress 2 at 340°, put down a towel on a hard and flat surface, placed my red layer down on top of my jacket, and pressed the EasyPress 2 down with two hands for 2-3 seconds. Then I waited until the clear film was warm (and not hot anymore) and peeled the clear film back.

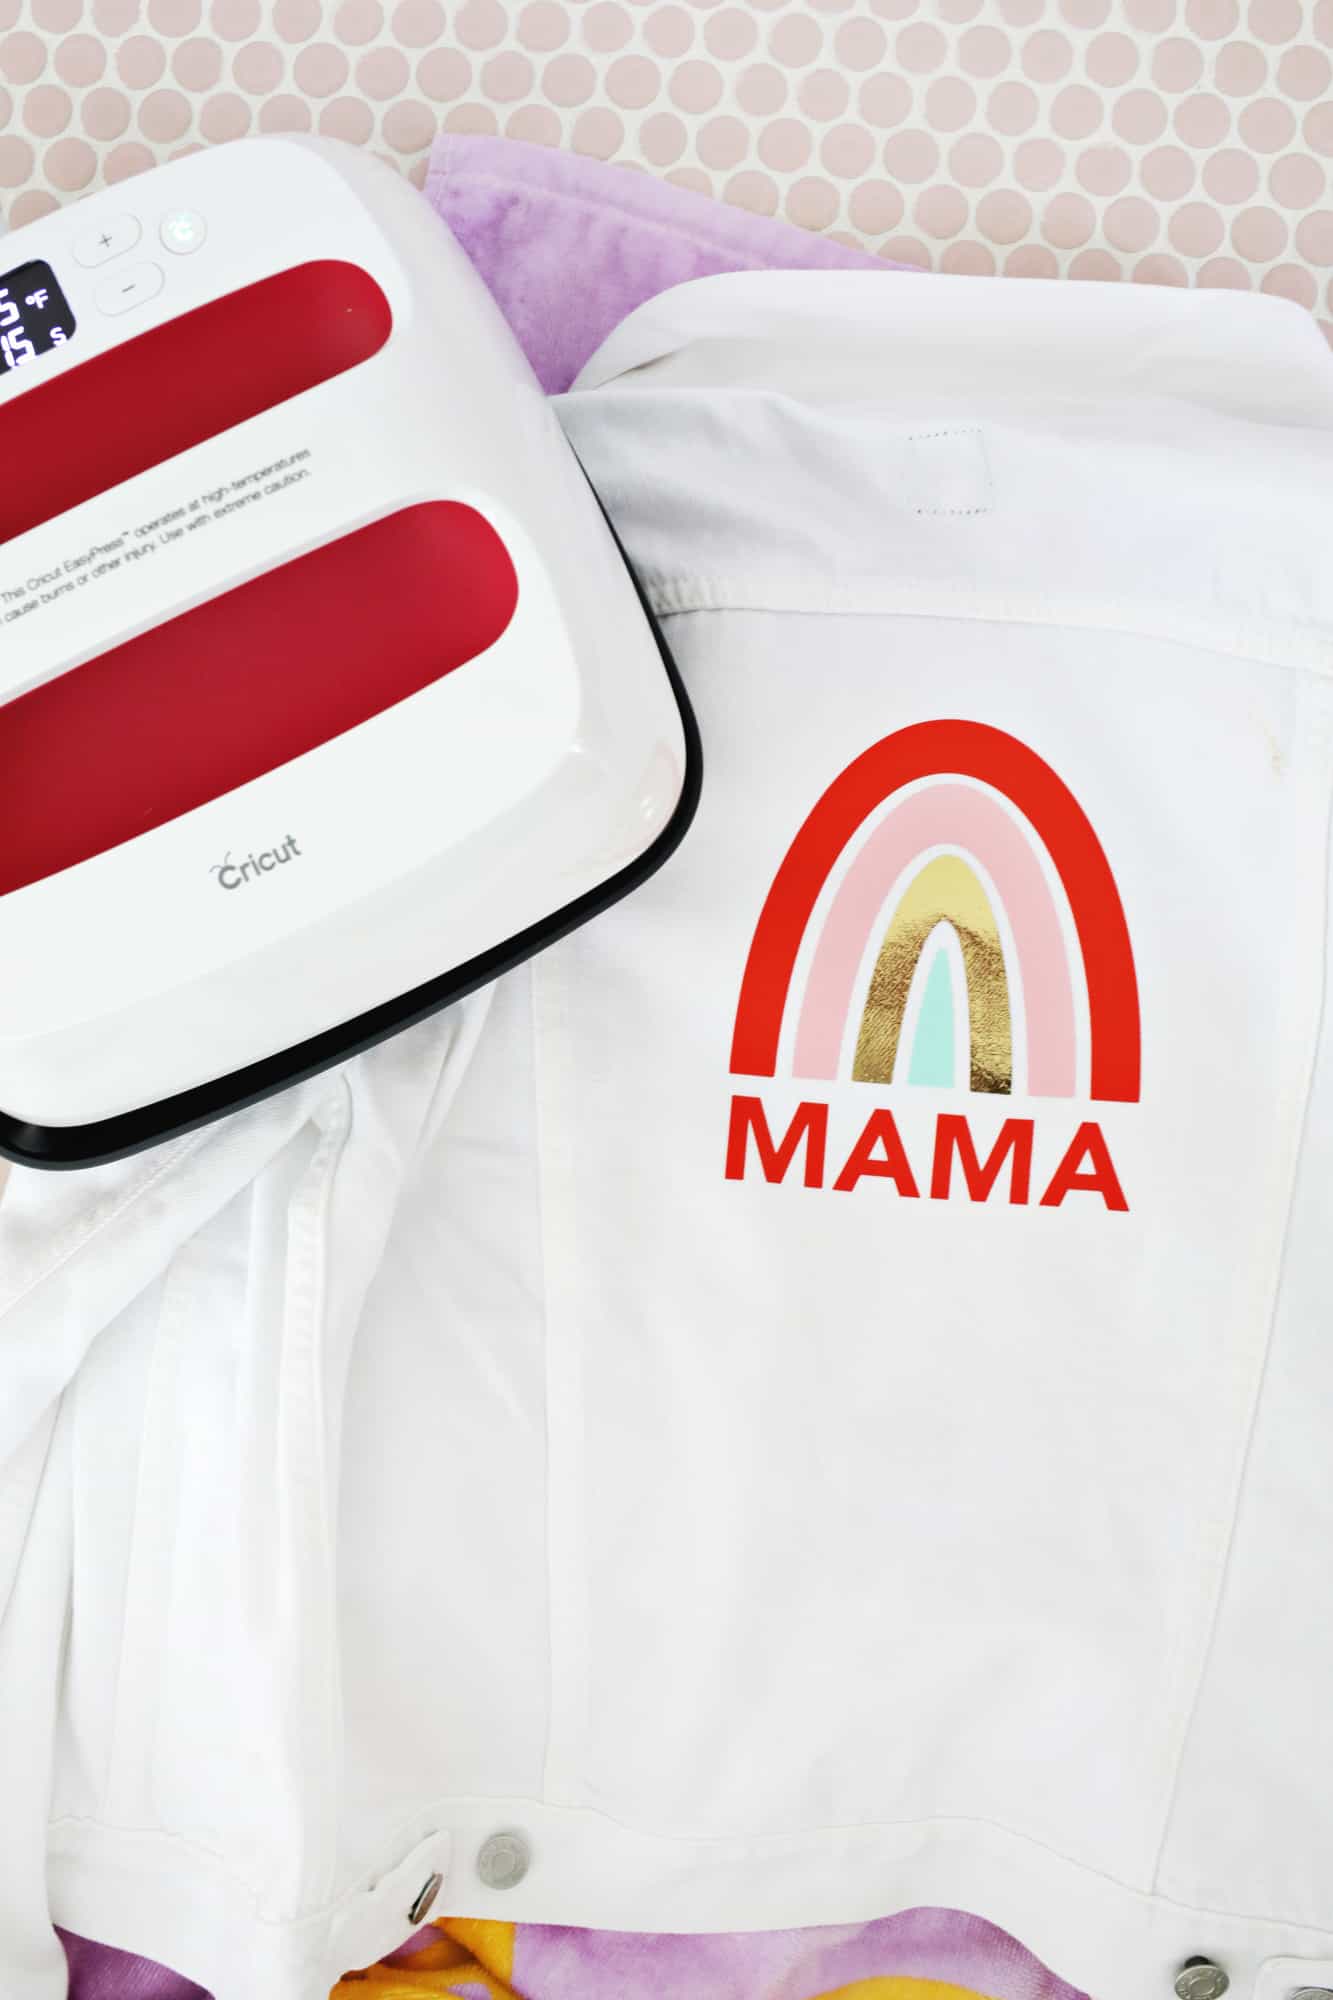 Then I added the pink layer and repeated, then the mint layer and repeated. Then I lowered the EasyPress 2 temperature to 305° and since it was the last layer I pressed down for 15 seconds to set the whole design. Then I flipped the jacket over and pressed the back of the design for another 15 seconds and removed the final clear film when the design was warm. The EasyPress 2 made it super easy to set the temperature I needed, it covered the whole design at once, and it even has a timer on it so you can set it for a certain amount of seconds each time if you want—love it! Repeat with your kid’s jacket and you’re ready to match!
 If you’re using an iron instead of an EasyPress 2, you can use this guide for the foil iron-on (set your iron to the wool setting with no steam) and this for the Everyday iron-on (set your iron to the cotton setting with no steam). Since toddler jackets are so much smaller, you may need the smaller iron-face to get into that little area between the seams to iron on your design. Also, If you want to cut apart the “mini” phrase and put it under the jacket like the Mama one, you can. I just liked it above my rainbow based on where the jacket seams were on her design.
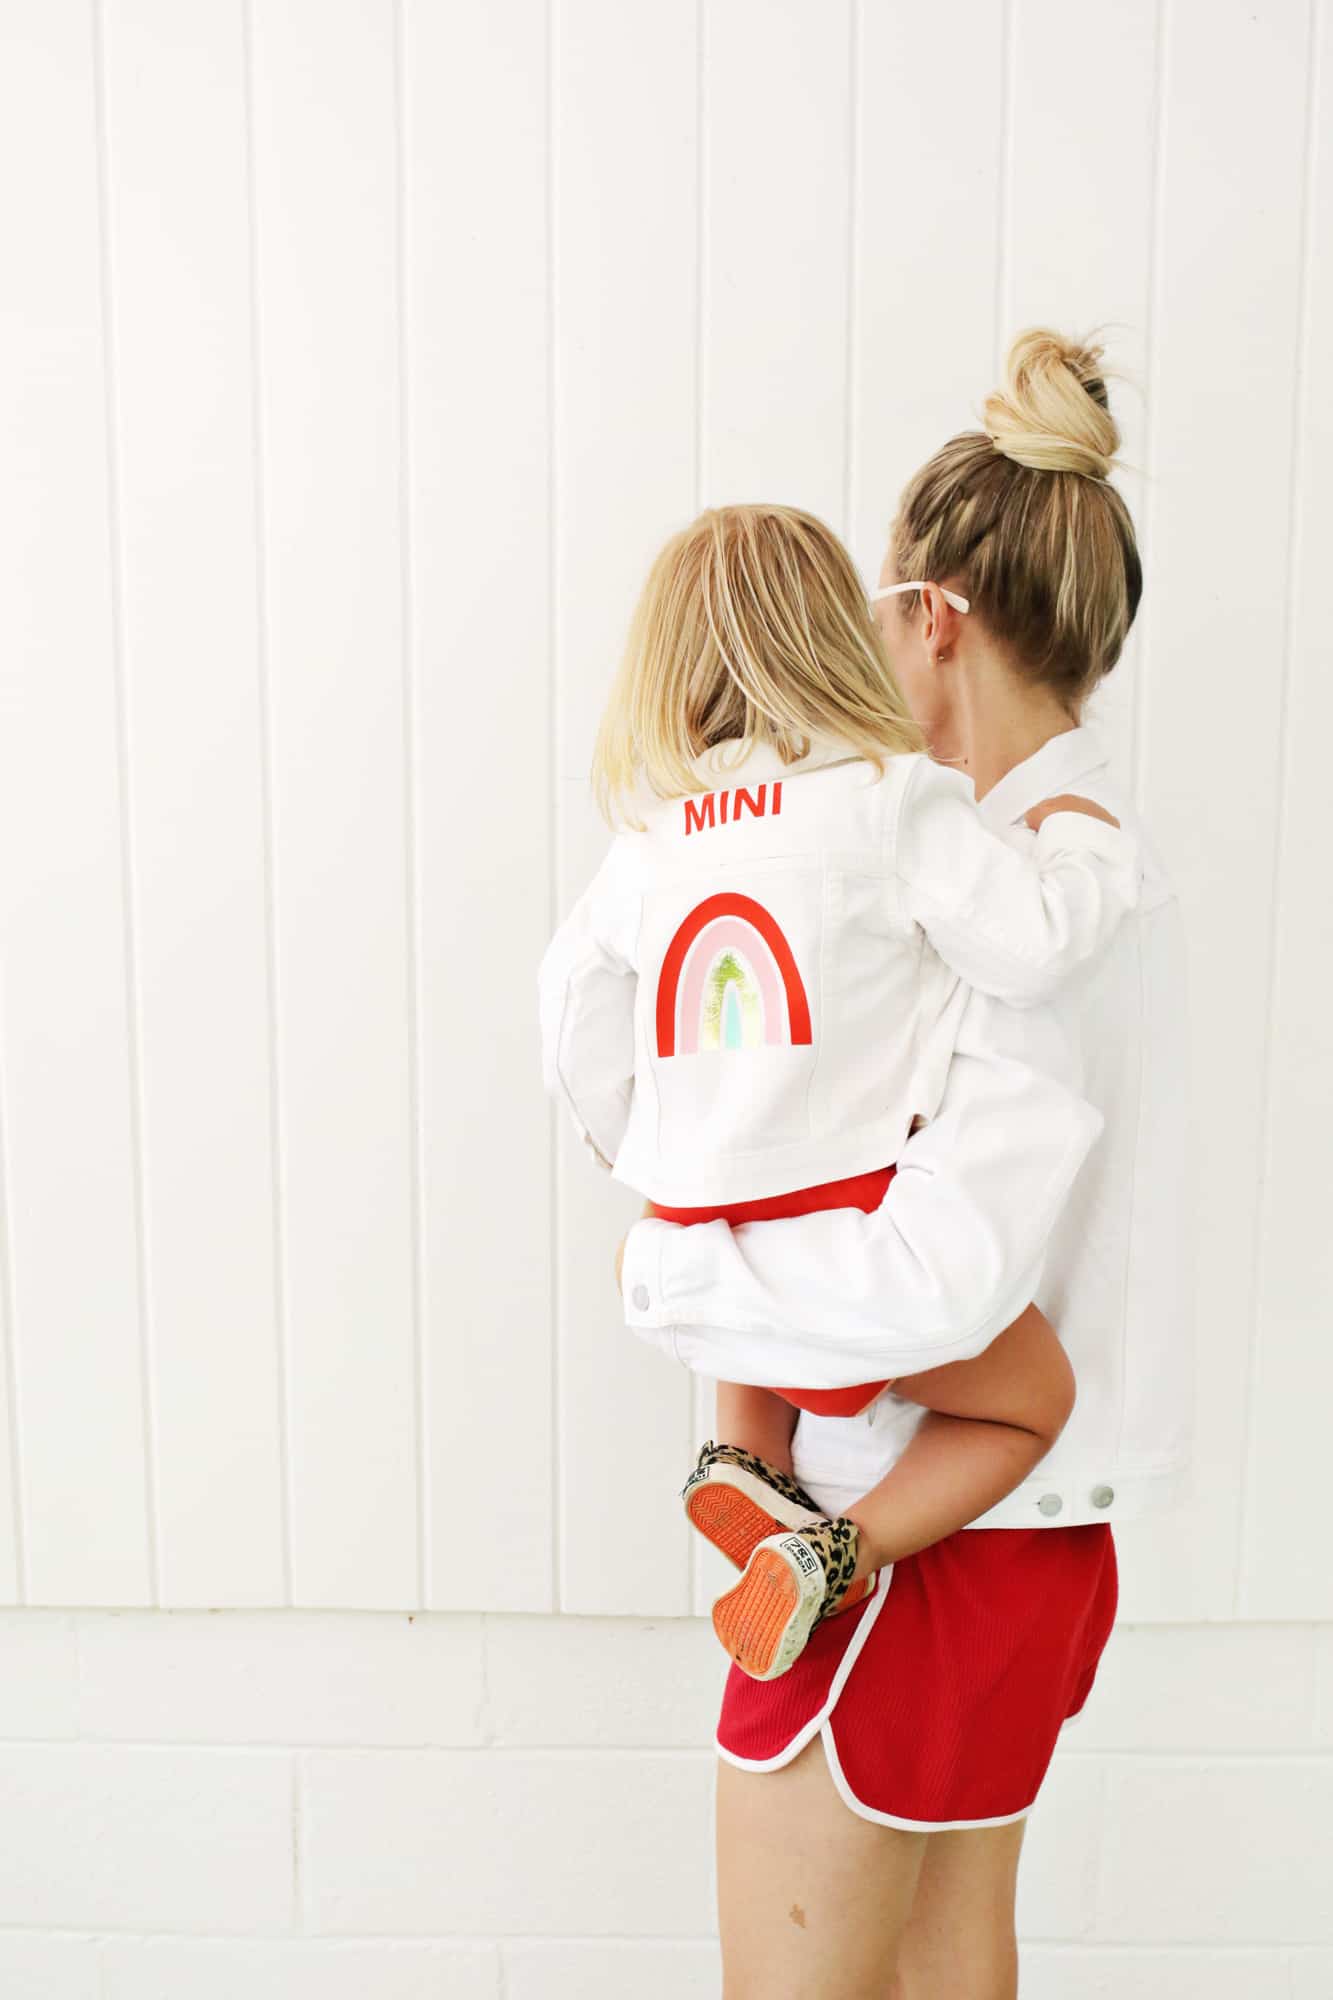
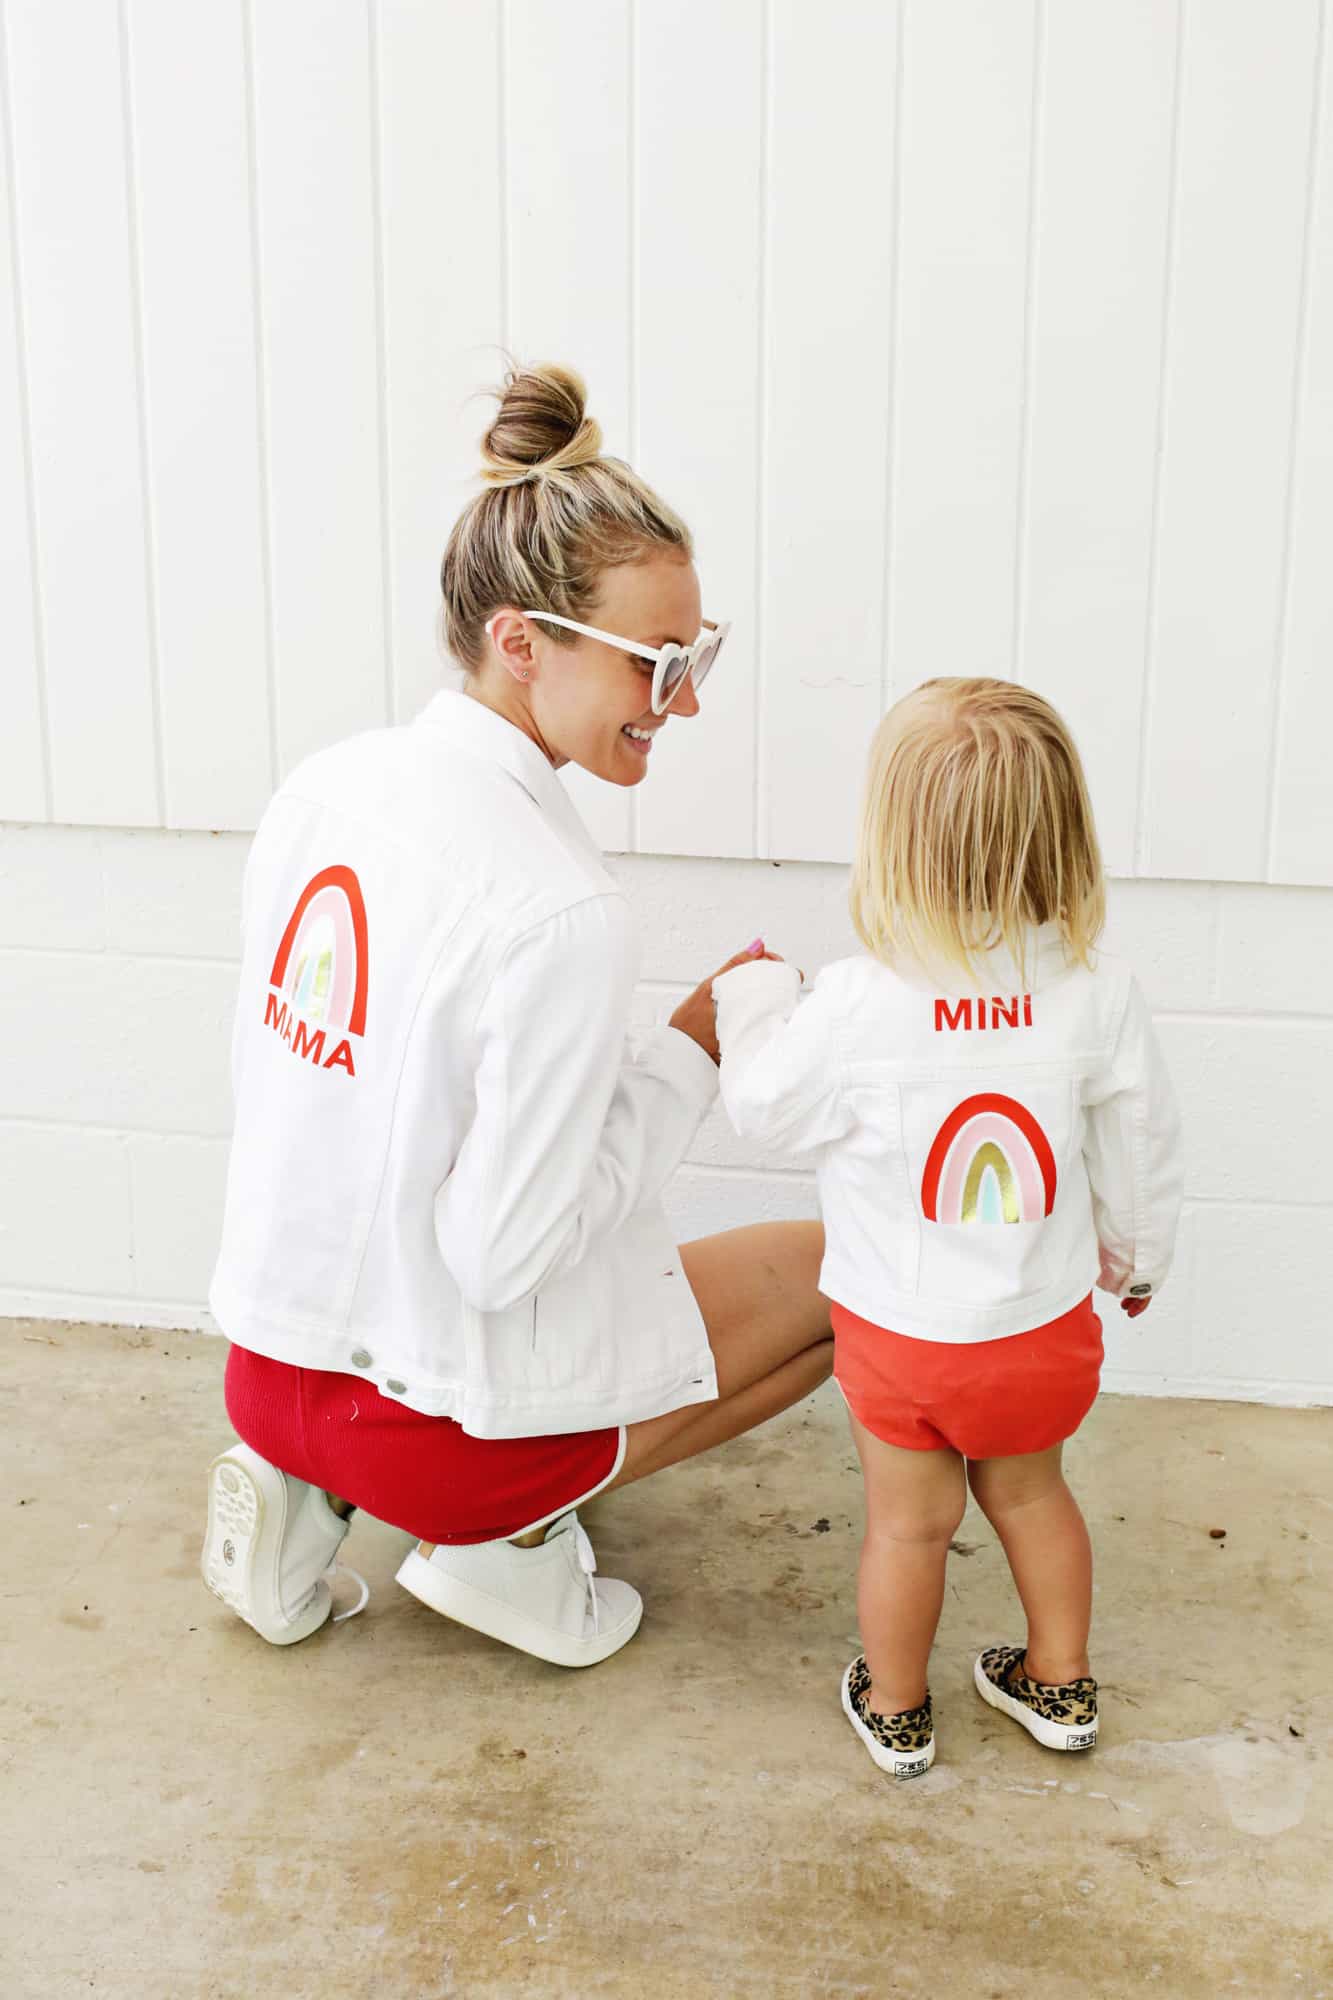 How cuuuuuuuuute is that?! By the way, if you love this look but don’t want the words on your version, you can either click the little eyeball icon in each letter layer in the Cricut Design Space to hide the letters, or just peel the letters off the clear film once the design cuts, so they won’t be there to iron on when you go to apply the rainbow.
You can also switch the colors for whatever color iron-on vinyl you want to use! You can change the colors in design studio if you want to be proper about it, but since that’s just for your reference (the machine is just cutting whatever color you put in), you can also just make a little chart for yourself of which colors you are switching out and load the color you want when it’s time to cut that shape out. This design would also be cute on lots of other matching clothing articles as well, so don’t feel limited to jackets!
It’s supposed to be like 90° this weekend buuuut I still have a feeling that we are going to be wearing these jackets out somewhere! Hope you and the Minis in your life love this too! xo. Laura
7 Comments
I may have missed this, but where did you guys find your matching jackets before you applied the decals?:)
I’ll add the ones I got to the supply list!
Laura 🙂
LOVE this! Have you had any issues with the vinyl peeling or is it pretty solid?
So far it feels pretty solid! Make sure you flip the designs over and do the back too, that helps it adhere
Laura
This is so cute!! Will look so adorable on you both!
-Kate
https://daysofkate.com/
This is such a cute and brilliant idea!
Hey Elsie! This is kind of off topic but how would you describe you and Nova’s style? I love it and want to see more of it on me, I guess. Thanks! Atahlia