 So, my husband is pretty into almost any kind of game—video games, sports, yard games, board games … he loves them all! When we were planning our porch makeover, I knew he would want to incorporate some games into the area. But I didn’t want the space to feel like a game room, so I thought that a dartboard in a sleek cabinet would be the perfect solution! I tried to buy a dartboard that would match the modern feel of the rest of the space, but almost everything I came across had either a rustic or a pub feel to the design (and a lot of them were hundreds of dollars as well). So I decided to do a DIY version instead!
 Supplies:
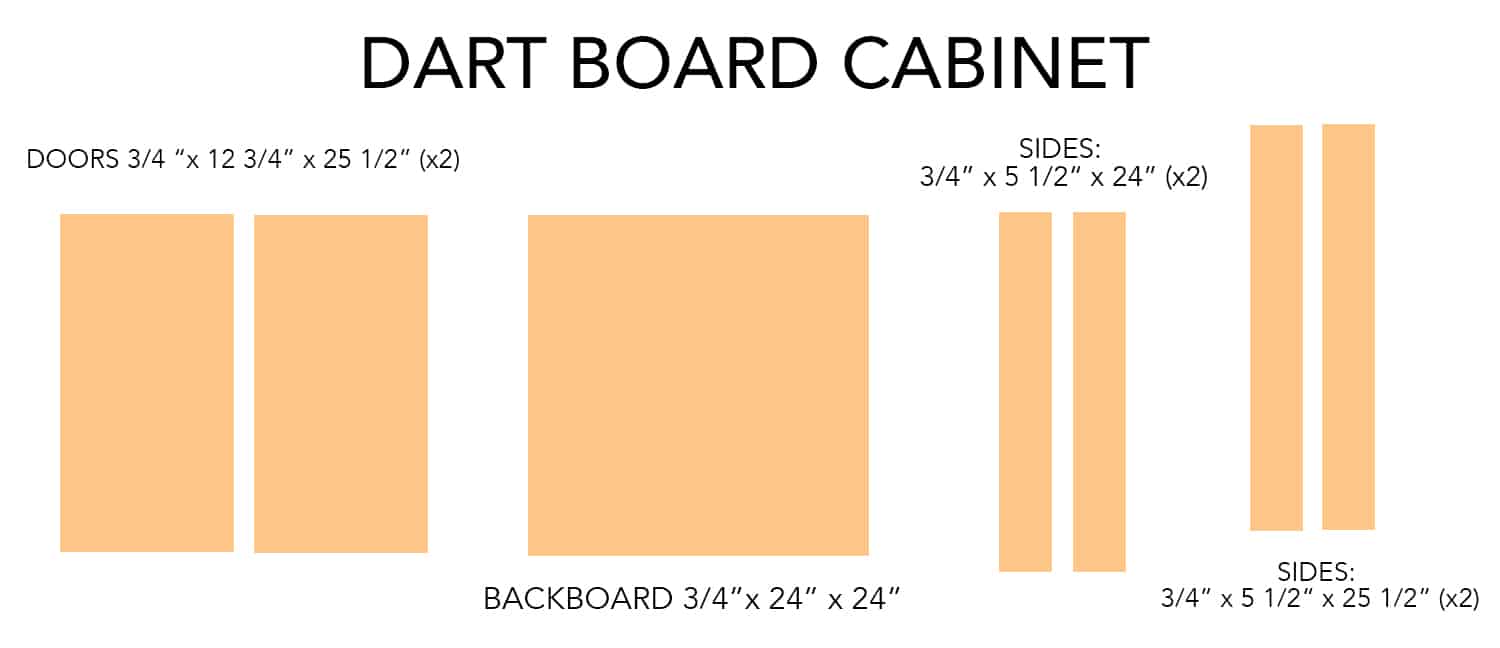
-3/4″ x 24″ x 24″ plywood board for the backboard (try and find one that size or have it cut down for you)
-3/4 “x 12 3/4” x 25 1/2” boards for the doors (you will need 2)
-3/4” x 5 1/2“ x 24” boards (top and bottom boards for cabinet, you will need 2)
– 3/4” x 5 1/2“ x 25 1/2” boards (left and right side of cabinet, you will need 2)
-3/4″ x 1 1/2″ x 8″ boards (for the dart storage, you will need 2)
–1 1/2″ hinges (you need 4)
–cabinet pull (you need 2)
-paint in your color choice
-wood filler
–magnetic cabinet catch
-1 1/2″ wood screws
–square (optional but helpful)
-2 small whiteboards (if you want to keep score for games like cricket)
-drill and drill bits
–circular or chop saw if you aren’t able to get the wood cut down elsewhere
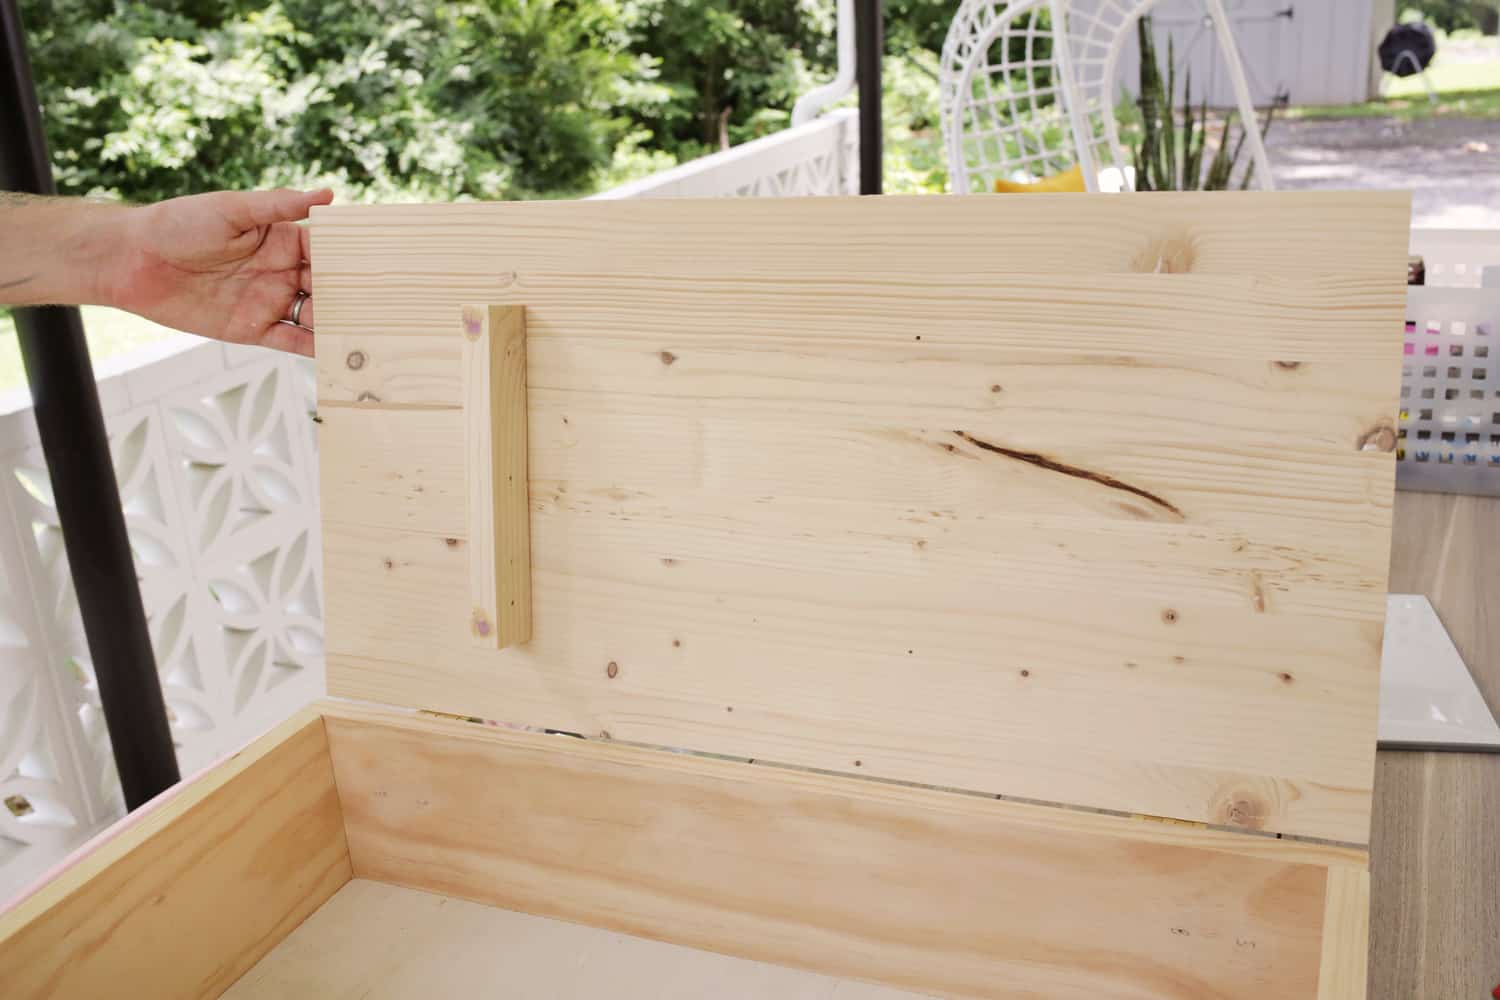
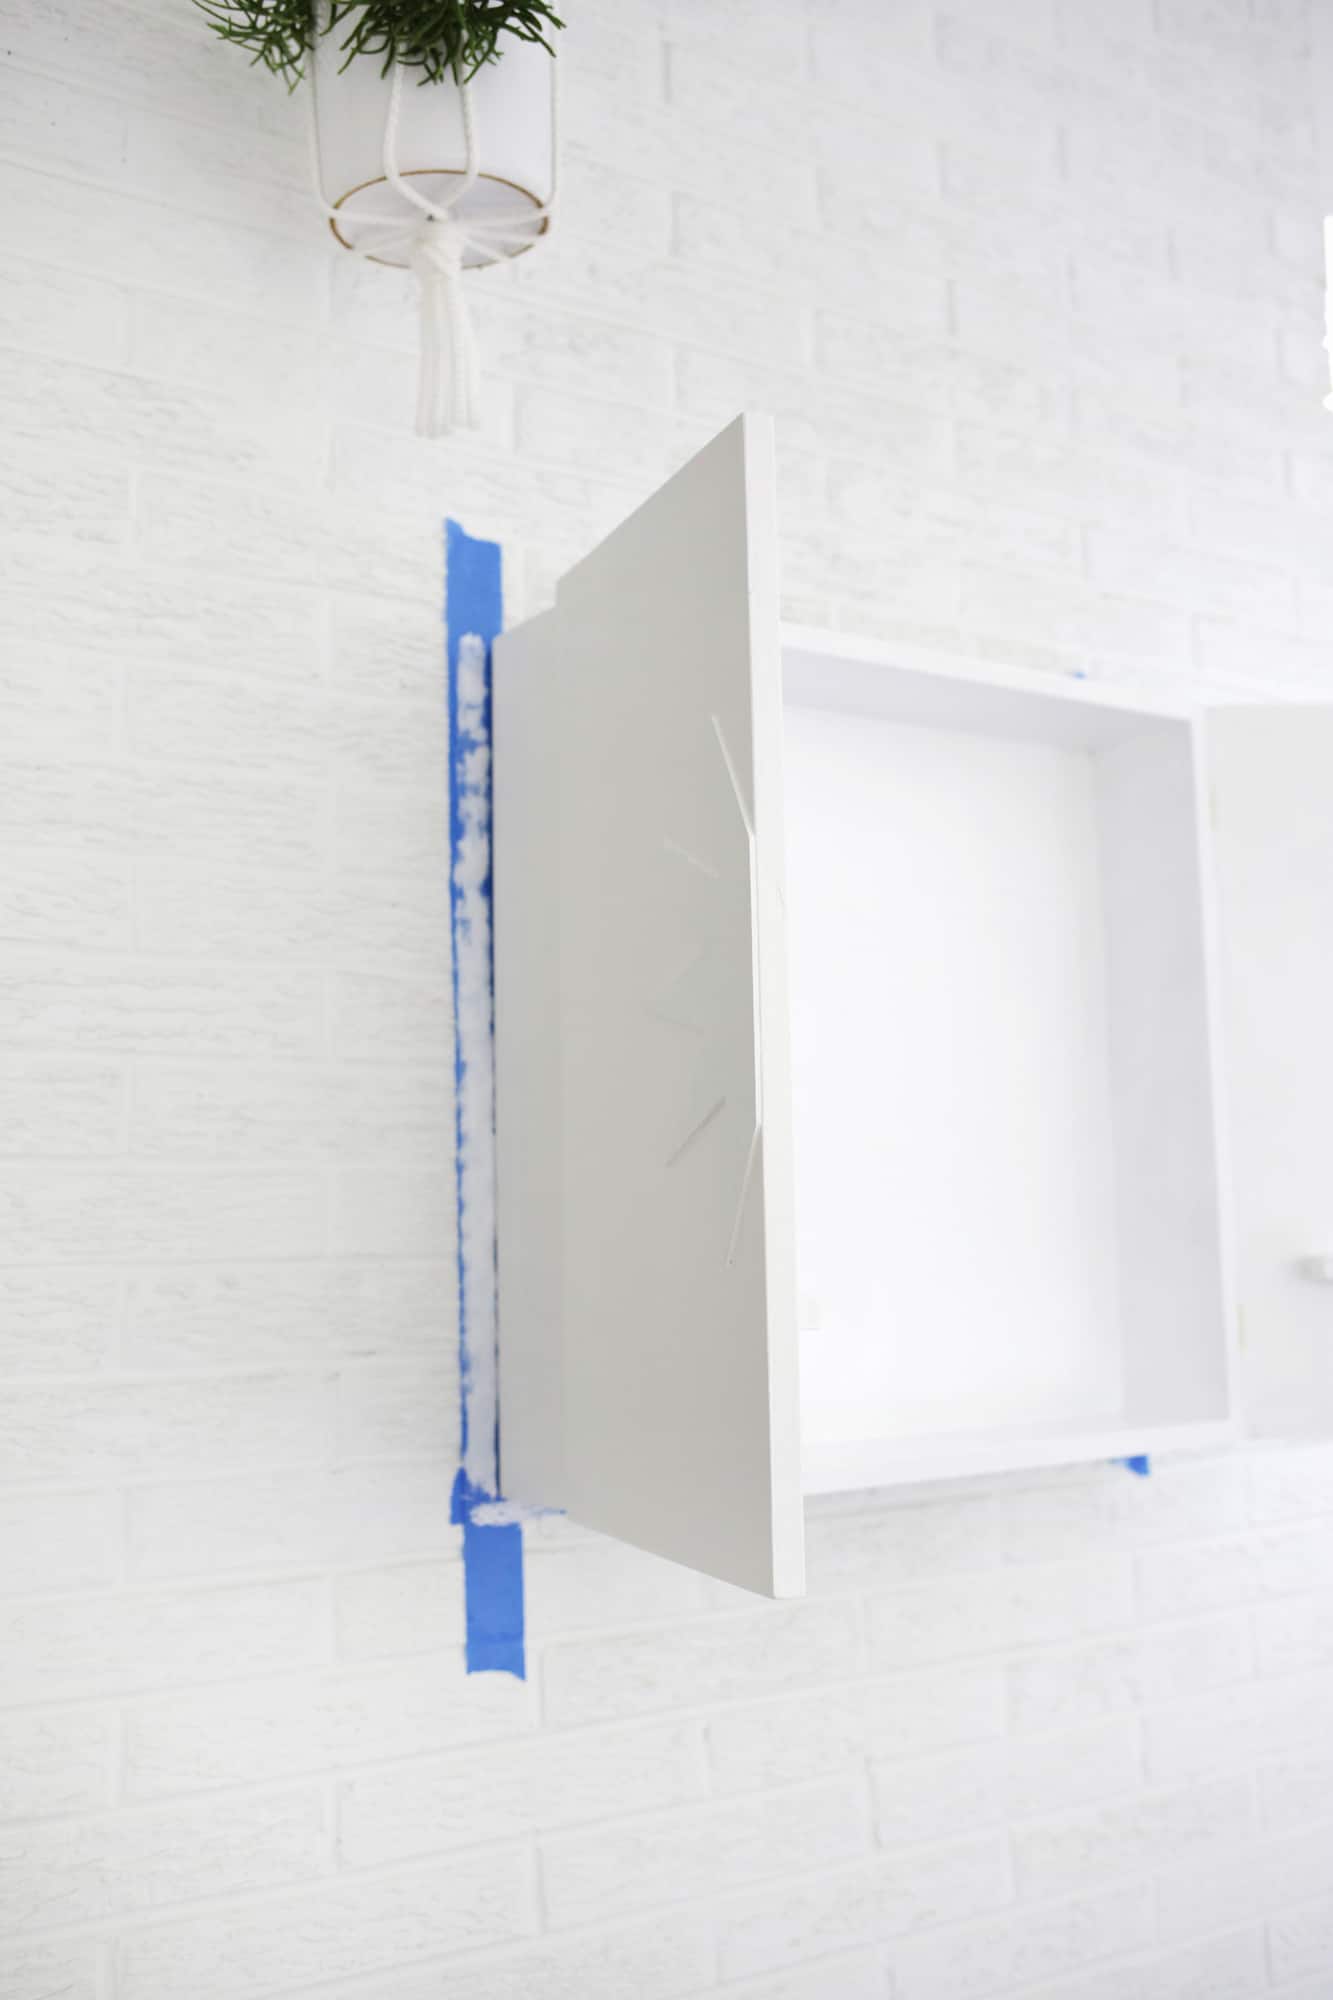
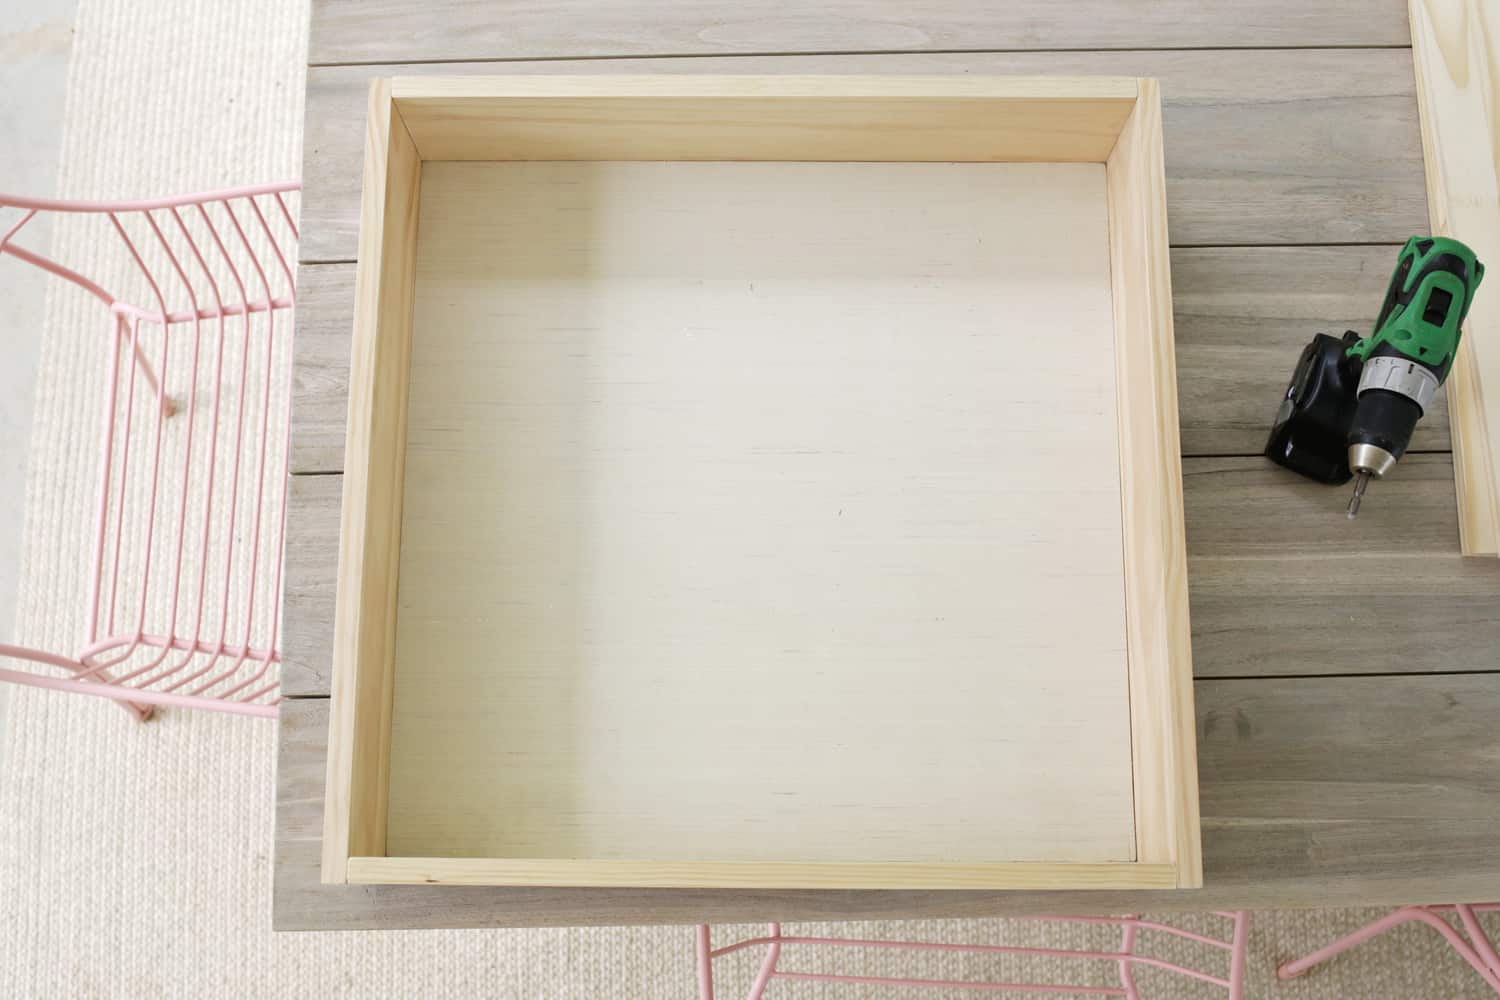 First, take your backboard and lay it flat. Add your top and bottom boards around the sides so it encloses the backboard within the side pieces and connect your longer sides to your shorter side pieces with wood screws so you have a frame around the backboard. Then screw your frame into the backboard from the outside edges so that the frame is now connected to your backboard and you essentially have a shallow box without a lid.
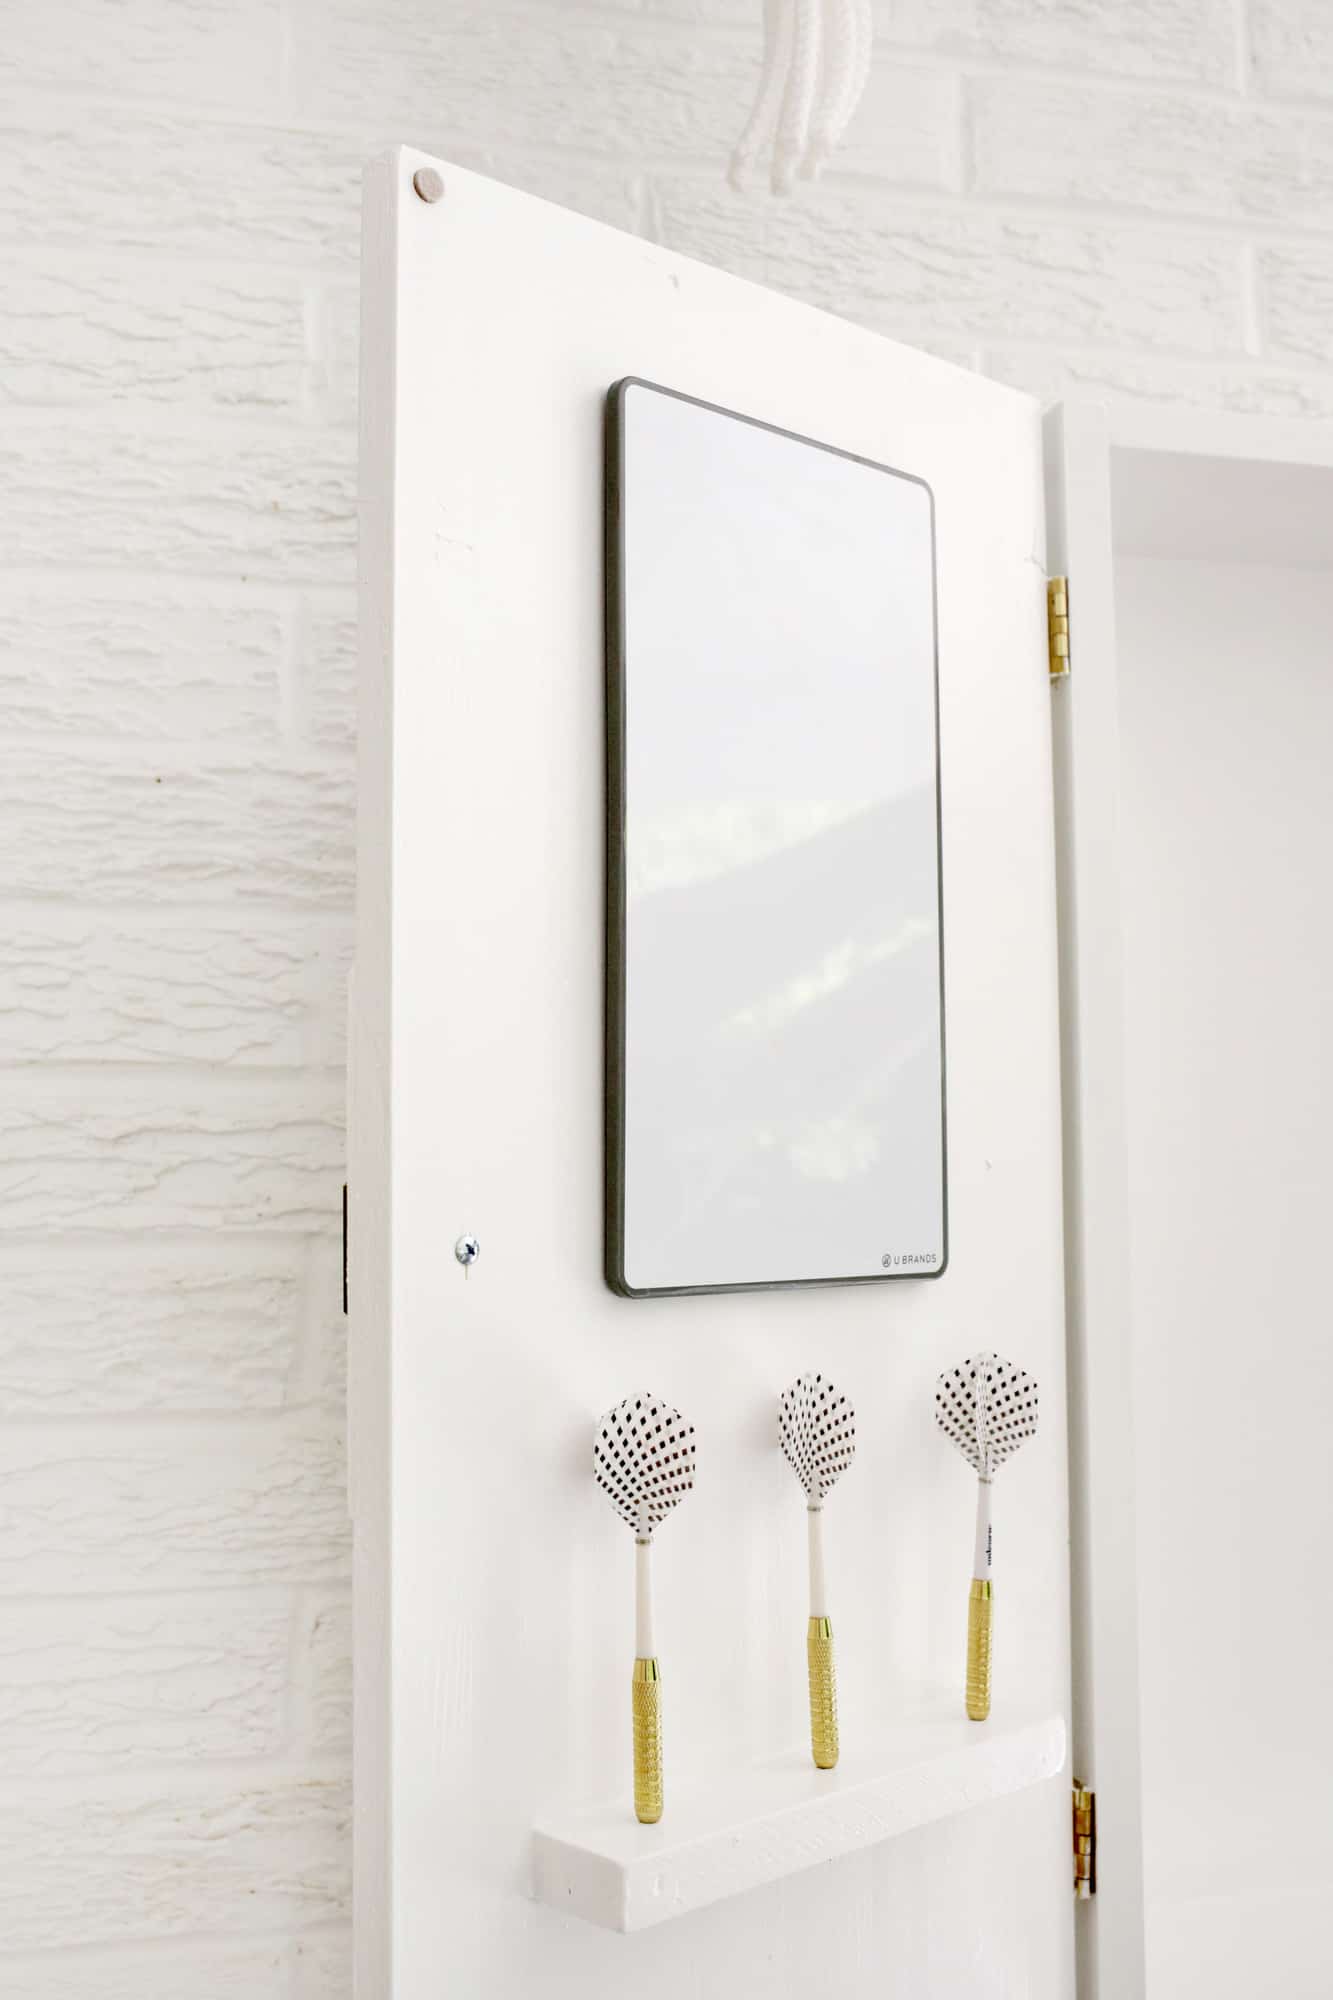
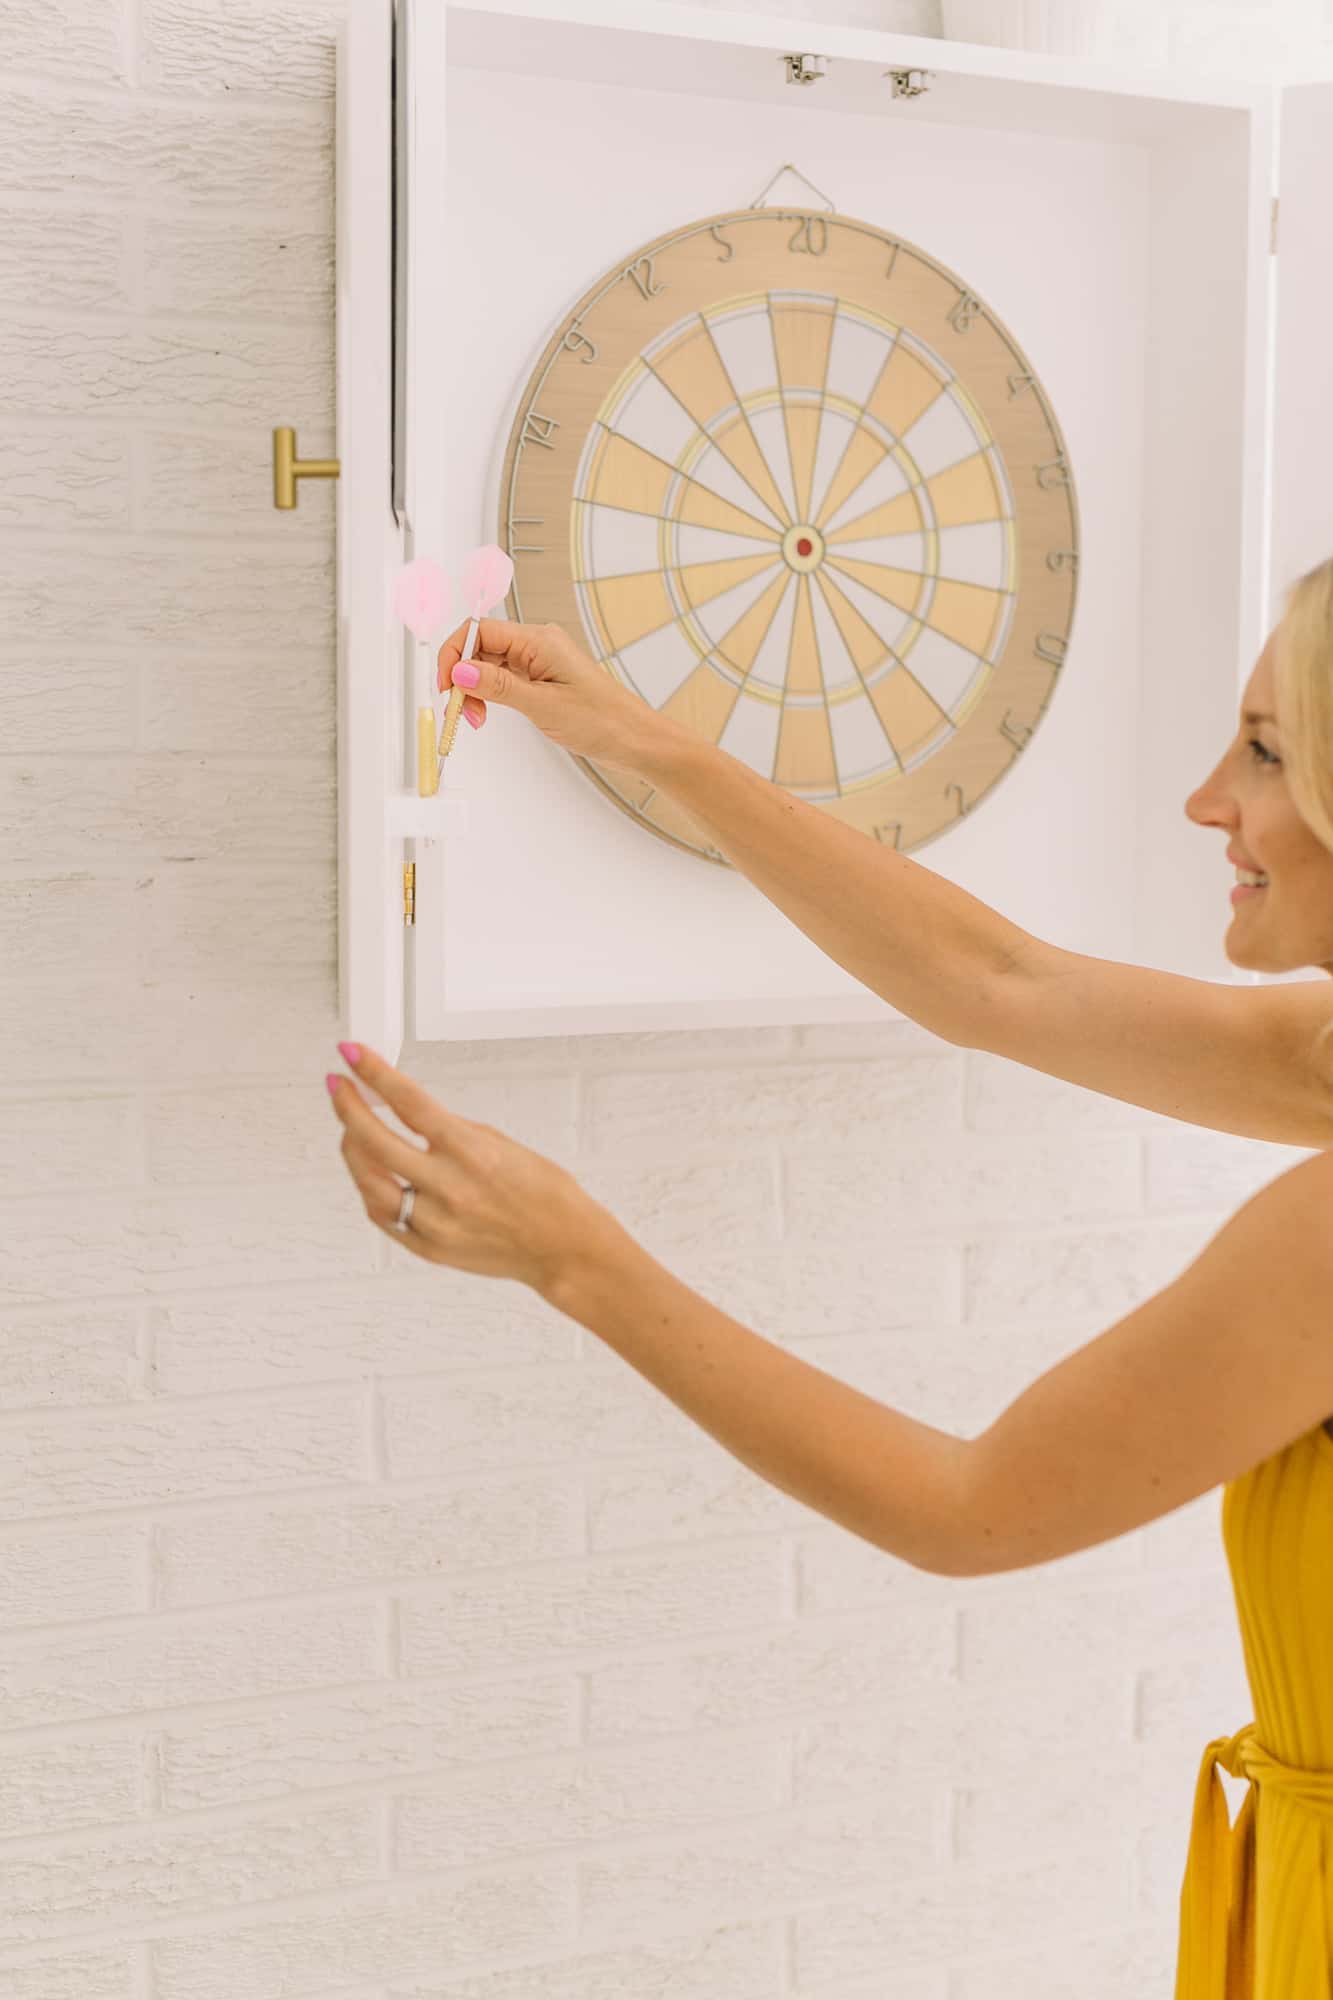
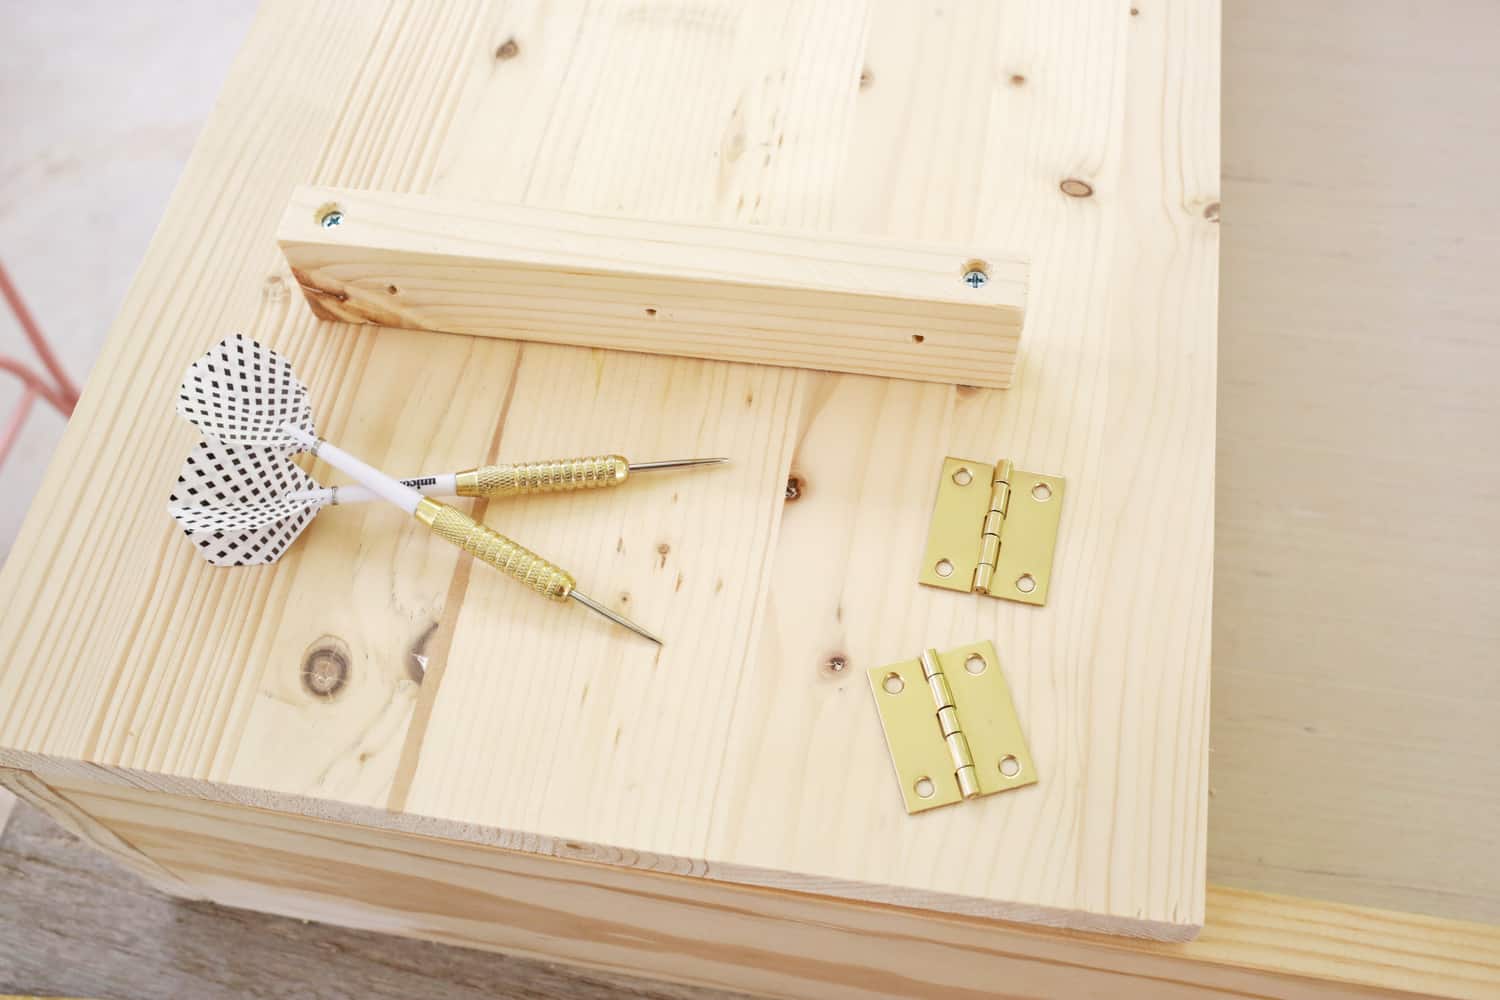 Take your 8″ dart storage boards and drill 3 holes per board just a little bigger than your dart tips (we just spaced the holes evenly) into the 1 1/2″ wide side of your board. Use wood glue to glue each onto the inside bottom of your two doors so that you still have room to mount the whiteboards above each dart holder (you can also use a few screws to attach it to the door like we did).
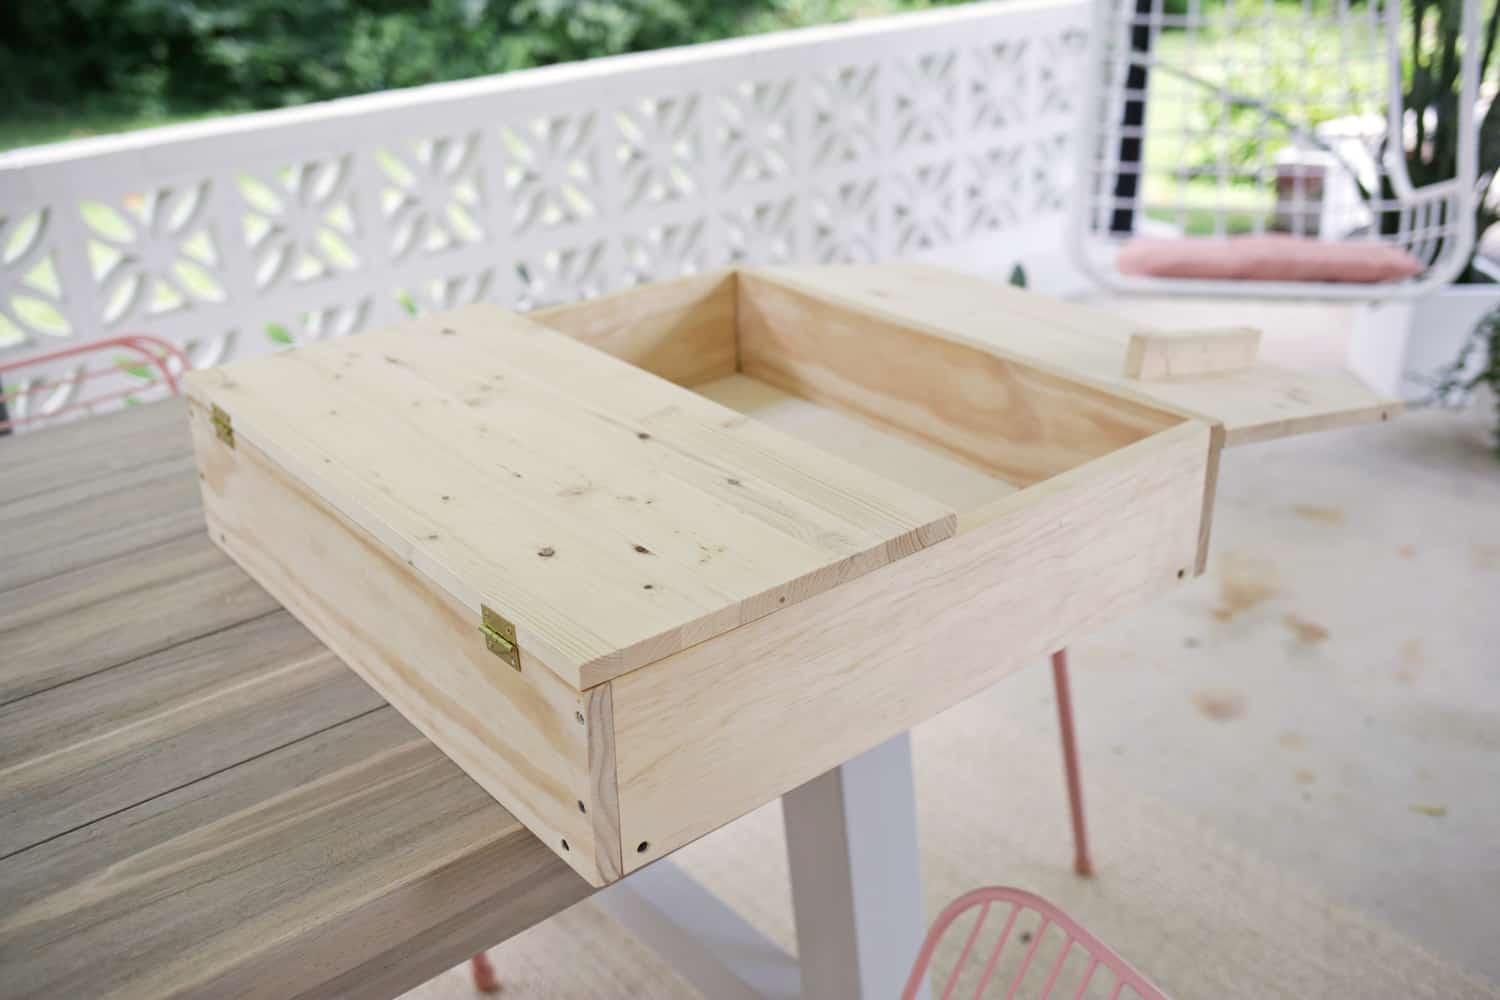 Place your doors on top of your box so they line up with the outside edges. Use your hinges to attach the side of the doors to the side of the cabinet (I would place them about 3″ in from the top and bottom) so the doors can fully swing open.
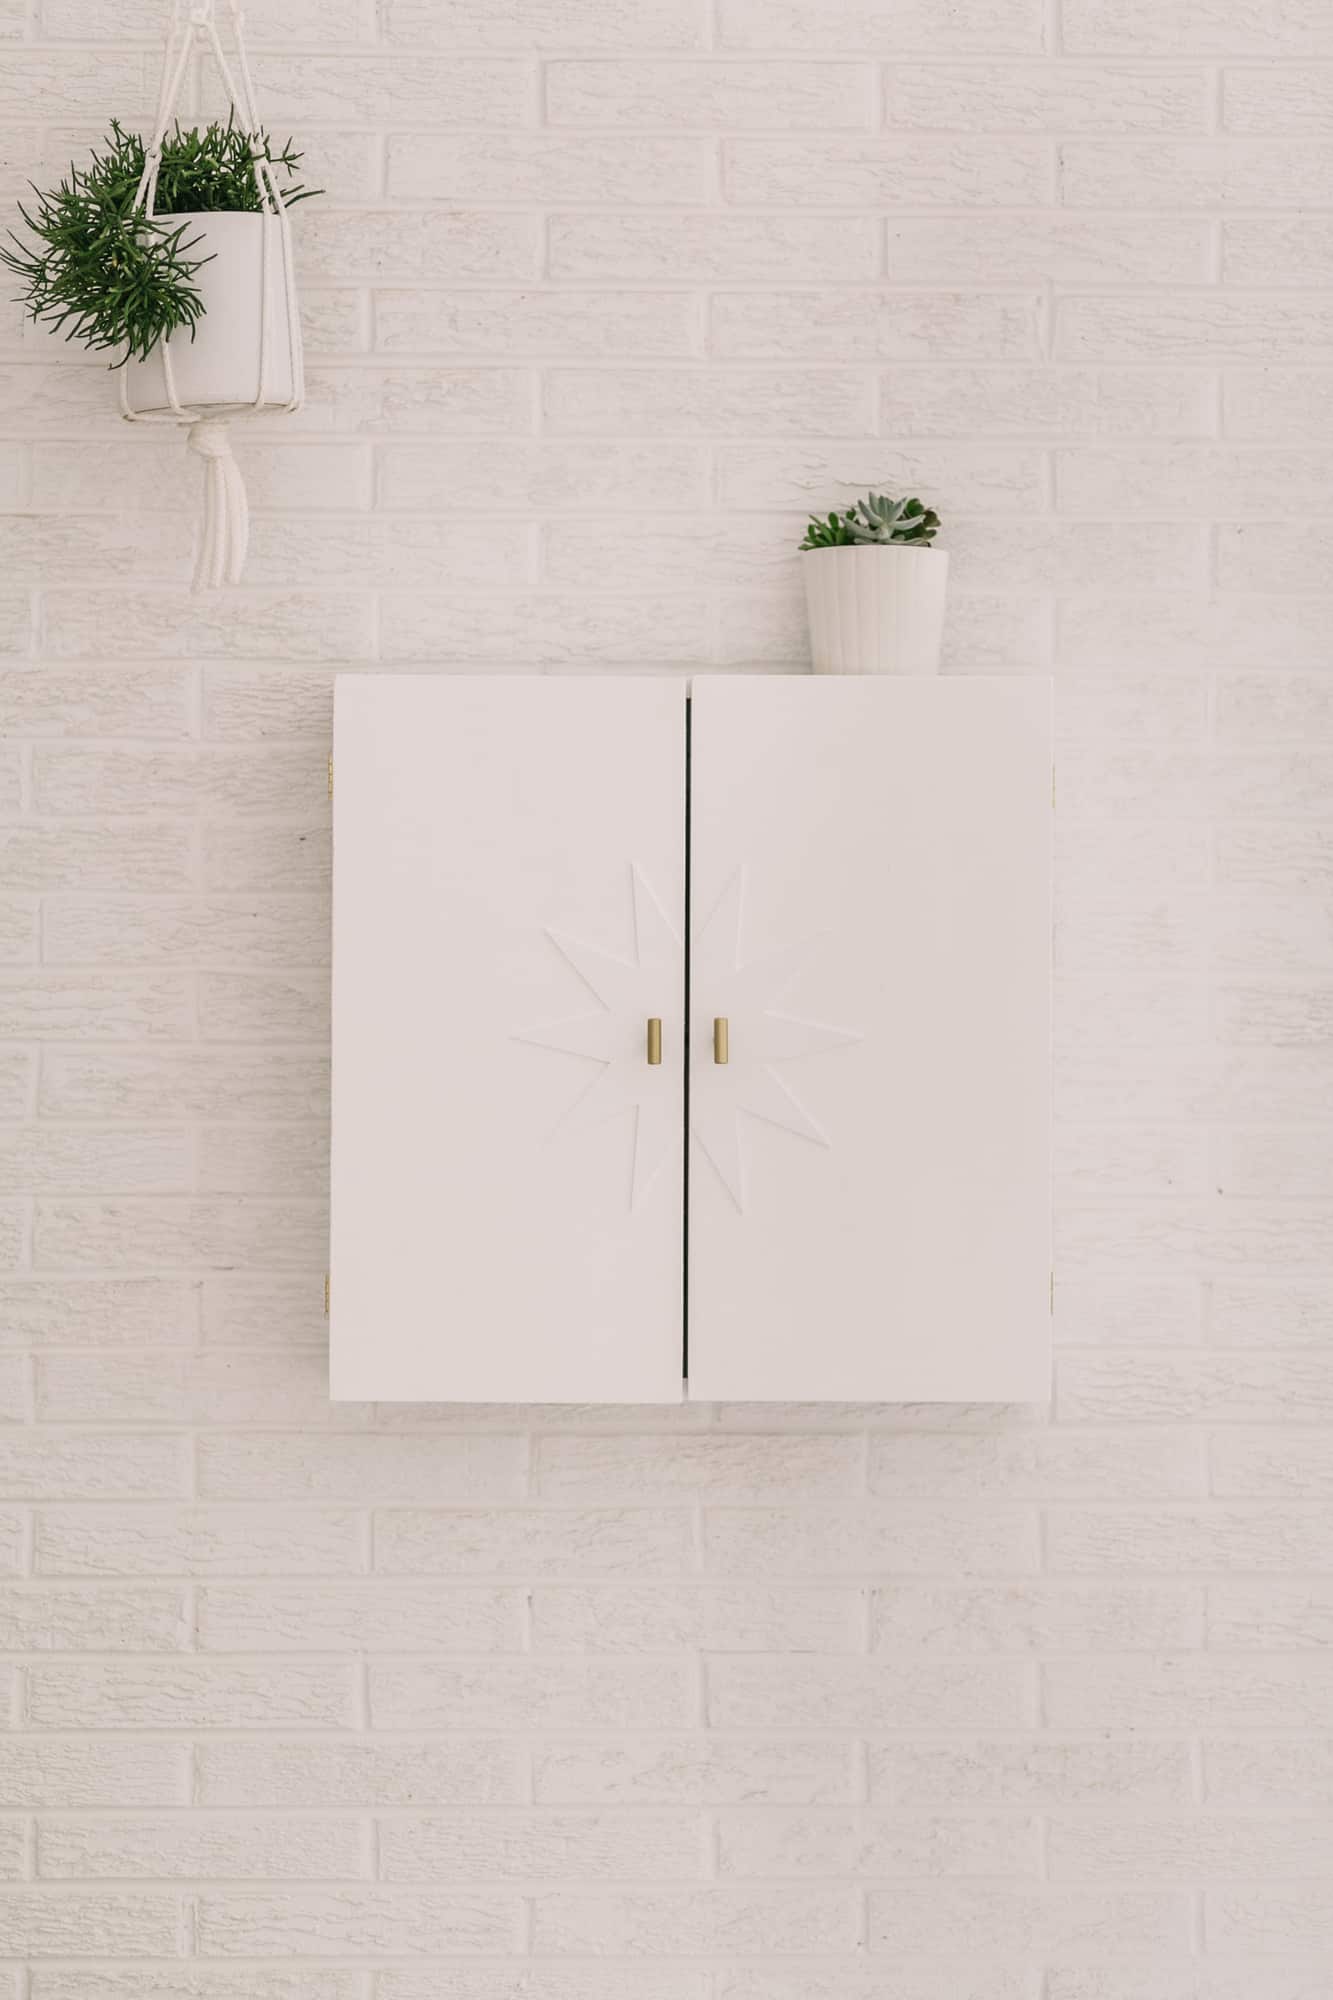
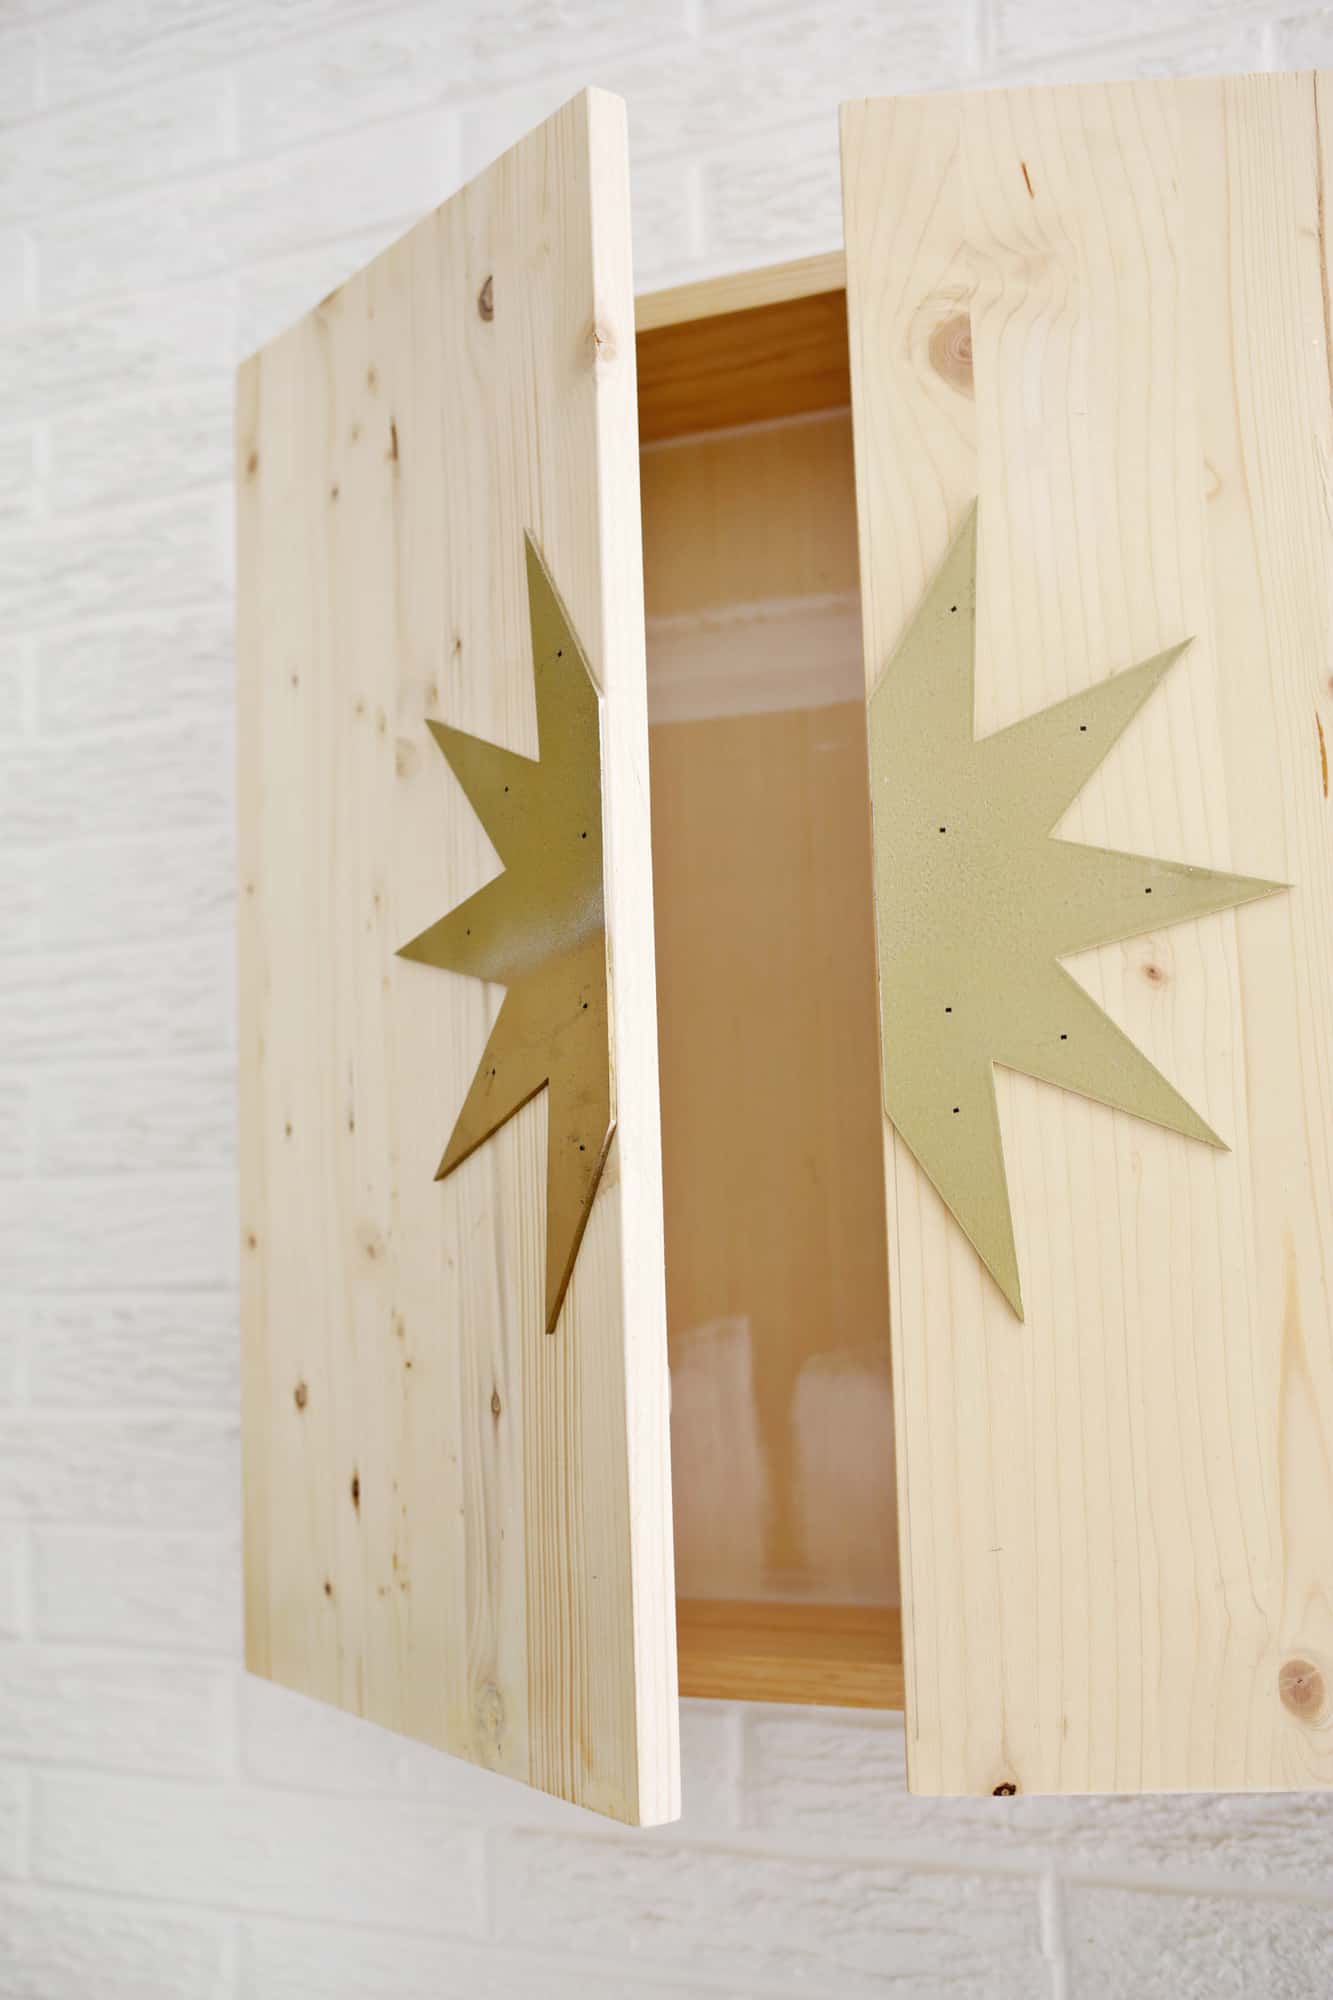 I also added a wood detail to the doors with a 10-pointed star cutout I had leftover from this project, so feel free to add some trim detail or do a painted design as well!
 Fill any holes with wood filler and sand when dry. Give your cabinet a few coats of paint (it may be easier to mount first and then paint so you can open and close the doors more easily) and then drill holes to add your cabinet pulls. If your doors don’t want to stay closed on their own, you can also add a magnetic cabinet catch to help the doors stay shut.
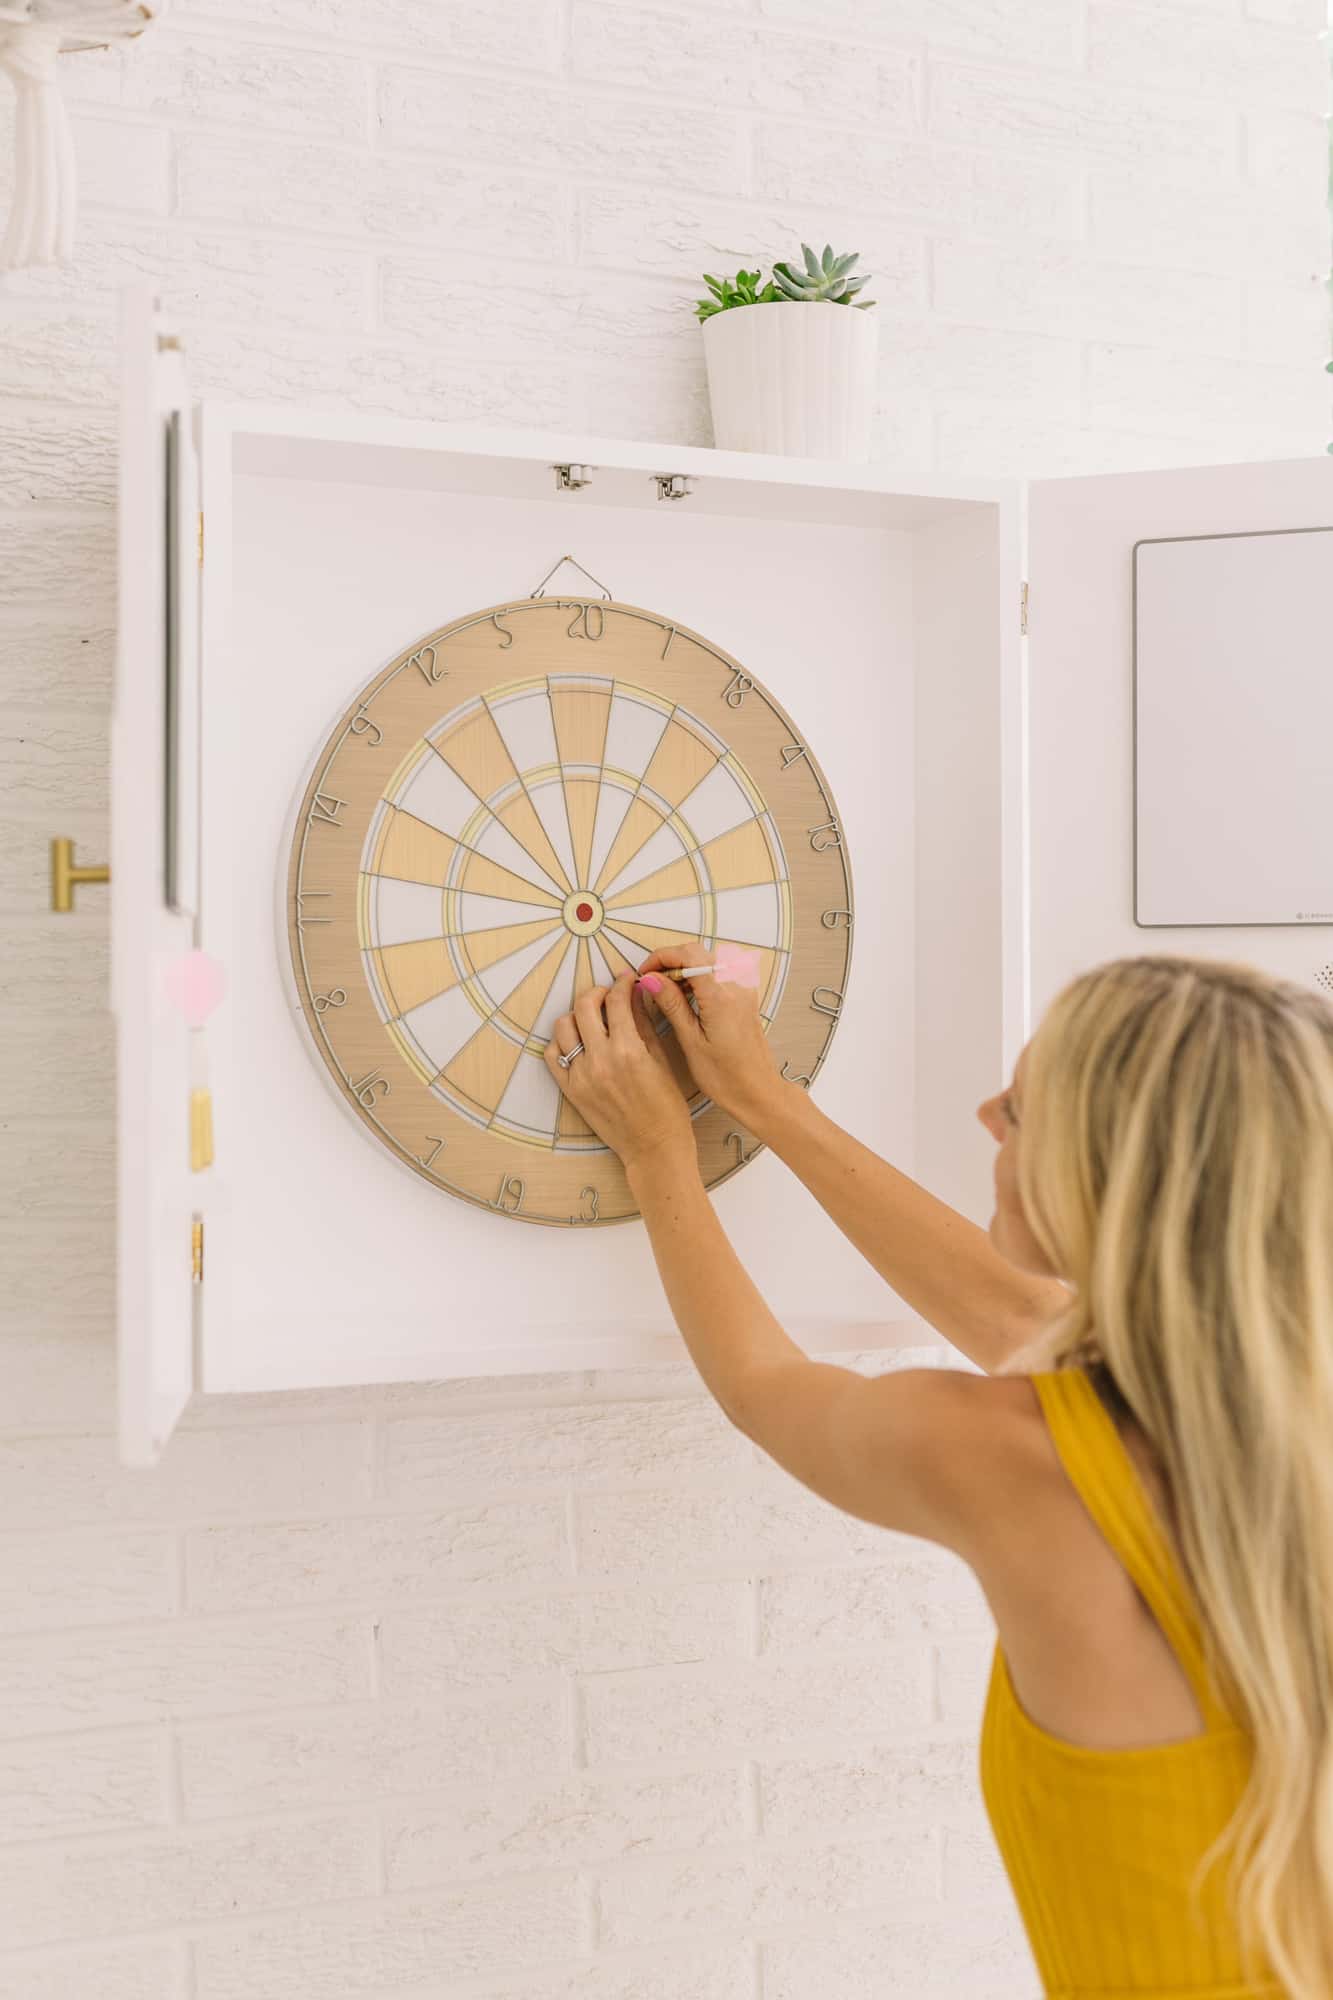
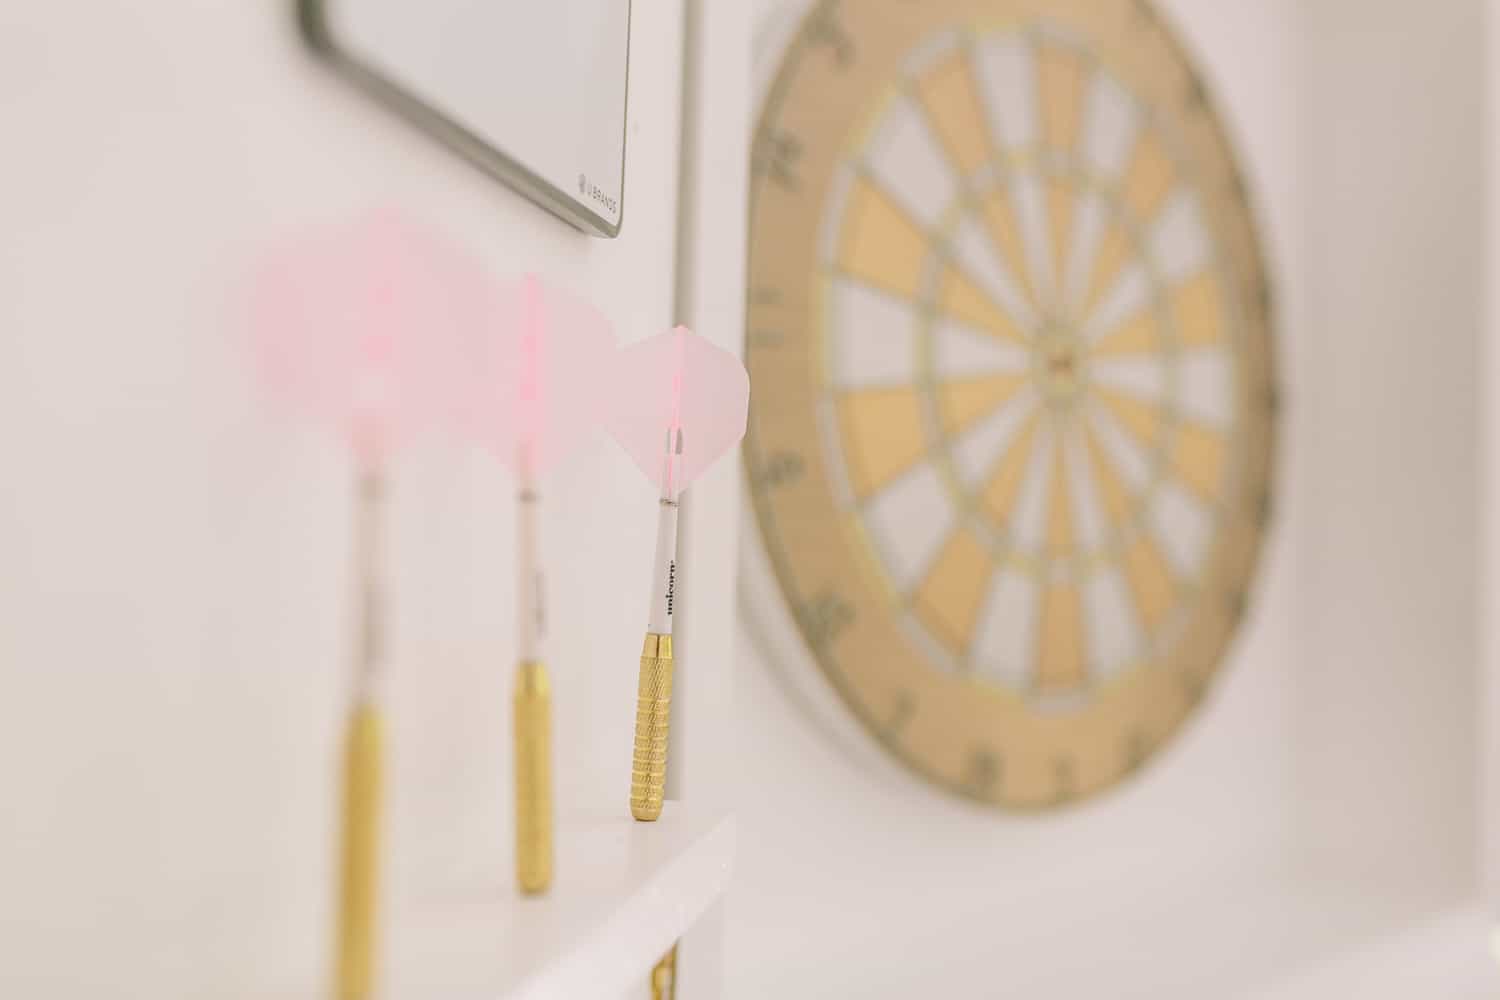
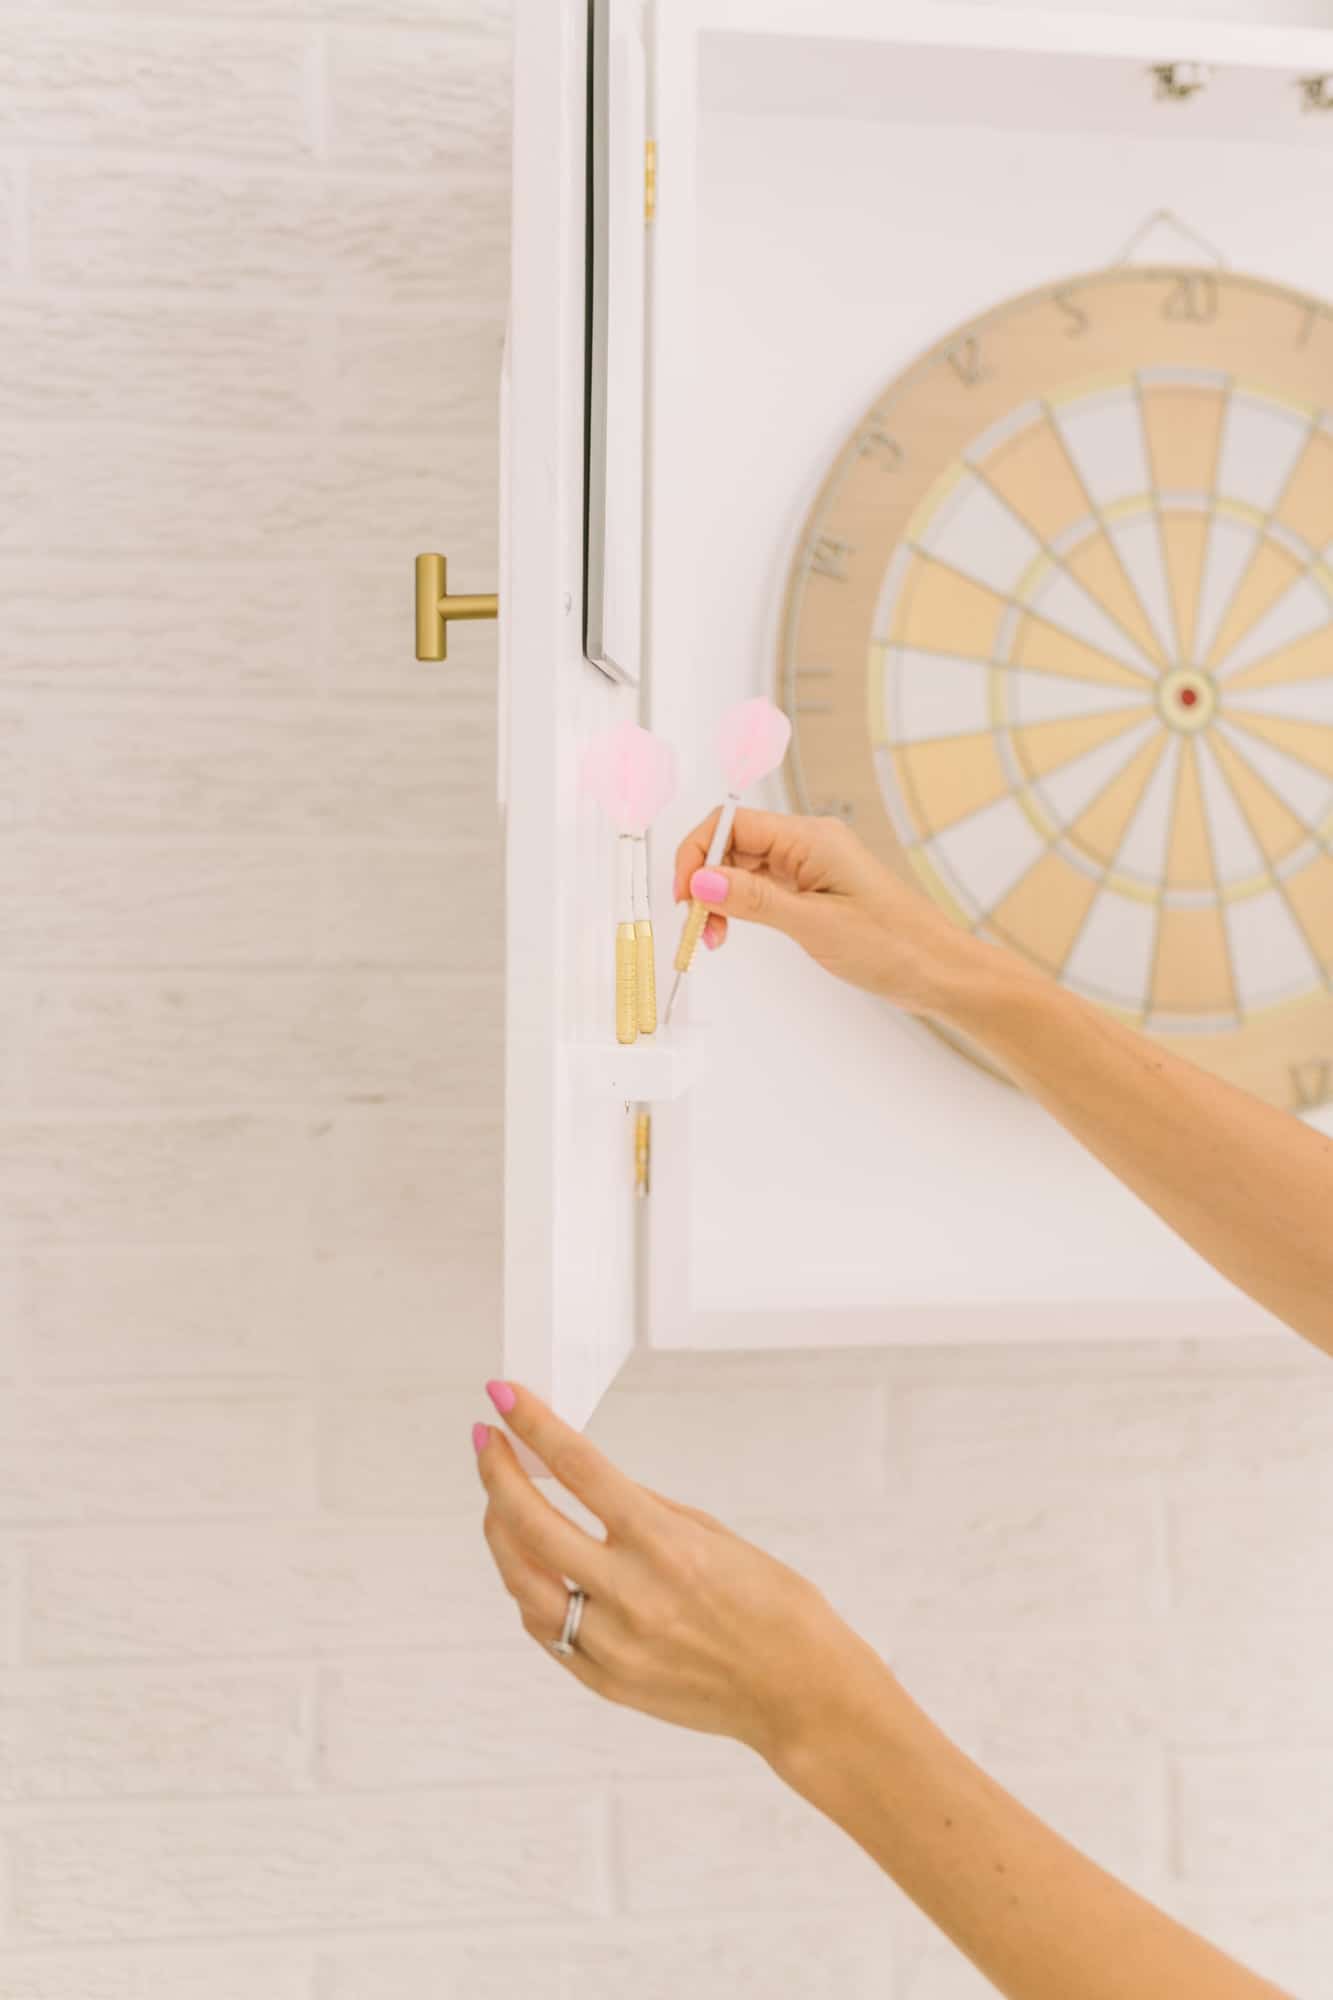
 Add your dartboard to the middle, your white boards and darts to each door and your dart cabinet is ready to use! As an FYI, the bullseye of your dartboard is supposed to hang 5’8″ above the floor, so keep that in mind when you hang your cabinet.

 Wow. I love it! Definitely a much brighter and more modern vibe than most of the cabinets I was looking at, so it really blends into the space and helps it feel integrated rather than stand out. It’s great to have a stylish way to incorporate some games into our outdoor area and we can’t wait to have friends over and break this cabinet in a bit! xo. Laura
P.S. This is the dartboard pictured, FYI, but the one we got has the printed pattern off from the metal divider lines on top. So Todd recommends you go with a board like this if you are a more serious player—haha!
5 Comments
Okay, this is the prettiest dartboard ever! Darts are a huge thing here – this would make such a useful and lovely decoration at home! 😀
Charmaine Ng | Architecture & Lifestyle Blog
http://charmainenyw.com
Another slam dunk! You gals are creative and adorable! Thanks for the inspiration.
This is so cute! Thank you for the inspo, Laura!
where did you get the darts? I’m dying over the polka dots! super cute.
Here’s a link— https://amzn.to/2LCCkAY 🙂