
 I am SO excited to share today’s post with you! Almost seven years ago, we made our first DIY dining room table and have loved it so much through multiple homes and countless paint jobs. It was so well loved.
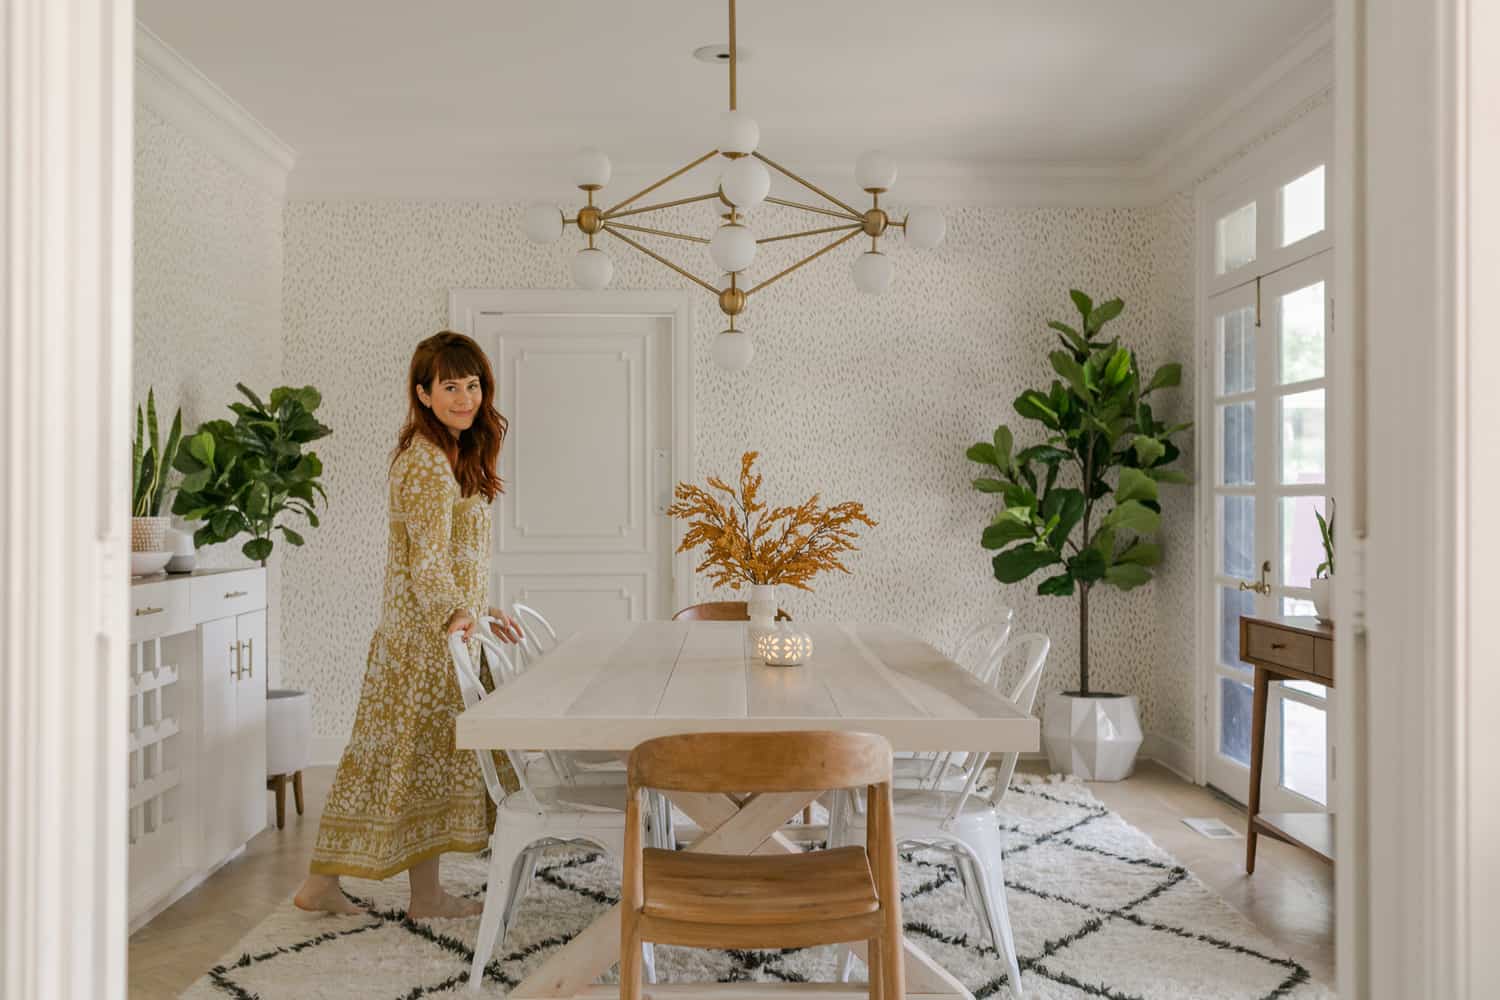
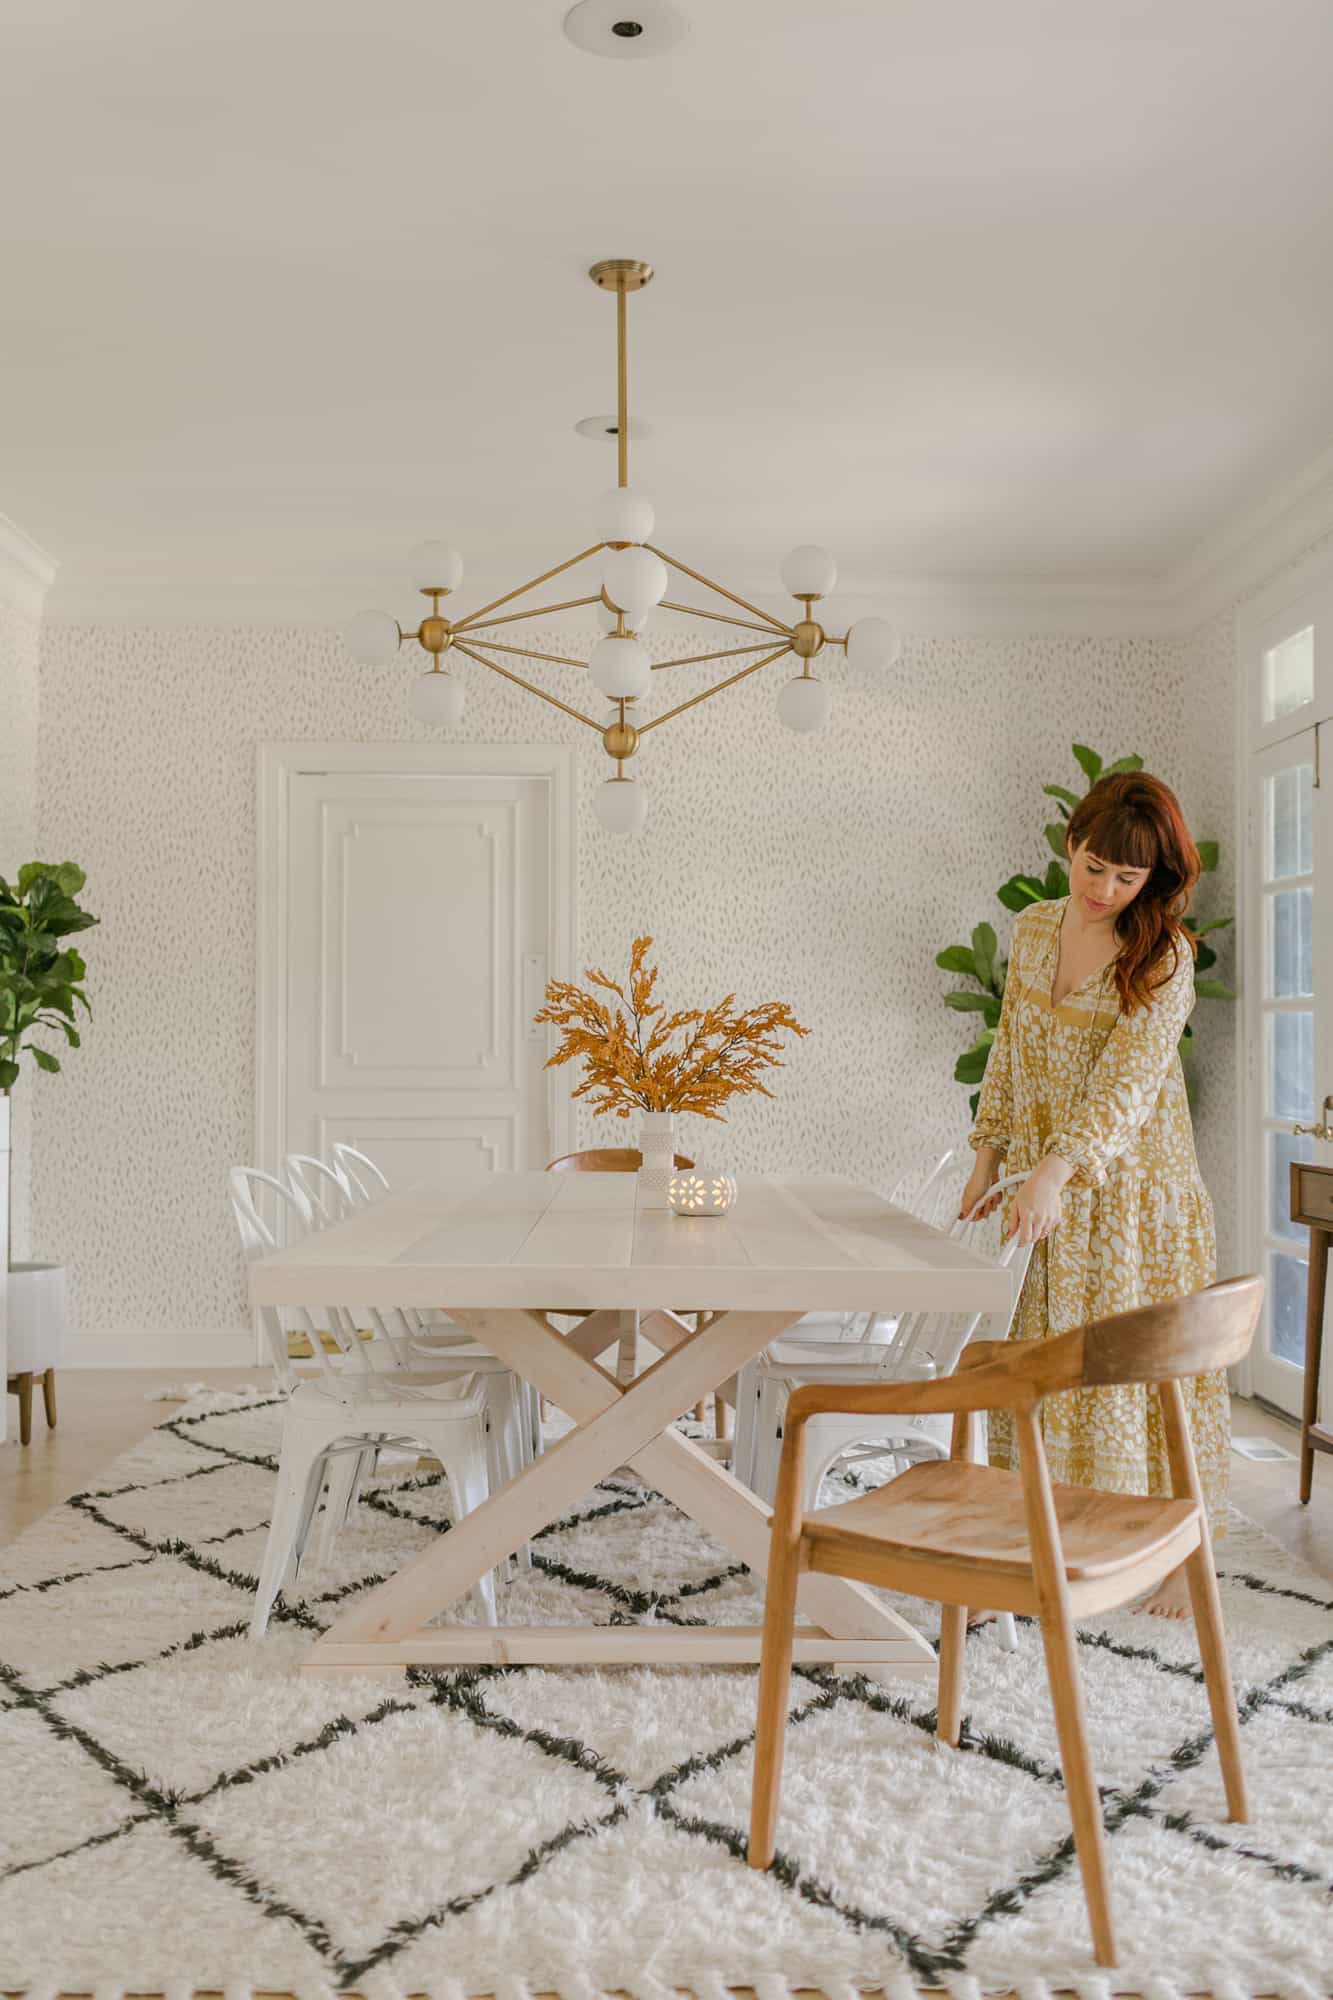
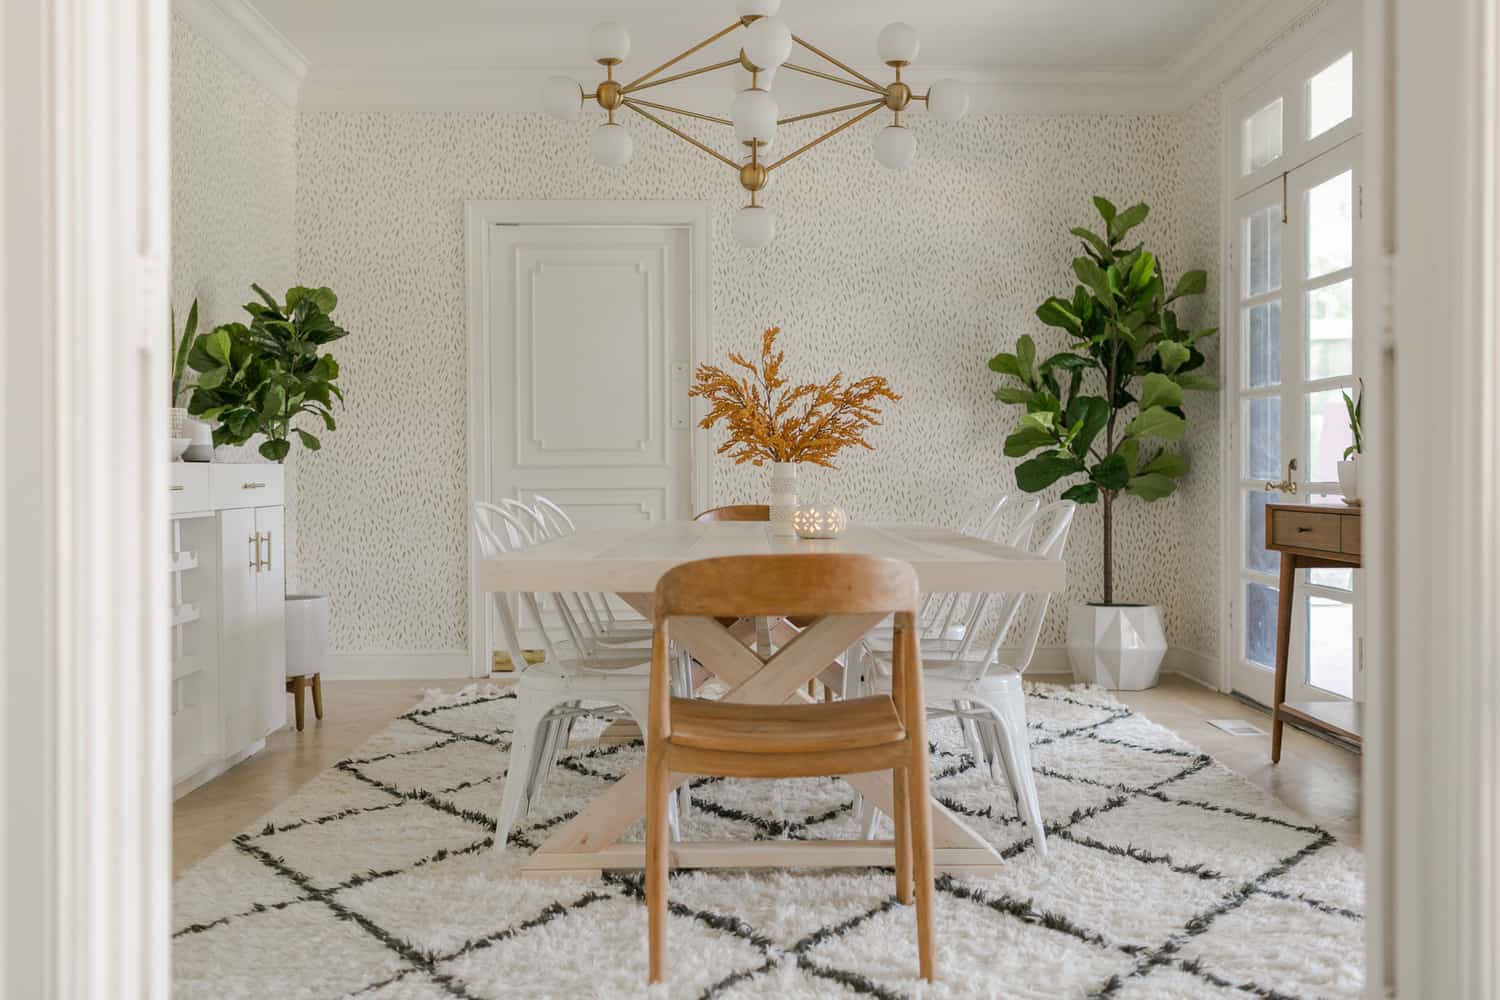
Recently, Collin and I were working on another project, a bench for the holiday house and I loved it SO much. You might remember Collin made a built-in breakfast table in this style a couple years back and it seemed like the right time to take on a more ambitious project: a DIY farmhouse table with whitewash stain.
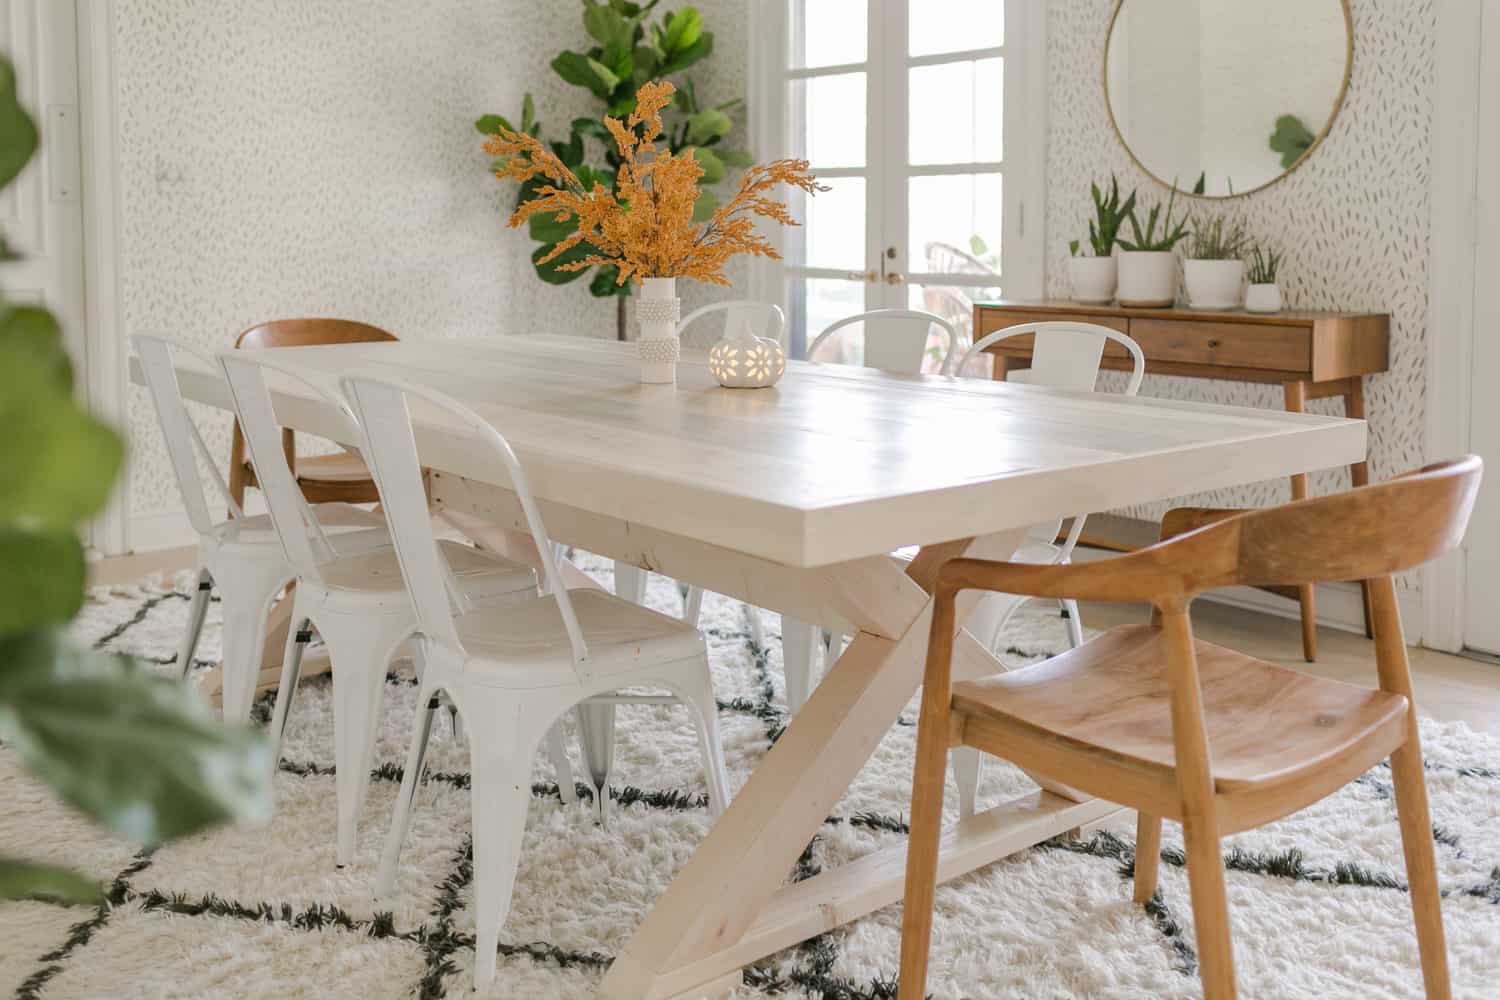 It turned out SO gorgeous. The total cost to build the table was around $250—and it looks so much more expensive. I was thinking of getting some new chairs, but when I saw them with the new table even the chairs looked nicer, so I kept them for now. Let me know if you think they are too casual or just right … I’m curious!
OK, let’s get into the full DIY! I hope some of you use this tutorial to make your own.
Supplies:
-two 4″x4″ x 8′ douglas fir boards (x brace)
-six 2’x4 ‘x 8′ boards
-six 3/4″x 8″ x 8’ poplar boards (table top)
-three 3/4″ x 2.5″ x 8″ poplar boards (table top trim)
-white flat paint
-paint brush
–satin polyurethane
-wood glue
-rubber gloves
-2″ wood screws
-1 3/4″ wood screws
–kreg square drive 1 1/4″ screws
-felt furniture pads (optional)
Tools:
-drill
-miter saw
-nail gun & 1.5″ nail brands
-electric sander & 220 grit sand paper
-400 grit sandpaper
-chisel
-tape measure
-safety glasses
-dust mask
–kreg pocket hole kit
–kreg clamp
Before i start, i just want to say that i used poplar boards for this project because i knew we were going to white wash it and poplar is a lot prettier wood and won’t yellow over time (where as typical pine boards yellow pretty bad after only a few weeks with the white washing style.) Poplar is slightly more expensive than pine, but if you’re going with any sort of natural finish i highly recommend spending the extra money! If you’re going to be staining your table a dark color or painting it, then you can use the same size boards but all in pine to save a few dollars.
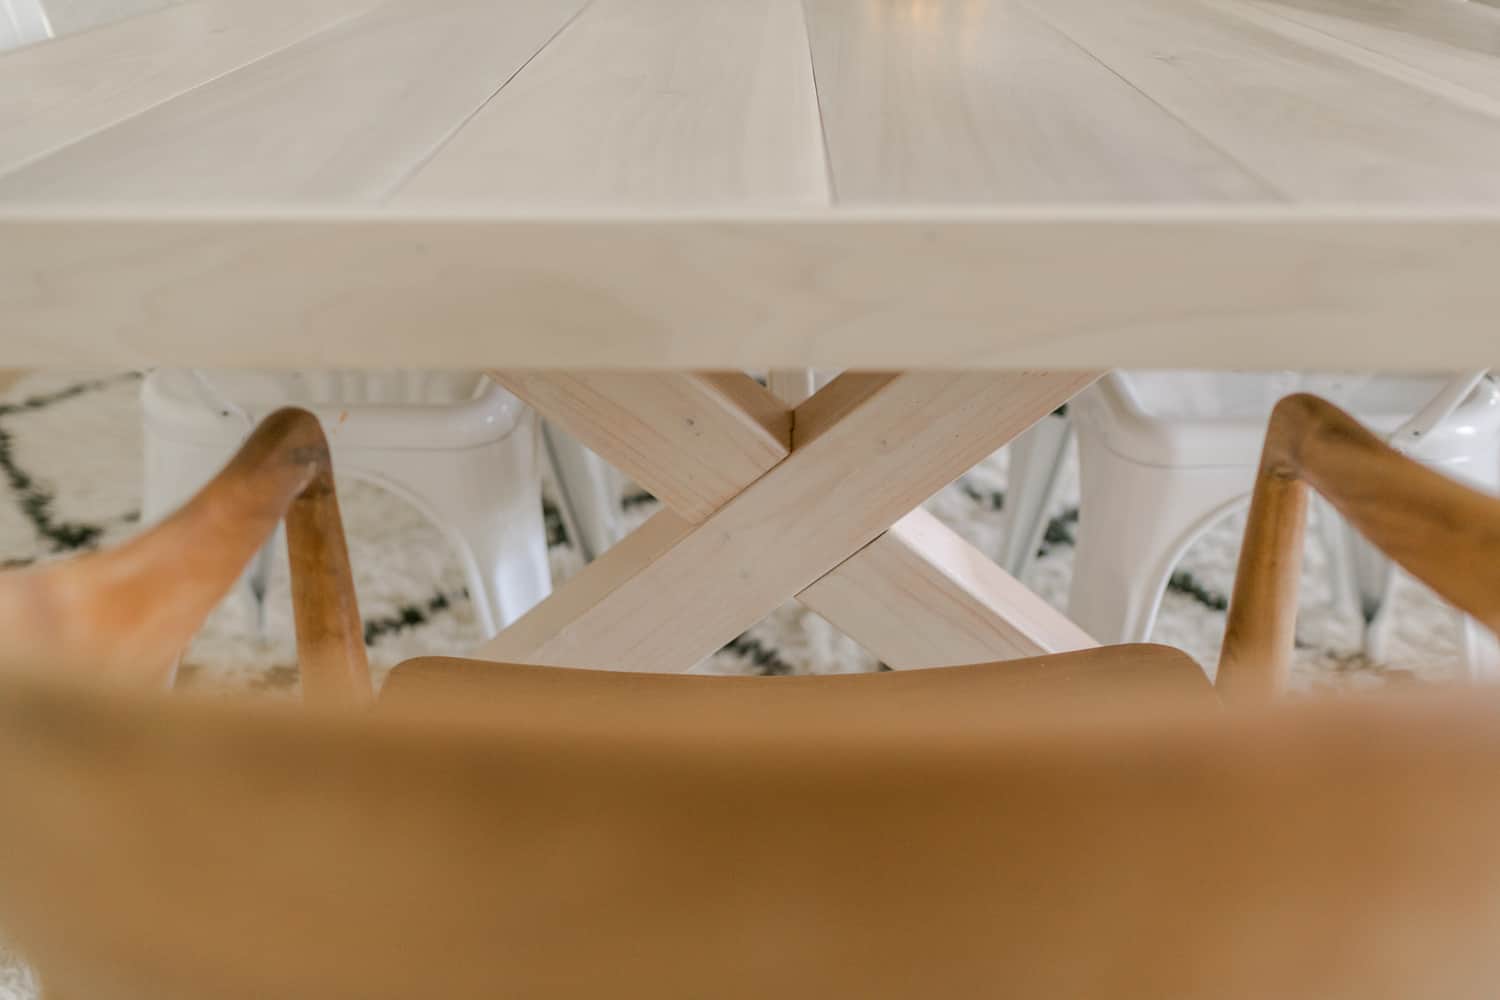
First, you’re going to need to build the base of the table! Start by cutting your 4″x4″x 8′ boards with your miter saw to 40″ with 50° angle cuts on both ends. The boards should be 40″ point to point as shown in the picture below.
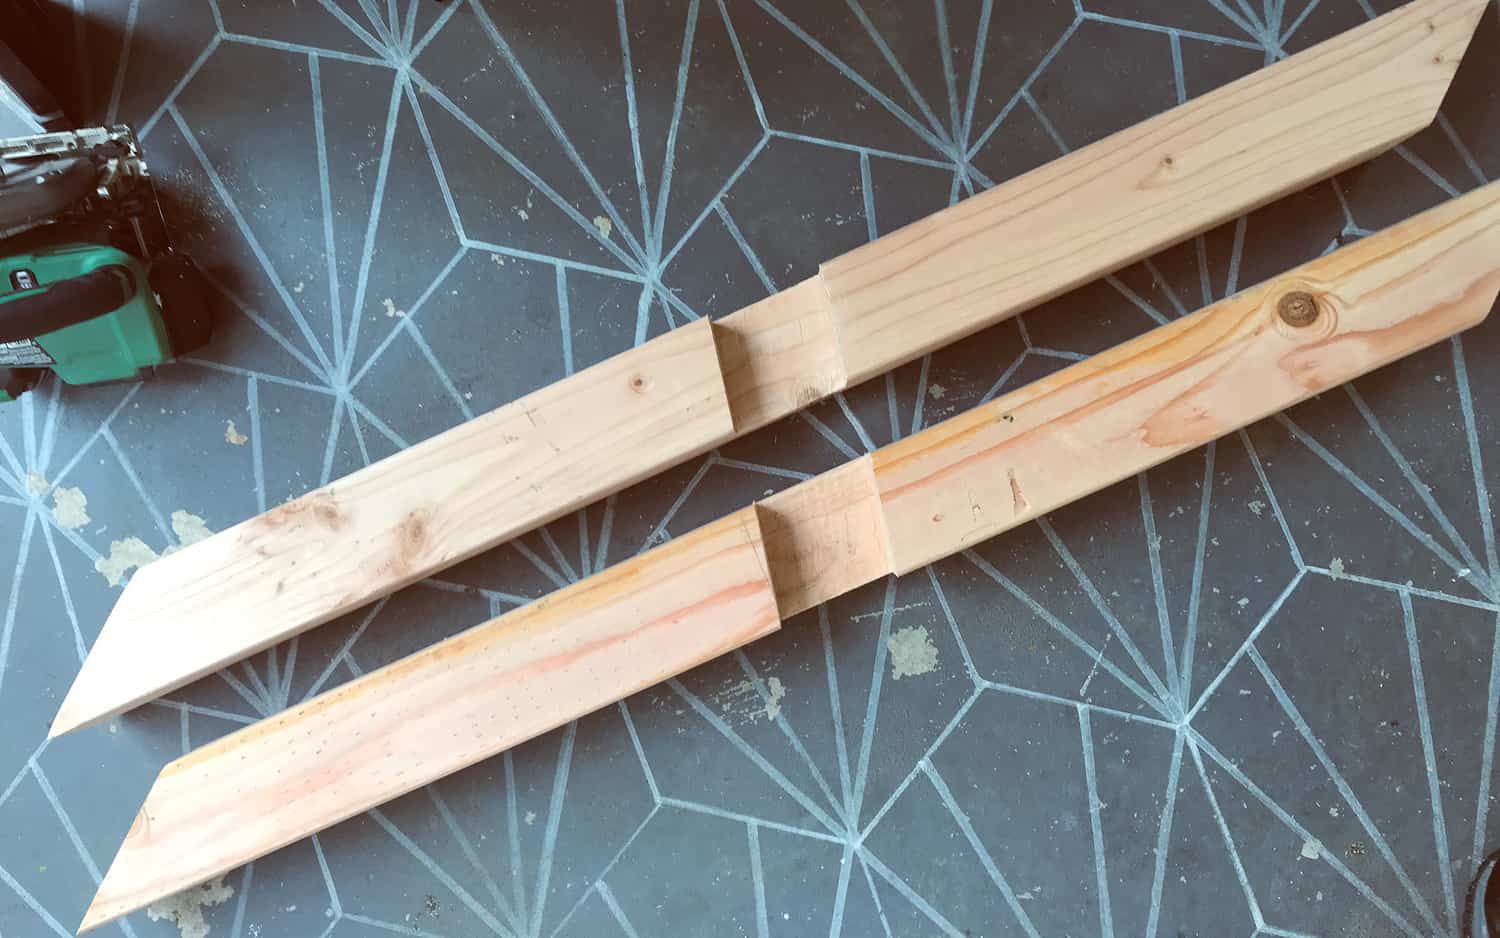 Next, you’re going to need to cut chunks out of the center of the boards so that they interlock into each other and make one x shape. To do this, find the center of each board, which if you’re following this exactly, will be 20″ because our boards are 40″. Once you have the center of the boards marked with a pencil, lay them on the ground, one on top of the other until the middles of each board are lined up perfectly. Double and triple check by measuring that they are perfectly even and then with a pencil trace where the two boards meet together on each board. Always remember to wear your safety glasses and dust mask!
 Next, lay your board on your miter saw and adjust the blade to match the angle you traced on your board. Most miter saws let you adjust the depth to which it will let you cut. If your miter saw has this feature, then set it to exactly half of the 4″ board at 2″ deep and make a bunch of little cuts where you traced. Once you make a bunch of small cuts, you can break the slices of the board out and use a chisel to clean up whatever didn’t break out as shown above. Repeat the process with the other board. If your miter saw doesn’t have the depth adjustment feature, you can mark the 2″ on your board and make the cuts very carefully, making sure you don’t cut past your mark.
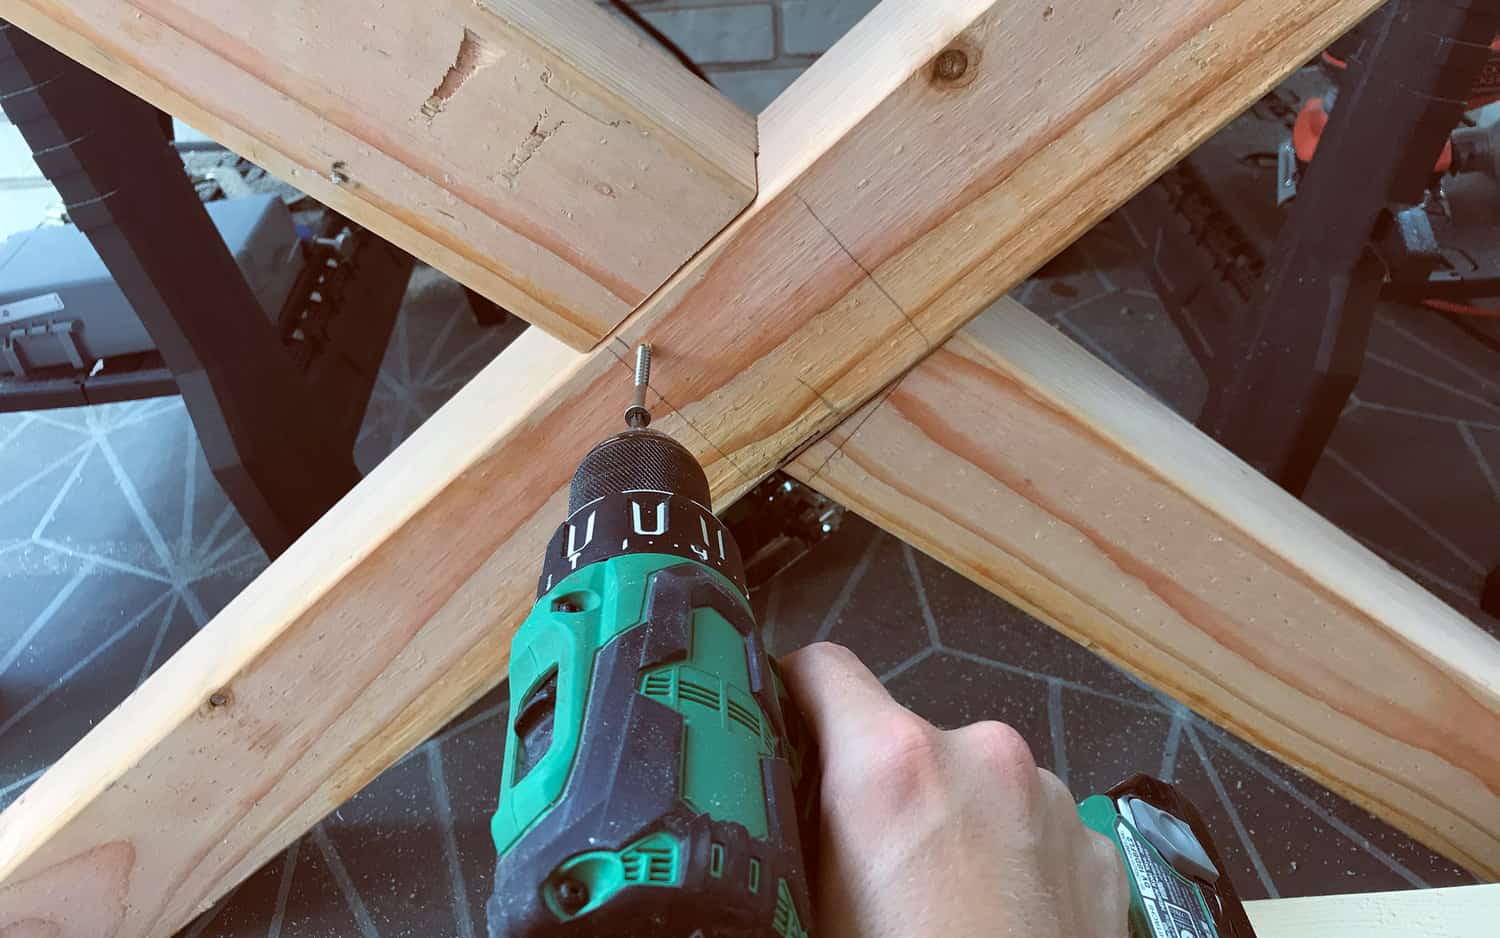 Using wood glue and 2″ wood screws, screw the two pieces together with the screws on the side that will face the inside of the table (you can pick whichever side looks best to face the outside).
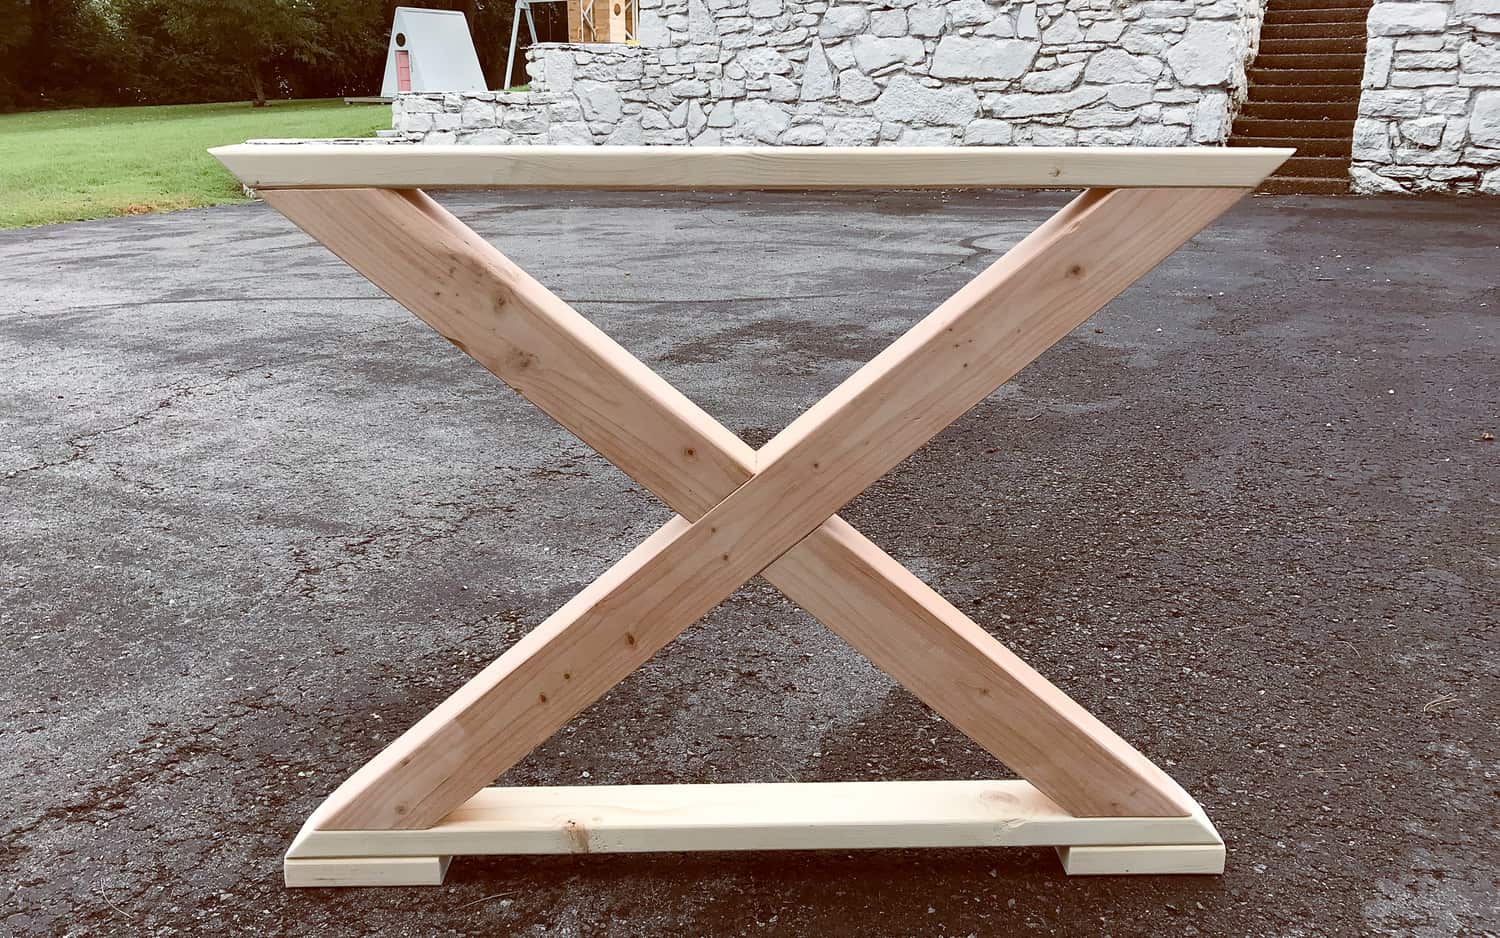 Next, cut two 2″x4″x8′ boards for the top and bottom with the same 50° angle on each as well as two 8″ pieces for the feet. Attach the 2″x4″ pieces you cut to the x brace with glue and wood screws. Repeat this whole process to make the second leg for the table. Take your electric sander with 220 grit sandpaper and give both of your legs a good sanding to smooth them out and make them look nicer because these boards can tend to be kind of rough. You won’t regret this process! it will make your table look a lot more expensive in the end. Definitely don’t forget your safety glasses and dust mask! Whenever i get impatient and forget them i always regret it.
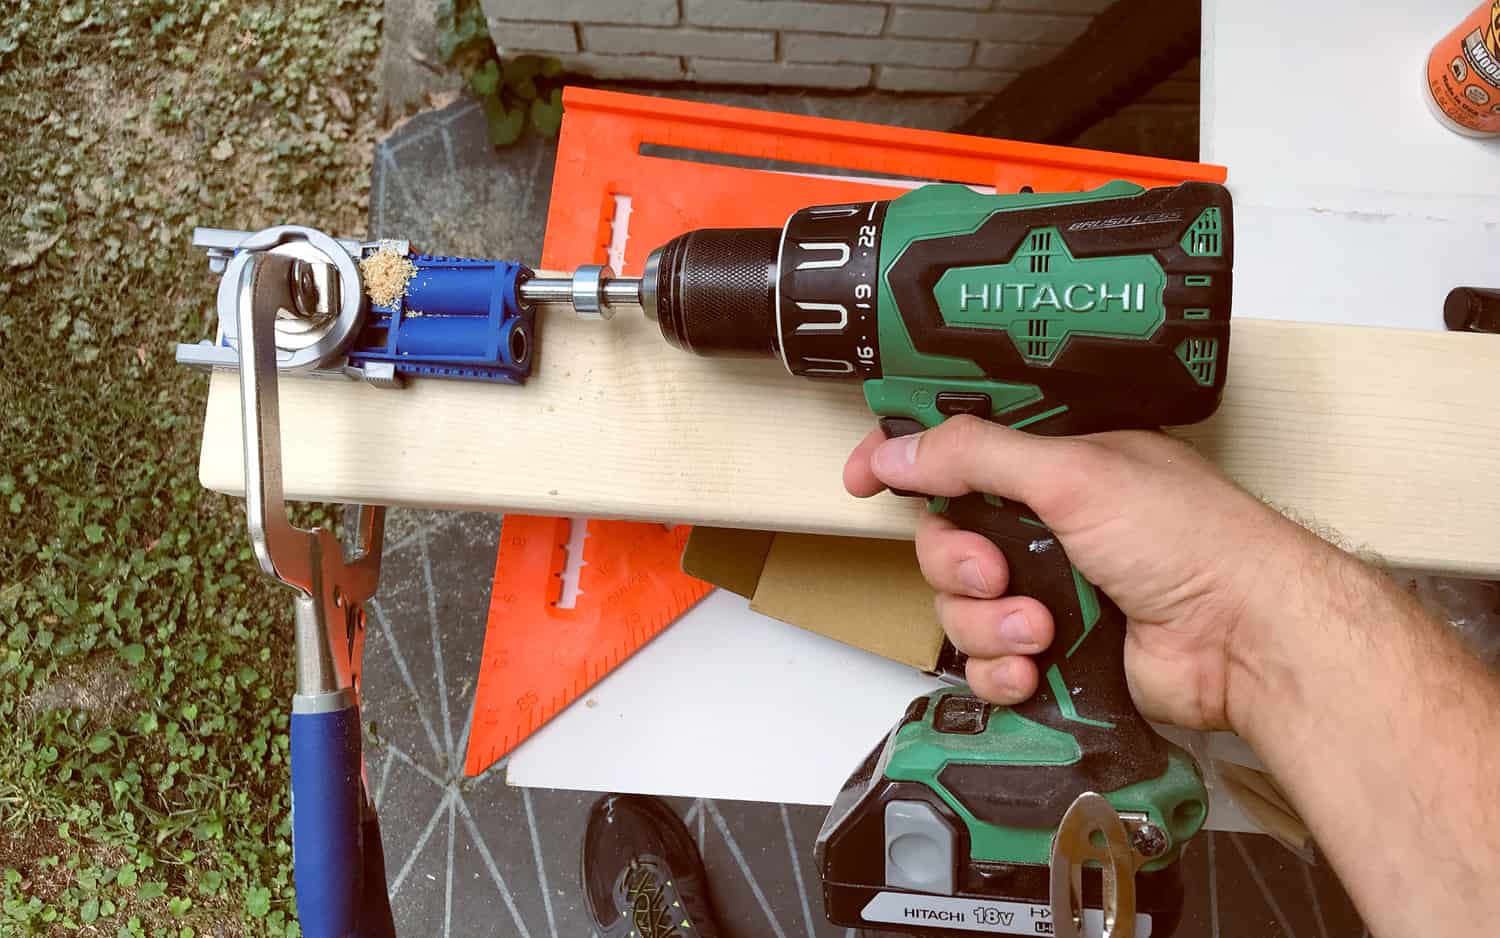 Next, cut three of your 2″x4″x8′ boards down to 5′ and using a kreg pocket hole kit, drill four pocket holes on each side of each 5′ board, two pocket holes per side of each board. In addition, cut three 2.5′ pieces from the same 2’x4′ boards. The 2.5′ pieces do not need pocket holes in them. Sand all of these pieces with your electric sander.
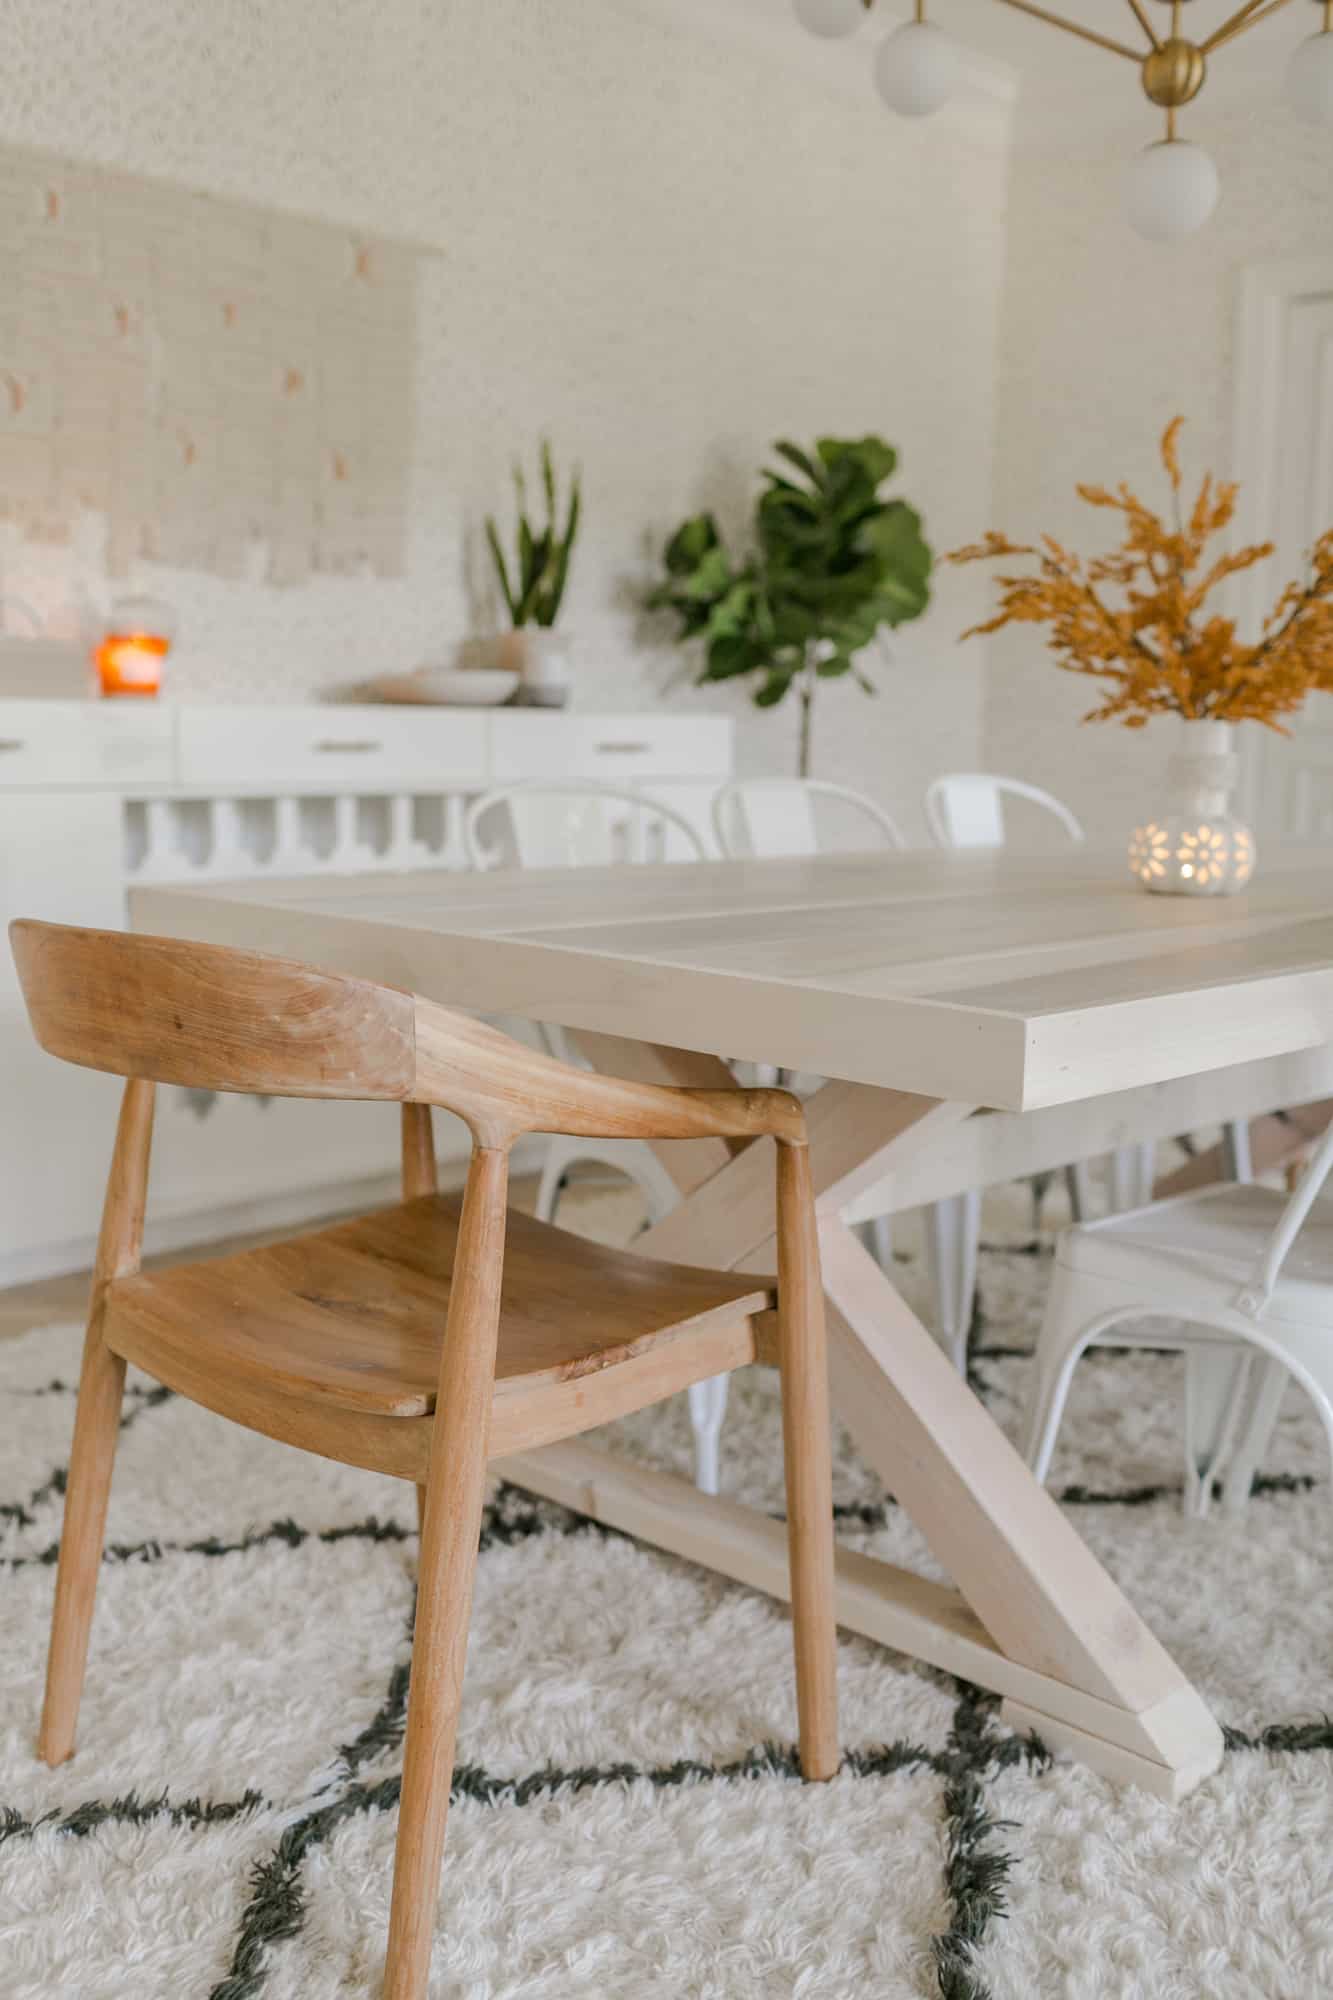
 Attach the three 5′ boards to each leg as shown in the picture above. One attached in the middle of each x and the other two on either side of the top of each leg, 2.5′ apart and flush with the top. Next, attach your smaller 2.5′ boards in between the two top 5′ boards, but attach them horizontally instead of vertically. Screw in each board from the outside 5′ boards into the ends of the smaller 2.5′ boards as shown above. The 2.5′ boards will act as braces for your table top boards. Now the base of the table is done!
 Next, build the table top! Take all six of your 3/4″x 8″x 8″ boards and cut them all down from 96″ to 90″, making sure they are all exactly the same length! Now take a good look at each side of each board and decide which side you will want to be the top of the table and lay each board face down so the top of the table is facing the floor. Cut two 4′ pieces of your 2’x4′ boards and place them on either end of your 6 table top boards and using some wood glue and screws, attach the them to each end. Flip your table top over so the top side is facing upwards.
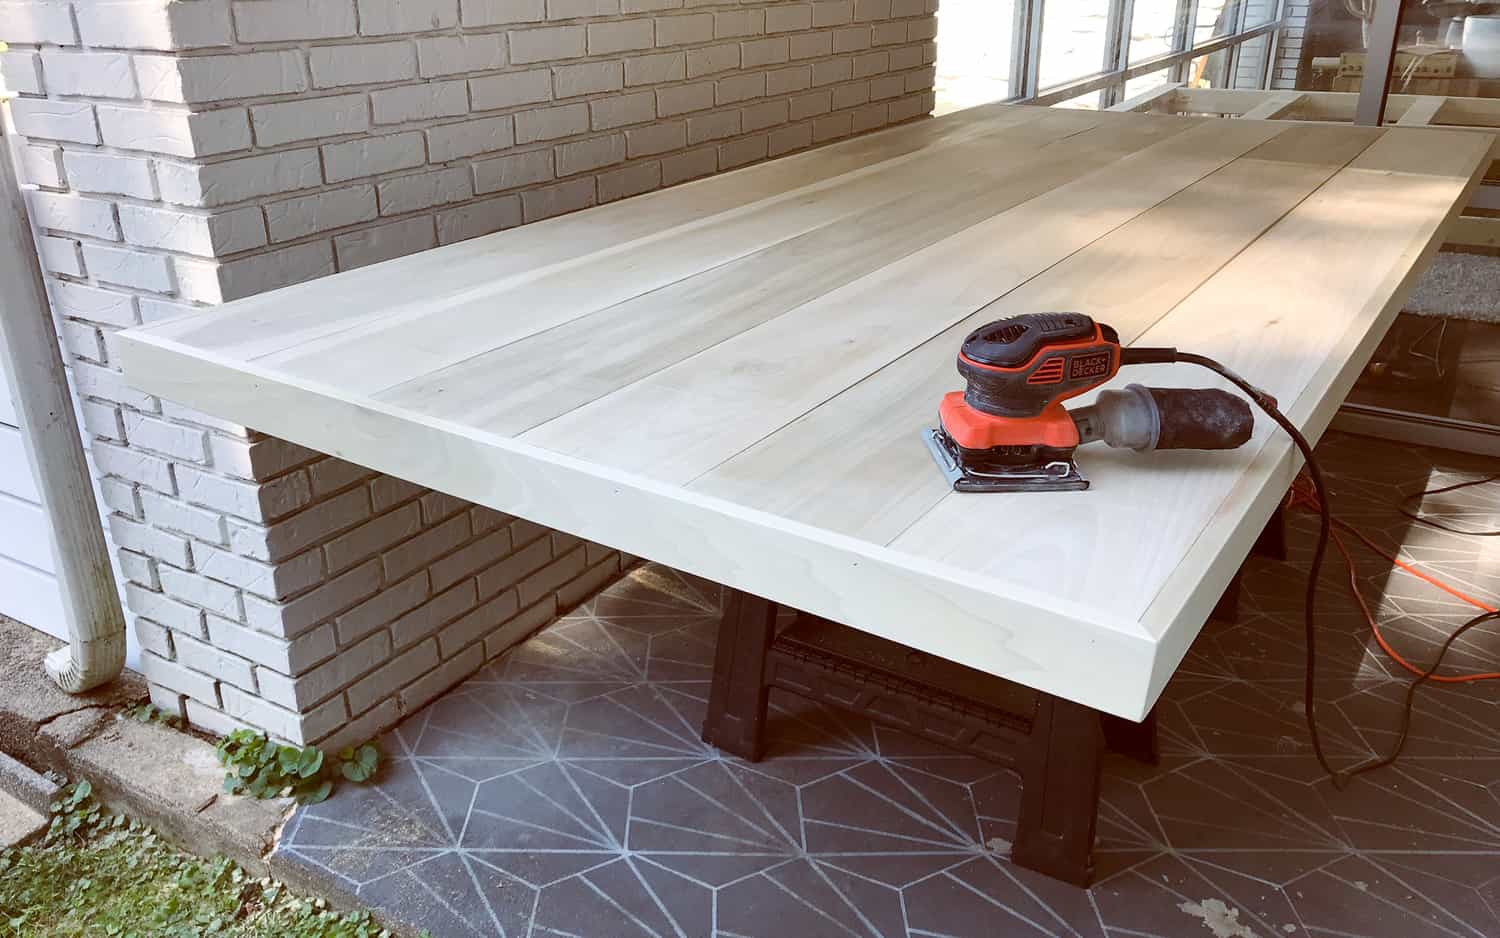 Next, with your miter saw cut two of your three 3/4″x2.5″x 8′ boards to 90″ with 45° angles at each end and attach them to each of the long sides of the table top using wood glue and a nail gun with 1.5″ nail brands. Cut the other 3/4″x 2.5″x 8″ board to two 48″ pieces with 45° cuts and attach them to the ends of the table the same way. Take your electric sander and give the table top a good even sanding, making sure to round the edges slightly so they aren’t so sharp. Place the table top onto the table base and position it so there is an even amount of distance on all sides of the table and screw the table top onto the base by using 1 3/4″ screws and screwing them through the 1.5′ horizontal brace pieces that are a part of the base, up into the table top. It’s important to use the correct length screw because you don’t want them to be too long and come out the top of the table!
 Make a mixture of equal parts white flat paint and water and mix thoroughly and wearing some rubber gloves, take a rag and dip it in your paint and water mixture and rub evenly into the entirety of the table to create a white washed look. Repeat this if the first coat isn’t quite white enough. Once the paint and water mixture is dry, take satin polyurethane and paint it onto the entire table and let dry for the brands recommended time and then do one or two more coats on the table top just to give it a the maximum chance of avoiding staining from the inevitable spilled glass of wine. Once completely dry, take your 400 grit sandpaper and by hand, lightly sand the whole table to smooth out the rough polyurethane. This will give your table a perfectly smooth finish that feels very expensive! if your table is going to be on hardwood or tile and not carpet or a rug, put some felt furniture pads on the bottom of the feet. That’s it, your table is done!
 If you use our DIY to build a table, we’d LOVE TO see it! Please tag us in a photo on Instagram! This is a large project, but it’s well worth it for the huge savings and chance to customize it with your perfect stain color.
Sources: Mirror/Rejuvenation, White Chairs/Amazon, Teak Wood Chair/Lulu & Georgia,Wallpaper/Juju Papers, Console Table/West Elm.
xx! Elsie + Collin
16 Comments
You girls are crazy pros! Love, love, love the table – don’t think I’d be able to handle the DIY myself, though! ❤️✨
Charmaine Ng | Architecture & Lifestyle Blog
http://charmainenyw.com
Beautiful job! I LOVE how it turned out!
I see the chairs two ways:
1. The white chairs seem to “disappear “ given the scale of the table and the two end chairs. Which if that’s what you’re going for, it totally works.
2. However, a whole table of chairs similar to your wooden chairs would be stunning in my opinion and make the table stand out more because of the contrast.
Either way, I may be making a farm house table soon. 😉
I like the white metal chairs, but feel that the darker wood chairs at either end clash with the white wash. Lovely table!
Love the wood chairs, who makes them, where are they from?
Great job on the table!
Hi Chris! Here’s a link- https://tinyurl.com/y3lnbzdc
YES! Where are the wooden end chairs found??? 😀
Lulu & Georgia 🙂 https://tinyurl.com/y3lnbzdc
What a gorgeous table!!! You guys have the best DIYs!! I’ve already done two-the wood plank ceiling and just did Laura’s mid century trellis this weekend. I may have to make this one #3! I agree with Chari’s comment above. I love the contrast of the brown chairs with the whitewashed table! I currently have the opposite situation going on in my dining room: dark table with off-white chairs and I love the contrast. 🙂
I LOVE the chairs!!! You could use SO many combinations with the white wash, very smart! The white chairs with the wood tie in really nicely to your style and the rest of the house! Looks SO good!
My husband made me a farmhouse table for our 5 year anniversary! It is about 7 years old now and still SO perfect! ????????????????????????
Great DIY! U guys ROCK!
So gorgeous! This has inspired me to do a DIY table for our house!
Great project!
I love the rug! Mind sharing where it’s from?
It’s from Rugs USA (https://rstyle.me/+JSvJVovyj-NvPApNPKqunA) 🙂
I love the wooden chair with the white table the most! Great DIY – would love to try.
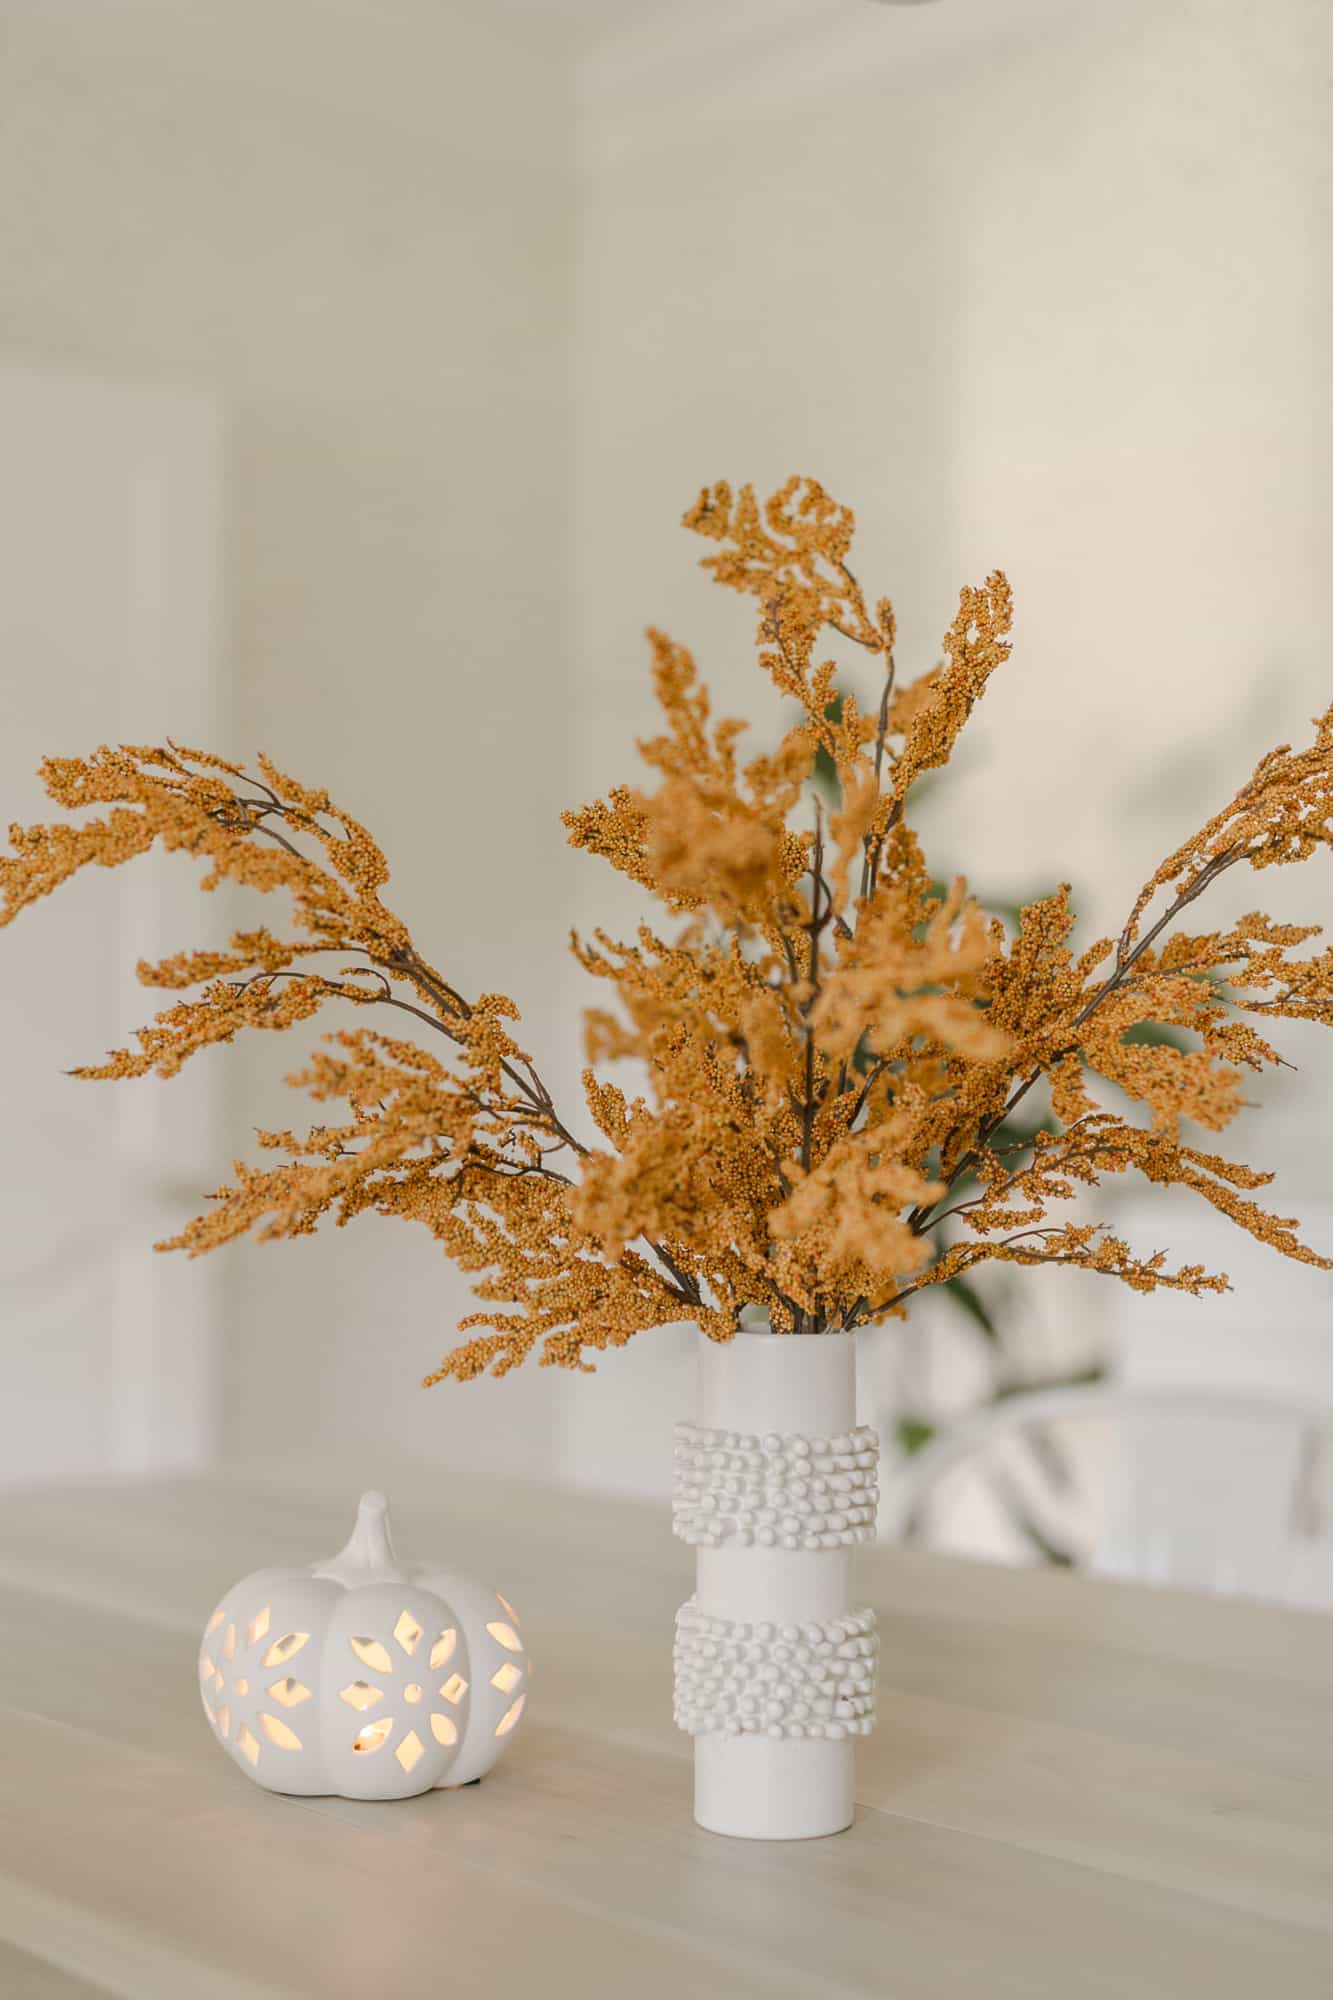
Hi! Where is the white vase from?
THX!!!
Question of the day: Does it really count as “DIY” if some guy named Collin is making all your projects for you?
Hi Rhea,
Short answer- YES. It counts.
Long answer- I feel proud, and zero shame to work, employ and collaborate with people who have talents and strengths that I don’t have. In twelve years of owning businesses one of the most important lessons I have learned is that it doesn’t work for me to try to do everything by myself.
Collin is amazing. I am so grateful to have him on our team! Zero shame- TONS of pride!