 There comes a day in the life of every mom when the crib can no longer contain their child and one must choose whether to track down that conversion piece that came with their crib, dive straight in and buy a twin-sized bed, or go the toddler bed route. If you’re working with a small or shared room, space is likely a hot commodity, so a twin might not make sense yet, and how many of you remember where you put that extra piece to your crib when you bought it two years ago. Mom brain is a thing! If the toddler bed is the best option, why not make one that fits well within all of your mid-century, Scandinavian design dreams.
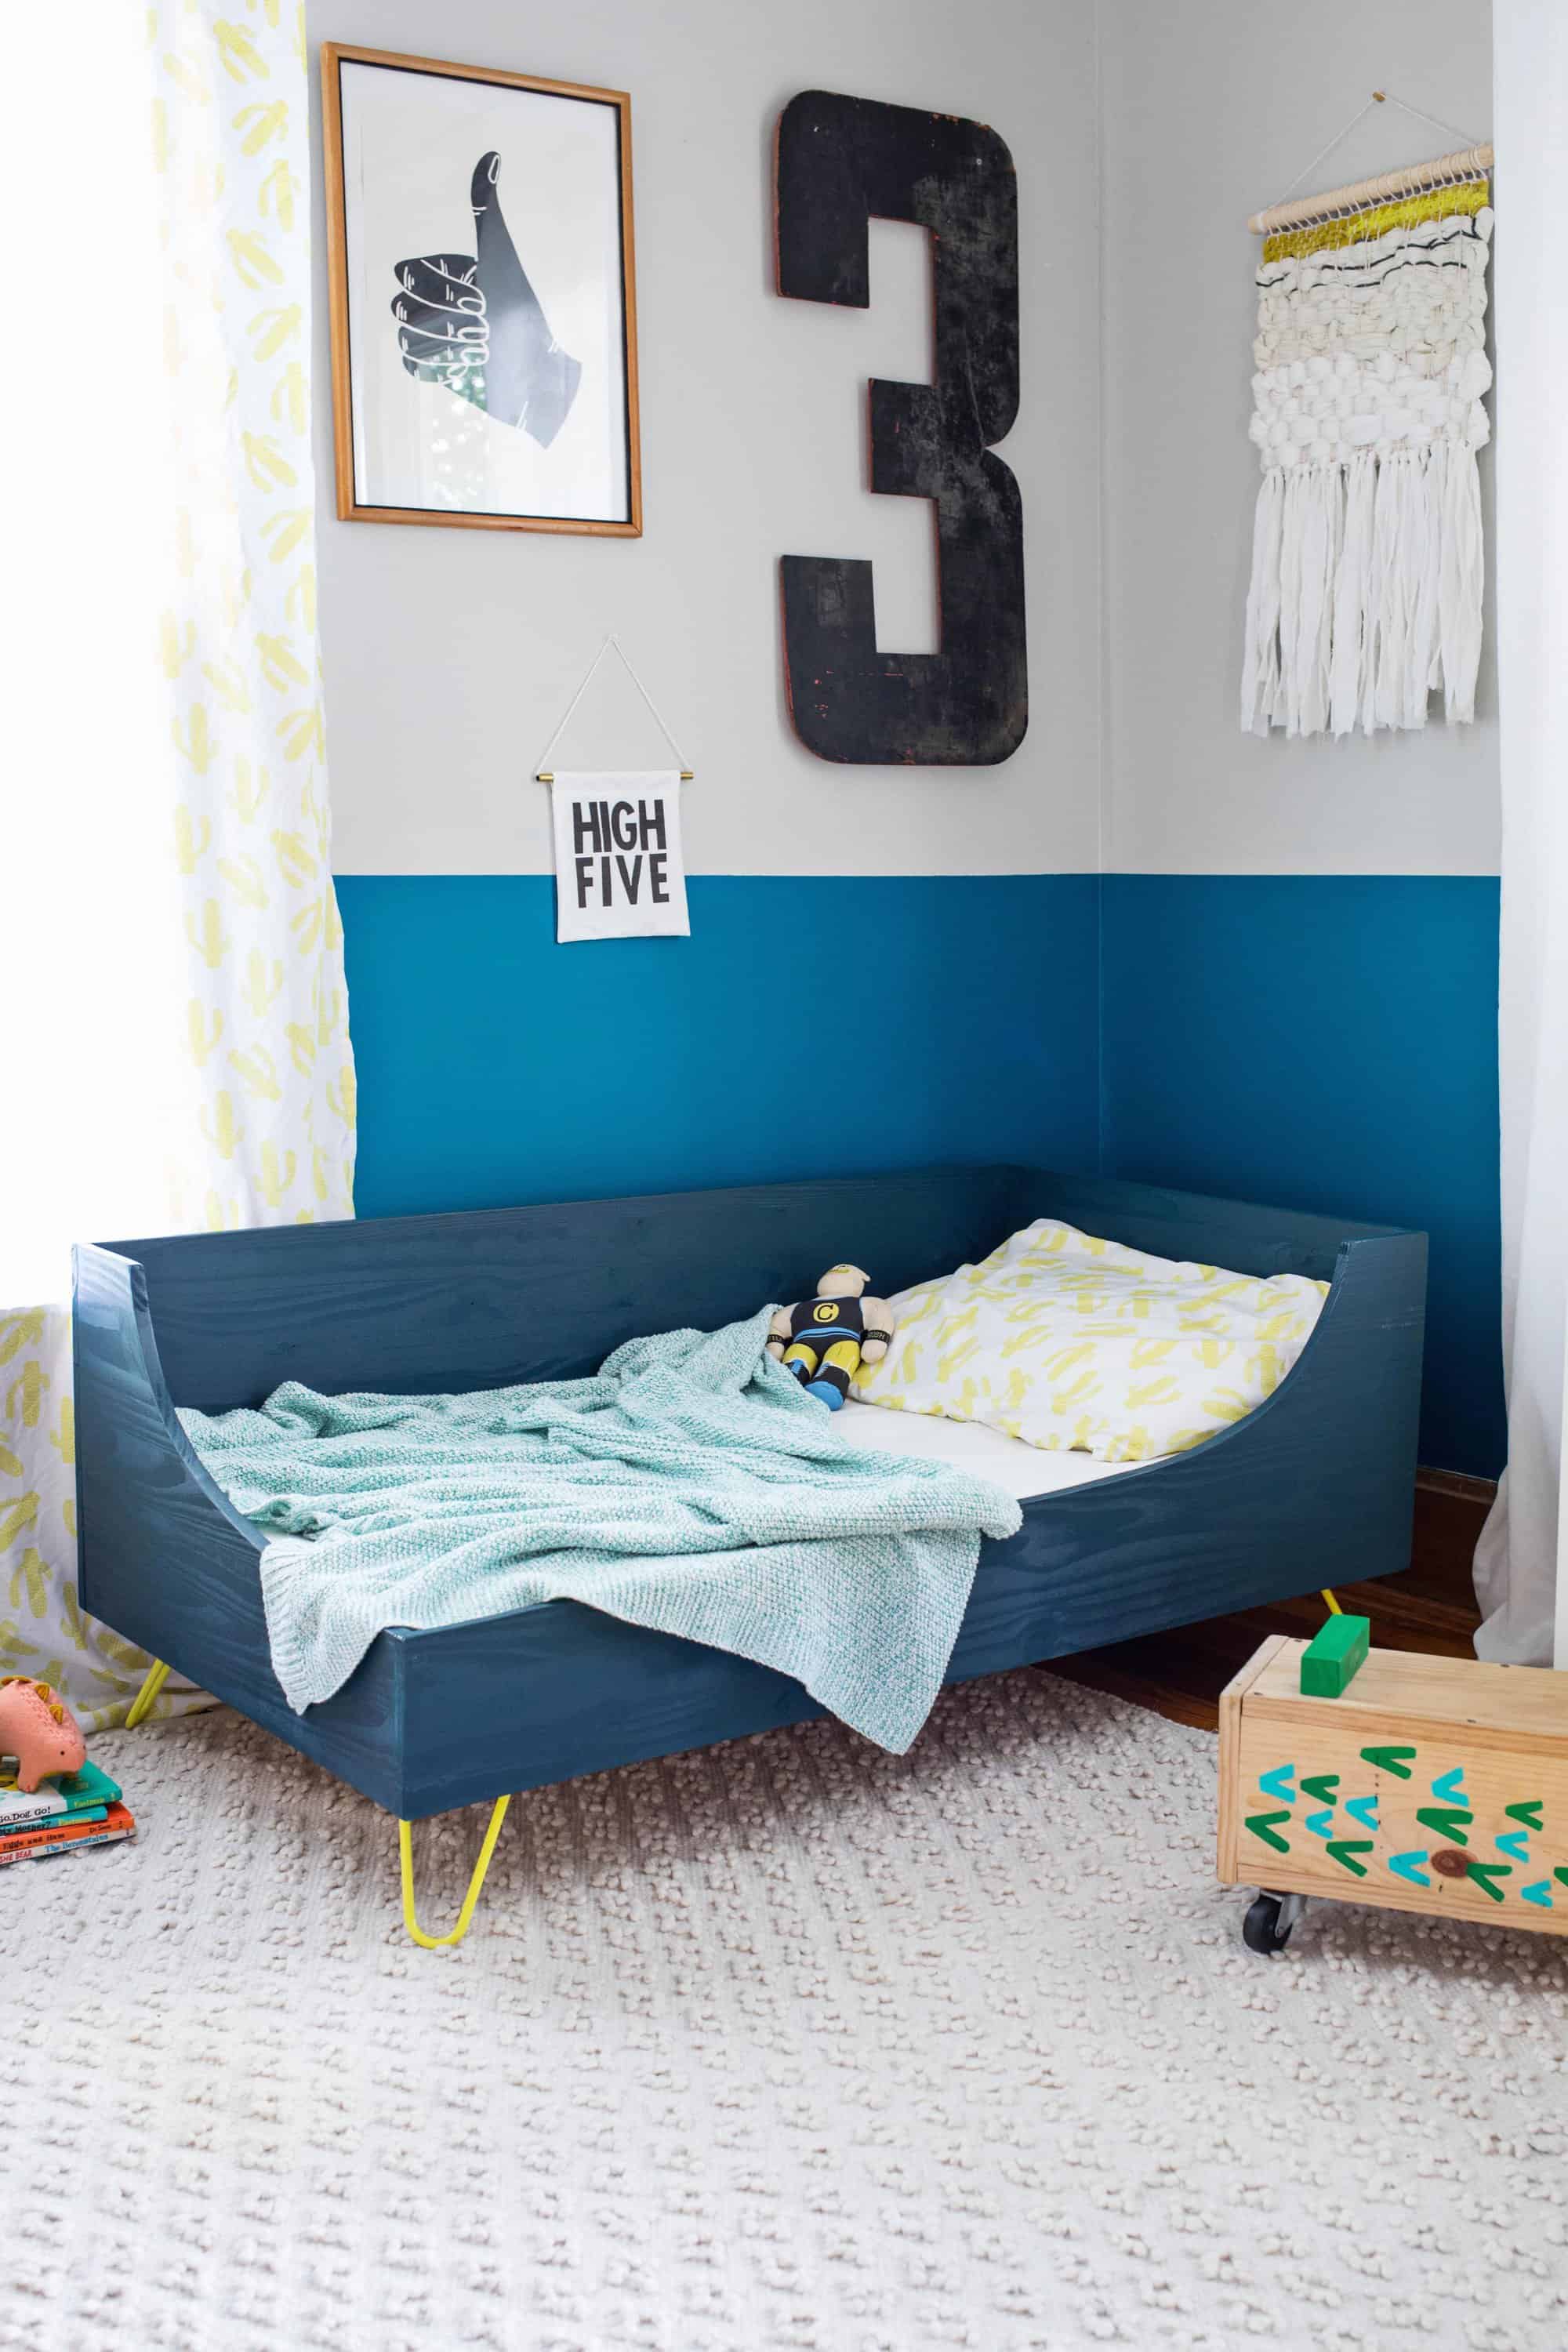
There are some dandy little toddler beds on the market these days, but I had my eye on a specific bed from The Land of Nod that I’d found on Pinterest last year. However, when I went to track it down this spring, it was no longer available! Nooooo!! I decided to try my hand at making something with a similar silhouette up top but with hairpin legs instead of the tapered wooden ones from the original design. It meant using a jigsaw for the first time, but it was more than worth it. My son’s new bed is so solid! We gifted his crib to an expecting friend and gave this whole corner a little makeover. Once he’s outgrown this bed, I plan on reusing the same hairpin legs to build him a twin-sized platform bed and possibly using the wooden frame and mattress as a dog bed. Can you tell we’re all about repurposing over here? Ha!

 Supplies:
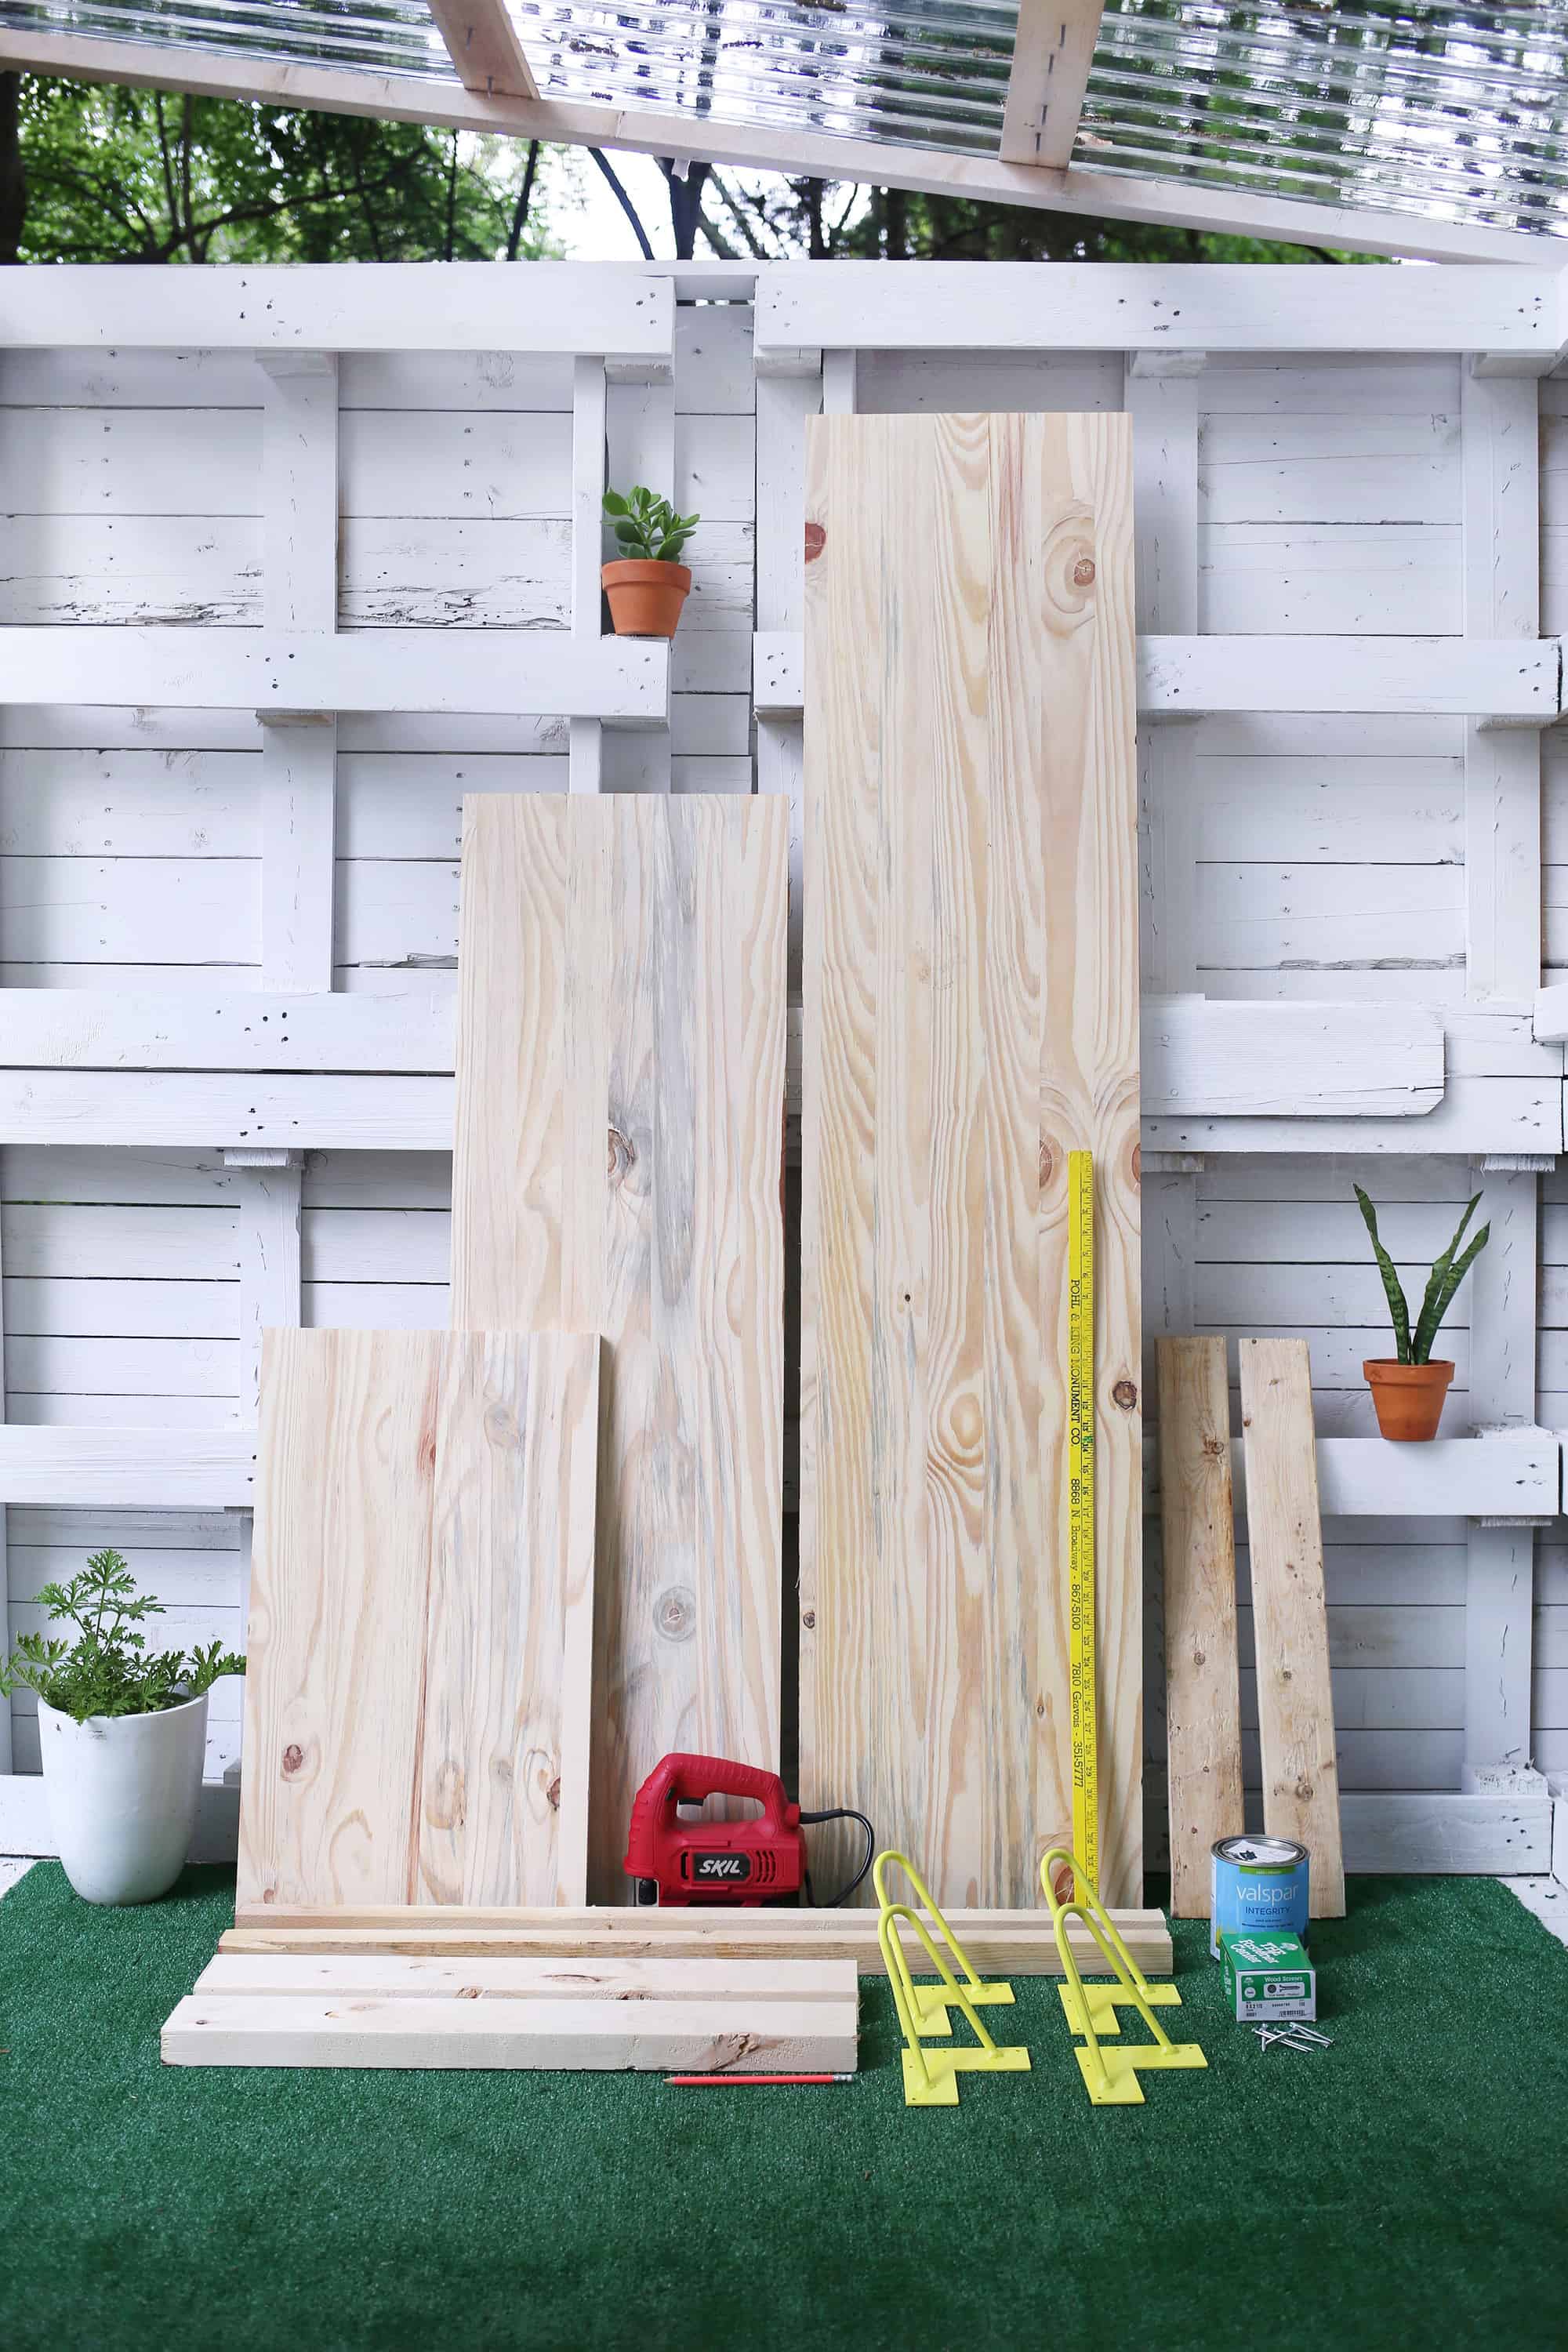
-one 1″ x 16″ x 6′ paint grade panel (found at Lowe’s)
-one 1″ x 16″ x 8′ paint grade panel (found at Lowe’s)
-one 2″ x 2″ x 8′ common pine board for side slat support
-one 2″ x 6″ x 8′ common pine board for frame support
-four 1″ x 3″ x 8′ common pine boards for bed slats (I used Ikea bed slats instead)
–four 6″ powder coated hairpin legs
-sixteen #8×3/4″ screws for legs
-power drill
-power sander or sand paper with 120 and 80 grit paper
-wood putty
-one quart of paint
-paint brush or small roller brush
-jigsaw
-jigsaw blade for cutting curves
-protective eye wear
-clamps
Cut List:
-cut the 1″ x 16″ x 8′ board down so that you have one piece that measures 27.5″ and one piece that measures 53.5″ long. You’ll have a scrap piece leftover.
-cut the 2″ x 6″ x 8′ board so you have two pieces that are 27.5″ each.
-cut your 2″ x 2″ x 8′ board in half
-cut your four 1″ x 3″ x 8′ boards into 27.5″ lengths for a total of 12 pieces.
This bed frame fits a standard crib mattress.
 The two pieces you cut from the 1″ x 16″ x 8′ board will make up two sides of your bed. One measures 27.5″ long and the other measures 53.5″ long. You won’t cut these.
Use the shorter one as a template and place it on top of your board that is 1″ x 16″ x 6′ long so that it is flush with one end. Make a faint pencil mark on top of the long board, and then set the short board aside.
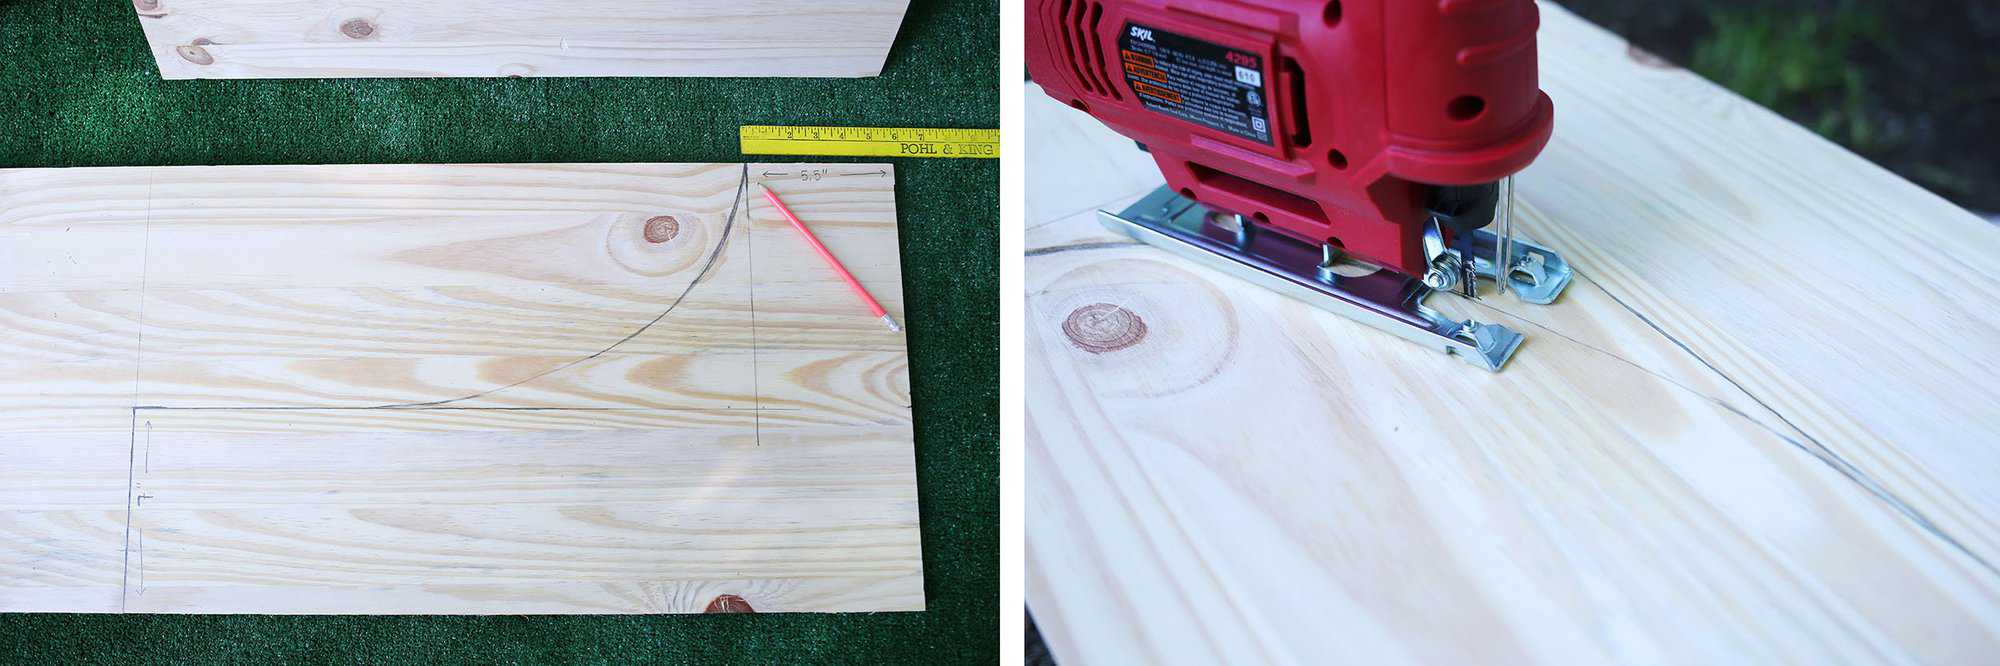 From the place you just marked, measure 7″ in from one edge as shown and use your yardstick to draw a dark line. Then measure 5.5″ from the top right corner of the board. This is where you’ll want to start your curve. It helped me to mark a right angle at the 7″ mark and draw a faint line all the way to the short end of the board and then mark a right angle at the 5.5″ mark and draw a faint line straight down to the bottom so that those two lines formed their own right angle. This just gave me a better framework for what kind of curve I wanted to freehand on my board. I lightly drew a few curves until I was happy and then drew a darker line over the correct one. It reminds me of the curve of a skateboard ramp.
Then clamp your 6′ board to a table top or saw horses and use your jigsaw to cut along the dark lines. Go slowly along the curve and be sure to wear protective eye gear. This is your third side of the bed.
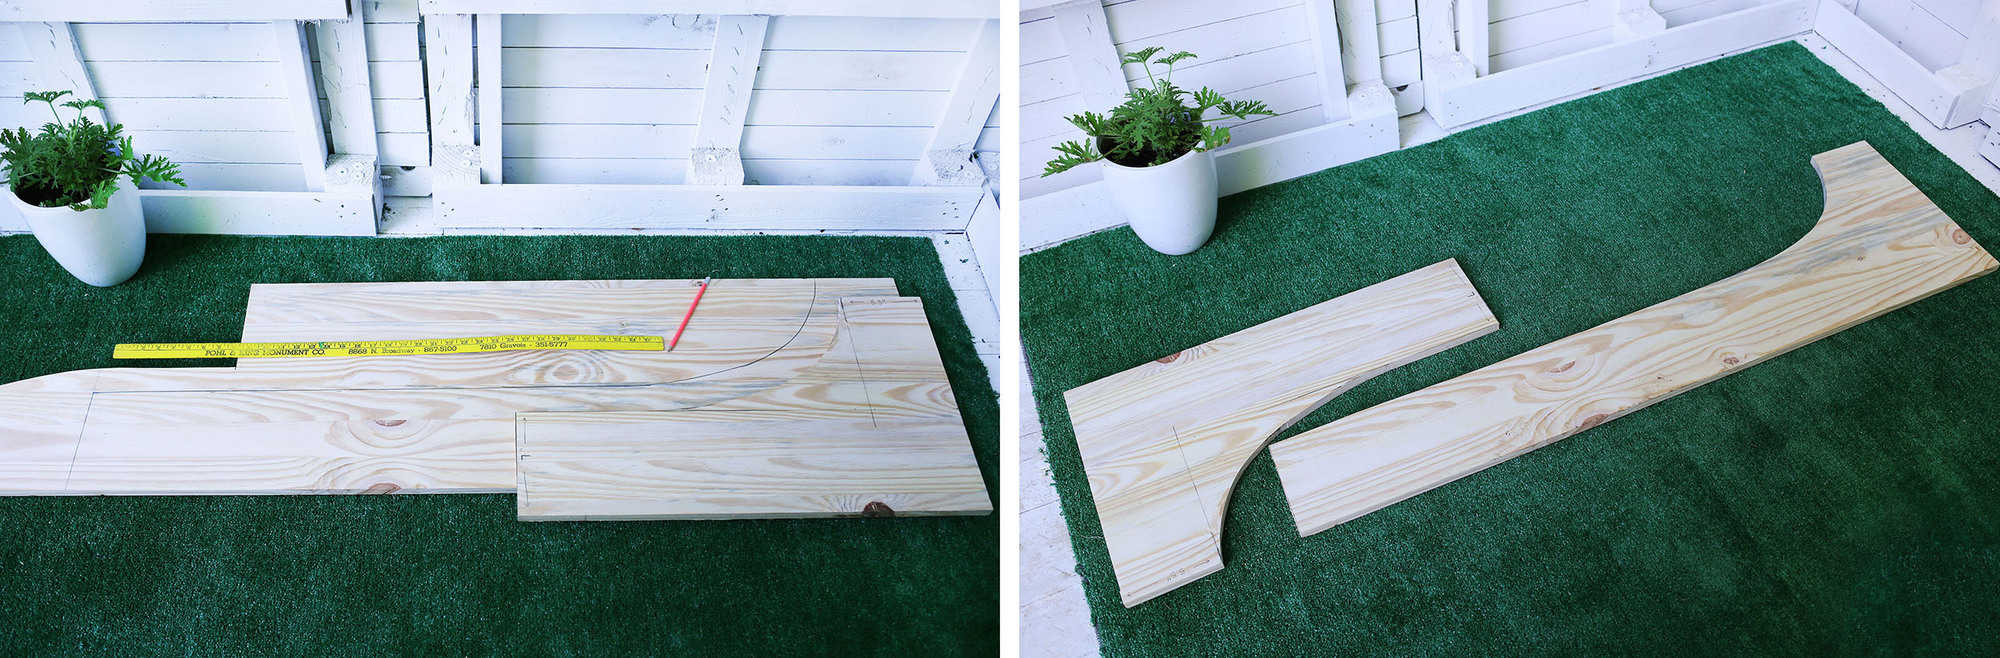 Measure up 53.5″ from the other end of the 6′ board you just cut from. Make a right angle and measure up 7″. Use the curved board that you cut out (the third side) as your template to mark your curve on this longer cut of wood. Line up the 5.5″ side of the cut piece of wood with the appropriate top corner of the 6″ board and then trace your angle. Extend the line of that angle so that it meets up with your 7″ mark. Darken your cut line and then cut it out with the jigsaw as well.
These are the third and fourth sides of your bed as they would have been cut from your 6′ board for reference.
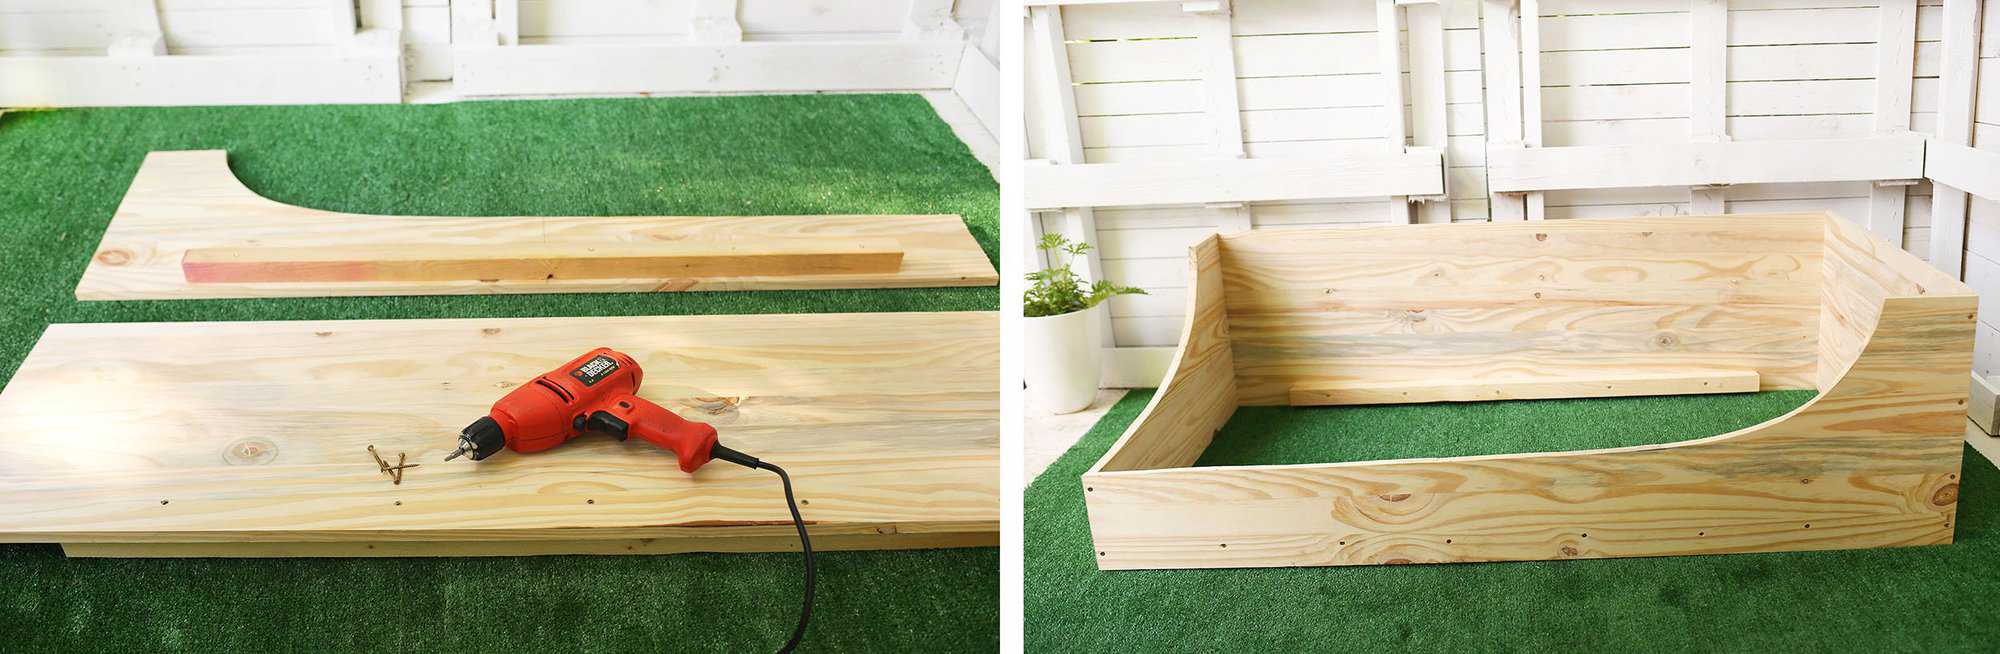 Decide which corner you want the low curve of your bed to be in and attach your 2″ x 2″ x 4′ length to the opposite side. Mine were cut to 36″ lengths so they appear a bit shorter, but never mind that. Place it about 2″ up from the bottom of your long side. Repeat on the other 53.5″ cut of wood. Clamp them in place, and then screw them together in five places from the right side of your board. You’ll be able to fill the screw holes with putty and paint over them later, but this provides a stronger hold than screwing from the inside.
Attach the long boards to the short boards so that your short boards are inset. Screw in two places in the low corner and in three places in the other corners. Check that your angles are square each time.
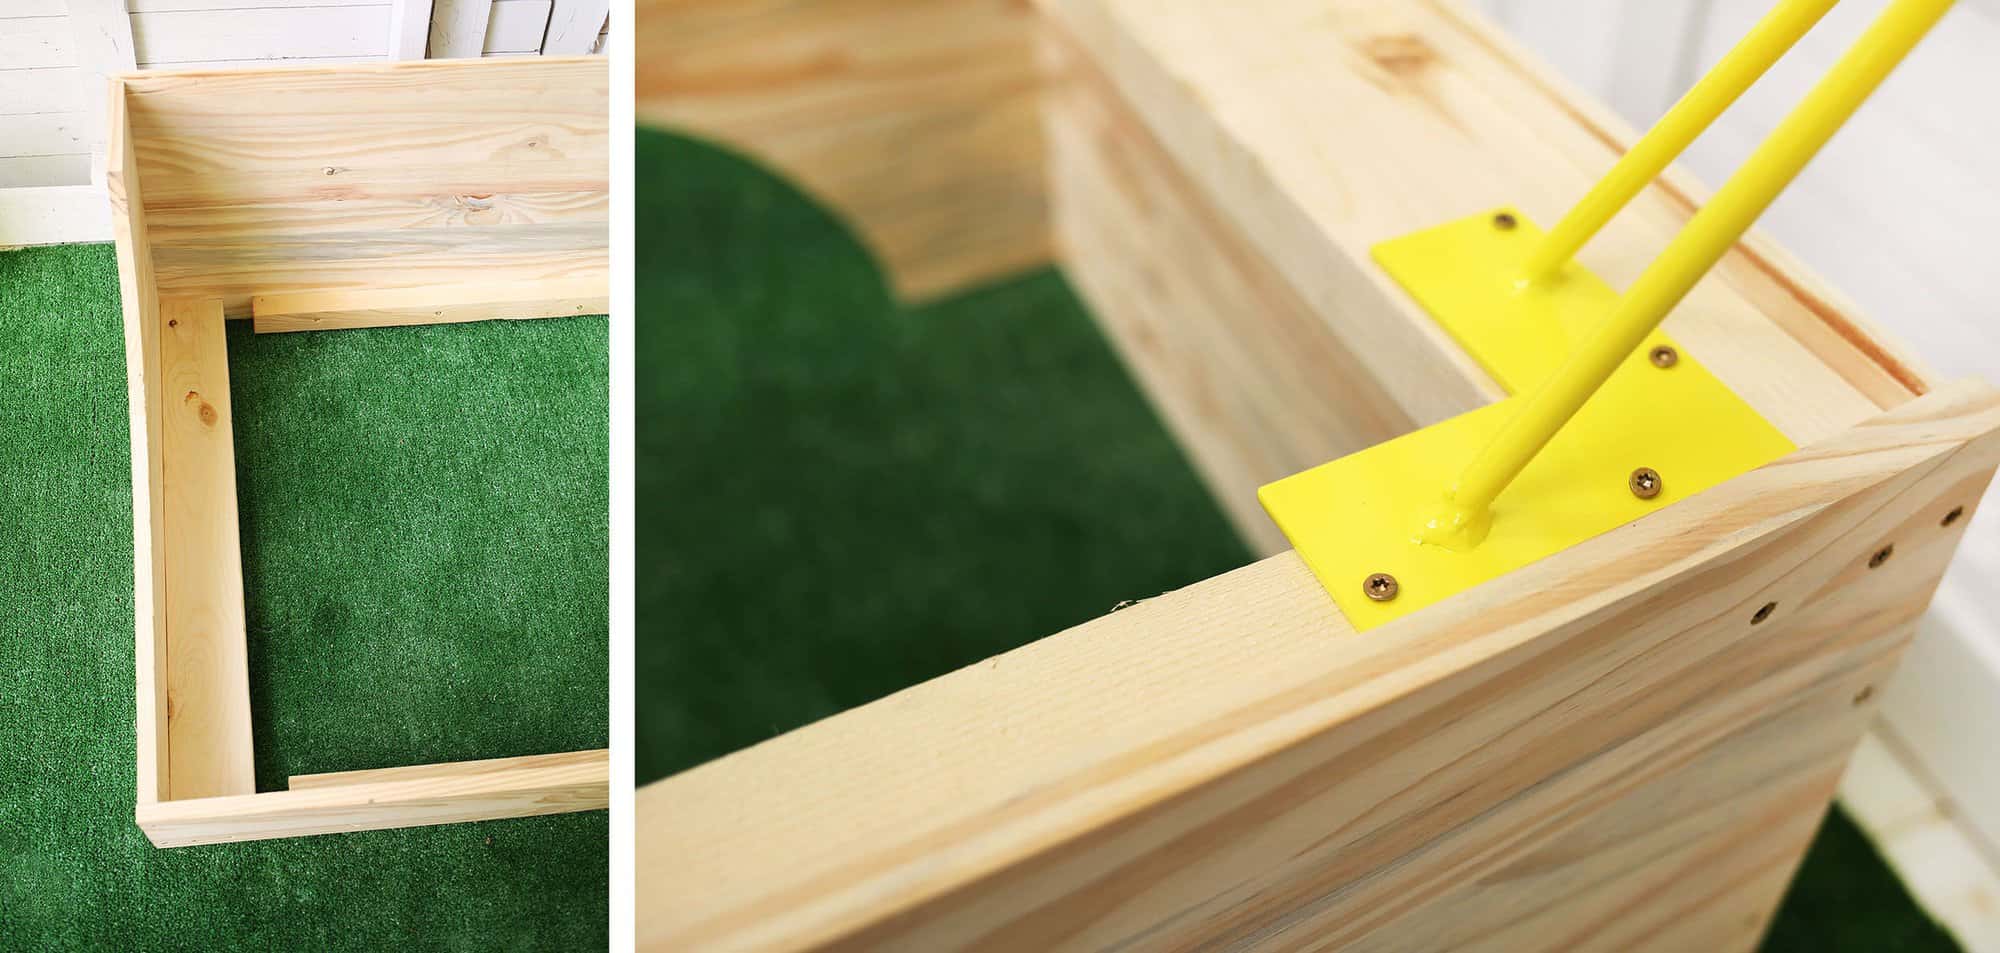 Place one of your 2″ x 4″ x 27.5″ cuts of wood at one of the short ends. It should fit snugly. The top of it should be flush with the top of your 2″ x 2″ x 4′ side slats. Screw in place along three sides. Repeat on the other end. This helps reinforce your frame and creates a base to attach your legs.
Flip your bed upside down (carefully since it’s only supported on three corners). Attach your hairpin legs so that they’re about 2″ in from the short end of the bed but right up against the inside of the long sides. Mark your holes and pre-drill. Then screw your legs in. Repeat until all four legs are attached. Carefully flip your bed back over.
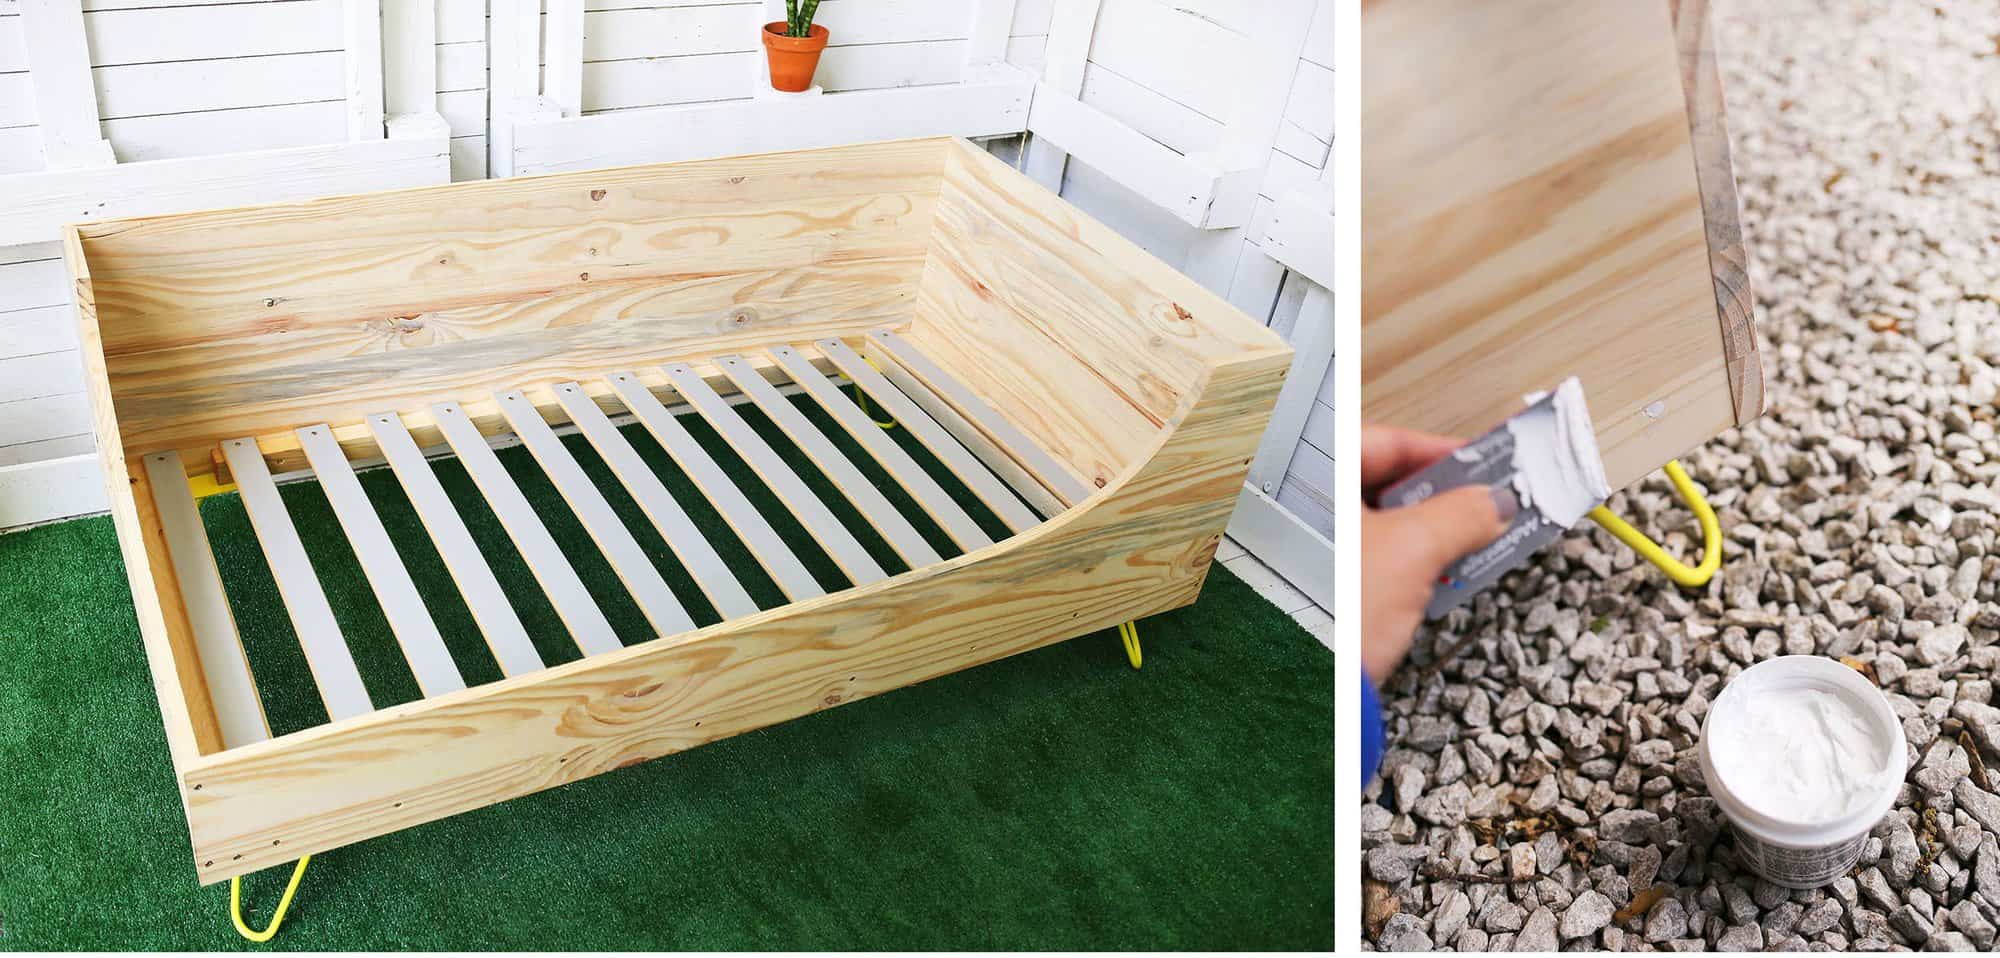 Evenly space out your slats and add a screw at each end.
Fill in your screw holes and any gaps in your joints with wood putty and let dry. Sand everything down, and paint or stain.
 Let things dry, and then make a big deal about how cool your kid’s new bed is compared to that old crib. Because cribs are for babies! And your kid is SO big now! And try not to get too weepy when you realize they really are growing up so quickly. You can do it.
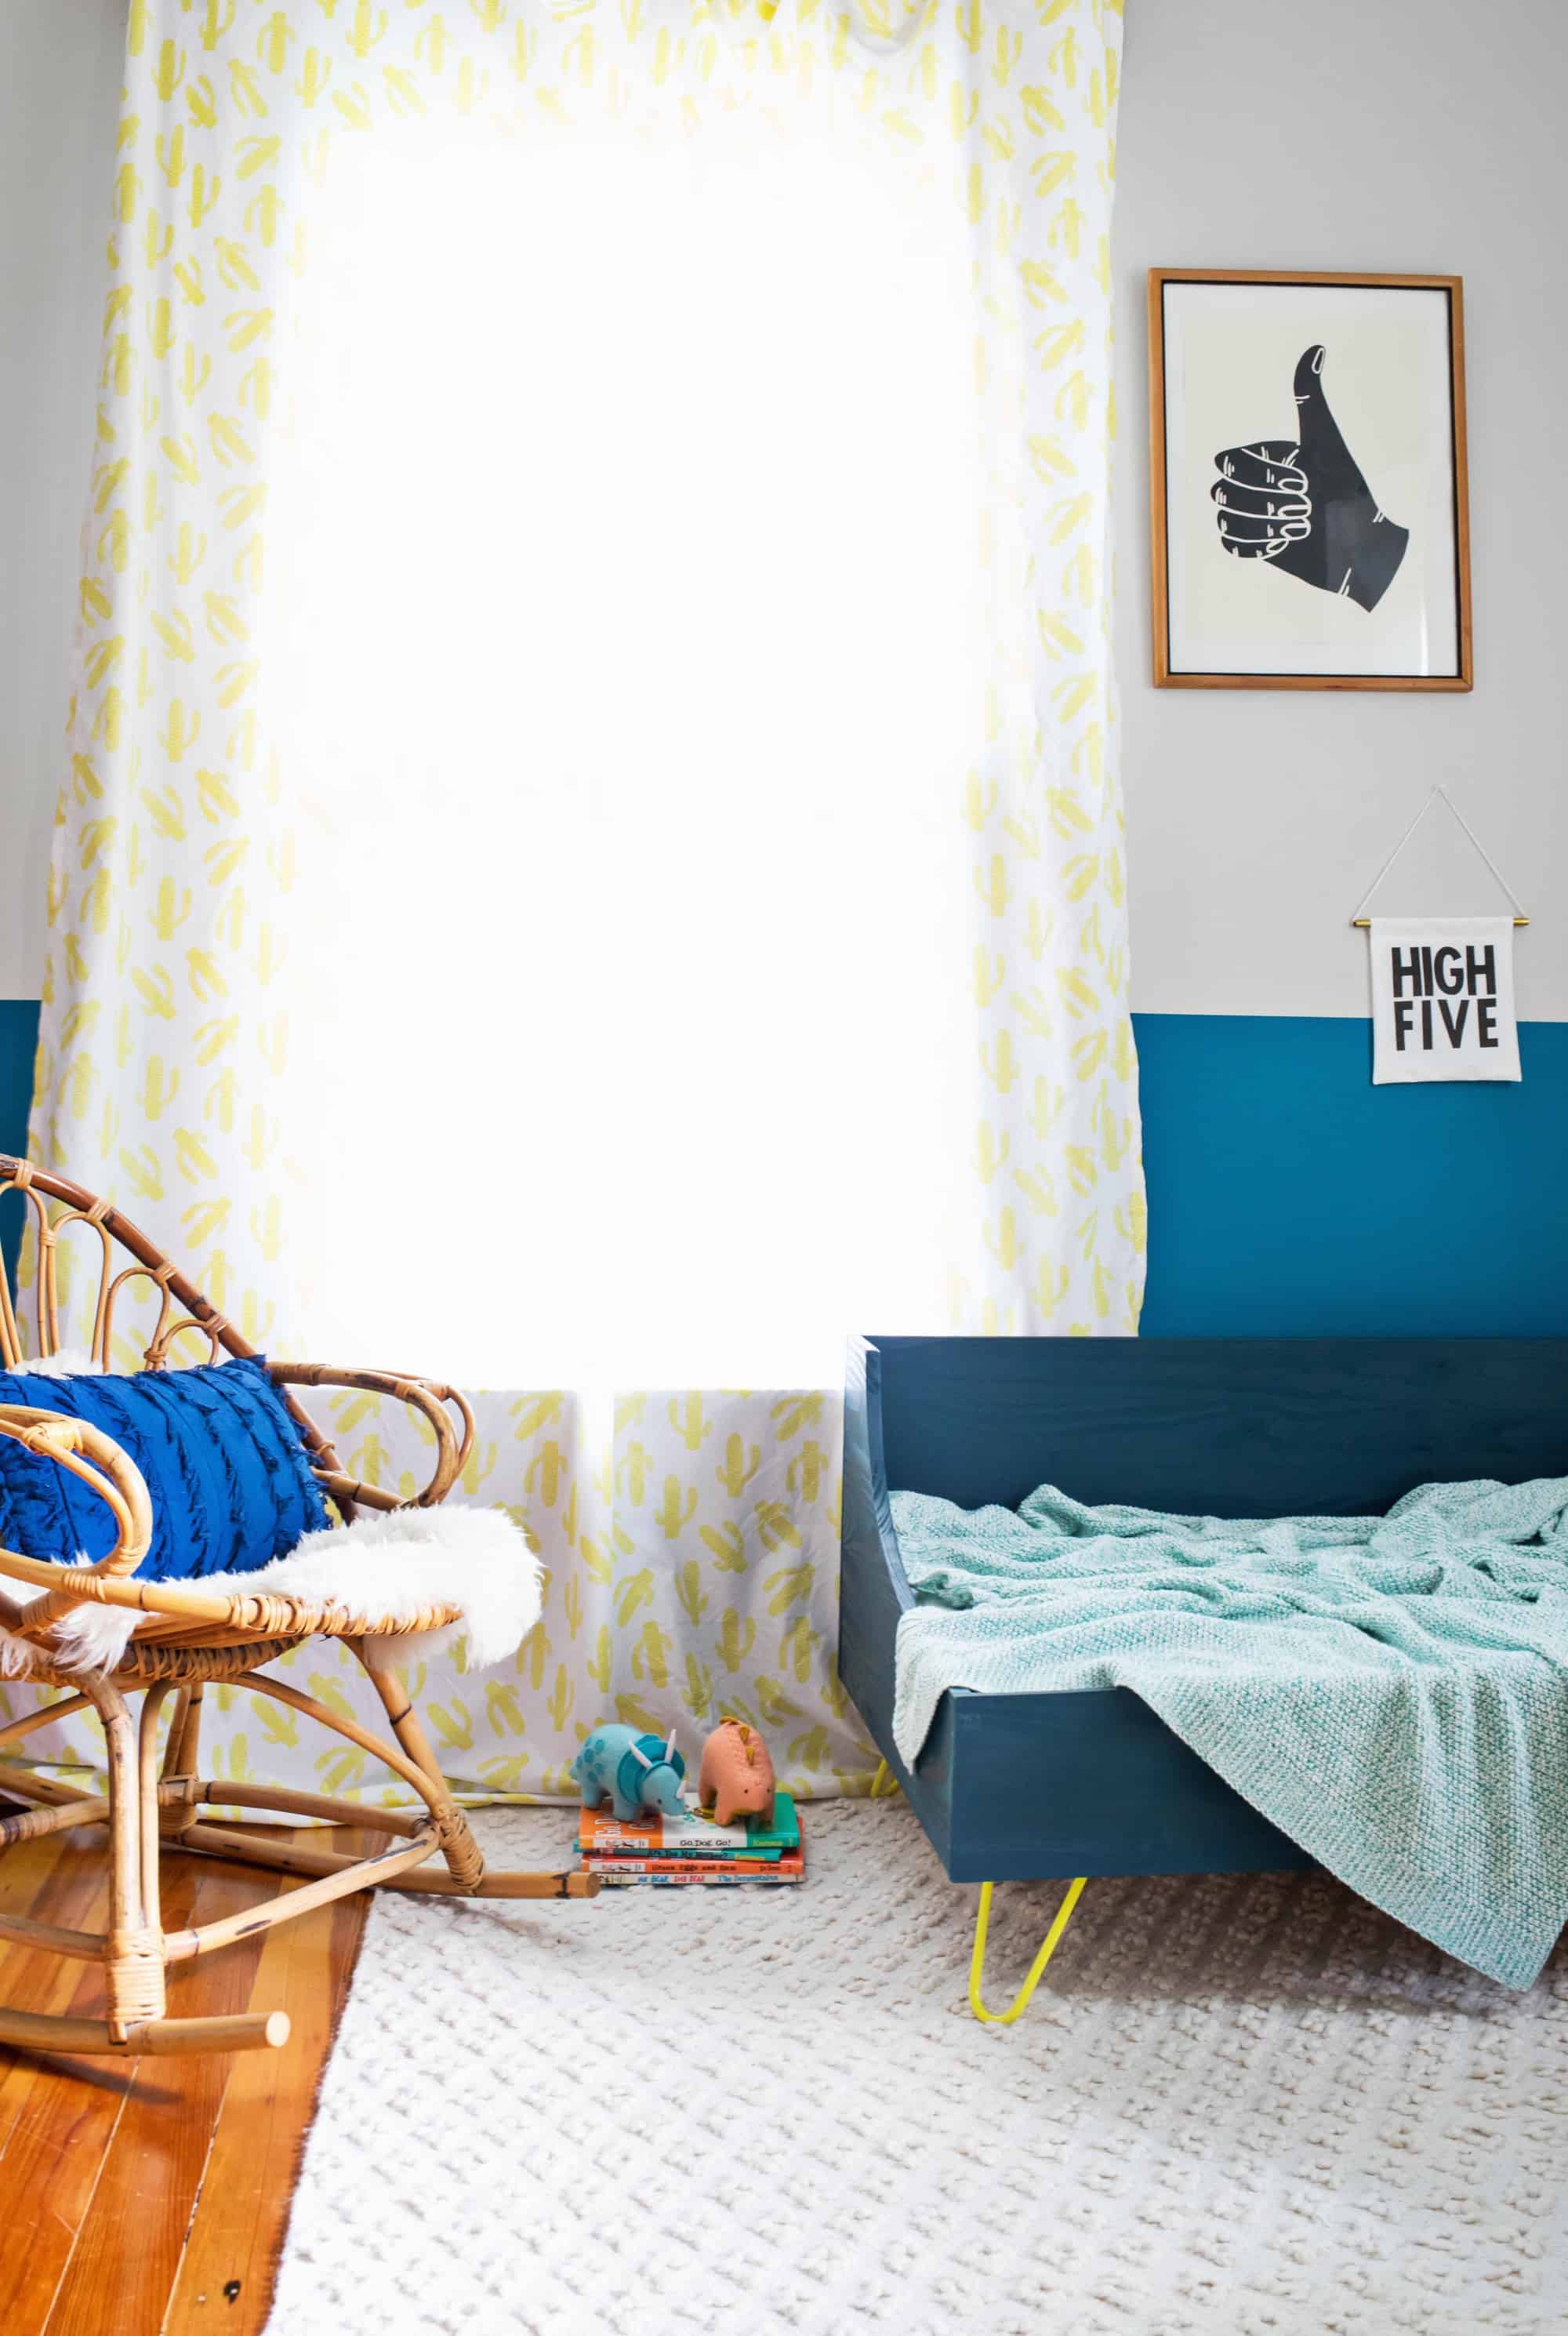
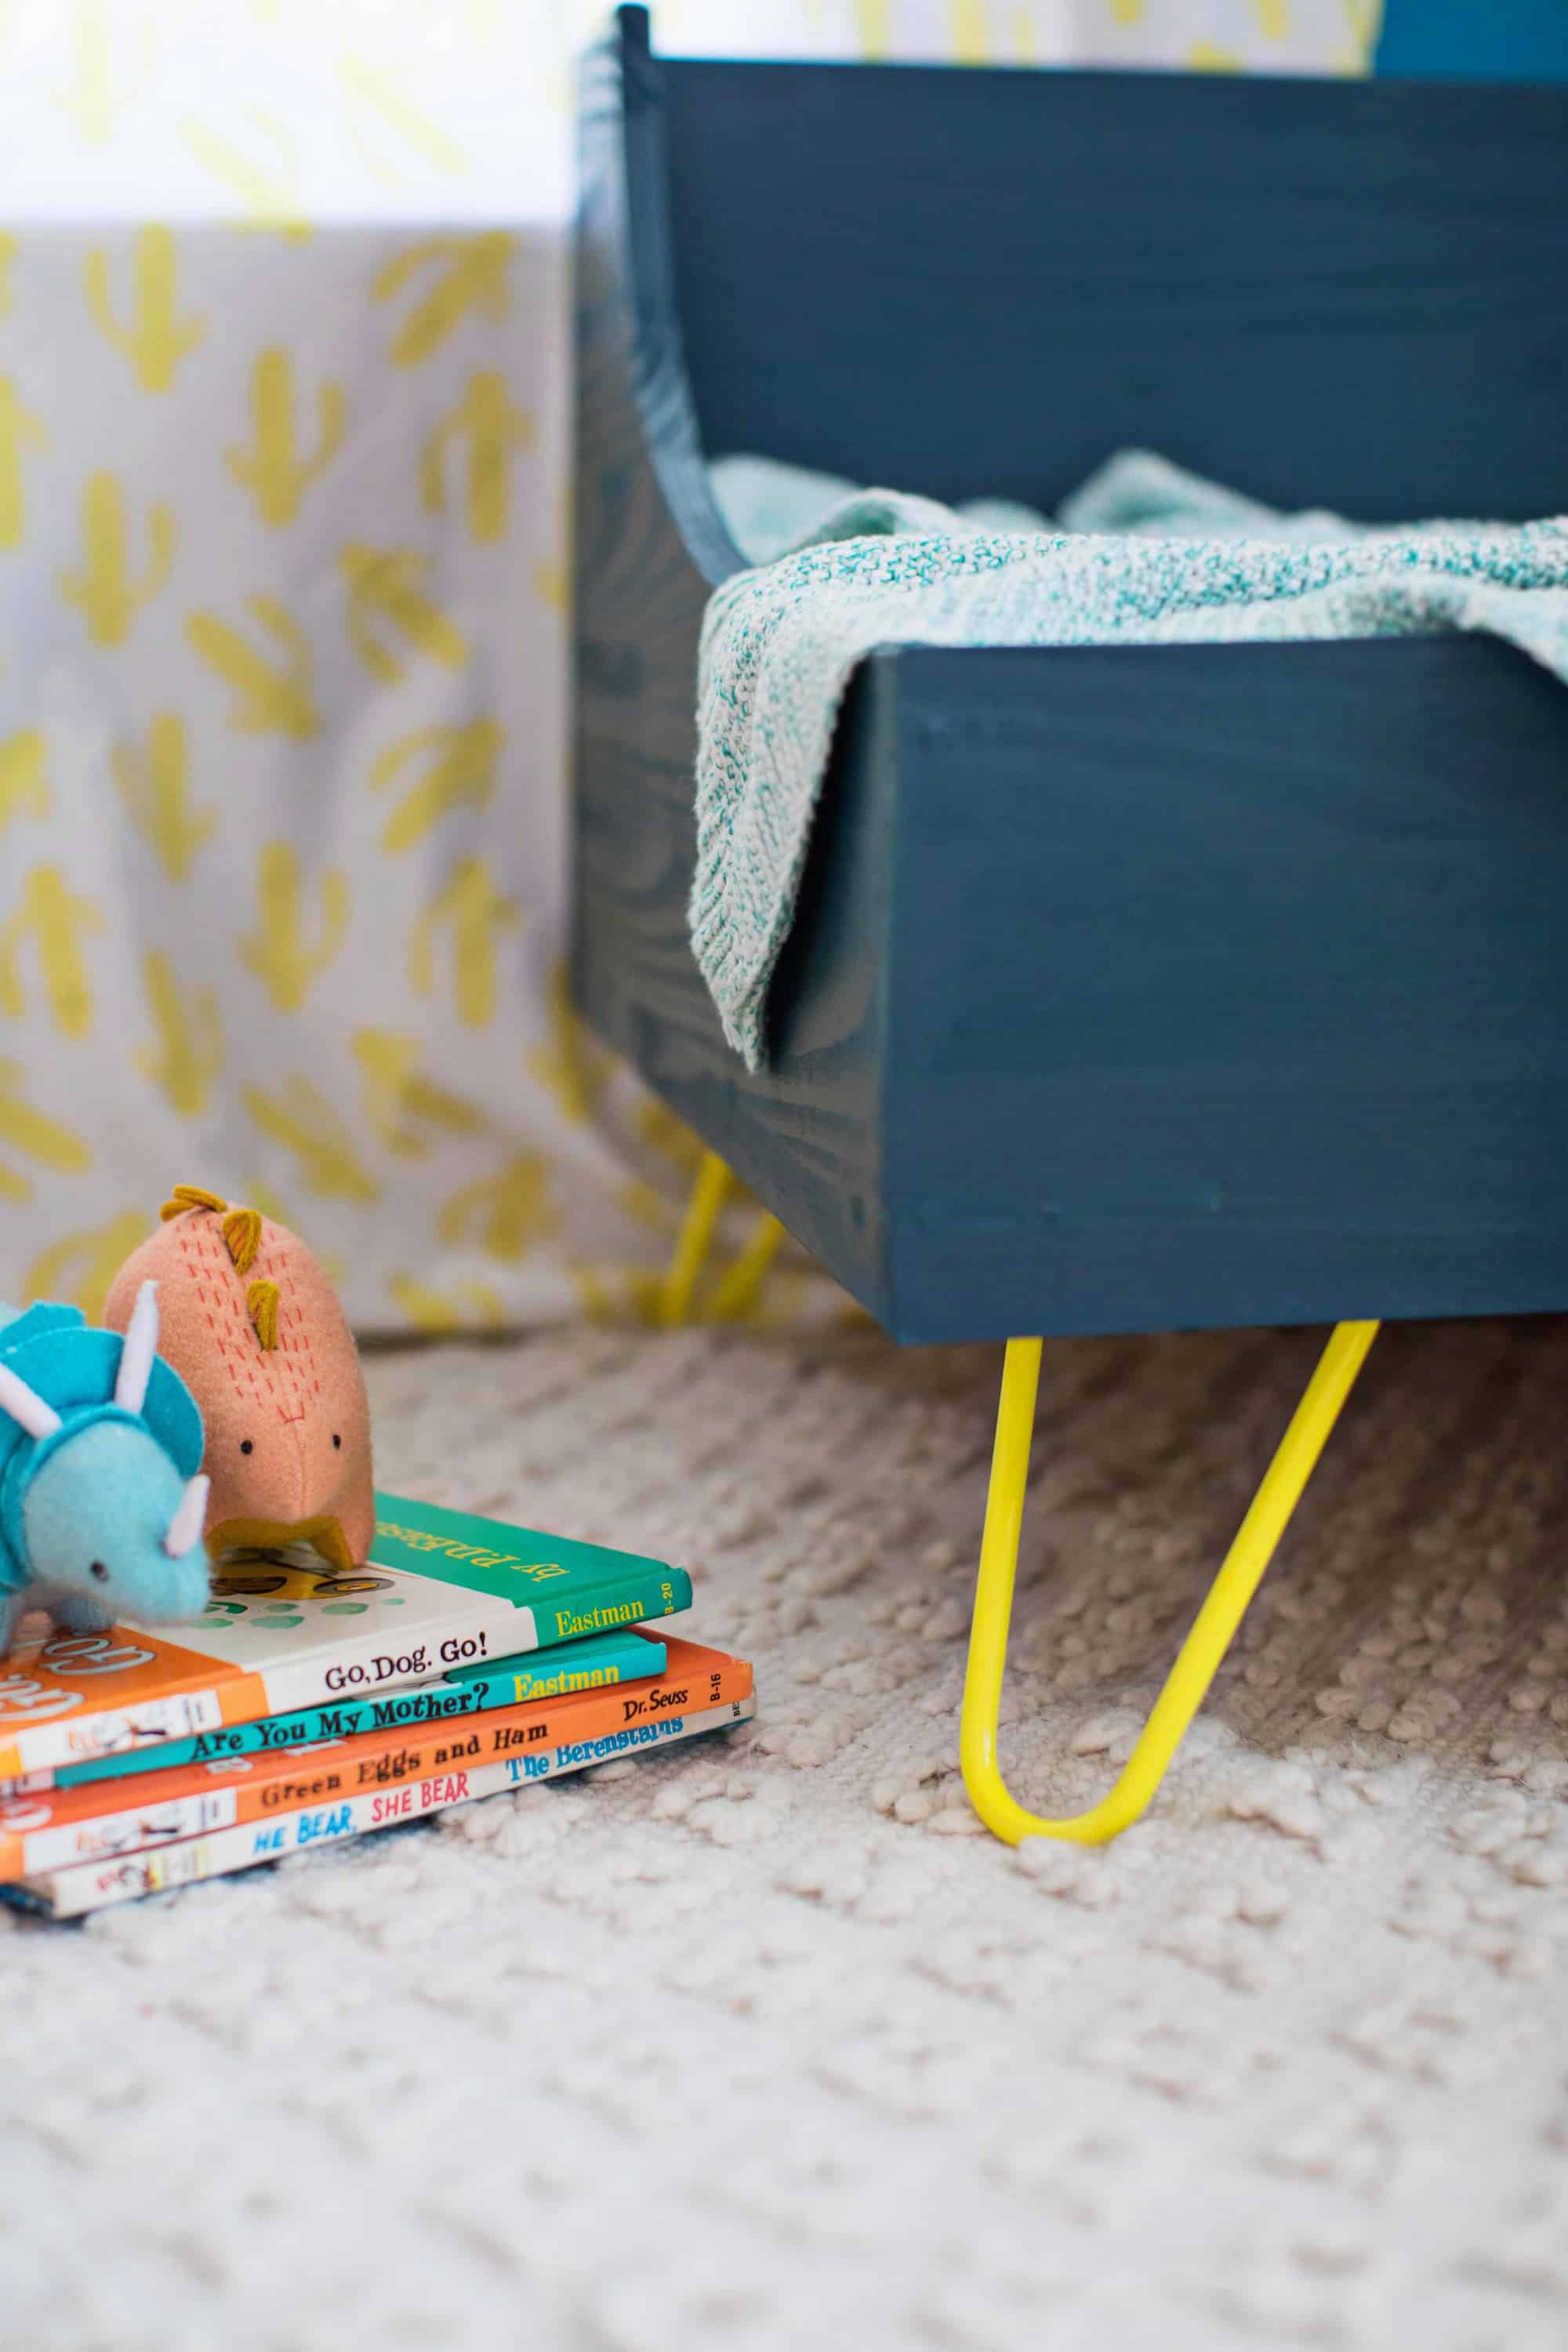
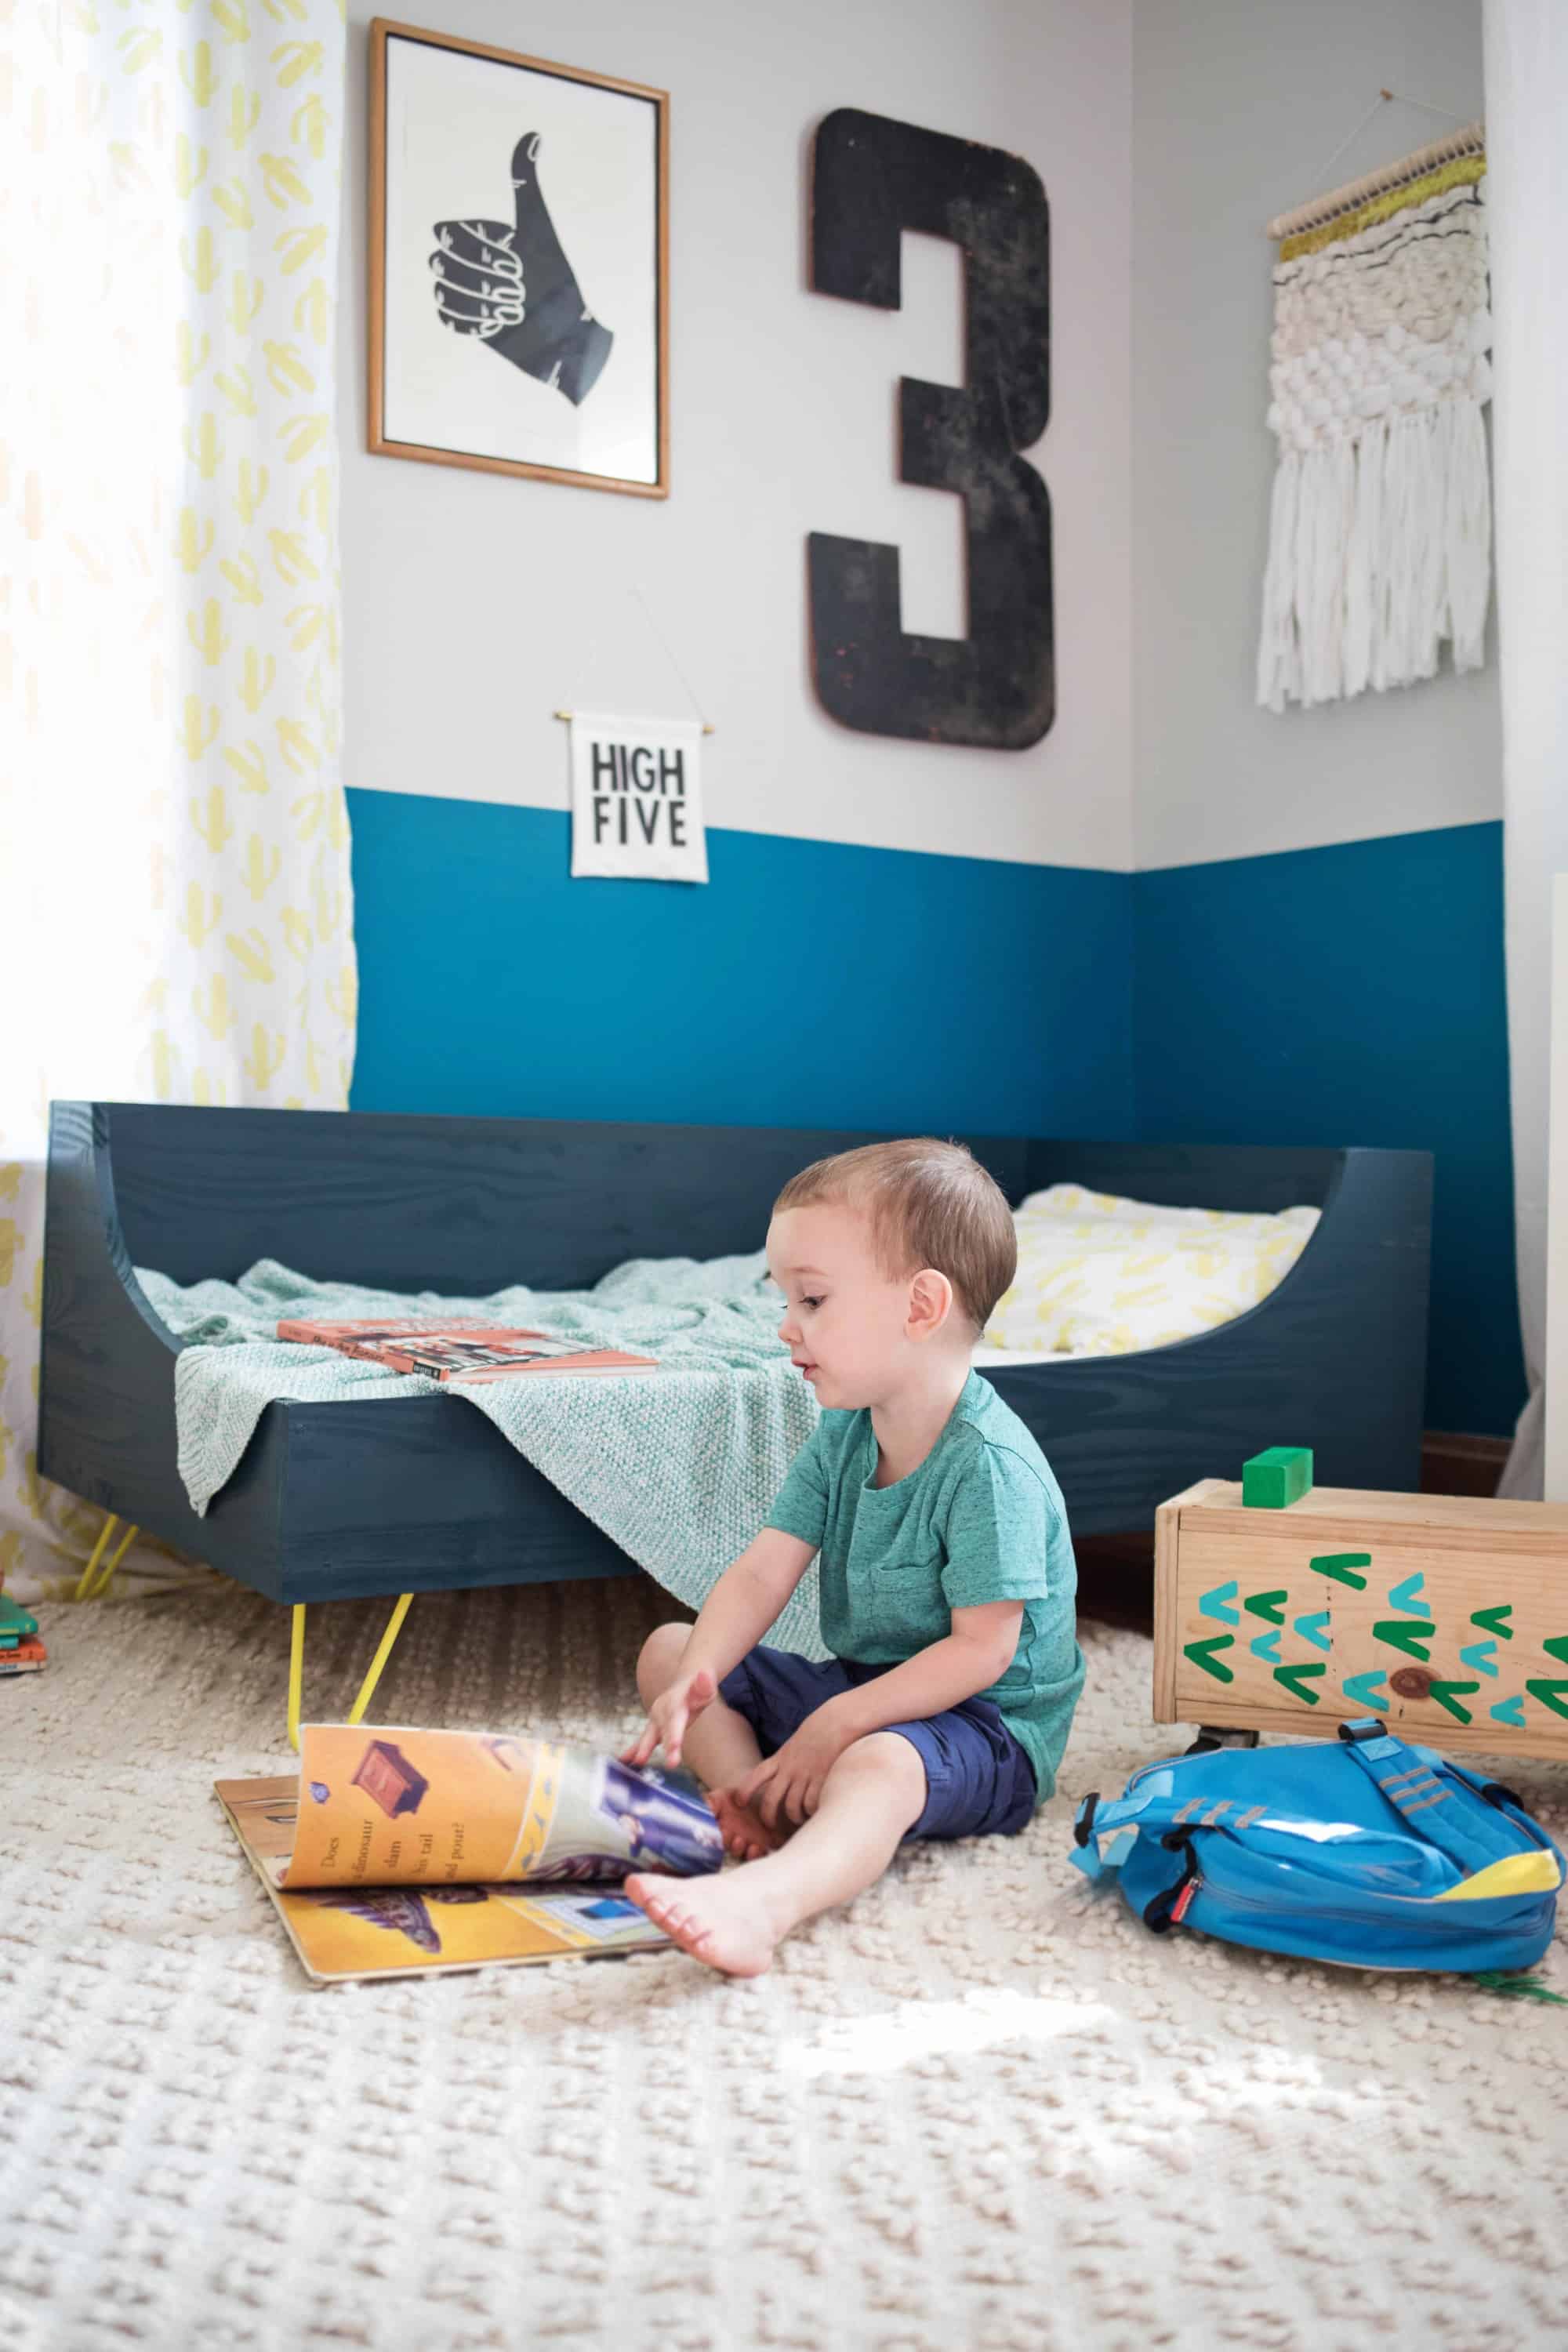
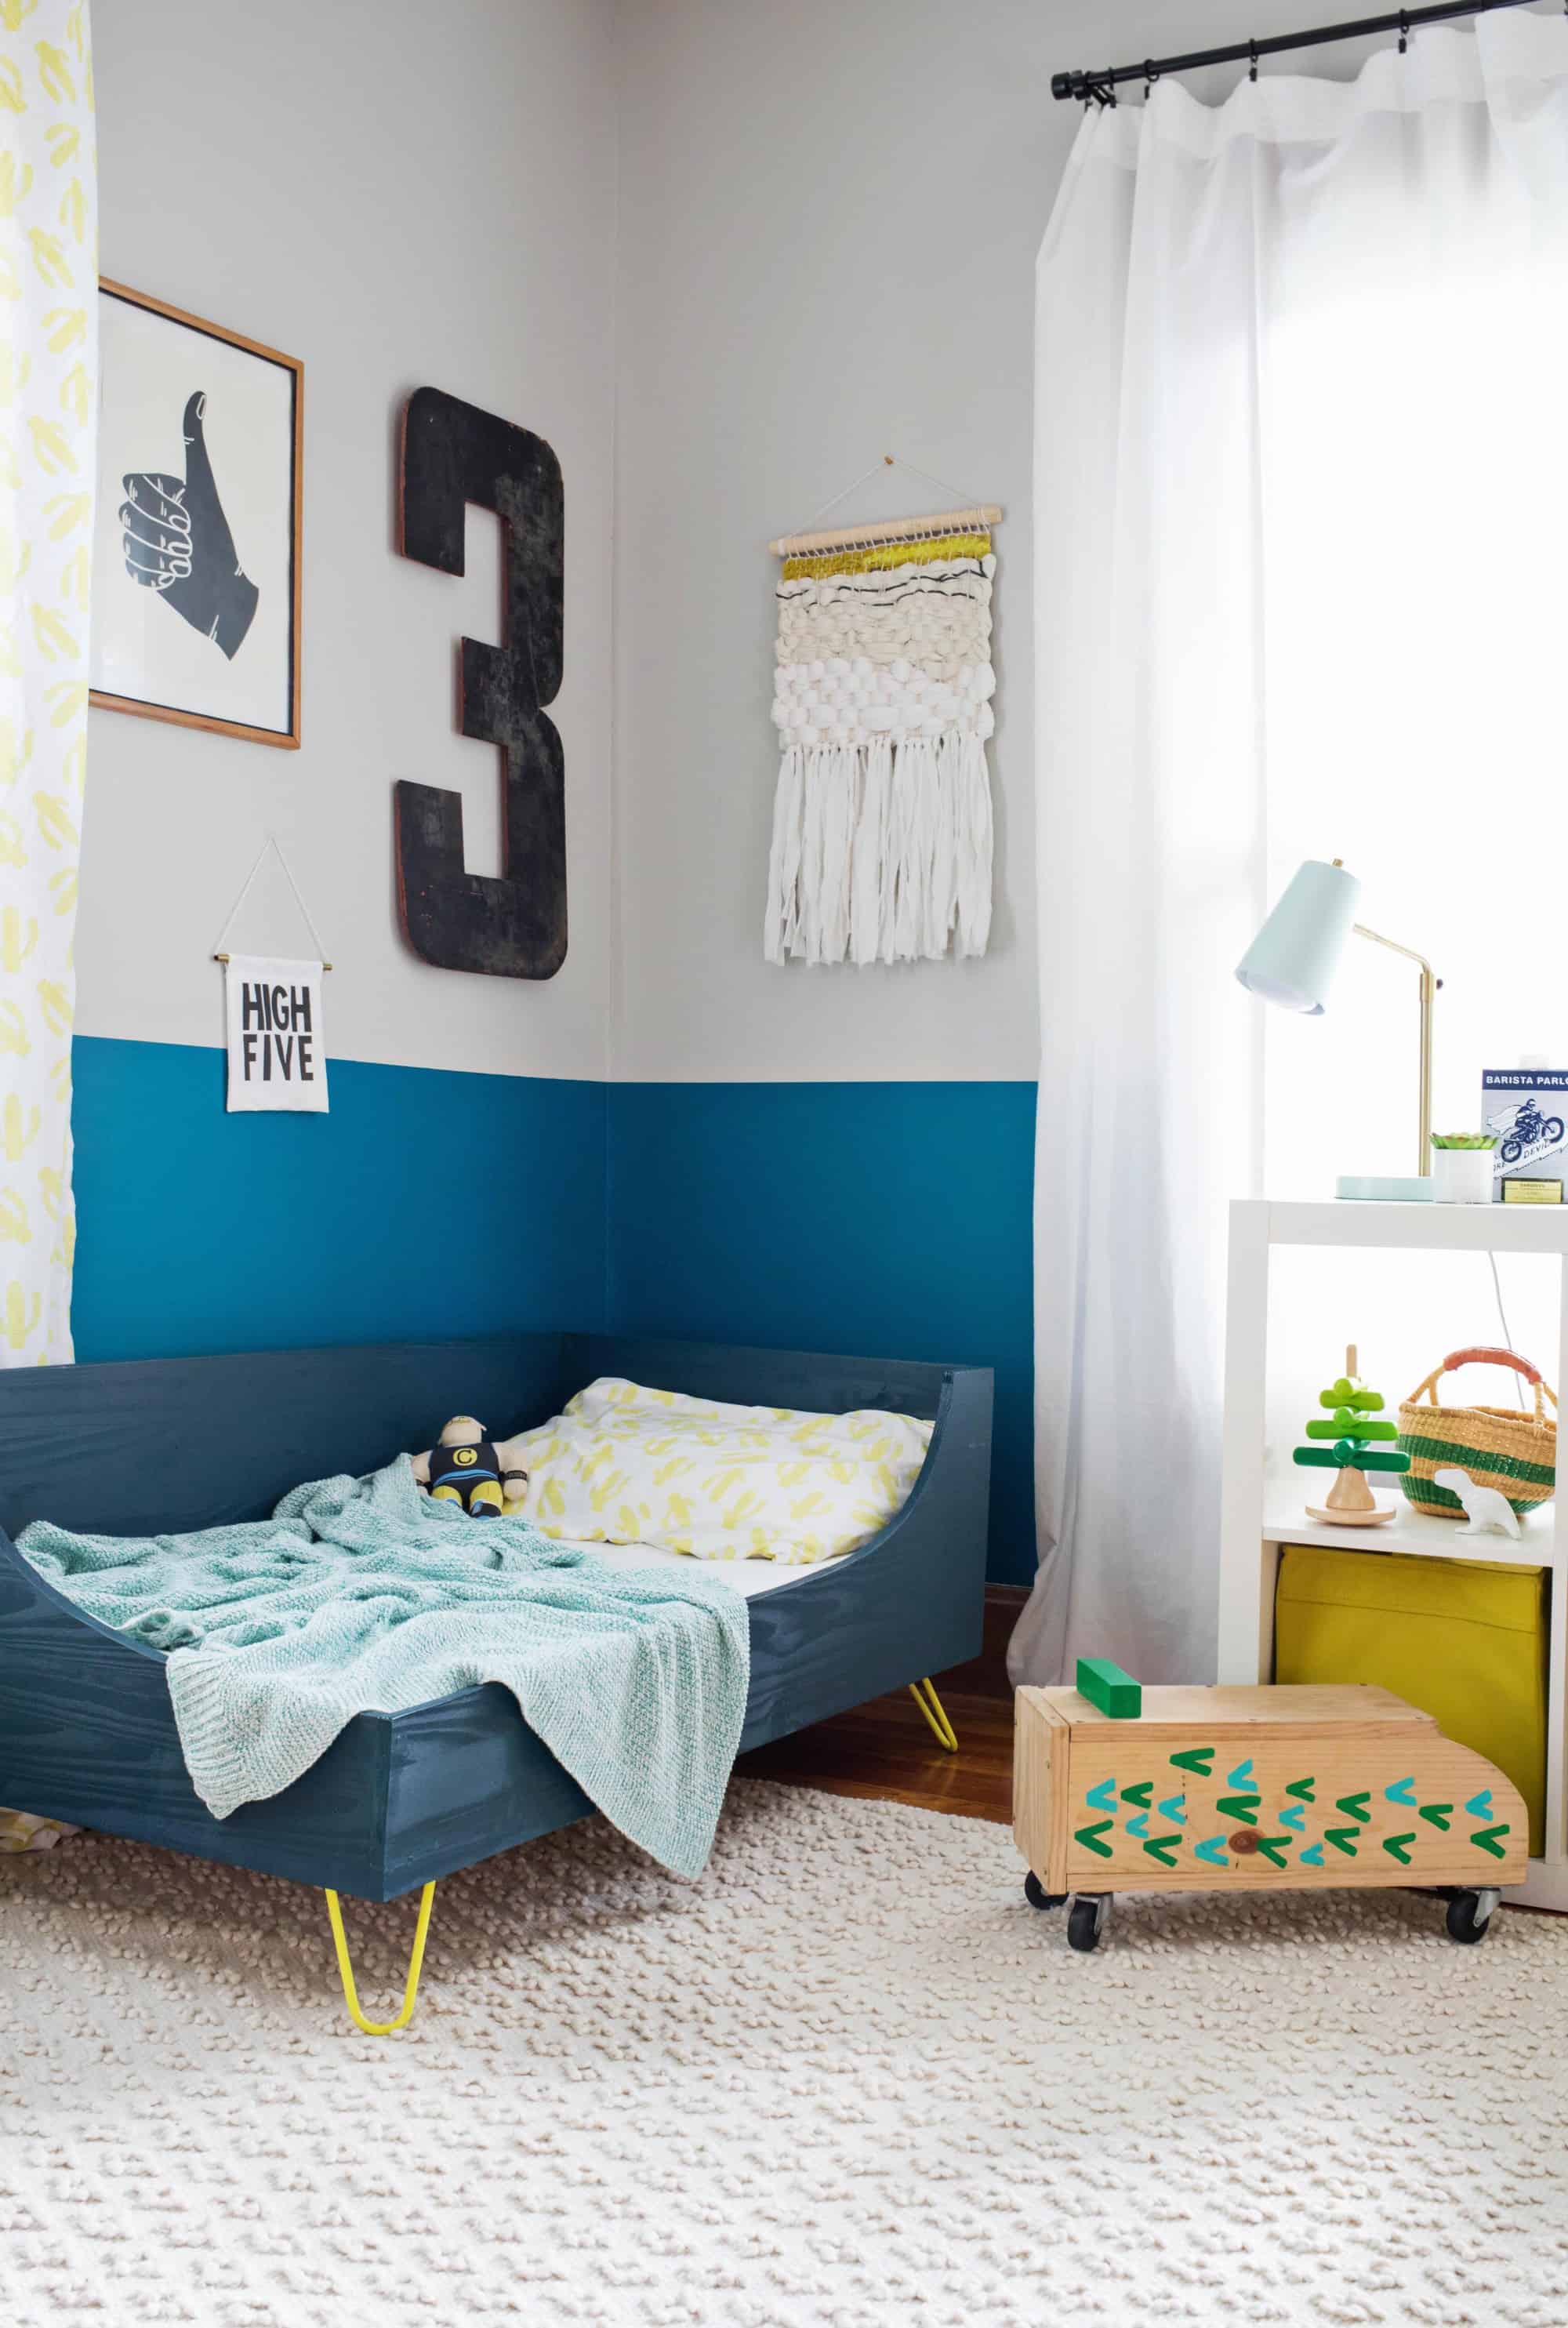 I painted my son’s bed a darker shade of the same teal blue to help it blend into the wall a little bit. I love tonal colors, so the light blue blanket just made sense after that. I love the unexpected yellow legs and how they pick up on other colors in this corner of a shared kid room. –Rachel
30 Comments
Hi! Love this idea.
How much did this cost you?
Additionally, that paint grade panel, is it pine?
This is awesome!! Do you remember your total cost? Trying to price out building vs buying. Thank you!
Can you link which Ikea slats you bought? They offer two and I’m assuming it’s the smaller size, but want to be sure. Thanks so much!
This is so cute! love it!! 🙂
Wow How cool! Needs alot of patience and time though?
This is soooo cute! love it
www.melodramaticadventures.com
So cute! We won’t need a toddler bed for a couple more years, but I love how classic yours looks!
Such an awesome bed frame – great job!! Love the design, color and hairpin legs. We’re currently searching for a twin sized frame that has some uniqueness just like this. What measurement/cut adjustments would you make to accommodate a standard twin mattress? Thx:)
This bed is precious. Thanks for the DIY!
I really love the thumbs up artwork. Can you tell me where it’s from?
What a great idea! I love that it is so clean and unfussy. If it were mine though, I would need to ’round off’ the top corners of the curved opening. I know someone who would whack his head by falling on that square corner (sigh).
I love this. Wish my hubby & I were a bit more handy to try it out. xxx
Great job!! I love the result it’s so fresh! Also those felt dinosaures by the side of the bed are soooo cute… where are they from?
Elodie,
Those are Land of Nod! We LOVE their design aesthetic.
I’m definitely saving this bed idea for future kiddos – so cute!
-Courtney
http://www.babygraham.com
Wow, that a really cool and nice diy! Very inspiring.
This is so awesome! Would love to build something like this for my kiddo when he transitions out of his crib. Would also love to see how you turn this into a dog bed! Unless your dog is huge and there’s no modification required–my dog is a tiny jack russell (who would still happily take that whole bed to herself, who am I kidding!).
Hilde,
We have a black lab/weim mix so she’s a good sized dog. I was thinking this would be a darling dog bed design for all kinds of dogs, big and small! It would need some recalculations but I think it would be darling for a small dog!
Where is the yellow cactus fabric from?!
This bed is just adorable.
A little me would have loved it back… very much back then 😉
I love this idea! I have no kids, but this is a cute future project!
Beautiful decoration,thank you for this ideas xoxo
The pink pineapple
http://thepinkpineappleblog.blogspot.com/
Such a fun project! A bit of an off topic question – what color are your ceilings in this room? I love the two tone and am curious how you finished out the top.
That’s so stylish!
https://www.makeandmess.com/
Smith is too cute for words!
So so cute!!! We are approaching that phase with our youngest and I am dreading getting the cars toddler bed out of storage ? I of course want their rooms to be comfortable and “little kiddish” for them but it’s so nice to see a trendy looking toddler bed!!
Ooooh I might make this, but as a dog bed.
That would be the cutest dog bed!
Those hairpin legs are my favorite! Never thought to use them for a bed.
I love it – I wish I had a bigger version of that for myself! It looks so casual and modern!
Charmaine Ng | Architecture & Lifestyle Blog
http://charmainenyw.com